# Classification Quickstart Guide (/docs/classification/quickstart)
### **Introduction** [#introduction]
Transcend's Classification detects and classifies sensitive data across your entire data estate. Whether your data system is a an internal database, a SaaS tools like Salesforce, or a storage providers like AWS S3, we can help.
Use your classification results to:
- Accelerate compliance documentation, such as RoPAs
- Enable complete data deletion requests (DSARs)
- Support data minimization efforts & track progress
- Get insight into your organization's attack surface
This guide is meant to help you get started, from connecting your first data system to viewing results of your first Classification scan.
### Prerequisites [#prerequisites]
In order to use Classification, you will need administrator access to Transcend and to the data systems that you wish to scan.
### 1. Connect a Data System [#1-connect-a-data-system]
Choose a data system to connect.
- Navigate to **Infrastructure > Integrations** in the left sidebar
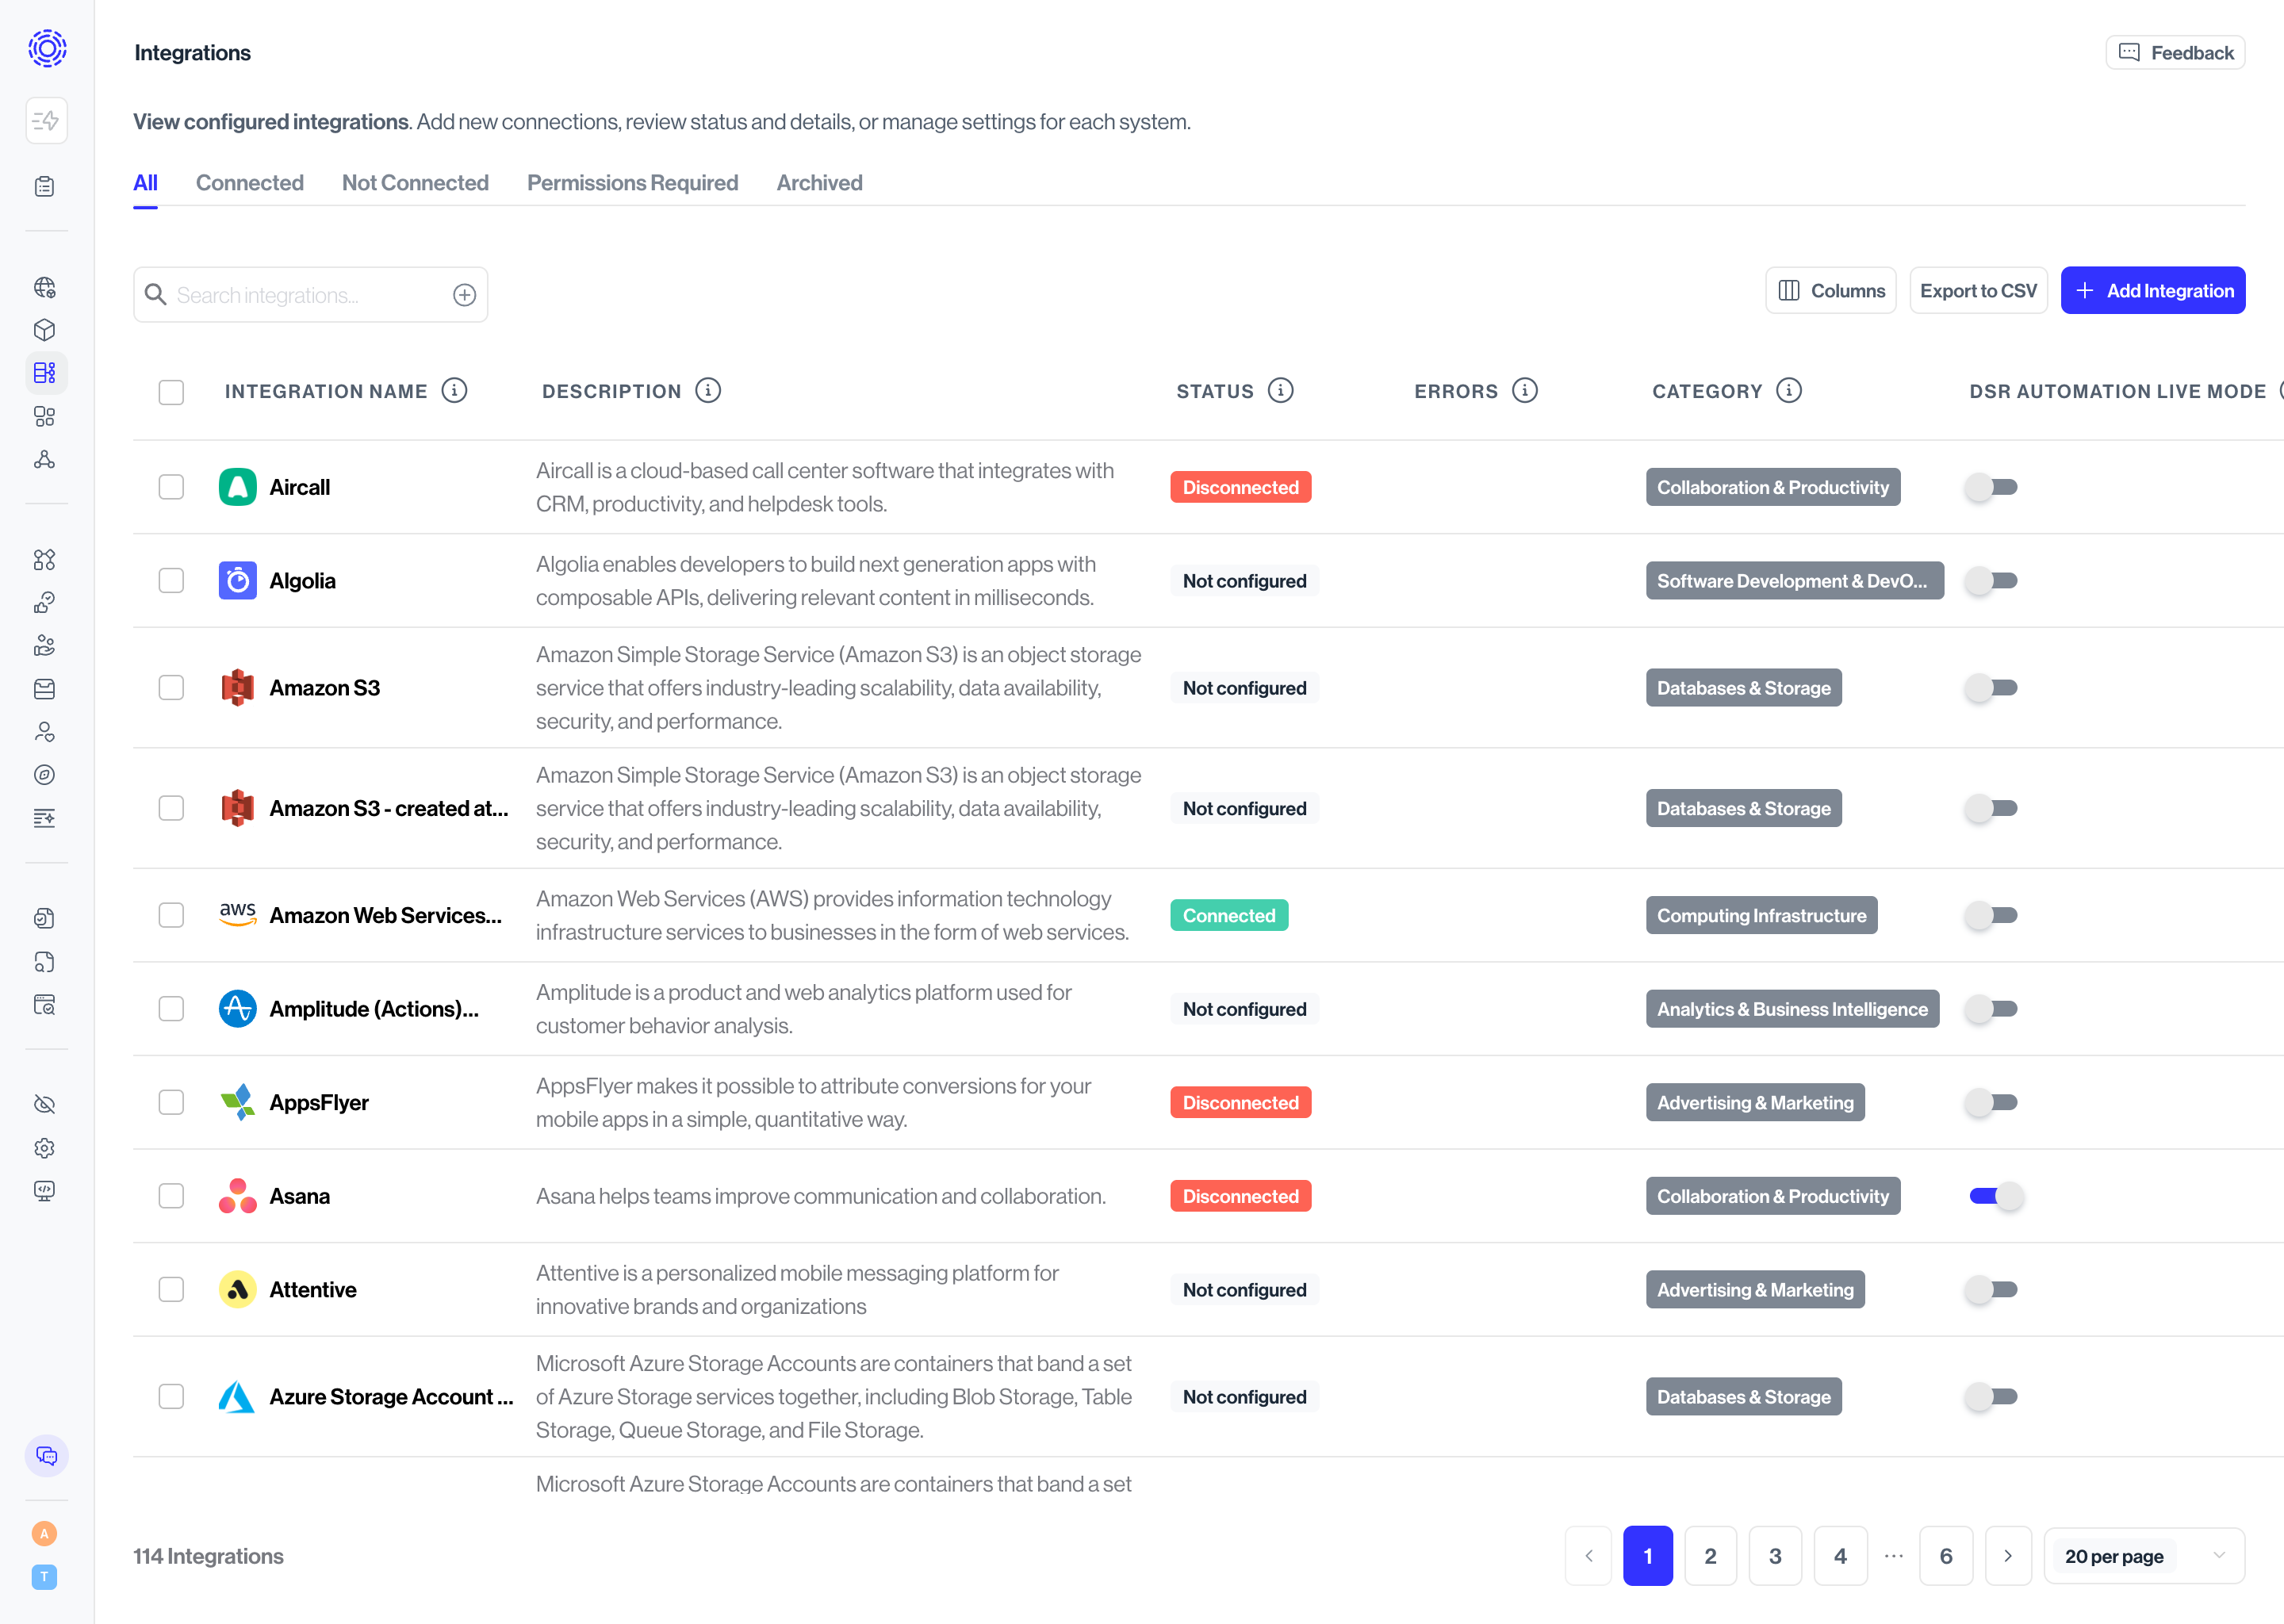
- Click **Add Integration**
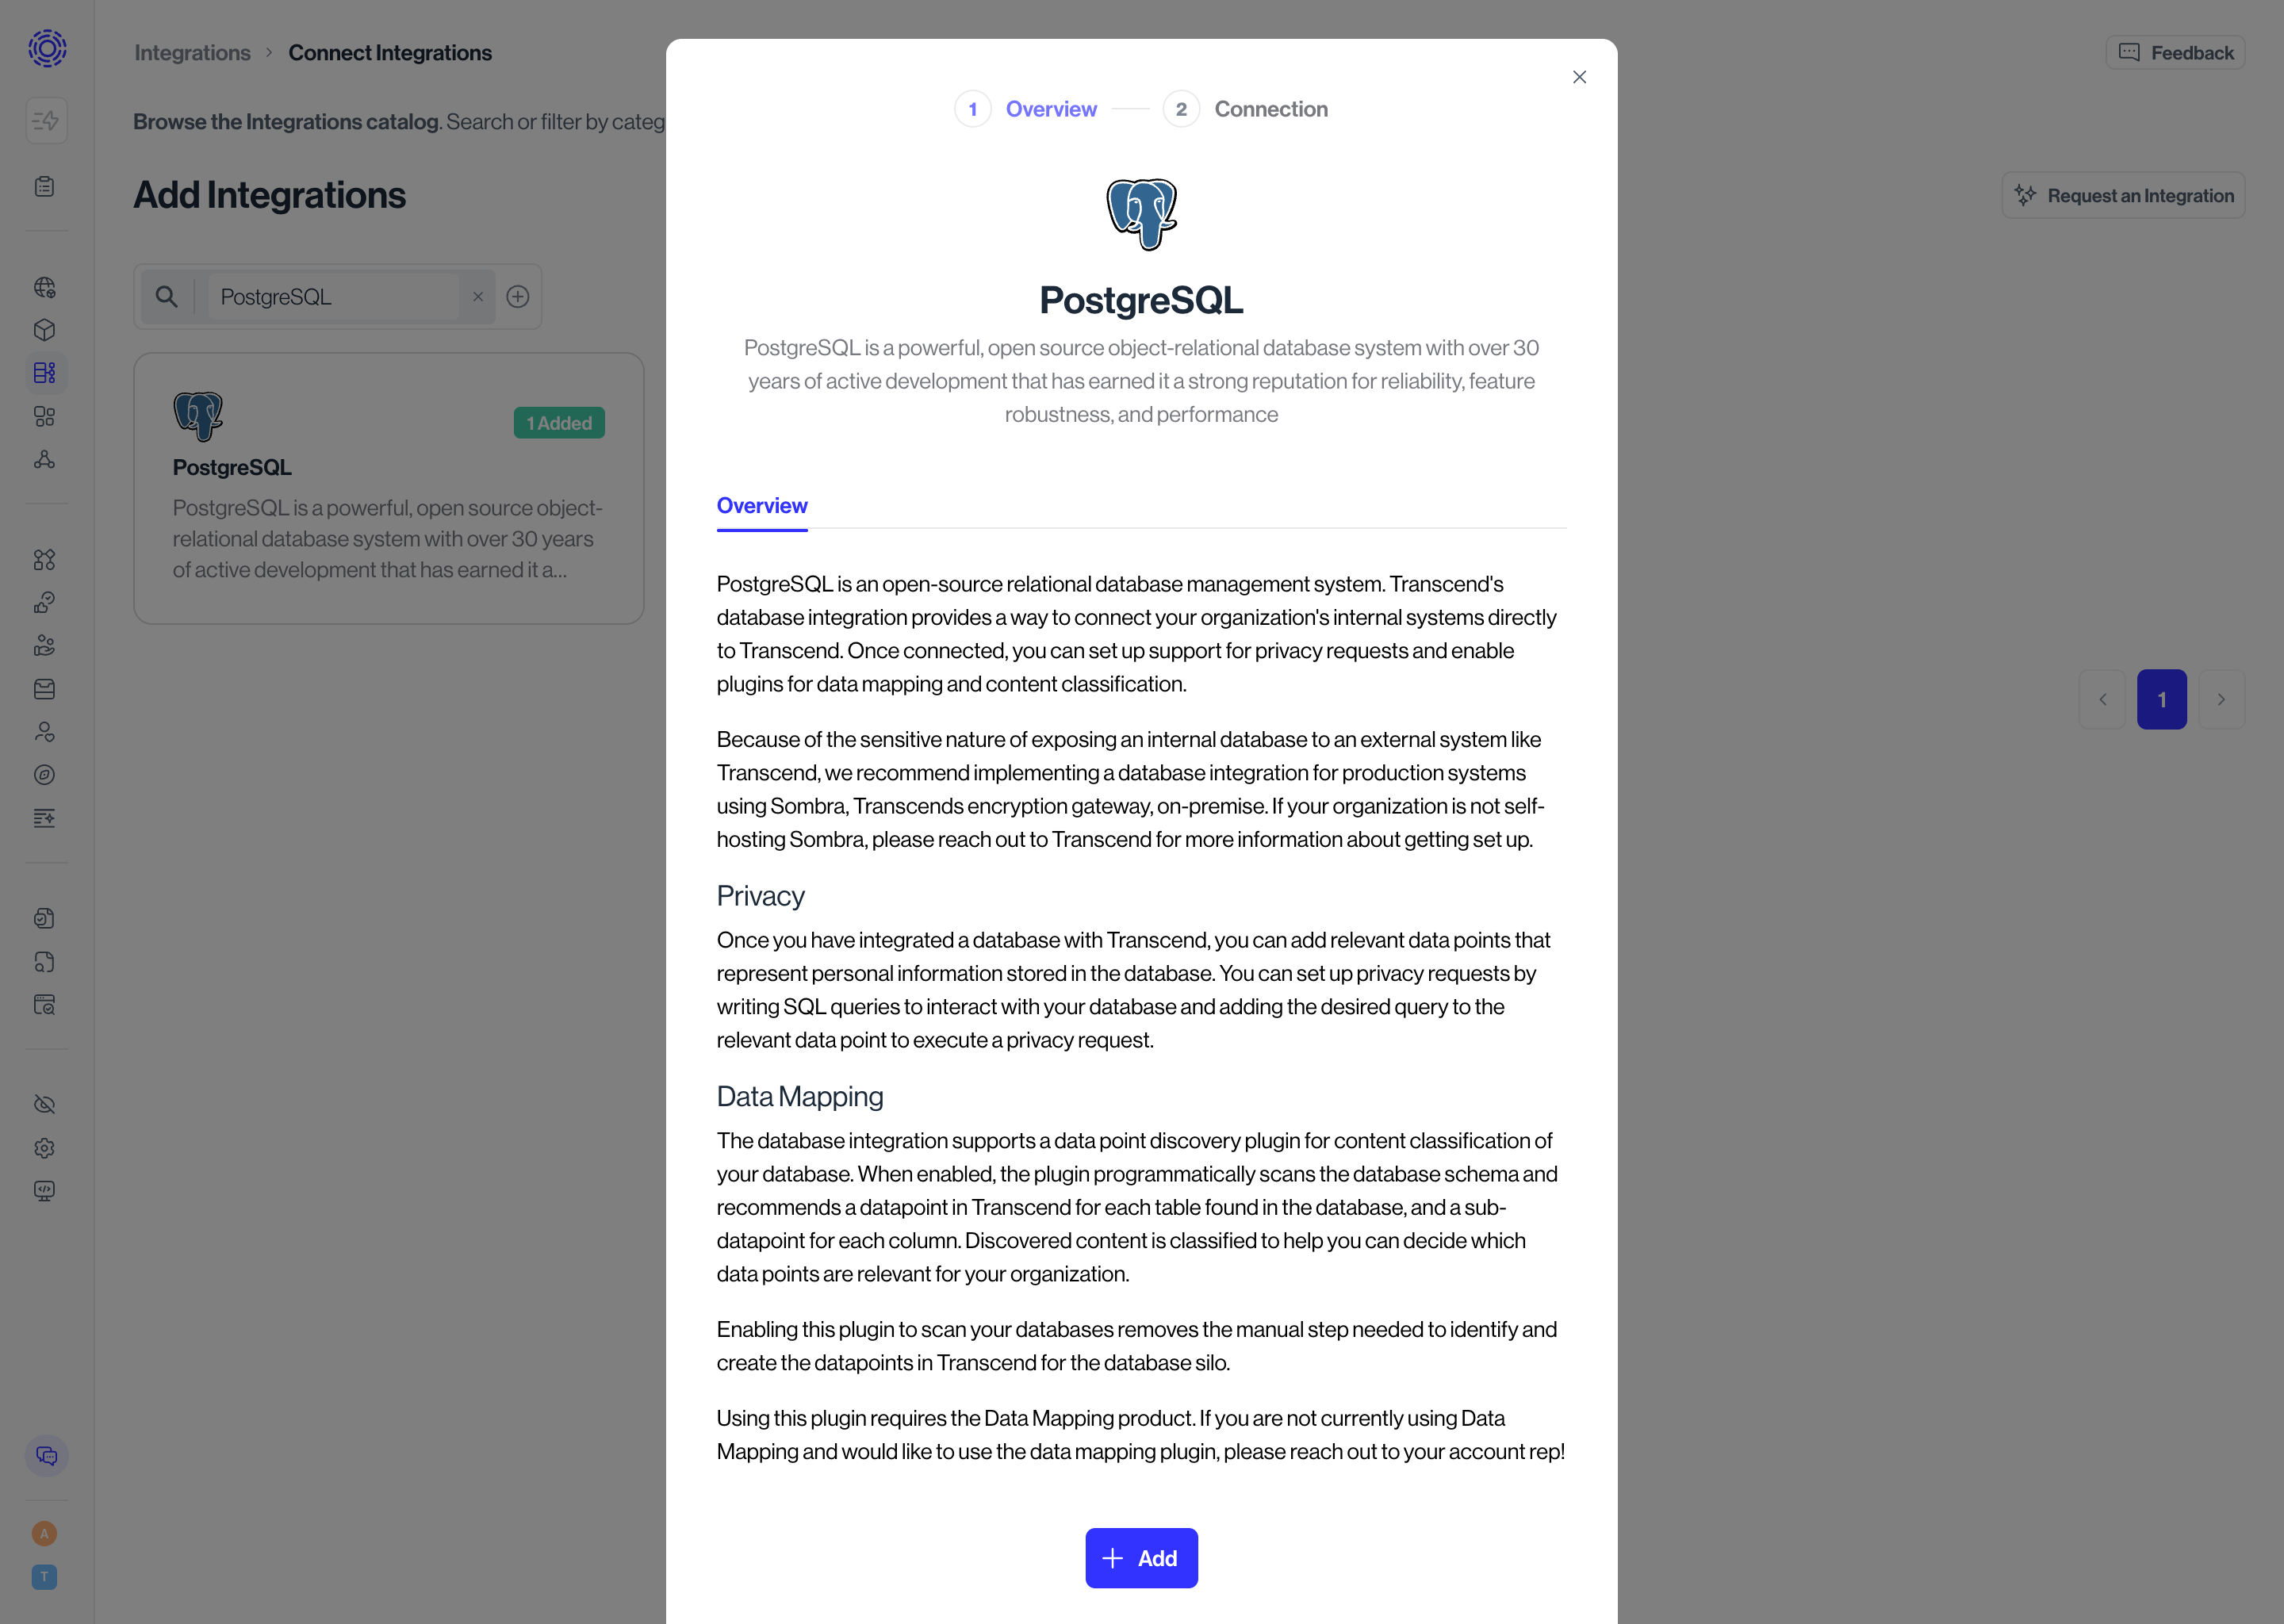
- **Search** for and select your data system (e.g.,)
- On the modal overview step, click **Add**
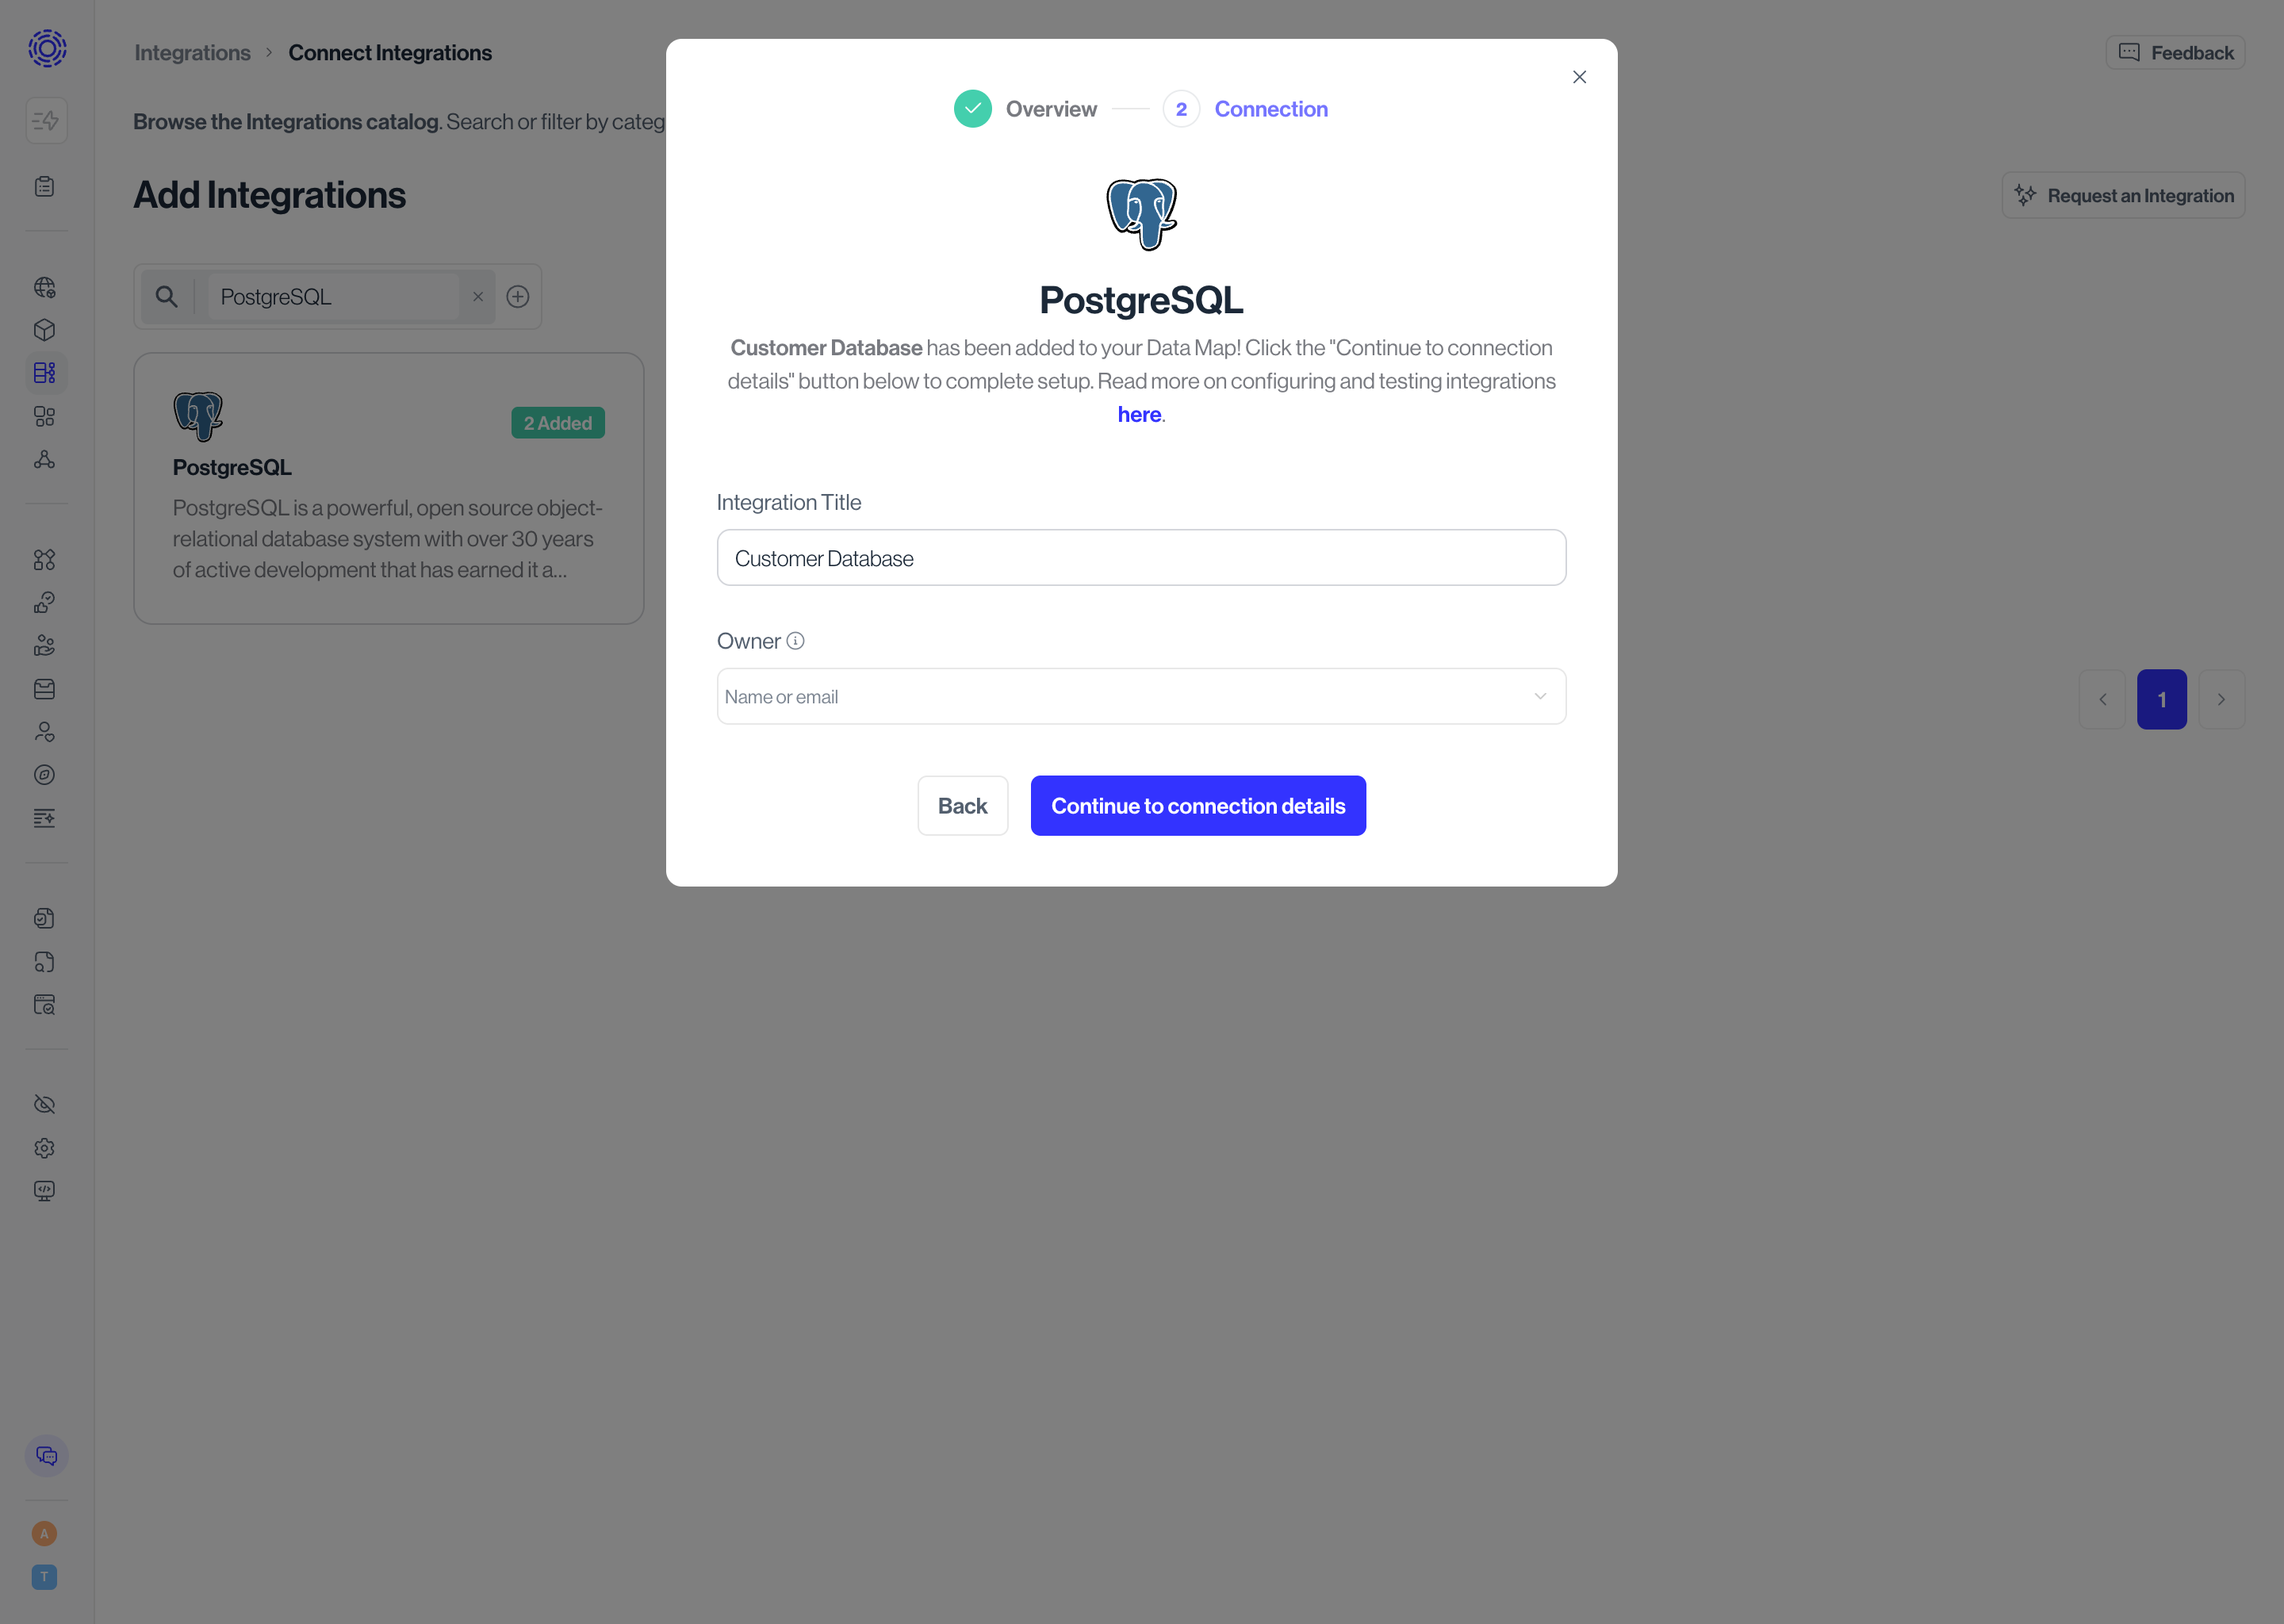
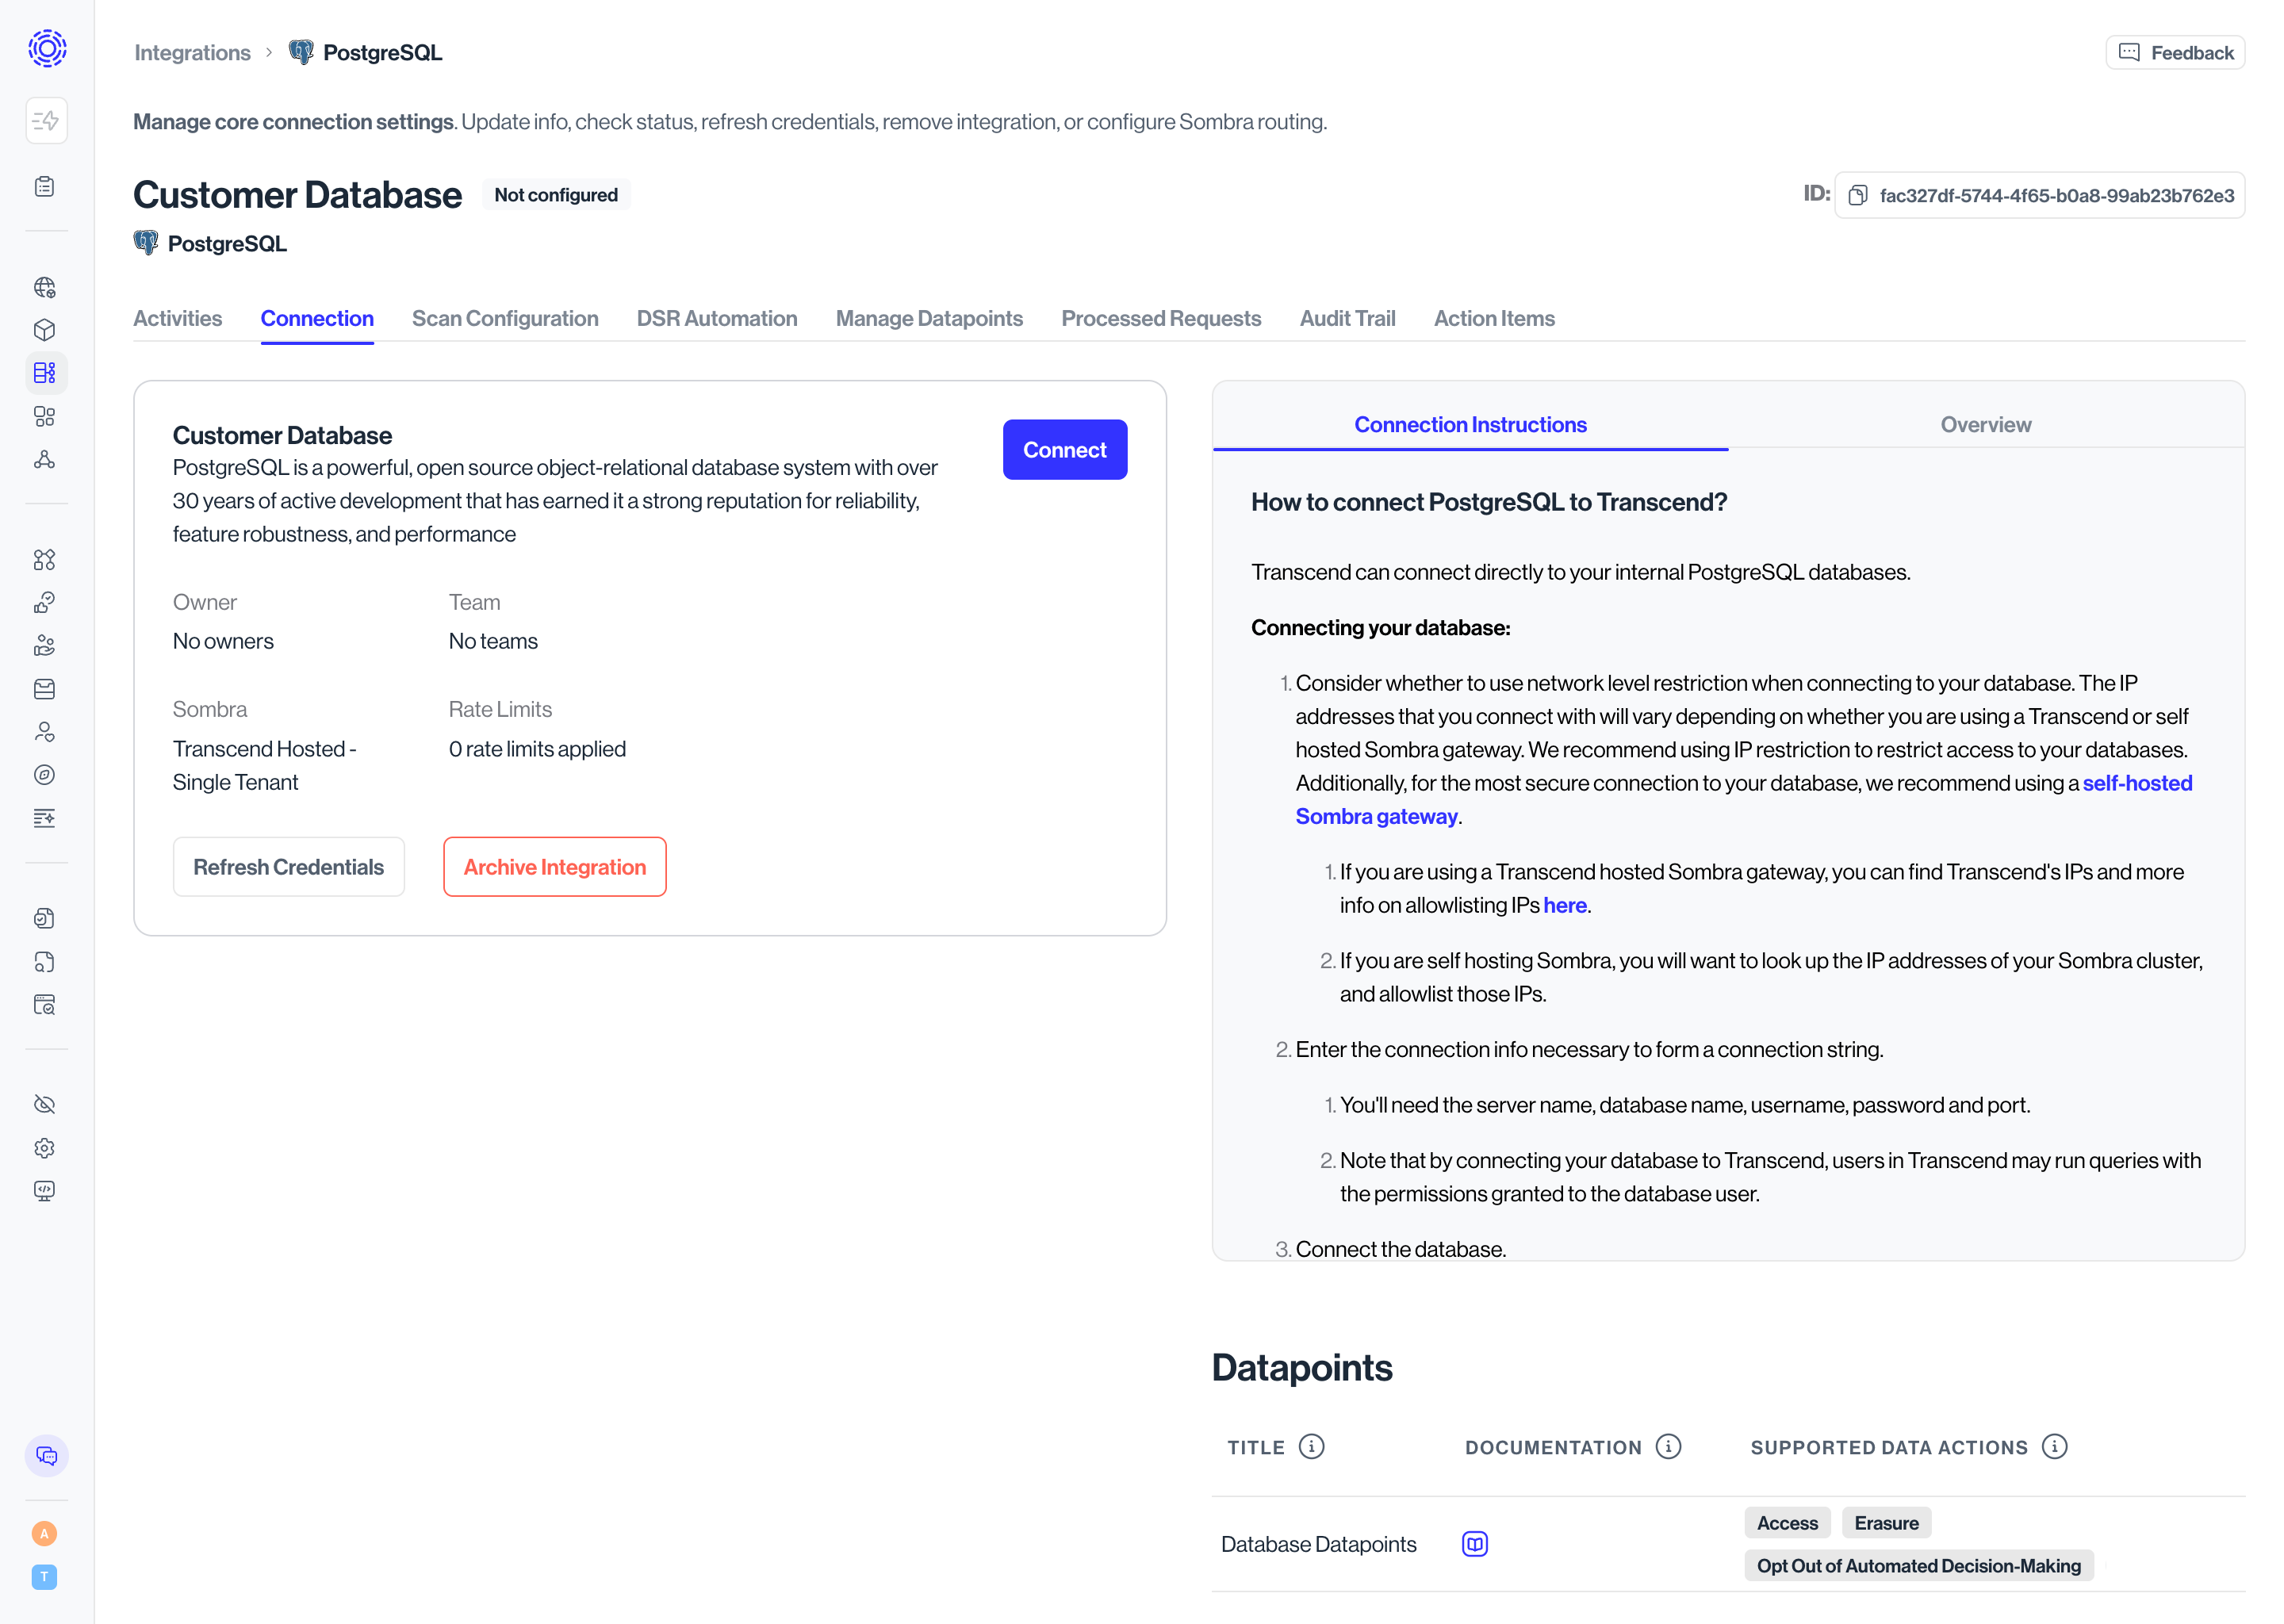
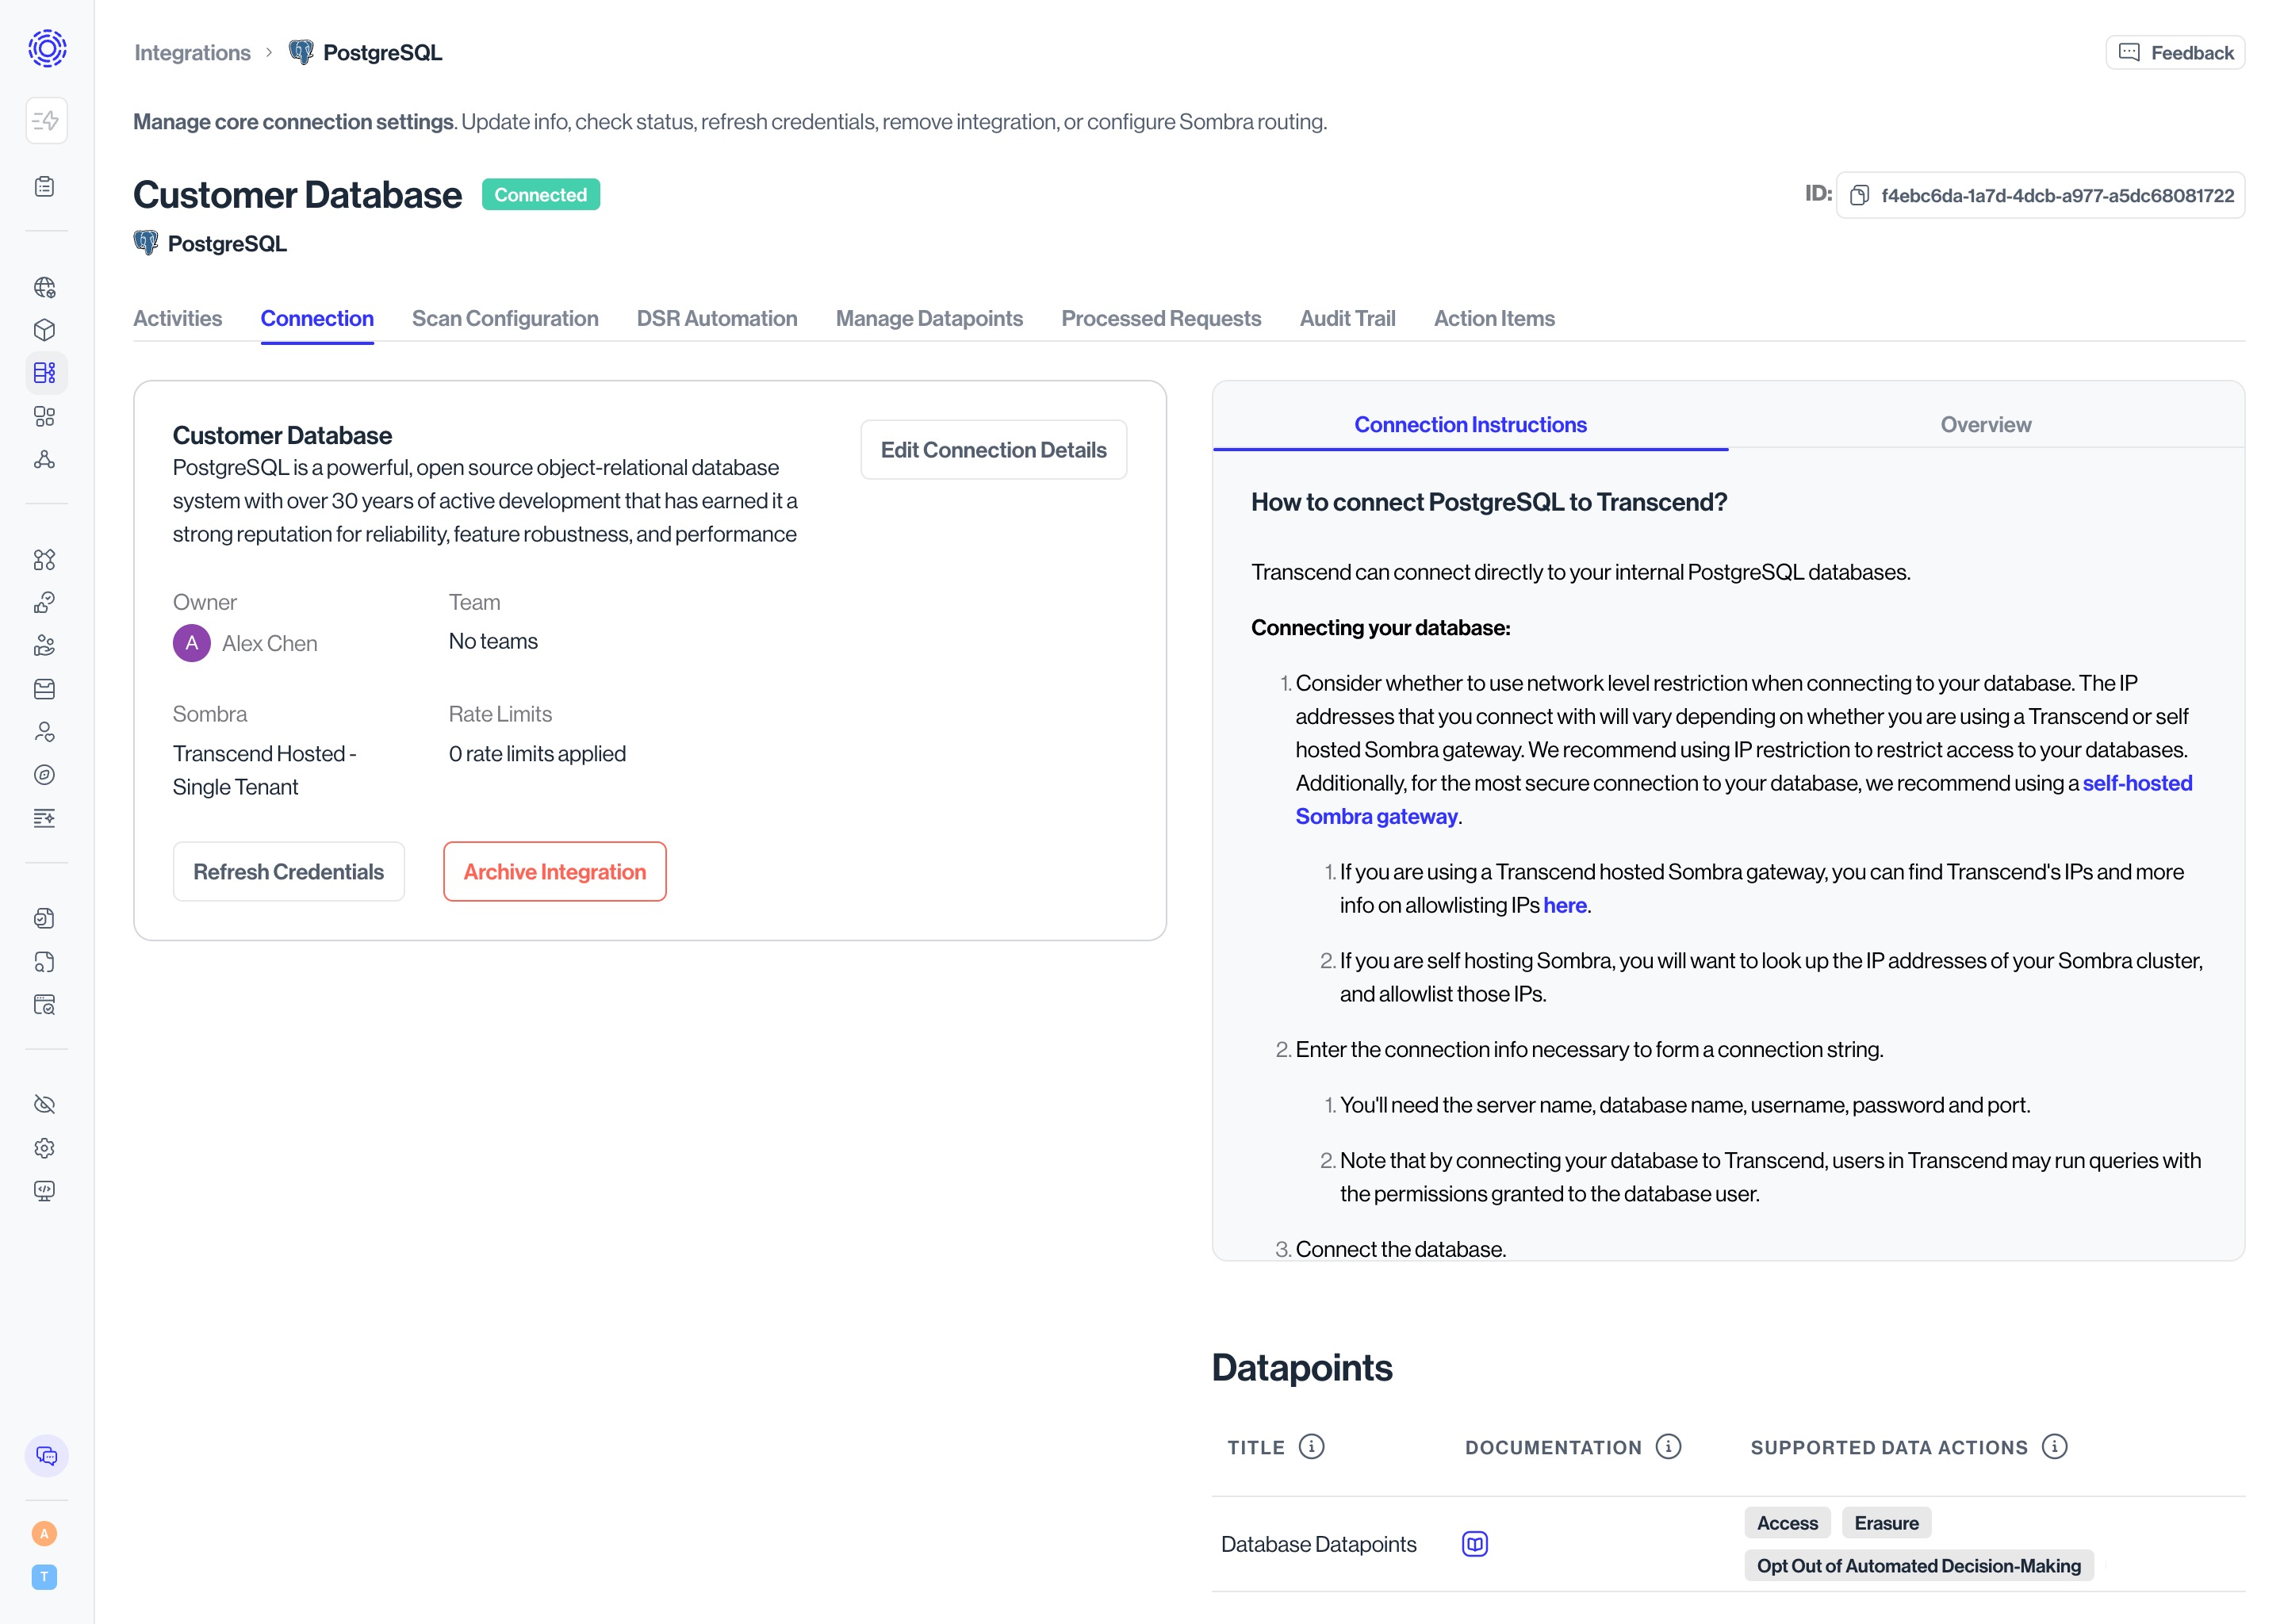
- On the modal connection step, add a system owner (optional), and click **Continue to Connection Details**, which will take you to the **Connection** tab in Integrations, where you will see an orange **Not Configured** badge next to the system name.
In the **Connection** tab, there will be detailed instructions on what to do next.
- If you are connecting an **internal database**, required information usually includes:
- Server address and port
- Database name
- Username and password (or other authentication details)
- Connection options (SSL, etc.)
- If you are connecting a **SaaS tool** or **storage provider**, required information typically includes:
- Authorizing via OAuth
- Entering API credentials
- Granting necessary permissions
- If connection is successful, the badge by the data system name will update to **Connected**.
### 2. Configure and Run an Ad-Hoc Scan [#2-configure-and-run-an-ad-hoc-scan]
- Once you have connected the Integration for your data system, go to the **Scan Configuration** tab.
- Under "Scan Type" select "Discovery + Classification Scan"
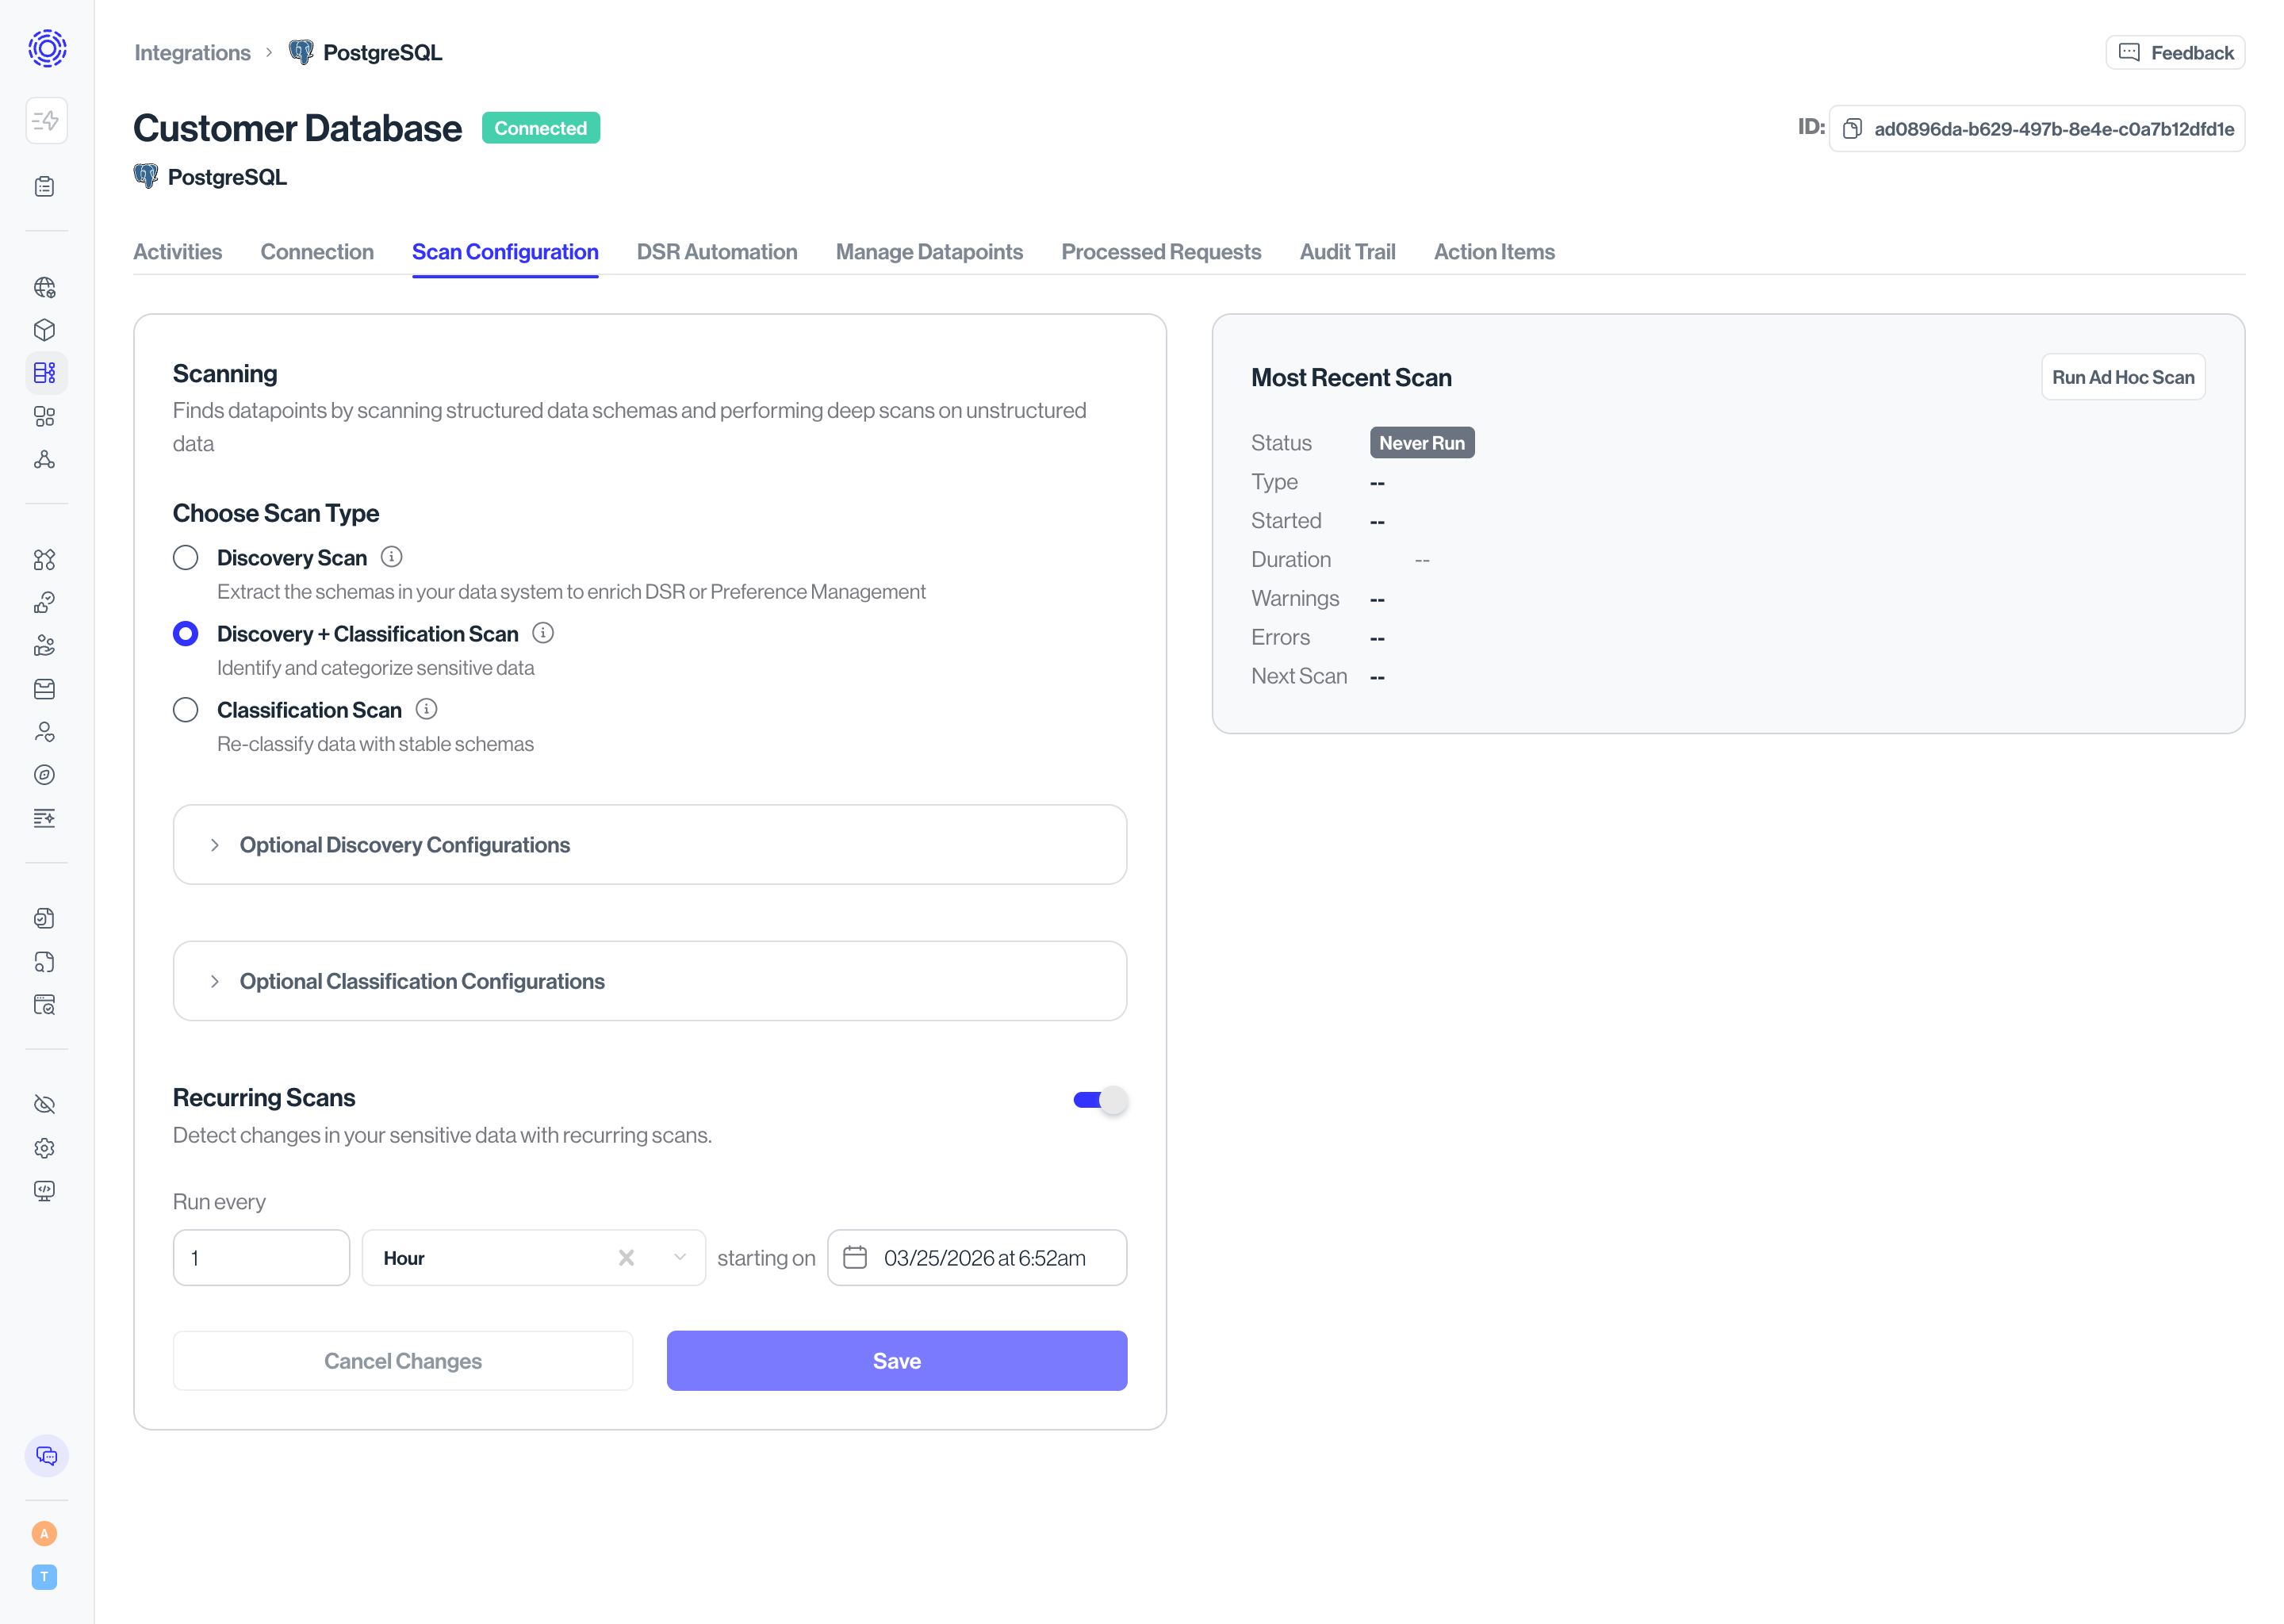
- On the right hand side, in the "Most Recent Scan" widget, click the **Run Ad-Hoc Scan** button to start a test scan. The status of the Most Recent Scan widget should immediately change to "In Progress," and you will be able to see a "Duration" field reflecting how long the scan has been In Progress.
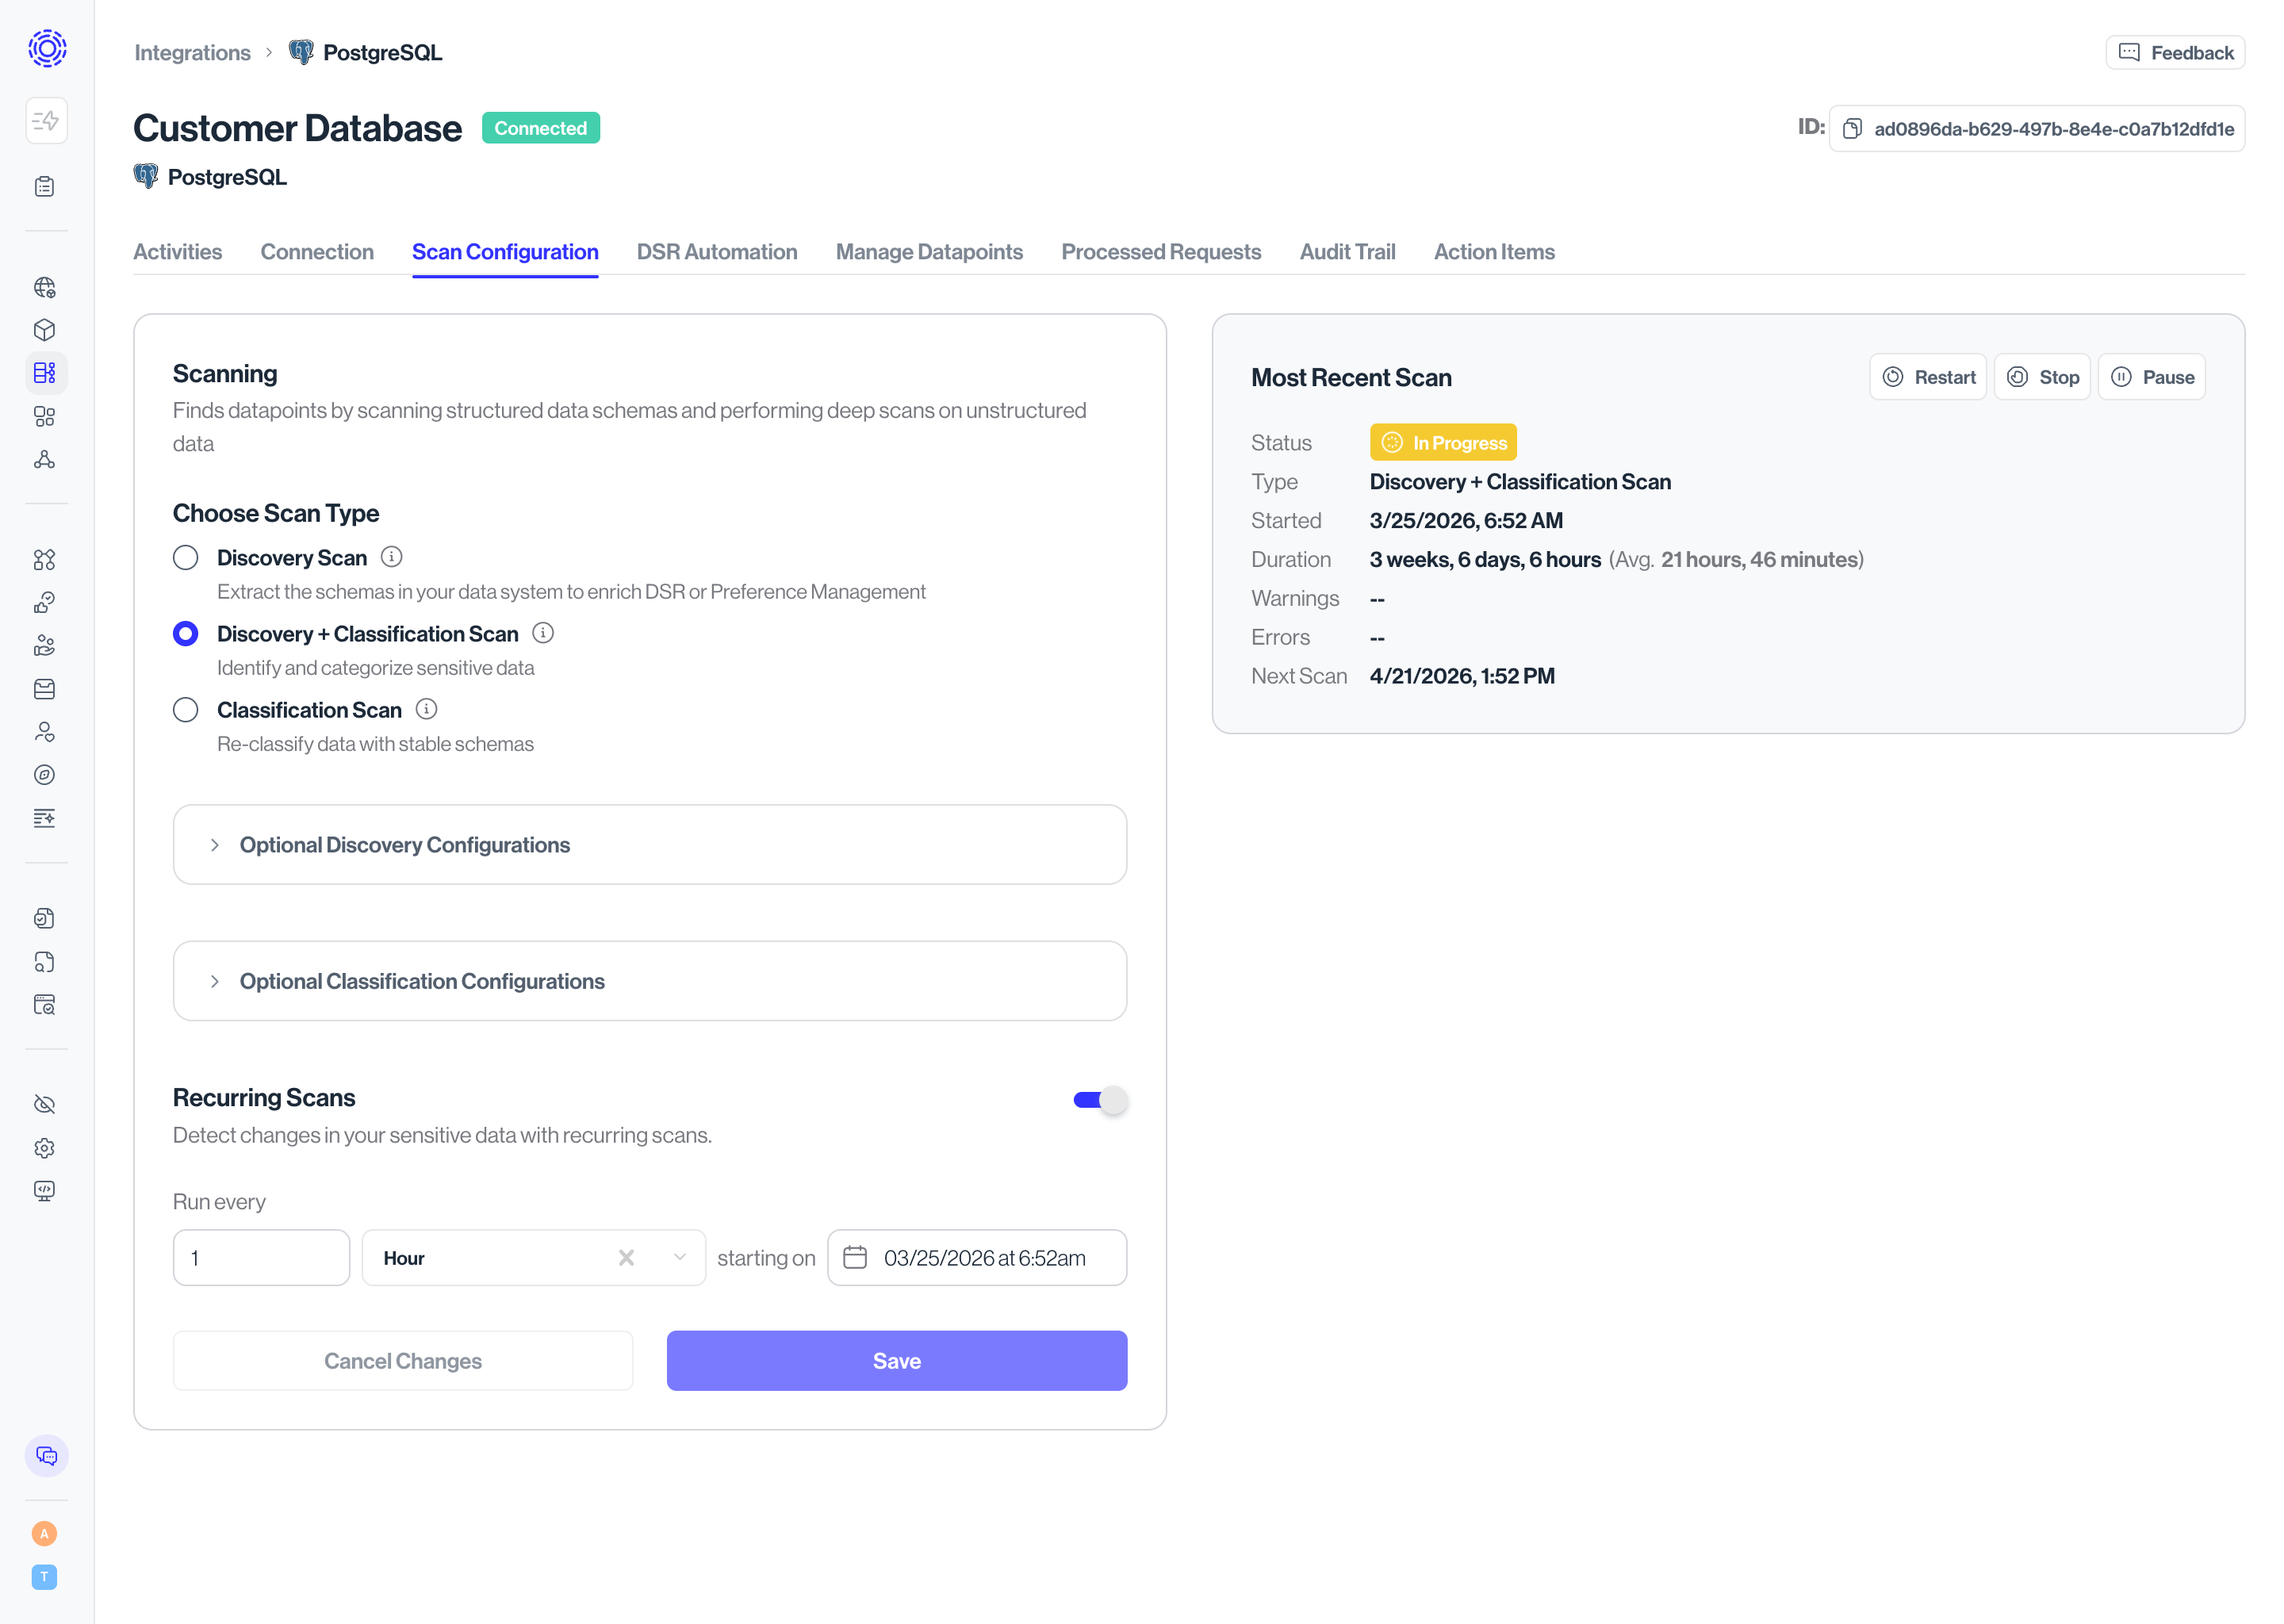
- When the scan is complete, the Most Recent Scan status will update to **Complete**
**Note:** The first time you run a scan on a given system, the time it will take to complete is difficult to predict, as it varies with your Sombra and data system configuration.
### 3. Review the Results [#3-review-the-results]
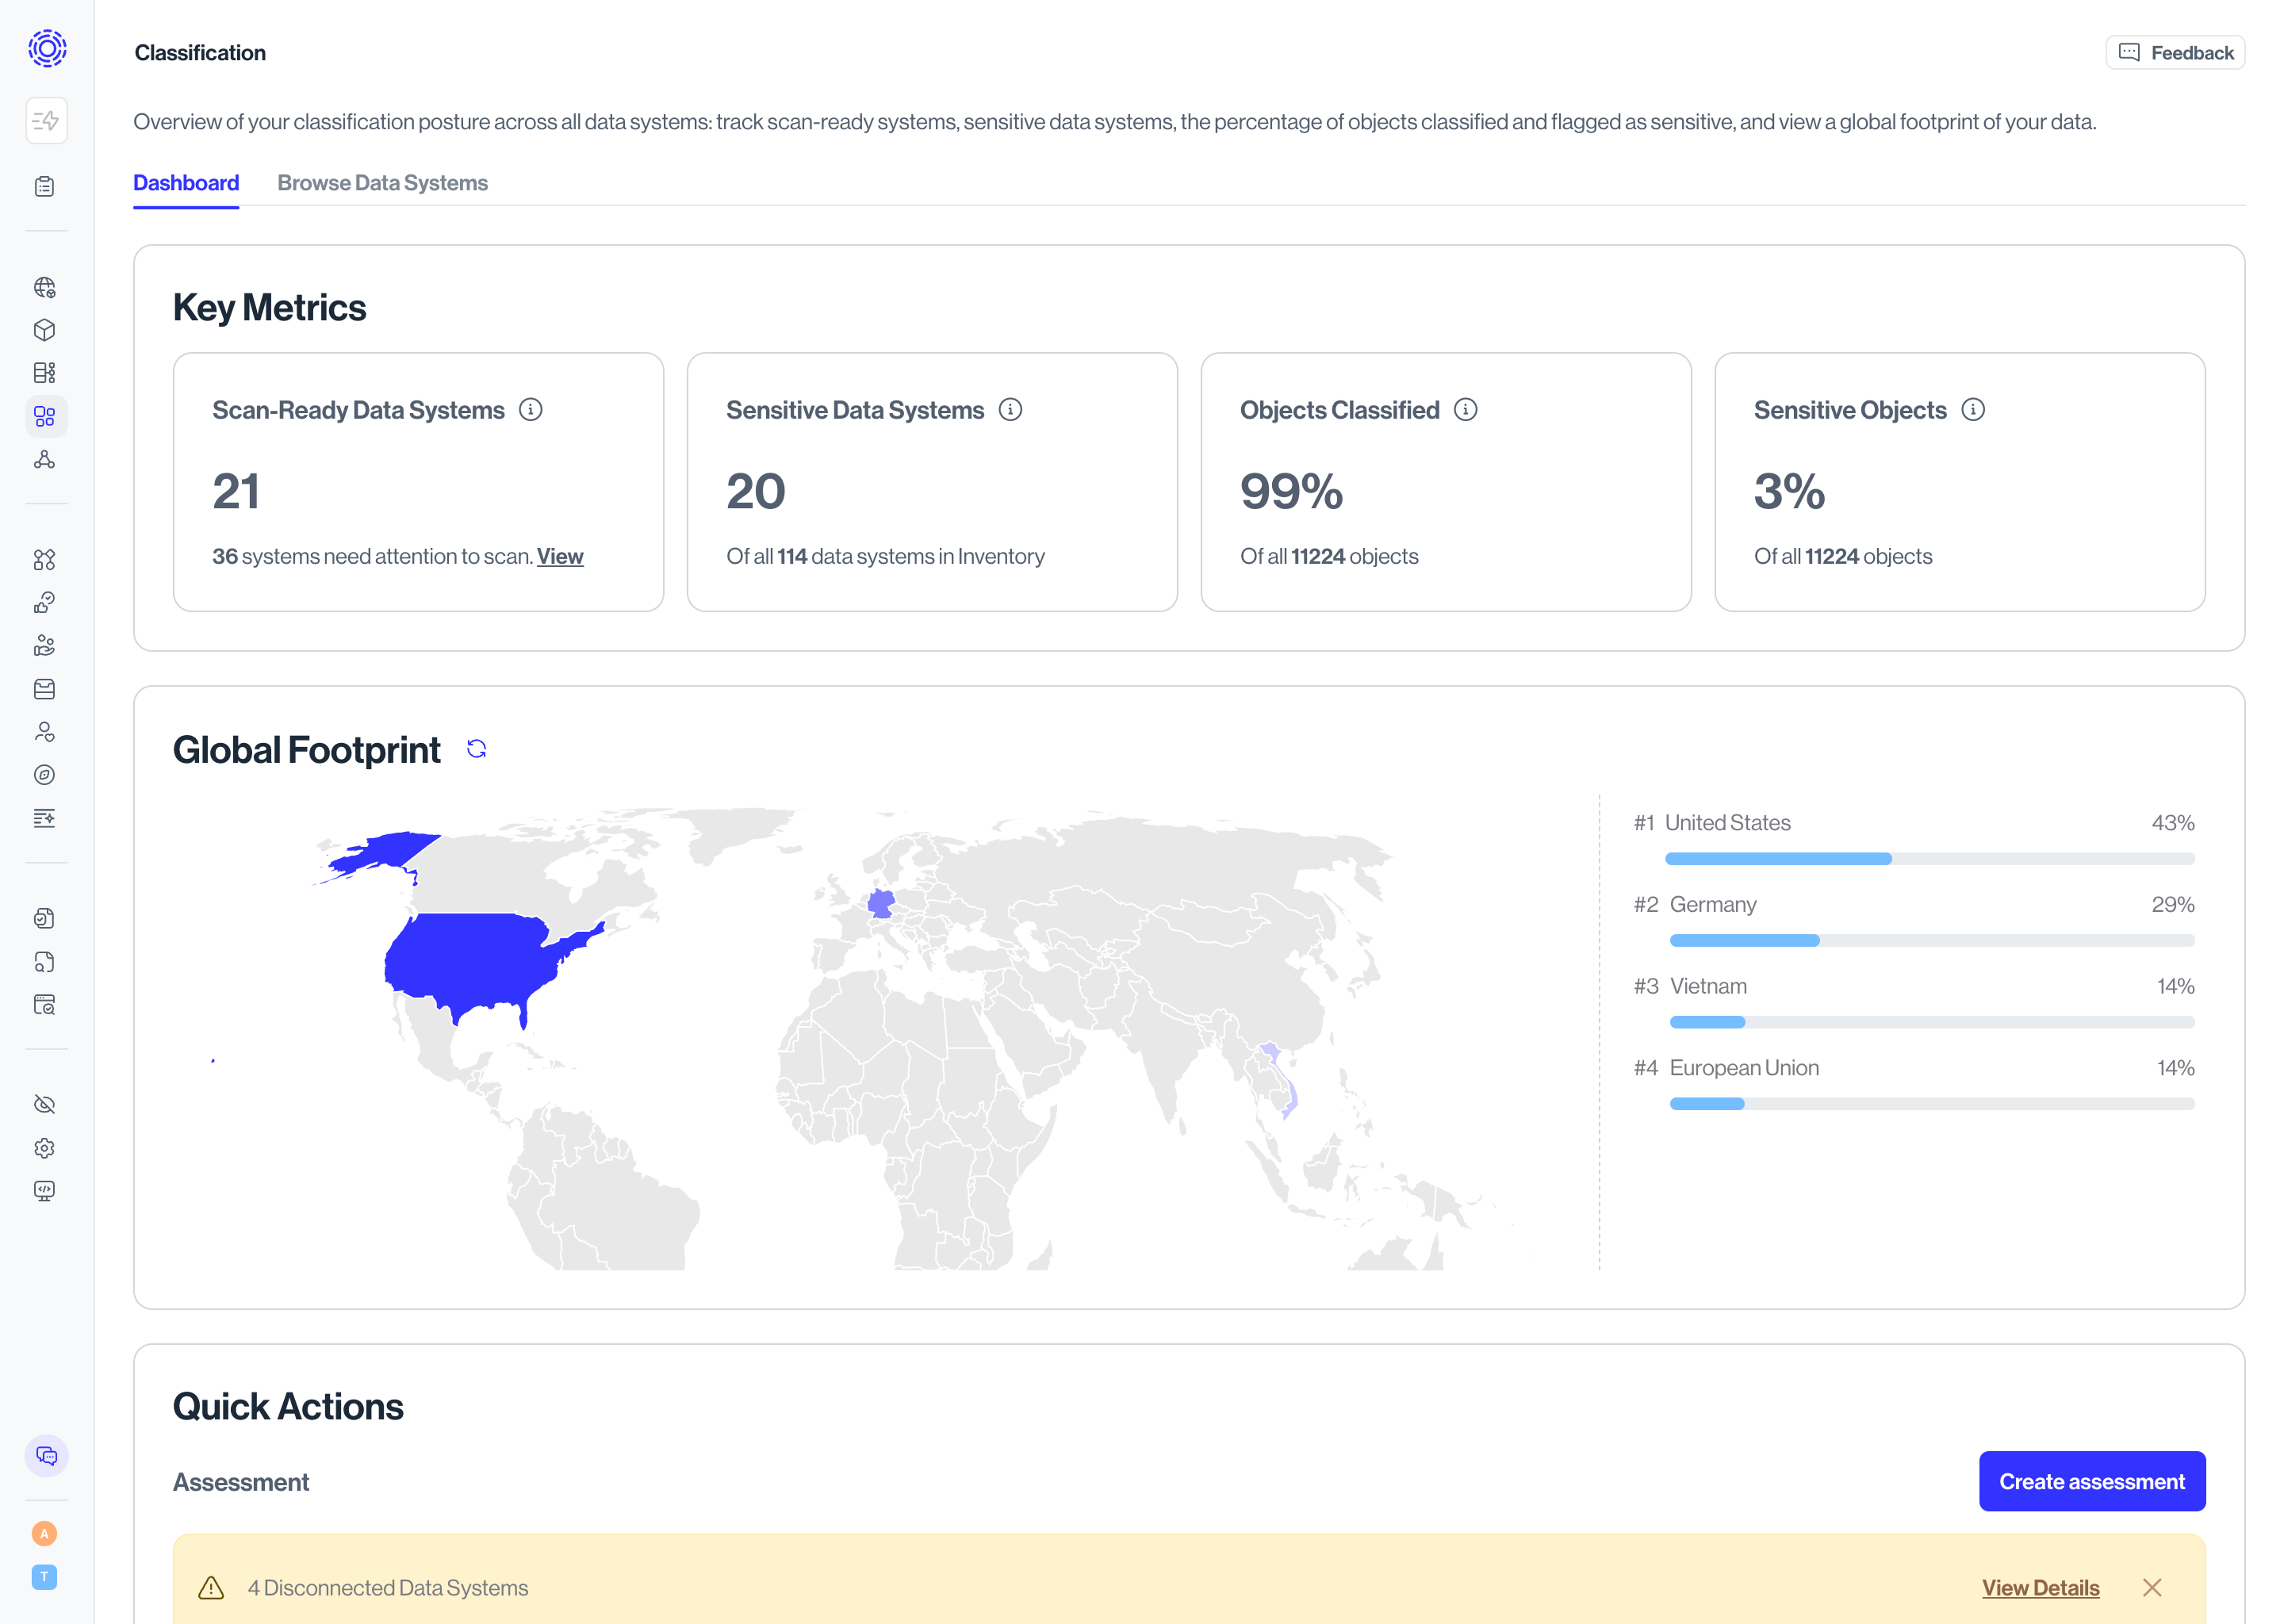
- Once the scan is complete, navigate to **Classification** in the left hand sidebar, which will take you to the Classification Dashboard. There, you will see summary metrics for your sensitive data (including anything manually labeled as sensitive).
**Notes on Transcend Terminology**
- **Objects** are Tables (such as a table in a MSQL Database) or Files (such as a .txt file in an Amazon S3 Bucket)
- Within **Tables**, Properties (often called 'datapoints' in our UI) are the columns in a table and Samples are individual table cell values
- Within **Files**, there are no columns (they generally don't have any), only Entries (individual bits of sensitive data extracted from a blob of text, such as a name)
On the Dashboard view, you only see the total count at the **Object** (table or file) level.
- Click **Browse Data Systems**, which will take you to an overview of all data systems that support classification.
- Search for your chosen data system, and notice the summary findings on the card for Total Objects and % Objects Sensitive.
- Clicking on the data system card will take you to the data system overview, where you can see additional information about that system.
- Click on the **Datapoints** or **Objects** tab (the naming will depend on the type of integration) to review your classification scan results