# Helm (Recommended) (/docs/sombra/deploying/deployment-options/helm)
This is our recommended approach for deploying Sombra in production environments. While there are various ways to deploy Sombra and related components, we recommend Helm for most users, especially those with multi-cloud or hybrid cloud environments.
> **Prerequisites**Follow our [Getting Started guide](../getting-started.mdx#step-1-create-a-transcend-api-key) to get access to our container registry, and get all the environment variables you'll need when configuring Sombra.
## Step 1: Set Up a Kubernetes Cluster [#step-1-set-up-a-kubernetes-cluster]
Follow your hosting provider's instructions to launch a Kubernetes cluster. You should get to the point where you can connect to the cluster with `kubectl`.
### On Amazon Web Services [#on-amazon-web-services]
Set up your cluster on [Amazon Elastic Kubernetes Service (EKS)](https://docs.aws.amazon.com/eks/latest/userguide/getting-started.html).
- Connect [kubectl to EKS](https://docs.aws.amazon.com/eks/latest/userguide/create-kubeconfig.html). On **AWS**, your `kubeconfig` is typically configured via the [`aws eks update-kubeconfig`](https://docs.aws.amazon.com/eks/latest/userguide/create-kubeconfig.html) command. If you used [eksctl](https://docs.aws.amazon.com/eks/latest/userguide/getting-started-eksctl.html), your `kubeconfig` may have been configured automatically.
- If you're setting up the LLM Classifier for Data Discovery & Classification, follow [NVIDIA's guide](https://docs.nvidia.com/datacenter/cloud-native/gpu-operator/latest/amazon-eks.html) to deploy GPU nodes on EKS.
For a complete Terraform example that creates all required AWS infrastructure, see the [AWS EKS with Terraform guide](./eks-terraform.mdx).
### On Microsoft Azure [#on-microsoft-azure]
Set up your cluster on [Azure Kubernetes Service (AKS)](https://learn.microsoft.com/en-us/azure/aks/).
- Connect [kubectl to AKS](https://learn.microsoft.com/en-us/azure/aks/learn/quick-kubernetes-deploy-cli#connect-to-the-cluster). On **Azure**, your `kubeconfig` is typically configured via [az aks get-credentials](https://learn.microsoft.com/en-us/azure/aks/learn/quick-kubernetes-deploy-cli#connect-to-the-cluster).
- If you're setting up the LLM Classifier for Data Discovery & Classification, follow [NVIDIA's guide](https://docs.nvidia.com/datacenter/cloud-native/gpu-operator/latest/microsoft-aks.html) to deploy GPU nodes on AKS.
### On Google Cloud [#on-google-cloud]
Set up your cluster on [Google Kubernetes Engine (GKE)](https://cloud.google.com/kubernetes-engine/docs/how-to/cluster-access-for-kubectl).
- Connect [kubectl to GKE](https://cloud.google.com/kubernetes-engine/docs/how-to/cluster-access-for-kubectl). On **GCP**, your `kubeconfig` is typically configured via [gcloud container clusters get-credentials](https://cloud.google.com/sdk/gcloud/reference/container/clusters/get-credentials).
- If you're setting up the LLM Classifier for Data Discovery & Classification, follow [NVIDIA's guide](https://docs.nvidia.com/datacenter/cloud-native/gpu-operator/latest/google-gke.html) to deploy GPU nodes on GKE.
### On Premises [#on-premises]
For on-prem deployments, you can set up your Kubernetes cluster using one of the following solutions:
- **OpenShift**: A Kubernetes distribution by Red Hat that provides an enterprise-ready platform with additional tools for development and operations. Follow the [OpenShift Setup Guide](https://docs.openshift.com/container-platform/latest/welcome/index.html).
- **Kubeadm**: A tool built to easily bootstrap a minimum viable Kubernetes cluster. It is ideal for users familiar with Kubernetes and who require granular control over their cluster configuration. Follow the [Kubeadm Setup Guide](https://kubernetes.io/docs/setup/production-environment/tools/kubeadm/install-kubeadm/).
- **Rancher**: An open-source platform that provides a complete Kubernetes management solution to deploy and manage clusters. Follow the [Rancher Setup Guide](https://ranchermanager.docs.rancher.com/getting-started/installation-and-upgrade).
- **VMware Tanzu**: VMware's enterprise-grade Kubernetes offering that integrates tightly with VMware infrastructure, making it suitable for environments already invested in VMware. Follow the [VMware Tanzu Setup Guide](https://docs.vmware.com/en/VMware-Tanzu-Kubernetes-Grid/index.html).
Follow [NVIDIA's guides](https://docs.nvidia.com/datacenter/cloud-native/gpu-operator/latest/platform-support.html#supported-operating-systems-and-kubernetes-platforms) to deploy GPUs to your Kubernetes cluster in your on premises environment.
### Locally [#locally]
You can test a Kubernetes cluster locally using one of these services:
- [Docker Desktop](https://docs.docker.com/desktop/kubernetes/)
- [Minikube](https://minikube.sigs.k8s.io/docs/start)
- [Kind](https://kind.sigs.k8s.io/docs/user/quick-start/)
_Note: if you do not have an NVIDIA GPU on your machine, you will not be able to use the LLM Classifier in your cluster._
## Step 2: Configure `kubectl` to Connect to Your Cluster [#step-2-configure-kubectl-to-connect-to-your-cluster]
The guide you followed in Step 1 may have already set up your `kubectl` with your cluster's context. If so, you can proceed to Step 3.
If you haven't already installed the `kubectl` CLI, follow these [instructions to install kubectl](https://kubernetes.io/docs/tasks/tools/).
### Find the `kubectl` Context for Your Cluster [#find-the-kubectl-context-for-your-cluster]
Check if your cluster's context is already available with:
```shellscript
kubectl config get-contexts
```
If you do not see your new cluster's context, you need to configure `kubectl` (via your `kubeconfig` file) to connect to your cluster. Check the documentation of your hosting provider.
- On **AWS**, your `kubeconfig` is typically configured via the [`aws eks update-kubeconfig`](https://docs.aws.amazon.com/eks/latest/userguide/create-kubeconfig.html) command. If you used [eksctl](https://docs.aws.amazon.com/eks/latest/userguide/getting-started-eksctl.html) to set up your cluster, then your `kubeconfig` may have been configured automatically.
- On **Azure**, your `kubeconfig` is typically configured via [az aks get-credentials](https://learn.microsoft.com/en-us/azure/aks/learn/quick-kubernetes-deploy-cli#connect-to-the-cluster).
- On **GCP**, your `kubeconfig` is typically configured via [gcloud container clusters get-credentials](https://cloud.google.com/sdk/gcloud/reference/container/clusters/get-credentials).
### Set the `kubectl` Context for Your Cluster [#set-the-kubectl-context-for-your-cluster]
Once you have the NAME of your cluster's context (from `kubectl config get-contexts`), set `kubectl` to its context:
```shellscript
kubectl config use-context MY_CONTEXT_NAME
```
## Step 3: Add the Helm Chart for Sombra [#step-3-add-the-helm-chart-for-sombra]
Add Transcend's Helm repository:
```shellscript
helm repo add transcend https://transcend-io.github.io/helm-charts/
helm repo update
```
You can list the charts available in our Helm repository with `helm search repo transcend`. You should see a chart for `transcend/sombra`.
Transcend's Helm chart repository can be found [here](https://github.com/transcend-io/helm-charts/).
## Step 4: Configure Sombra with `values.yaml` [#step-4-configure-sombra-with-valuesyaml]
Create a file named `values.yaml` with the following content:
```yaml
imageCredentials:
password:
replicaCount: 1
envs:
- name: SOMBRA_ID
value:
- name: ORGANIZATION_URI
value:
- name: TRANSCEND_URL
value:
envs_as_secret:
- name: SOMBRA_REVERSE_TUNNEL_API_KEY
value:
- name: JWT_ECDSA_KEY
value:
- name: INTERNAL_KEY_HASH
value:
```
Defaults for `values.yaml` are set in the Helm chart's [values.yaml here](https://github.com/transcend-io/helm-charts/blob/main/charts/sombra/values.yaml). Your `values.yaml` file overrides these defaults.
> **Missing some variables?**Refer to Steps 1–3 in our [Getting Started guide](../getting-started.mdx#step-1-create-a-transcend-api-key) to get the environment variables.
## Step 5: Install Sombra on Your Cluster [#step-5-install-sombra-on-your-cluster]
Now, deploy Sombra to your cluster. In Helm terms, you will _install_ your chart onto your cluster, and each time you install, that is called a "release".
Install the `sombra` chart onto your cluster:
```shellscript
helm install sombra-test transcend/sombra --values=./values.yaml
```
For this test run, we've chosen the name "sombra-test" for our release. You can replace "sombra-test" with any name you'd like. The release name is used only to distinguish between several installations of the same chart in your cluster—which is not a typical situation with Sombra. It should be a lowercase string with dashes.
## Step 6: Confirm Your Helm Chart is Installed on Your Cluster [#step-6-confirm-your-helm-chart-is-installed-on-your-cluster]
First, check that the Helm chart installed into your cluster:
```shellscript
kubectl get all --namespace="transcend"
```
**On namespaces:** the chart will create a namespace in your cluster called `transcend`. Most calls we'll make to `kubectl` require `--namespace="transcend"` (or in short form: `-n transcend`). Bare calls (e.g., `kubectl get all`) will turn up empty results, since it's looking in the default namespace (named `default`).
**Tip:** Rather than type `--namespace="transcend"` each time, add an alias:
```shellscript
alias k="kubectl --namespace=transcend"
k get all # kubectl --namespace="transcend" get all
k events # kubectl --namespace="transcend" events
```
## Step 7: Test the Transcend Ingress [#step-7-test-the-transcend-ingress]
Go to the [Sombra Gateways](https://app.transcend.io/infrastructure/sombra/sombras) page and click the "Test" button under "Test Gateway Connection" to make a GET request to the `/test` endpoint of the Sombra Gateway.
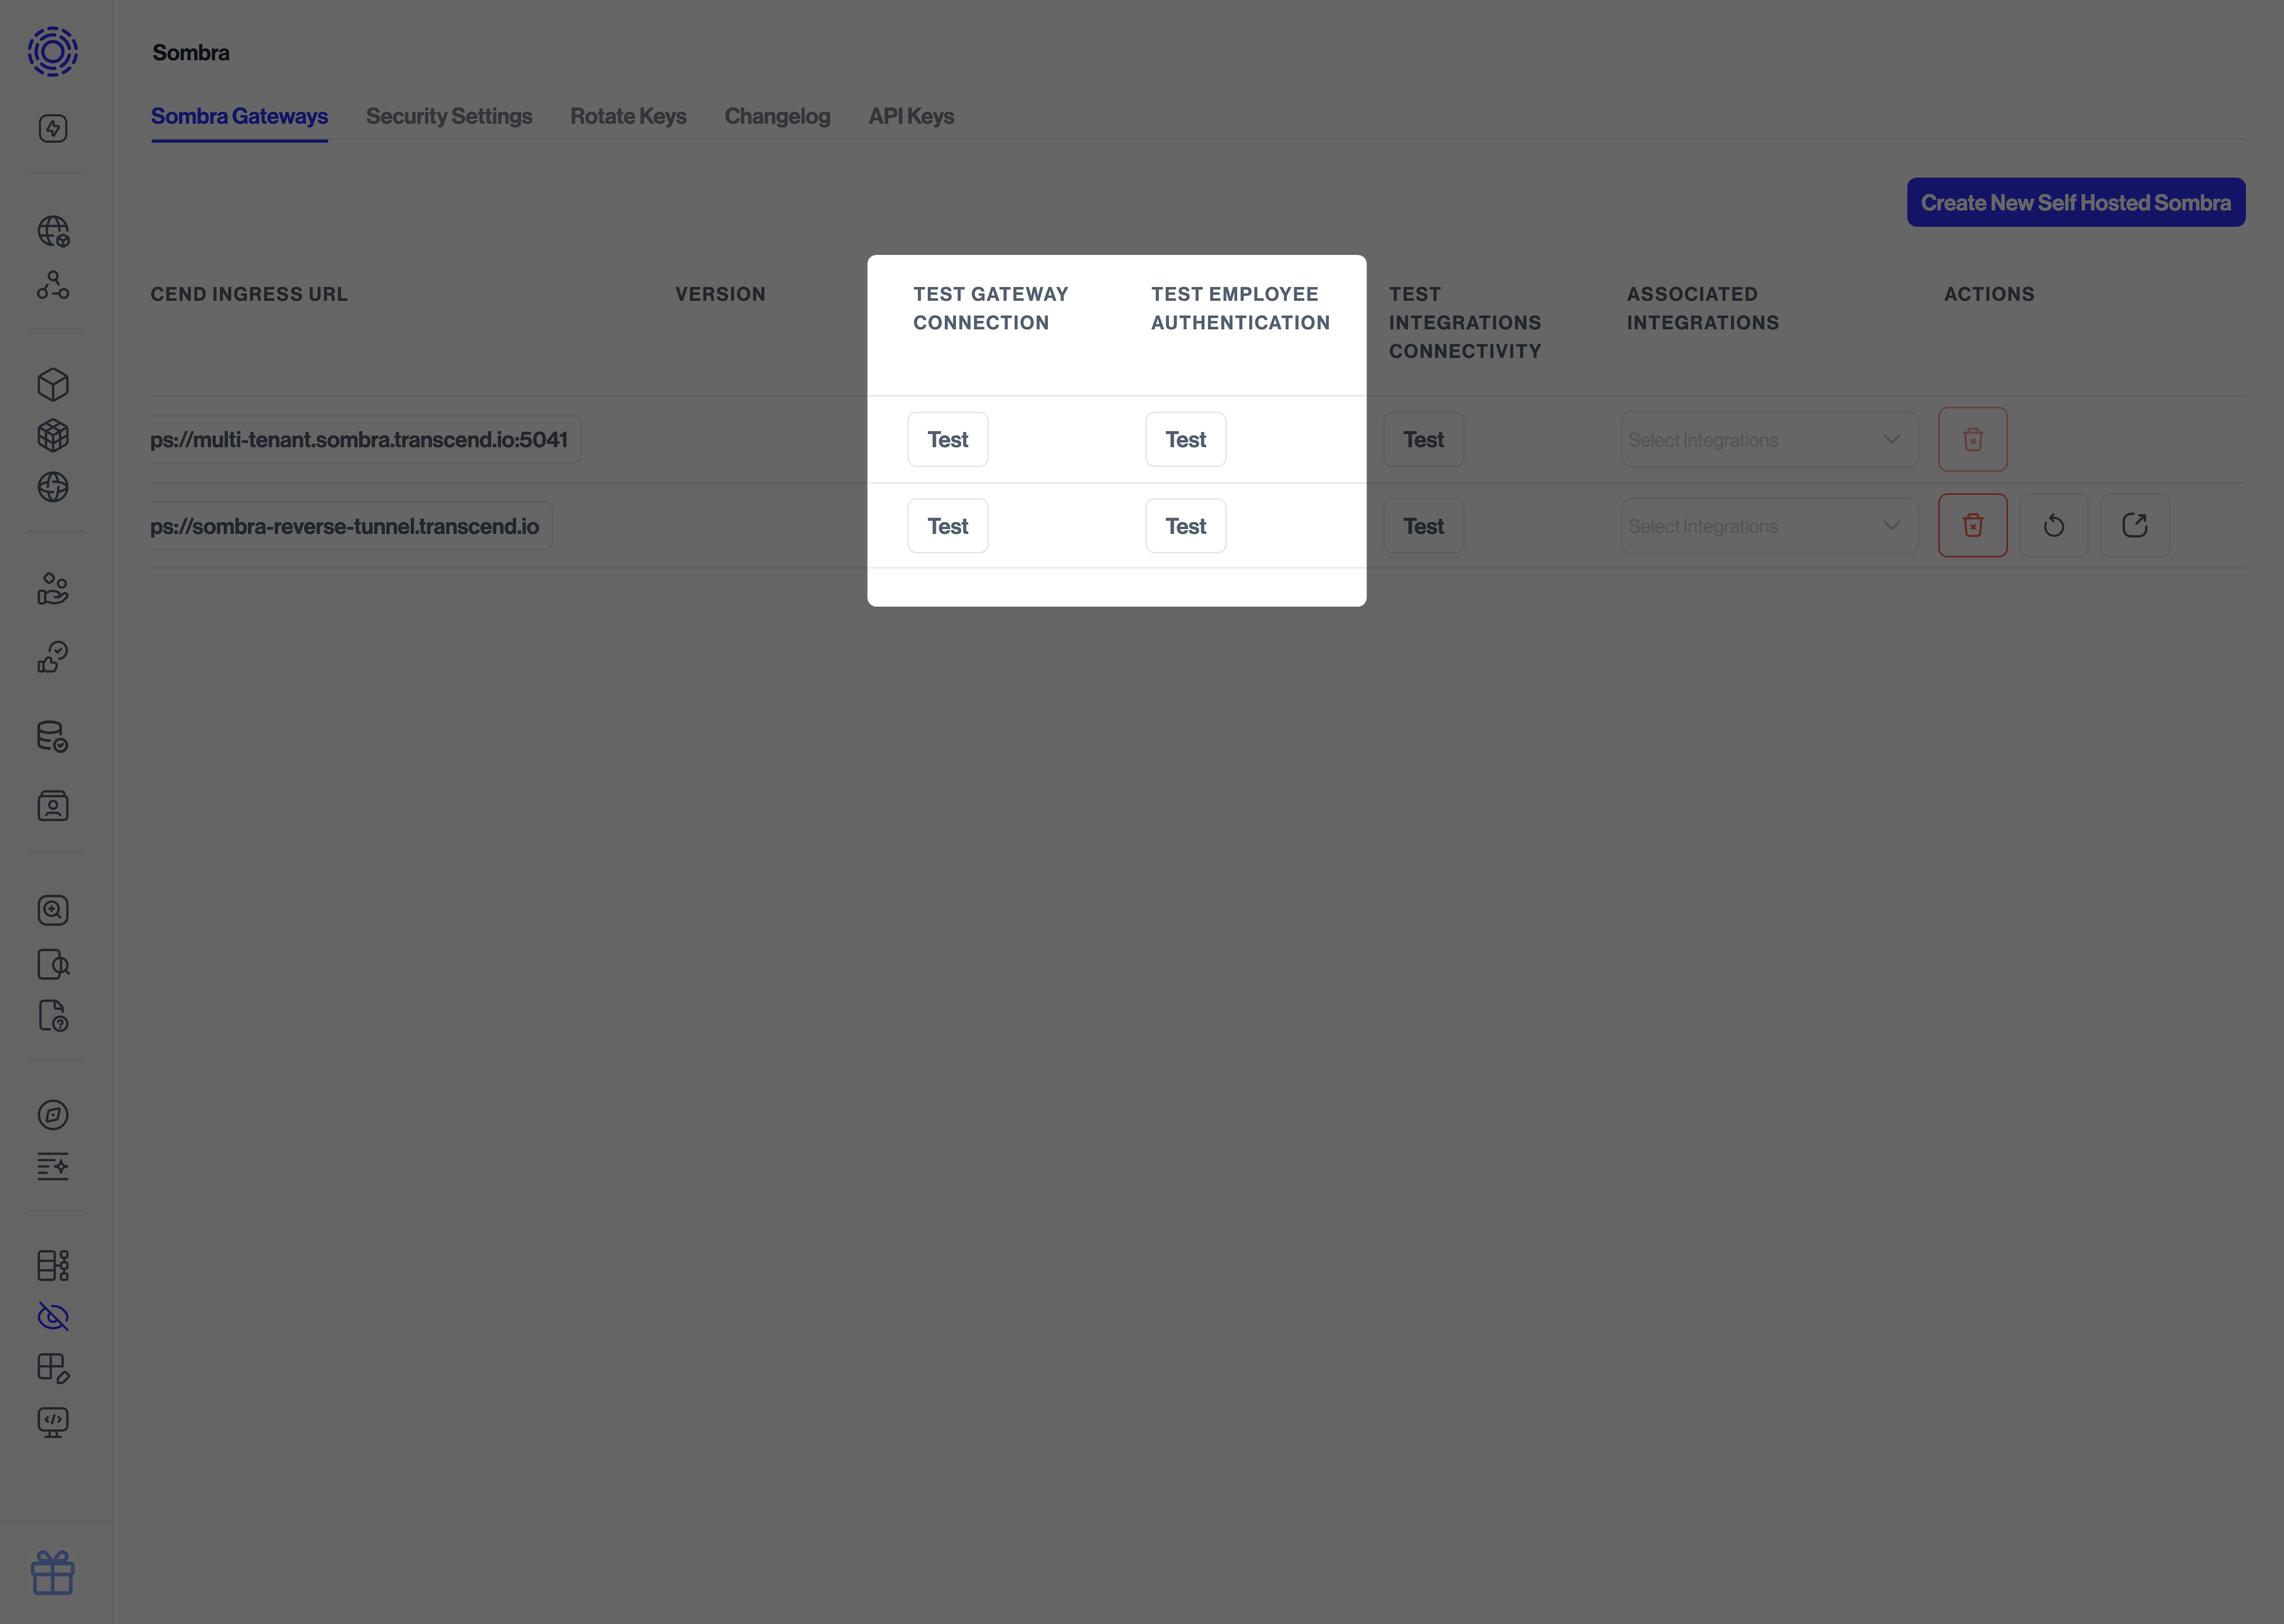
You should see a successful message if the connection is working. Congratulations on successfully deploying Sombra!
## Step 8 (Optional): Customize Sombra [#step-8-optional-customize-sombra]
The [Customizing Sombra](../customizing-sombra/index.mdx) guide covers all options available, but we recommend:
1. [Giving your systems access to the Sombra API through the Customer Ingress](../customizing-sombra/networking.mdx#customer-ingress).
2. [Deploying the LLM Classifier](../customizing-sombra/llm-classifier.mdx), if you're using Sombra for Data Discovery & Classification.
3. [Setting up SSO](../customizing-sombra/authentication.mdx#employee-authentication) for your admin users.
## Troubleshooting [#troubleshooting]
If you encounter issues during deployment, follow these steps:
1. **Diagnose the issue** using Kubernetes events and logs:
```shellscript
kubectl events -n transcend
kubectl logs -n transcend deployment/sombra-test
```
2. **Fix the issue** based on the error messages (see common issues below)
3. **Upgrade the release** with your changes:
```shellscript
helm upgrade sombra-test transcend/sombra --values=./values.yaml
```
#### "Failed to pull image (...) HTTP 403" [#failed-to-pull-image--http-403]
You don't have access to our Docker registry. Make sure you have a valid API key under `imageCredentials.password` in your `values.yaml` file. See our [Getting Started guide](../getting-started.mdx#step-1-create-a-transcend-api-key) to get the API key. If the issue persists, reach out to Transcend support.
```shellsession
$ kubectl events -n transcend
LAST SEEN TYPE REASON OBJECT MESSAGE
6m44s Warning Failed Pod/sombra-test-559b7796b9-j7r2w Failed to pull image "docker.transcend.io/sombra:latest": Error response from daemon: error parsing HTTP 403 response body: no error details found in HTTP response body: "{\"Message\":\"User is not authorized to access this resource with an explicit deny\"}\n"
```
#### "0/1 nodes are available (...) Insufficient memory" [#01-nodes-are-available--insufficient-memory]
```shellsession
$ kubectl events -n transcend
LAST SEEN TYPE REASON OBJECT MESSAGE
27m (x2 over 32m) Warning FailedScheduling Pod/sombra-test-llm-classifier-5c9486974b-drq9v 0/1 nodes are available: 1 Insufficient memory. preemption: 0/1 nodes are available: 1 No preemption victims found for incoming pod.
```
You need to increase the memory in your cluster.
#### "0/1 nodes are available (...) Insufficient nvidia.com/gpu" [#01-nodes-are-available--insufficient-nvidiacomgpu]
```shellsession
$ kubectl events -n transcend
LAST SEEN TYPE REASON OBJECT MESSAGE
37m Warning FailedScheduling Pod/sombra-test-llm-classifier-5c9486974b-drq9v 0/1 nodes are available: 1 Insufficient nvidia.com/gpu. preemption: 0/1 nodes are available: 1 No preemption victims found for incoming pod.
```
You're using the LLM Classifier, but your cluster is missing an NVIDIA GPU or does not have the relevant drivers installed. This is managed by the [NVIDIA GPU Operator](https://docs.nvidia.com/datacenter/cloud-native/gpu-operator/latest/index.html#). Have you installed the GPU Operator into your cluster? See the NVIDIA guide for your hosting environment (linked in Step 1).
## Updating Sombra [#updating-sombra]
```shellscript
# Update the Helm repository
helm repo update
# Update the release
helm upgrade sombra-test transcend/sombra --values=./values.yaml
```