Setting up DSR Automation Forms
Learn how to configure Data Subject Request (DSR) automation forms in Transcend, including setting up data subjects, request types, identifiers, and email workflows. This guide also covers best practices for authorized agent flows, form visibility, and manual verification using the Admin Dashboard and API.
This guide walks through how to configure Data Subject Request (DSR) automation forms in Transcend. It covers data subjects, data actions, identifiers, and best‑practice patterns—especially for authorized agent flows.
1. Configure Data Subjects
Start by defining who can make which types of requests.
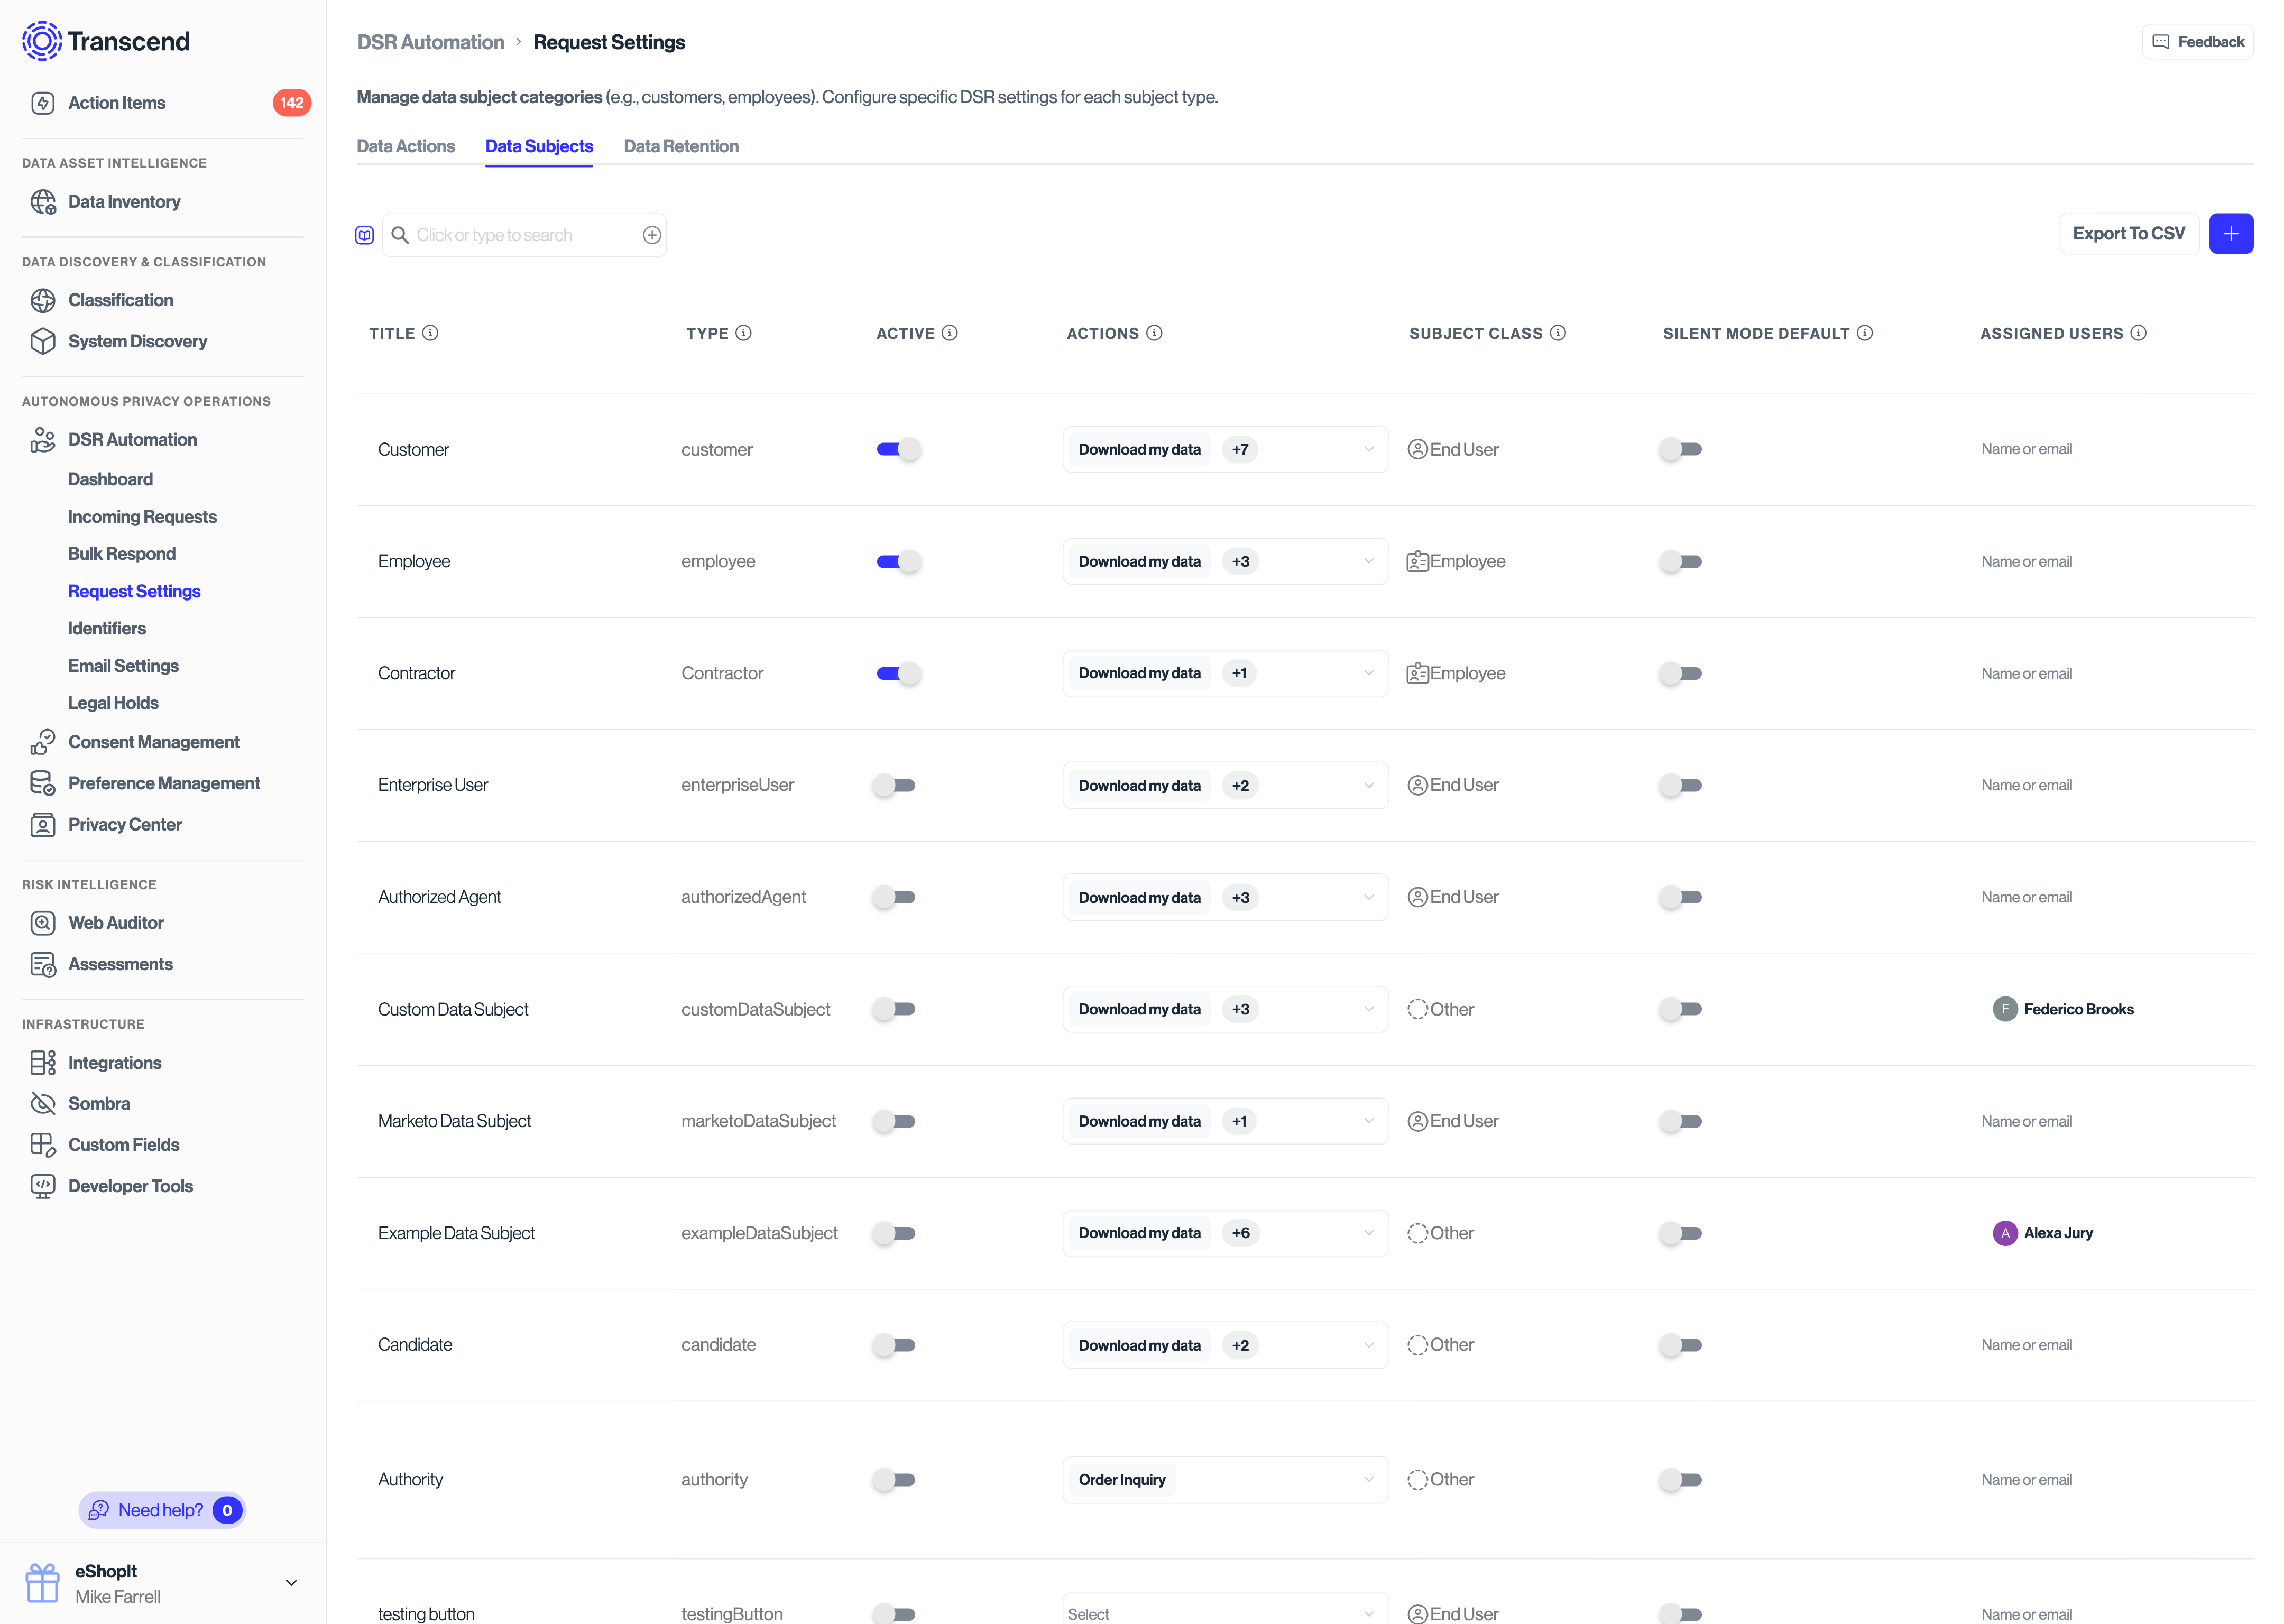
👉 Admin Dashboard → Privacy Requests → Settings → Data Subjects https://app.transcend.io/privacy-requests/settings/data-subjects
Data Subjects determine:
- Who is allowed to submit a request
- Which request types (data actions) they can submit
- Whether those requests appear in the Privacy Center form, or are restricted to Admin Dashboard / API only
Key Configuration Options
For each Data Subject:
- Active
- Only active data subjects appear in the Privacy Center form
- Inactive subjects are still available for admin/API‑submitted requests
- Request Type Access
- Define which data actions (e.g. Access, Delete, Opt‑out) this data subject is allowed to submit
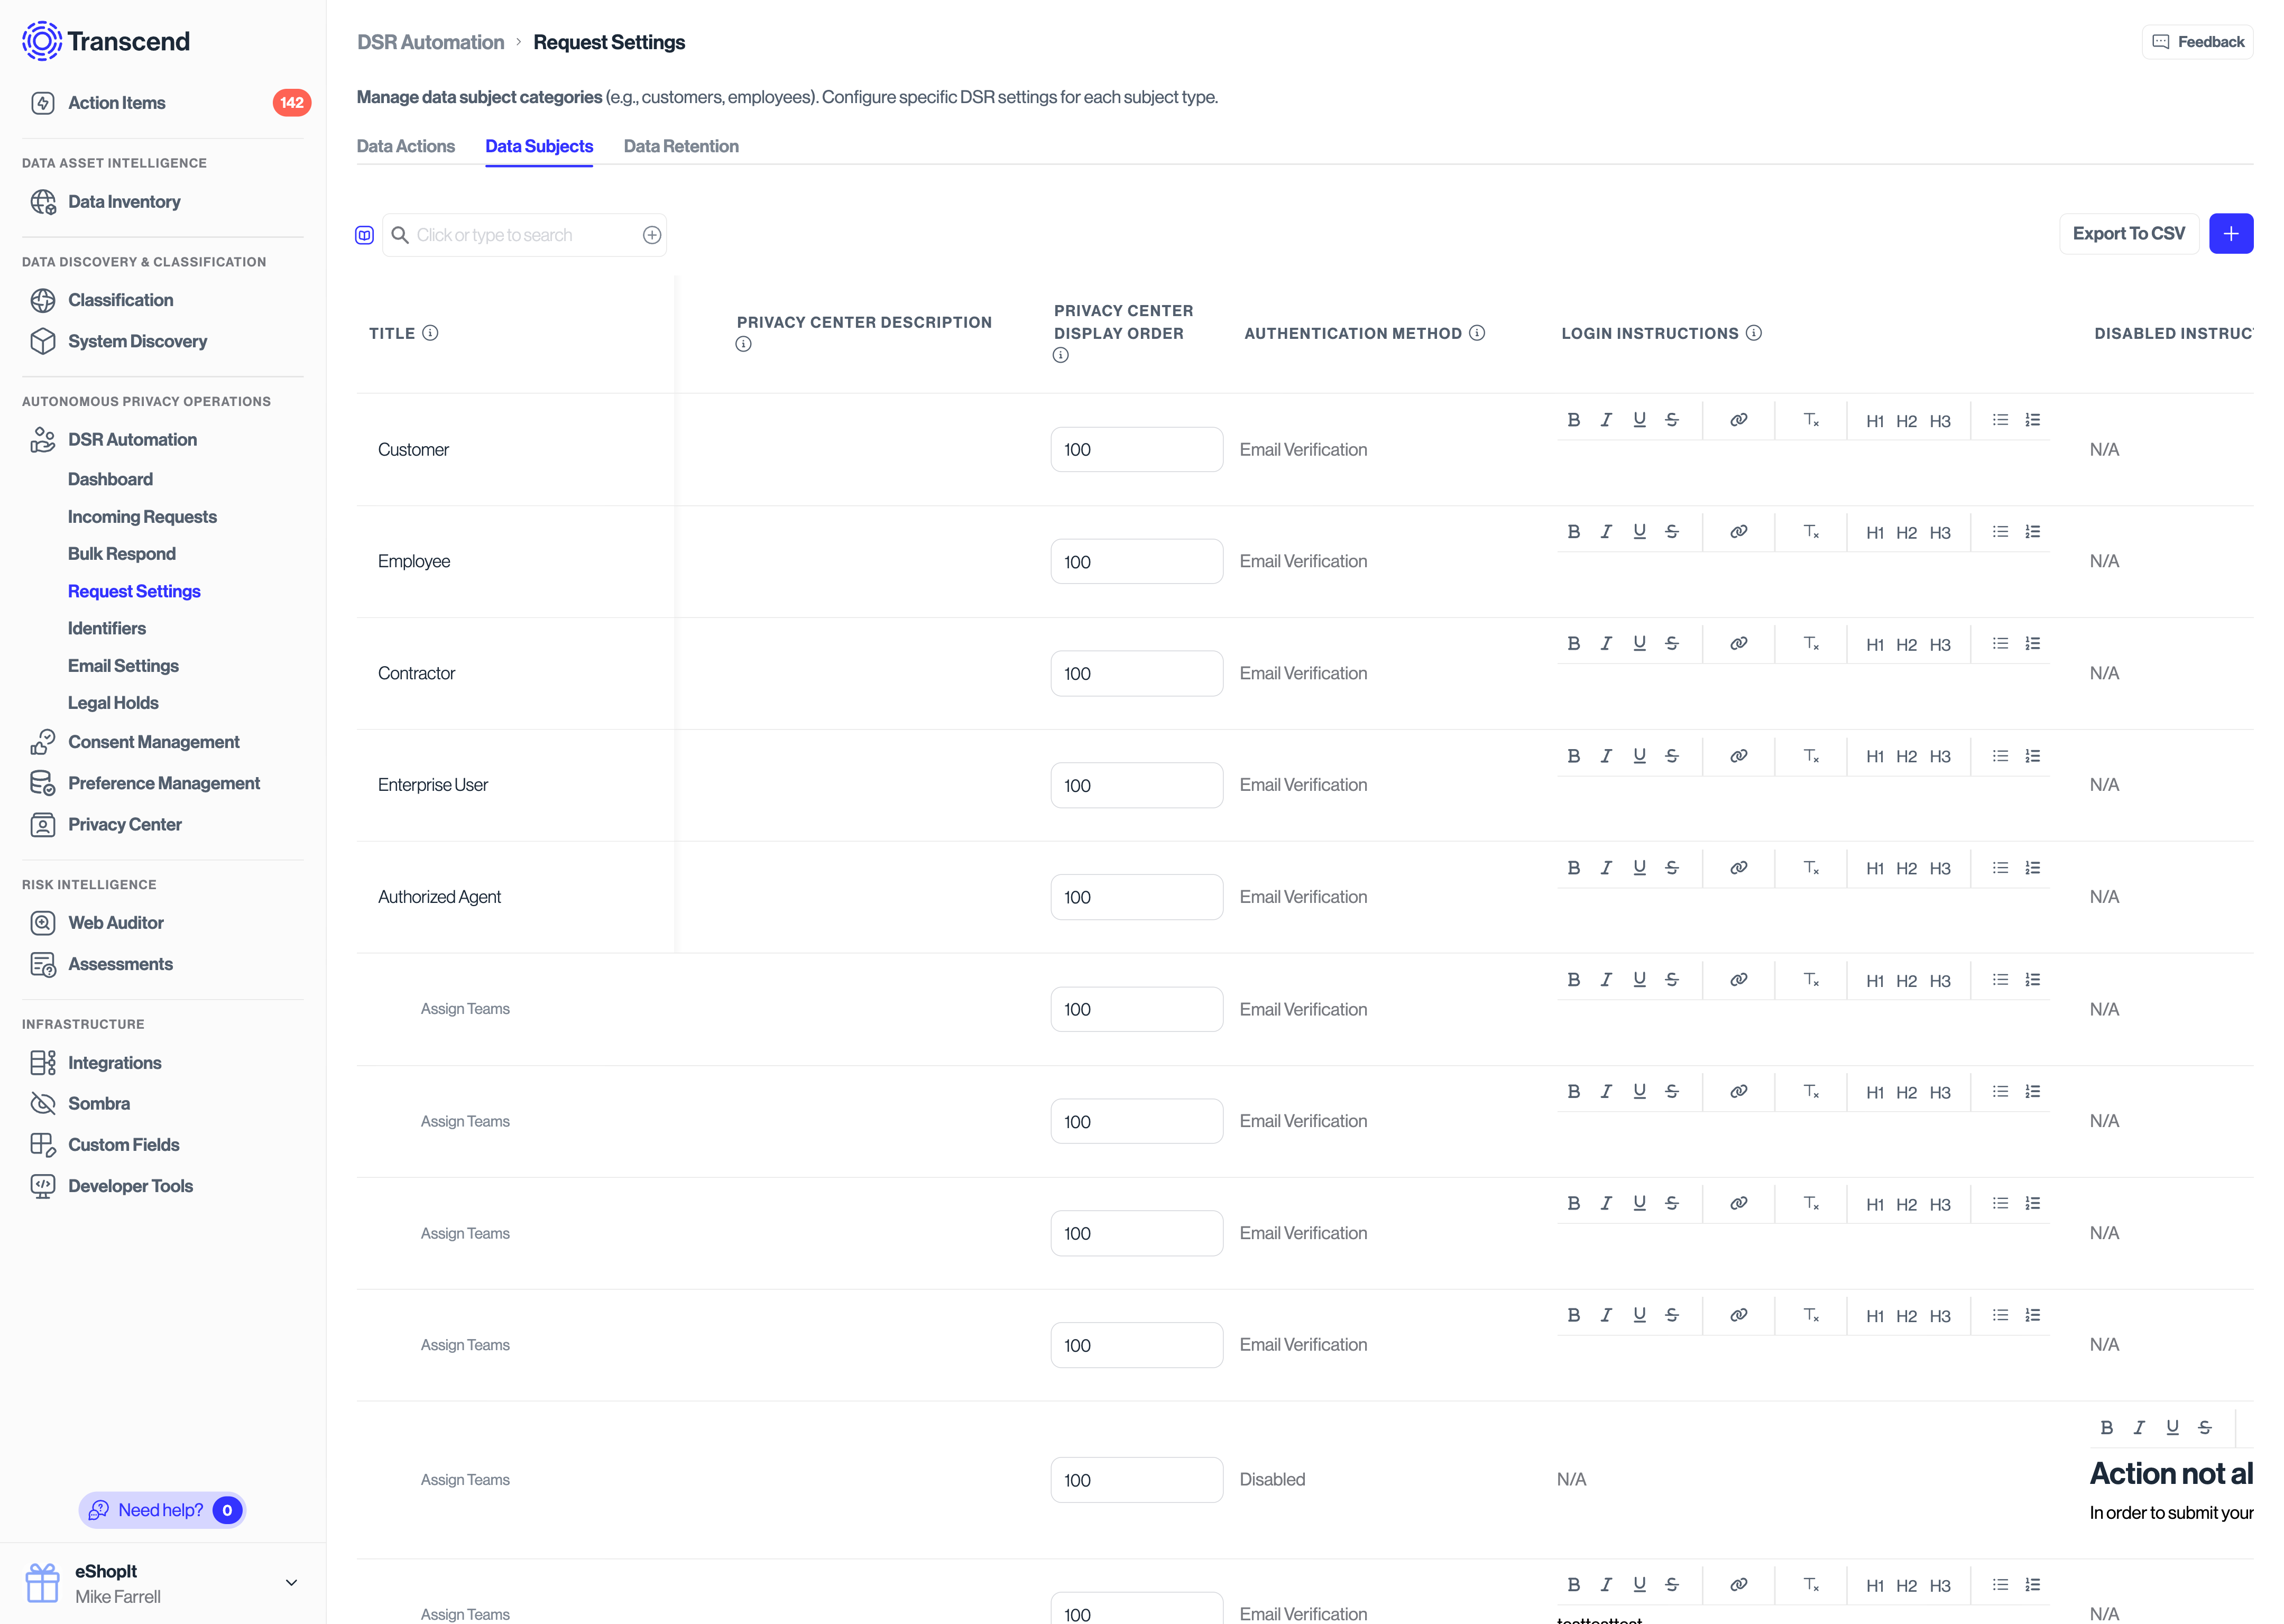
- Description (Optional)
- Displayed in the Privacy Center to help users understand who this option applies to
- Authentication Method Instructions
- When using the Disabled authentication method, you can add:
- Custom login instructions
- Disabled instructions explaining why self‑serve is unavailable
- This is useful for Authorized Agents
- When using the Disabled authentication method, you can add:
2. Configure Data Actions
Next, configure what types of requests can be made and how they behave.
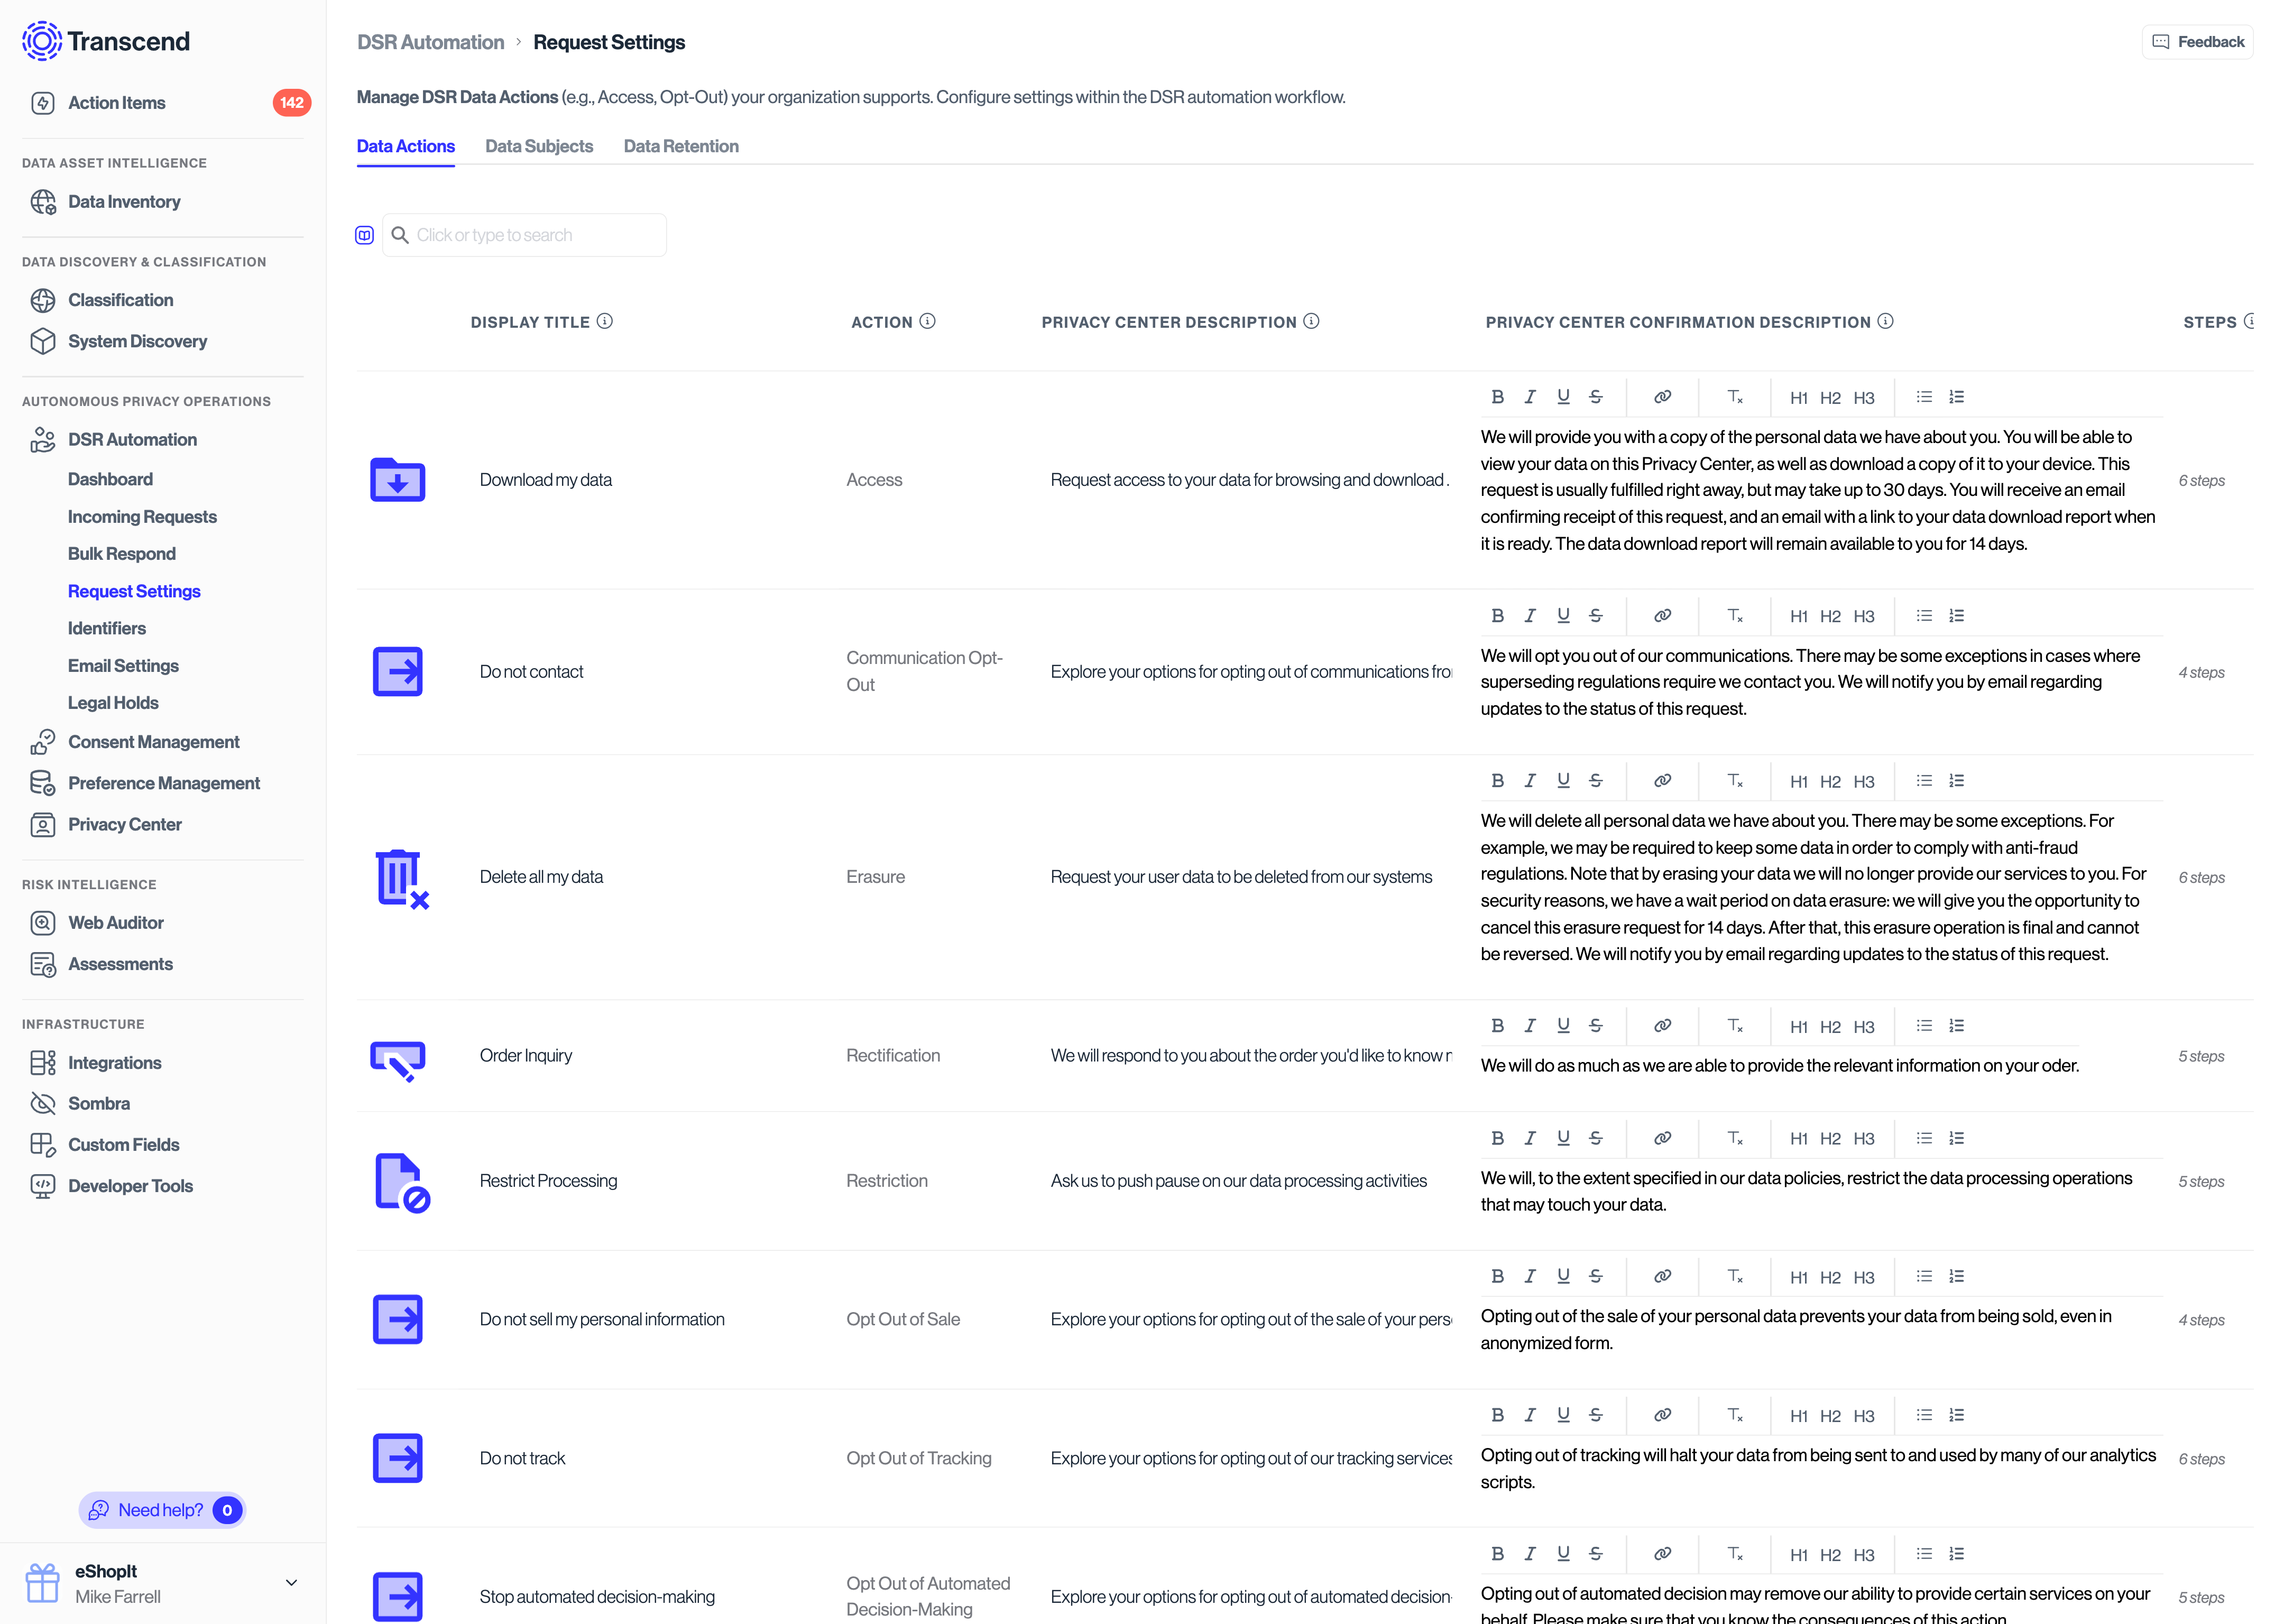
👉 Admin Dashboard → Privacy Requests → Settings → Data Actions https://app.transcend.io/privacy-requests/settings/data-actions
For each Data Action (e.g. Access, Delete, Opt‑Out), set the following fields:
Customizable Fields
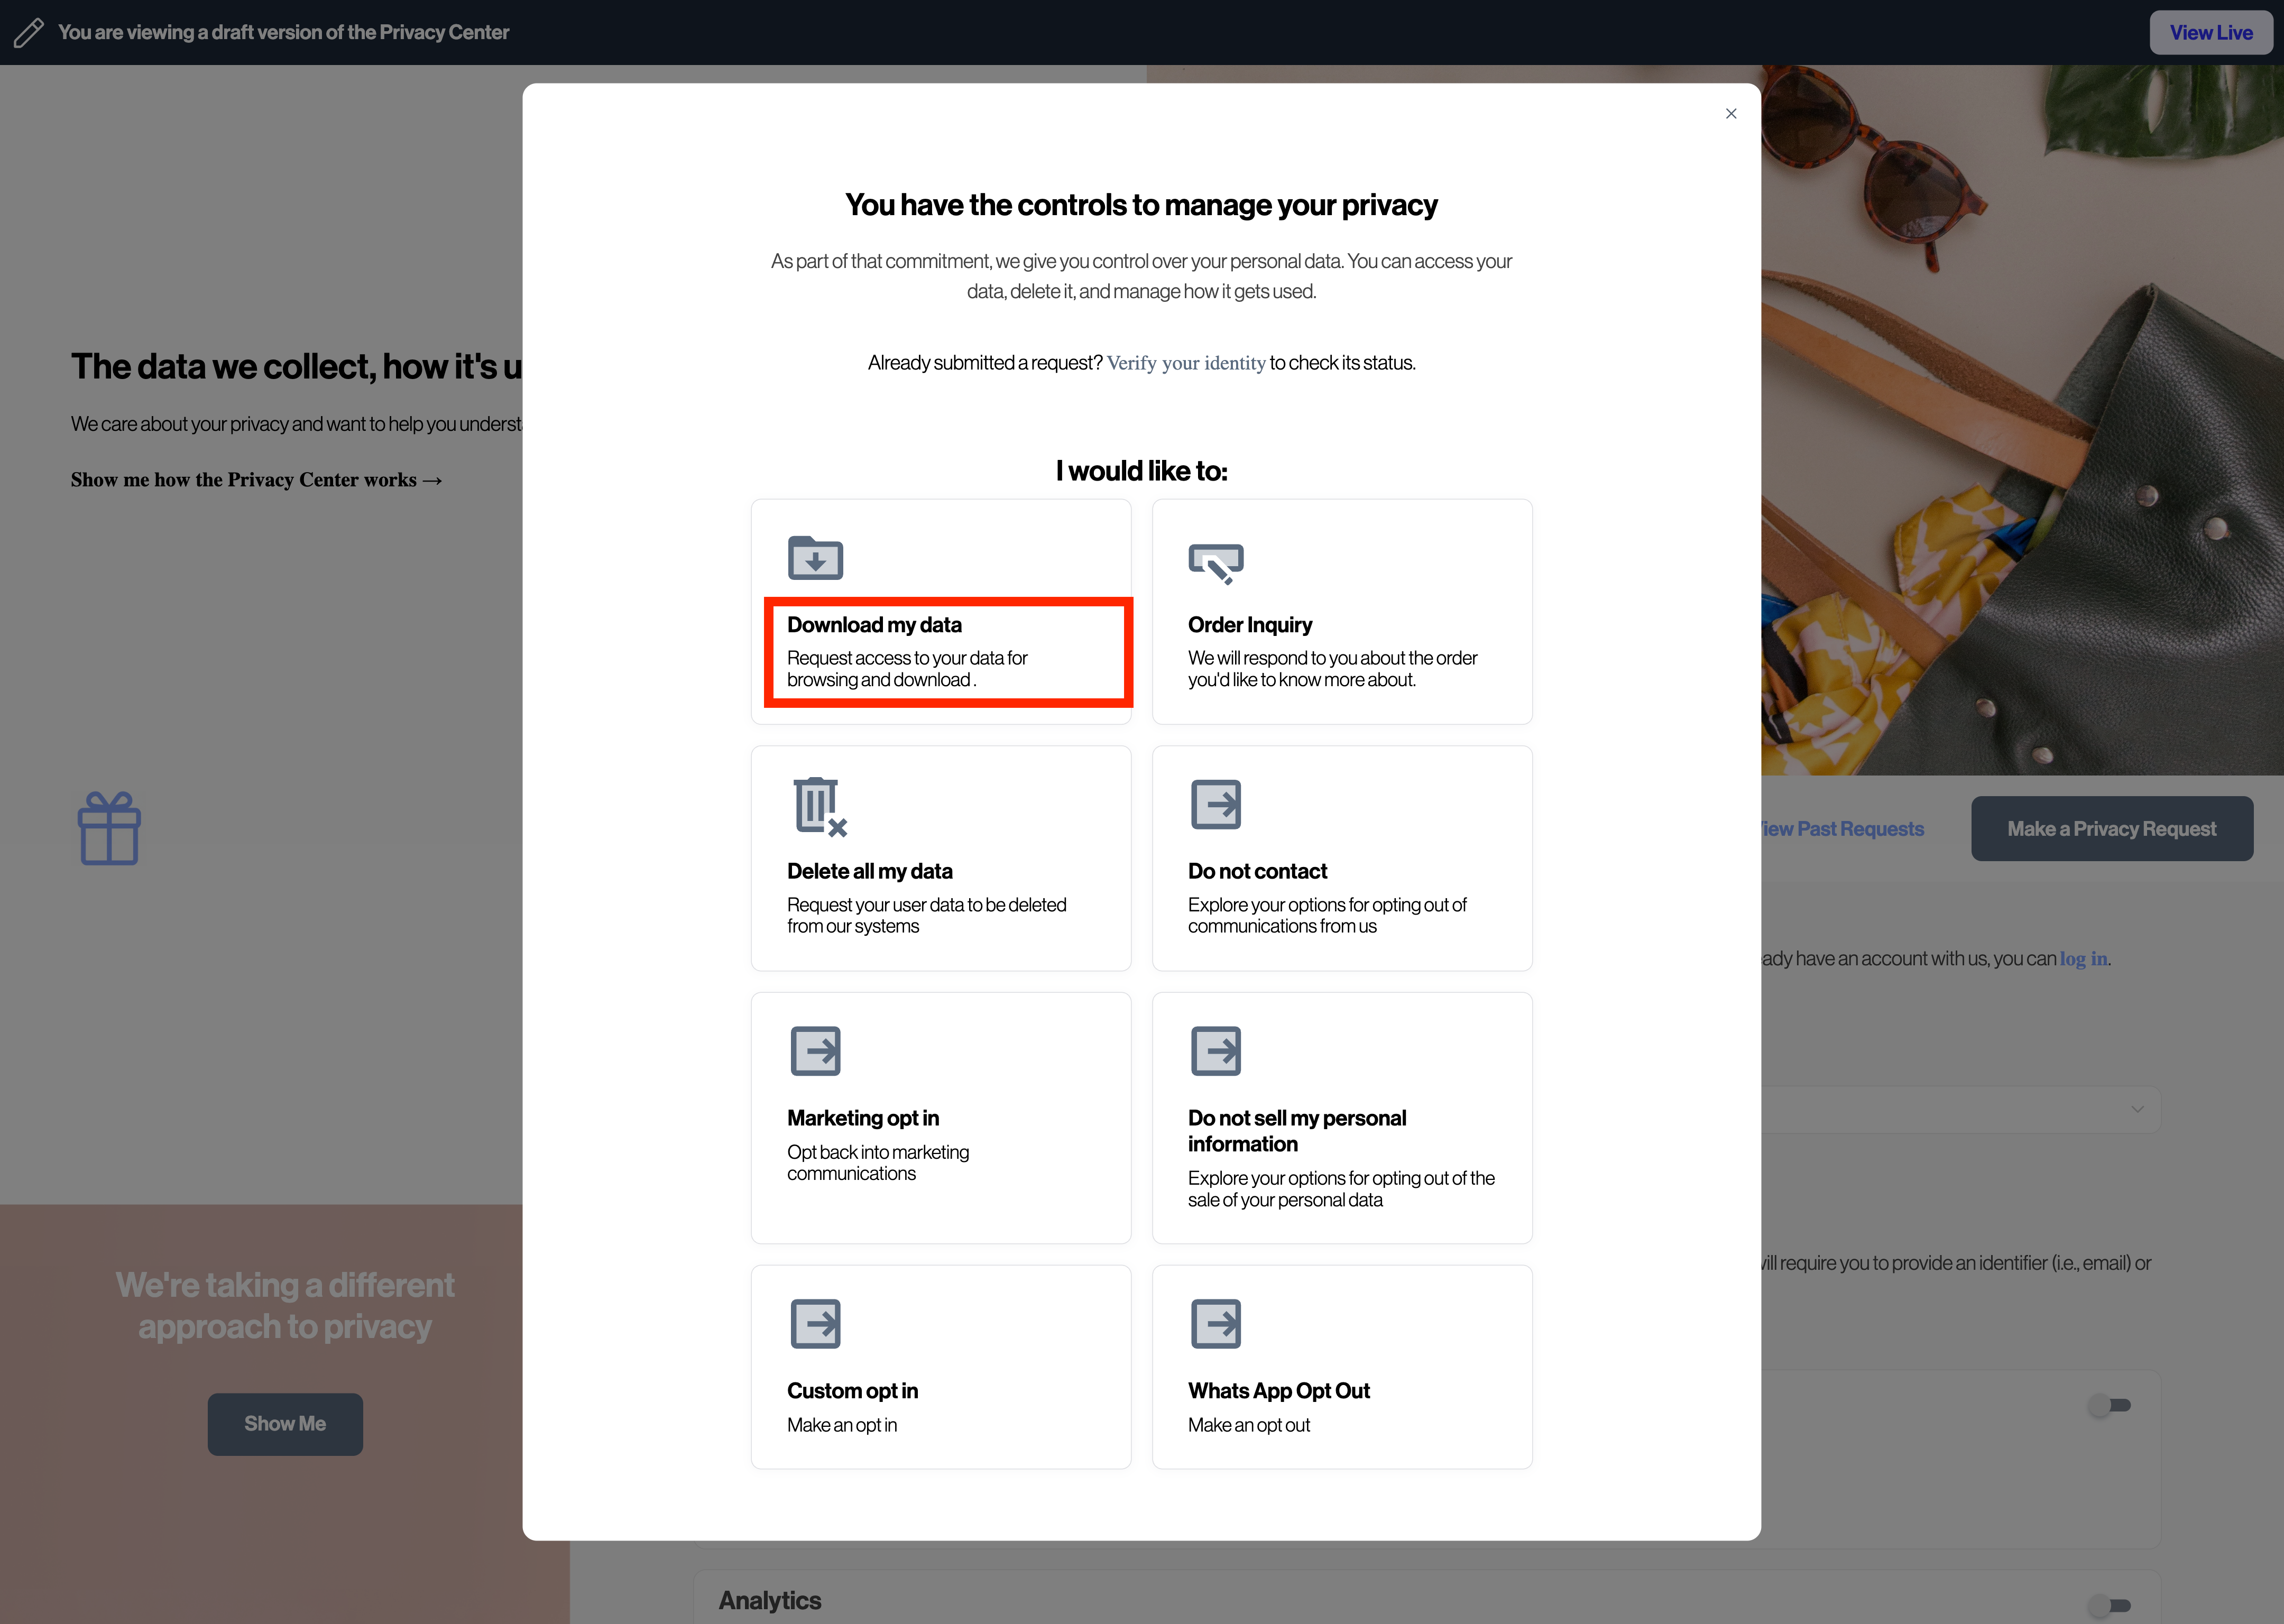
- Title
- Title of the request type - shown in initial selection screen
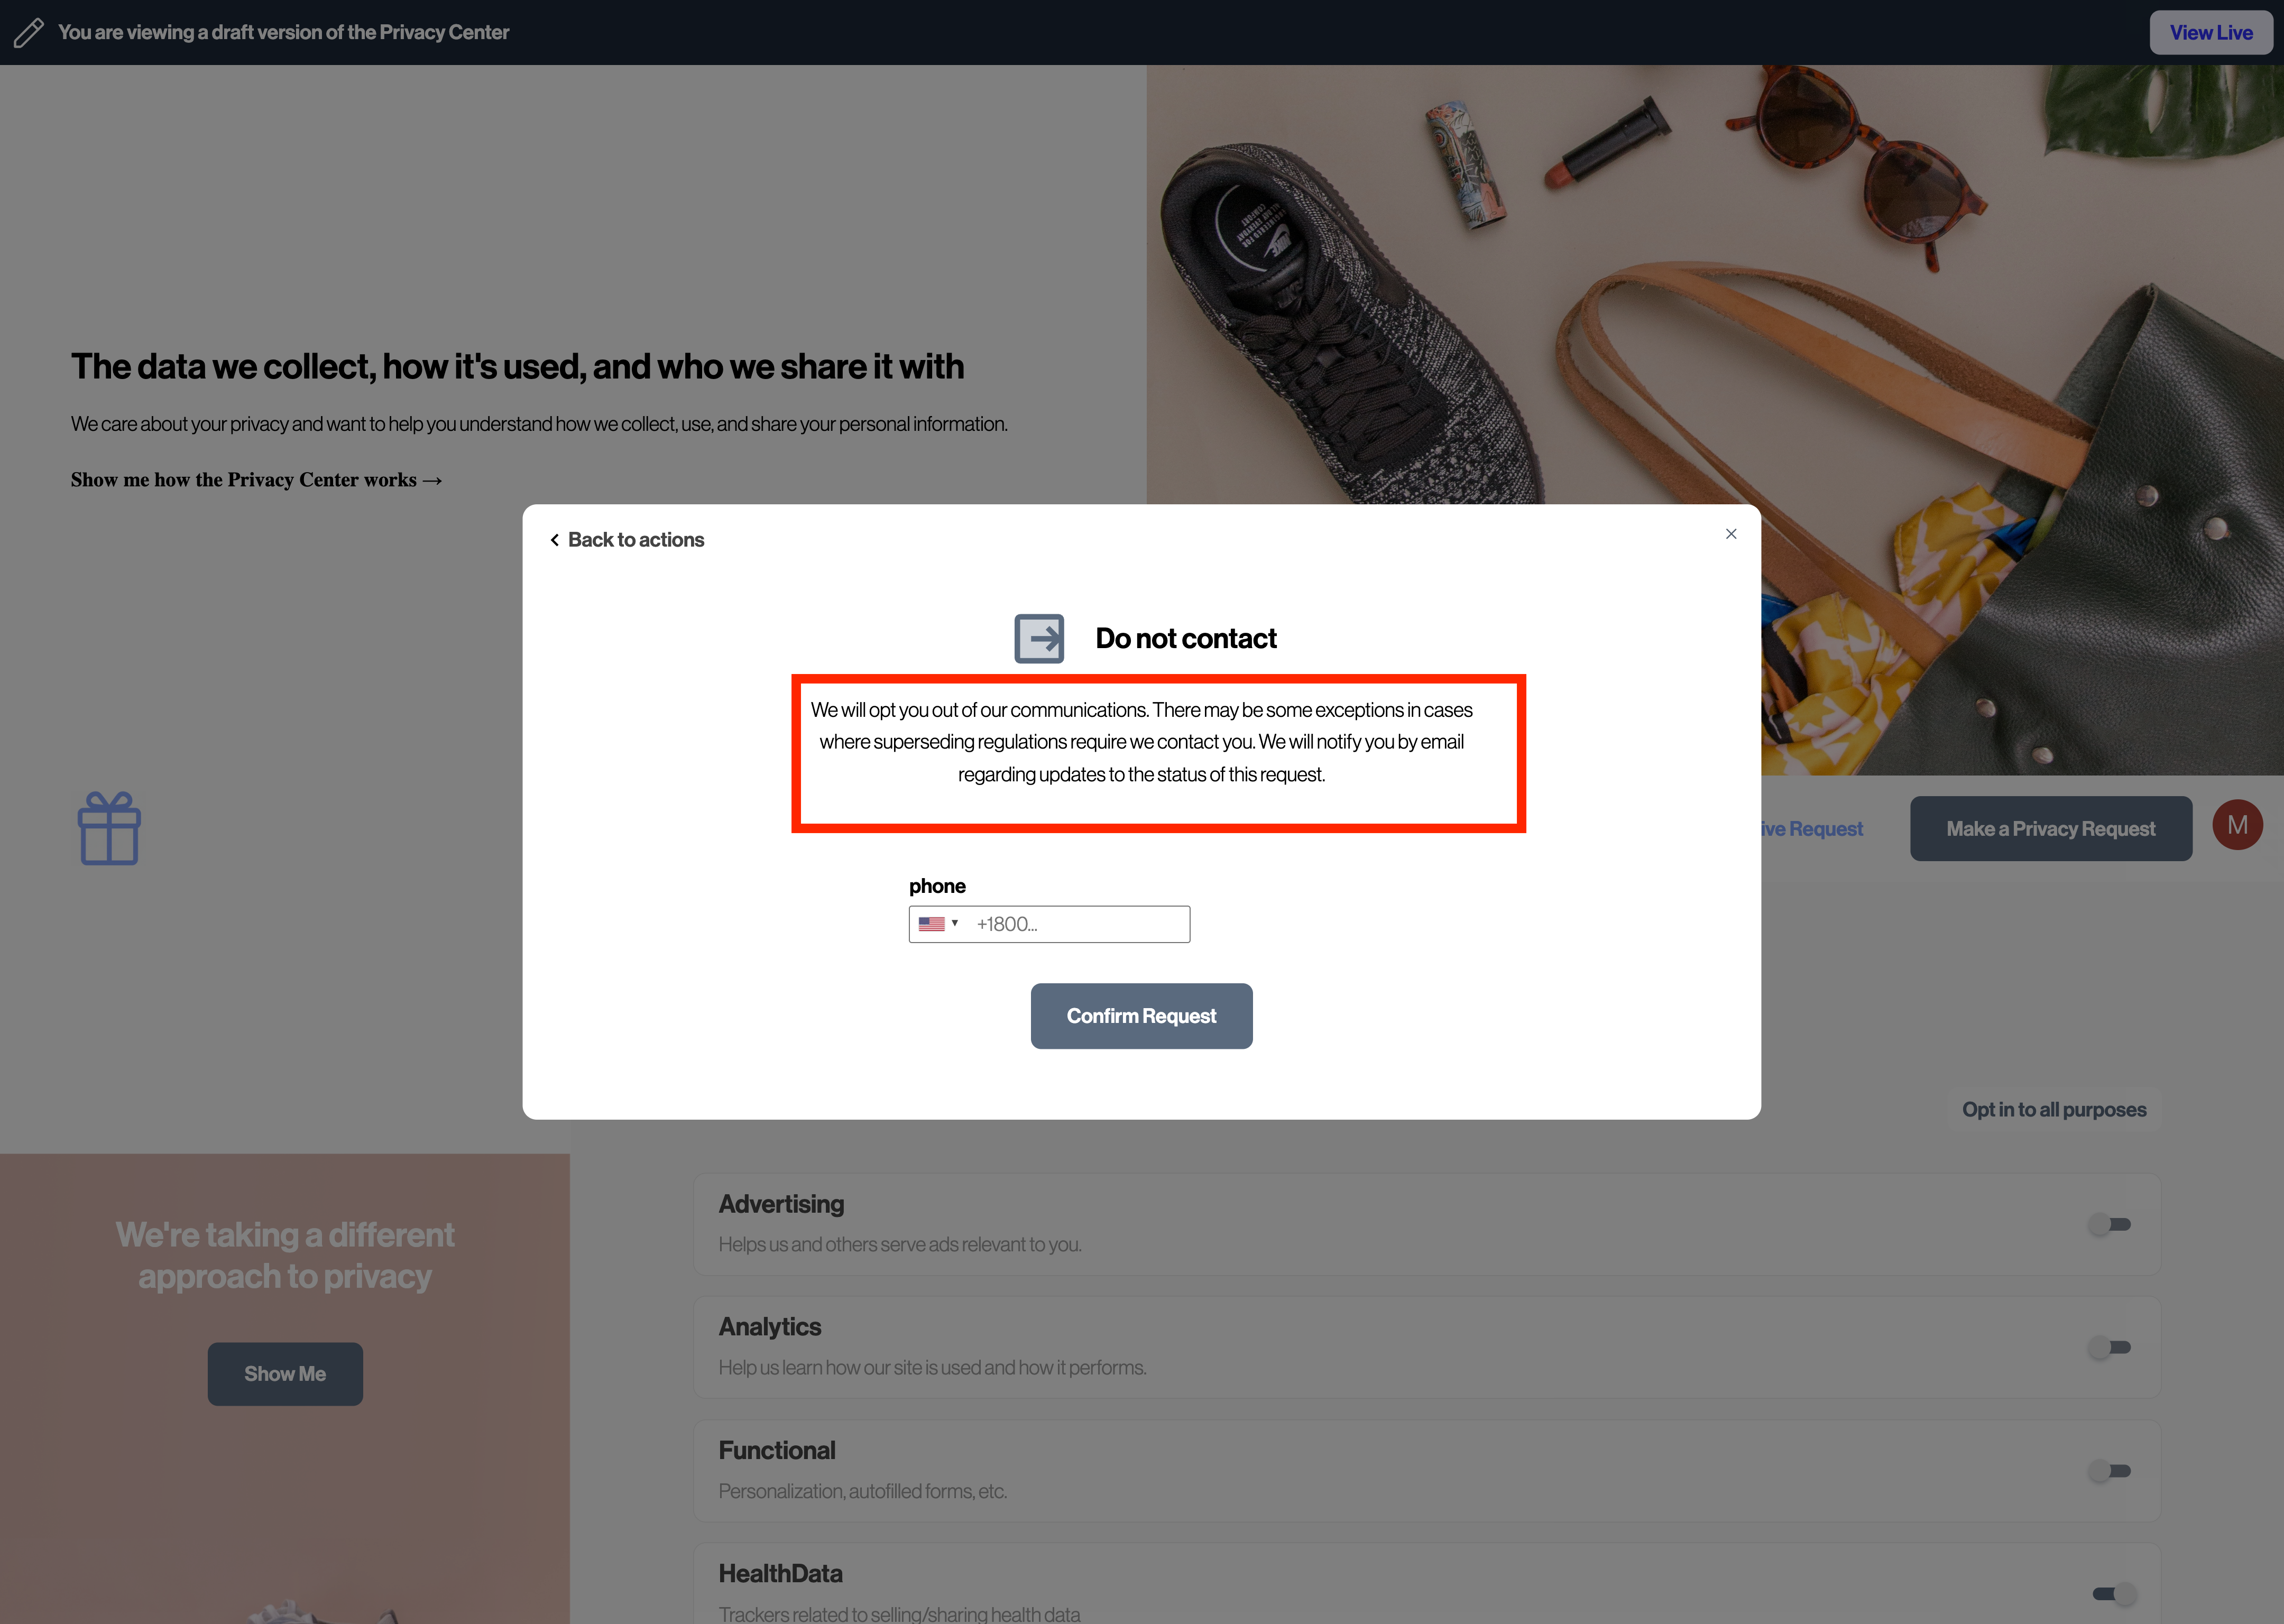
- Description
- Shown when the user selects the request type
- Secondary Description
- Displayed on the final review screen before submission
- This can be rich text to include callouts, links, etc.
- Email Templates
- Used throughout the request workflow (confirmation, progress updates, completion)
- Fully customizable
These descriptions and templates help set expectations and reduce support volume.
3. Configure Identifiers
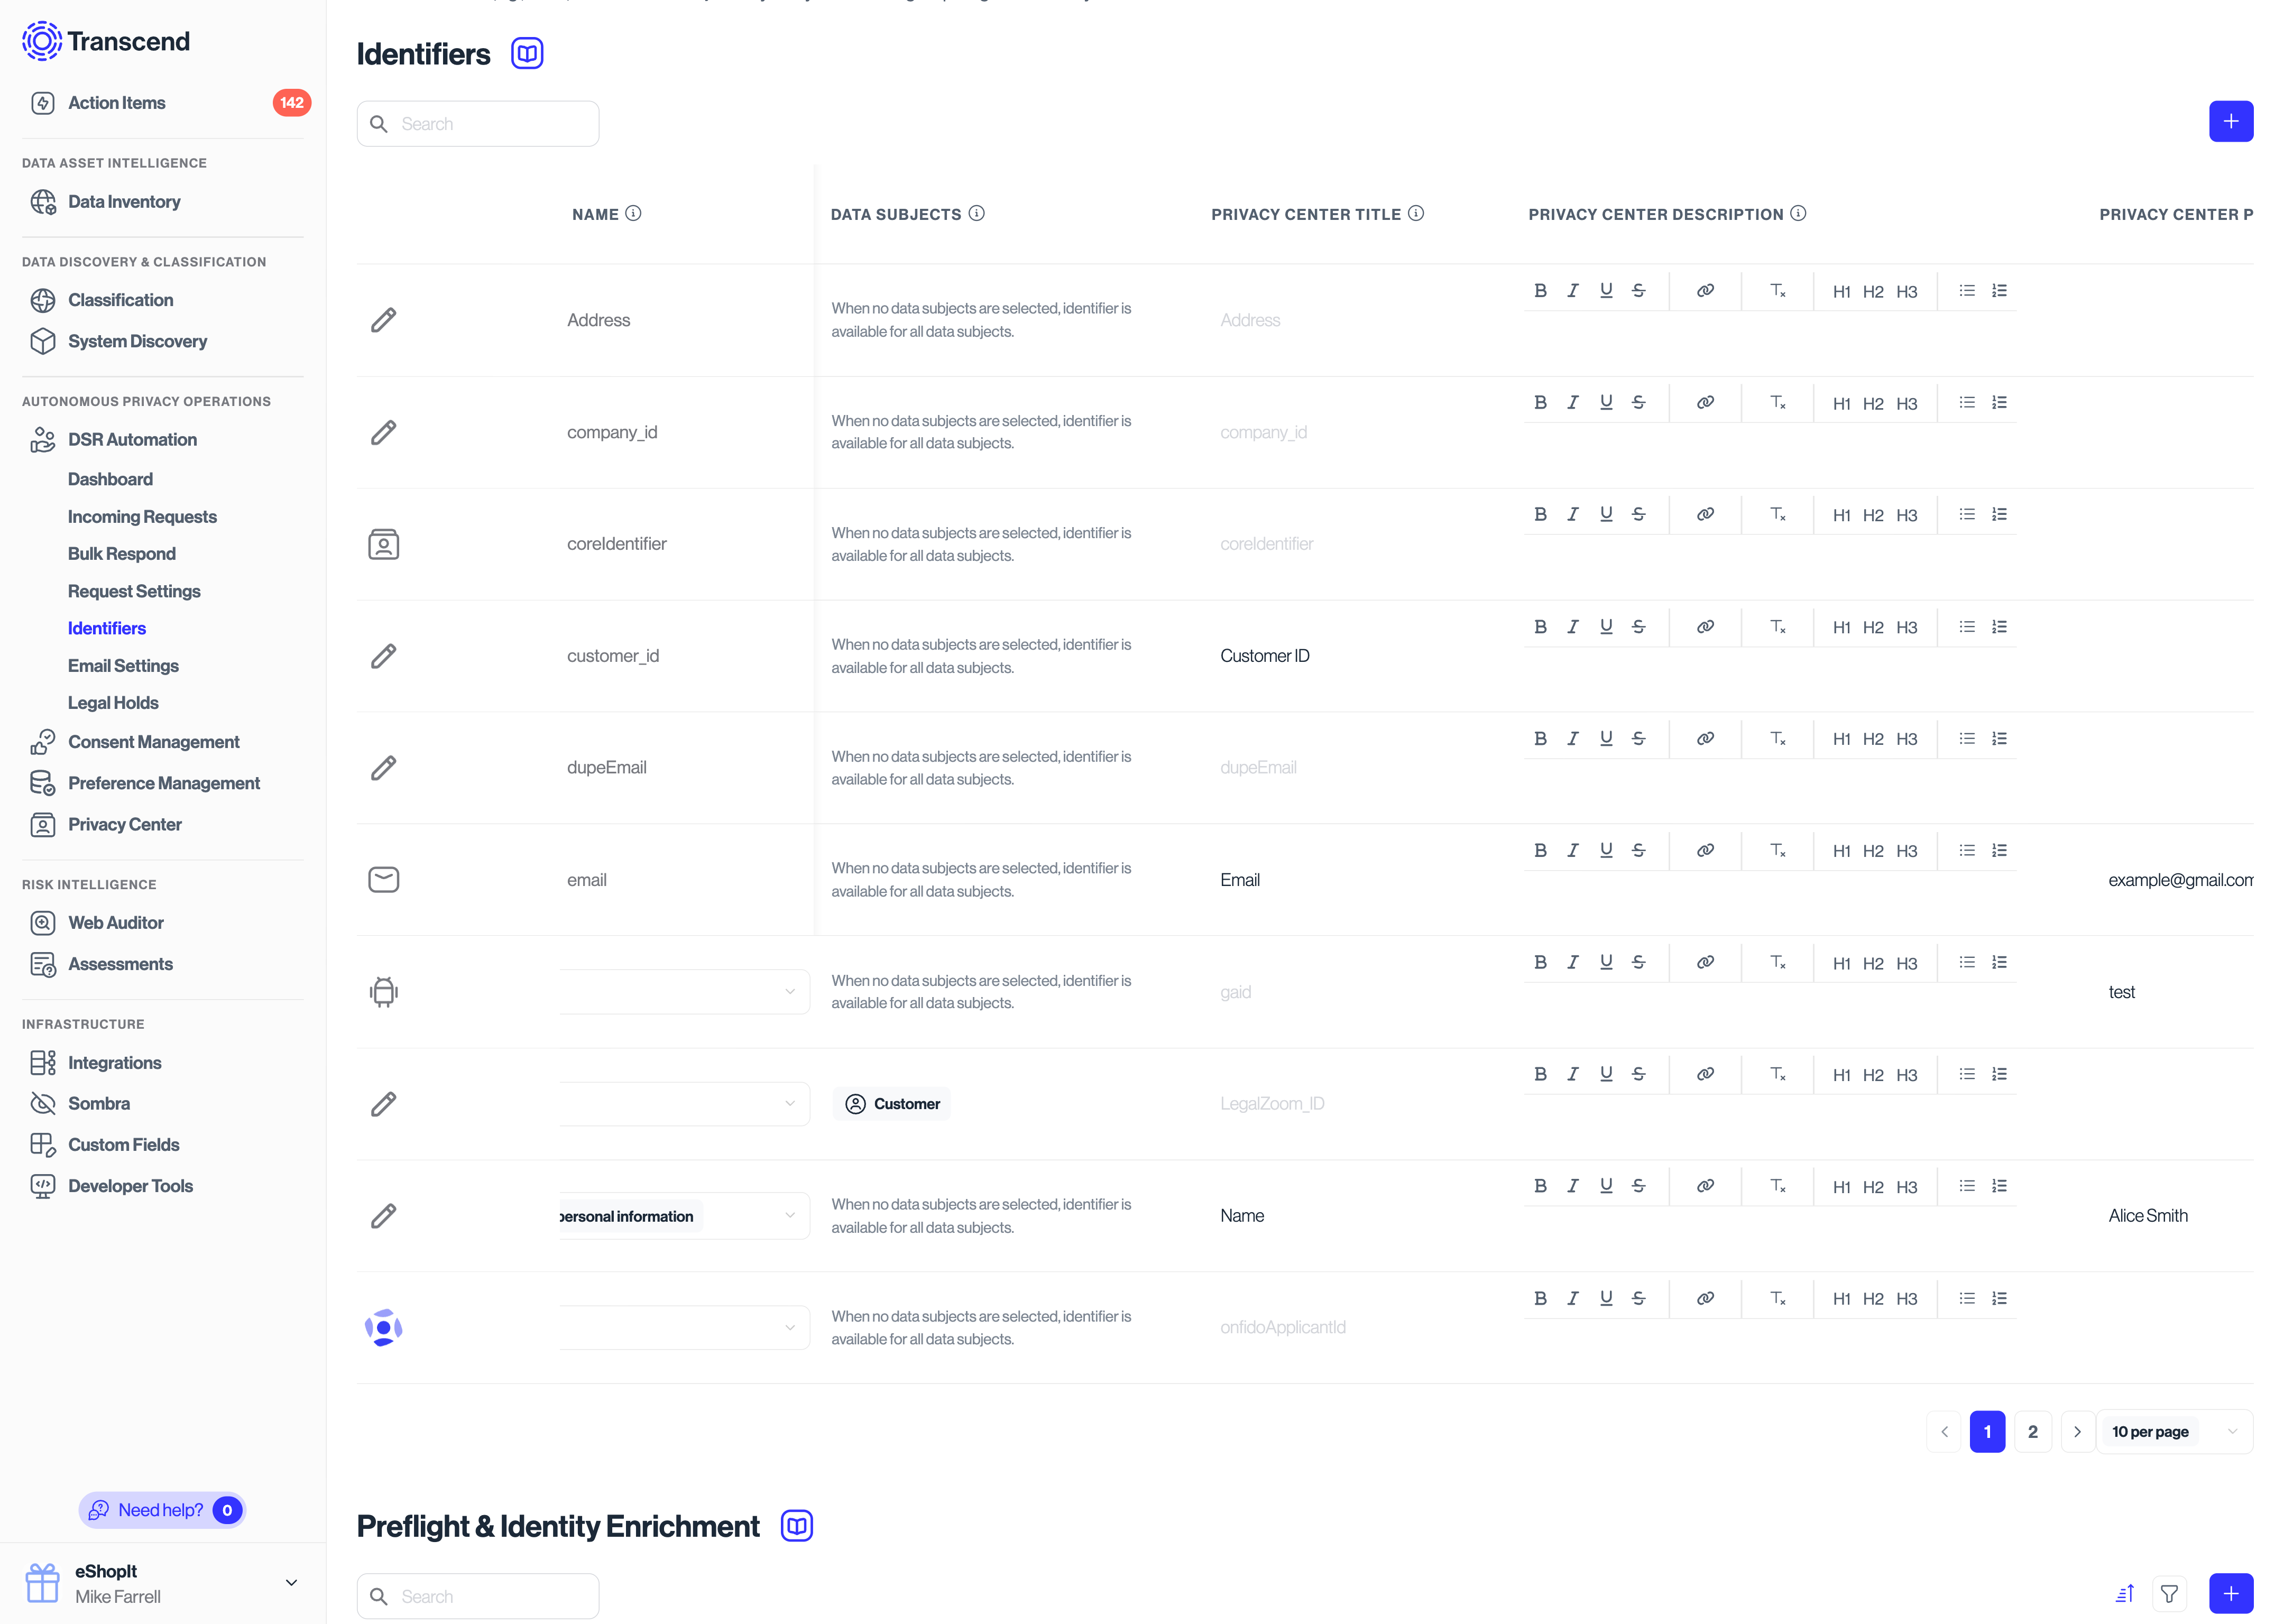
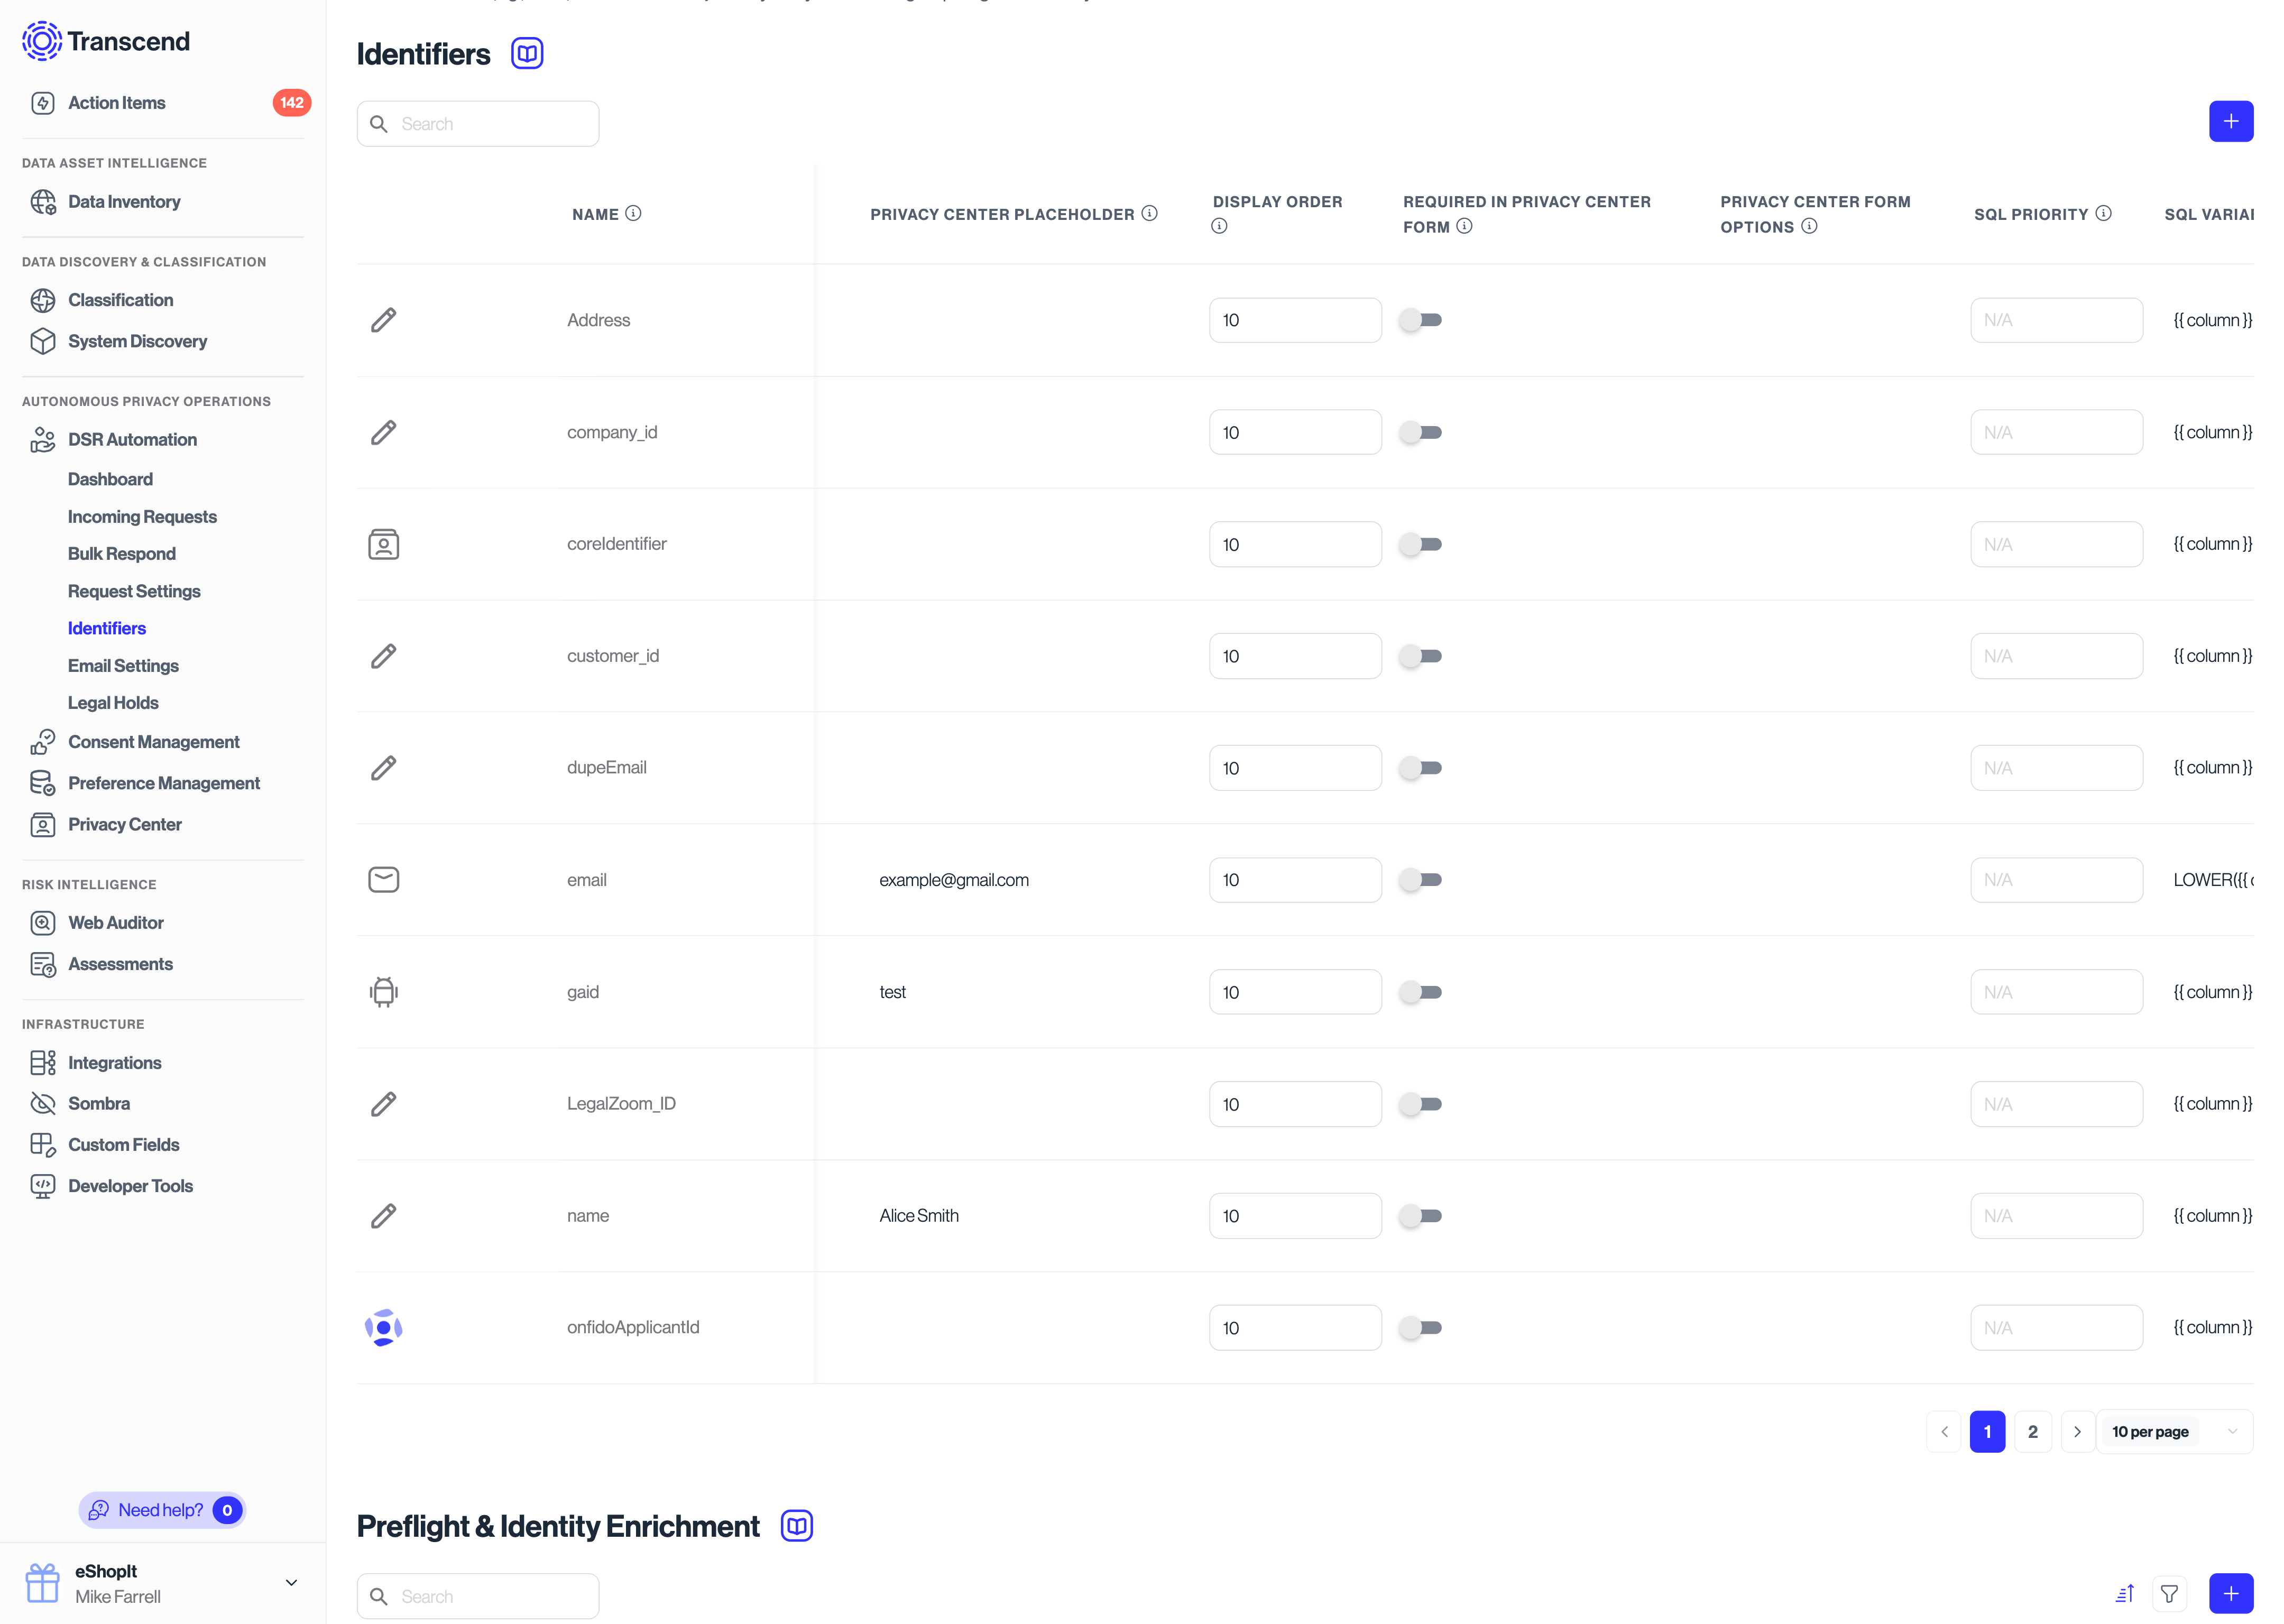
Identifiers define what information a data subject must provide to submit a request.
👉 Admin Dashboard → Privacy Requests → Identifiers https://app.transcend.io/privacy-requests/identifiers
Showing Identifiers in the Privacy Center
- Enable “Actions Enabled in Privacy Center Form”
- By default, identifiers apply to all data subjects
- You can restrict identifiers to specific data subjects if needed
Identifier Configuration Options
For each identifier:
- Title – Label shown to the user
- Description – Helper text explaining what to enter
- Placeholder – Example input text
- Display Order – Controls form layout
- Required – Whether the field is mandatory
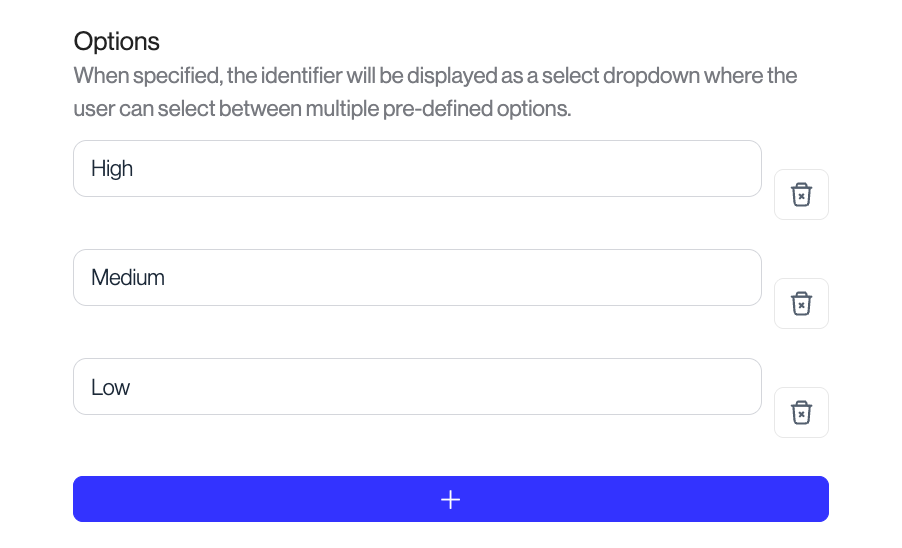
Single‑Select Identifiers
Identifiers can also be configured as single‑select inputs (e.g. country, account type) when structured input is required.
4. Email Notifications & Status Updates
Confirmation & Progress Emails
- Data subjects receive a confirmation email upon submission
- Optional transactional emails can be sent as the request progresses
Read more here.