Configuring the Privacy Center
The Privacy Center is the front-facing portal that connects your users to their data rights. Despite being built and wired-up by Transcend, the Privacy Center is designed to seamlessly integrate into the look and feel of your company's existing website, and is typically even hosted directly at privacy.your-company.com.
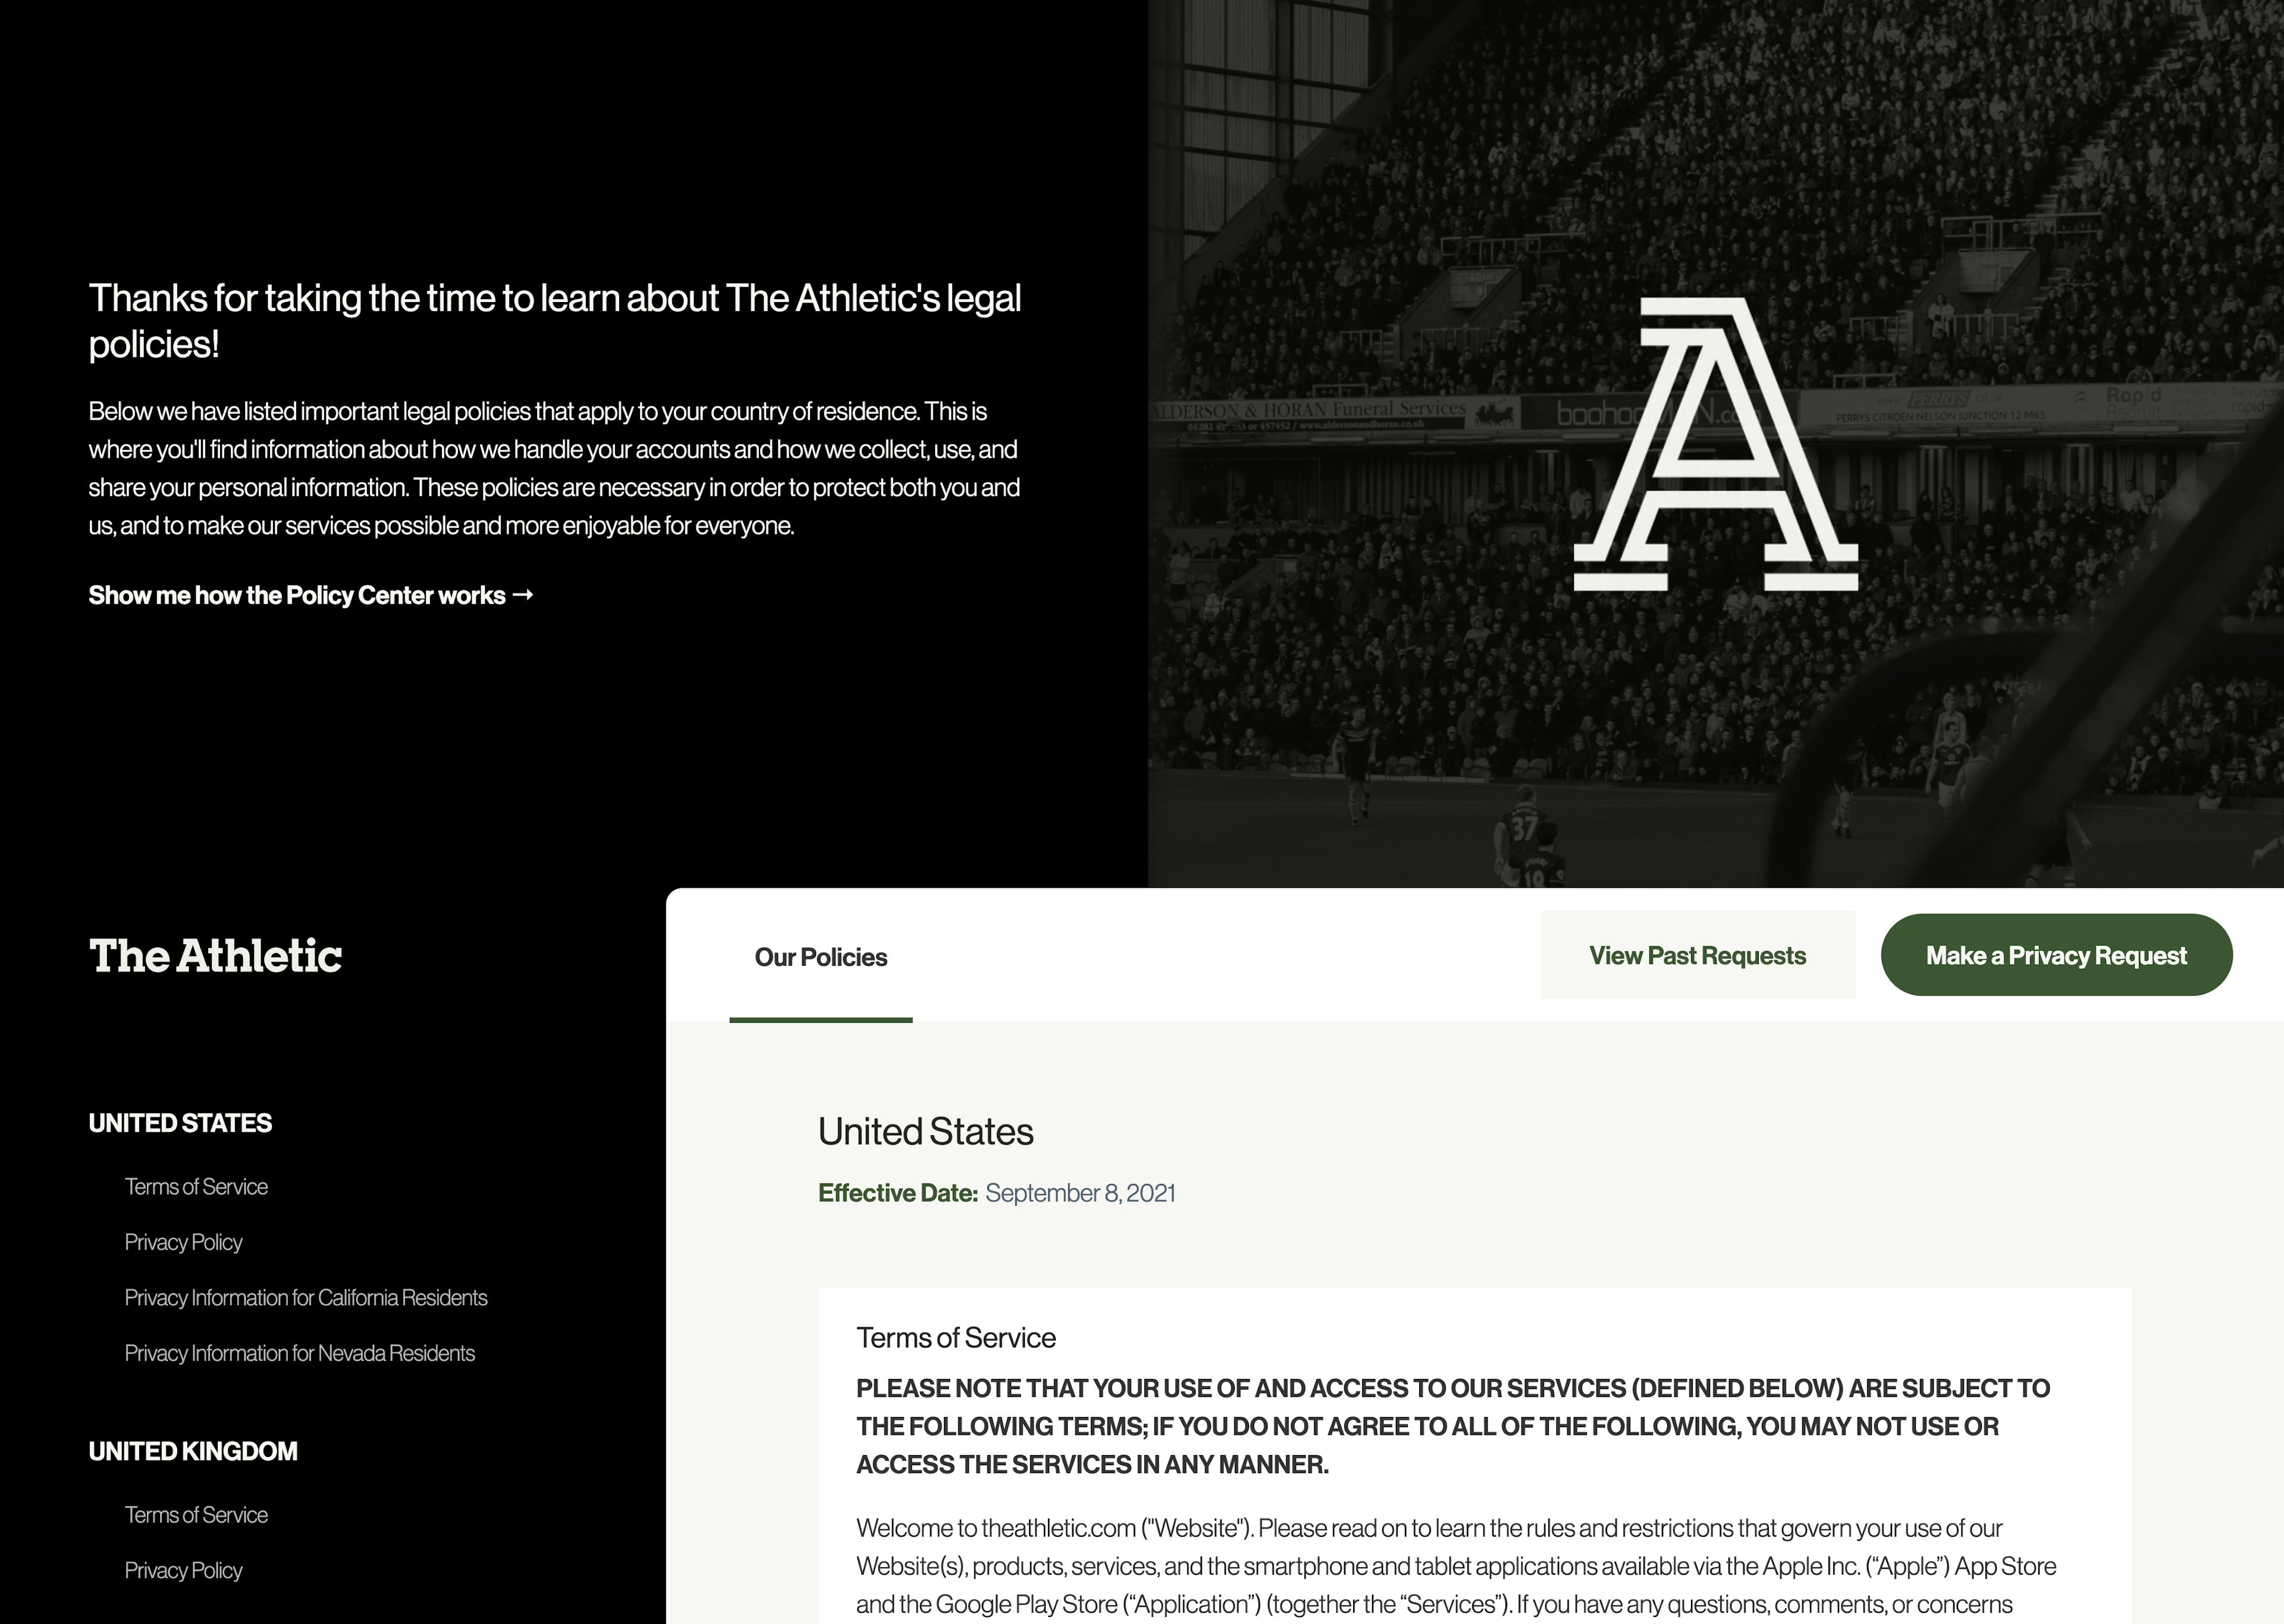
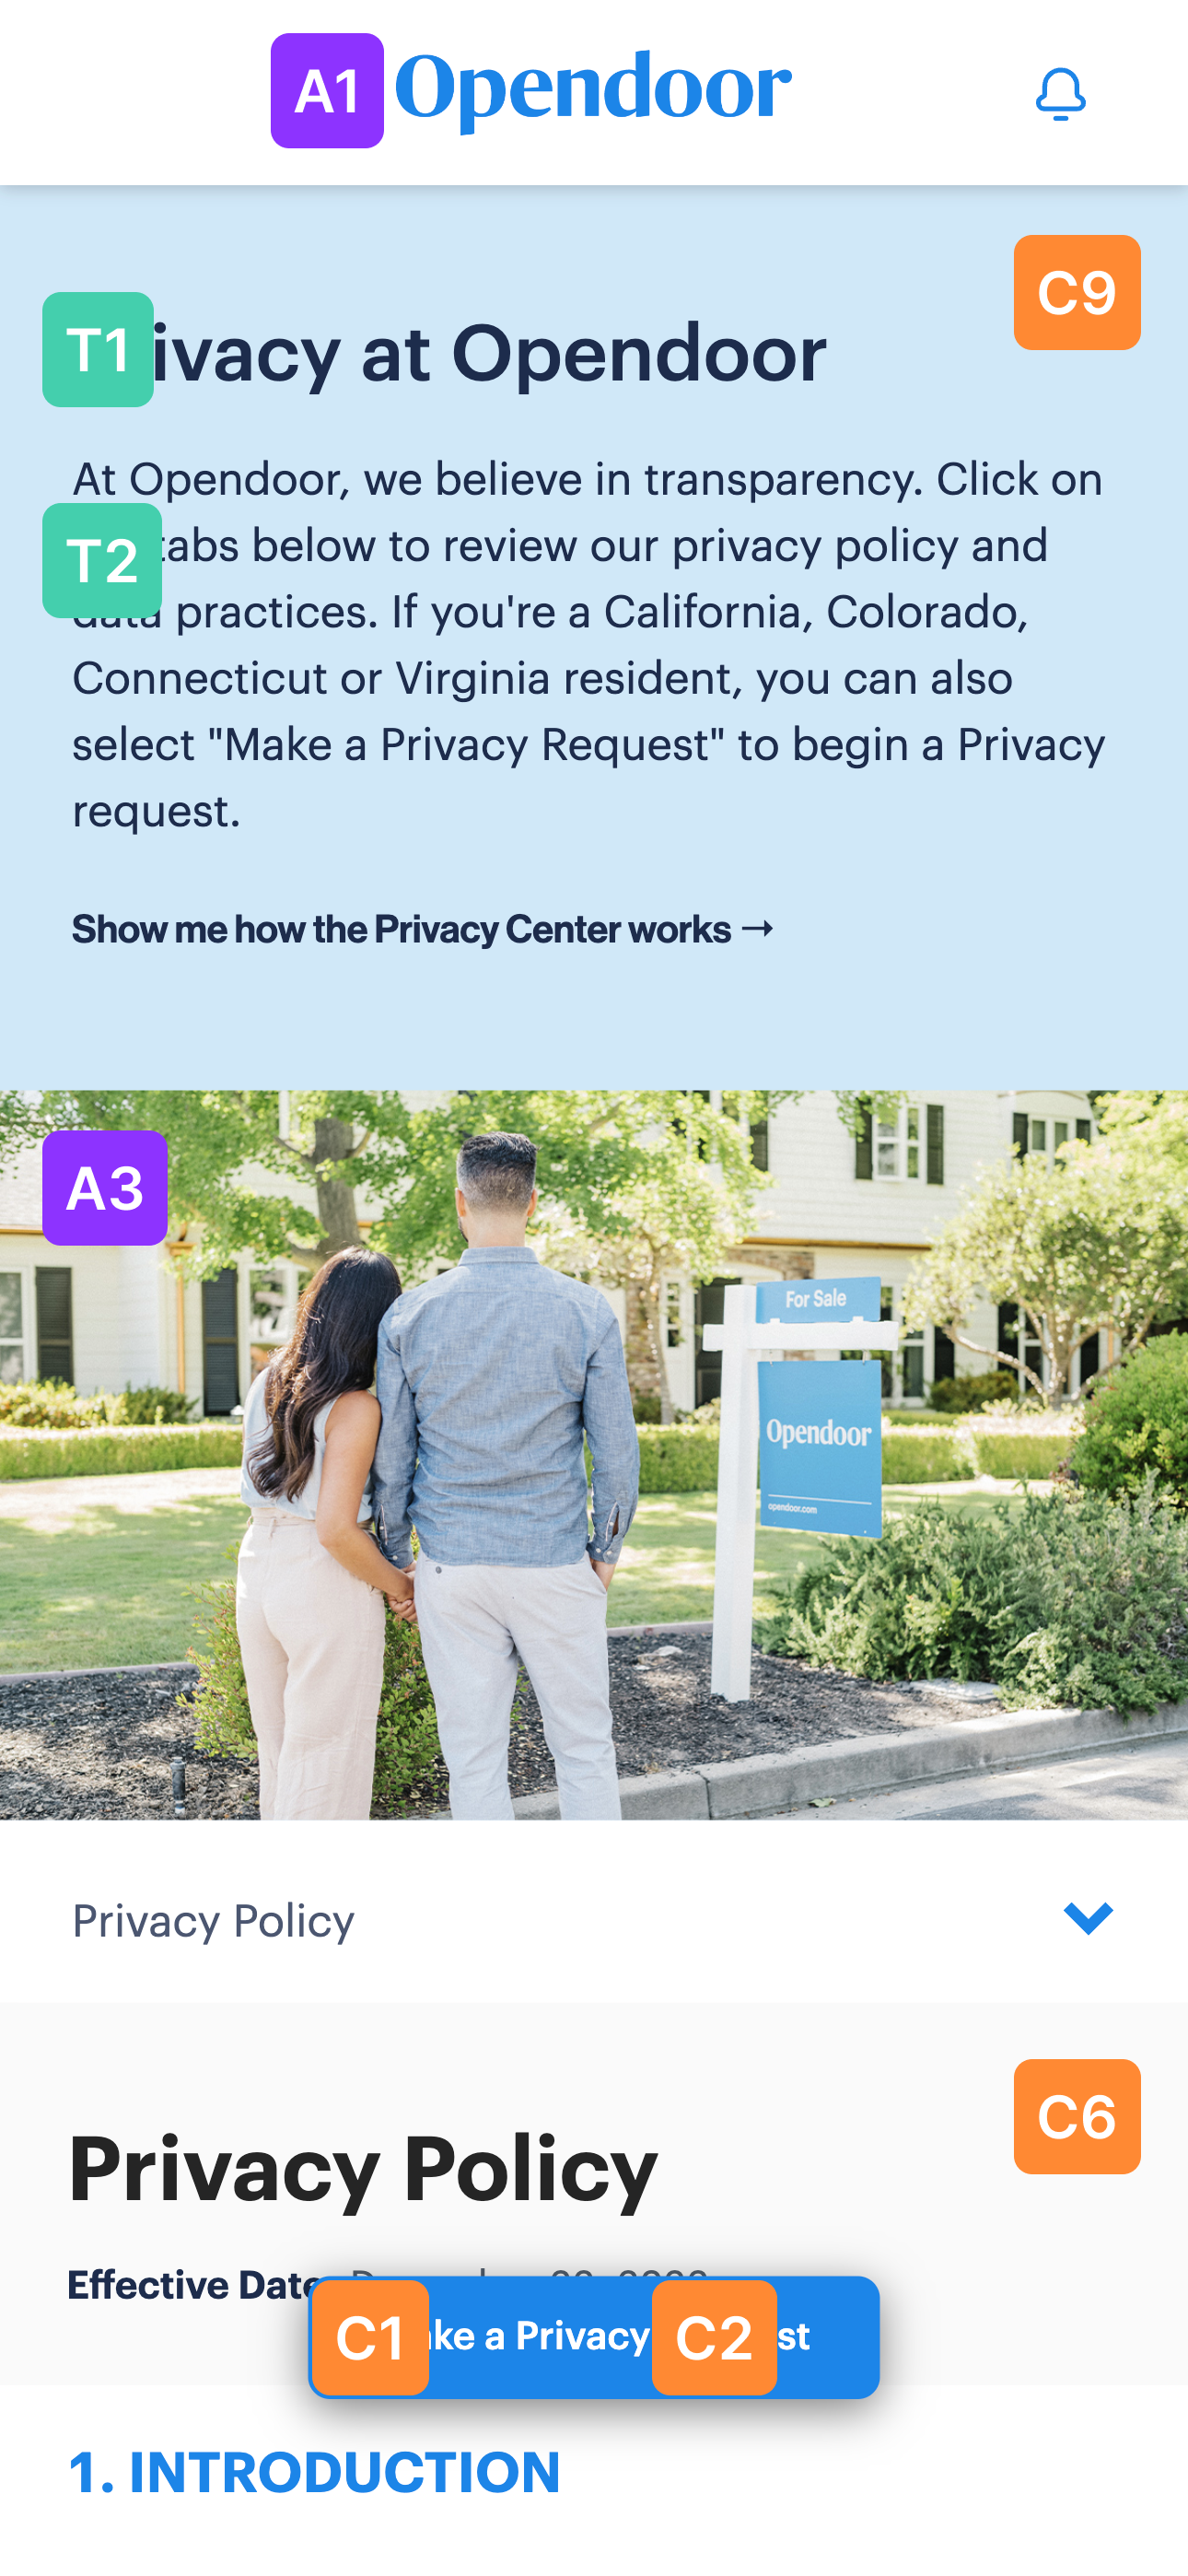
Once configured on your end, your companies data practices will be organized into an easy-to-understand format for your users. A side-menu navigation pane makes it easy for data subjects to explore your company's data practices and policies without being overwhelmed. It serves as a visualization of the data your company collects, how that data is used, and with whom it is shared.
Through the "Make a Privacy Request" tab, data subjects are able to submit the types of DSRs your organization supports through an intuitive interface.
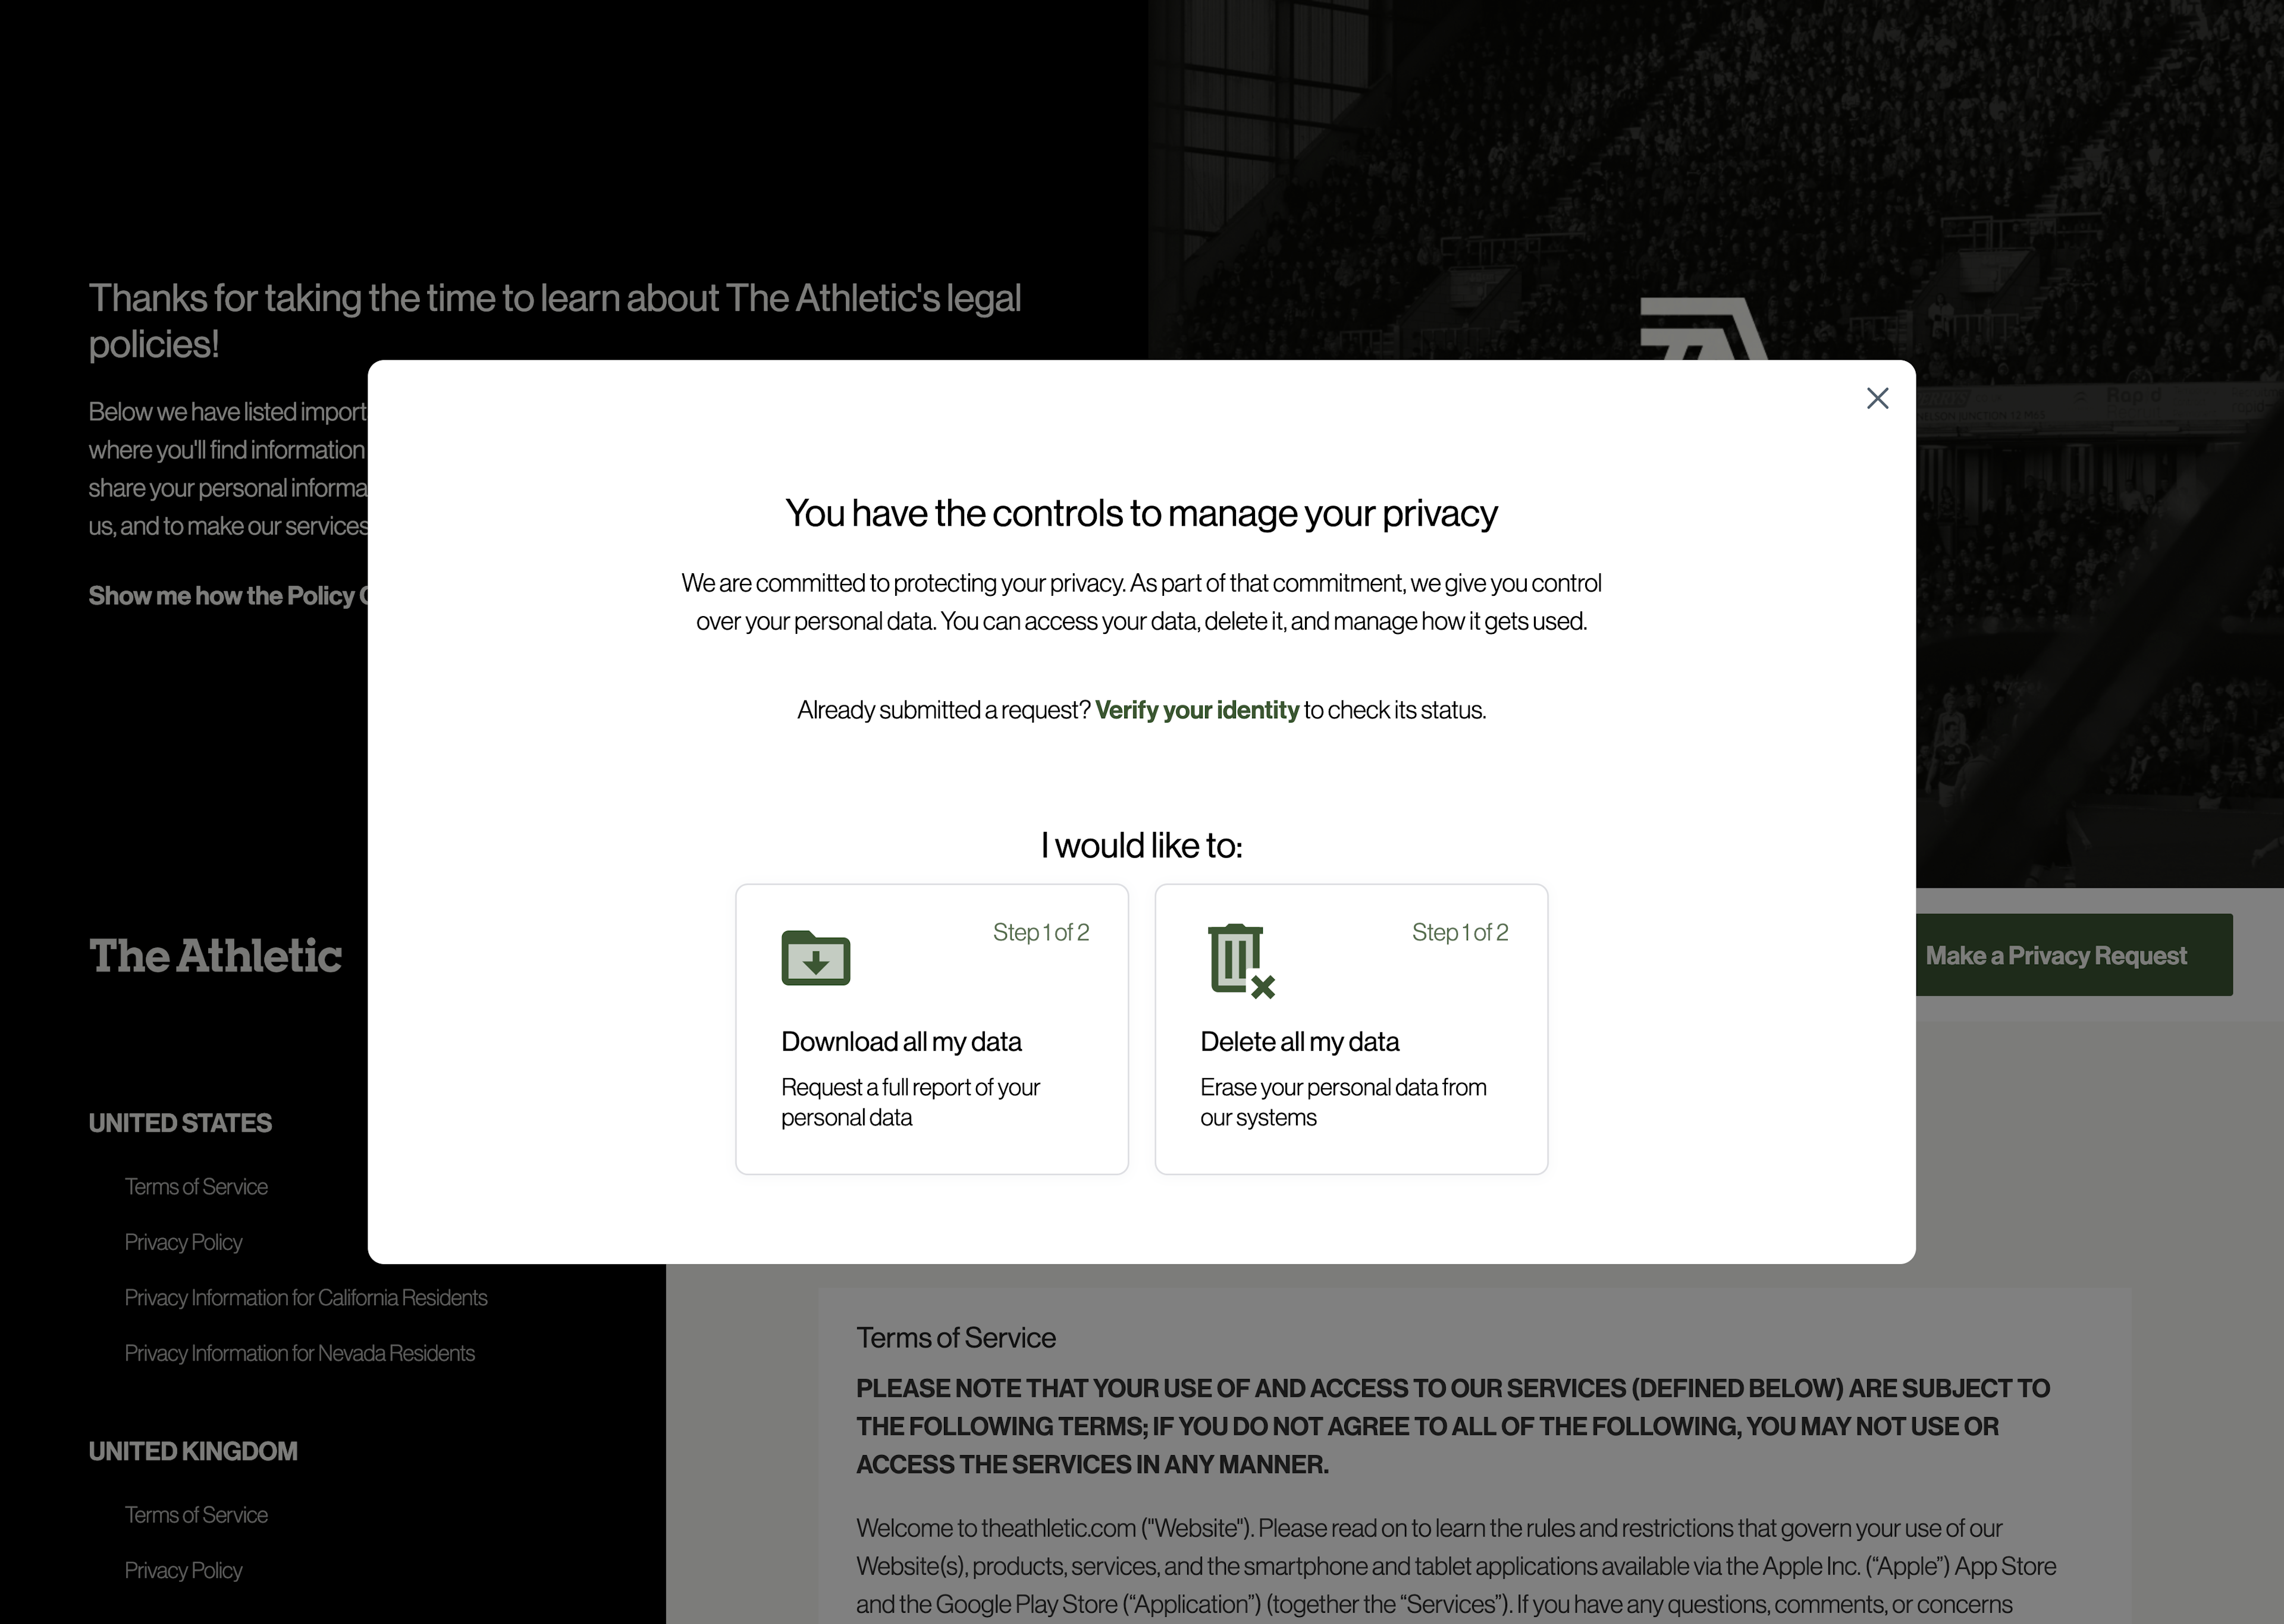
Through the "Privacy Settings" and "Communications Preferences" tabs, data subjects can set any privacy setting or choice.
Your company's Privacy Center can be configured from the Privacy Center tab → of the same Admin Dashboard. The steps for updating and deploying your company's custom Privacy Center can be broken into two steps:
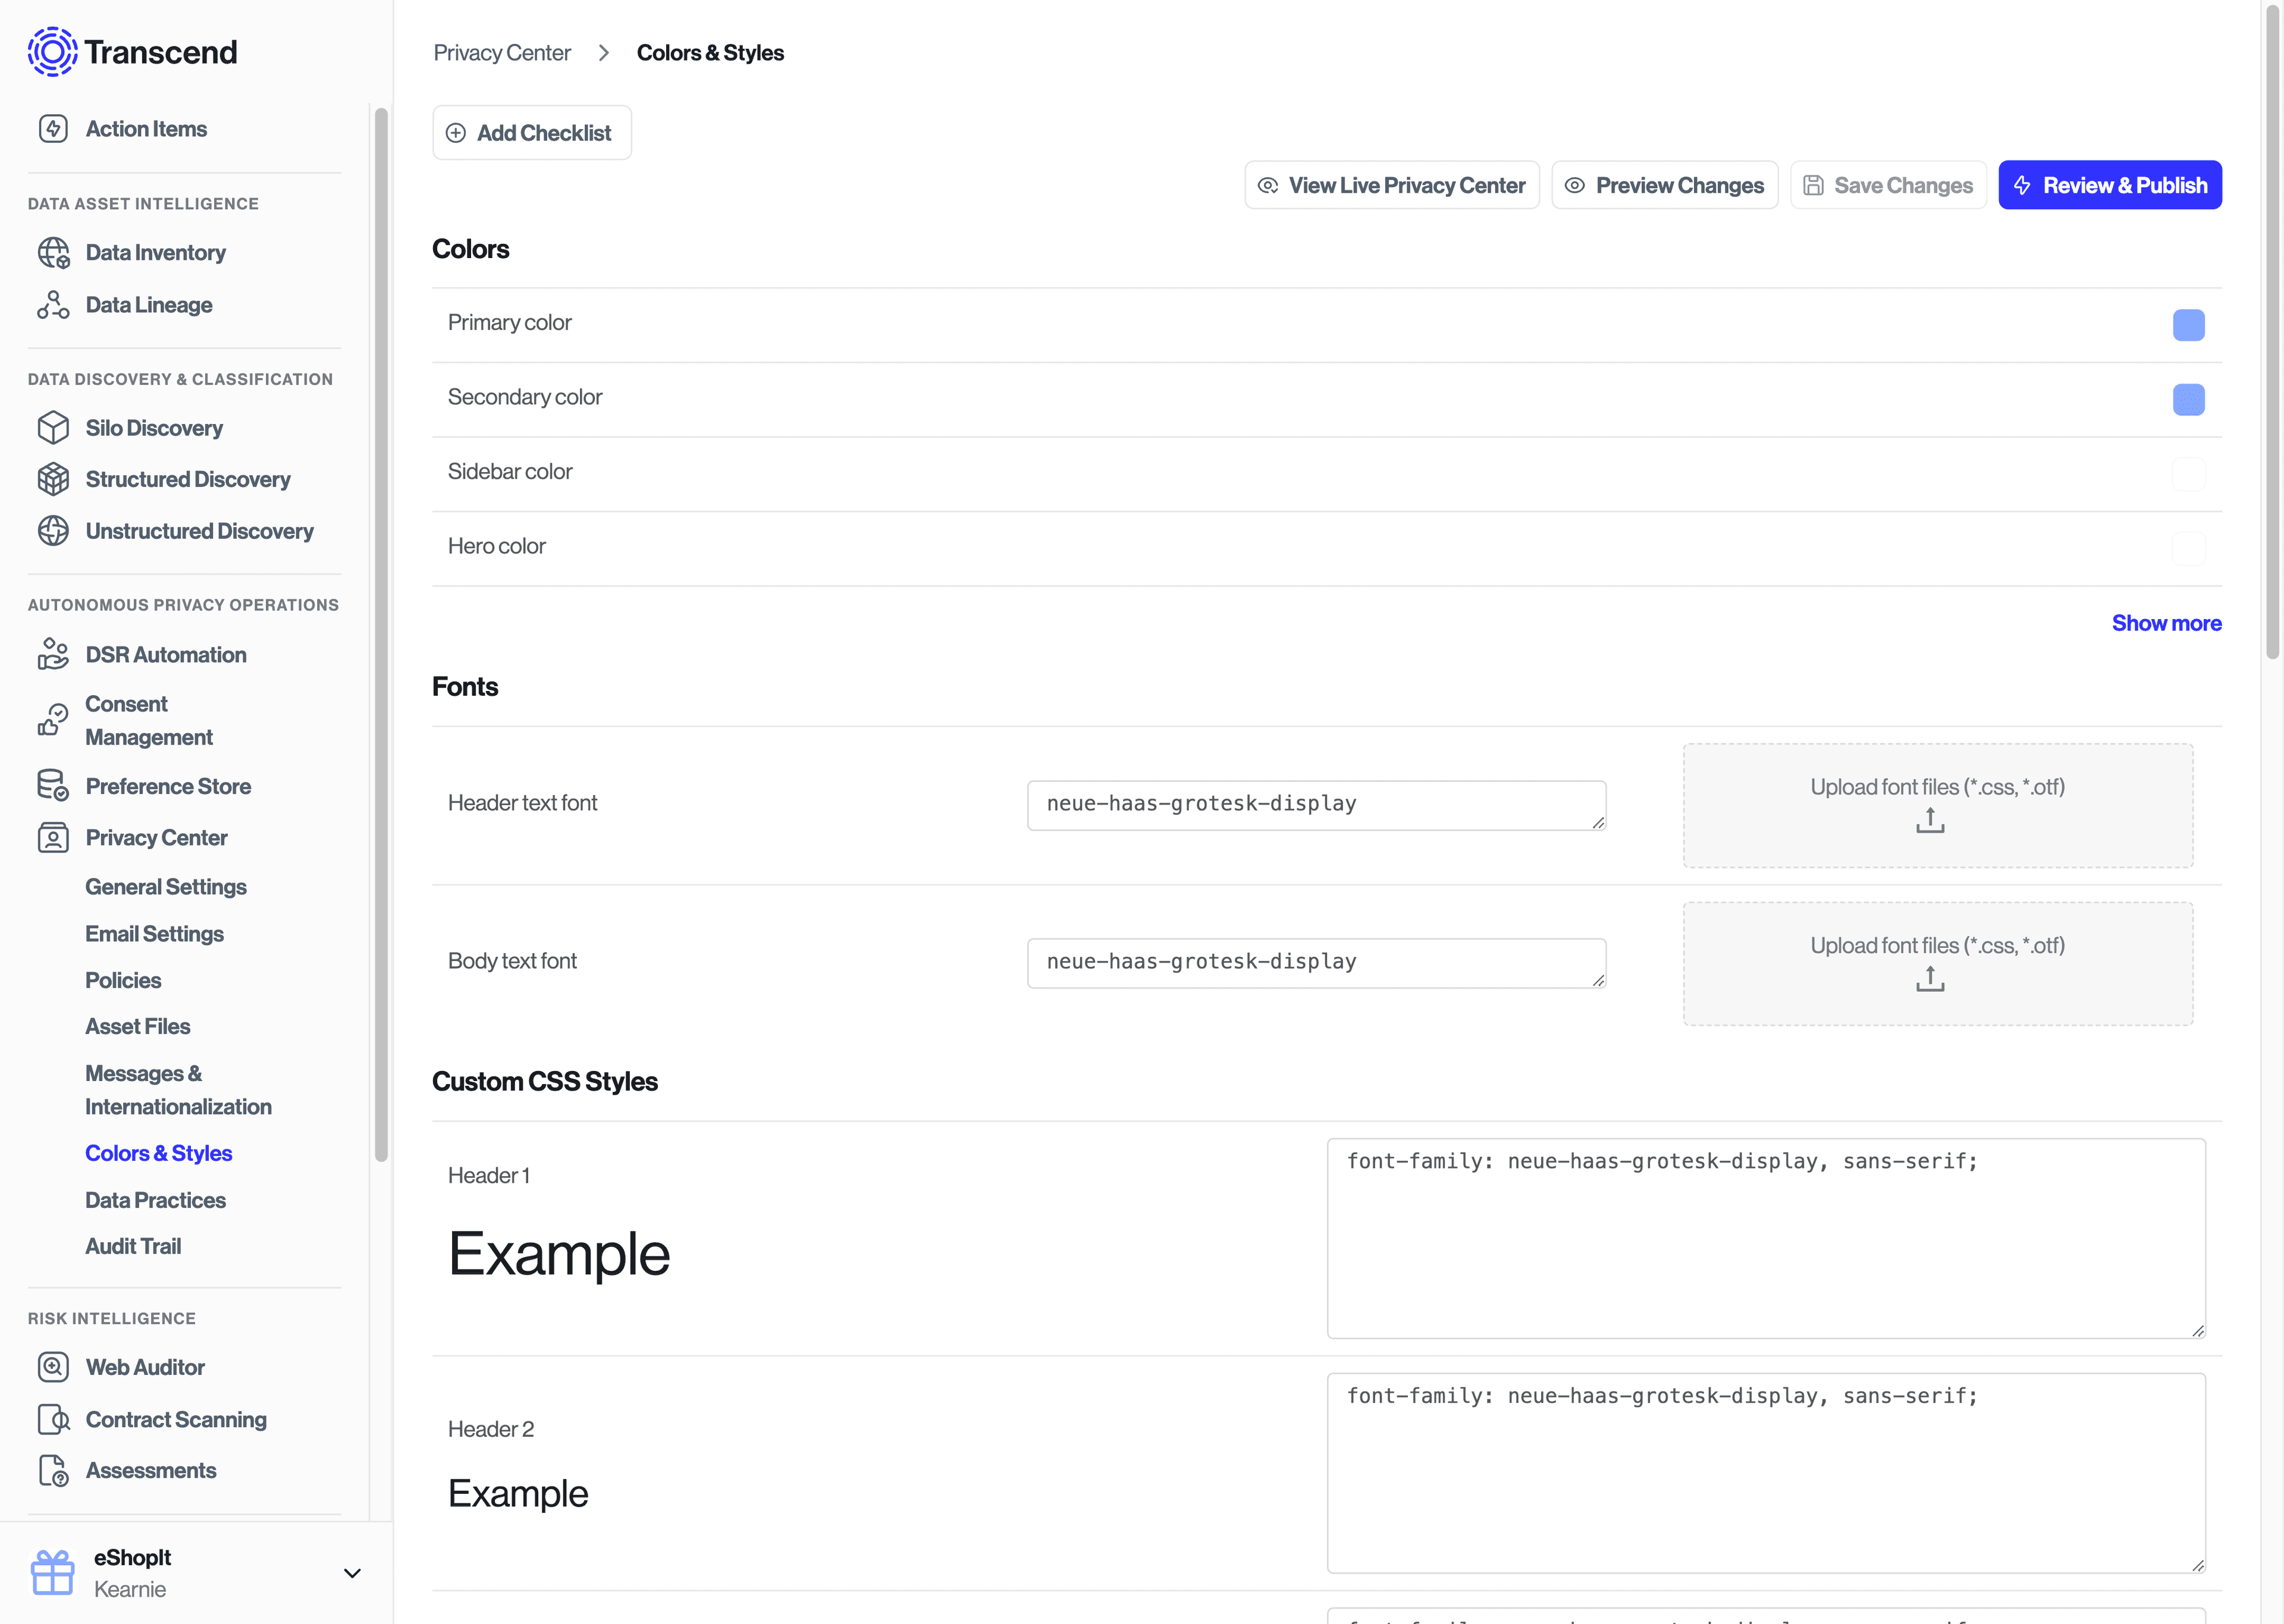
The bottom three panes on the Admin Dashboard's Privacy Center configuration let you customize your Privacy Center's look and feel.
Web
Mobile
| Asset name | What it controls | Recommendations | File type extension | Location in diagram |
|---|---|---|---|---|
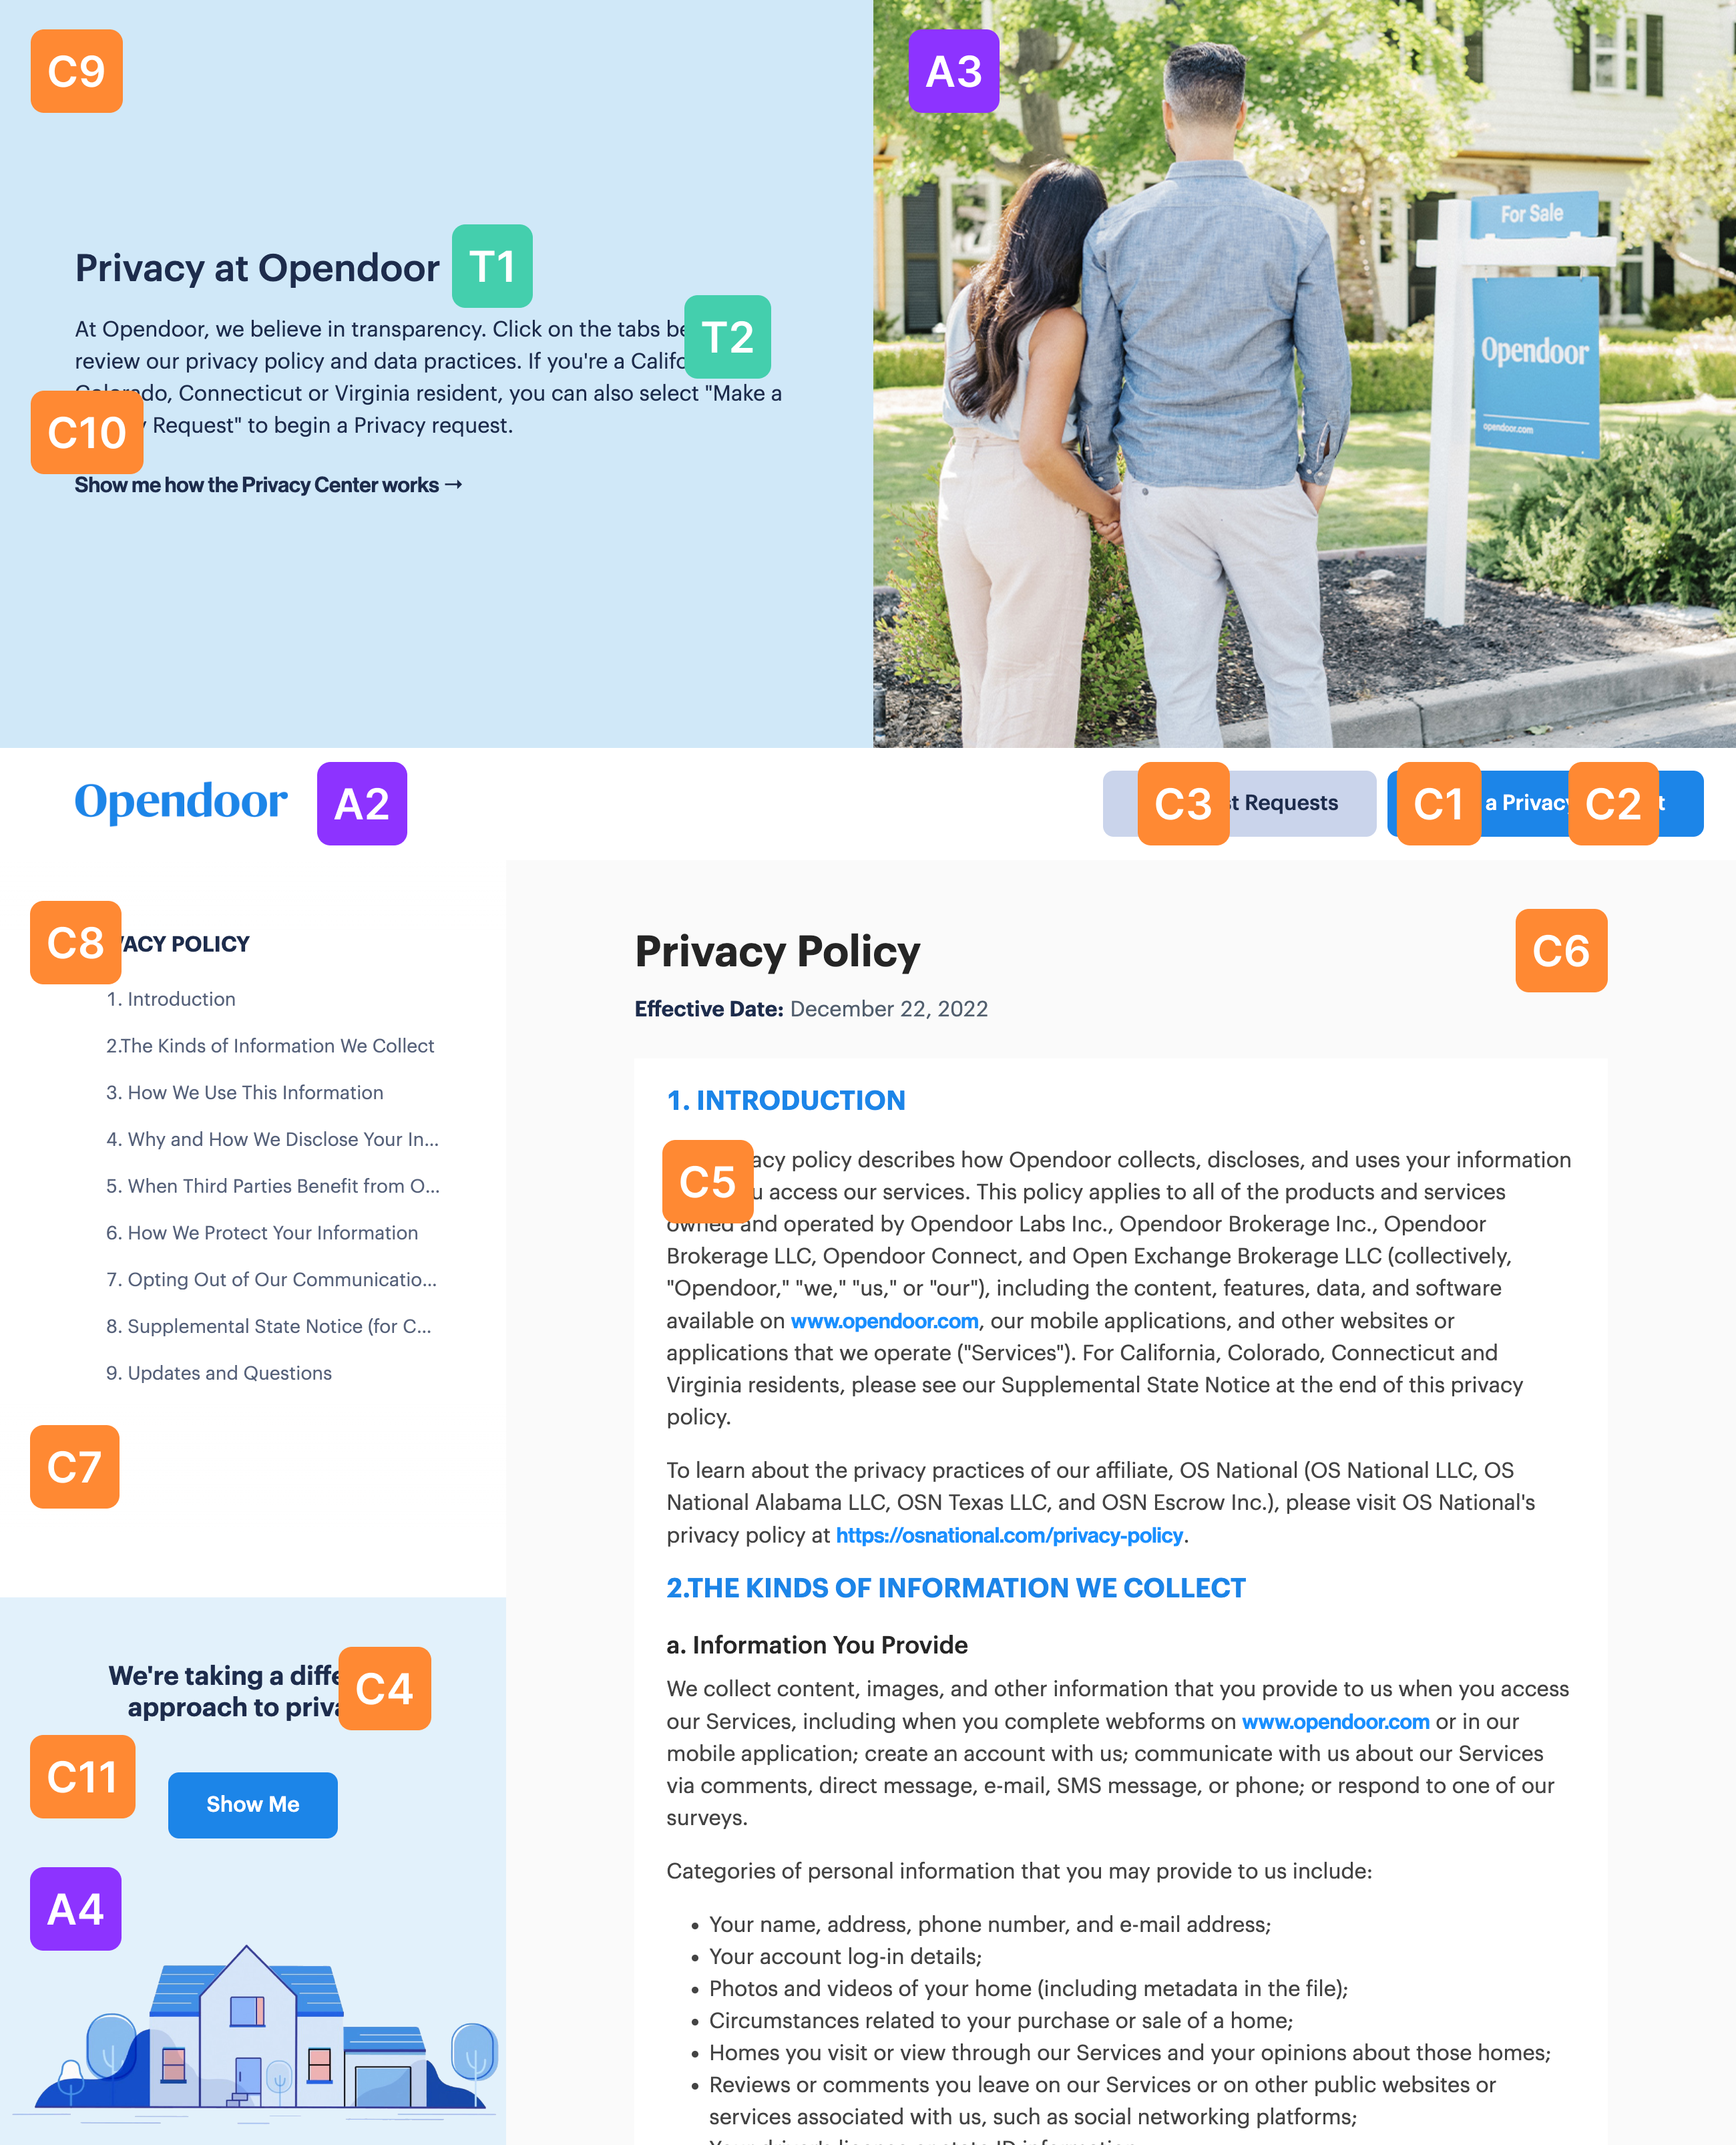
Logo | Your company logo, shown on the header nav bar in mobile views | Not white (header bar is white) | .png (.svg will render on the website, but not on certain communications such as Gmail) | A1 |
Favicon | The shortcut icon to display on browser tabs | 1:1 aspect ratio | .png, .svg, .ico | N/A |
Logo on Side Menu | Your company logo, rendered atop your primary color or side menu background color, defaults to Logo | Different colored version of your logo as needed (i.e., black or white) | .png, .svg | A2 |
Hero Image | The main image displayed on the hero banner | 3:2 aspect ratio, transparent background if you want the Hero background color to show through to prevent hard edge cut-offs | .png, .svg | A3 |
Sidebar Widget Background | The optional background image for the desktop view's sidebar widget | Image height between approximately 400-600px in portrait orientation to allow ample space for text and button content | .png, .svg | A4 |
| Color name | What it controls | Location in diagram |
|---|---|---|
Primary | The primary or main brand color, used ubiquitously to color miscellaneous components, i.e., primary backgrounds, buttons, etc. | C1 |
Text on Primary | The text color that is on top of the Primary color | C2 |
Secondary | The secondary brand color, used for components such as secondary buttons, etc. | C3 |
Text on about Transcend widget | The text color that is on top of the Transcend widget in the side menu | C4 |
Main paragraph text | The text color of the paragraphs in your policy | C5 |
Lighten text | The color for lighter text subtitles | N/A |
Background accent | An light background accent color that lies behind the page's main content | C6 |
Error | The color for error messages | N/A |
Side menu background | The background color of side menu, defaults to Primary | C7 |
Text on side menu | The text color on the side menu, defaults to Text on Primary | C8 |
Hero background | The background color of the hero banner, defaults to Primary | C9 |
Text on hero | The text color on the hero banner, defaults to Text on Primary | C10 |
About Transcend Widget background | The background color of the Transcend widget in the side menu, defaults to Secondary | C11 |
Highlighted text | The color of text highlighting on the webpage, defaults to a lighter variant of Primary | N/A |
| Description Name | What it controls | Location in diagram |
|---|---|---|
Hero title | The main title message on your hero banner, used as an introductory call out message | T1 |
Hero description | Some description text in the hero that appears underneath the title | T2 |
Meta title | The meta HTML title that displays on your web browser tab, used by search engines for indexing purposes. | N/A |
Meta description | The meta HTML description, used by search engines for indexing purposes. | N/A |
You may also customize the look and feel of your Privacy Center using CSS. This includes applying custom CSS to your headers, buttons, body text, and hero image. These changes can be made under the Custom CSS Styles section of the Privacy Center → Colors & Styles page.
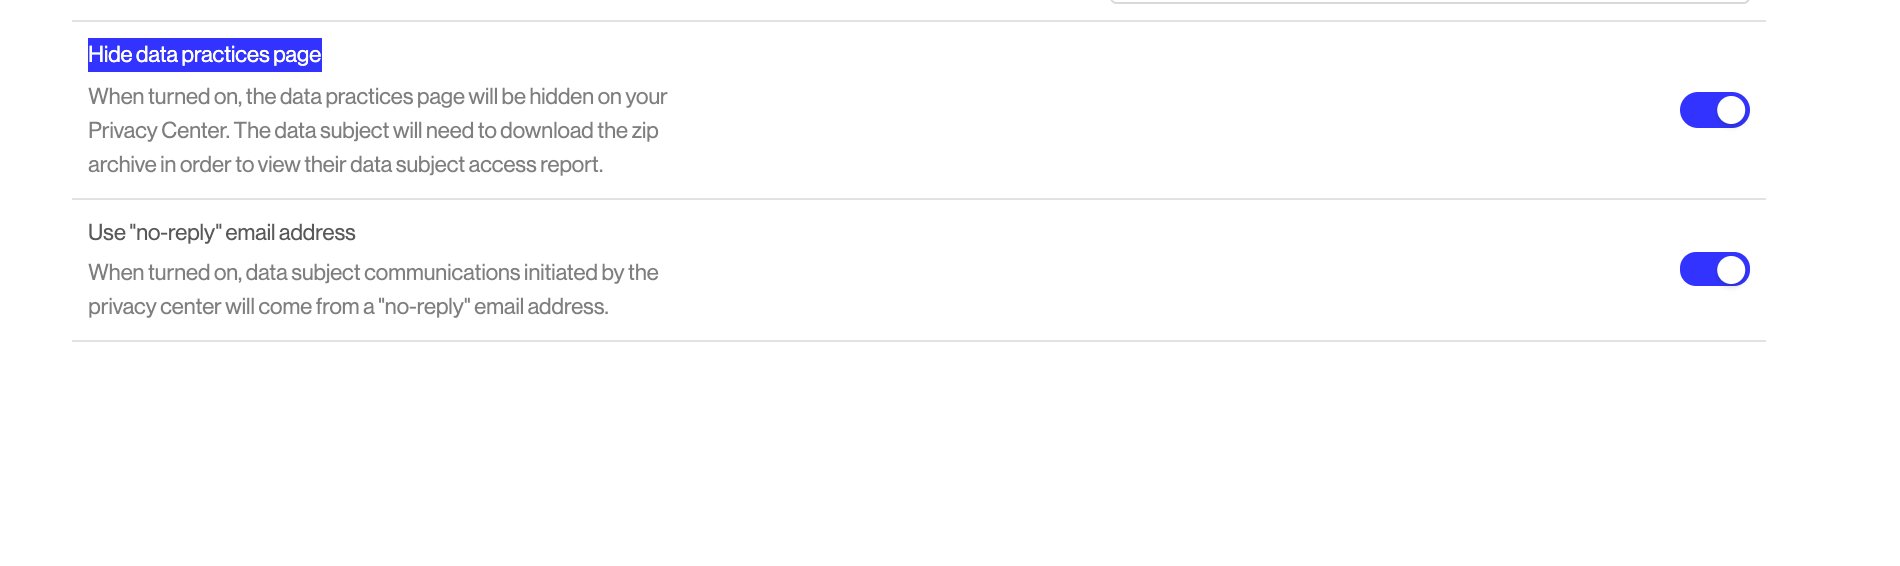
In Q1 2025, Transcend will deprecate the current Data Practices UI. For new customers, we recommend keeping this disabled.
To disable the data practices UI, navigate to the General Settings section of the Privacy Center settings. Toggle on the setting "Hide data practices page".
The structure of your company's data is determined by the Integrations and can be updated directly from the Admin Dashboard. This structure determines everything from how the side menu of your Privacy Center looks to how the bundle of data in a Data Subject Access Request presents itself. Since data regulations treat data differently based on how it is collected and used, configuring your Integrations correctly is about more than the aesthetics.
The "Data Practices" tab on the left side menu has three panels that allow you to add Data Collections to your Integrations.
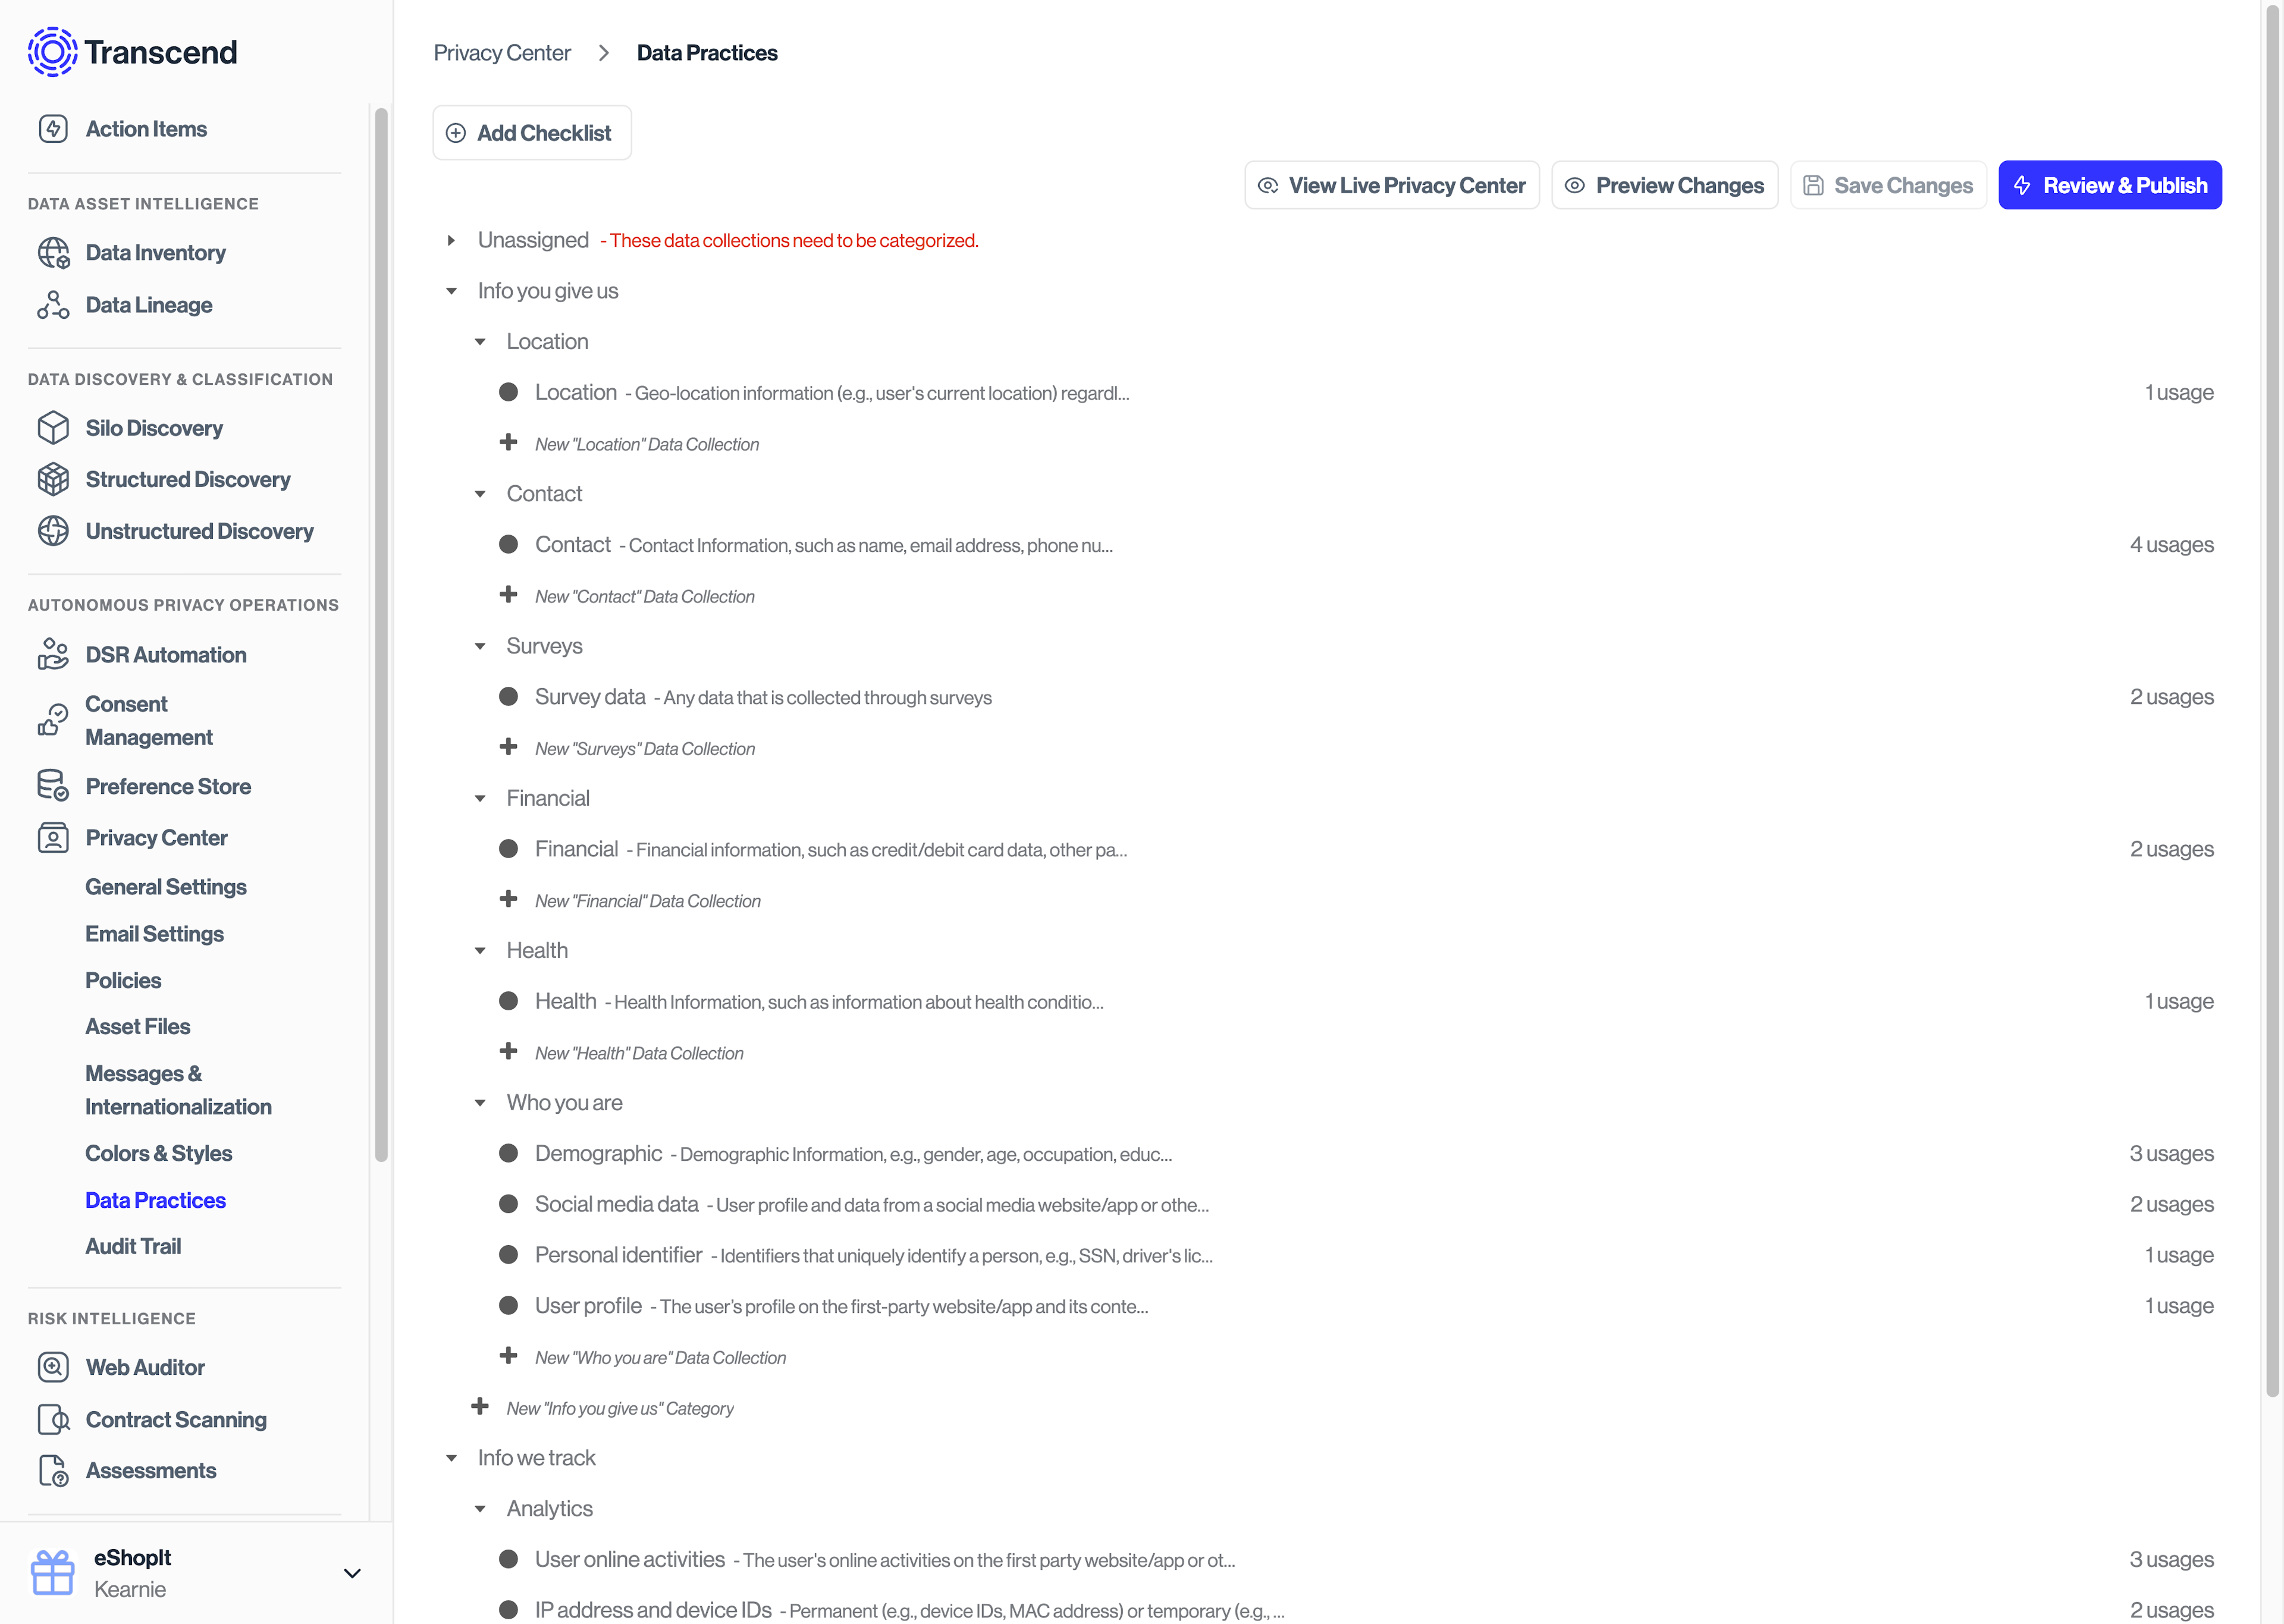
On creation, Data Collections should be given a method based on how such data was collected by your company.
| Data Collection Method | Description |
|---|---|
Info we track | Information that your company tracks about your users (e.g., analytics data from cookies). |
Info you give us | Information that your customers give you (e.g., information from forms they fill out). |
Info shared by others | Information that other vendors have shared with your company about your customers. |
When you first start with Transcend, your Privacy Center will be initially hosted at a Transcend-owned subdomain your-company.trsnd.co. While here, this Privacy Center looks and acts exactly as it would once you launch it on your own domain, so you can customize and test the page to your liking.
When you are satisfied with the changes made to your Privacy Center, you can launch it on your own domain at privacy.your-company.com via the Admin Dashboard. To do so, visit the "General Settings" tab on the left side menu and click on the dropdown arrow next to "Privacy Center URL". Setting up the Privacy Center on your domain requires updating some DNS records in your DNS database, the instructions for which will be displayed when you expand the "Privacy Center URL" section.
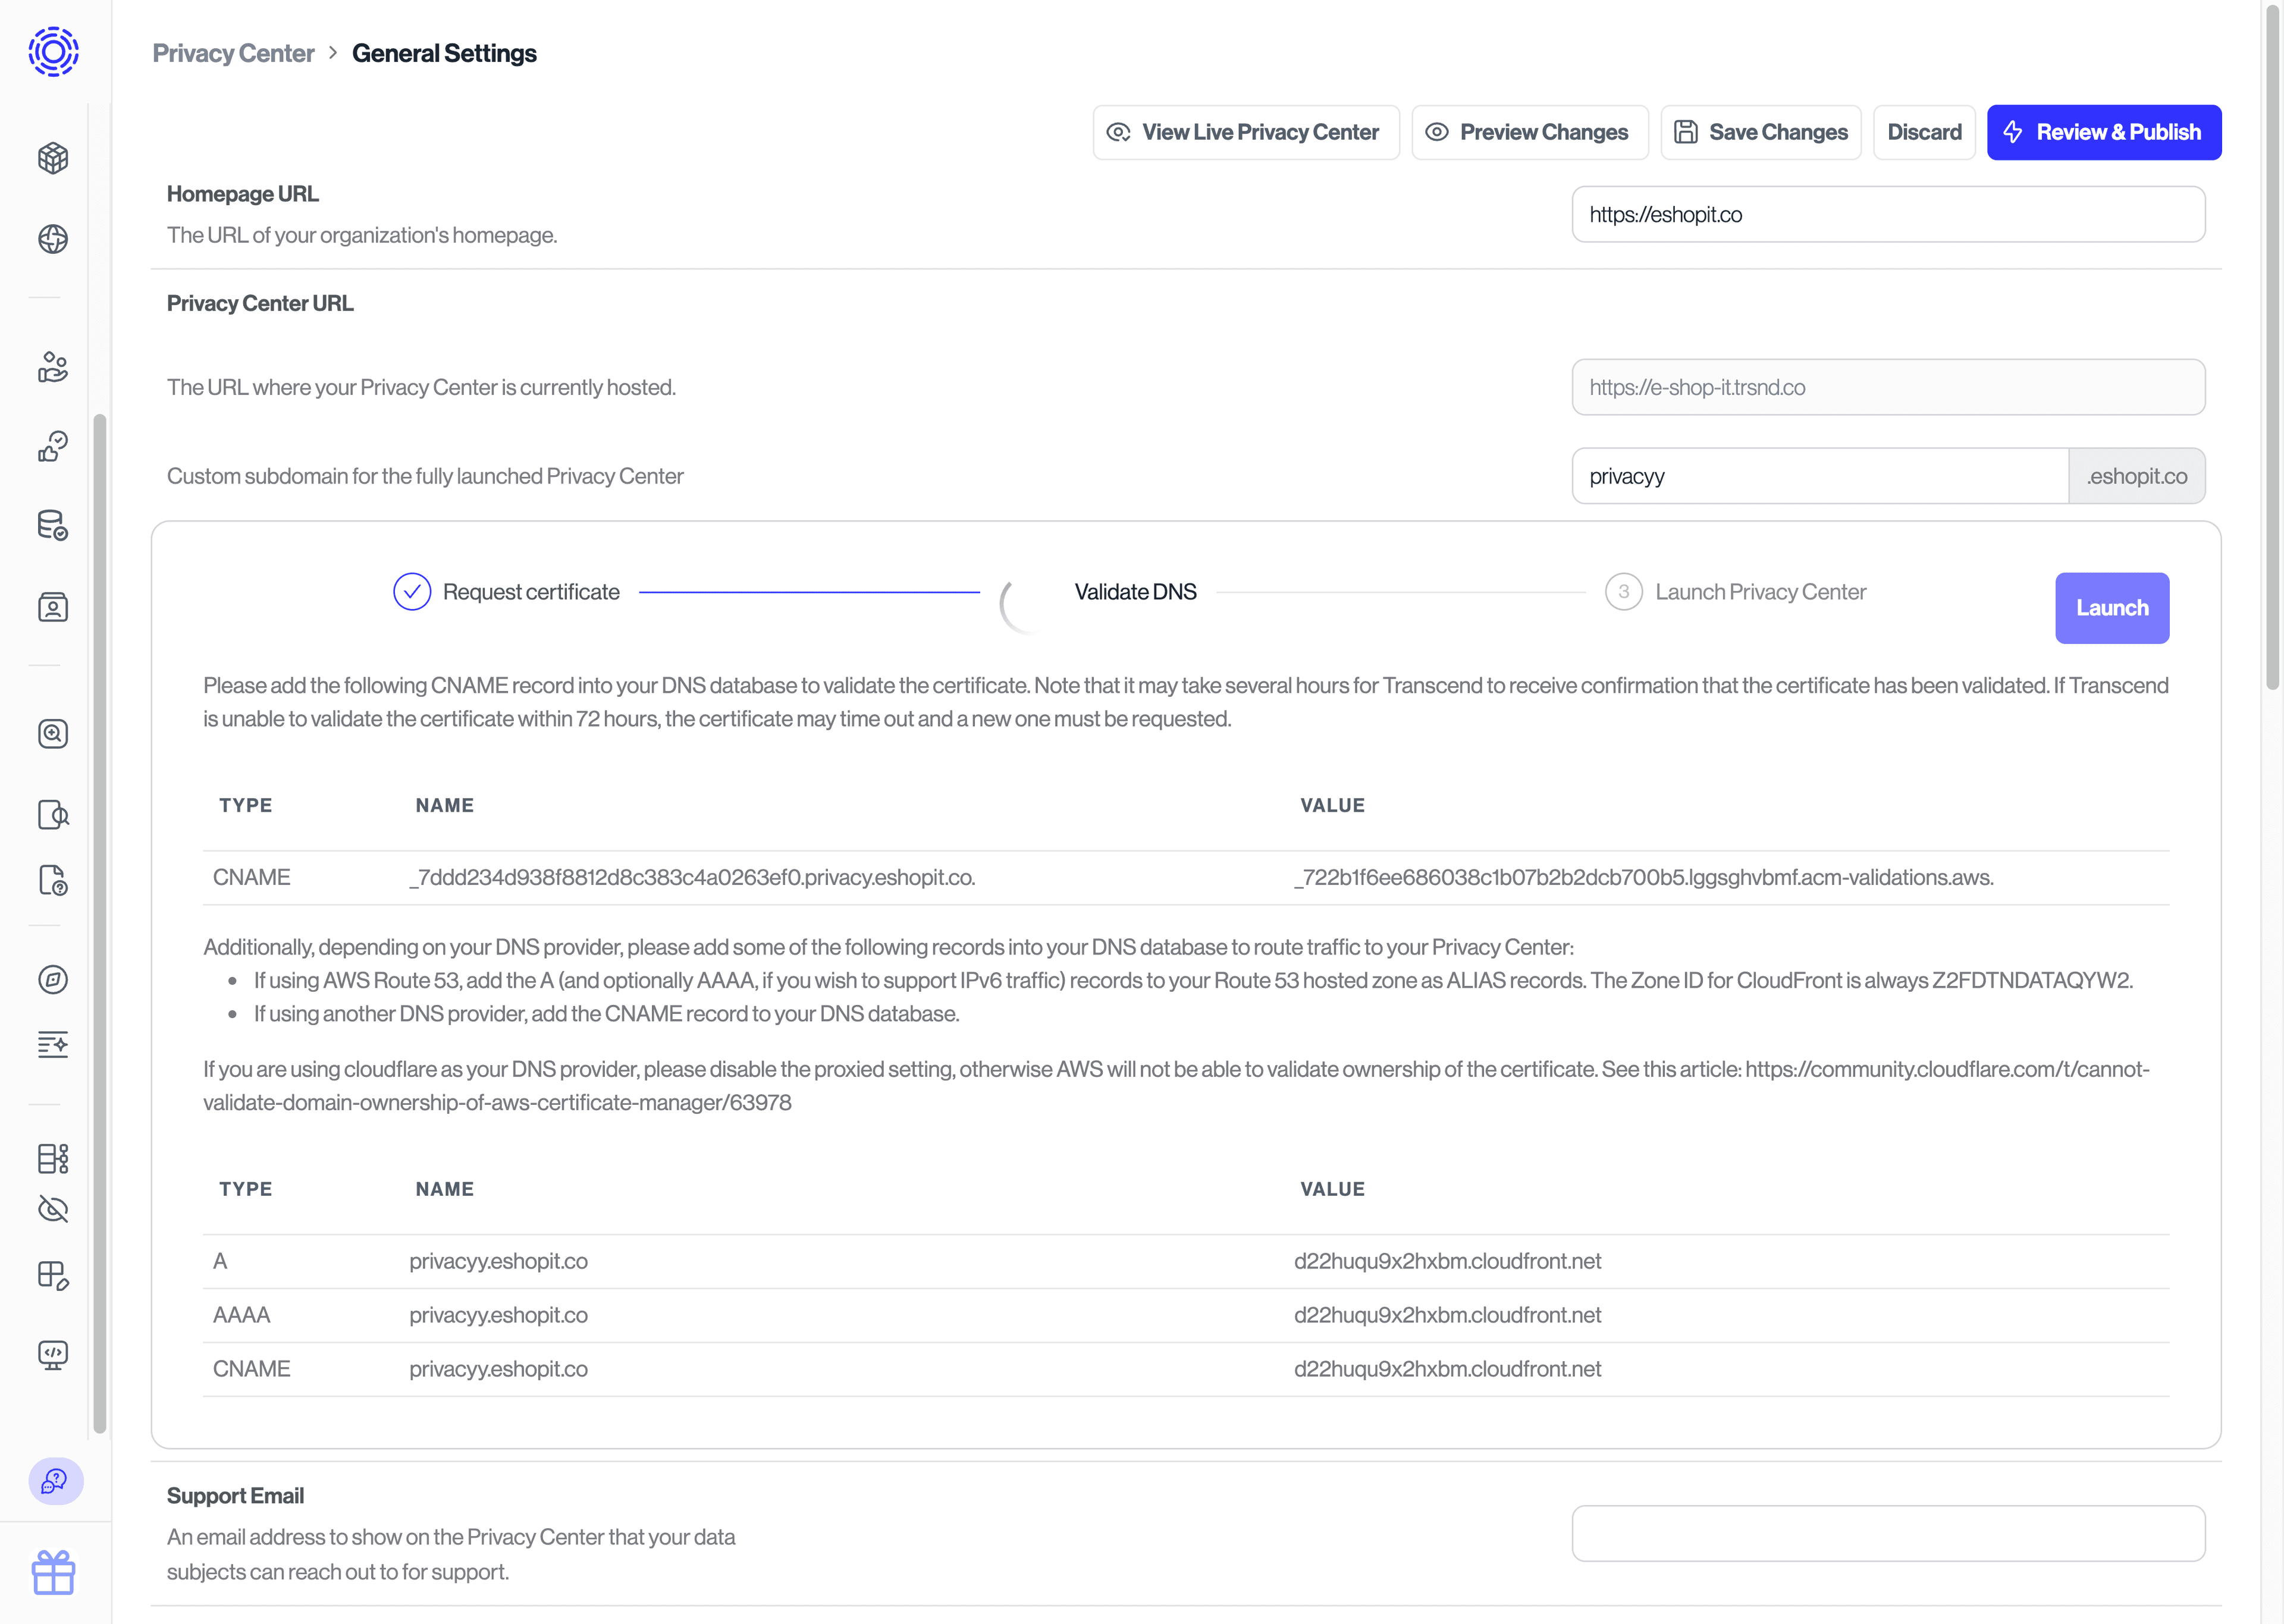
There are 3 steps to fully launching the Privacy Center on your domain:
In order for Transcend to host the Privacy Center on your domain, a certificate must first be requested that can authenticate the domain name privacy.your-company.com and demonstrate that communication with the page is secure.
The certificate in the previous step must then be validated, and traffic from your page privacy.your-company.com must be routed to the Privacy Center. To do so, the "Privacy Center URL" section will display a couple DNS records that must be added to your DNS database. Your DNS provider will propagate the record changes, which may take some time.
When the certificate has been successfully validated and your domain privacy.your-company.com correctly routes traffic to the new Privacy Center, click "Launch" to launch the Privacy Center at its new location!
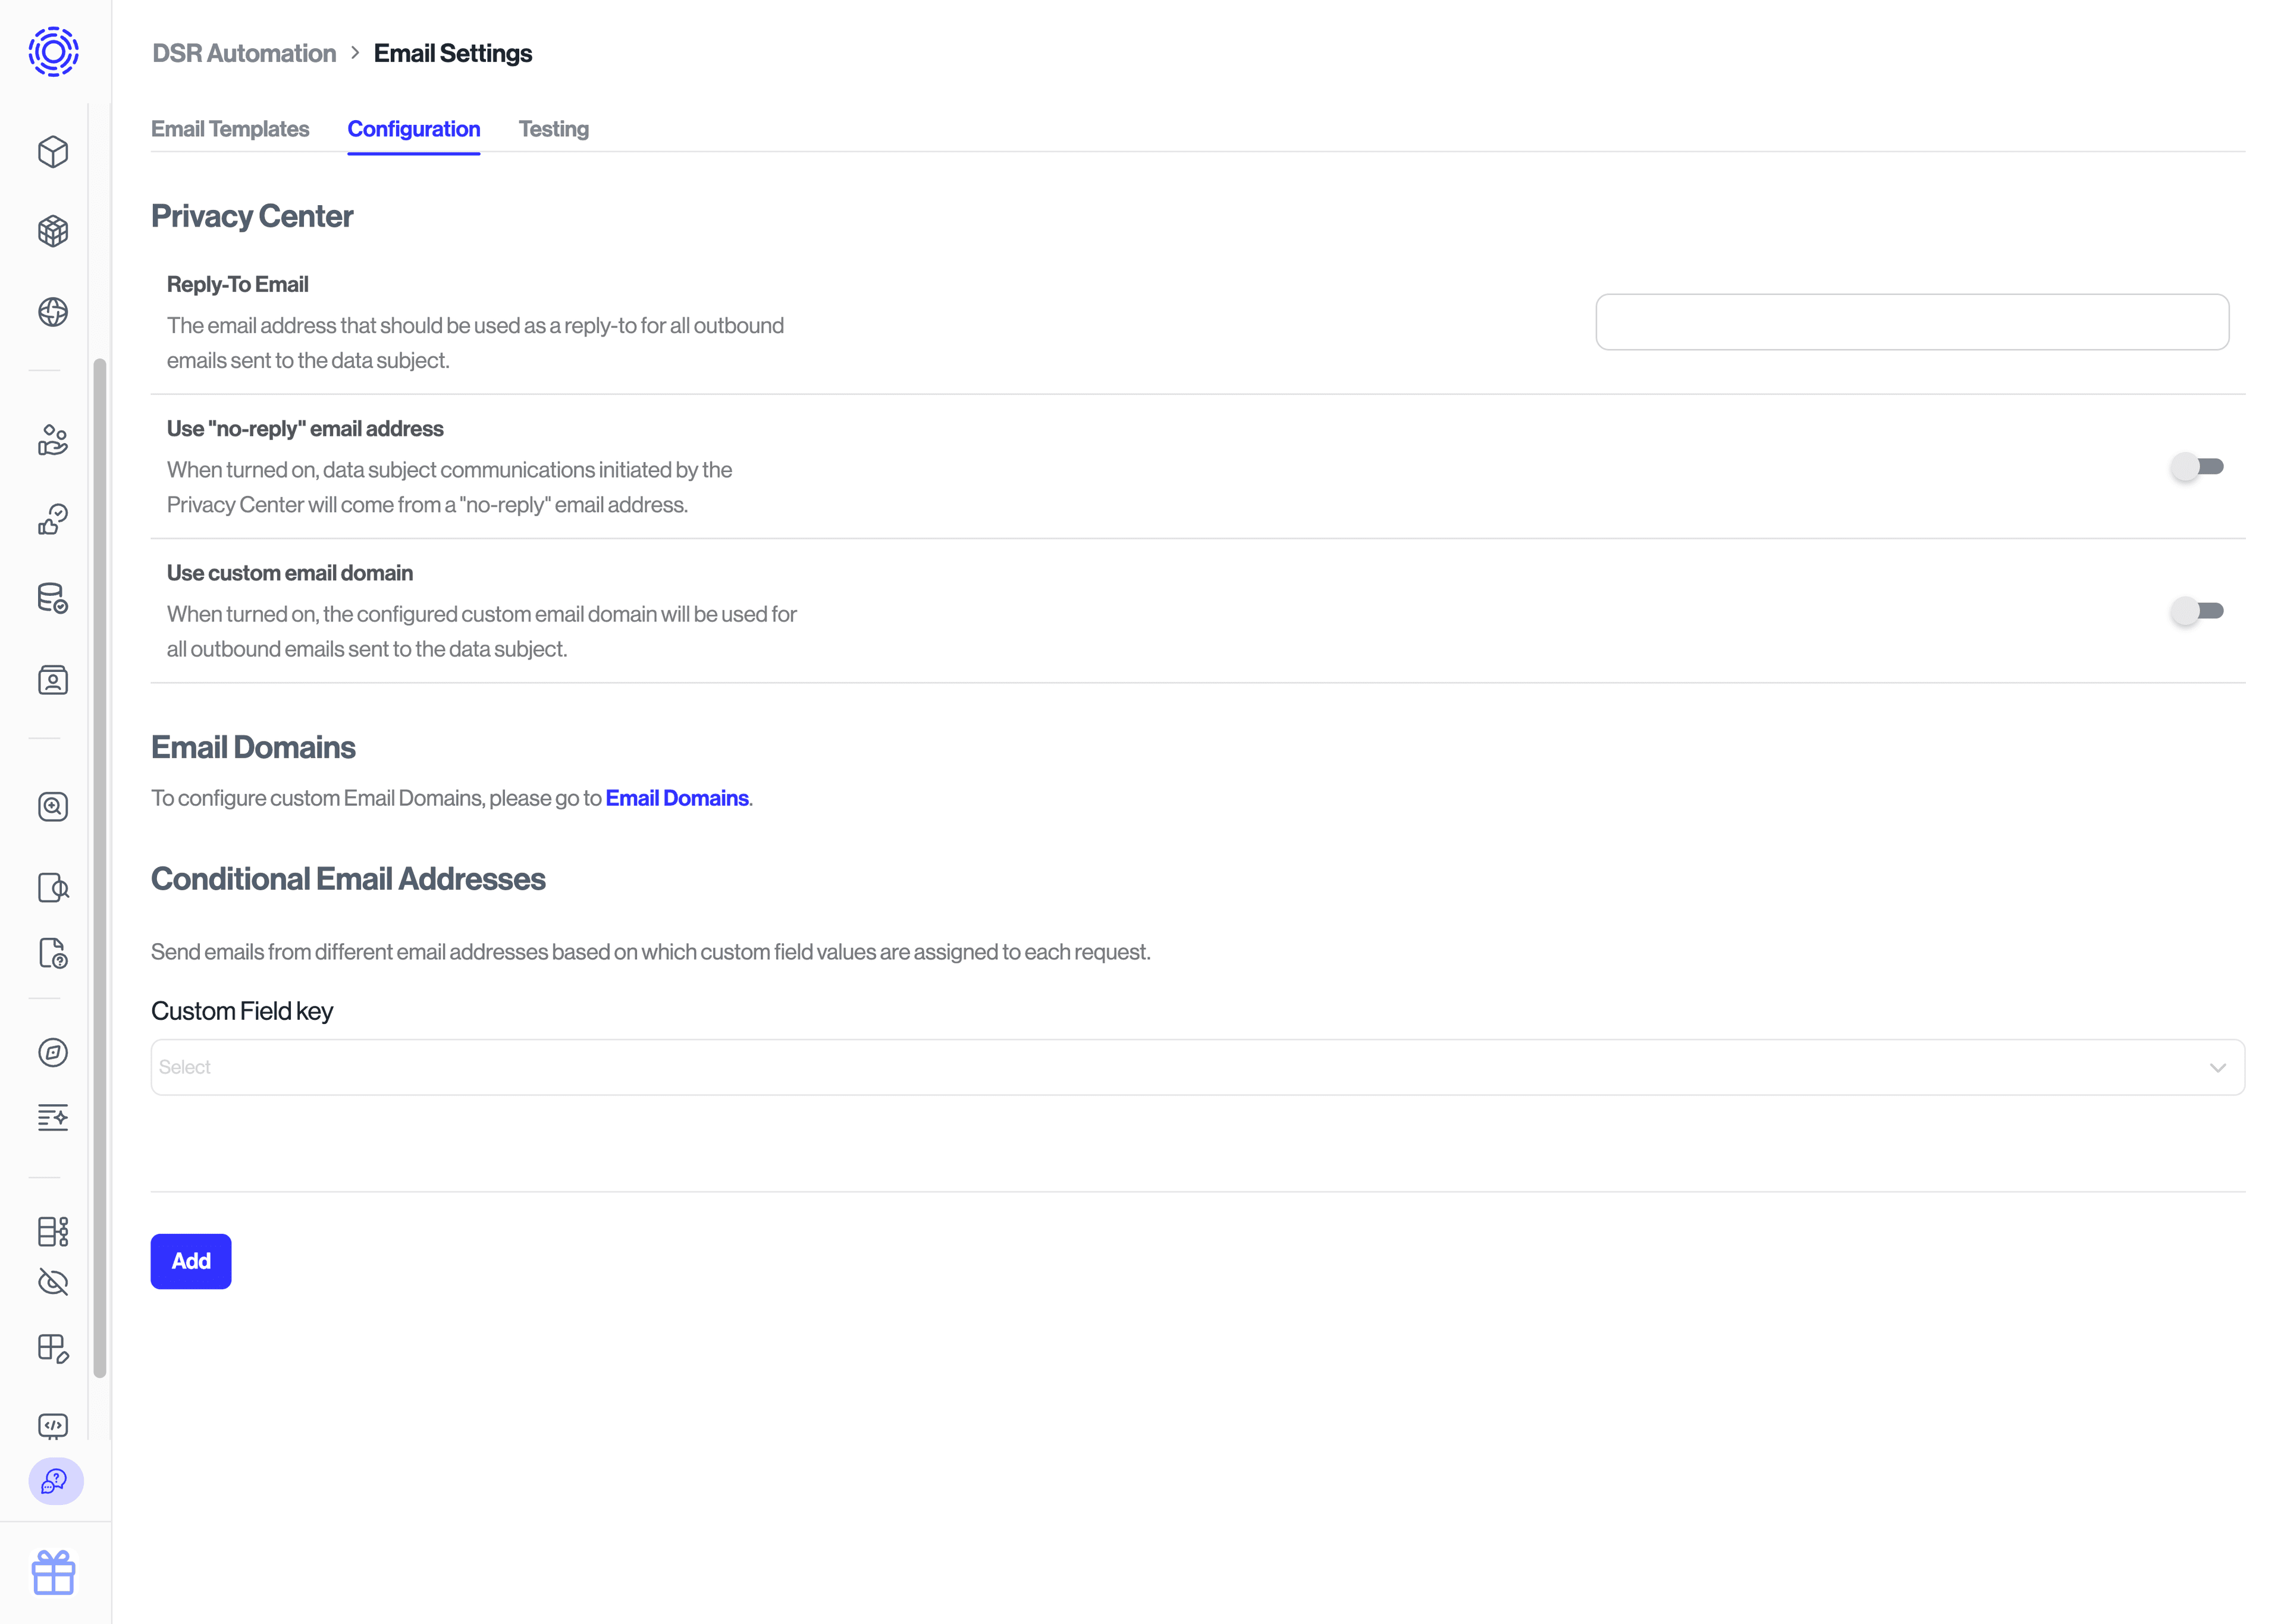
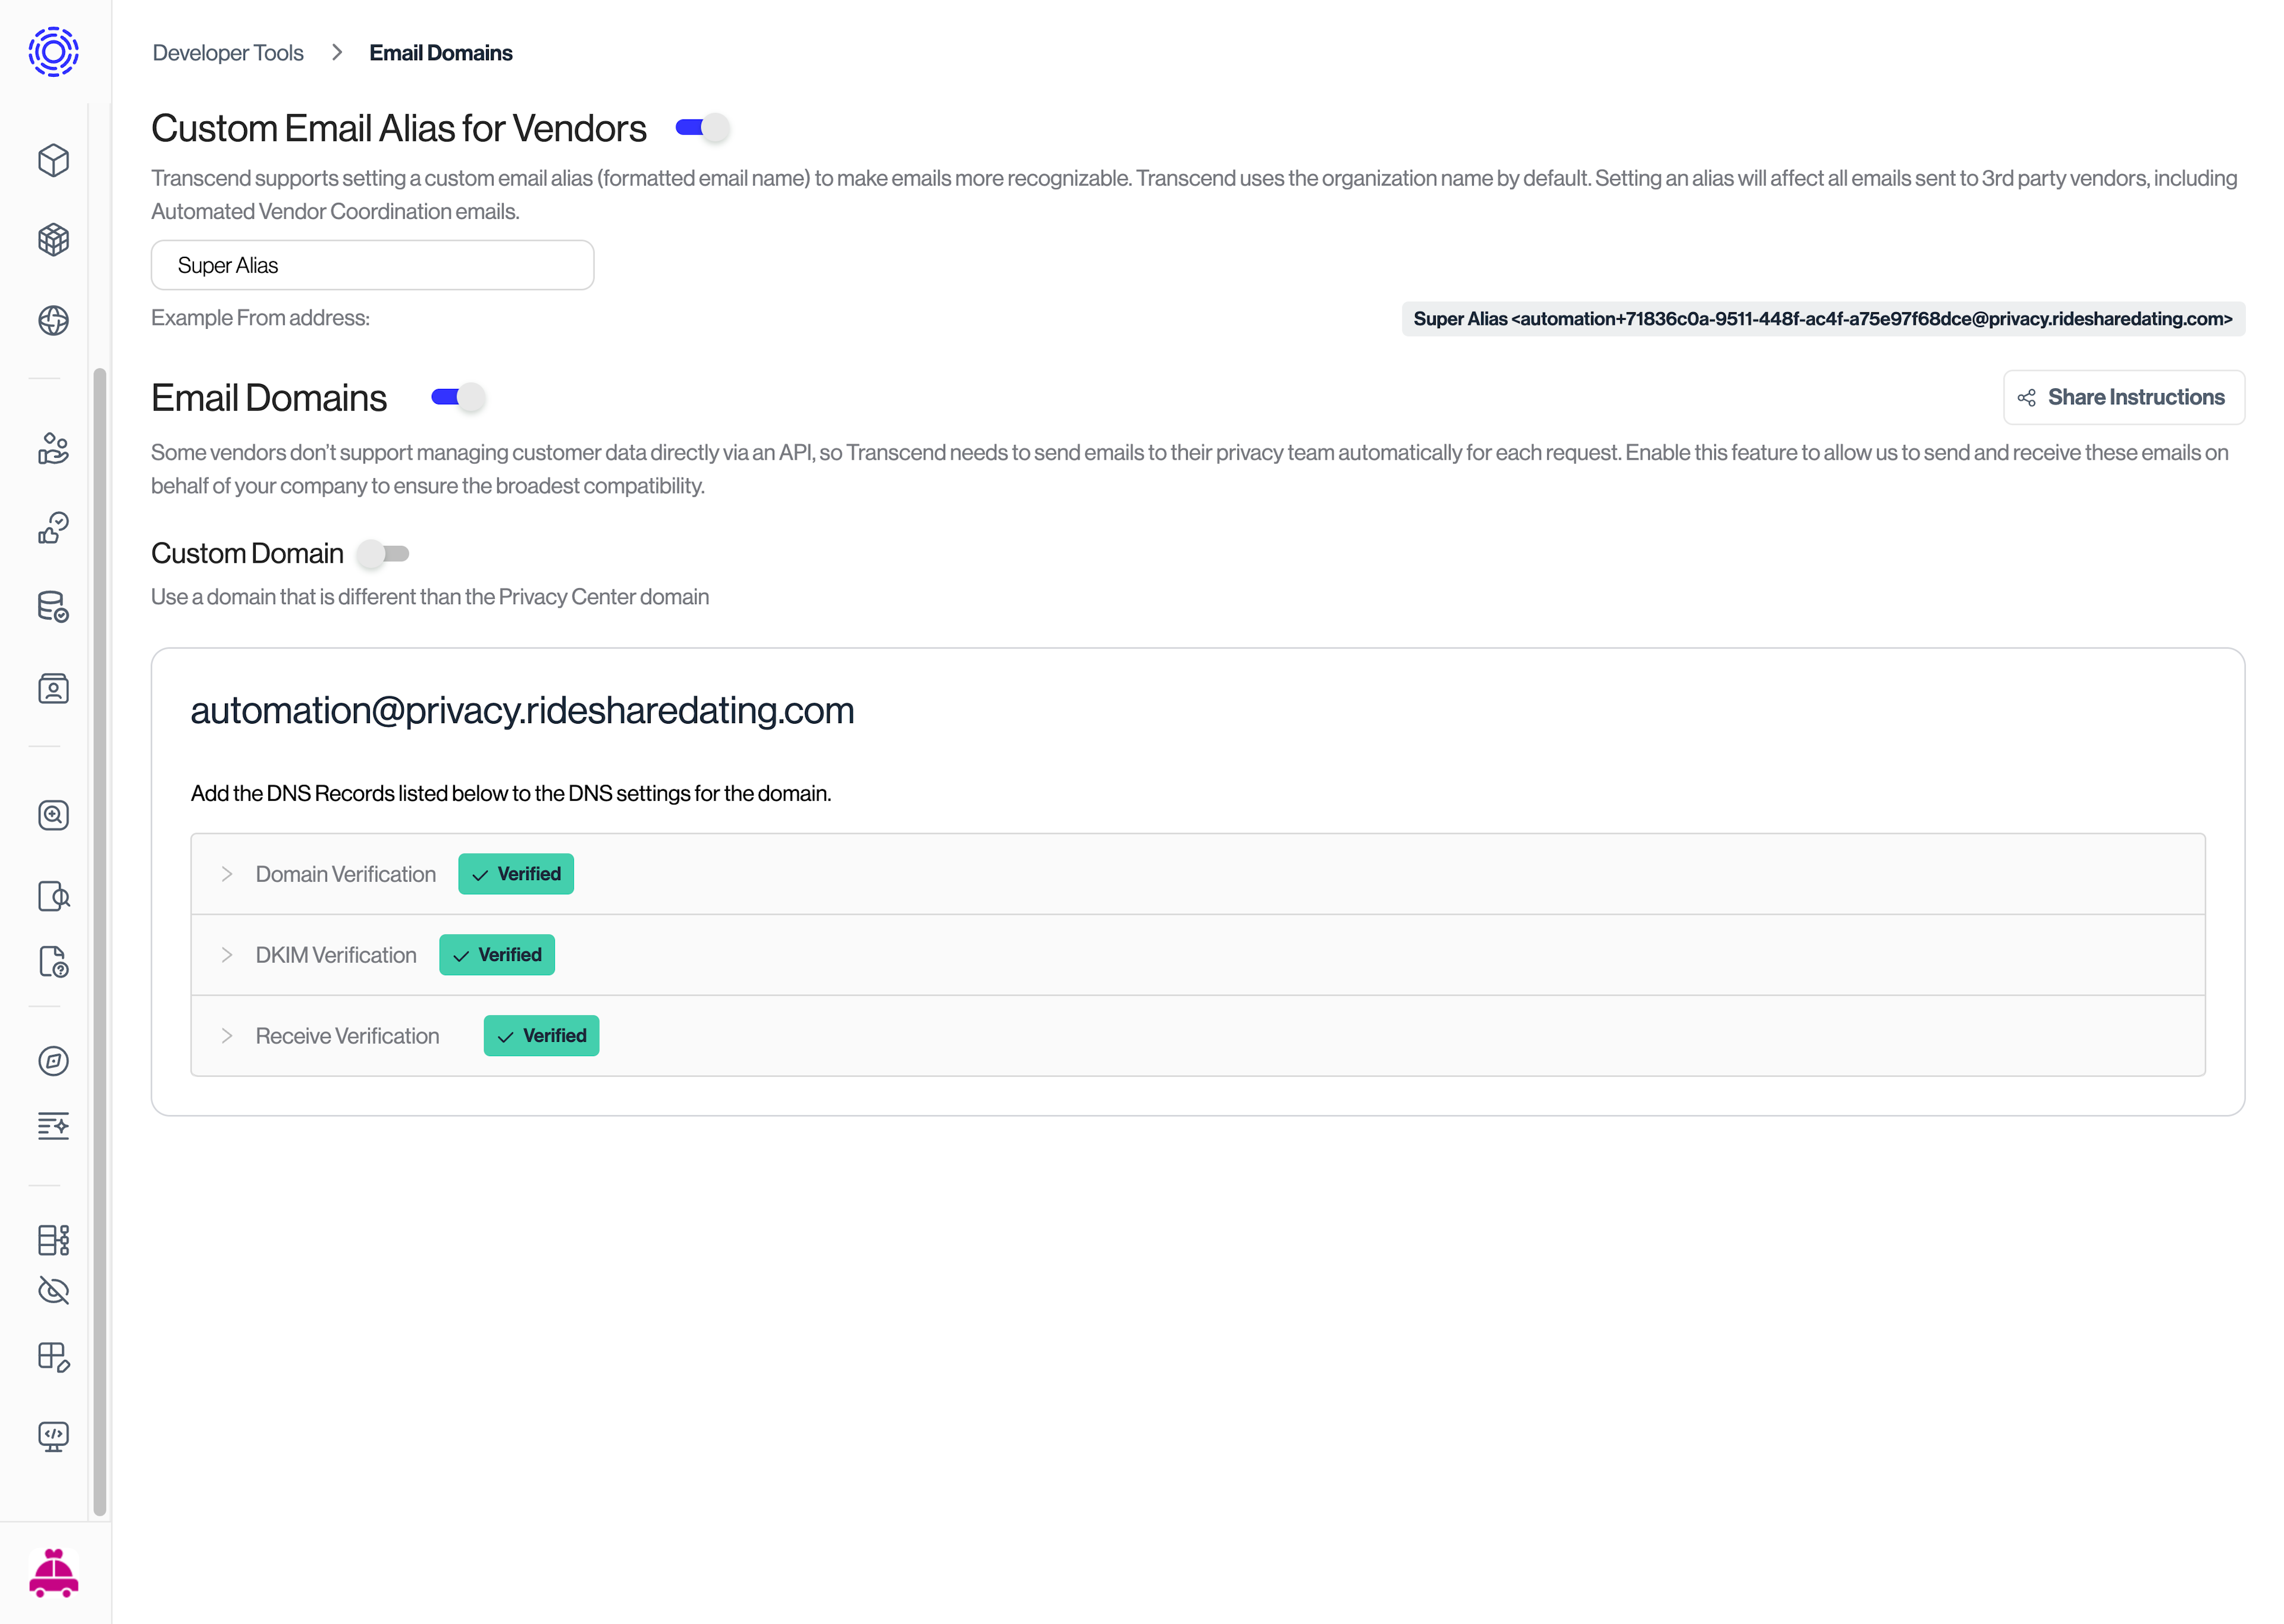
You can configure the email addresses, email aliases, and even the domains from which we send Privacy Center emails.
This diagram is labelled with the fields as configurable in the Email Settings:

| Location in diagram | Field name | What it controls |
|---|---|---|
| 1 | Email alias | The sender name visible in email clients |
| 2 | Email prefix | The local portion of the email address, prefixes the unique ID used for reliably tracing email replies. This is only configurable when custom Email Domains are configured |
| 3 | Reply to | The email address that will be used when the end-user replies to this email |
| 4 | Email domain | The domain from which the email is sent |
These fields are configurable in two ways:
This configuration is static across all DSRs and preferences, and is split between two pages: Email Settings and Email Domains.
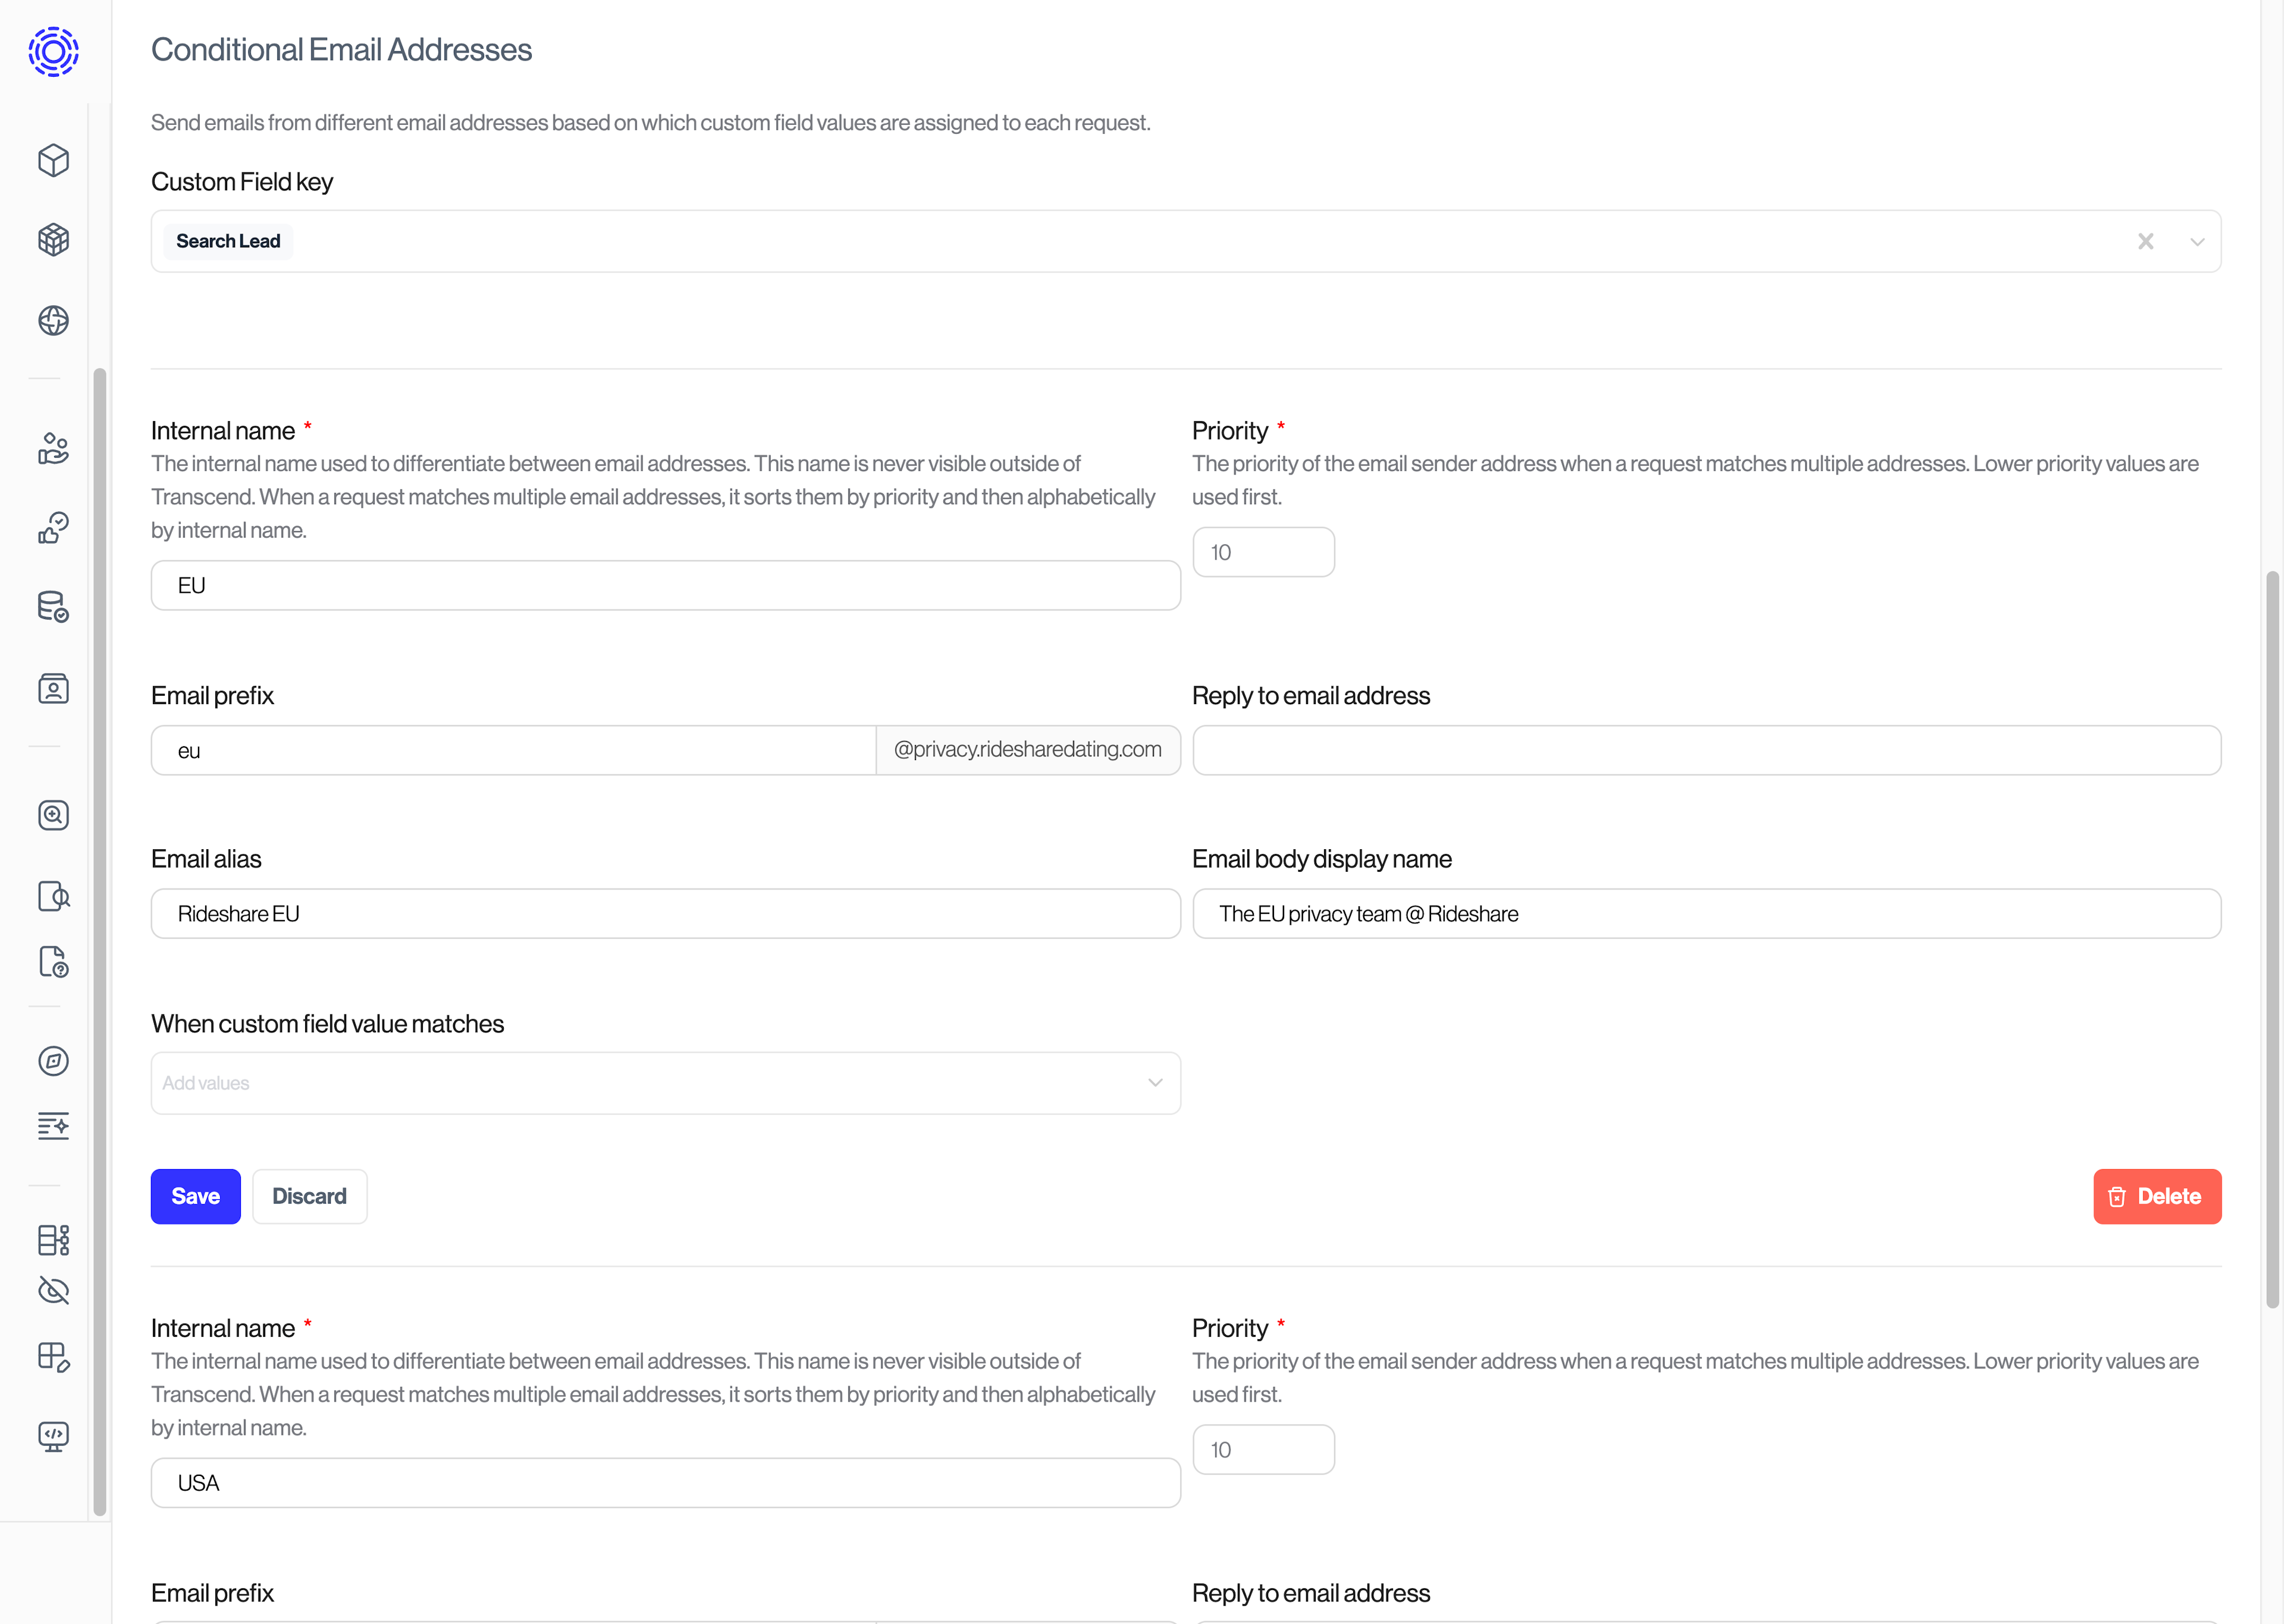
Based on the attributes present on each request, use the closest-matching conditional email address configuration when sending Privacy Center emails.
There is also an additional field for conditional configurations: Email body display name. This field populates a special template variable which can be used in Email Templates as {{ prettySenderName }}. This is most often used when conditionally configuring emails to be sent from teams within your organization.
Conditional configurations take priority over the Global configuration when any attributes match. If multiple attributes match a request, then the configuration with the highest number of matching attributes is used, otherwise the lower priority is used, otherwise the first one alphabetically by internal name is used.
When you have completed your initial configuration and are ready for them to be viewed by your end users, set your changes live by reviewing & publishing your updates.