End-User Identity Verification
Before a user can submit DSRs (see DSR Automation) or change their preferences (see Preference Management), the user will need to authenticate themselves.
The following identity verification methods are available through the Privacy Center:
- Email verification (magic link)
- Account login via JSON Web Tokens (JWT)
- Account login via OAuth 2
Email verification comes out-of-the-box with Transcend. If you maintain your own authentication code for account login, we recommend the JWT strategy. If you use a third-party CIAM provider like Auth0 or Amazon Cognito, we recommend account login via OAuth 2.
Each of these identifications strategies returns a unique & verified "Core Identifier". In addition to these verification methods, Transcend supports a series of additional preflight and verification checks that can be run in a workflow. You can read more about configuring these preflight checks here. These additional preflight checks allow for multi-factor authentication, such as with Twilio Text Code Verification or Stripe Government ID Verification.
You can modify the JWT and OAuth settings under "Privacy Center" -> "Authentication Methods" page in the Admin Dashboard. You can the enable each of these authentication methods under "DSR Automation" -> "Request Settings".
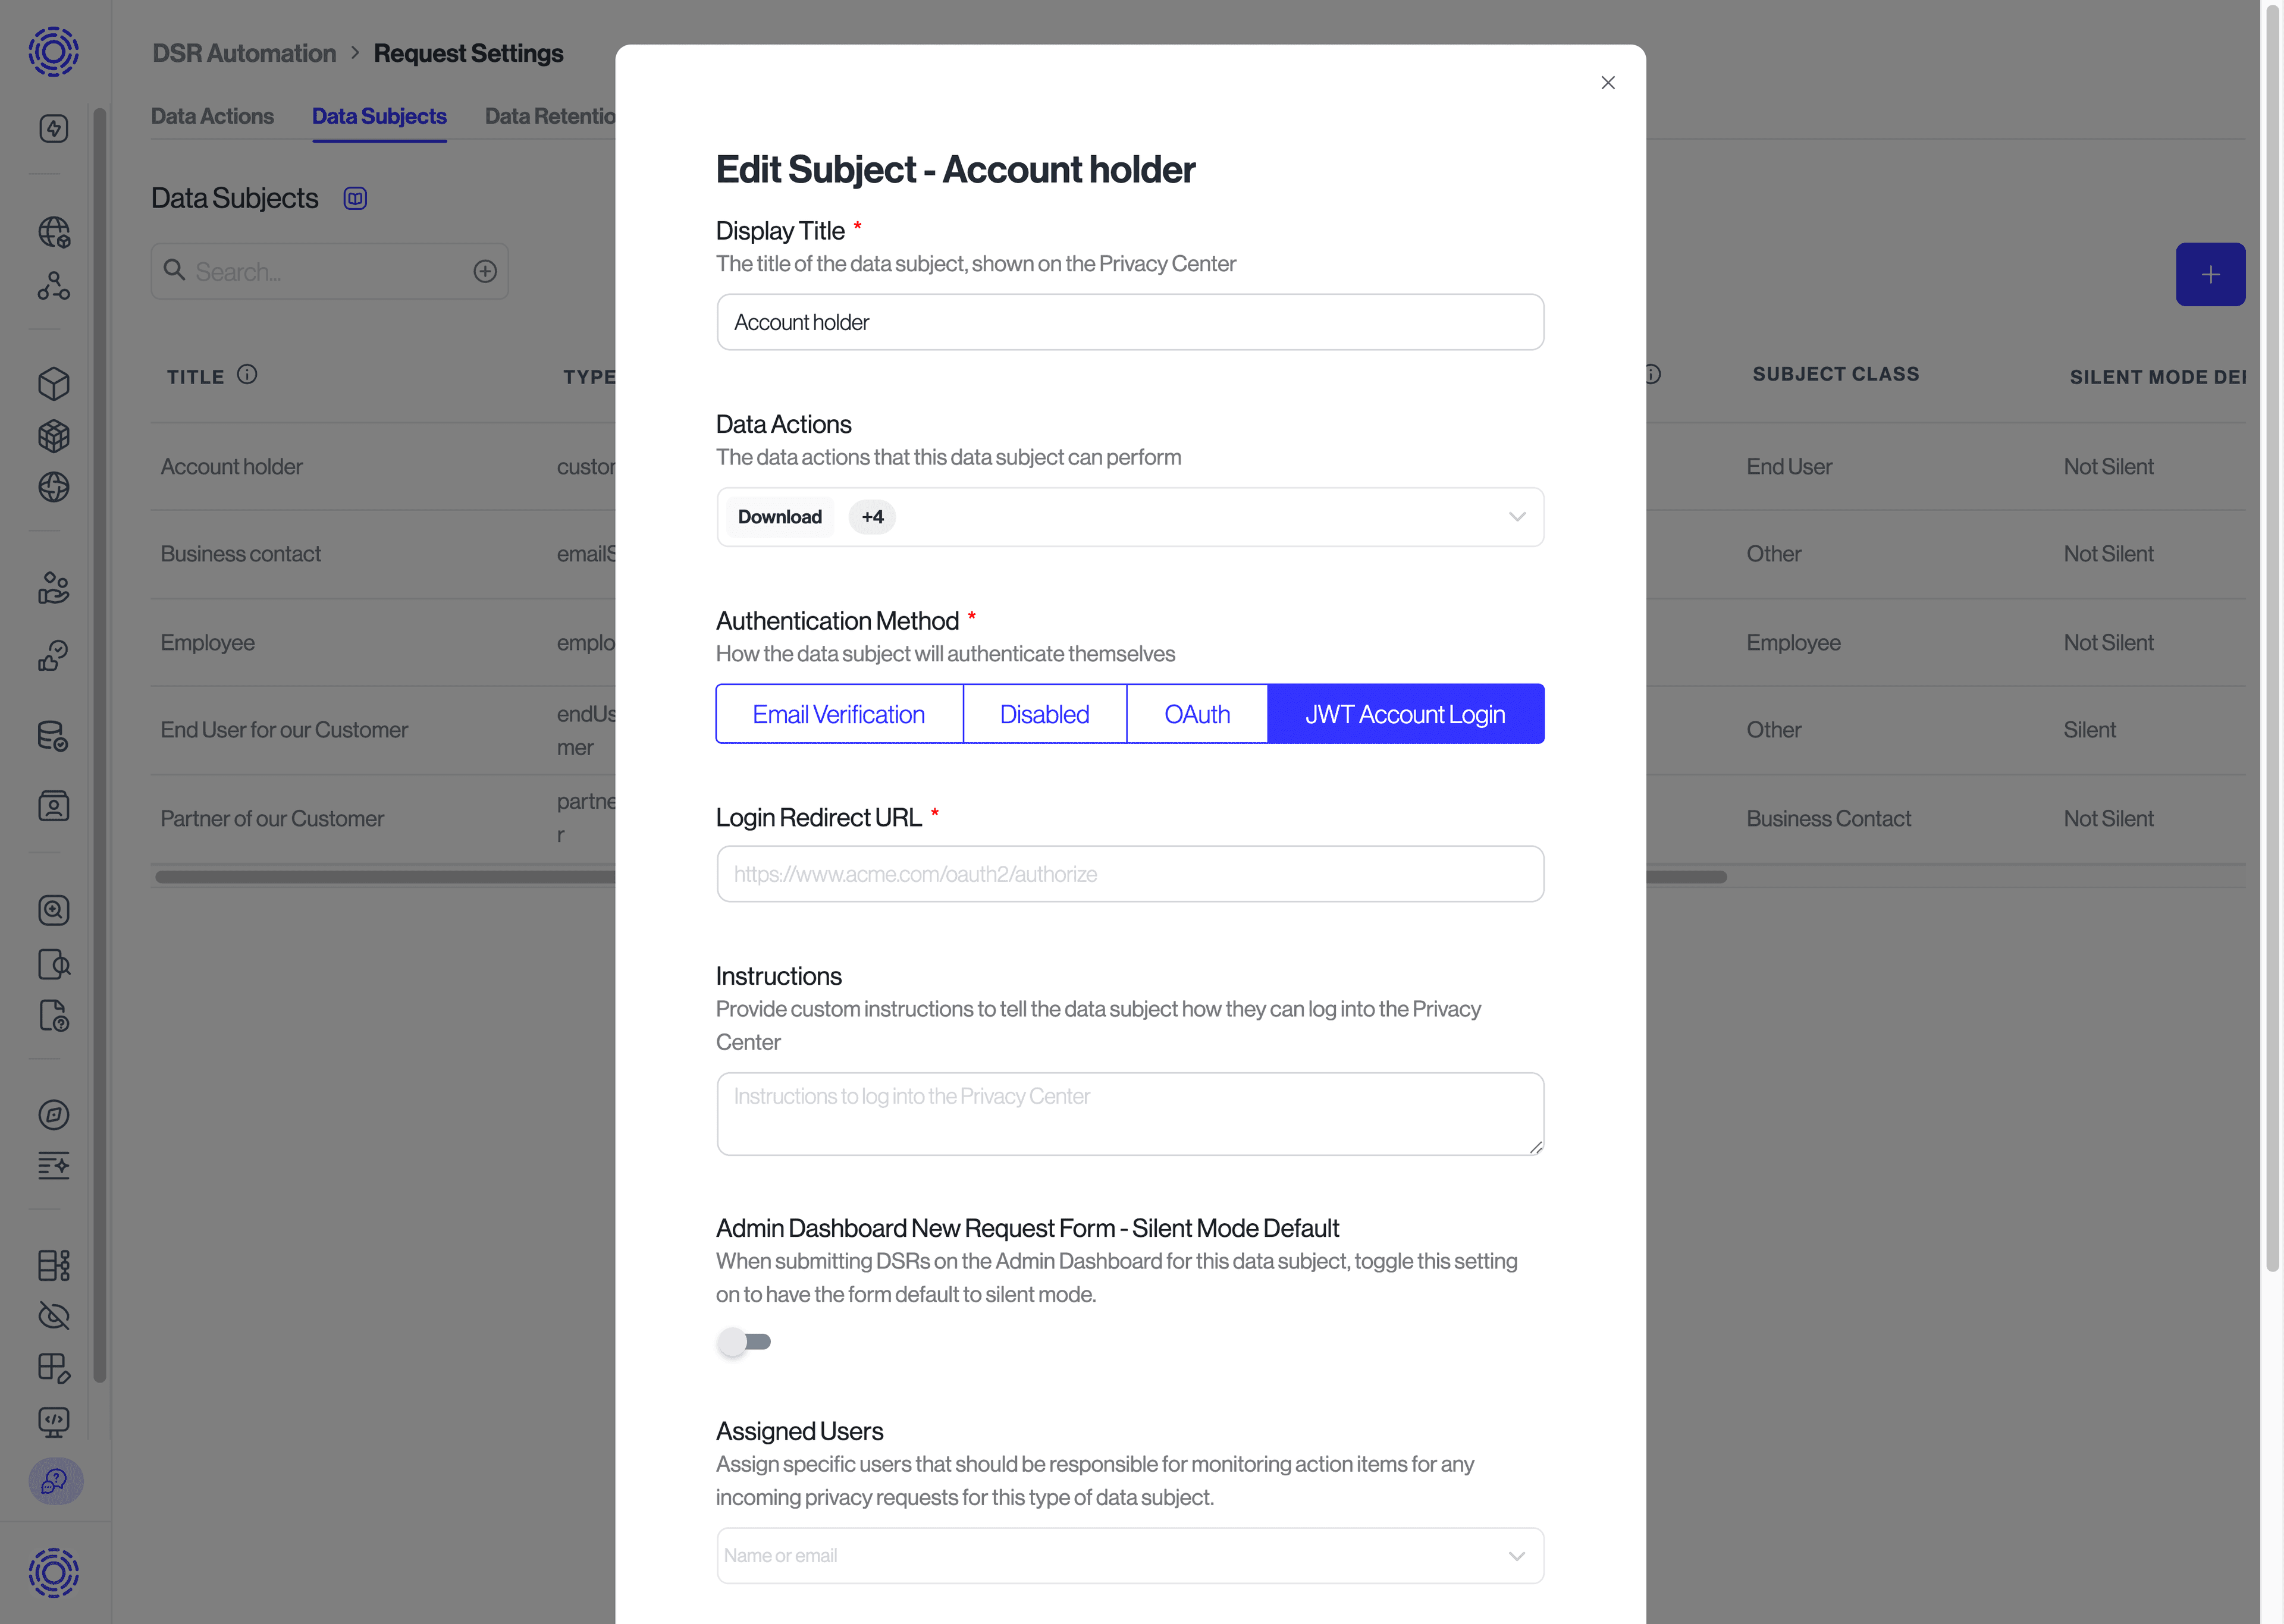
Once new authentication methods are configured, they can be enabled for specific Data Subjects by clicking the pencil icon next to each Data Subject, and then specifying the "Authentication Method" setting. You can read more about configuring Data Subjects here.

Transcend comes pre-configured with email verification. Before a user can submit a request, they must input their email address.
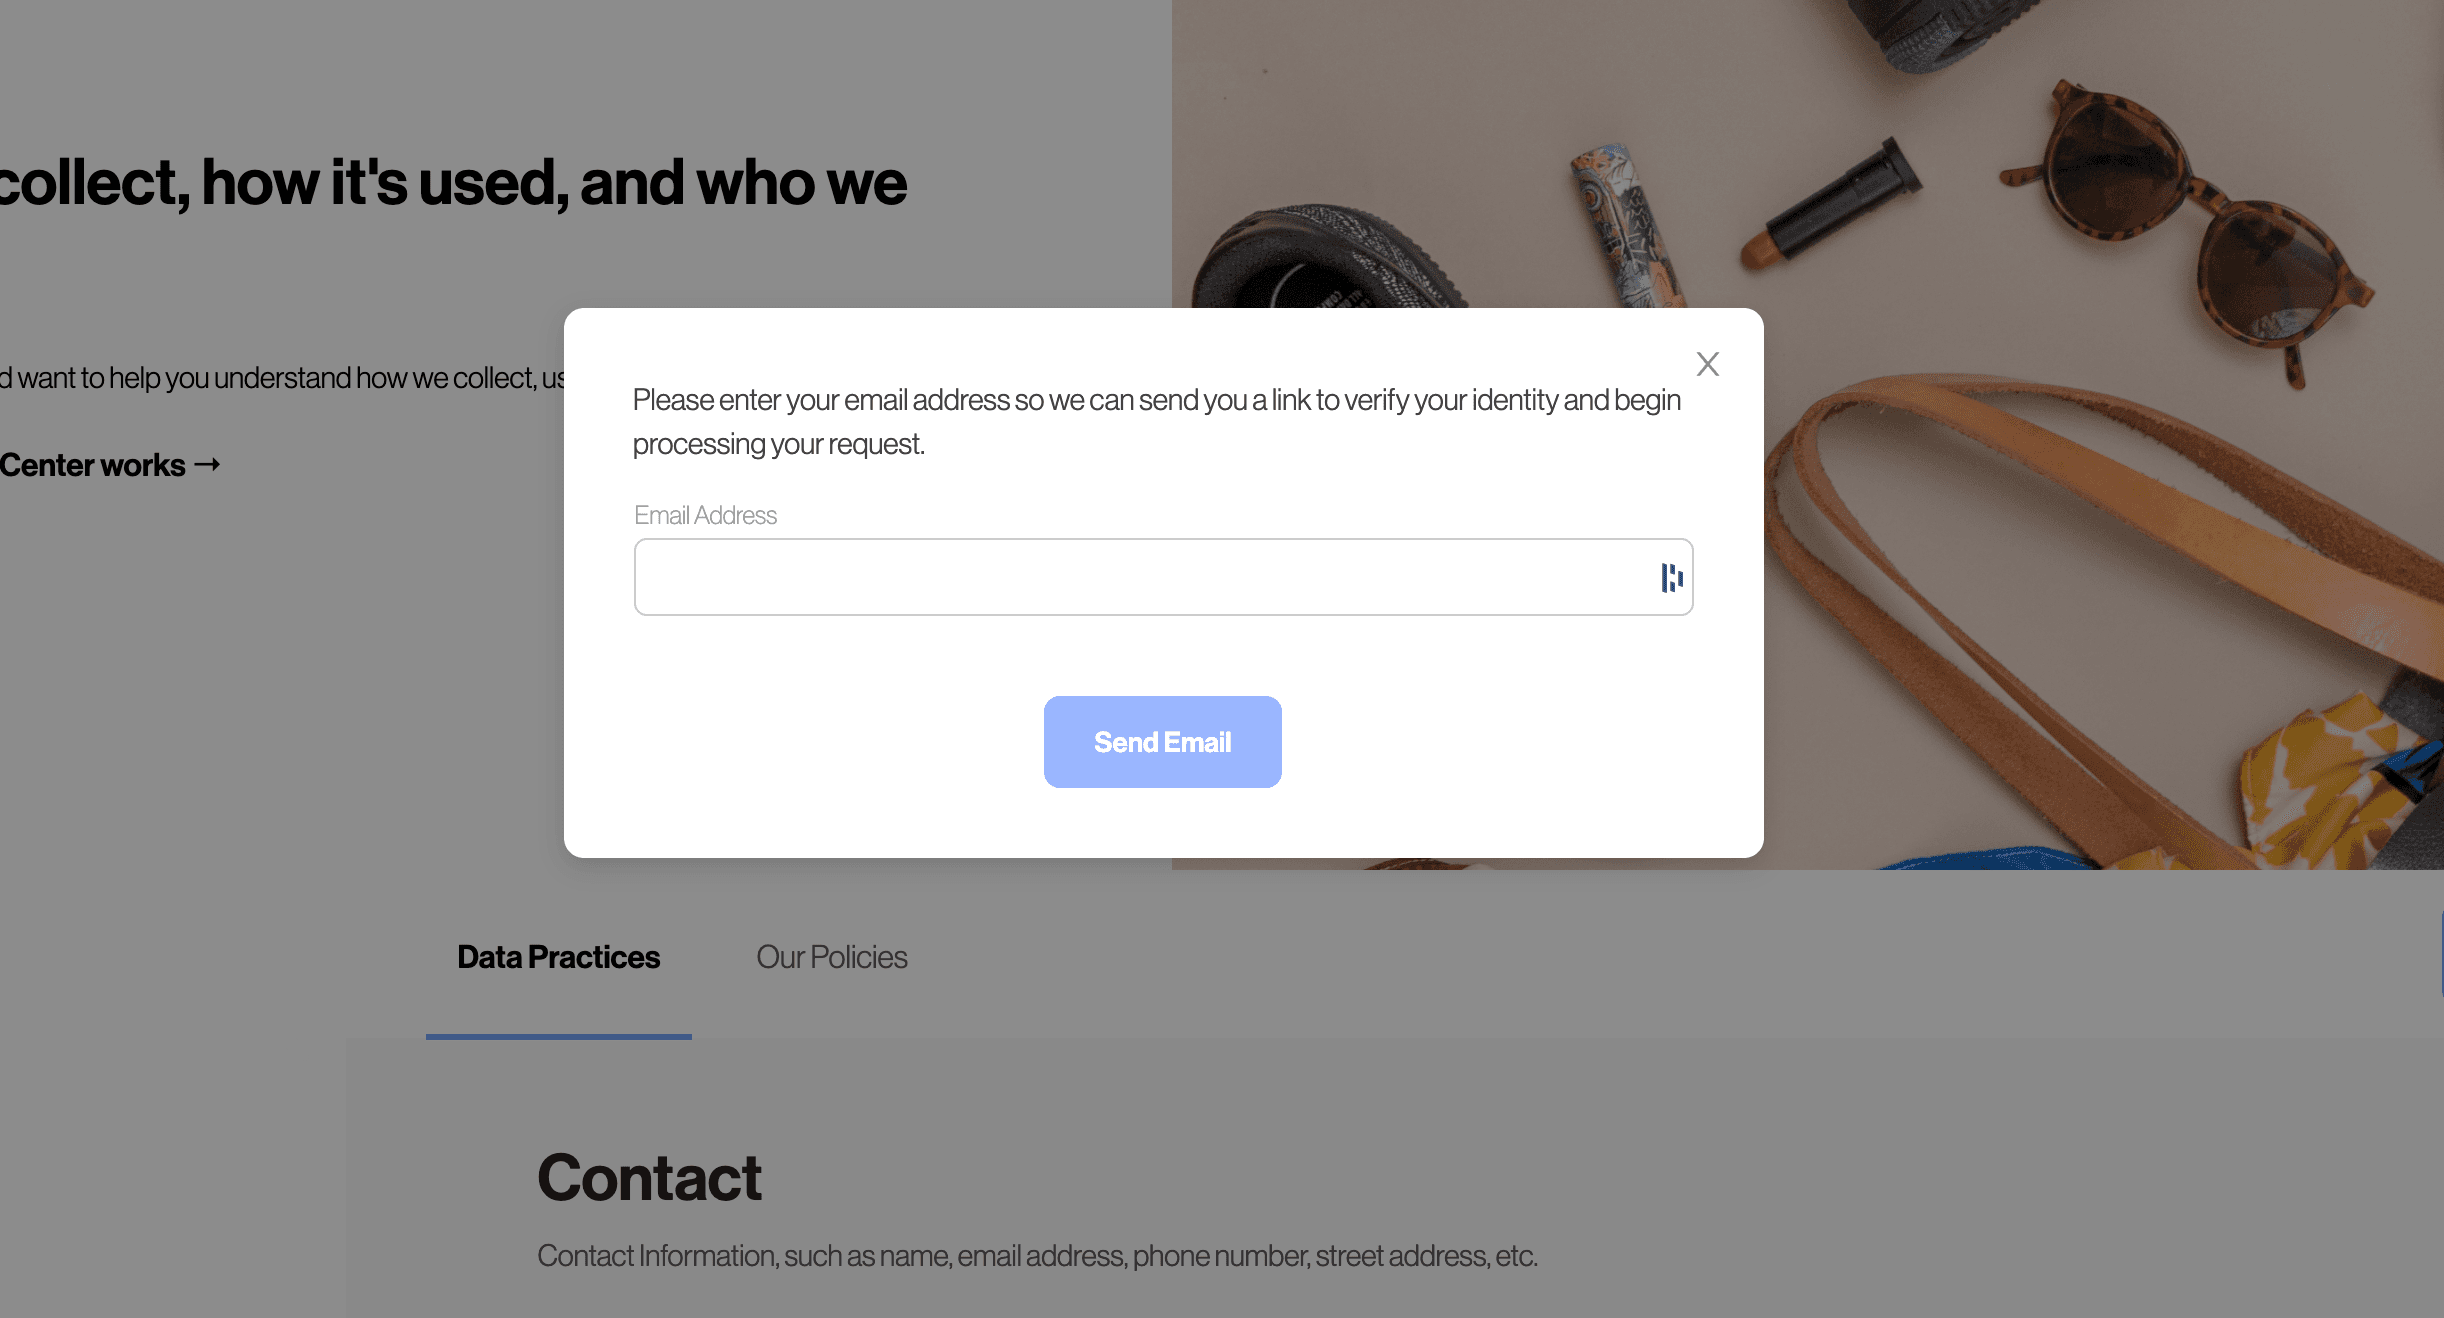
The data subject is sent an email where they are asked to click a magic link to verify their identity.

If you wish to customize the email that is sent in this verification flow, you can do so by modifying the Email Template with the title "Privacy Center Email Login".

The magic link is automatically injected into the email in a button below the email template. When the data subject clicks the link, they will be redirected into the Privacy Center with the "Core Identifier" verified as the verified email address.
Note that this email verification step on the Privacy Center happens before a DSR shows up in the Incoming Requests feed. This means all Data Subject workflows using the "Email" authentication method will have their emails pre-verified. When using Transcend's DSR API or when Manually submitting a Data Subject Request through the Admin Dashboard, there is a separate Email Verification Preflight Check that can be configured.
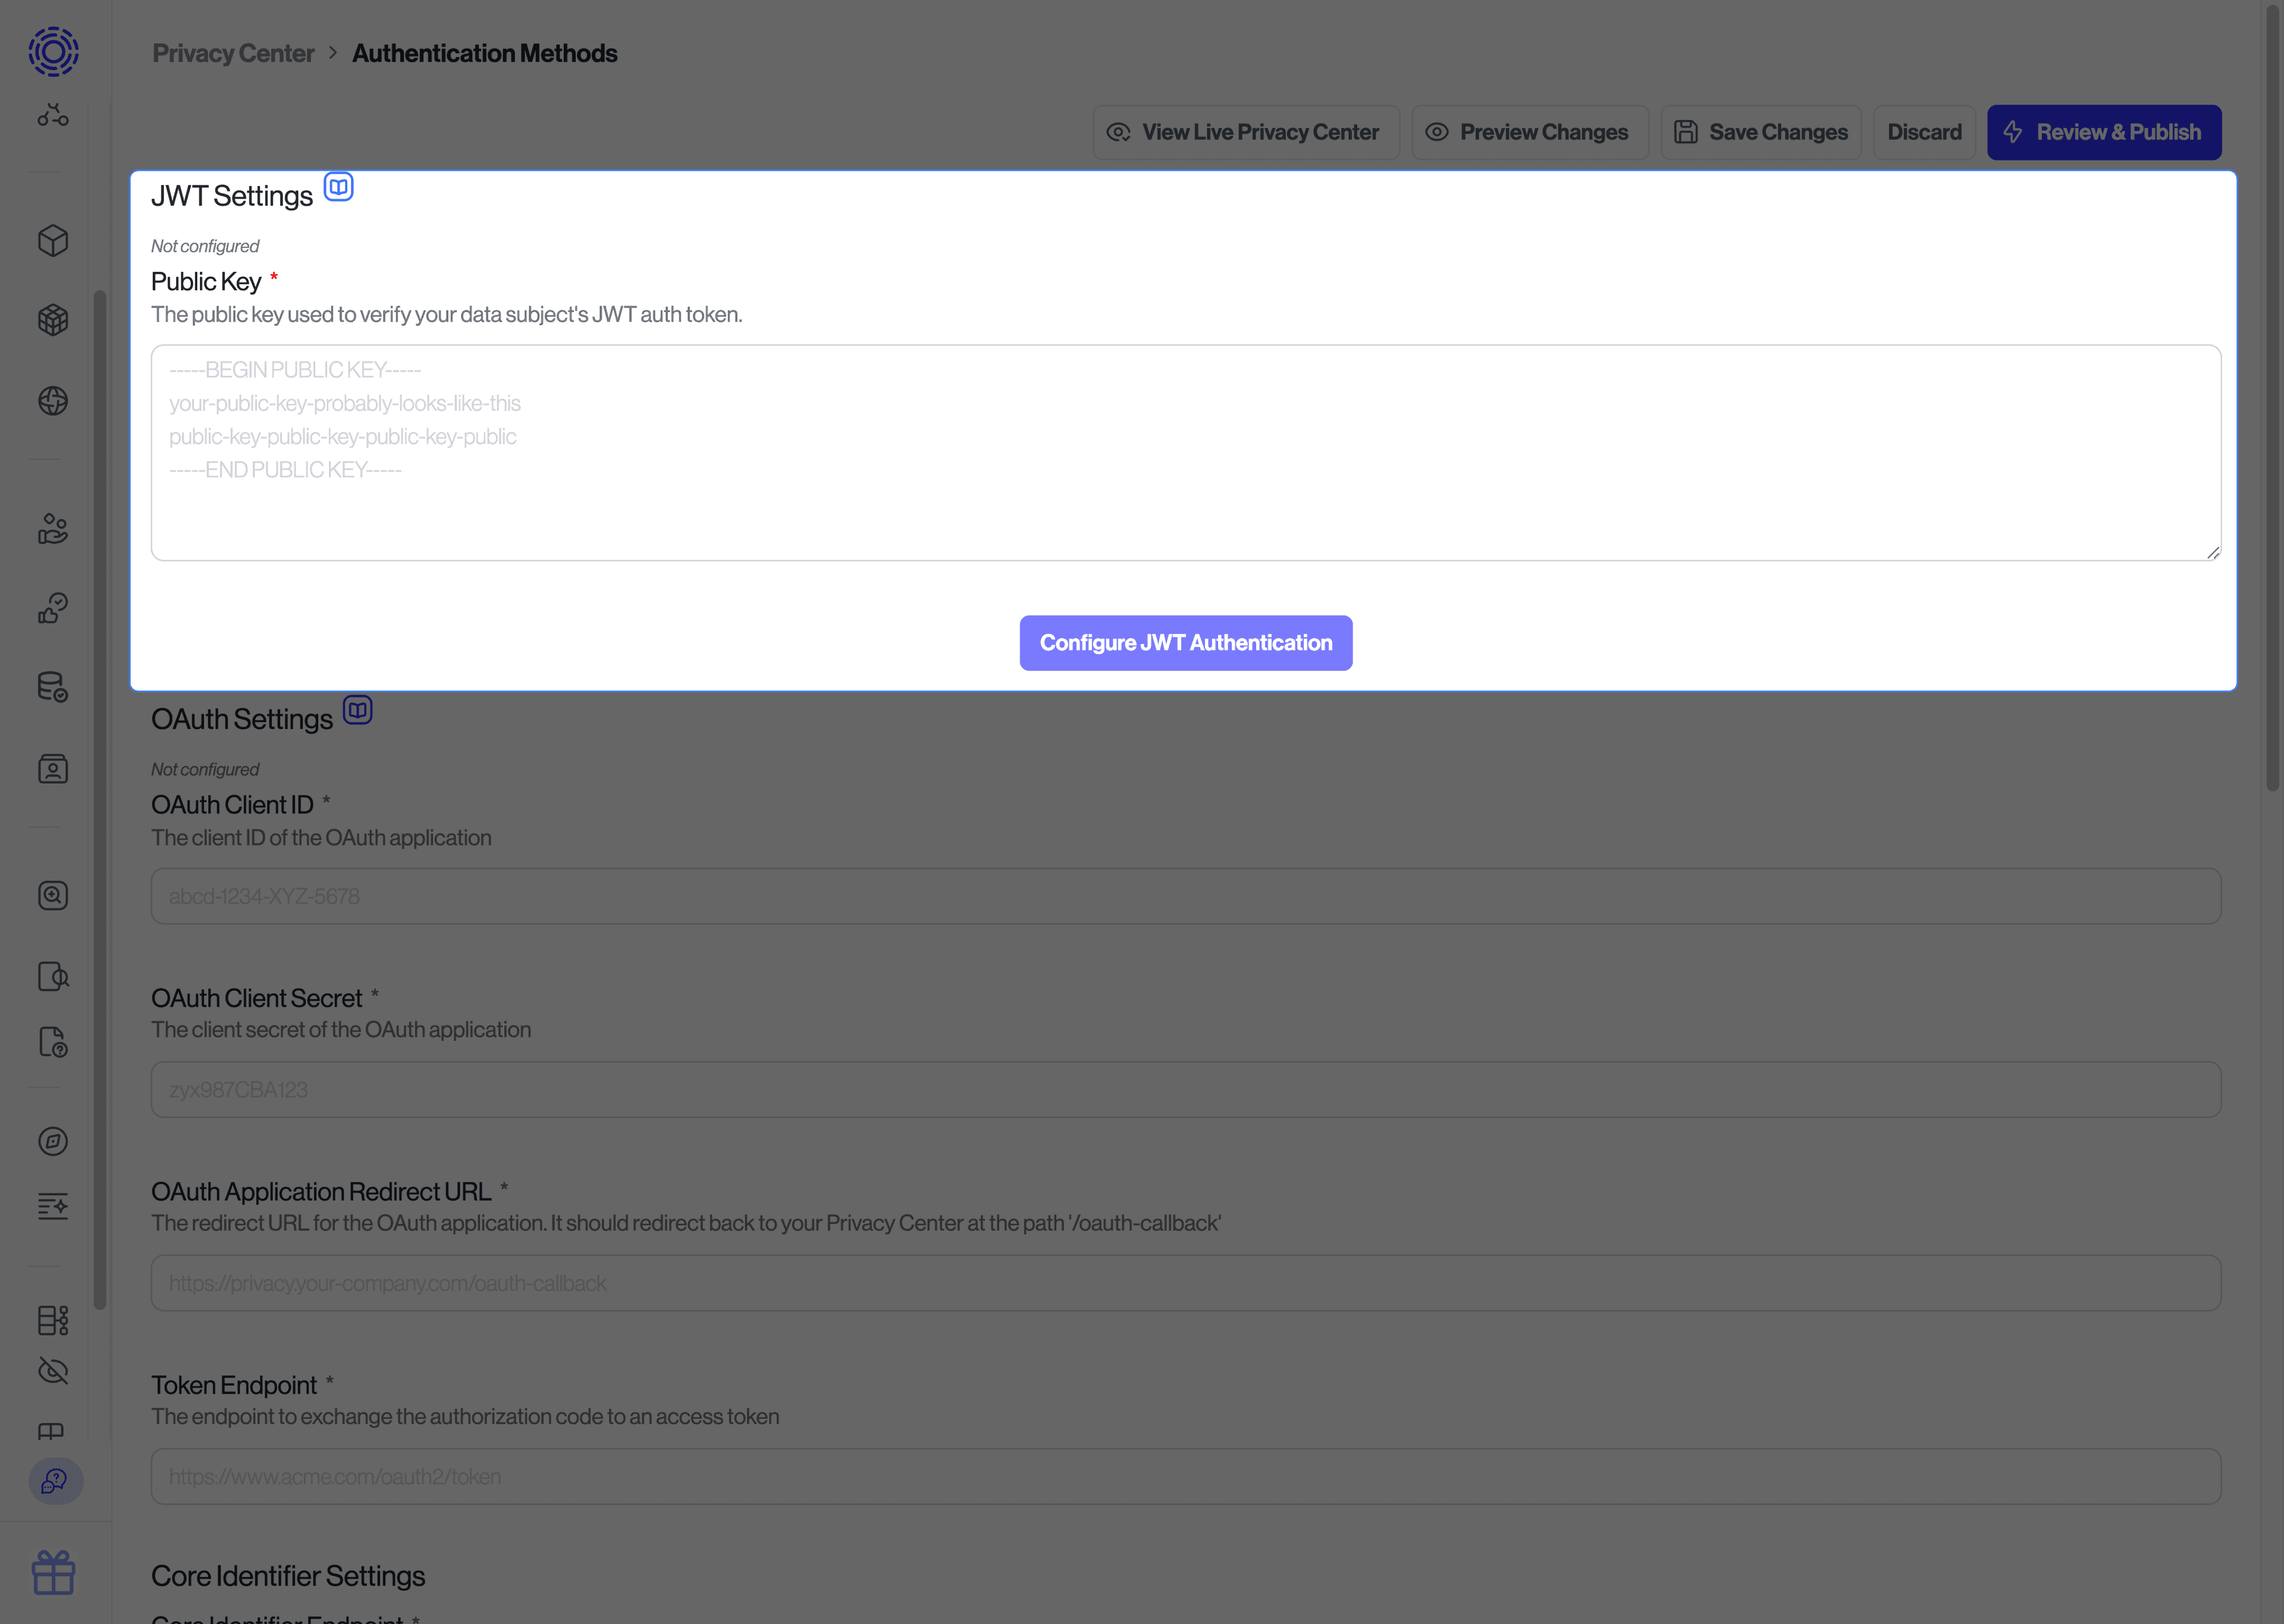
If you have end-users with accounts, it's best to have them prove they can sign in to their account. Transcend supports asymmetrically-signed JSON Web Tokens as a form of authentication to the Privacy Center. To support this form of authentication, you will need to host an endpoint on your authentication service that can check a user's session and redirect back to your Privacy Center.
- Data subject is redirected from your Privacy Center to your backend API.
- If the data subject has an active valid session, your backend API redirects the user back to the Privacy Center with a JSON Web Token (signed with your private key) containing the core identifier for that user.
- If the data subject has no active session, redirect them through their account login and then back to the JSON Web Token endpoint.
- Sombra™ will validate the JSON Web Token using the
public key associated with the private key used to sign the JWT.
To set up JWT account login, visit the "Request Settings" page. There is a section for "Authentication Methods > JWT" where you can set the public key that Sombra will use to validate the session JWT.
Read more on how to write the endpoint on your backend here.
If you are self-hosting Sombra, you will need to provide this public key in the environment variables for your Sombra gateway as described here.
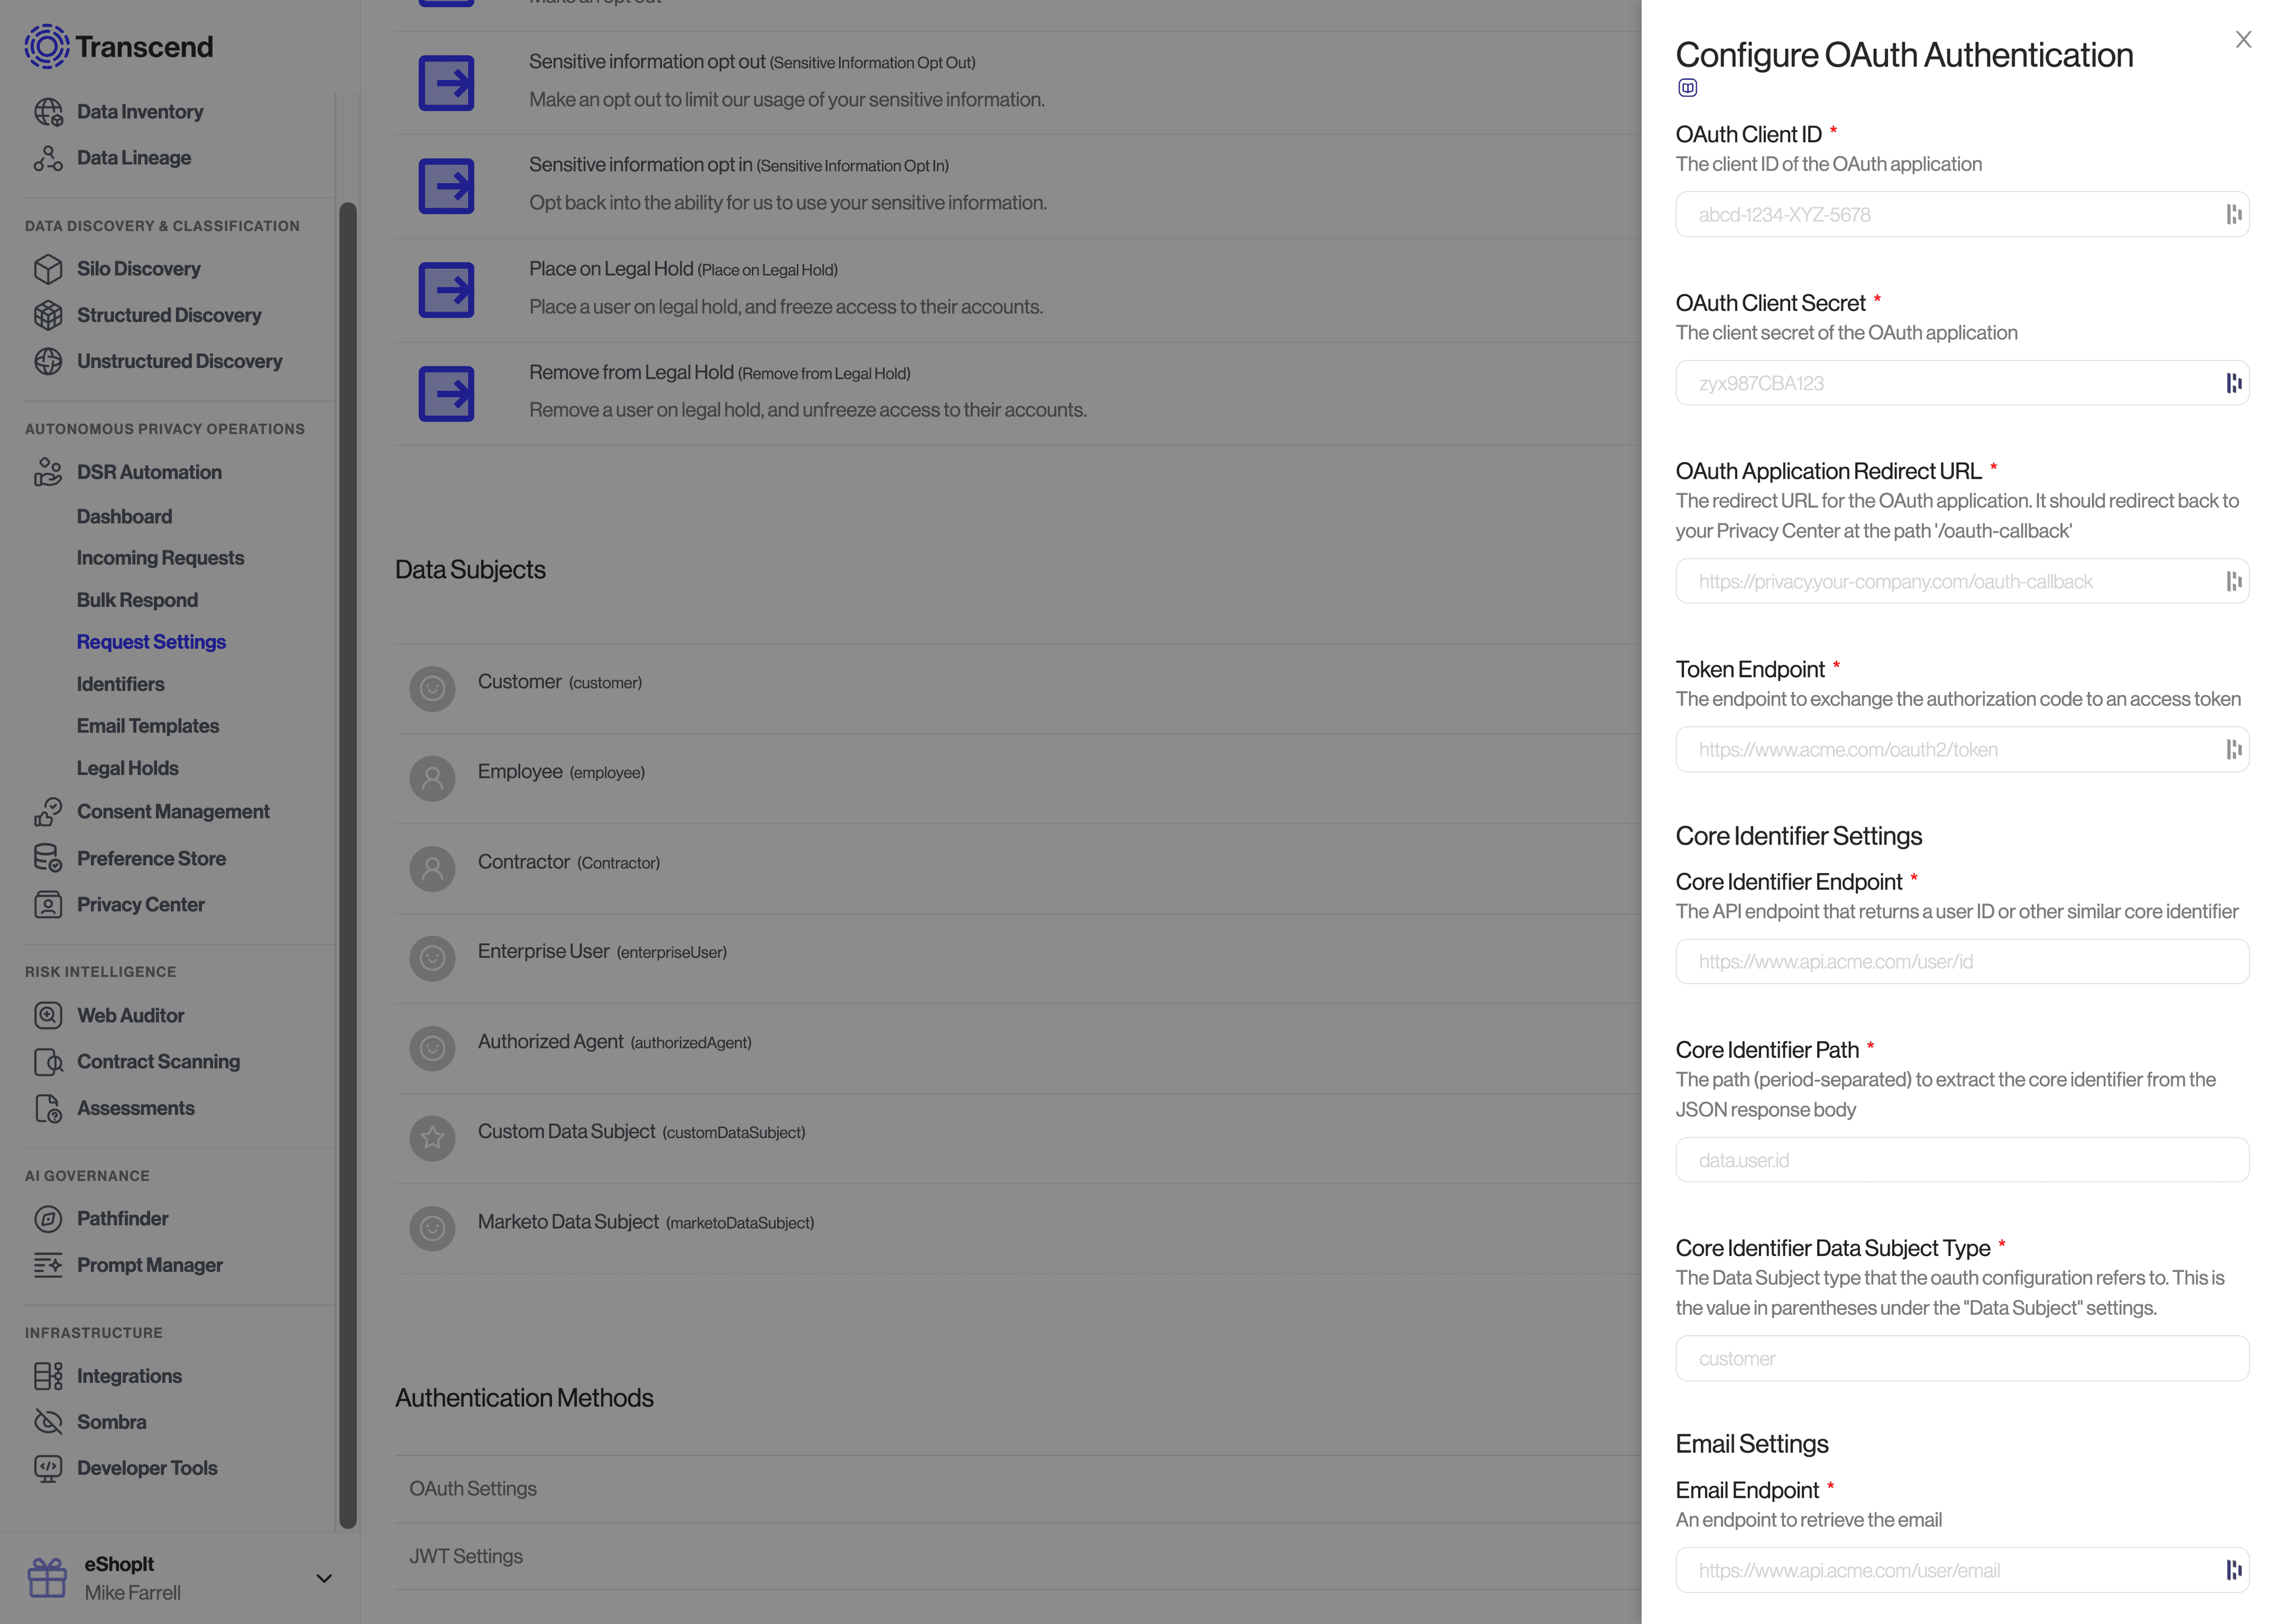
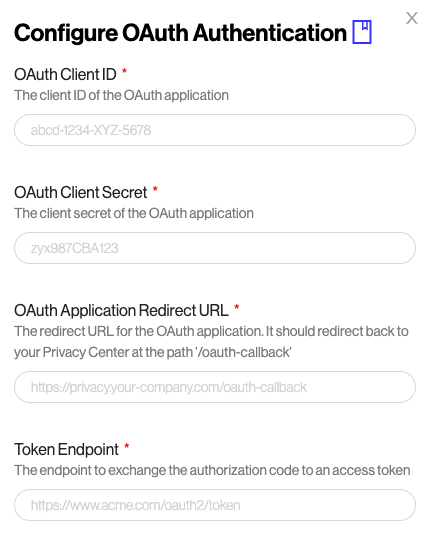
If you have the ability to create OAuth 2 applications, such as with a CIAM provide like Auth0 or Amazon Cognito, you can create an application for your Privacy Center to allow data subjects to log in with their account. The application will only need permission to receive the email address associated with the user.
OAuth 2 verification is performed with Sombra (End-to-End Encryption) meaning you don't have to trust Transcend to authenticate the user.
If you already have OAuth 2, just register a new application on your side (you can call it "Transcend Privacy Center"), and then input the needed Client ID, scopes, etc. in the "Request Settings" settings page, under "Authentication Methods > OAuth".
If you are self-hosting Sombra, you will need to provide the OAuth configuration settings in the environment variables for your Sombra gateway as described here.