Trigger a Custom Function with Rules Automation
Use Rules Automation to run a published General Custom Function when an inbound webhook arrives or on a schedule (Cron job).
Custom functions must be triggered either by DSR or a Rules Automation trigger. This guide walks through triggering a Custom Function with Rules Automation.
- Ensure Rules Automation is enabled for the organization and that the
Manage Rulesscope is granted. - The Custom Functions tooling is available for creating and publishing a General function.
- A single-tenant Sombra is selected for the Custom Function (Sombra is configured on the function, not on the rule).
- For webhook triggers, configure either Basic authentication with a shared secret or hash-based message authentication code (HMAC) verification. This guide uses HMAC.
- Create a General Custom Function in the Custom Functions library and publish it.
- Create a Rules Automation rule and set the action to the published Custom Function.
- Activate the rule. Webhook ingestion only resolves Active rules.
- When the trigger fires, Transcend queues the run and then executes the active version of the function on the configured Sombra.
- For webhook triggers, a
200response means the webhook was accepted for asynchronous processing (not that the function has finished).
For an inbound webhook, the parsed JSON request body is available as payload.customInput. Transcend also adds a generated coreIdentifier used for internal correlation.
{
  "customInput": {
    "hello": "world"
  },
  "coreIdentifier": {
    "name": "<generated>",
    "value": "<generated>"
  }
}
For a scheduled rule, payload.customInput is null. Do not rely on the exact generated coreIdentifier values.
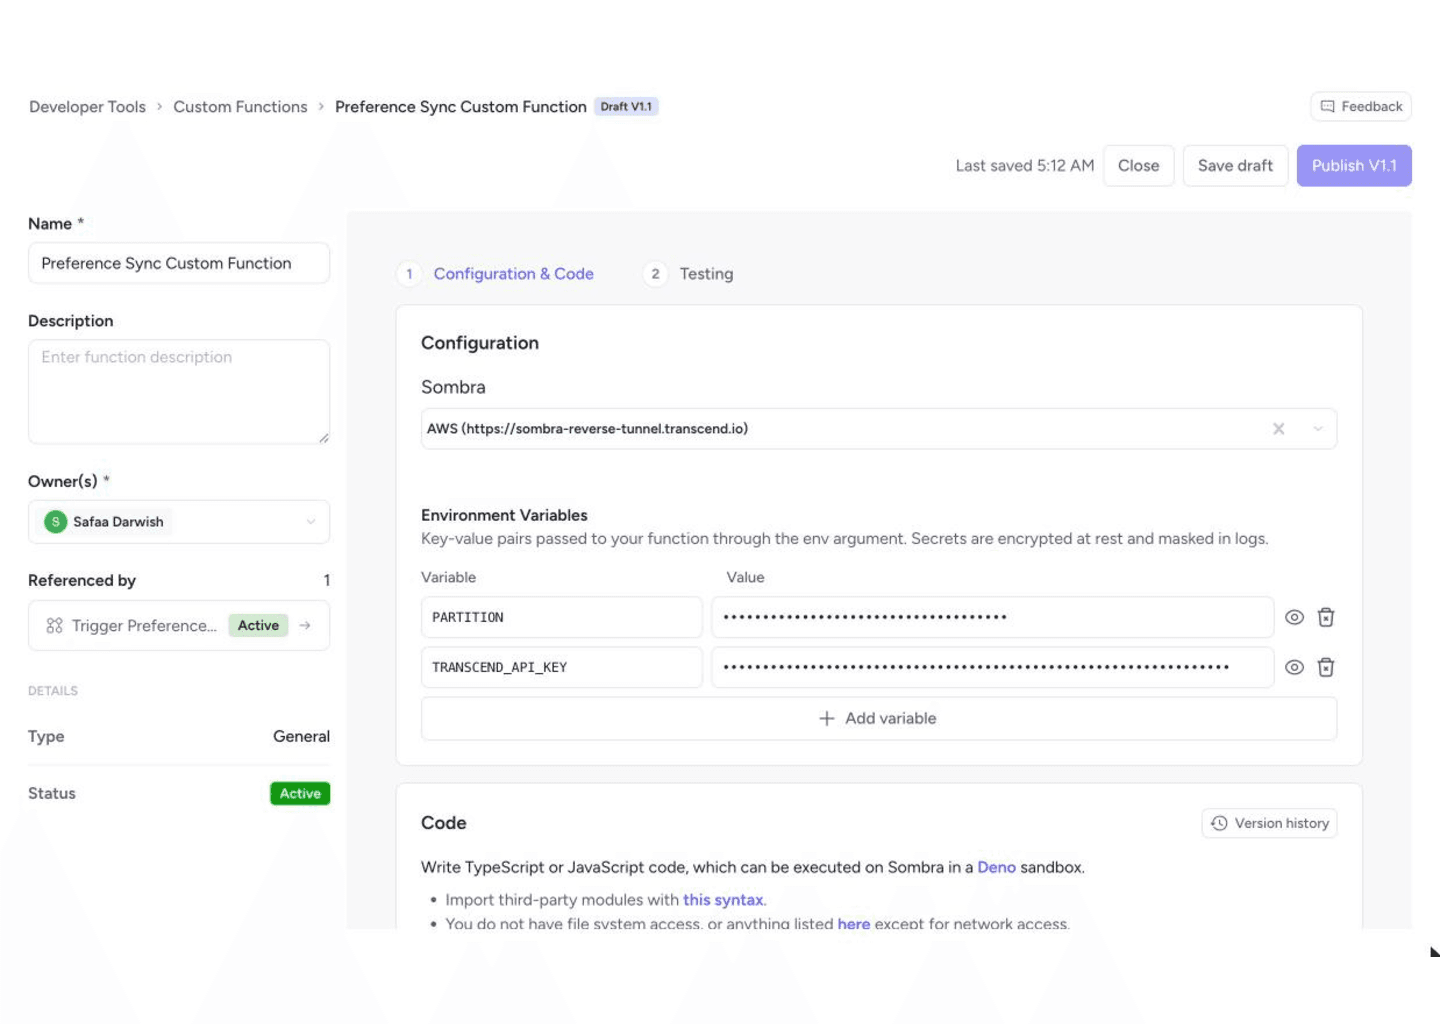
Rules Automation custom function actions use a General custom function. In the function editor, implement export default and configure environment variables in the function's Environment Variables tab.
// deno-lint-ignore require-await
export default async function handler({
  payload,
}: CustomFunction.GeneralArgument): Promise<void> {
  console.info('Custom input:', payload.customInput);
}
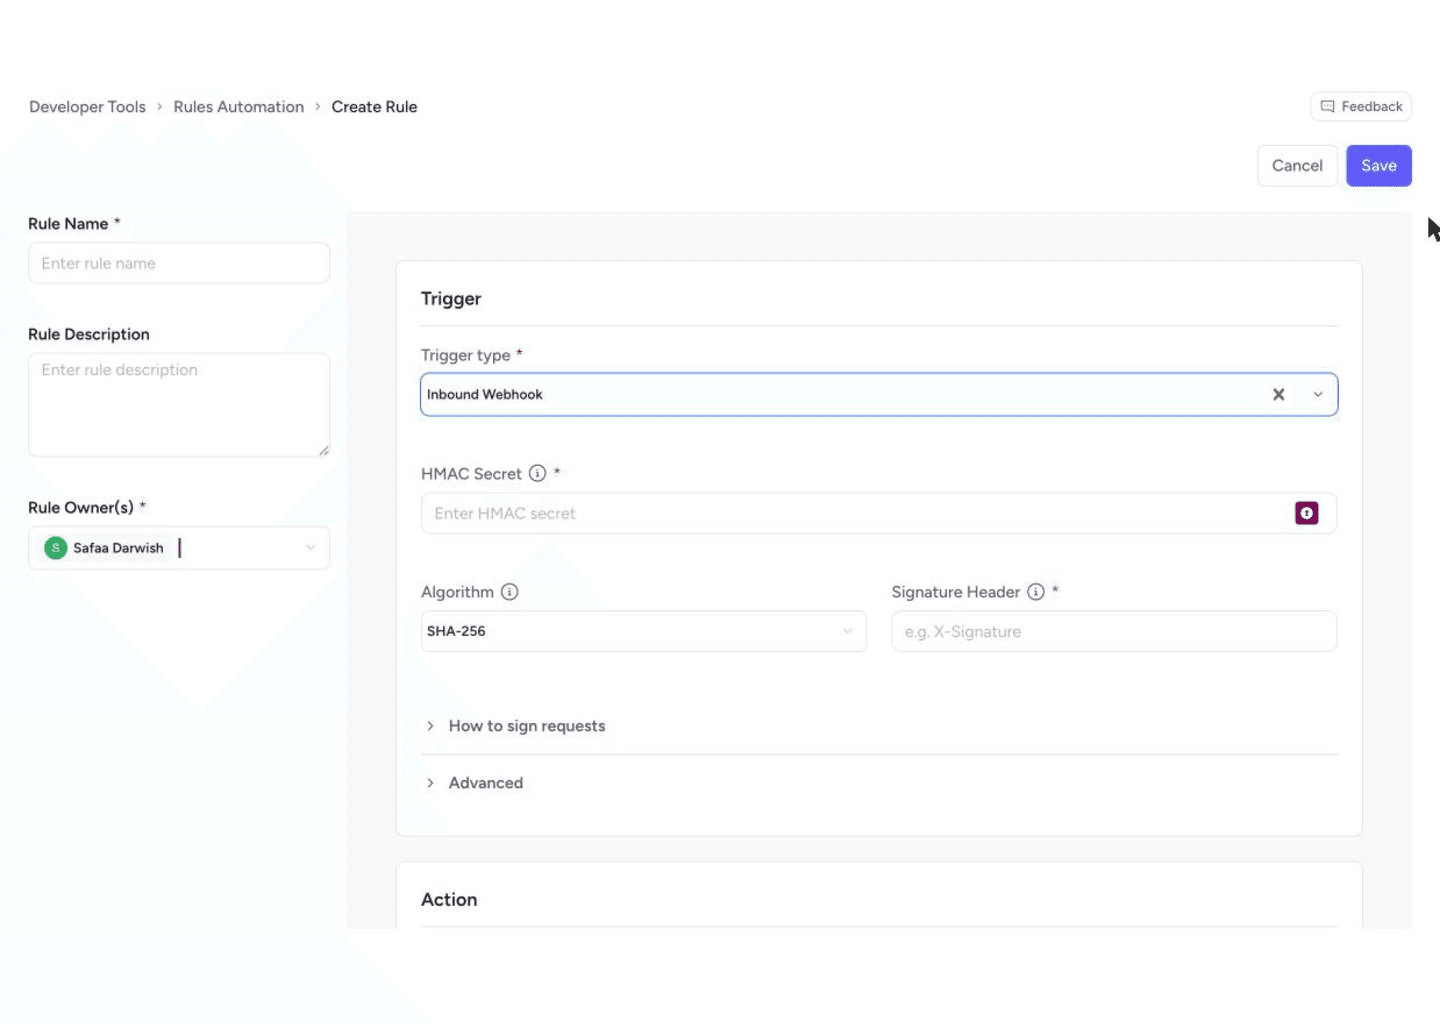
In the Admin Dashboard, go to Developer Tools → Rules Automation → Rules, and create (or edit) a rule. Fill in the rule title and owners, then configure the trigger and the action.
For HMAC authentication, configure the algorithm, signature header, and optional timestamp header and signed-message template in the rule wizard. Save the rule to reveal the webhook URL ending in /api/v1/webhooks/<webhook-id>.
For schedule triggers, set Starts at least 2 minutes in the future and choose Repeat (Daily, Weekly, Monthly, Yearly, or a custom interval). The picker defaults to a later start time to leave setup room. Scheduled rules do not expose an inbound webhook URL.
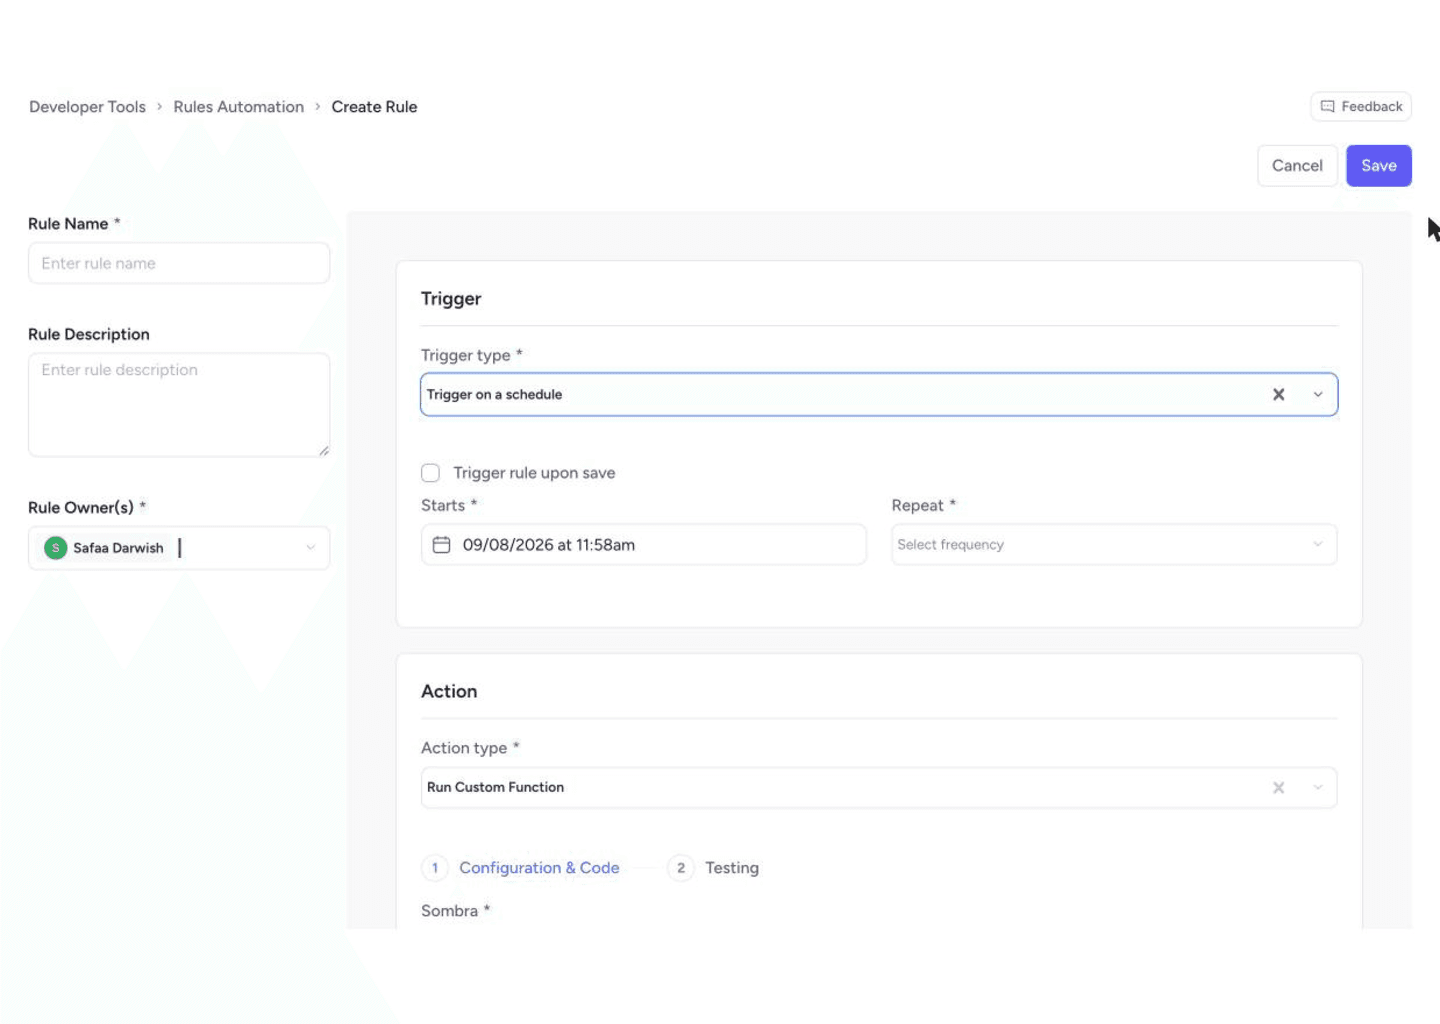
In the action configuration, select the published General Custom Function. Do not paste code into the rule; code and environment variables live in the function editor.
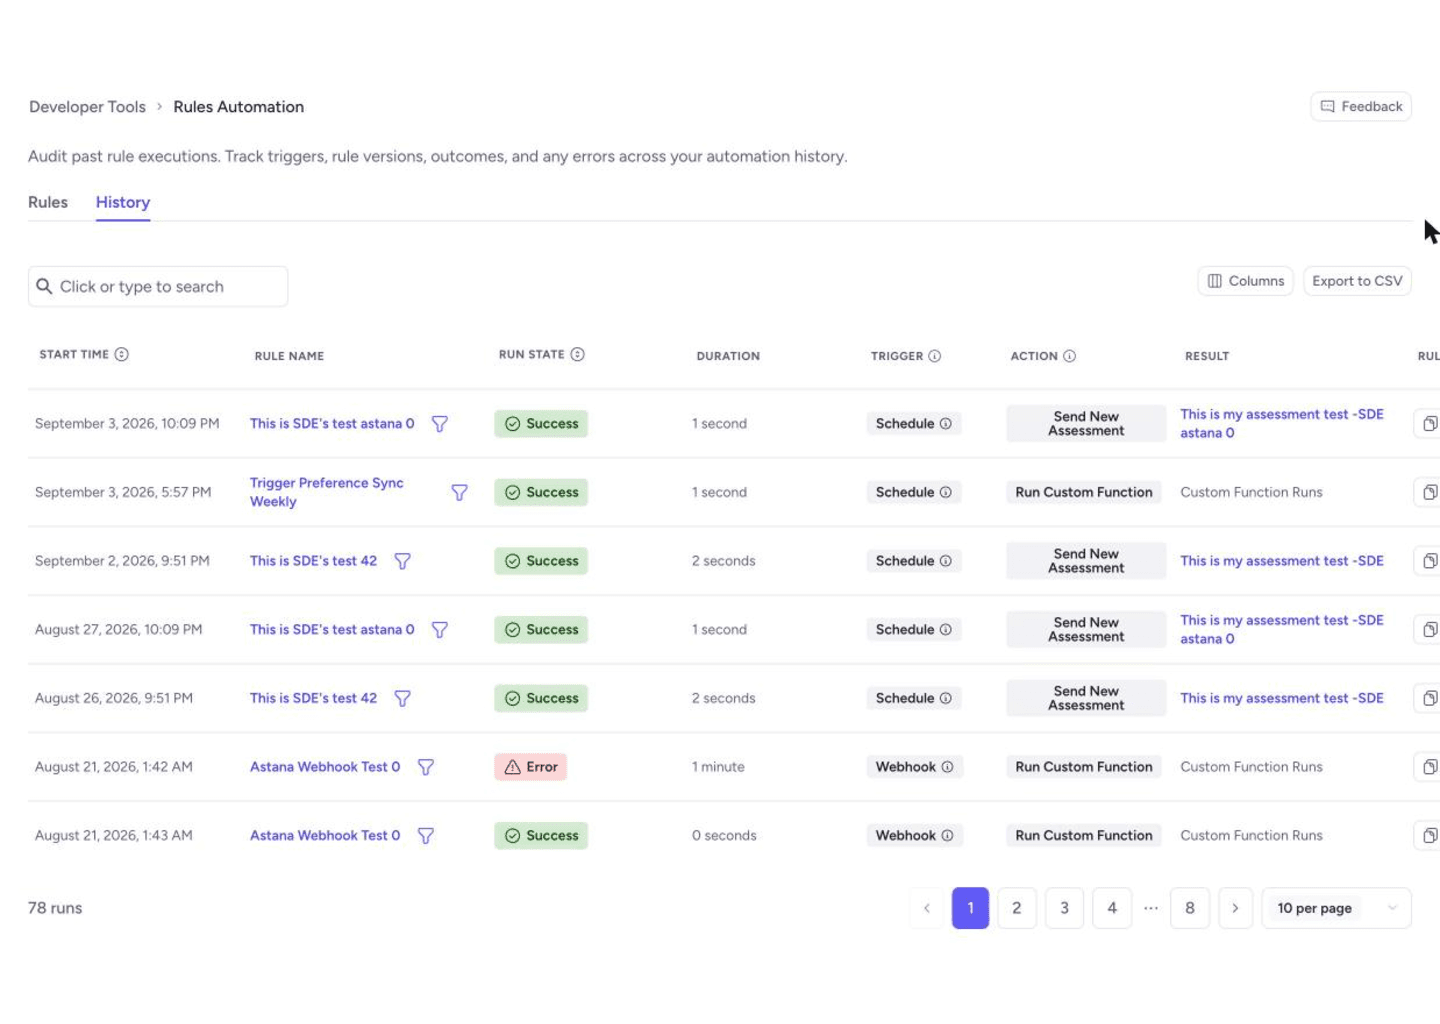
For webhook rules, send a signed POST request. Then check the rule's History (for execution outcomes) and the Custom Function's runs/logs (for console output).
When HMAC is selected, callers must sign the exact raw request body according to the configured algorithm and signed-message template, then send the digest in the configured Signature Header. The example below signs the raw body with SHA-256 and sends a hexadecimal digest in X-Signature. Replace WEBHOOK_URL with the URL shown after the rule is saved.
SECRET='your-hmac-secret'
BODY='{"hello":"world"}'
SIG=$(printf '%s' "$BODY" | openssl dgst -sha256 -hmac "$SECRET" | awk '{print $2}')

curl -sS -X POST "$WEBHOOK_URL" \
  -H "Content-Type: application/json" \
  -H "X-Signature: $SIG" \
  --data-binary "$BODY"
For Stripe-style signing that includes a timestamp, configure Timestamp Header and Signed Message Template under Advanced in the rule's trigger configuration.
- 200: accepted for async processing (function runs after this response).
- 401: webhook authentication failed.
- 404: webhook ID not found or the rule is not Active.
- 429: rate limit exceeded (check the Retry-After header).