Adding, Revoking, & Auto-Provisioning Access
Within your Transcend instance, you can manually add new users from within the platform. To do this:
- Navigate to the Administration page > Users tab in your desired Transcend instance
- Click the "+" button (located next to the search box on the right side)
- In the Add User modal, provide the details in the form, including:
- whether an email notification should be sent upon account creation
- user's full name
- determination of whether they will be an administrator for the instance
- any team(s) the user may be part of; and
- any additional scopes (not already covered by their assigned team(s)) the user should have
- When finished, click the "Add User" button at the bottom of the modal. A "Successfully added!" confirmation message should be displayed below the button, and you may now close the modal.
- Confirm the new user is listed in the Users table.
Important: If you plan to utilize SSO in the future, please ensure the email address used during this process is the same email address associated with their SSO account
At some point it may become necessary to revoke access to a user's account in Transcend, whether that's deleting / deactivating the account or simply disabling it.
If you need to completely revoke access of a user in your Transcend instance, you can click the trash icon next to the selected user on the Administration → Users tab. If you are using Single Sign On, the easiest way to revoke access is to deactivate the user within your single sign on provider. This will prevent the user from having the ability to log in to Transcend.
If you have a need to programmatically remove a user from Transcend, you can leverage the EU Hosting GraphQL API or US Hosting GraphQL API with the following mutation:
mutation {
  removeUser(input: { email: "INSERT_EMAIL@transcend.io" }) {
    clientMutationId
  }
}
As a CURL, this would be the following for EU hosting (default hosting option):
curl 'https://api.transcend.io/graphql' -H 'Authentication: Bearer INSERT_API_KEY' -H 'Content-Type: application/json' -H 'Accept: application/json' --data-binary '{"query":"mutation {\n removeUser(input: { email: \"INSERT_EMAIL@transcend.io\" }) {\n clientMutationId\n }\n}\n"}'or the following for US hosting option:
curl 'https://api.us.transcend.io/graphql' -H 'Authentication: Bearer INSERT_API_KEY' -H 'Content-Type: application/json' -H 'Accept: application/json' --data-binary '{"query":"mutation {\n removeUser(input: { email: \"INSERT_EMAIL@transcend.io\" }) {\n clientMutationId\n }\n}\n"}'in the commands above, please replace:
INSERT_API_KEY: a Transcend API key with the scopeManage Access ControlsINSERT_EMAIL@transcend.io: the email address of the user to remove
Removing a user's accounts may not always be the preferred option for revoking their access. You may want to bar an employee from accessing the platform if they haven't logged for a certain number of days, an extended leave of absence is upcoming, or other situations where the revocation is temporary and full access will be restored in the future. In these circumstances, it may make more sense to disable a user's account rather than removing their permissions or deleting the user account.
To disable a user account, you will need to utilize the EU Hosting GraphQL API or US Hosting GraphQL API with the following mutation:
mutation {
  disableUserAccount(id: "INSERT_TRANSCEND_USER_ID") {
    success
  }
}
For the above command, please perform the following replacements:
INSERT_TRANSCEND_USER_ID: the user ID of the user you want to disable
If you do not know the user's ID and need to obtain it, you can use the following GraphQL query to fetch the information:
query {
  users (
    filterBy: {text: "NAME_OR_EMAIL_OF_USER"}
  ) {
    nodes {
      email
      name
      id
    }
  }
}
The resulting output will be the email, name, and id of the user that contains either the name or email specified in the text area.
For the command above, please perform the following replacements:
NAME_OR_EMAIL_OF_USER: first / last name or the email address of the user as it exists in your Transcend instance
In addition to the above sections that walk through some more manual methods of adding / removing access, Transcend also offers the ability to auto-provision your users.
When one of your employees logs into Transcend for the first time using their SSO login, if you expose some certain attributes to Transcend, the employee will be assigned to the Transcend team when their account is created, thus giving them a specific set of scopes by default.
You can enable the following SSO attribute mappings
| Attribute | Transcend Mapping |
|---|---|
Employee Details.Title | title |
Employee Details.Department | department |
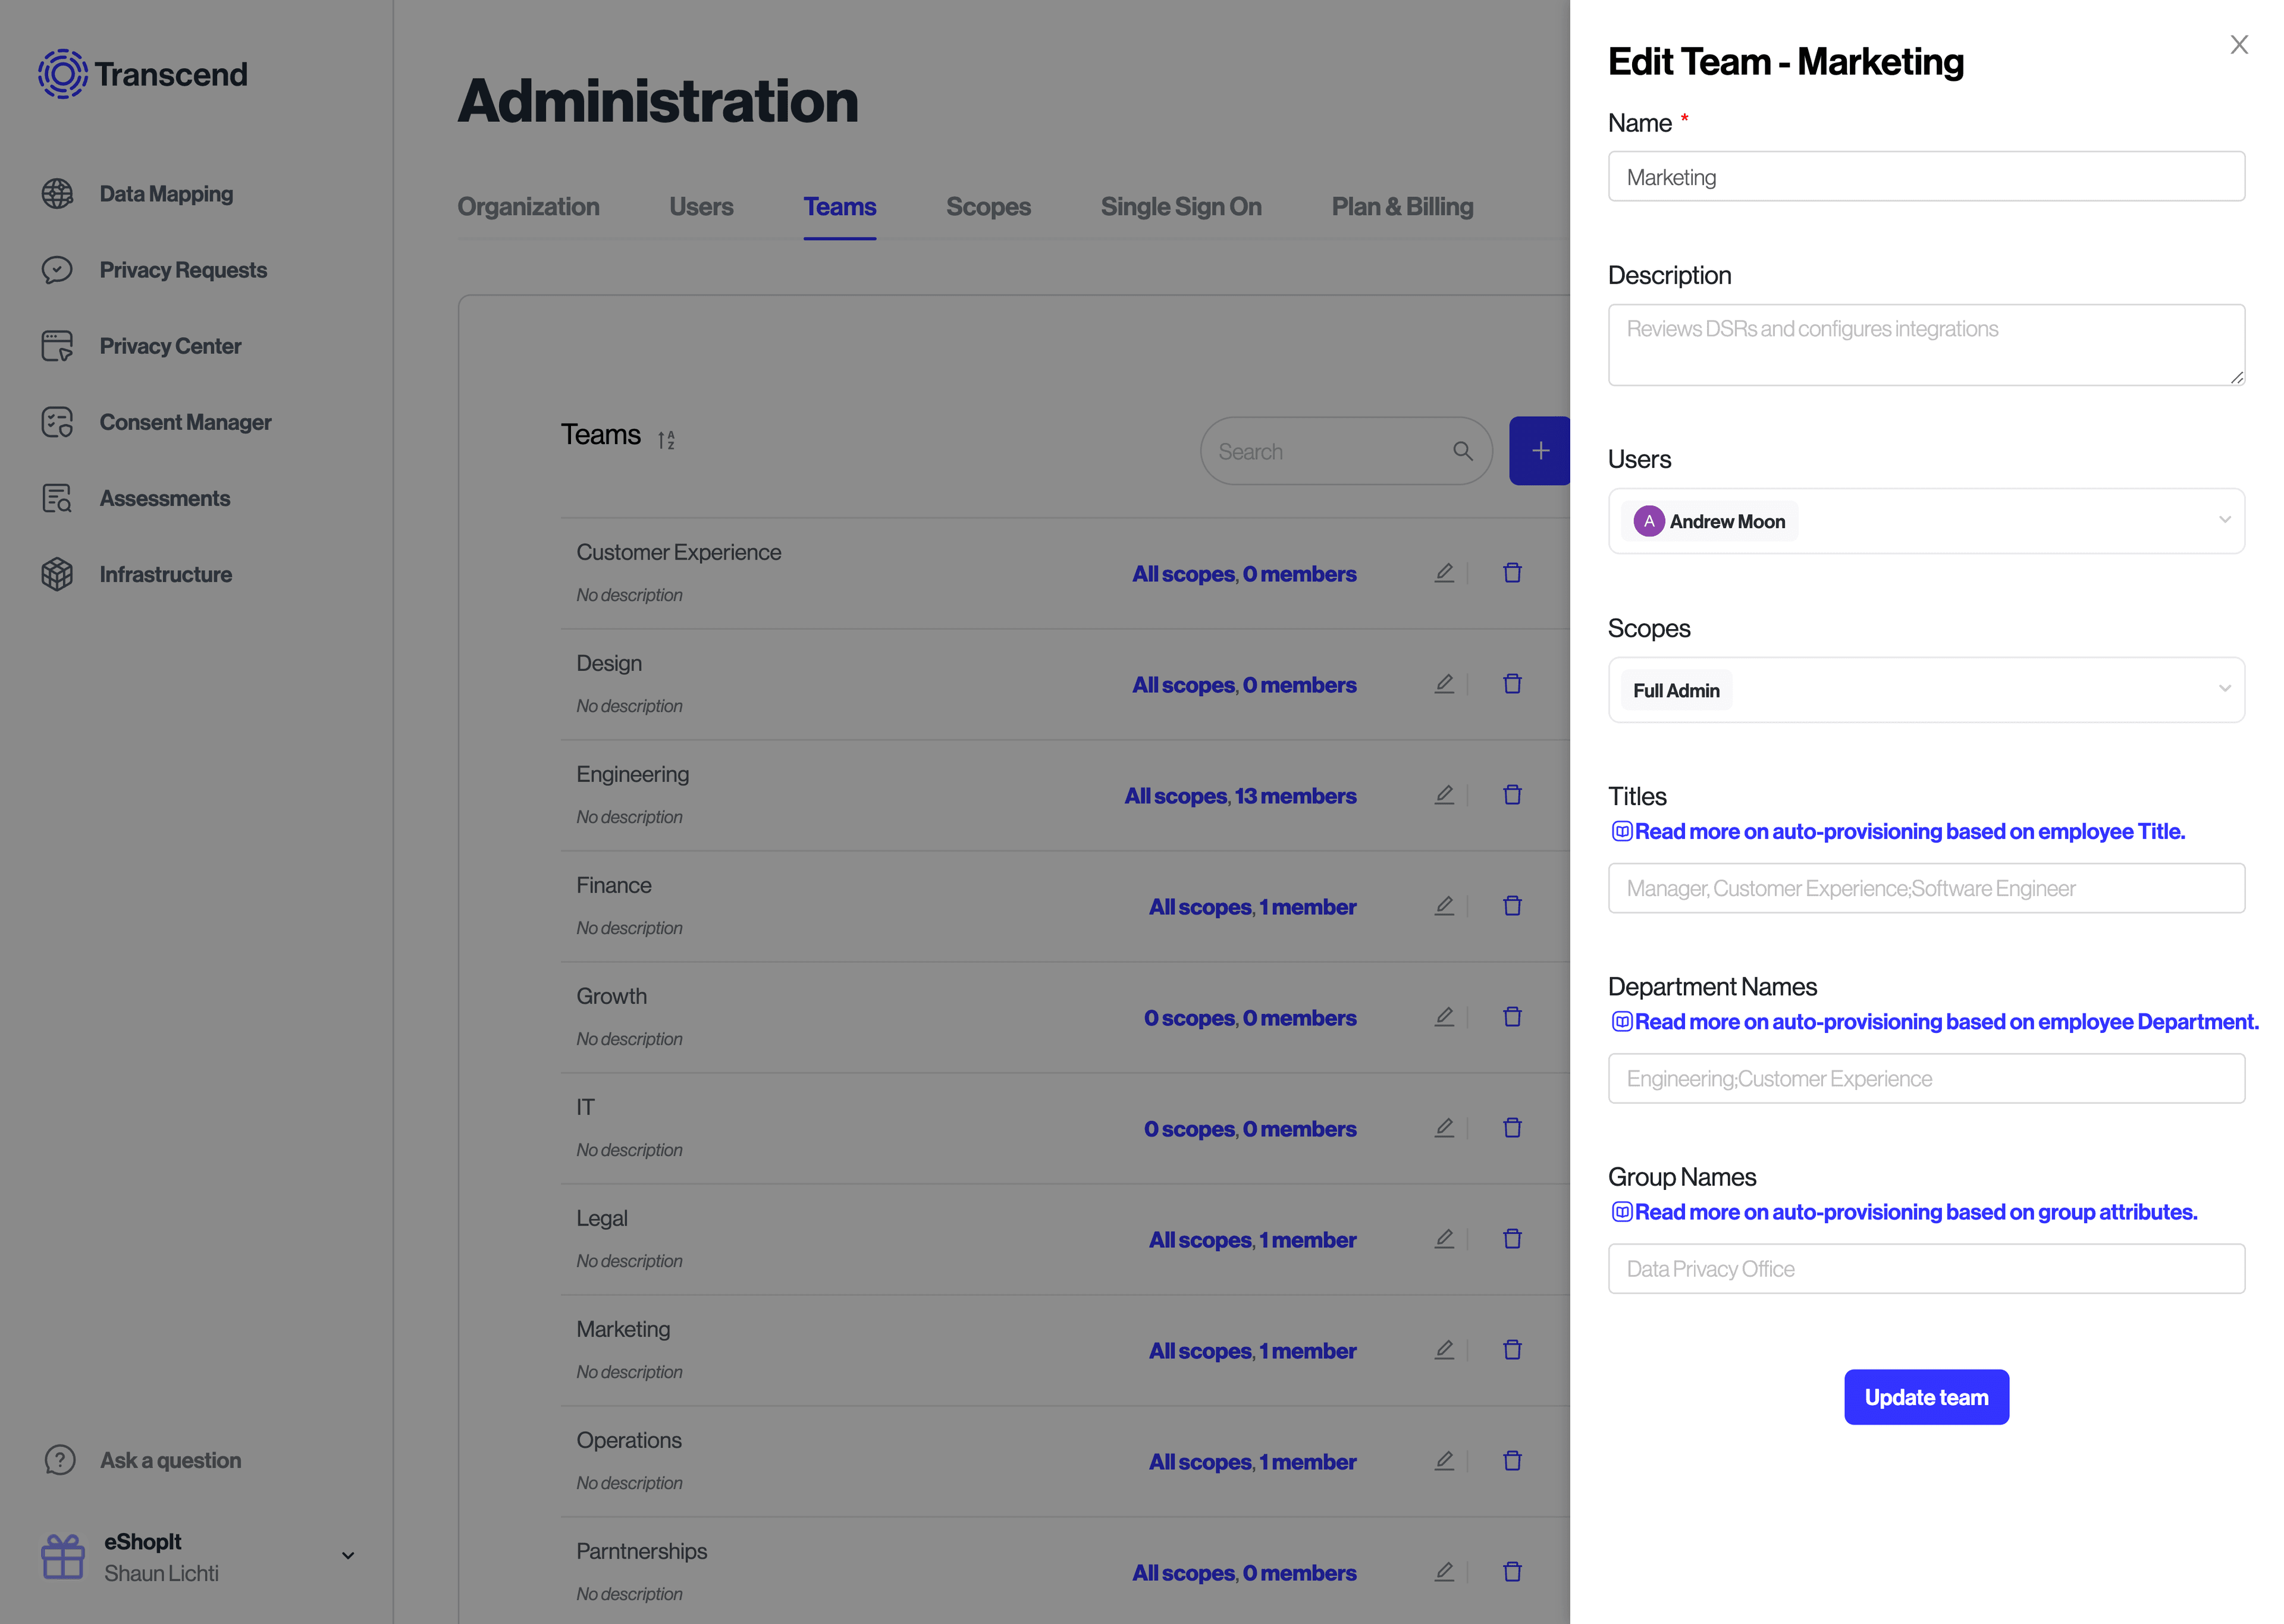
In addition to mapping SSO attributes to a "Team" on Transcend, you can map SSO groups (AKA Okta Groups) to do the same. For organizations that already have groups set up, this is often the preferred method. For those without groups, attribute mapping is the preferred mapping. You must configure user access to the group within your SSO provider, and then map the group name to the Transcend team as shown in the image below. (Below, we are mapping the SSO group named "Engineering" to a Transcend team named "Developers").
Titles / Departments / Group Names are case sensitive.
To attach multiple SSO groups, titles, or departments to one Transcend team, separate each value with a semicolon [ ; ] and no additional spaces. E.g.: Group A;Group B.
You can make changes to the mapping between your SSO provider and Transcend Teams on the Teams → tab under Administration.
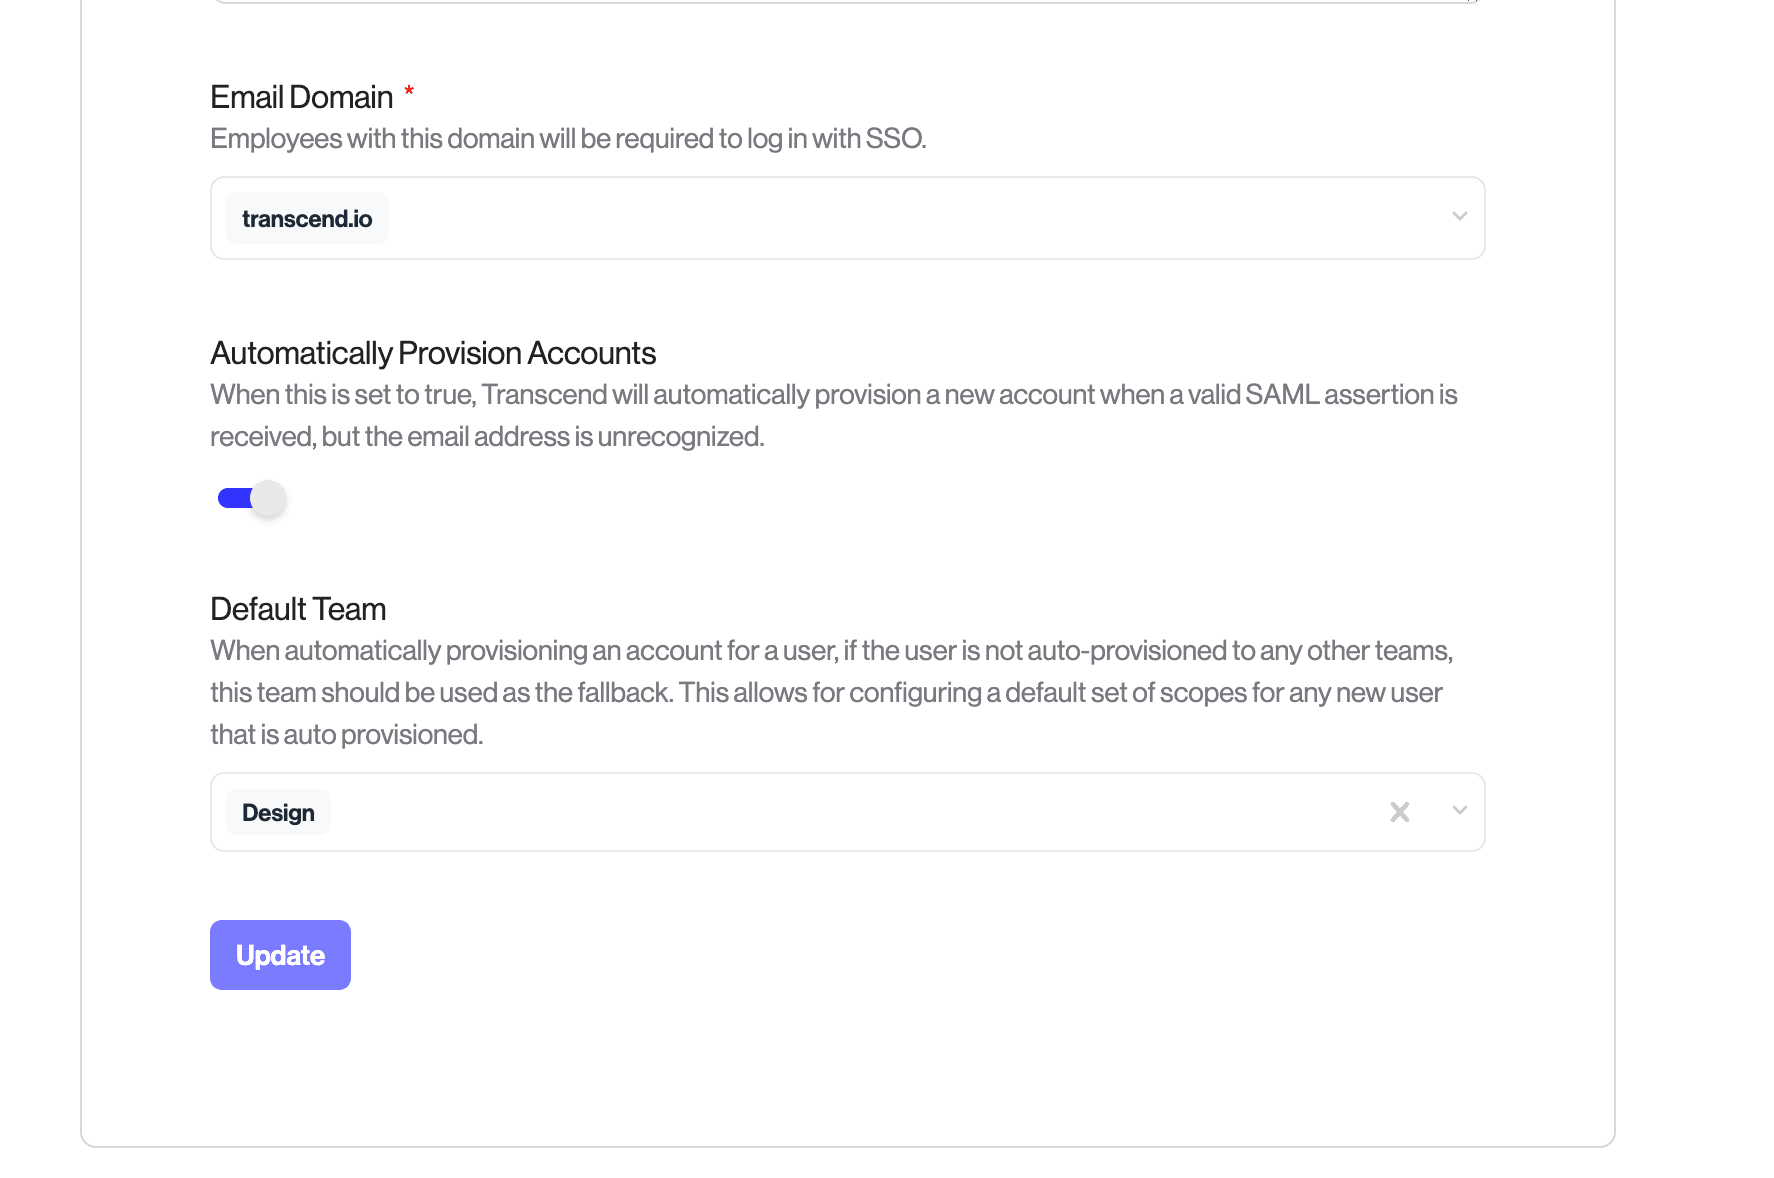
When a user is just in time provisioned and their SSO attributes do not map them to a team, the default behavior is that the user will have no scopes applied to them. If you want to set a default set of scopes for newly provisioned users, you can set a "Default Team" under Administration → Single Sign On. This team will be assigned to users that have no other teams provisioned to them. The newly created user will inherit the scopes of that team.
SSO mapping is used to grant team membership when the user’s SSO profile matches a configured team. For users who already exist in Transcend, each SSO sign-in can add matching teams; however, it does not sync or “reset” membership to only what the SSO provider sends at the time of login. That means if a user previously had broader access (e.g., from an old group, a manual team assignment, or extra scopes), that access remains part of the user's Transcend account until an admin changes it in Transcend.
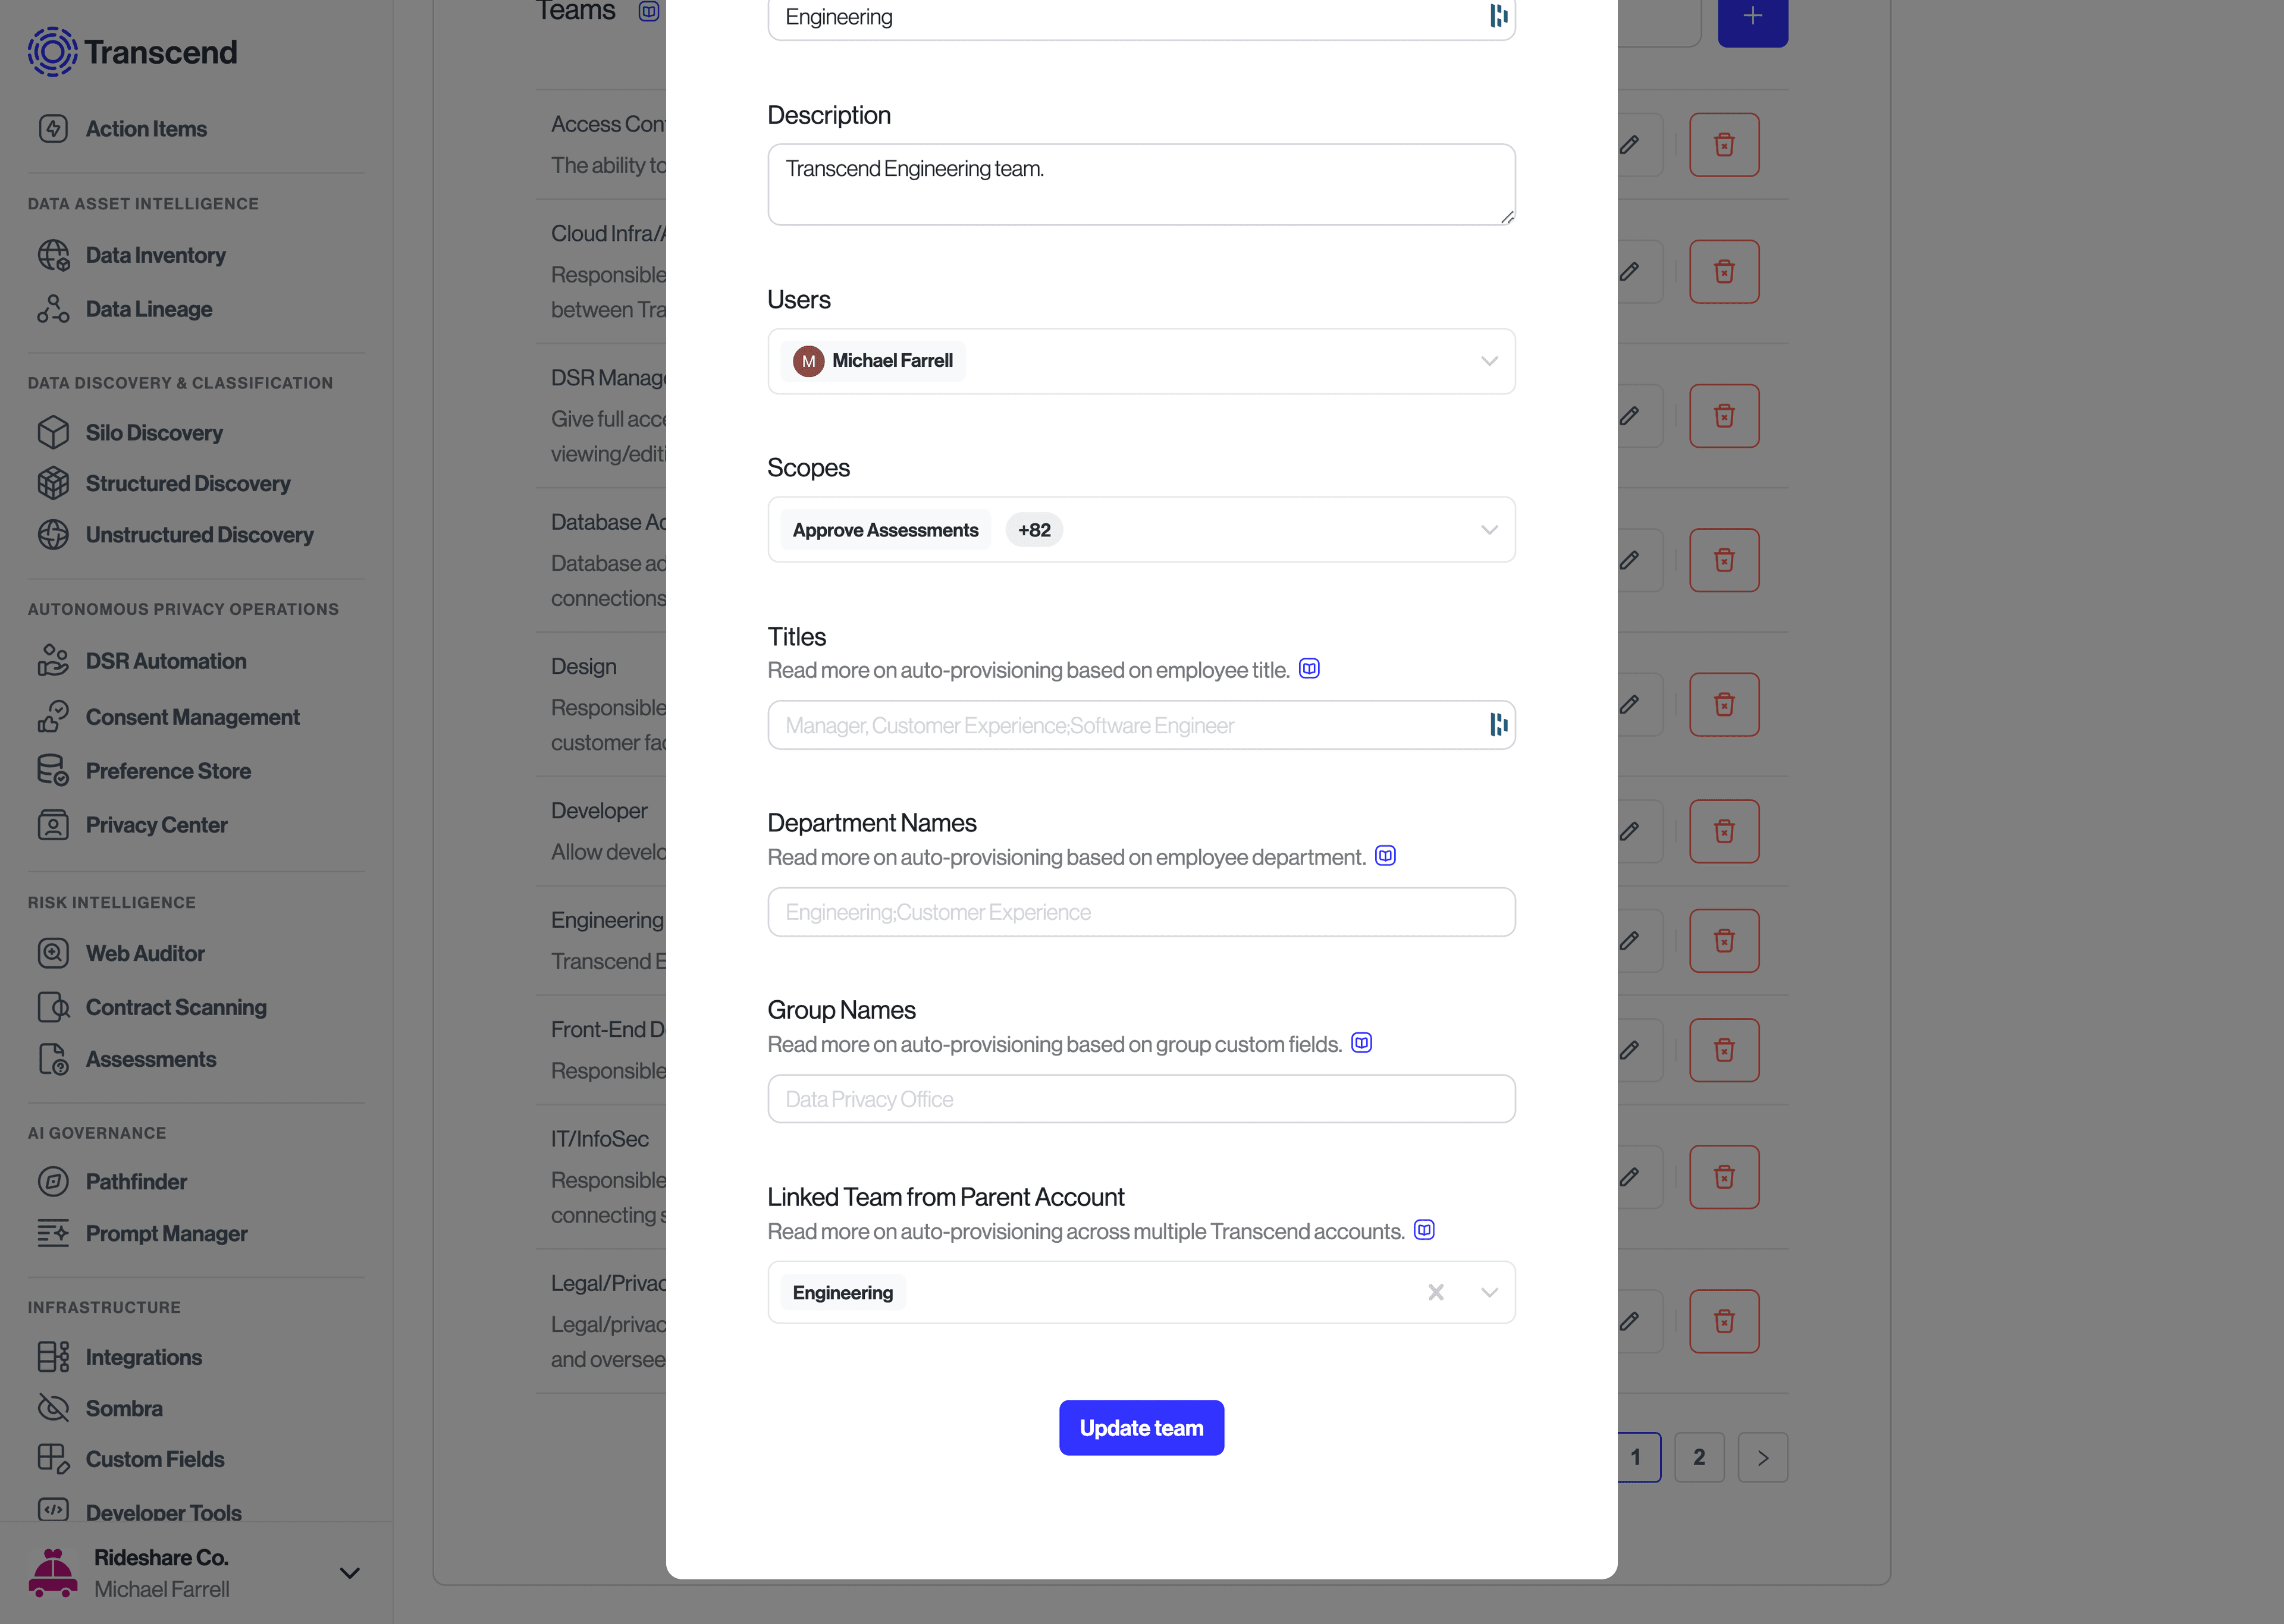
In some situations, it makes sense to have multiple Transcend accounts for different business units within a larger organization. For example, there may be some parent company operating over multiple child companies with independent brands and data sharing practices.
It is possible to configure a single SSO group that does just-in-time provisioning across multiple Transcend instances. This is done by:
- Follow the instructions in the section above to map an SSO group or department to a team in the parent Transcend instance where your SSO settings were configured.
- For each Transcend instance that you want to provision access to, switch into that Transcend instance and select the team created in (1) as the "Linked Team from Parent Account"