Okta SSO Configuration Guide
Ensure you have read the SSO Setup article to ensure you have configured the baseline and prepared for your IDP SSO connection.
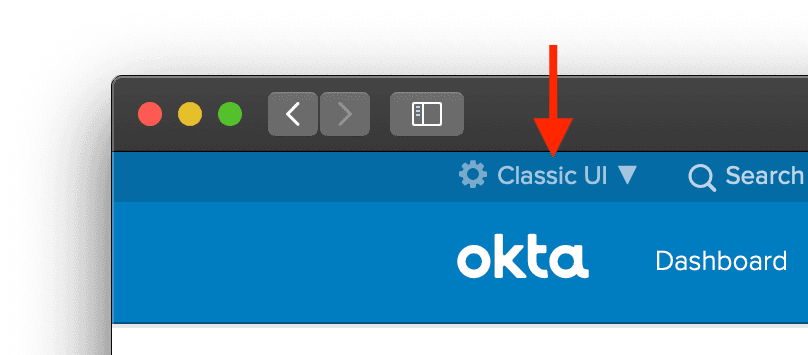
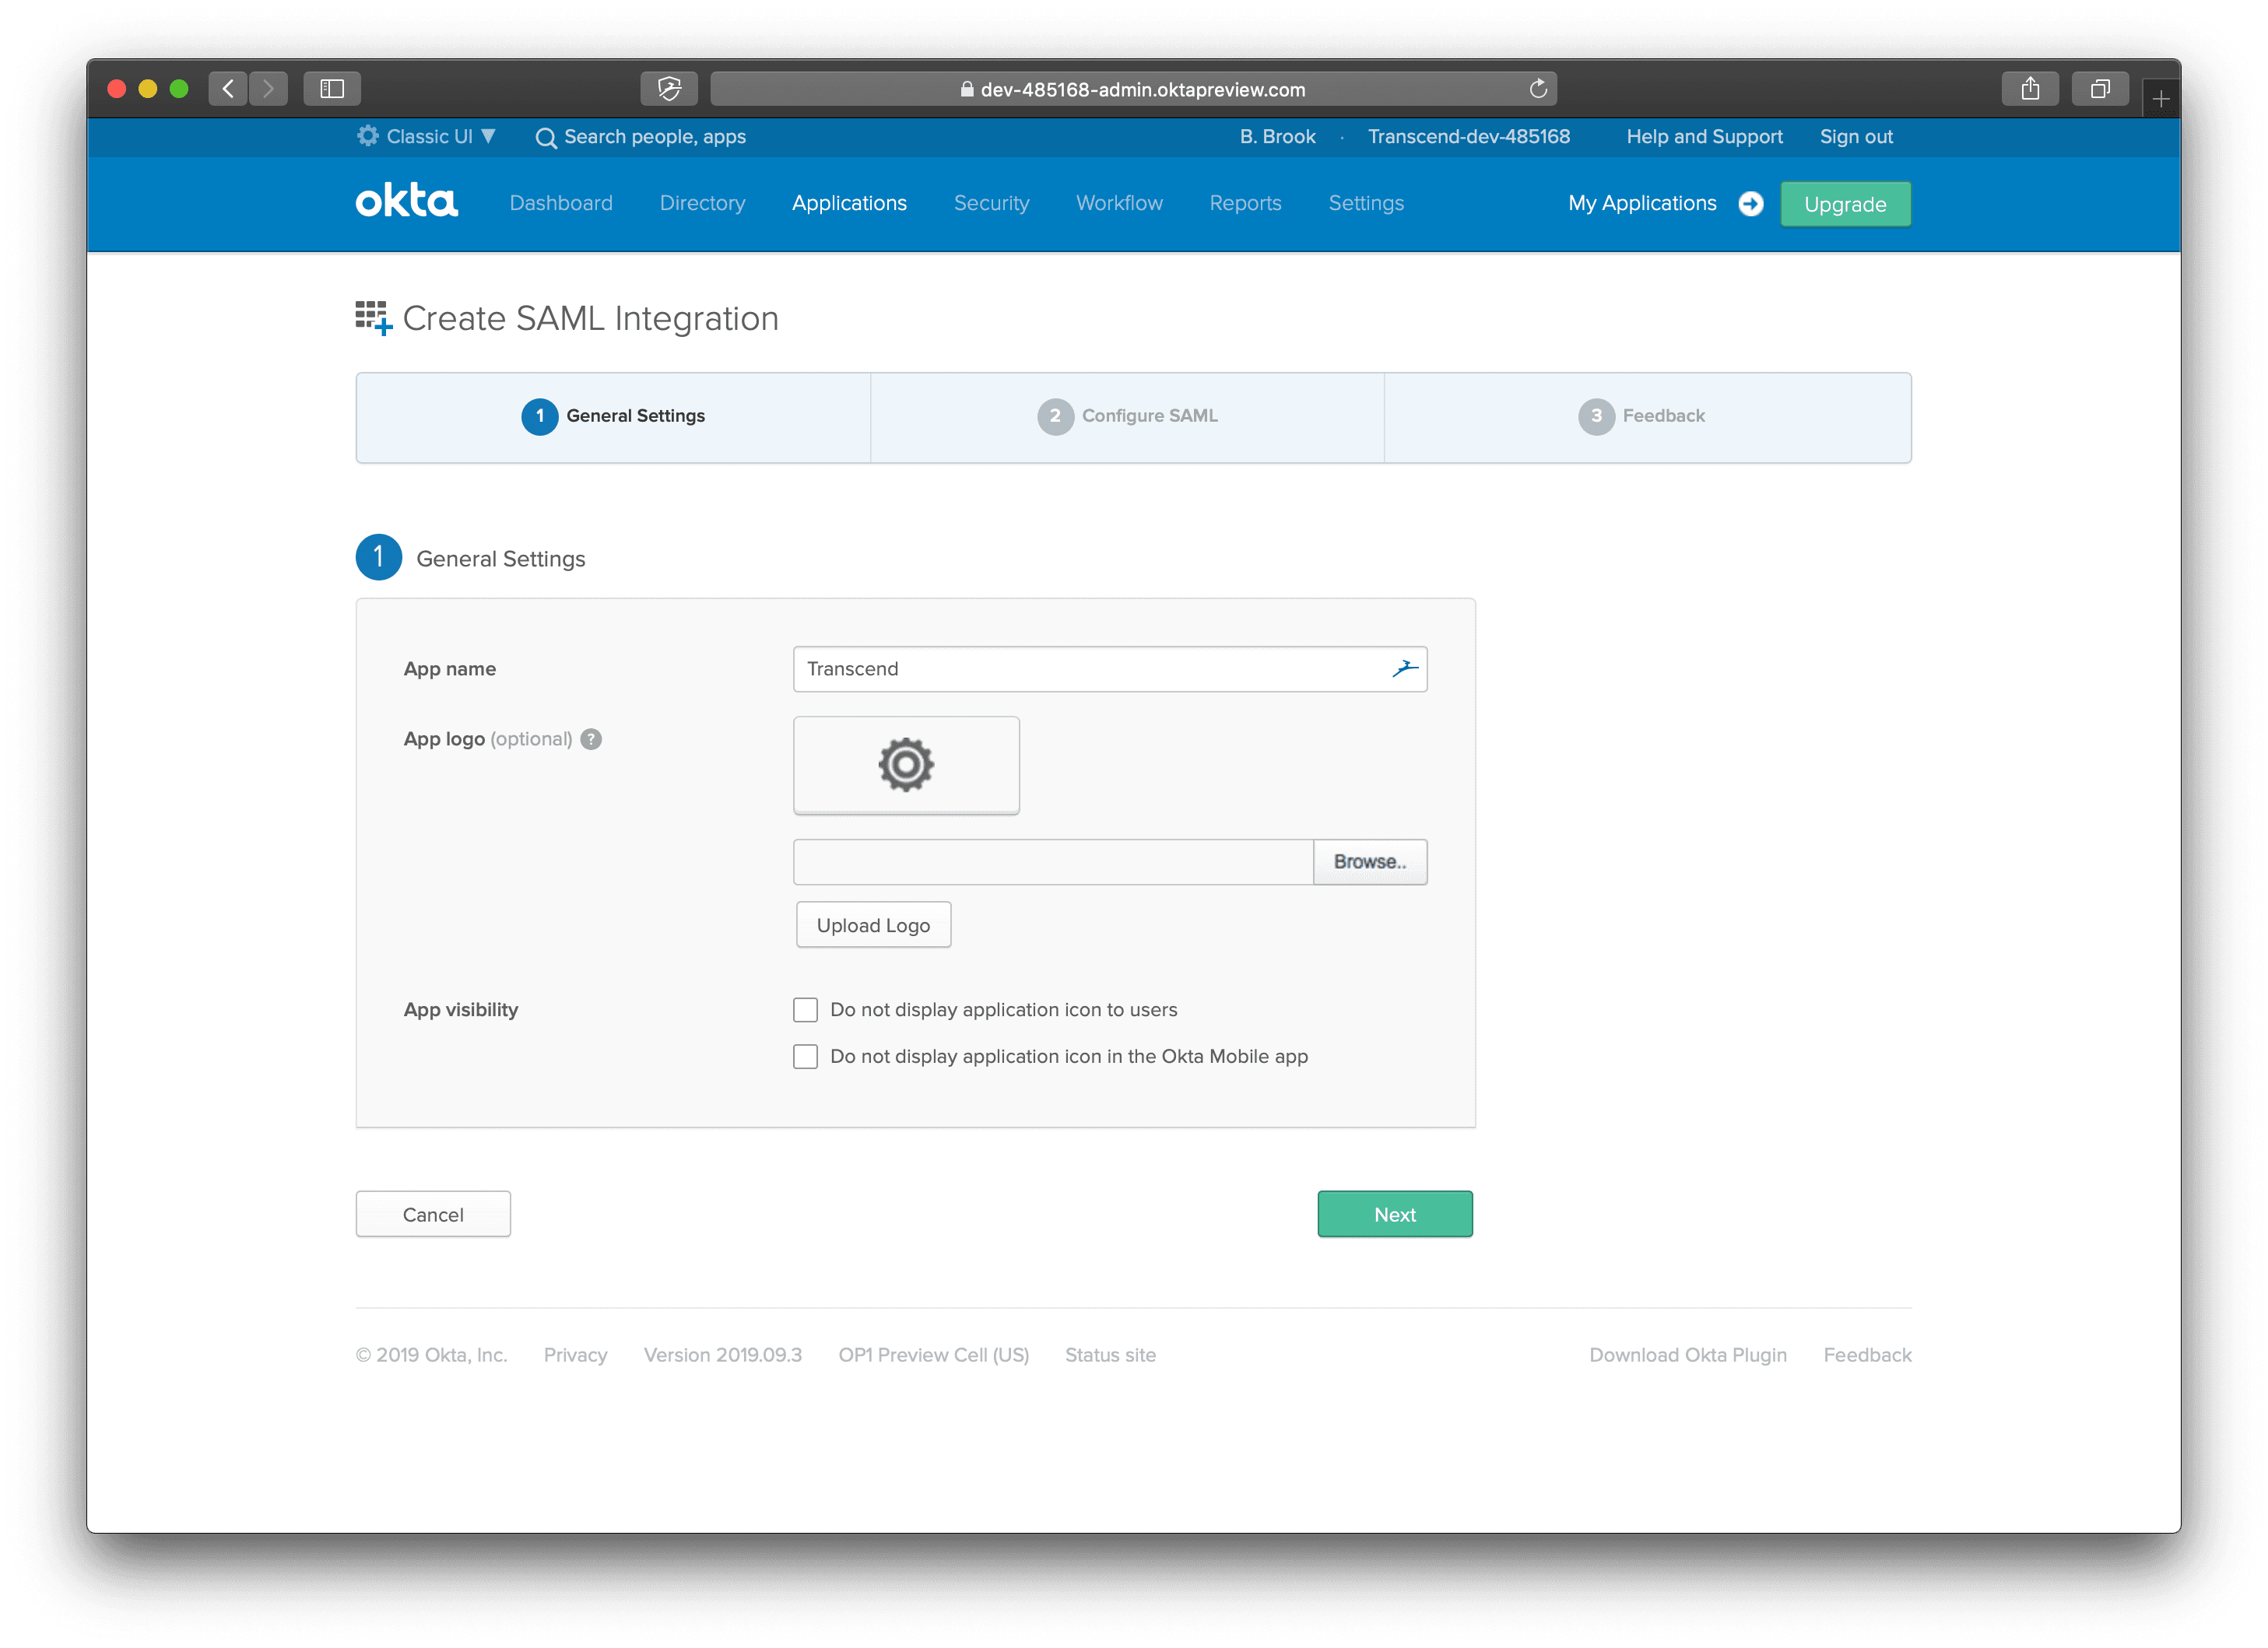
Note: this guide uses the Classic UI, which can be selected on the top-left dropdown in Okta
- Go to the Applications page
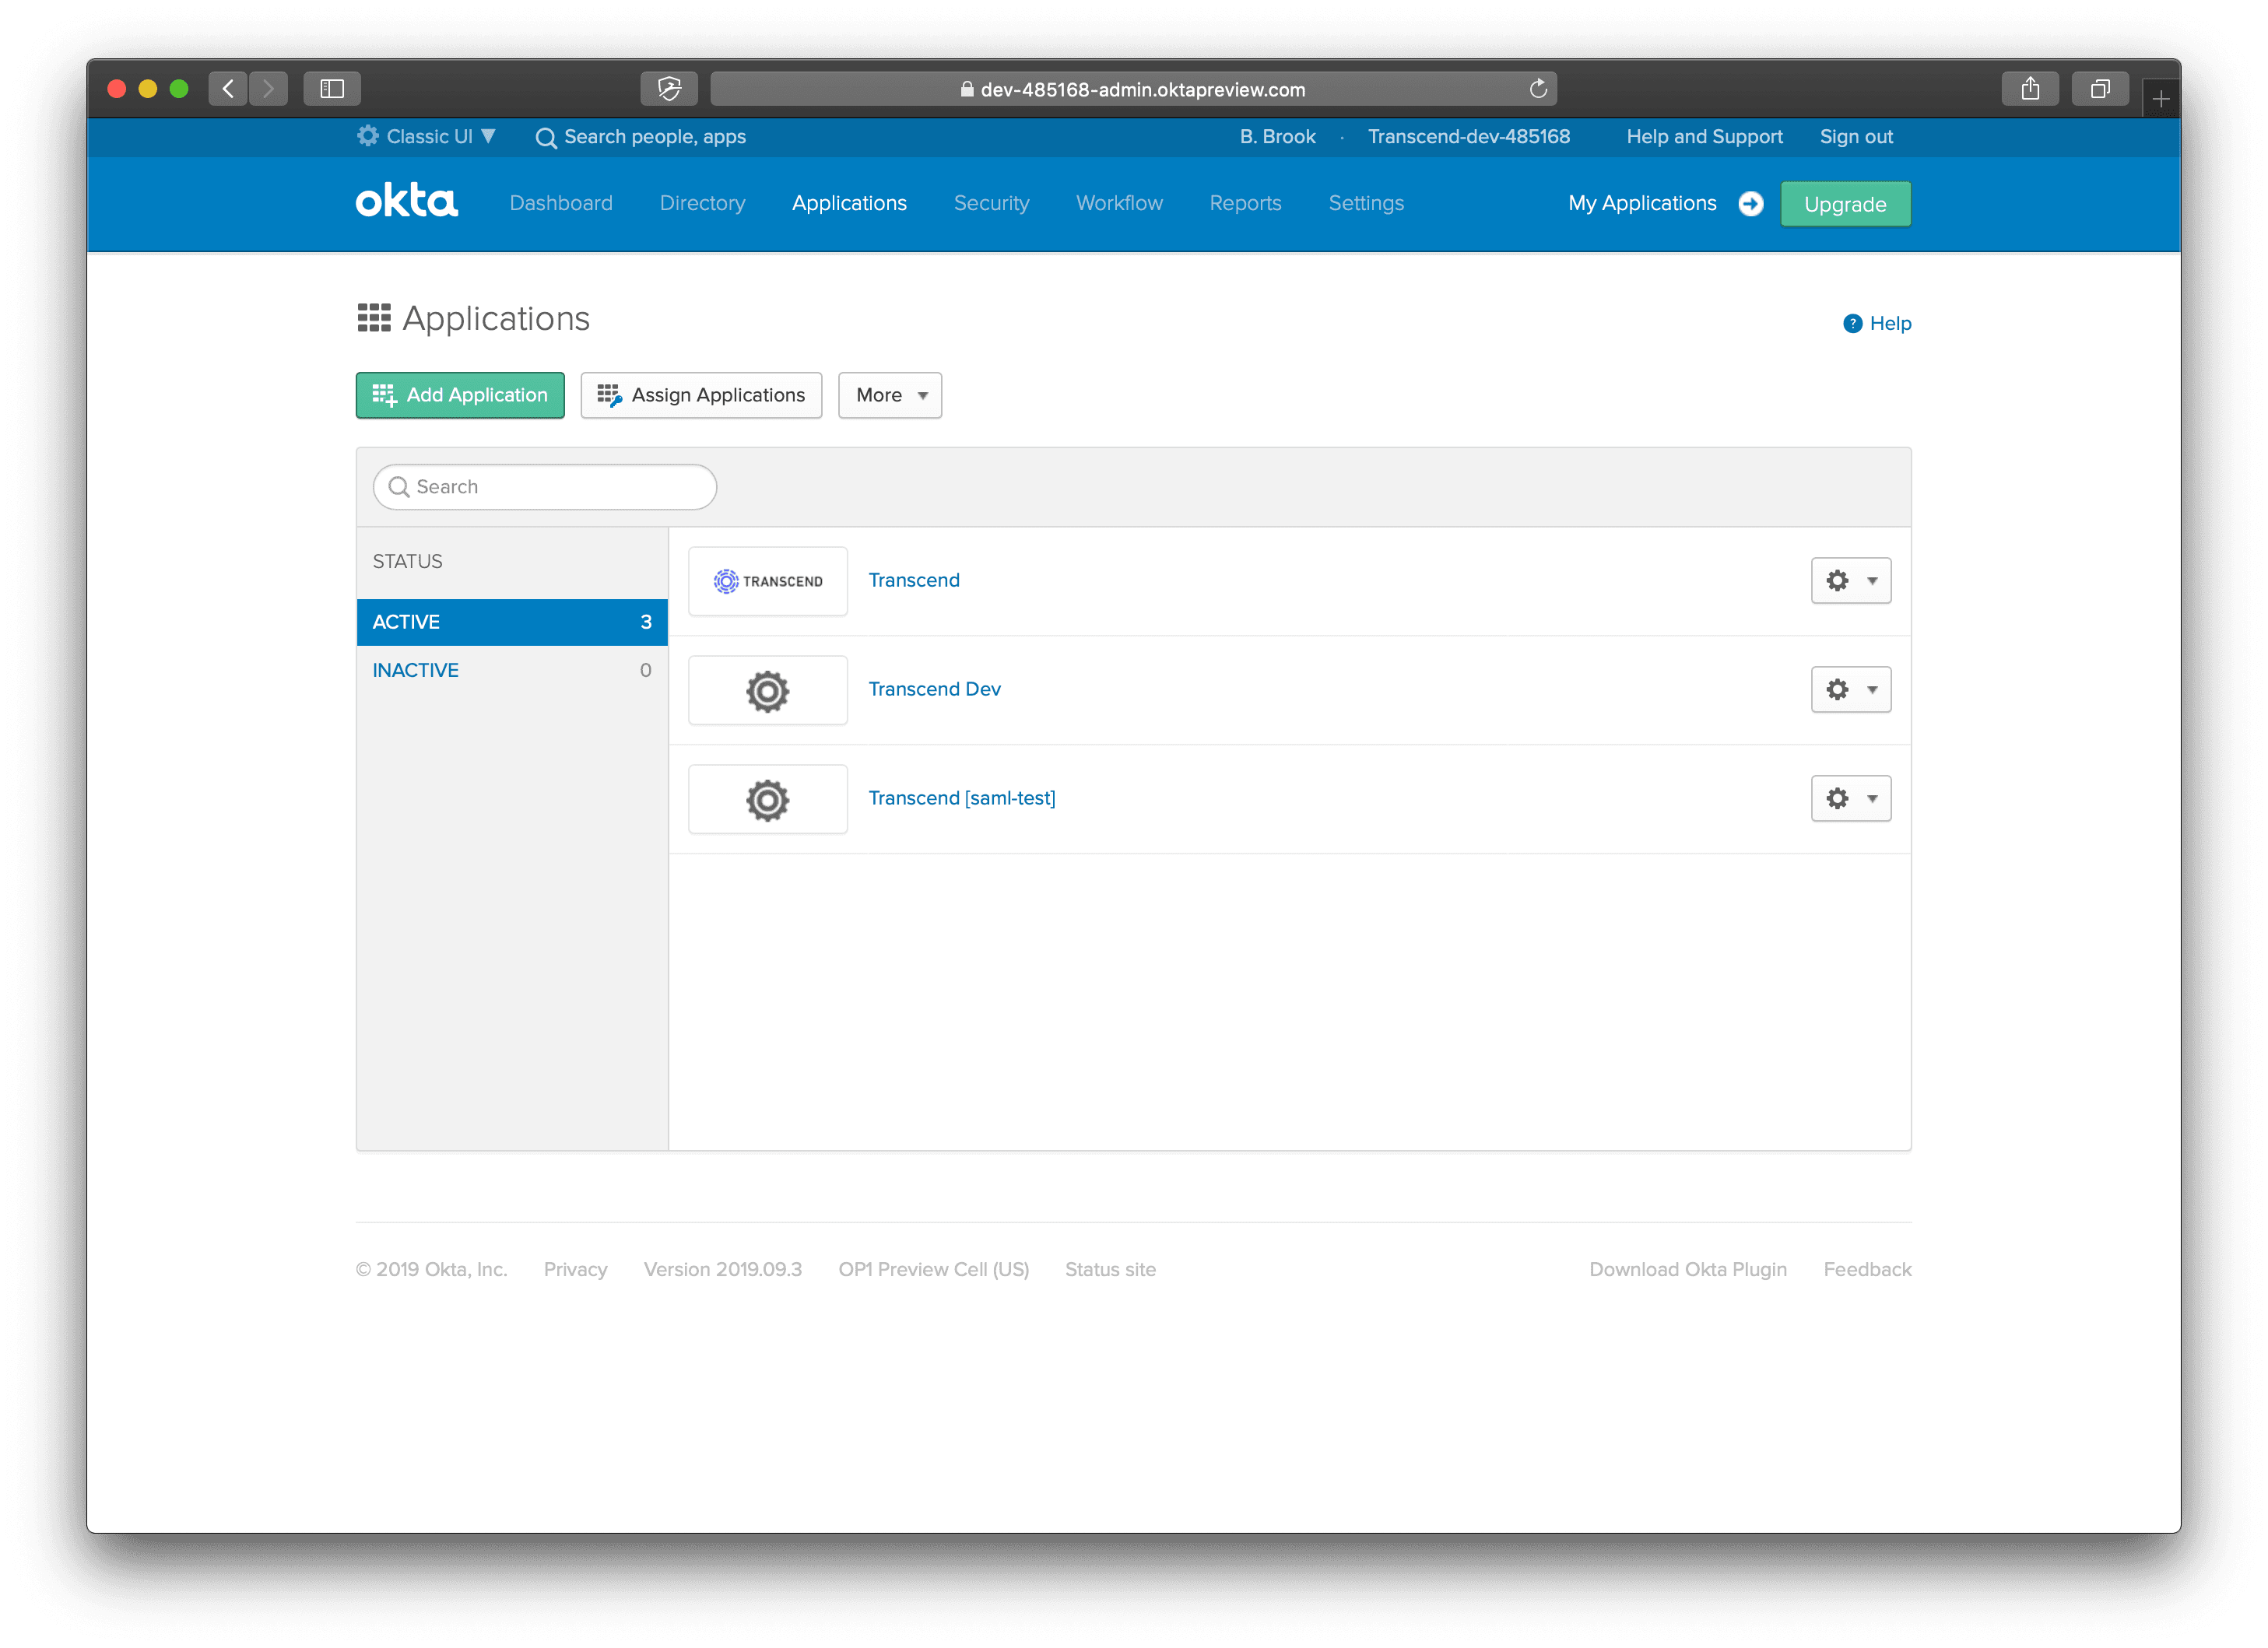
- Click Add Application
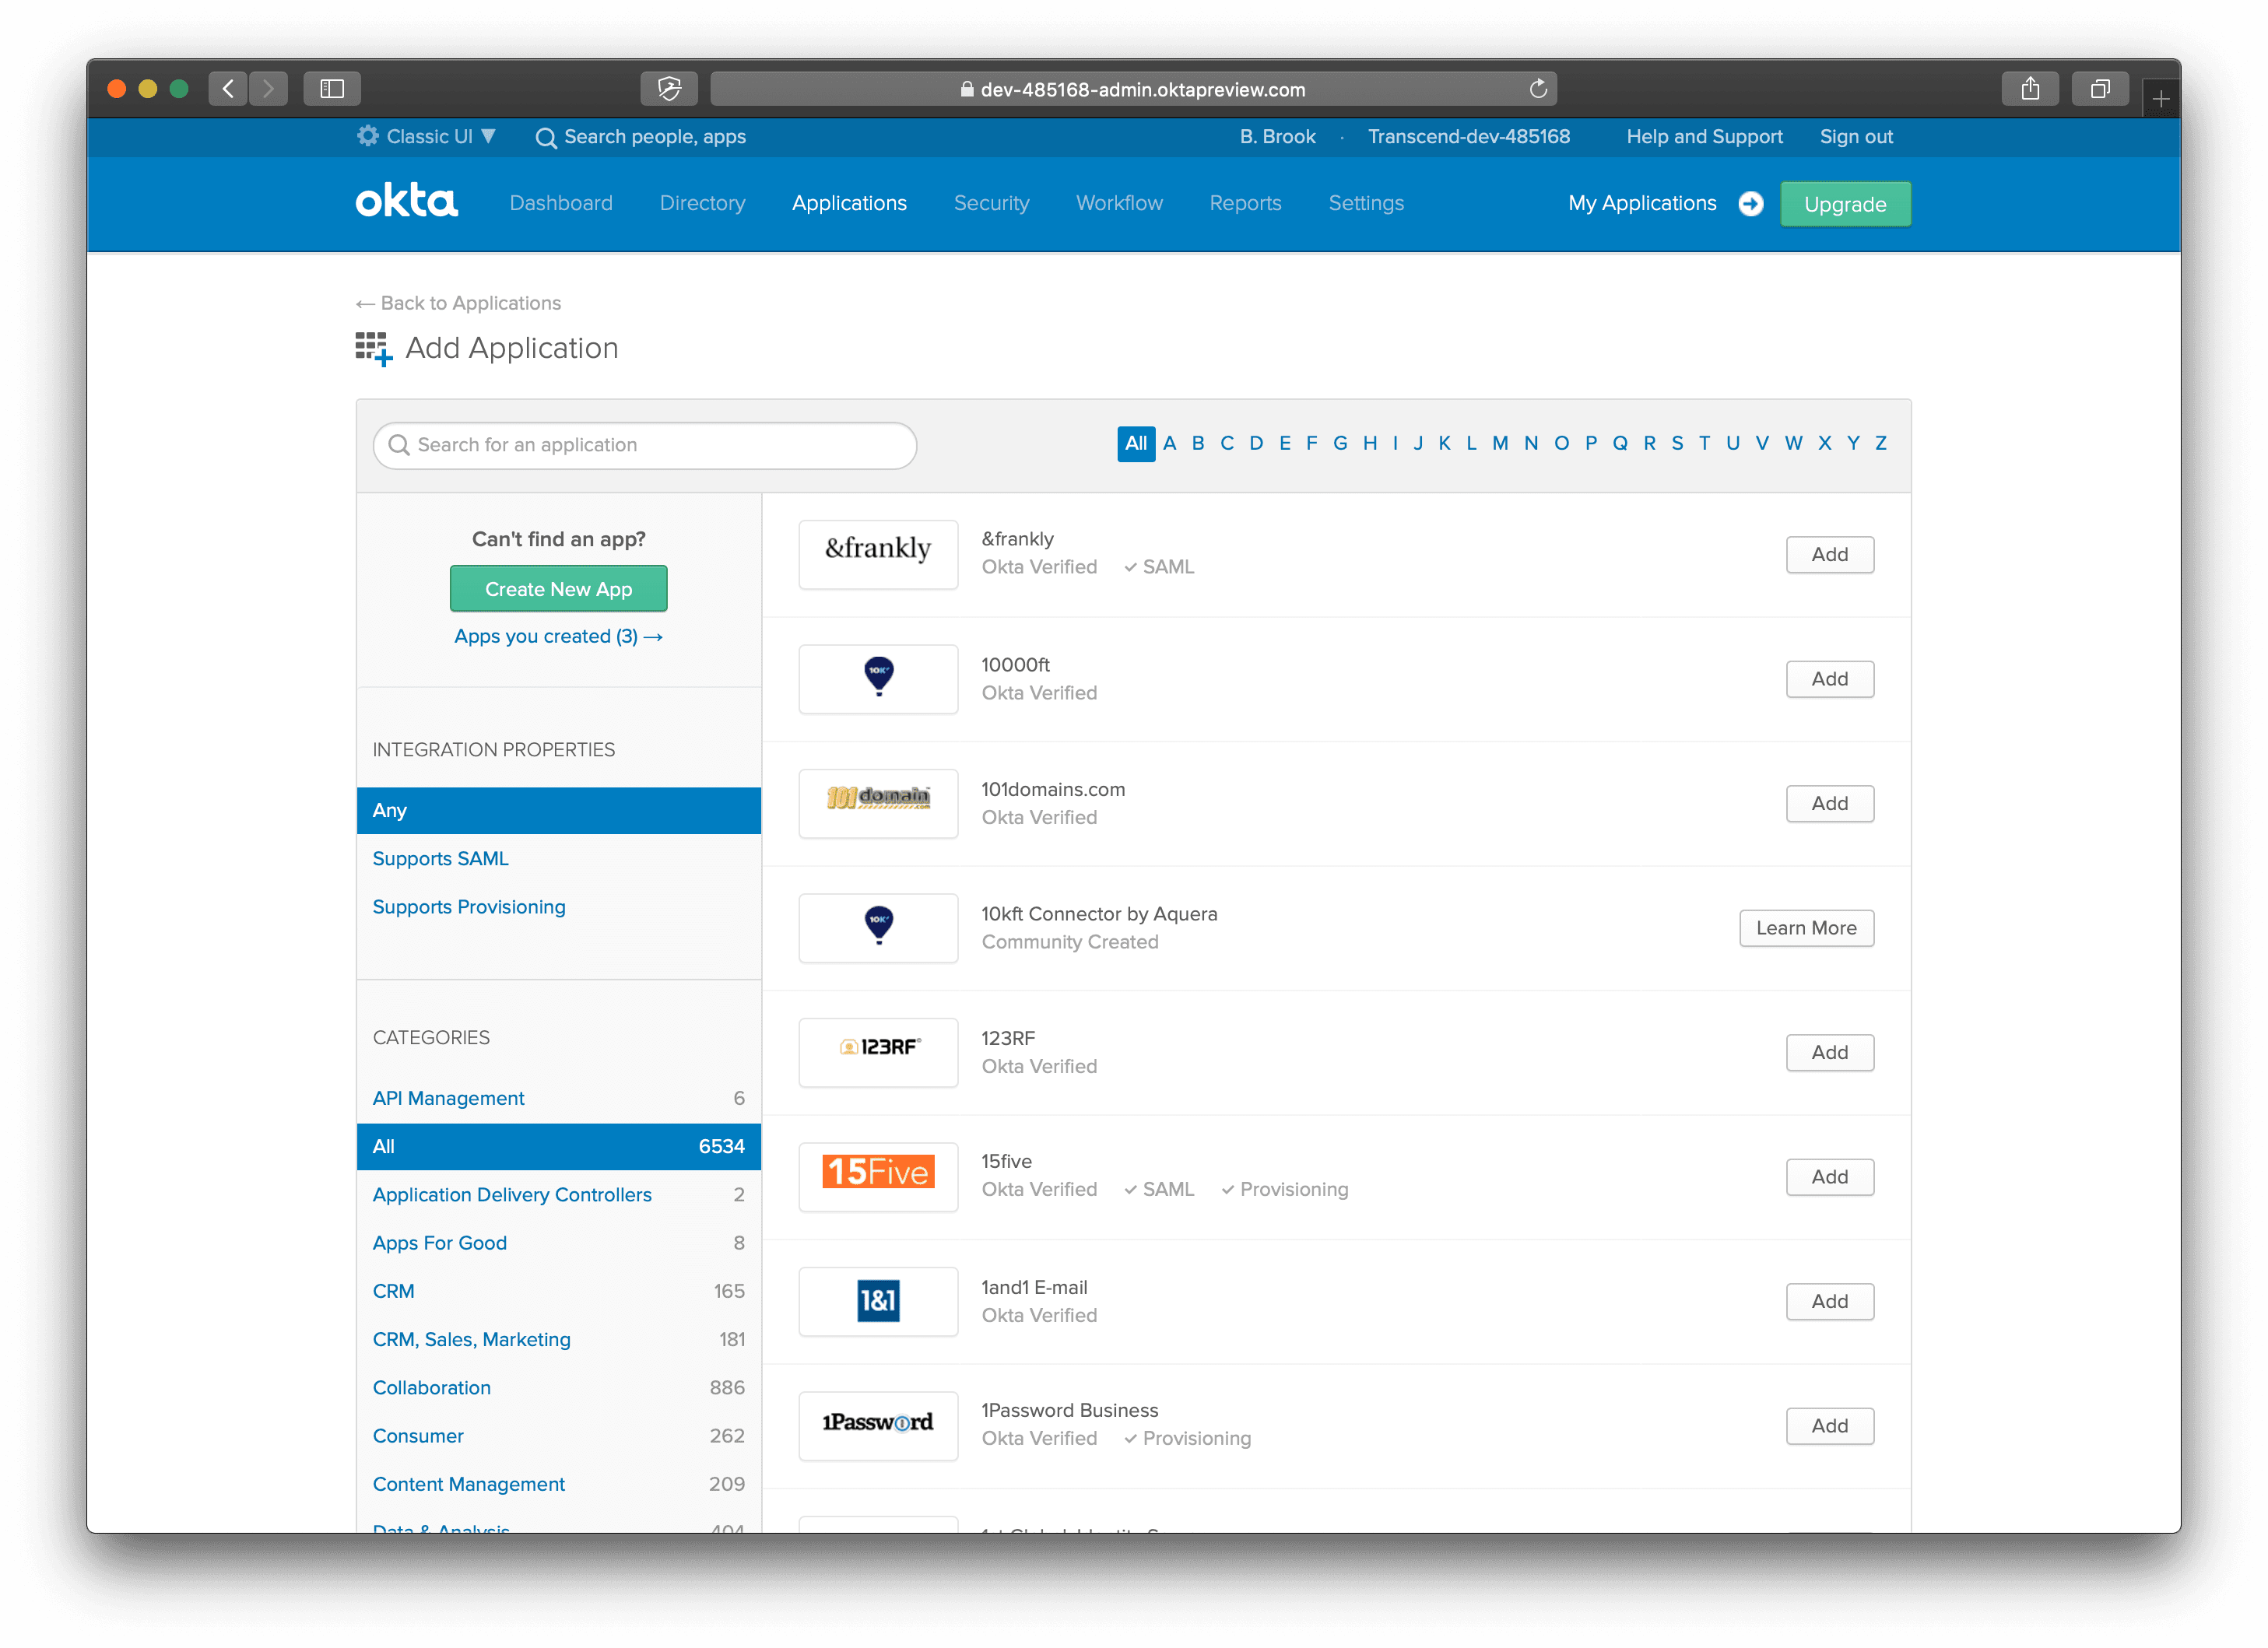
- Click Create New App.
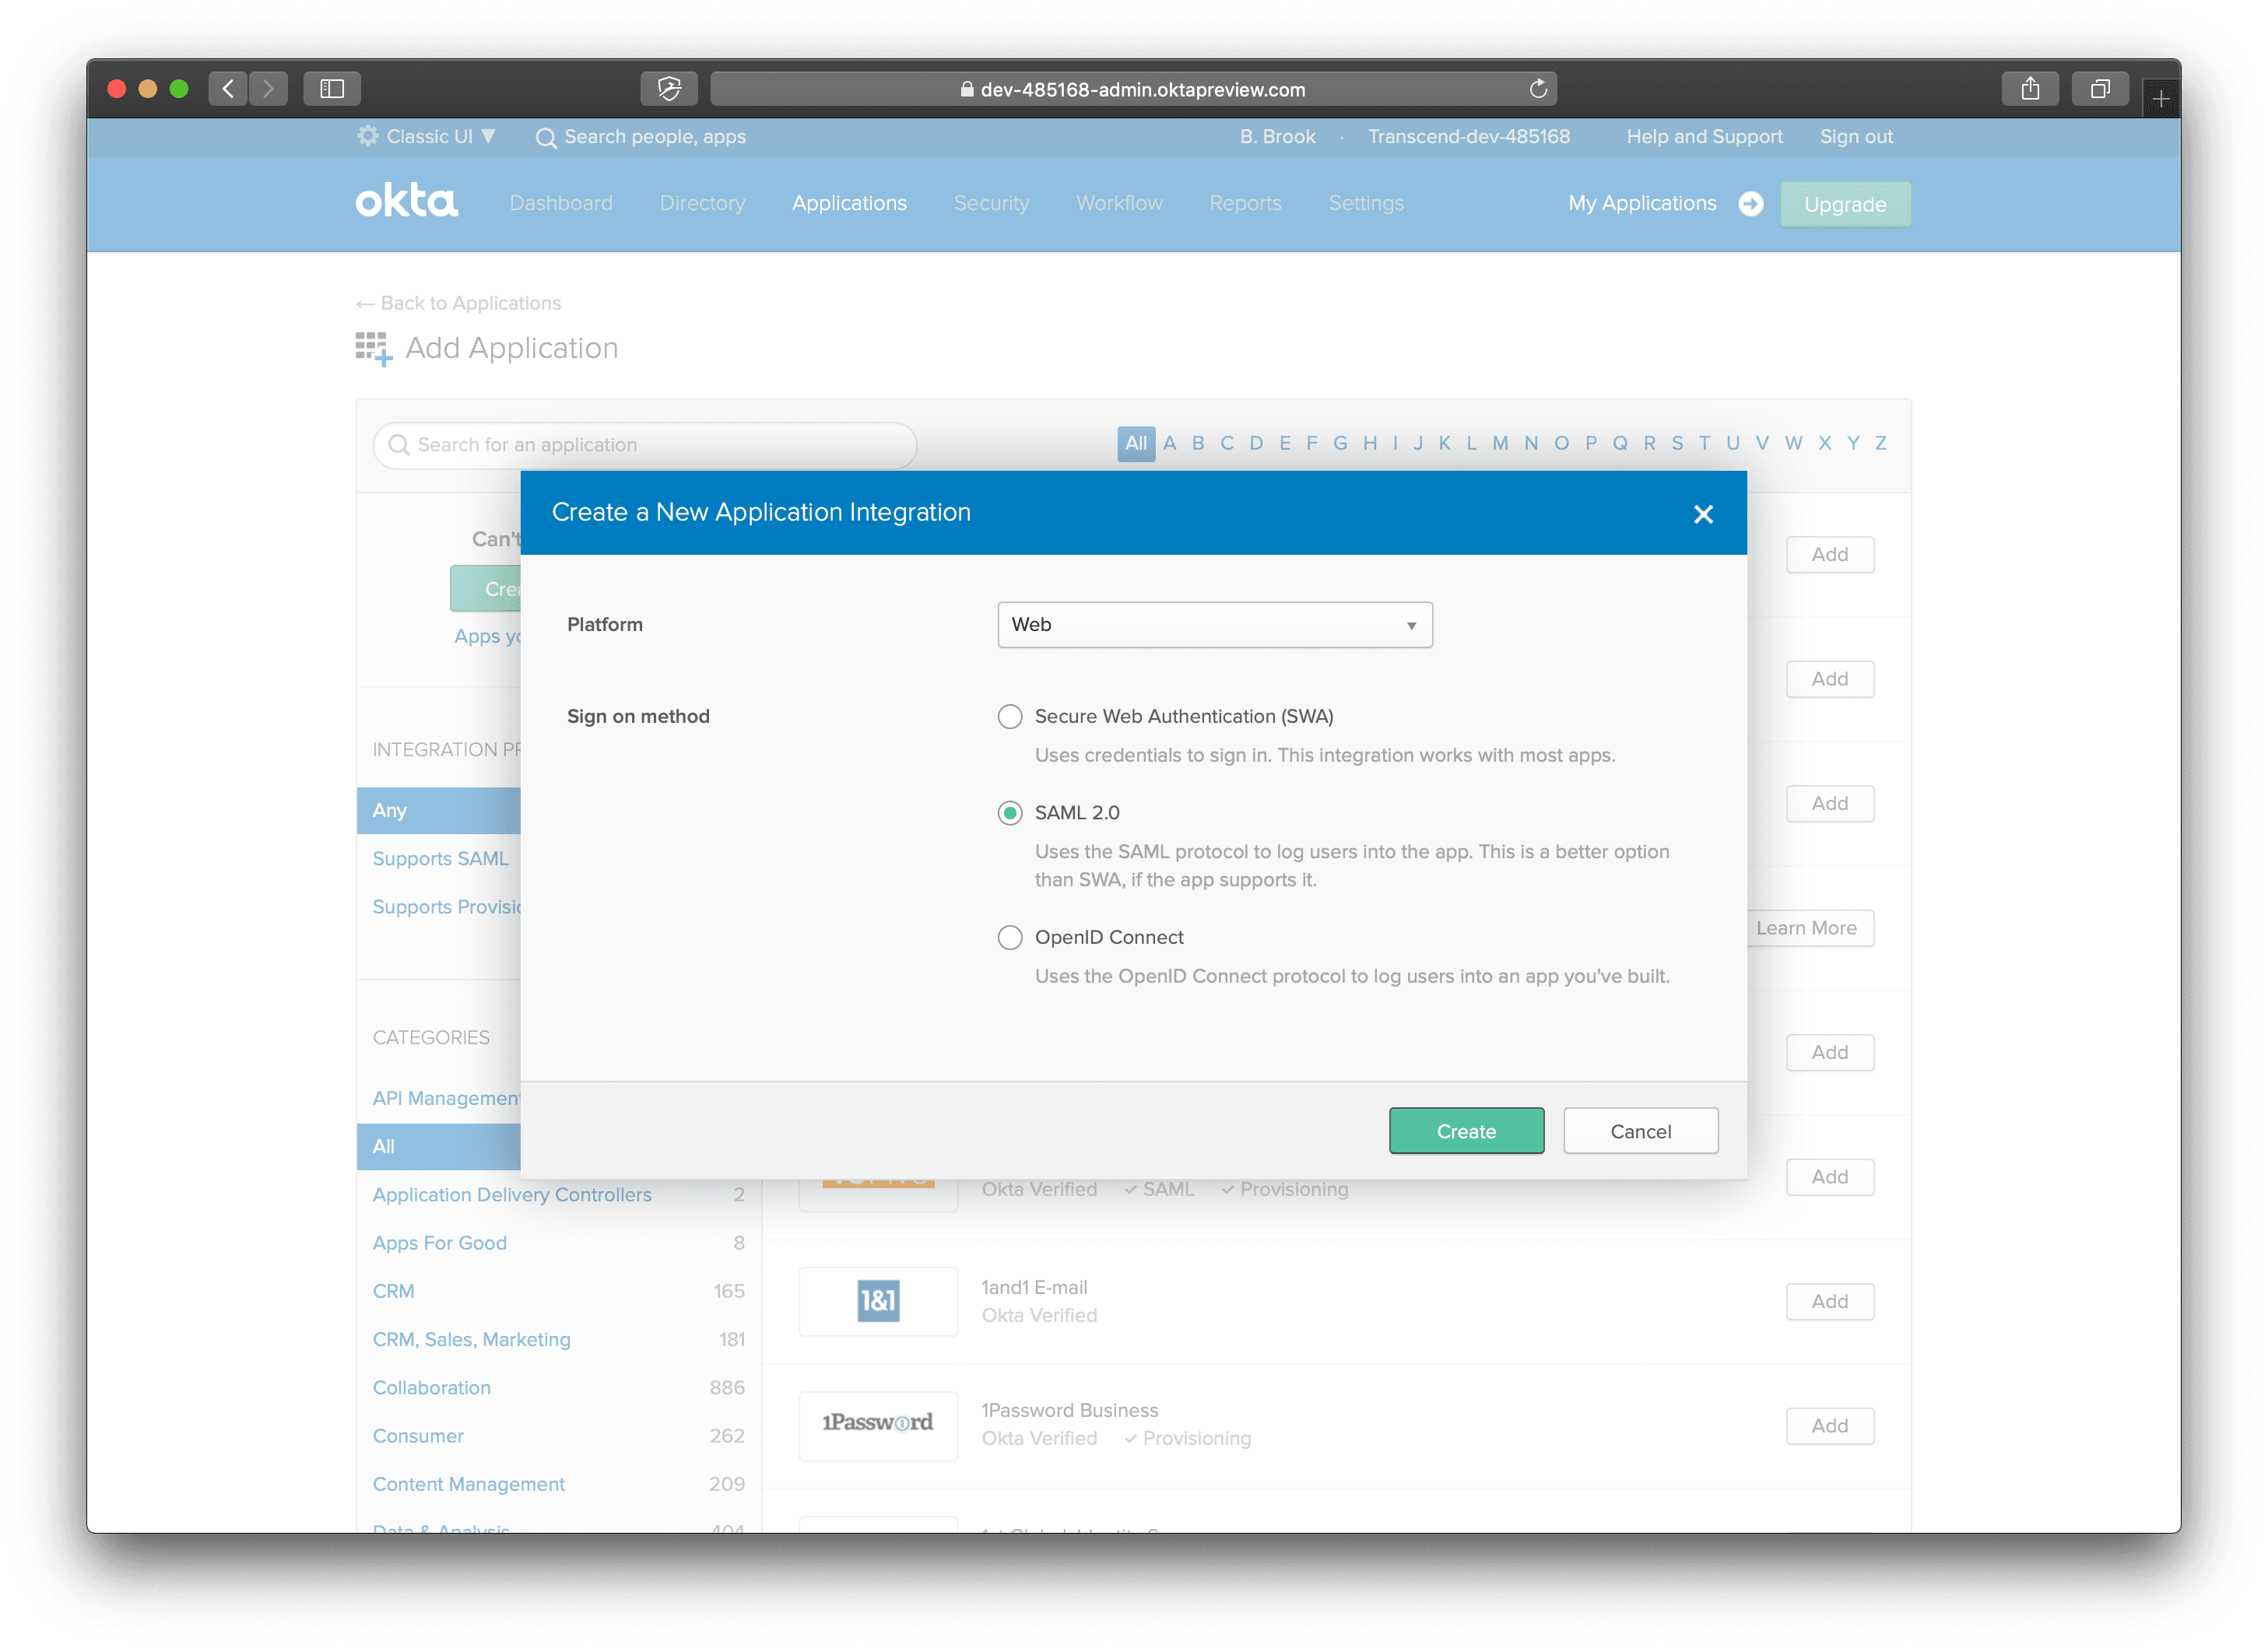
Under platform, select Web, and choose SAML 2.0. Click Create.
- Name your application Transcend.
You may download our App Icon here and click Upload Logo.
Click Next.
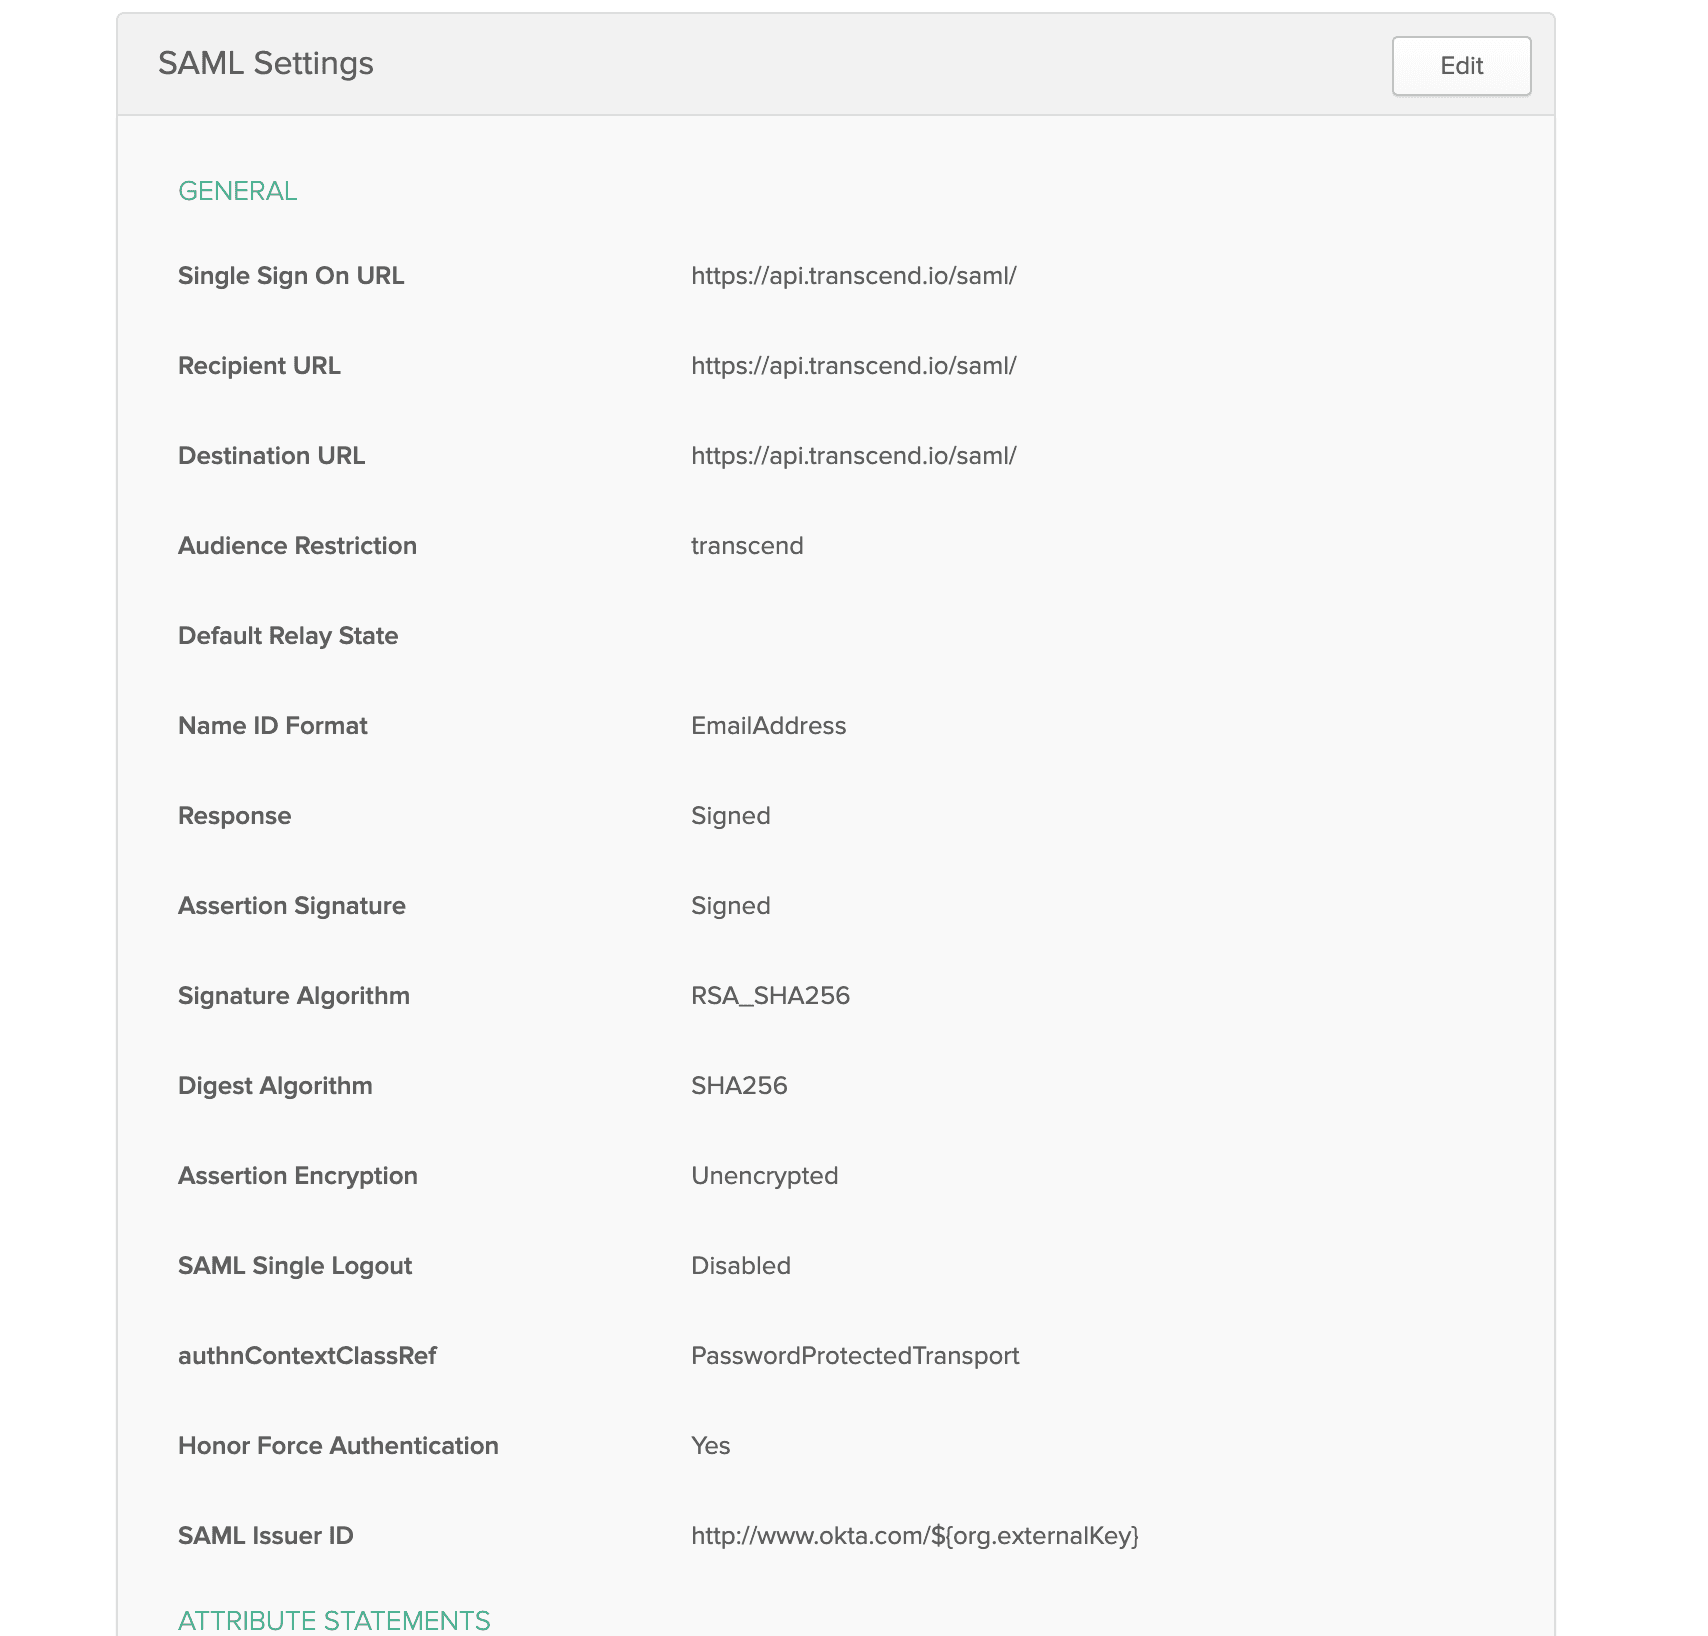
- Set your Single sign on URL to
https://api.transcend.io/samlfor the EU backend, orhttps://api.us.transcend.io/samlfor the US backend
Set Audience URI totranscend
Set Name ID format toEmailAddress
Set Application username toEmail
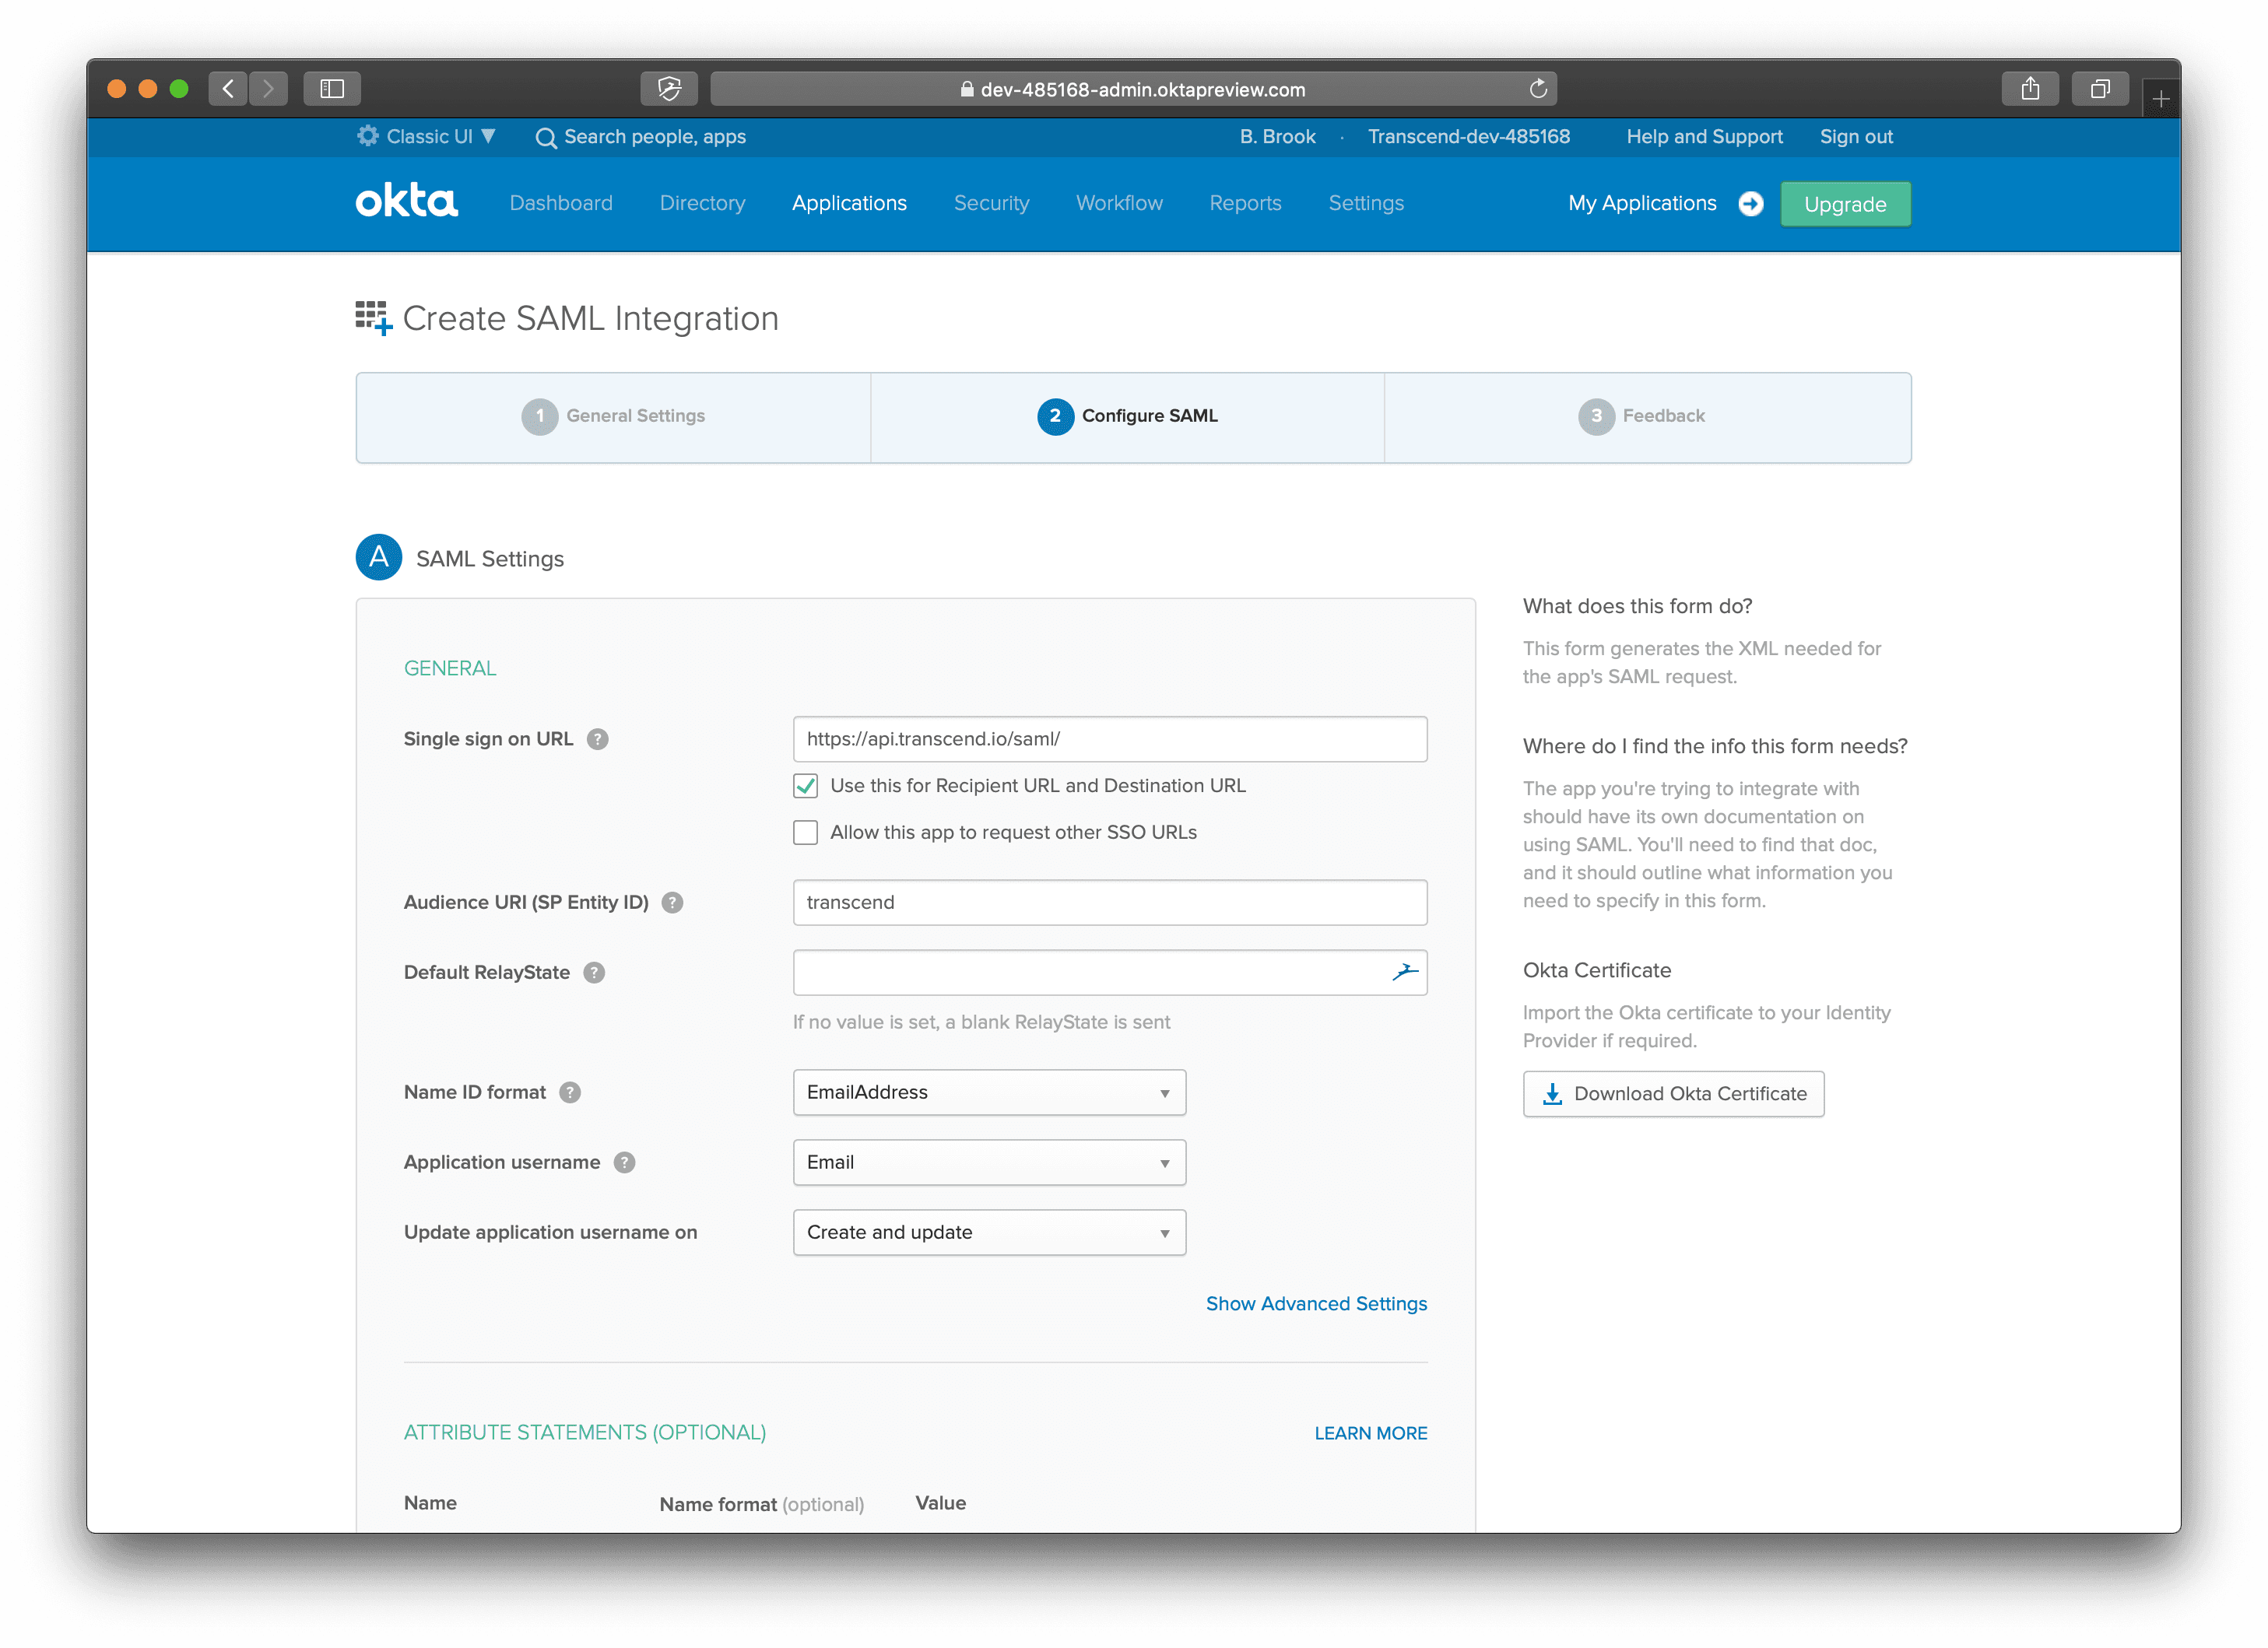
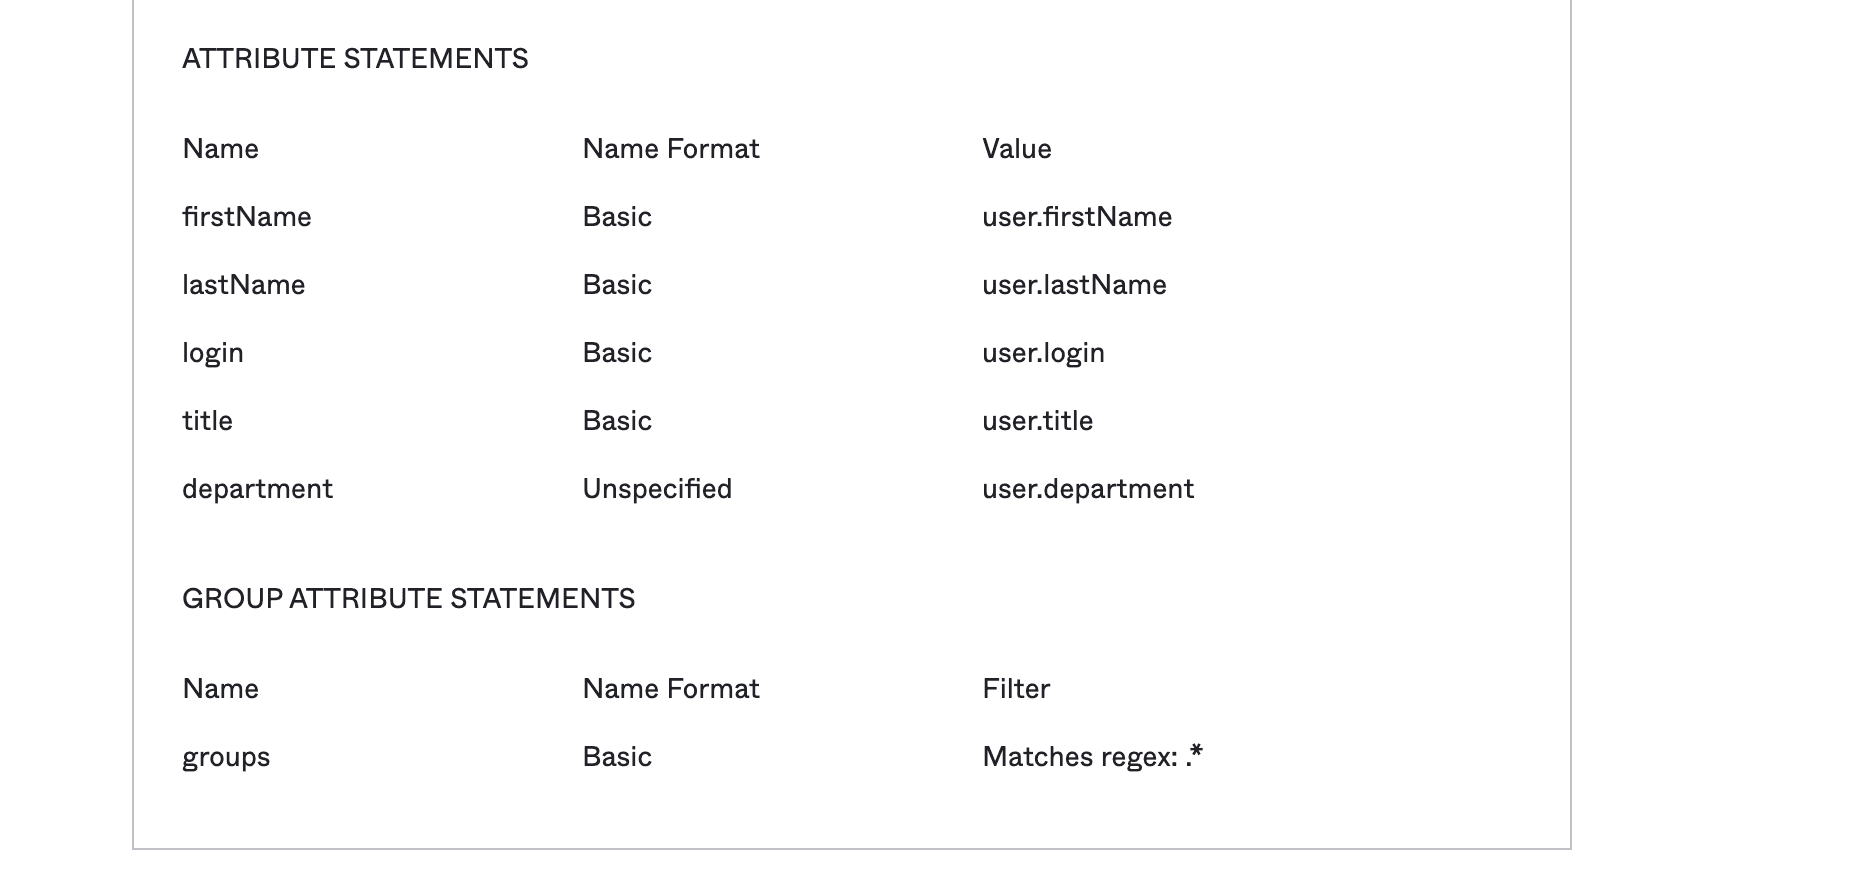
- Scroll down to Attribute Statements and set 3-5 attributes:
- Set Name to
firstName, Name format toBasic, Value touser.firstName - Set Name to
lastName, Name format toBasic, Value touser.lastName - Set Name to
login, Name format toBasic, Value touser.login - Set Title to
title, Name format toBasic, Value touser.title - Set Department to
department, Name format toBasic, Value touser.department - If you use Push Groups, you can also:
Set groups, Name format toBasic, Filter to.*(or another filter to only expose certain groups) - Click Next.
- Set Name to
- Select "I'm an Okta customer adding an internal app" and click Finish.

- You should be redirected to the Sign On tab. Click View Setup Instructions. Copy this information into Transcend on the Settings / SSO tab on the Admin Dashboard.
This info is your:- Identity Provider Single Sign-On URL
- Identity Provider Issuer
- X.509 Certificate