Managing Custom Fields
By setting custom fields, you can create columns and tags unique to your business needs. To start, navigate to Infrastructure > Workspace Configuration > Custom Fields on the sidebar.
- Existing account in your Transcend instance
To begin creating your new custom field:
- Navigate to Infrastructure > Workspace Configuration > Custom Fields on the sidebar.
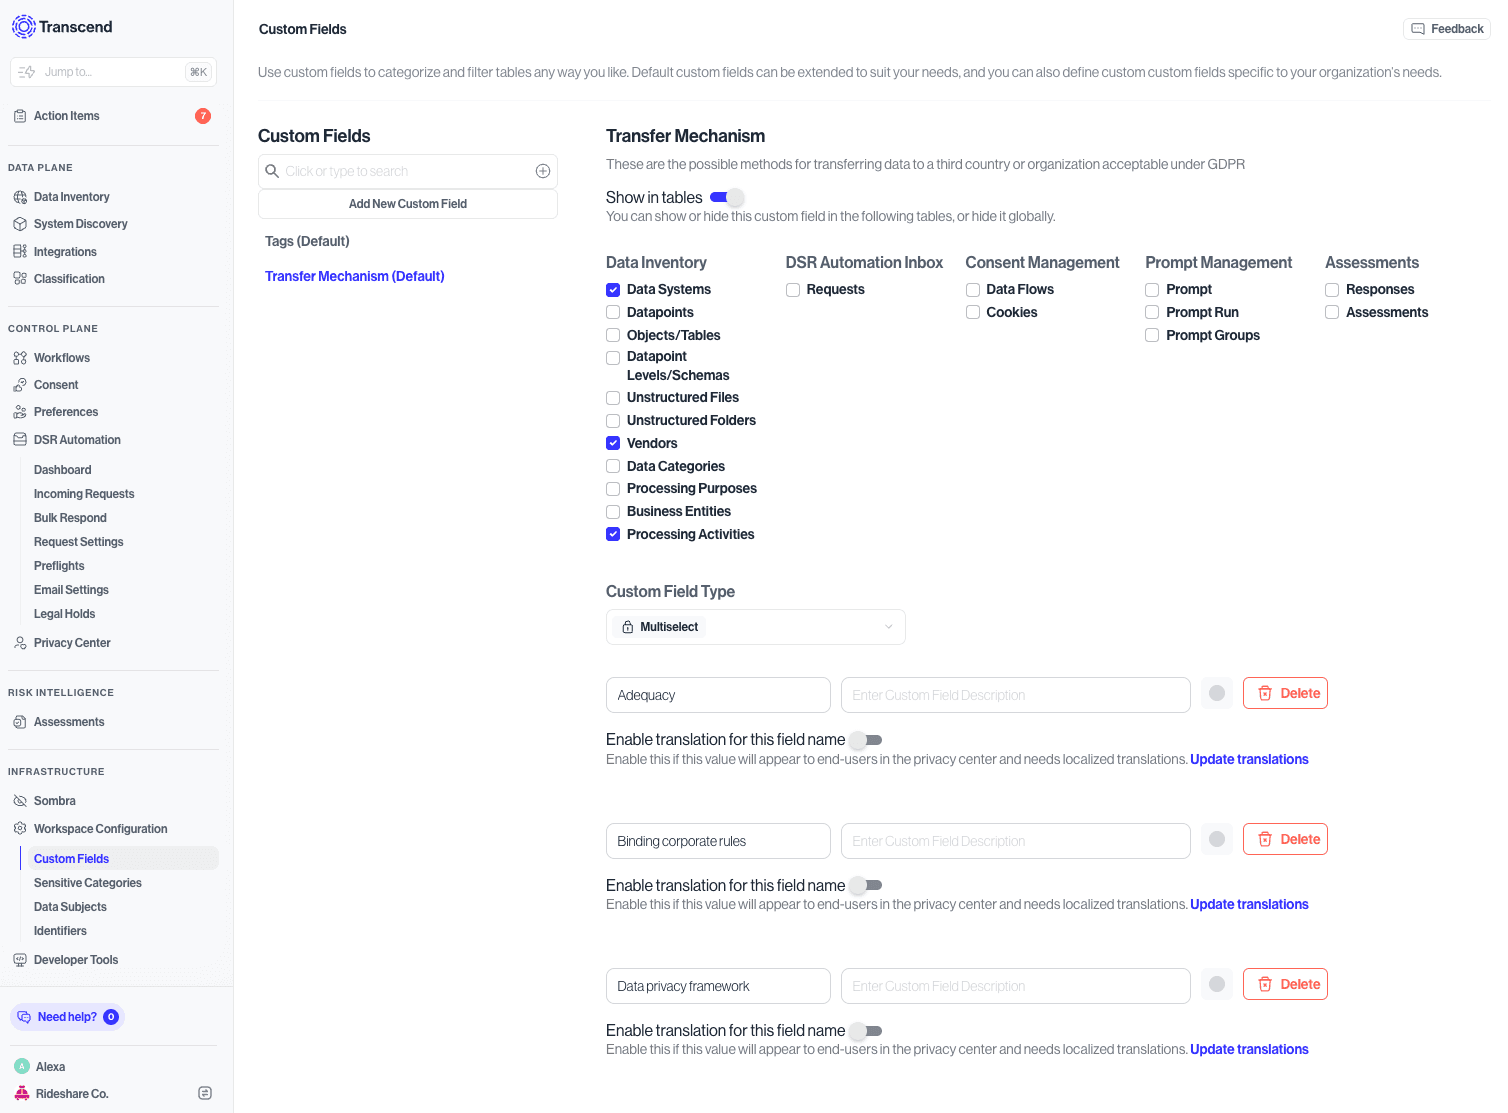
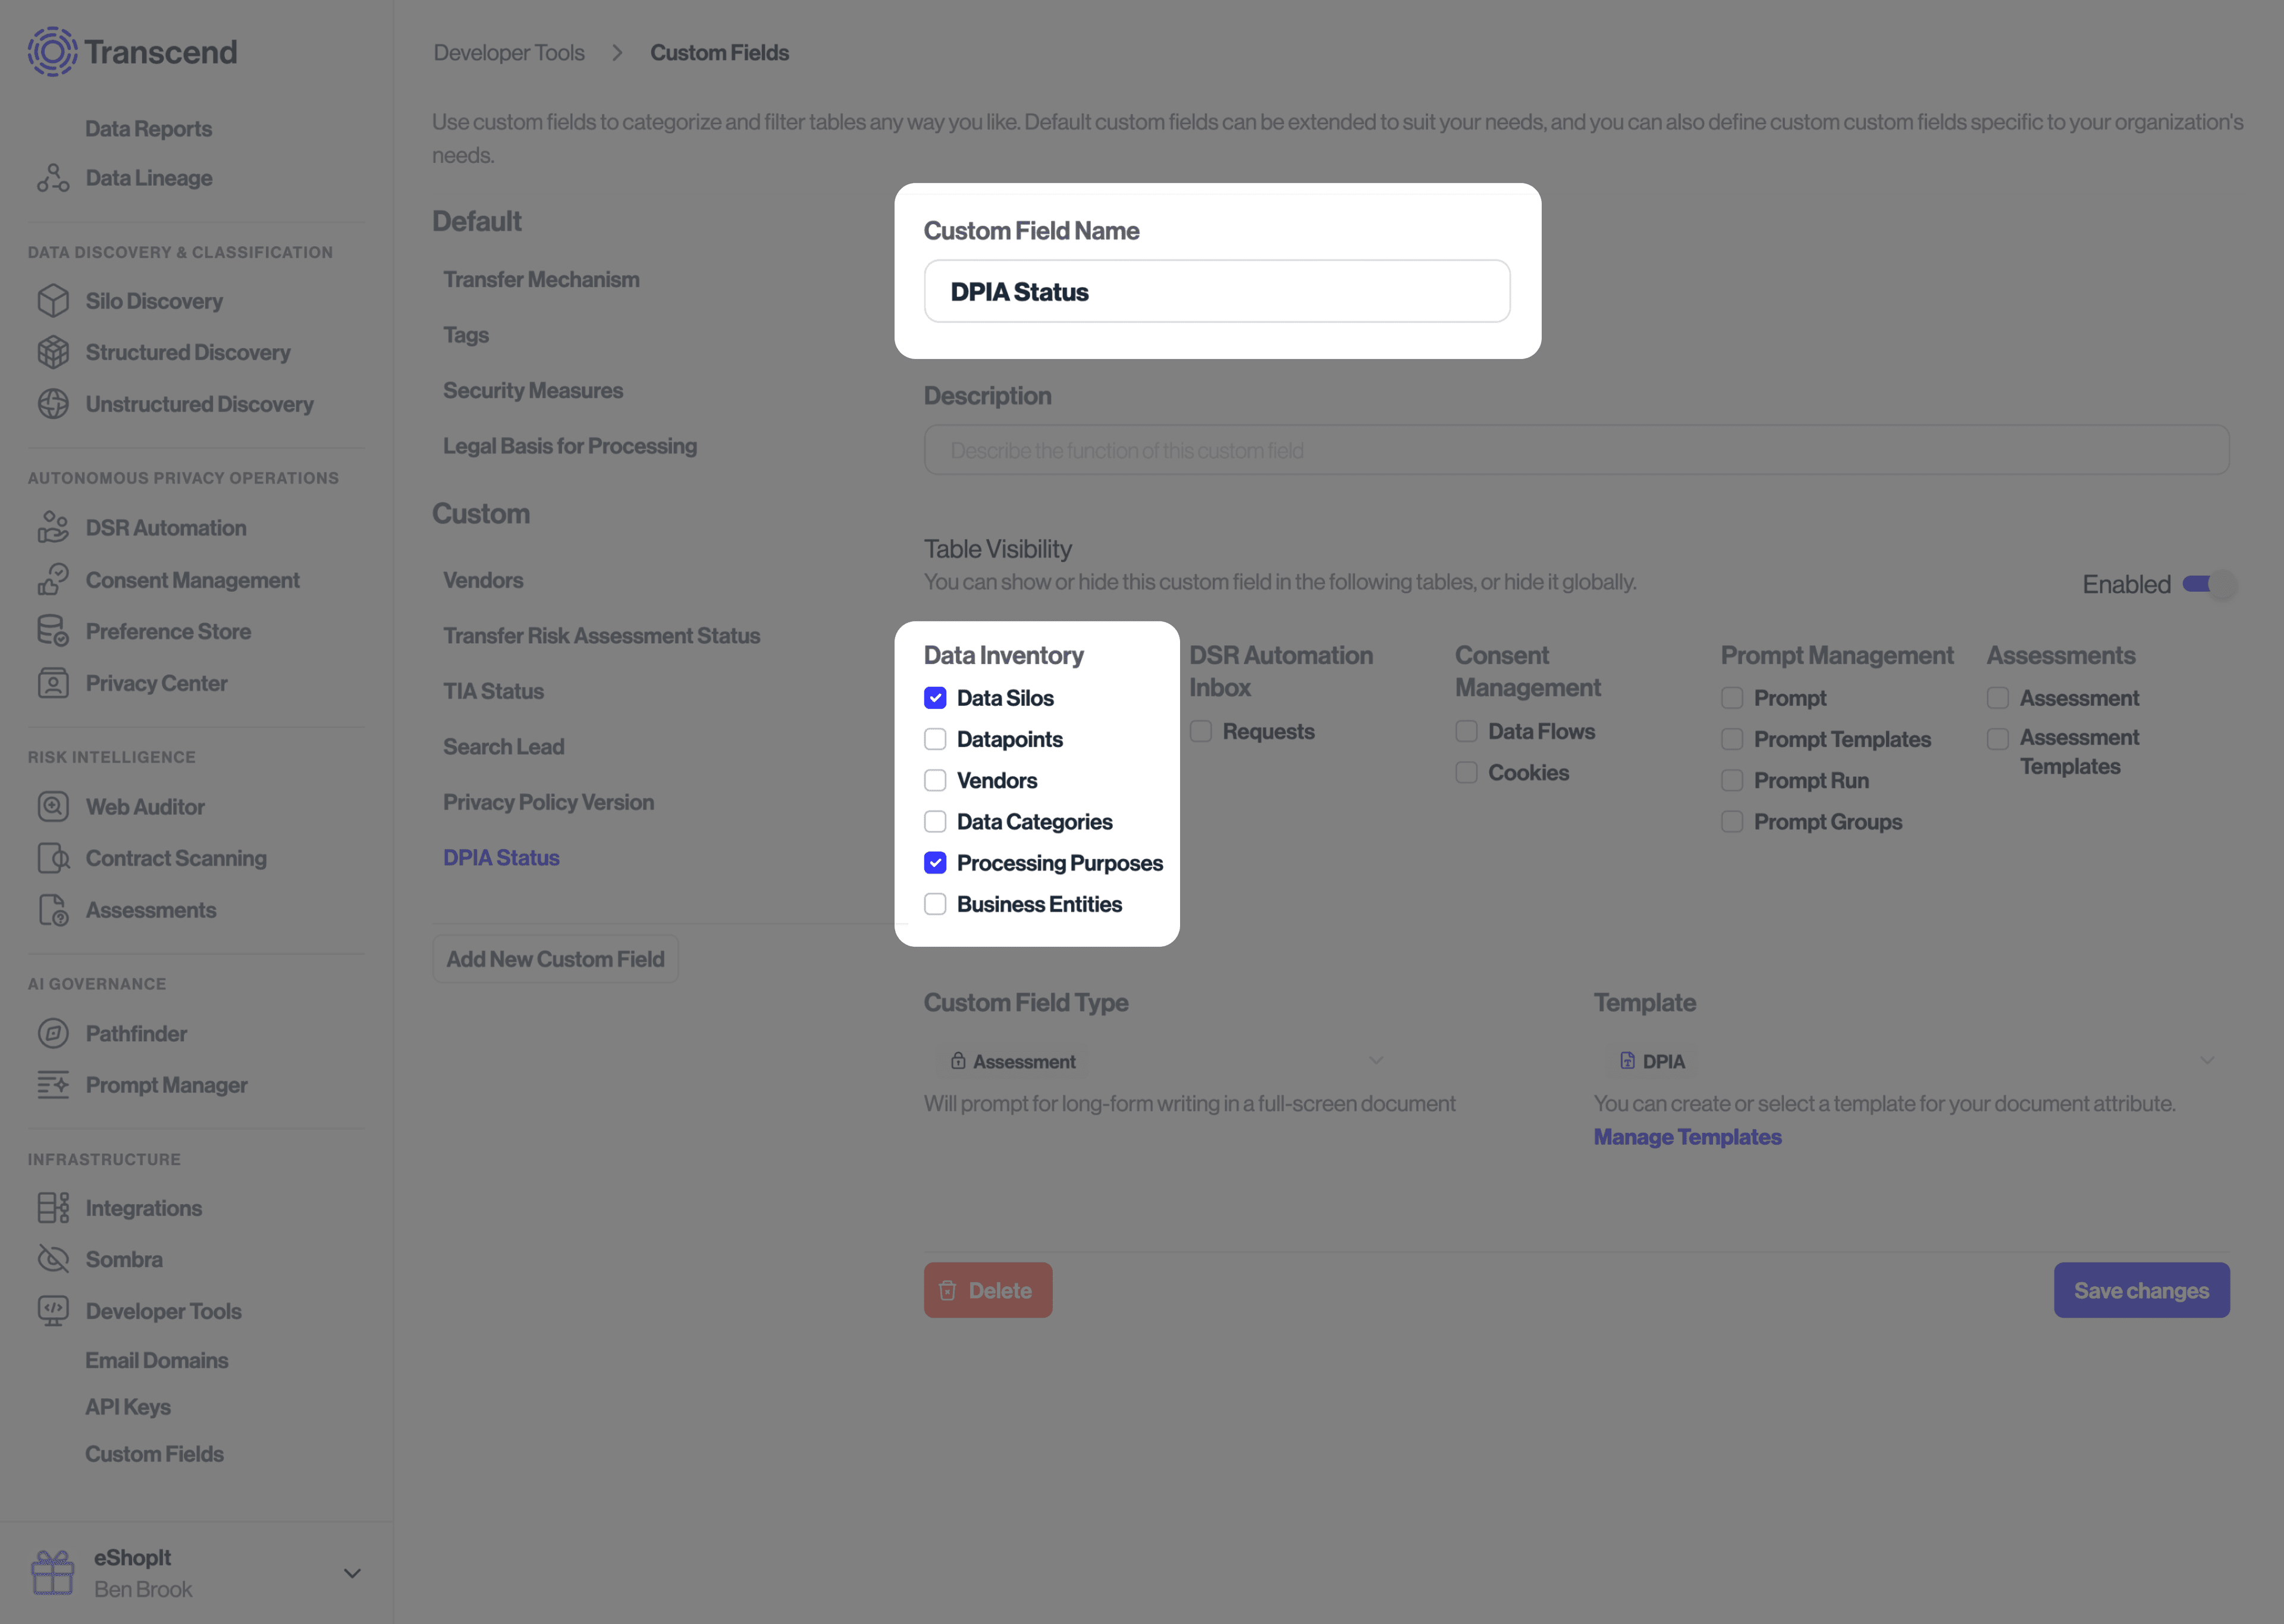
- Click the Add New Custom Field button
- In the "Custom Field Name" and "Description" text fields, add the name of your field and a brief summary explaining its purpose
- By default, the "Show in Tables" toggle is enabled. If you would like this field to not appear in tables globally, disable this toggle.
- Determine which product(s) the custom field is relevant for by selecting/deselecting the checkboxes
- The "Custom Field Type" is defaulted to multiselect. Adjust this field to fit the field type of your custom field. Available field types include:
- Multiselect
- Single Select
- Text
- Phone
- URL
- Assessment

- Click the Save Changes button to finalize your choices
- If your custom attribute is Multiselect or Single Select, click on the new "Add [FIELD NAME]" button. Now you can type in product selections and choose their associated colors. You can also add these directly from the dropdown menu in tables where these custom fields appear.
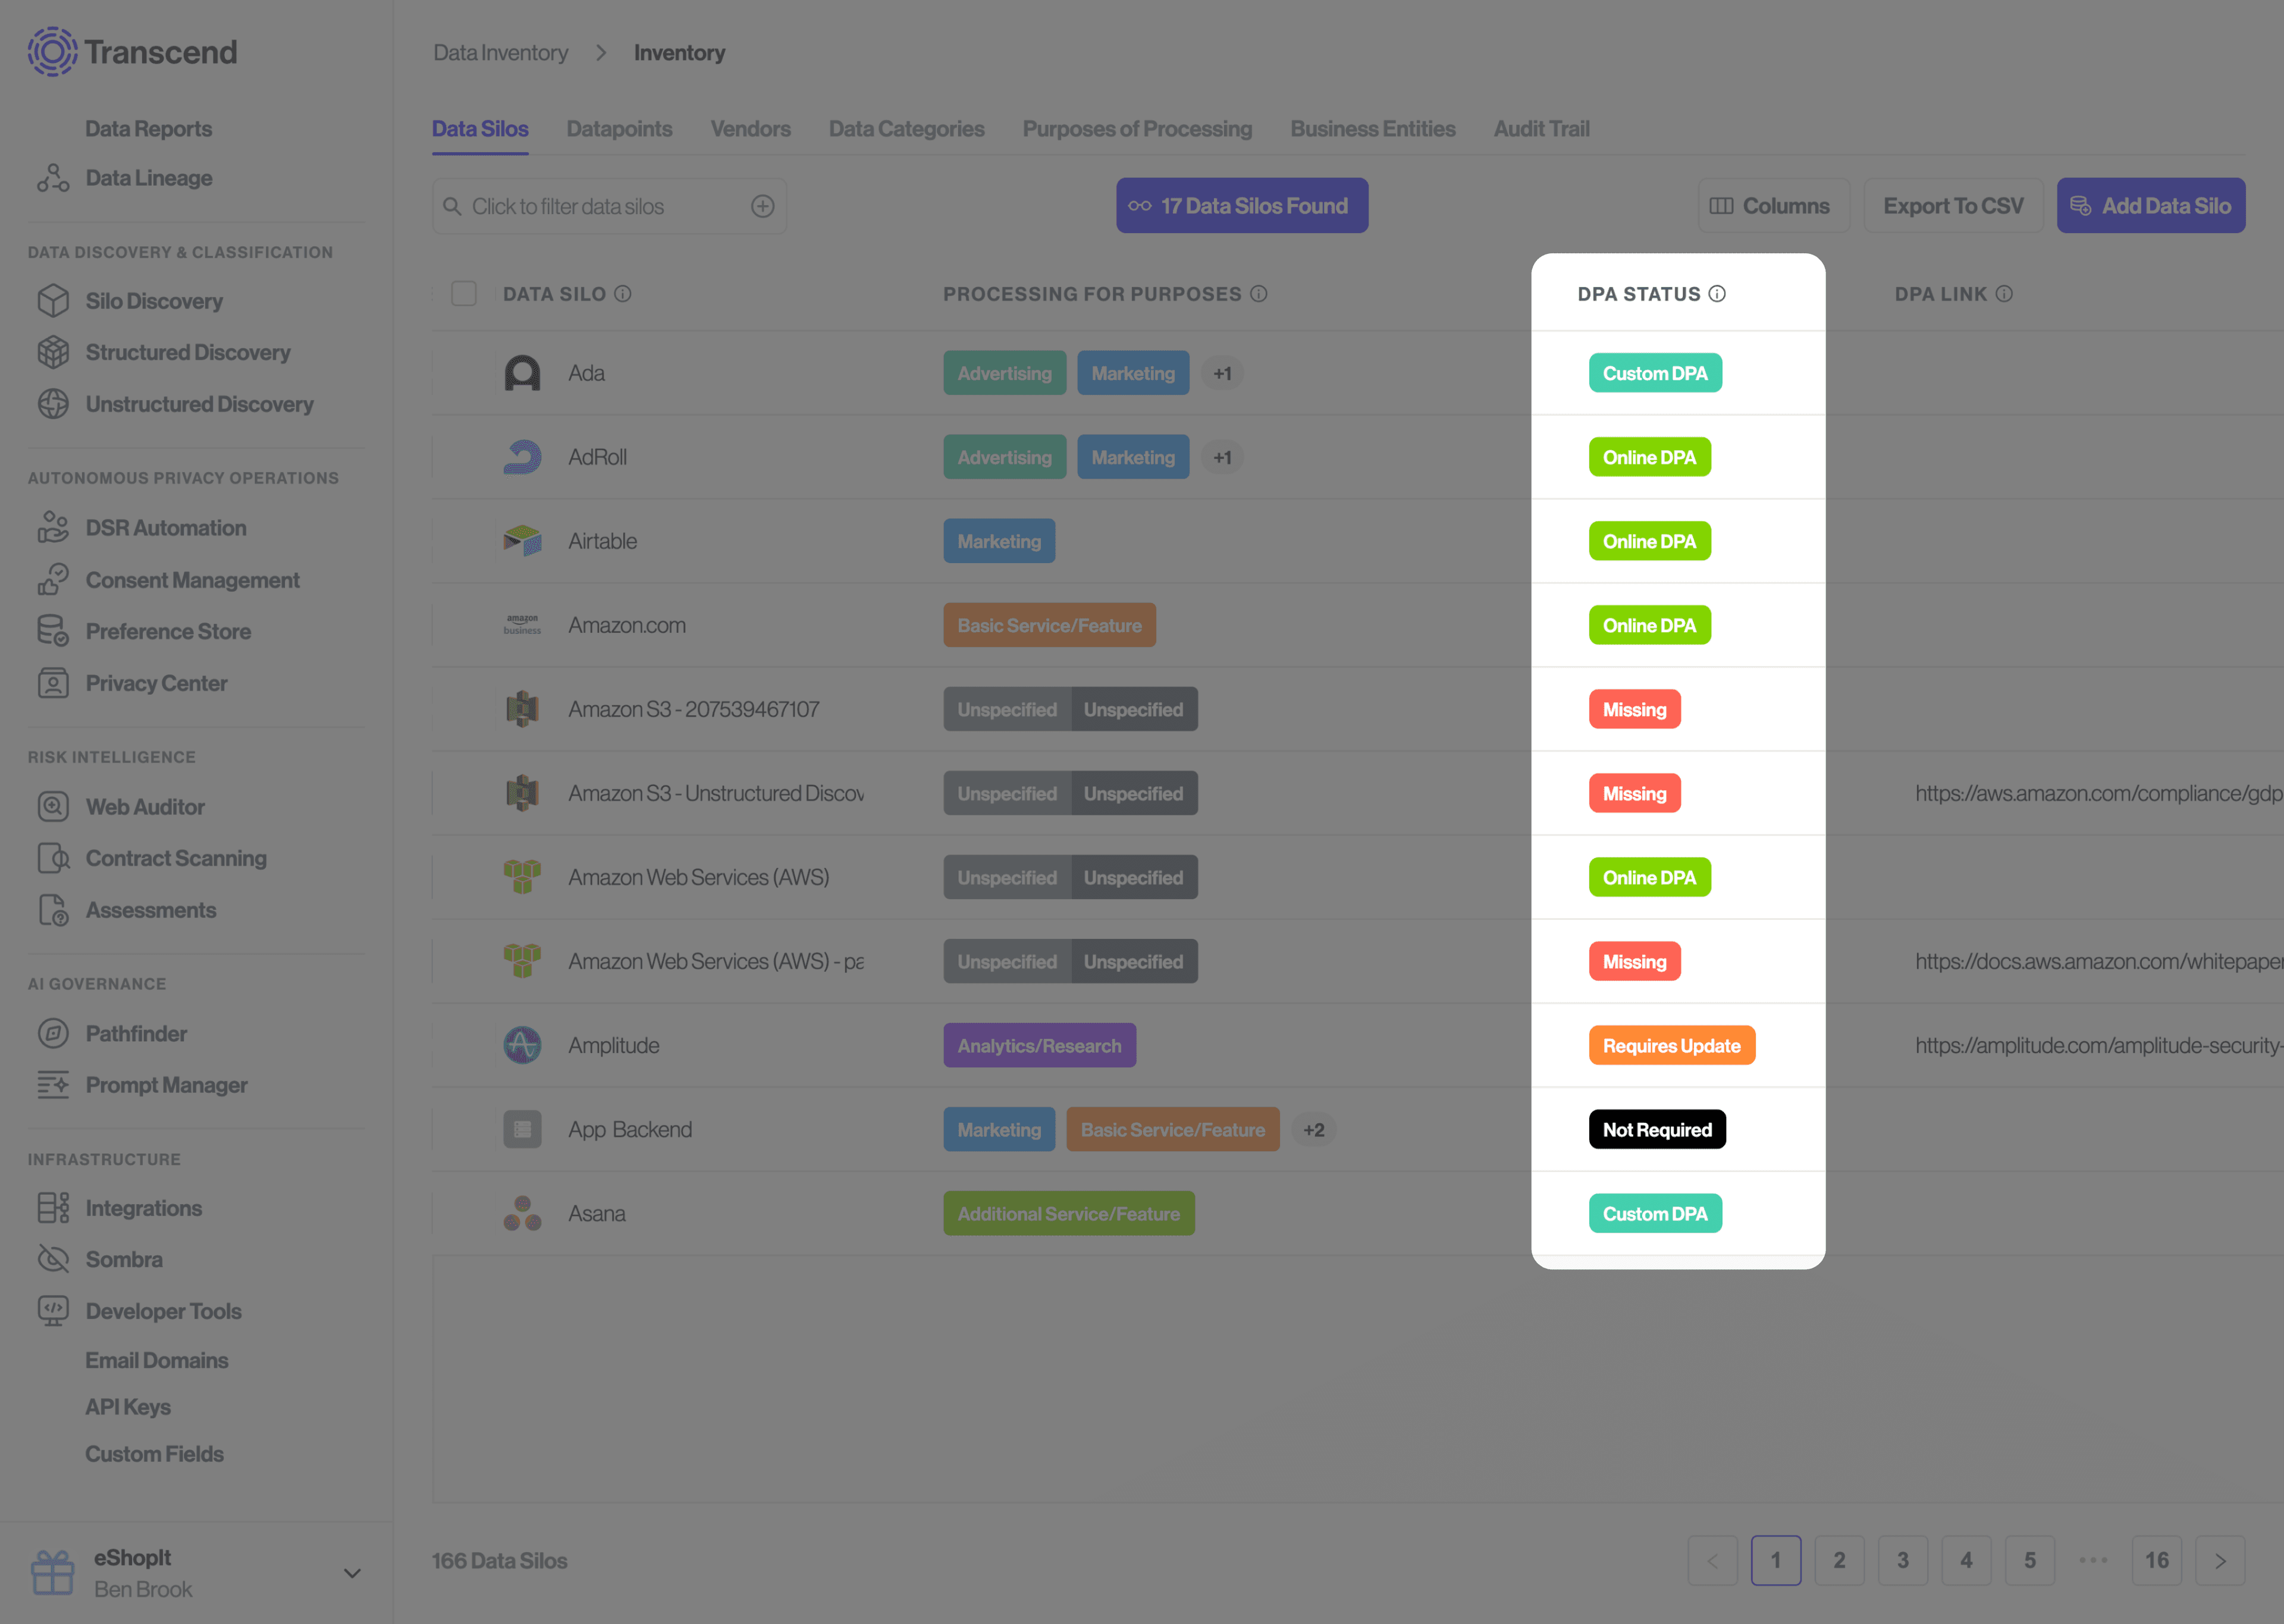
Once you have created and set your custom fields, you can see them in each of the views you added them to.
Scroll to the far right of the table on that page to view your new tag or custom field, then click in line to add or select the correct values. Typing in the search box of the dropdown menu of a Multiselect or a Single Select custom field will allow you to search for any existing tag from the list, or add a new one on the fly.
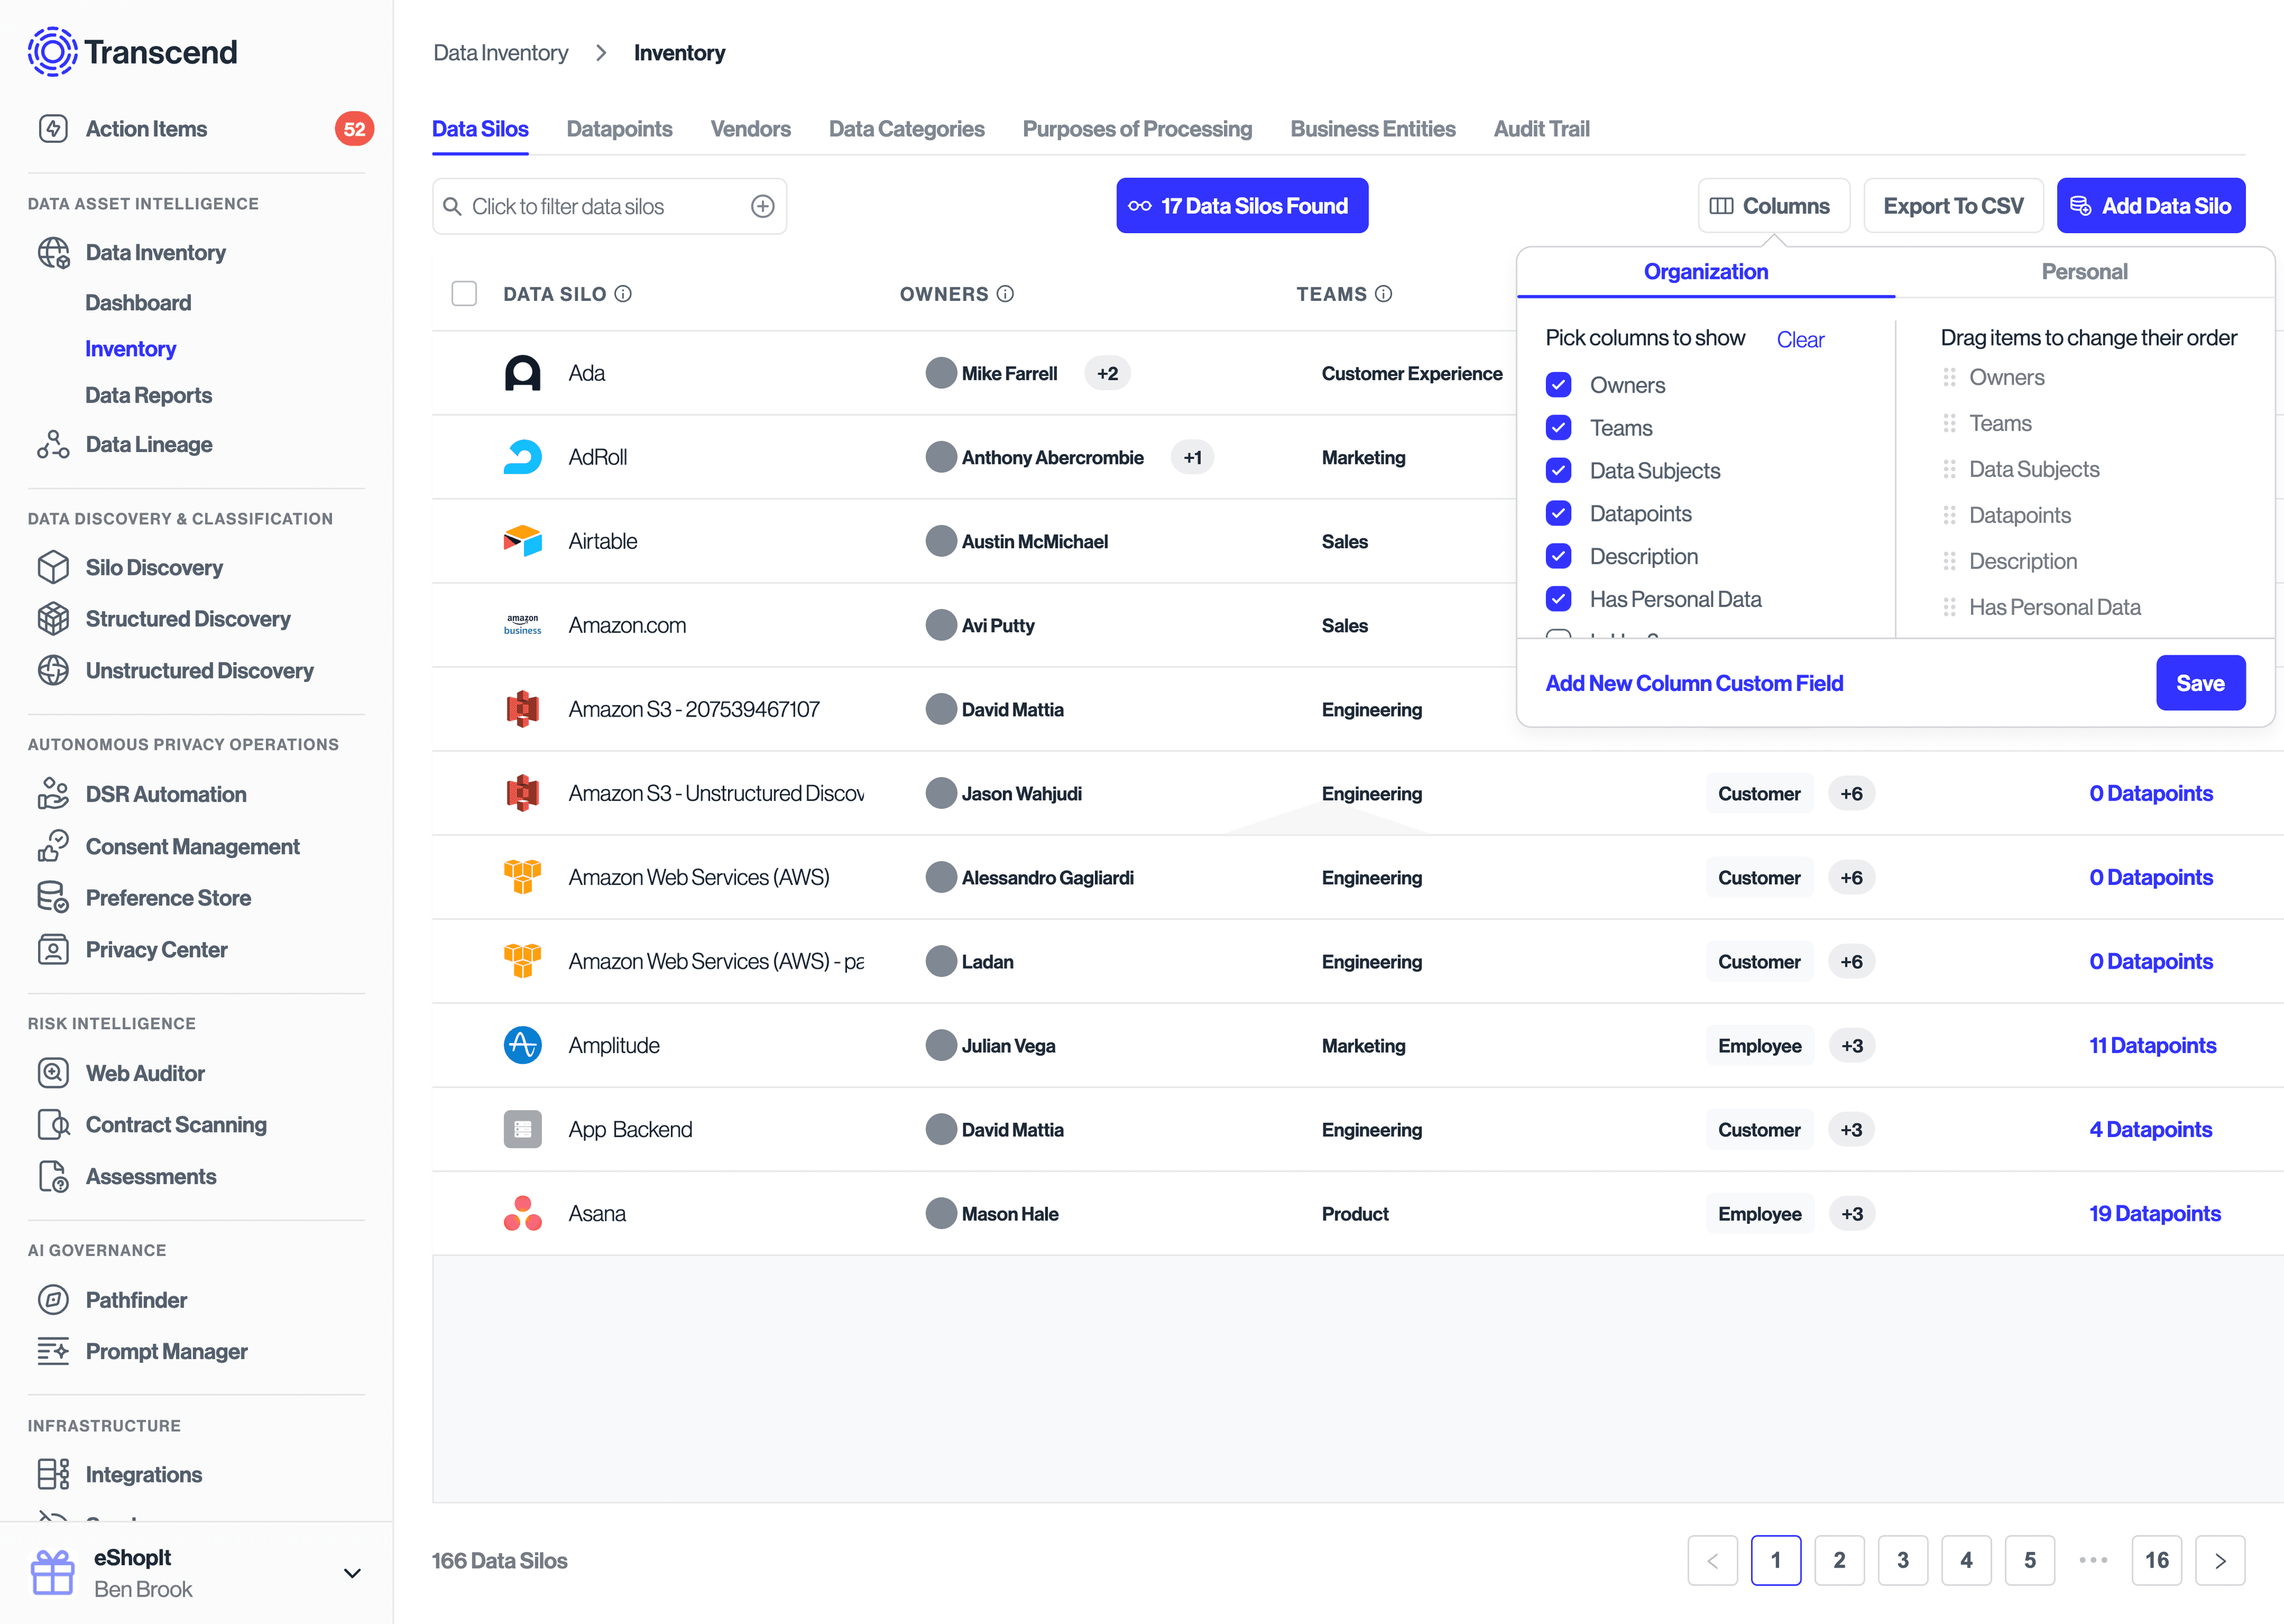
In many tables, tag and custom field columns can be reordered and hidden as desired. Look for the "Columns" button in the top right above a table and click on it to reveal these settings. Changes made to on the "Organization" tab will be applied to the whole organization, while the changes made on the "Personal" tab will only apply to your view of the given table.
Deselect columns from the list on the left to hide them from your table. Drag and drop columns on the right to reorder them in your table.