Azure AD SSO Configuration Guide
Ensure you have read the SSO Setup Overview article to ensure you have configured the baseline and prepared for your IDP SSO connection.
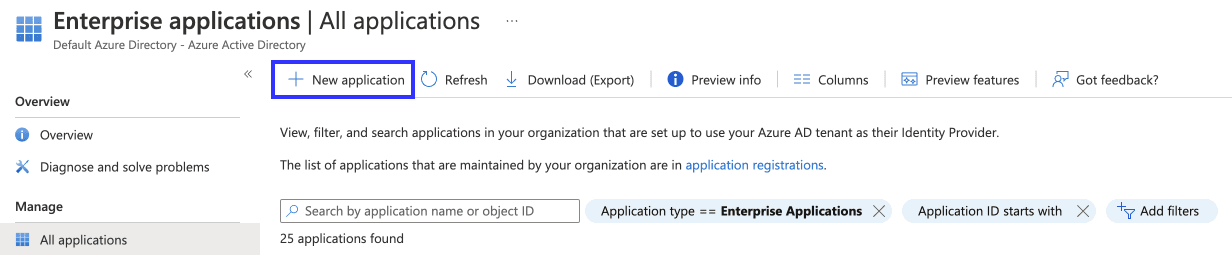
- Navigate to Active Directory and select Enterprise Applications from the menu.
- Select the option to Add a New Application
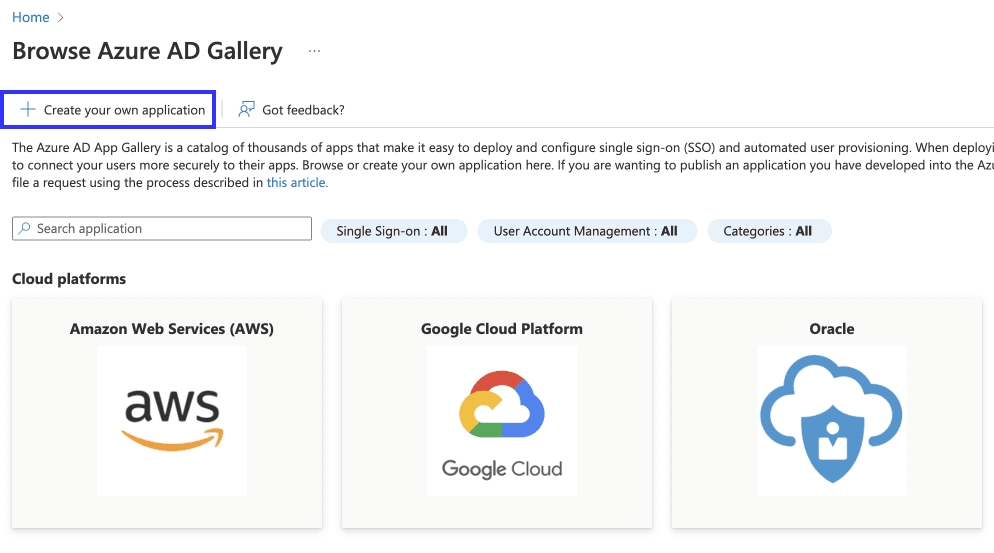
- Choose Create your own application.
- Add a name to help you remember the application (ex:
transcend-sso). - Select Set up Single sign-on and choose
SAMLas the SSO mode.

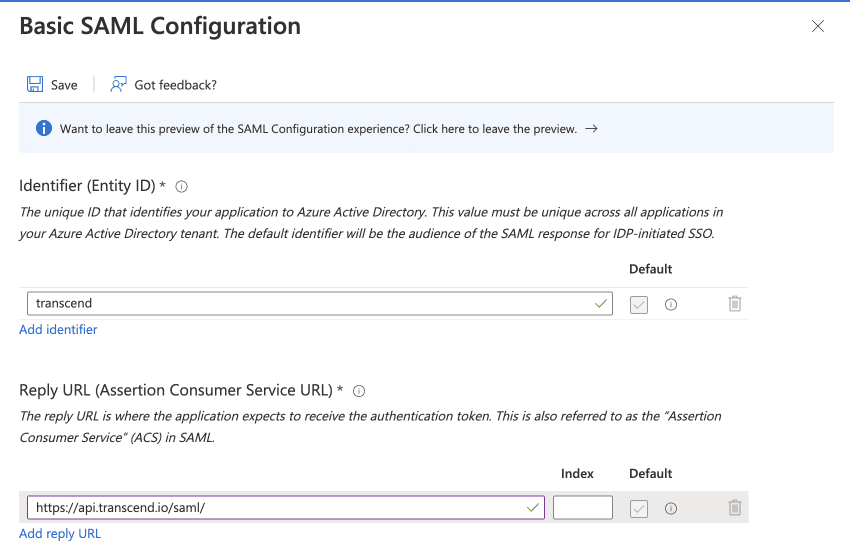
- In the Basic SAML Configuration Settings, enter the following information:
- Identifier (Entity ID):
transcend. Note - this must be an exact match, Transcend is looking for this string. - Reply URL (Assertion Consumer Service URL):
https://api.transcend.io/samlfor the EU backend, orhttps://api.us.transcend.io/samlfor the US backend - Sign on URL :
https://app.transcend.io/login - Relay State (Optional): leave empty
- Logout URL (Optional): leave empty
- Identifier (Entity ID):
- In the Attributes & Claims, create the following two claims:
- firstName:
user.givenname - lastName:
user.surname
- firstName:
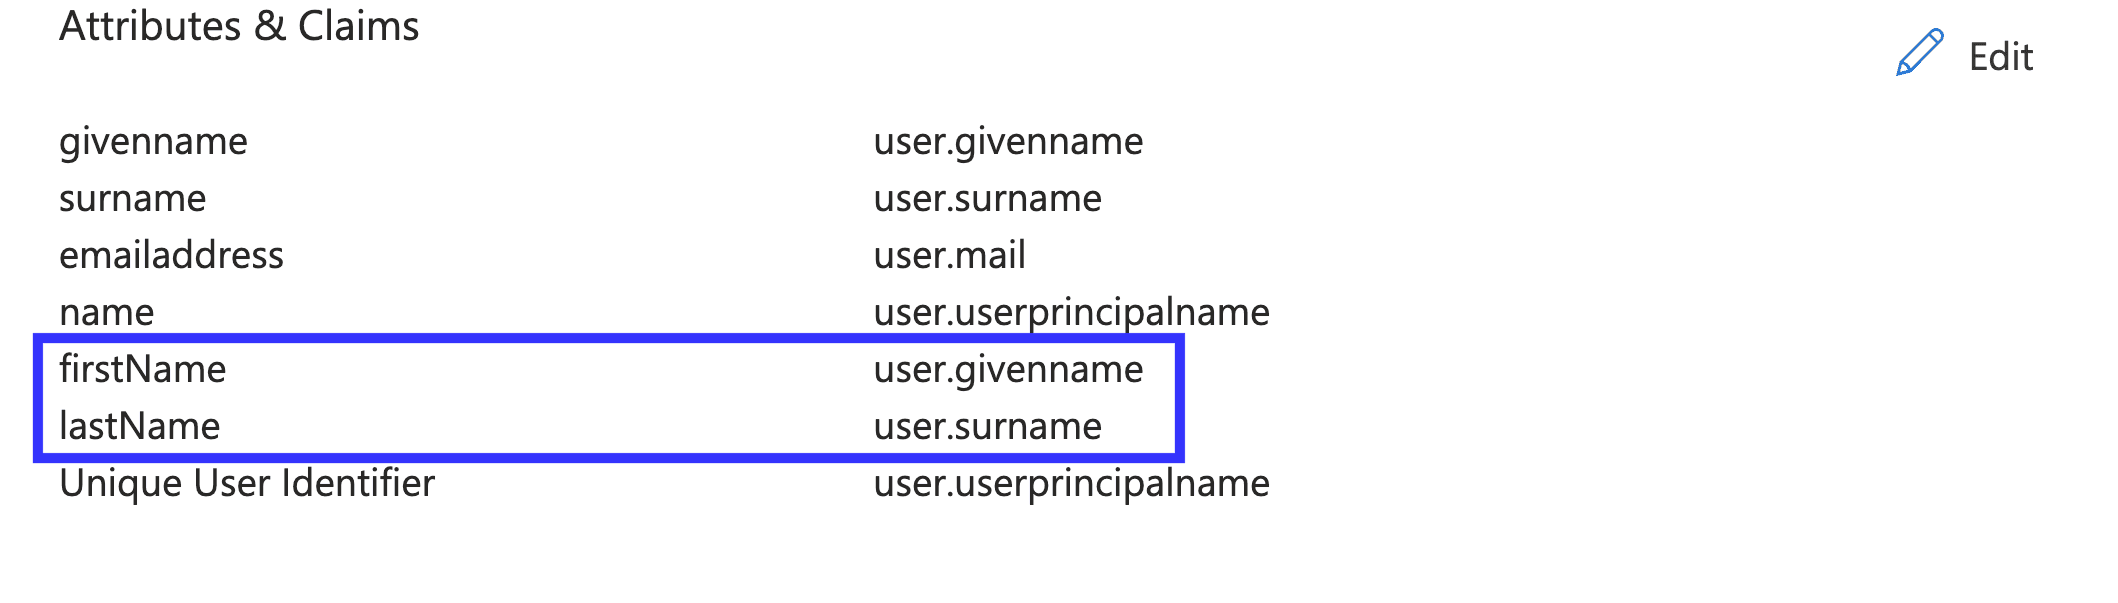
Transcend uses these claims to set names for users. Without them, users will be created with blank names.
Once the Transcend application is set up in Active Directory, obtain the credentials and certificate to enter in the Transcend Admin Dashboard SSO settings.
- In Transcend SSO Settings, enter
transcendfor Identity Provider Issuer. The value entered here must matchtranscendexactly. - Under the SAML Certificates section, download the X.509 Certificate by selecting the download option for Certificate (Base64). Copy this value to Transcend.
- Copy the login URL from Active Directory into Transcend. It should look similar to
https://login.microsoftonline.com/{{uuid}}/saml2.
Configure the groups and users who should have access to Transcend in Active Directory by navigating to the newly created Transcend app and selecting Users & Groups. Note that it may be worth creating a new group of users who should have access to Transcend.