Setting up Single-Sign-On

Transcend can be configured to support single sign on with a variety of identity providers to make it easy to manage access control to Transcend. Setting up SSO in Transcend makes it easy to give access to the correct people with the correct scope, all through your existing identity provider.

If you aren't using an identity provider, or would like to manually configure teams and scopes to delegate access to Transcend, see the Access Control Guide.

To get started, go to the Admin Dashboard settings and choose the “SSO” tab. Follow the steps in the next sections to create a SAML configuration.

This section outlines the general steps for setting up SSO in Transcend with an Identity Provider. The following sections provide guides for configuring an application for Transcend SSO for Okta, Google and Azure Active Directory.

You’ll need to create an application in your IDP. We have plans to have official apps in Okta, OneLogin, and other popular identity providers soon. In the meantime, you can create a SAML-based application.

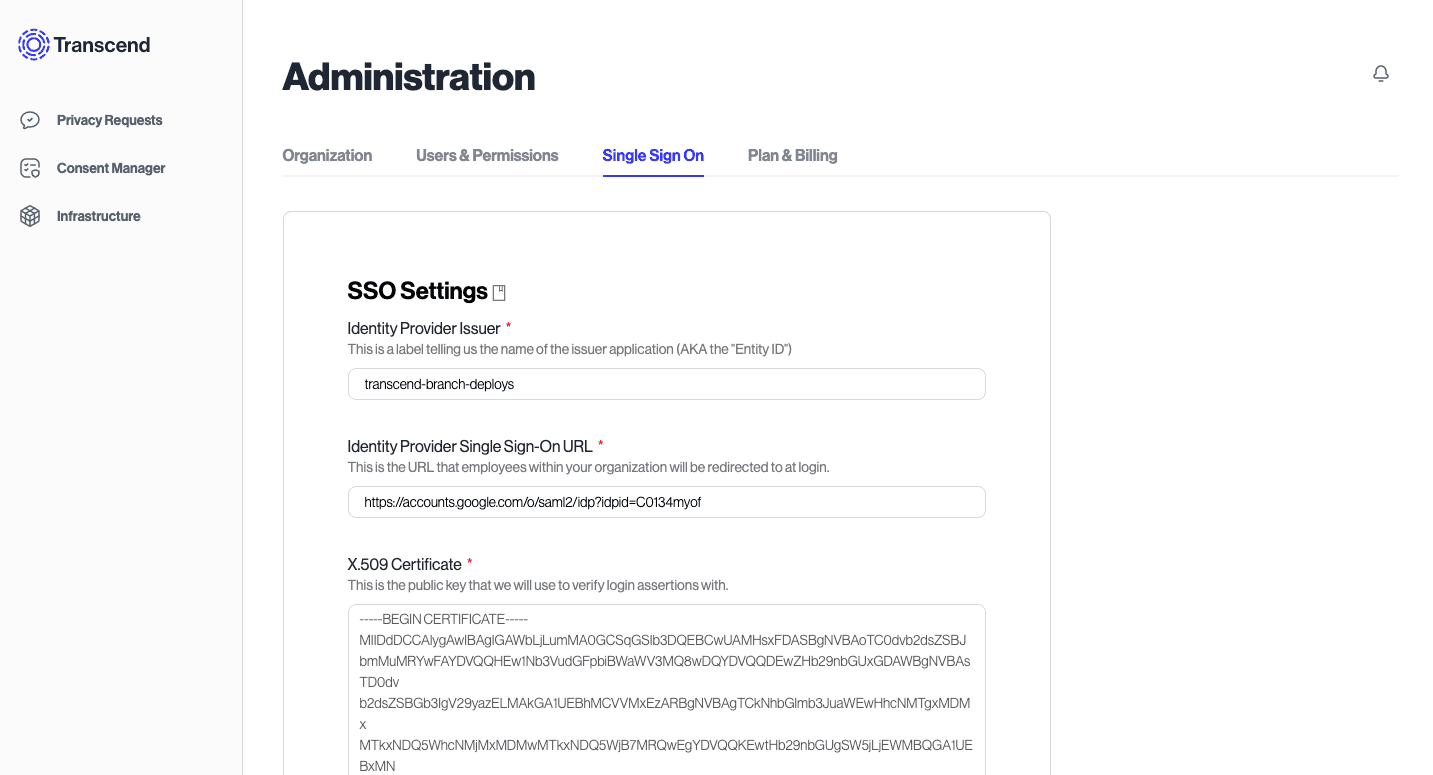
Your provider will ask you for a few things from Transcend, which we provide in the SSO tab.

Once you’ve created the application in your IDP, you can come back to Transcend and proceed.

Your IDP will provide an Identity Provider Single-Sign On URL, Identity Provider Issuer, and X.509 certificate. Copy them into their respective fields in Transcend.

You can now test via IDP-initiated SSO by logging out and logging back in at https://app.transcend.io/login. By entering your email address, you should be redirected to your identity provider.

If you have any trouble along the way, please reach out to us at support@transcend.io.

  • Audience: transcend
  • Single sign on URL: https://api.transcend.io/saml/
  • Recipient URL: https://api.transcend.io/saml/
  • Destination URL: https://api.transcend.io/saml/

Configure Okta for Transcend SSO.

Note: this guide uses the Classic UI, which can be selected on the top-left dropdown in Okta

  1. Go to the Applications page
  2. Click Add Application
  3. Click Create New App. Under platform, select Web, and choose SAML 2.0. Click Create.
  4. Name your application Transcend. You may download our App Icon here and click Upload Logo. Click Next.
  5. Set your Single sign on URL to https://api.transcend.io/saml Set Audience URI to transcend Set Name ID format to EmailAddress Set Application username to Email
  6. Scroll down to Attribute Statements and set 3-5 attributes:
    • Set Name to firstName, Name format to Basic, Value to user.firstName
    • Set Name to lastName, Name format to Basic, Value to user.lastName
    • Set Name to login, Name format to Basic, Value to user.login
    • Set Title to title, Name format to Basic, Value to user.title
    • Set Department to department, Name format to Basic, Value to user.department
    • If you use Push Groups, you can also: Set groups, Name format to Basic, Filter to .* (or another filter to only expose certain groups)
    • Click Next.
  7. Select "I'm an Okta customer adding an internal app" and click Finish.

8. You should be redirected to the Sign On tab. Click View Setup Instructions. Copy this information into Transcend on the Settings / SSO tab on the Admin Dashboard.

This info is your:

  • Identity Provider Single Sign-On URL
  • Identity Provider Issuer
  • X.509 Certificate

Configure Google for Transcend SSO.

  1. Go to Google Admin and select Apps.
  2. Select "SAML apps"
  3. Click the + sign on the bottom right
  4. Take note of your SSO URL, Entity ID, and download the Certificate
  5. Click Next. Under Application Name, enter Transcend. Feel free to add a description, like "Transcend's Data Privacy Infrastructure manages personal data across distributed data systems and vendors." You can download our App Icon here and click Upload Logo.
  6. Click Next to proceed to Service Provider Details

Under ACS URL enter https://api.transcend.io/saml Under Entity ID enter transcend Check Signed Response Under Name ID select Basic Information / Primary Email Under Name ID Format select EMAIL 7. Click Next to proceed to Attribute Mapping

Type firstName and select Basic Information / First Name Type lastName and select Basic Information / Last Name Type login and select Basic Information / Primary Email Type title and select Employee Details / Title Type department and select Employee Details / Department

  1. Copy the information from Step 4 into Transcend on the Administration / Single Sign On tab on the Admin Dashboard.

Enter your:

  • Entity ID into Identity Provider Issuer
  • SSO URL into Identity Provider Single Sign-On URL
  • Certificate into X.509 Certificate. You'll need to open the .pem file your downloaded in a text editor and copy the text in.

Configure Active Directory for Transcend SSO.

  1. Navigate to Active Directory and select Enterprise Applications from the menu.

  2. Select the option to Add a New Application

  3. Choose Create your own application.

  4. Add a name to help you remember the application (ex: transcend-sso).

  5. Select Set up Single sign-on and choose SAML as the SSO mode.

  6. In the Basic SAML Configuration Settings, enter the following information:

    • Identifier (Entity ID): transcend. Note - this must be an exact match, Transcend is looking for this string.
    • Reply URL (Assertion Consumer Service URL): https://api.transcend.io/saml/
    • Sign on URL : https://app.transcend.io/login
    • Relay State (Optional): leave empty
    • Logout URL (Optional): leave empty

Once the Transcend application is set up in Active Directory, obtain the credentials and certificate to enter in the Transcend Admin Dashboard SSO settings.

  1. In Transcend SSO Settings, enter transcend for Identity Provider Issuer. The value entered here must match transcend exactly.
  2. Under the SAML Certificates section, download the X.509 Certificate by selecting the download option for Certificate (Base64). Copy this value to Transcend.
  3. Copy the login URL from Active Directory into Transcend. It should look similar to https://login.microsoftonline.com/{{uuid}}/saml2.

Configure the groups and users who should have access to Transcend in Active Directory by navigating to the newly created Transcend app and selecting Users & Groups. Note that it may be worth creating a new group of users who should have access to Transcend.