Adding Assessments to the Data Inventory
One of the strongest features of Transcend's Assessments product is the ability to sync to the Data Inventory. There are several reasons to connect Assessments to the Data Inventory, such as:
- Collecting information about your systems.
- Evaluating your current systems.
- Updating the information in your Data Inventory.
- Collecting the information required to produce a ROPA report.
- Checking the status of your vendor assessments directly from the Data Inventory.
We enable two different ways to connect your Data Inventory and Assessments:
- Sync Assessment responses to fields of the Data Inventory: This feature allows you to send out Assessments that have certain questions mapped to fields of the Inventory and have the provided answers update the fields of the inventory.
- Link Assessment status to a row of the Data Inventory: To ensure that each vendor, data system, or other row of your Data Inventory has passed the required Assessments, you can have the status show up in their corresponding row.
Let's start with the first use-case.
To enable the option to sync responses from an assessment to fields of the inventory, you will need to first build that logic into the Assessment templates. You can decide to update an existing template, upload a template and then modify it, or create one from scratch. For this demonstration, we will create one from scratch.
- From the Assessments product page, navigate to the "Templates" tab.
- Click on "Create new Template" on the top right.
- Add a title, description, and any sections and questions you'd like.
- Now, go to the questions you would like to sync to the inventory.
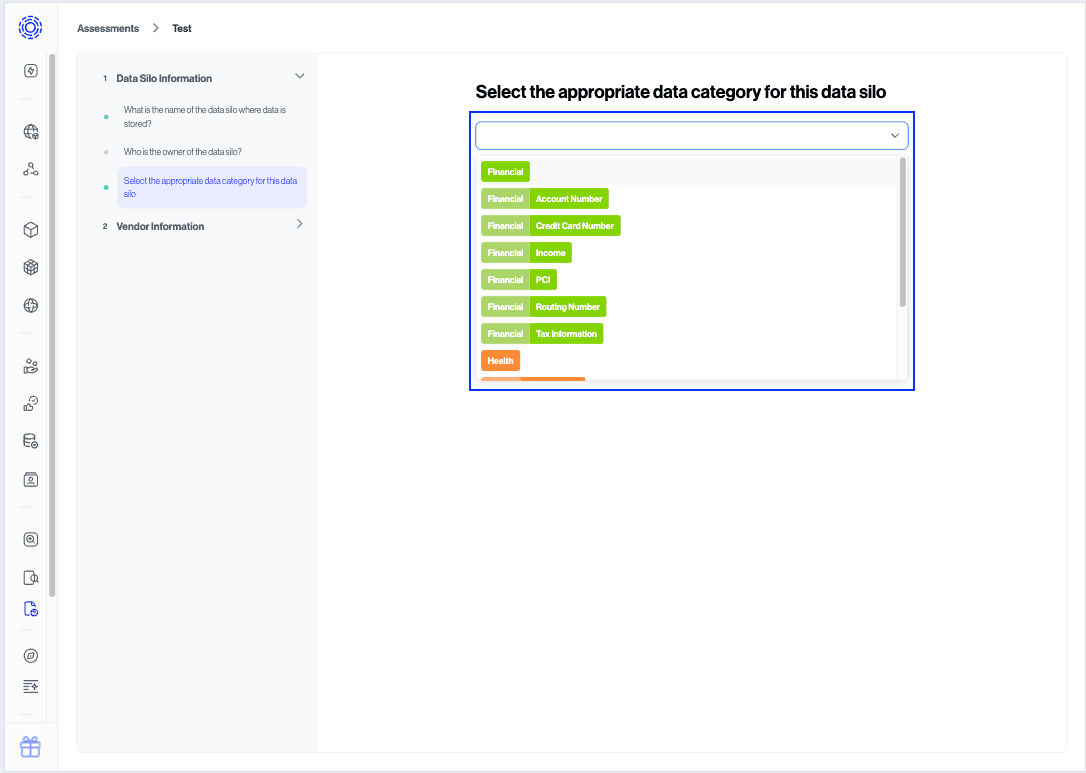
4.a. If your question type is set to "Single-select" or "Multi-select", you will see an additional drop-down appear to specify the "-select type". Select one of the fields from your Data Inventory to automatically generate the "Answer Options" based on the available, applicable values in your Data Inventory.
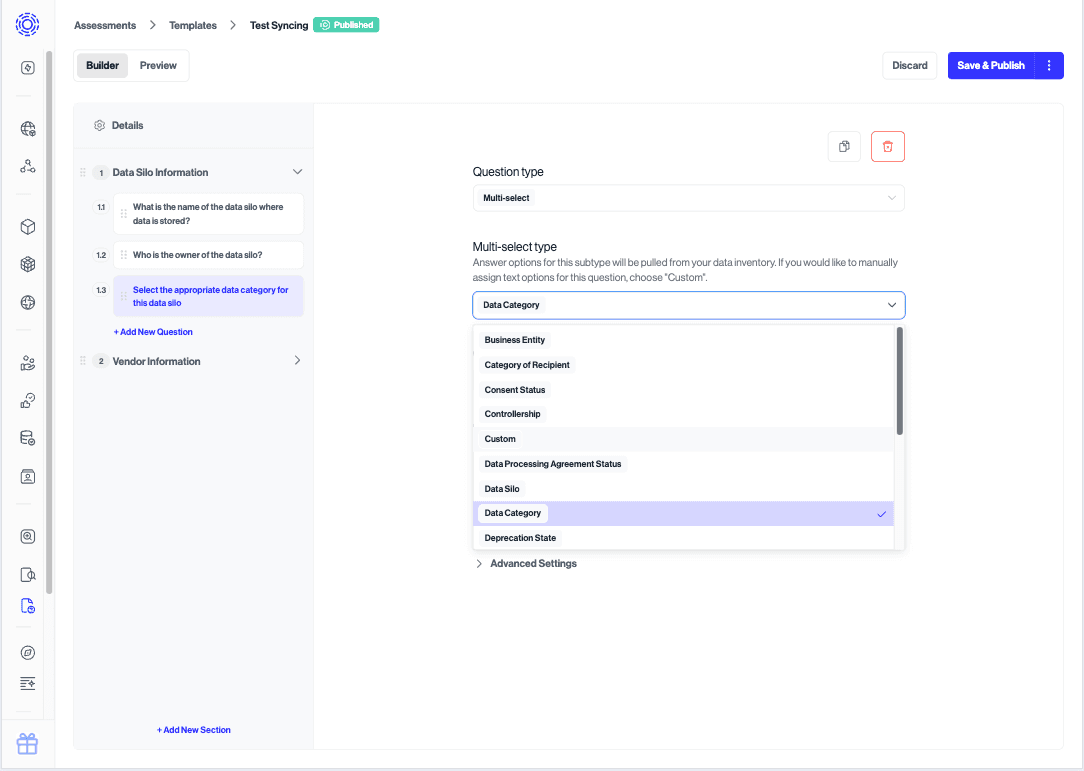
4.b. For example, if you selected "Data Category" as the "-select type" option, the respondent will see all of the available options for your configured "Data Categories" and will be able to select the one that matches the question.
- Click on "Advanced Settings" and then toggle "Sync Response To Table" to "On".
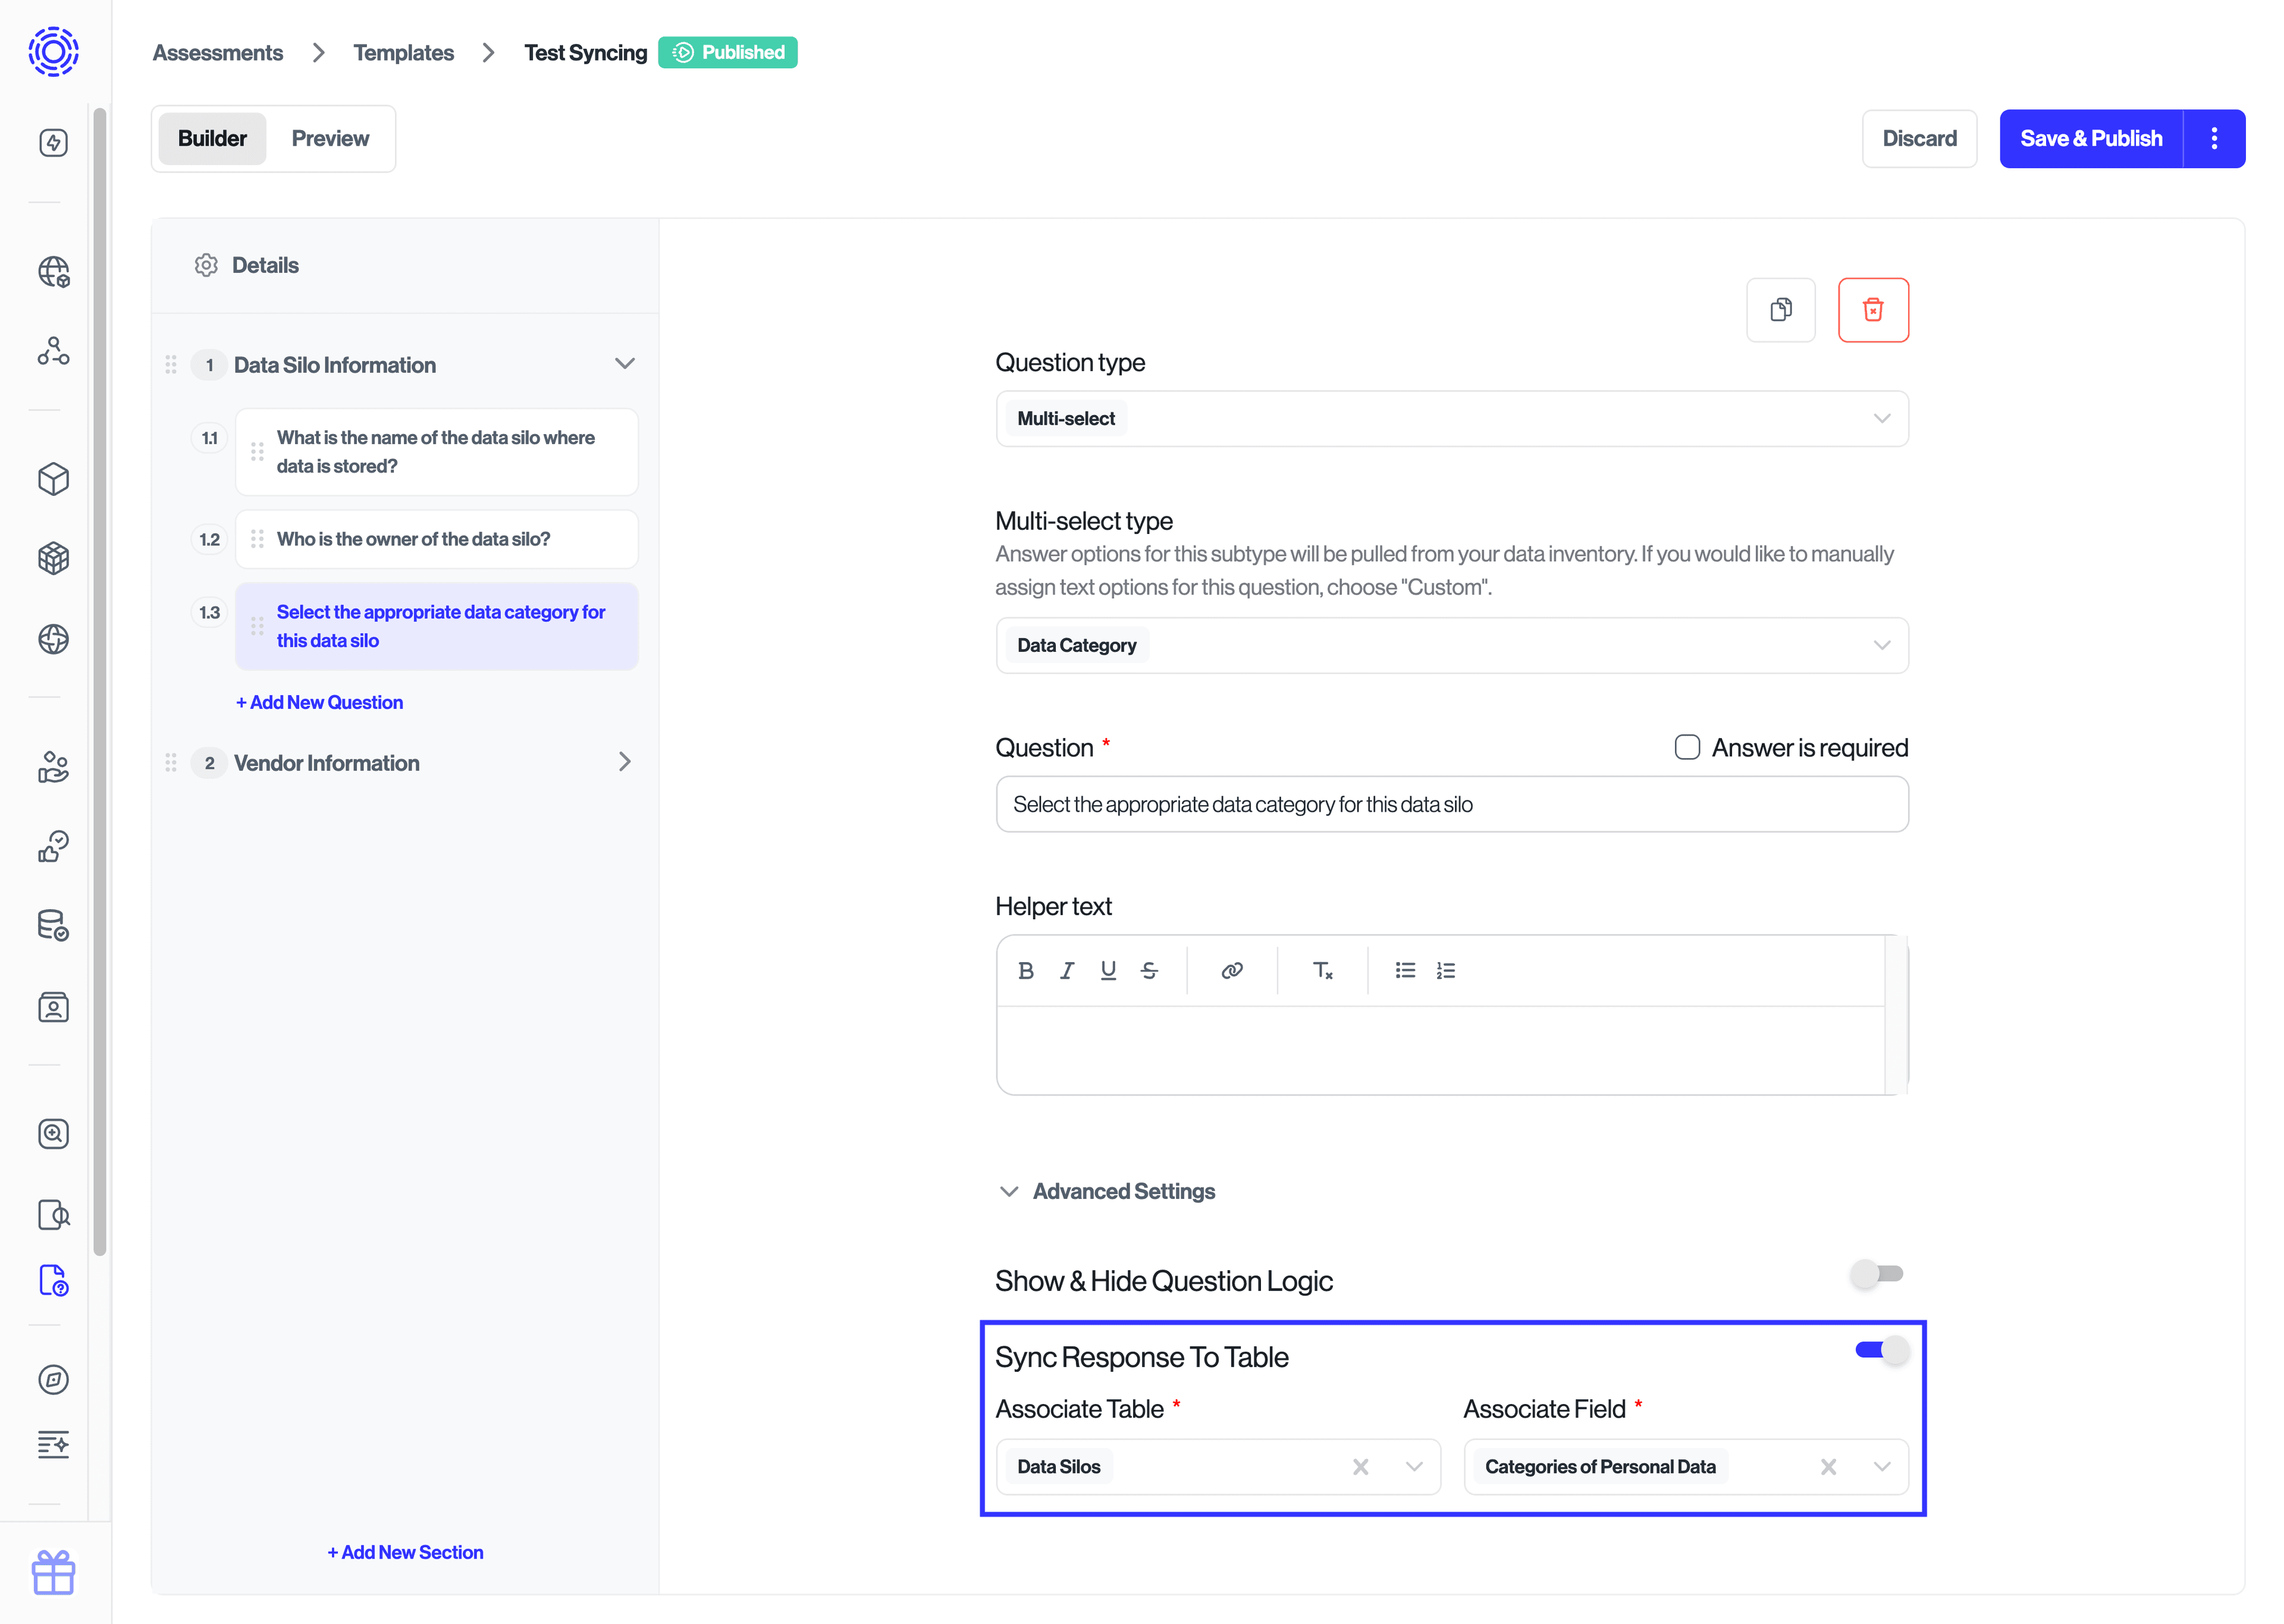
- Now you will see the option to) should be updated.
Note: Within the templates, you can associate the "Table" and "Column", while the "Rows" will be selected once an individual Assessment generated from that template is ready for review.
- Continue associating tables and fields for any other question that you would like to connect.
Now that you have created the logic to map certain question answers to fields of the inventory, any assessment generated from this template will provide you with the option to sync the responses to corresponding values of the inventory.
Now that we have configured the logic within the templates, which determines the "Table" and "Column" that can be updated for a given answer, let's see how a reviewer can associate responses to a specific "Row" of the Data Inventory.
- Create a new assessment based on a template that includes the "Syncing" feature toggled on for some questions.
- Assign the assessment as you would normally.
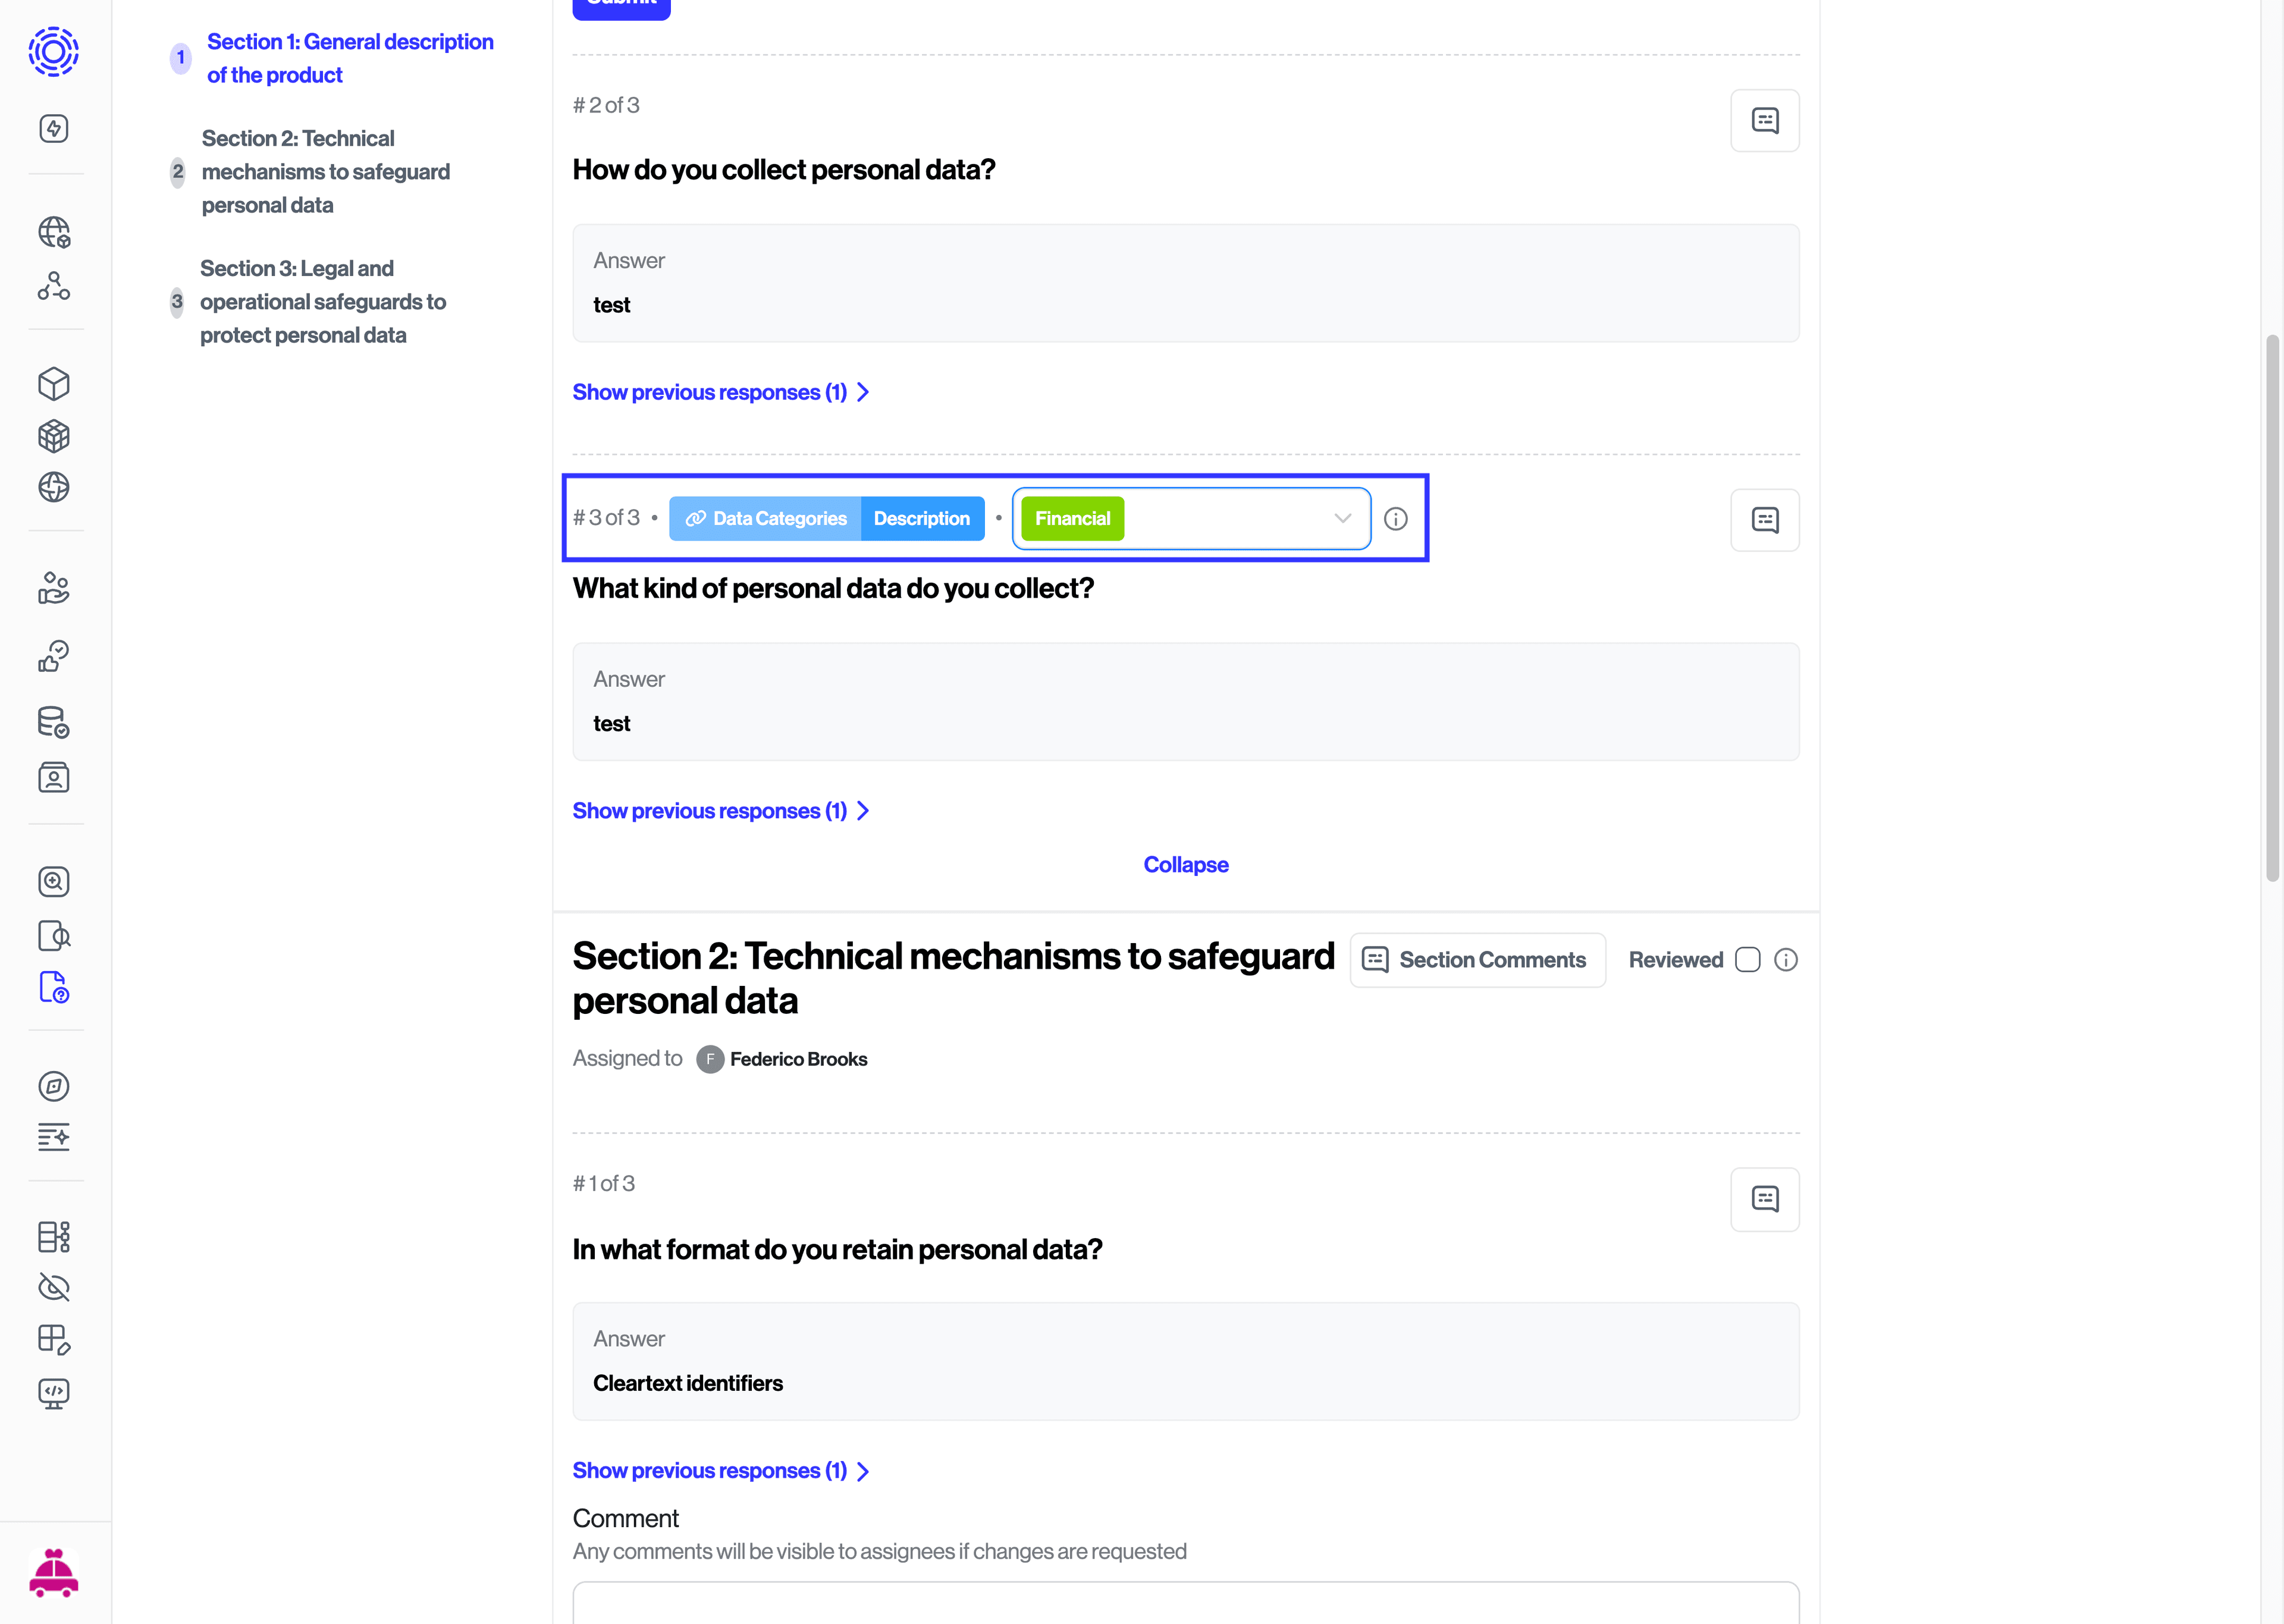
- Once an assessment is ready for review, click on "View Responses".
- Here, you will see the "Table" and "Fields" that have been selected for a given question, as well as a drop-down element next to it. Click on the drop-down to select the "Row" where the answer should sync to.
- Once the assessment is approved, the values will update the Data Inventory.
You have now successfully configured the mapping between questions and the Data Inventory, and updated the values for the corresponding rows.
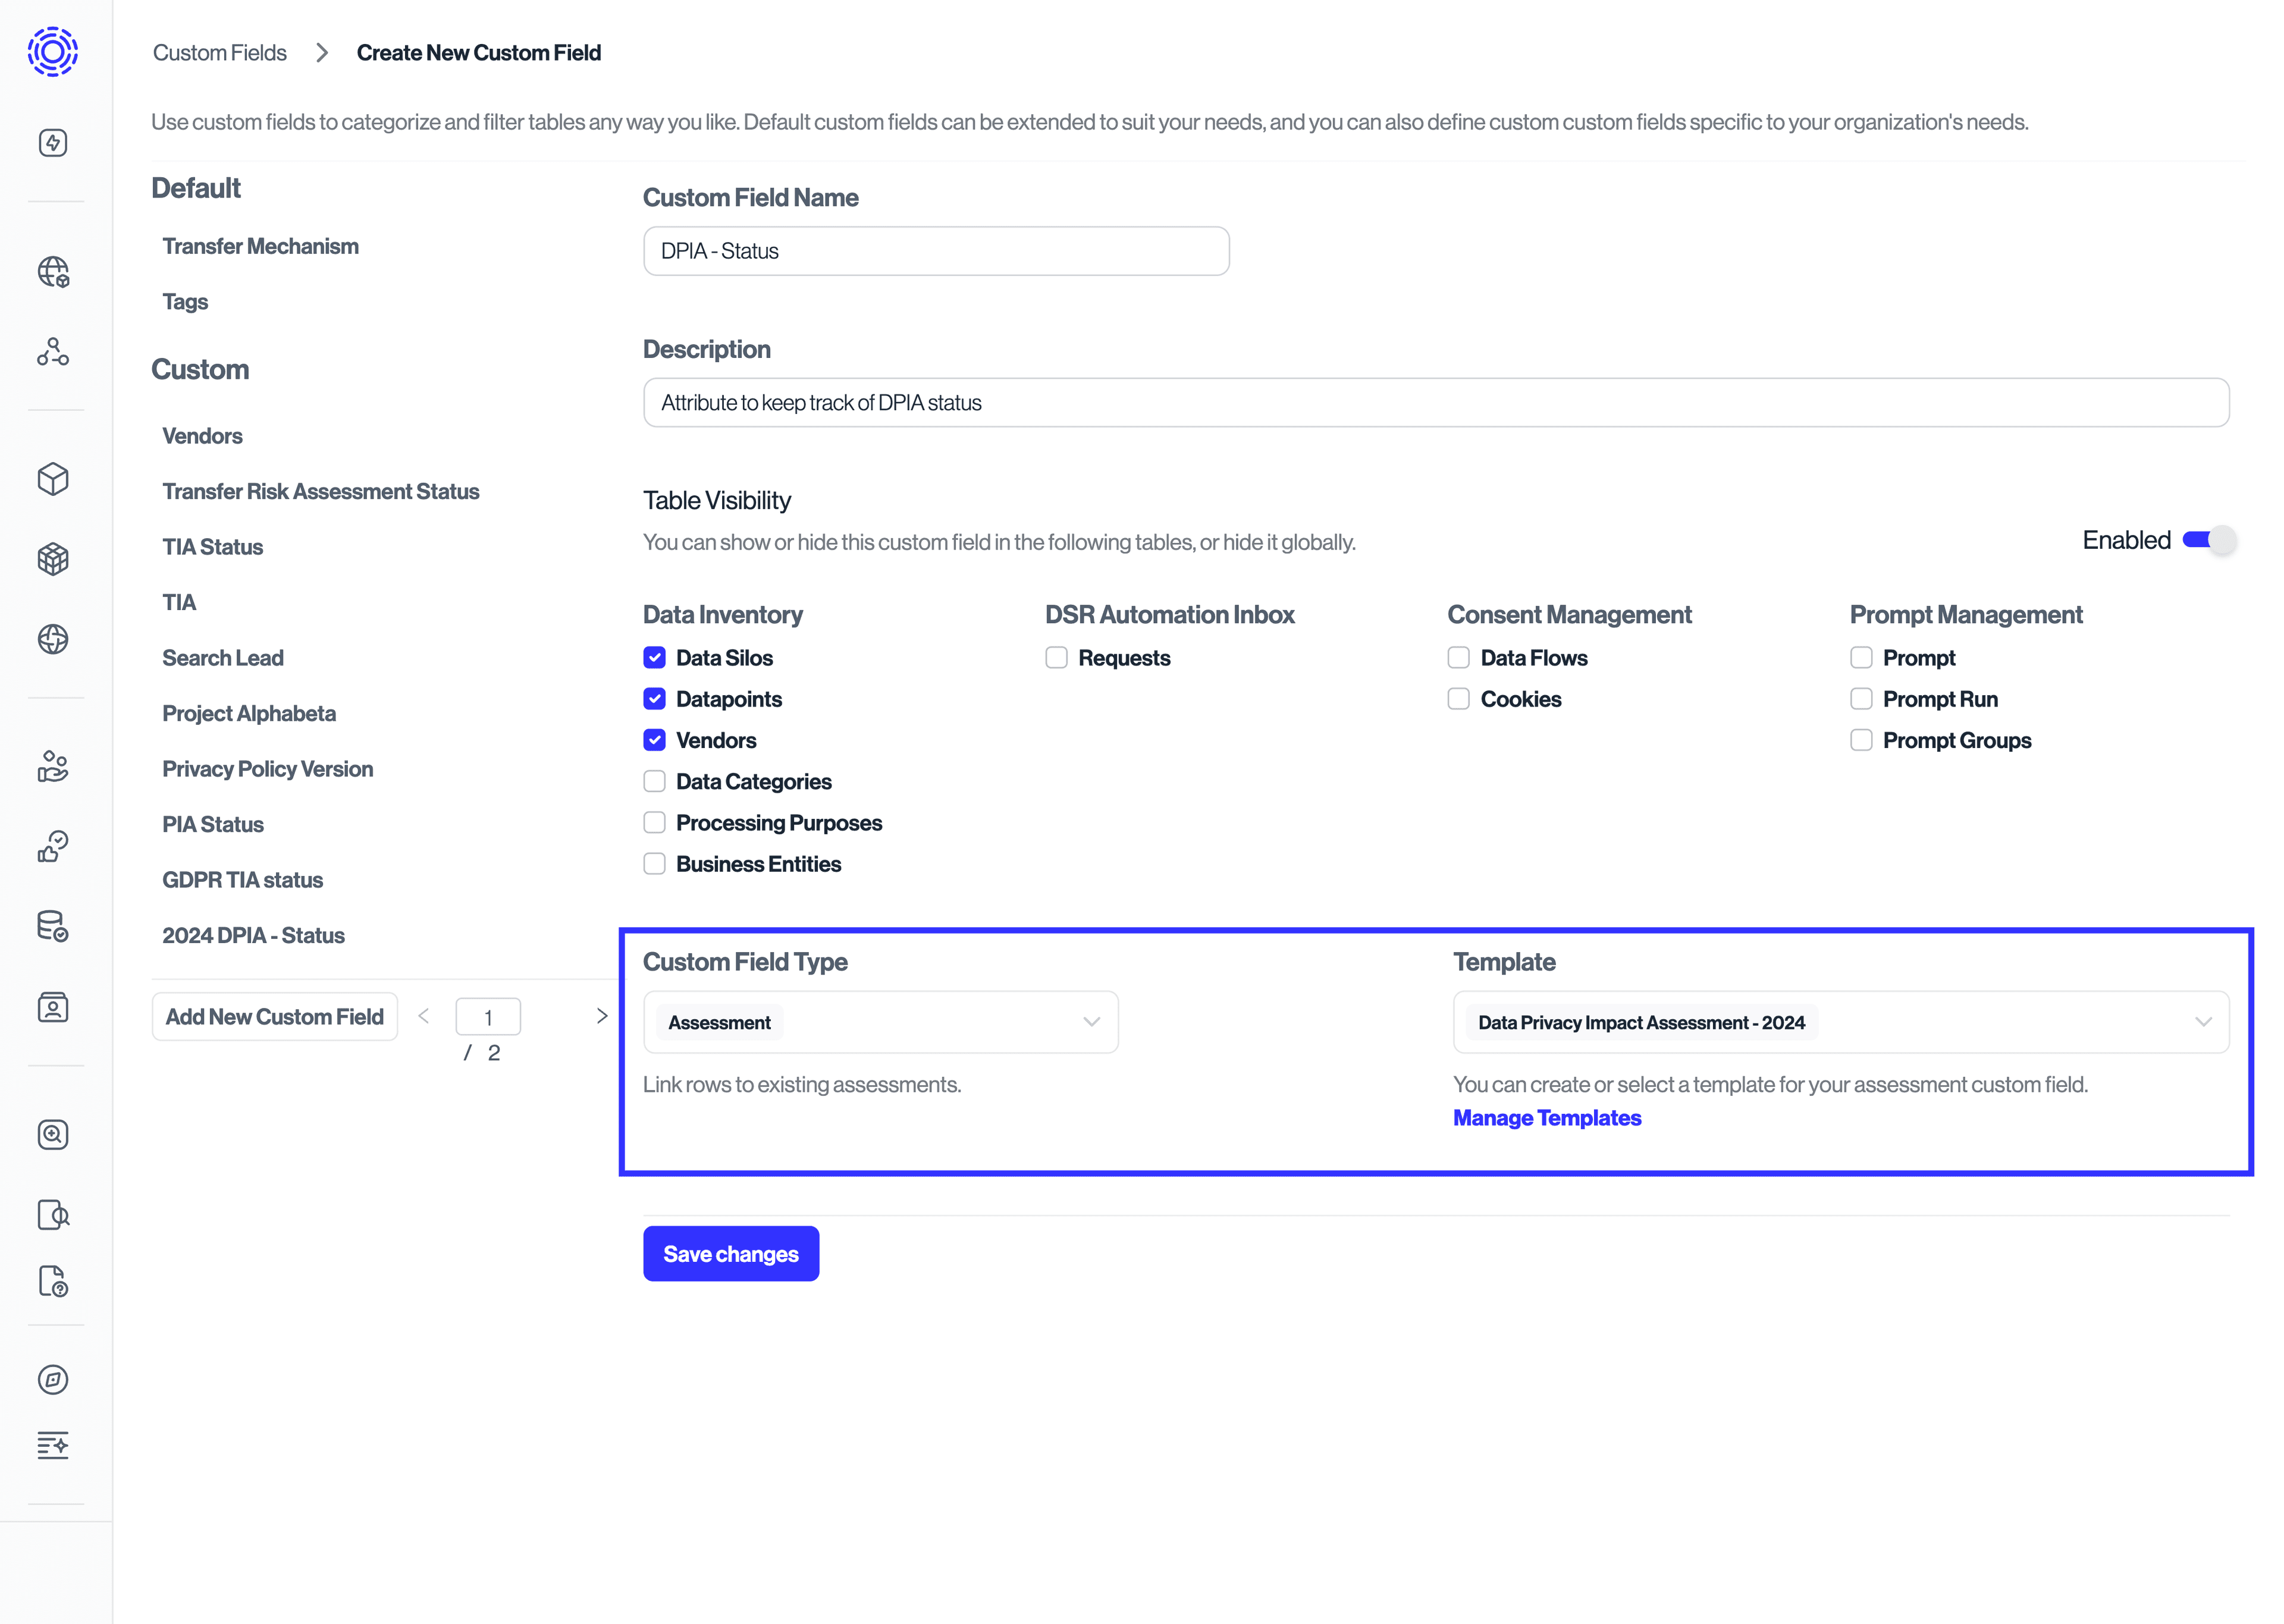
Now, let's see how to track the status of an Assessment against a row of the Data Inventory. To begin, you will want to create a new custom field. For details on creating custom fields, follow the steps in the Managing Custom Fields article.
For custom fields that link to assessments, we recommend using the name of the assessment template you’re using, in addition to the word “Status” (e.g., “DPIA Status”).
During this setup, ensure the following options are set accordingly:
- Table Visibility:
enabled - Tables:
Assessments > Assessment
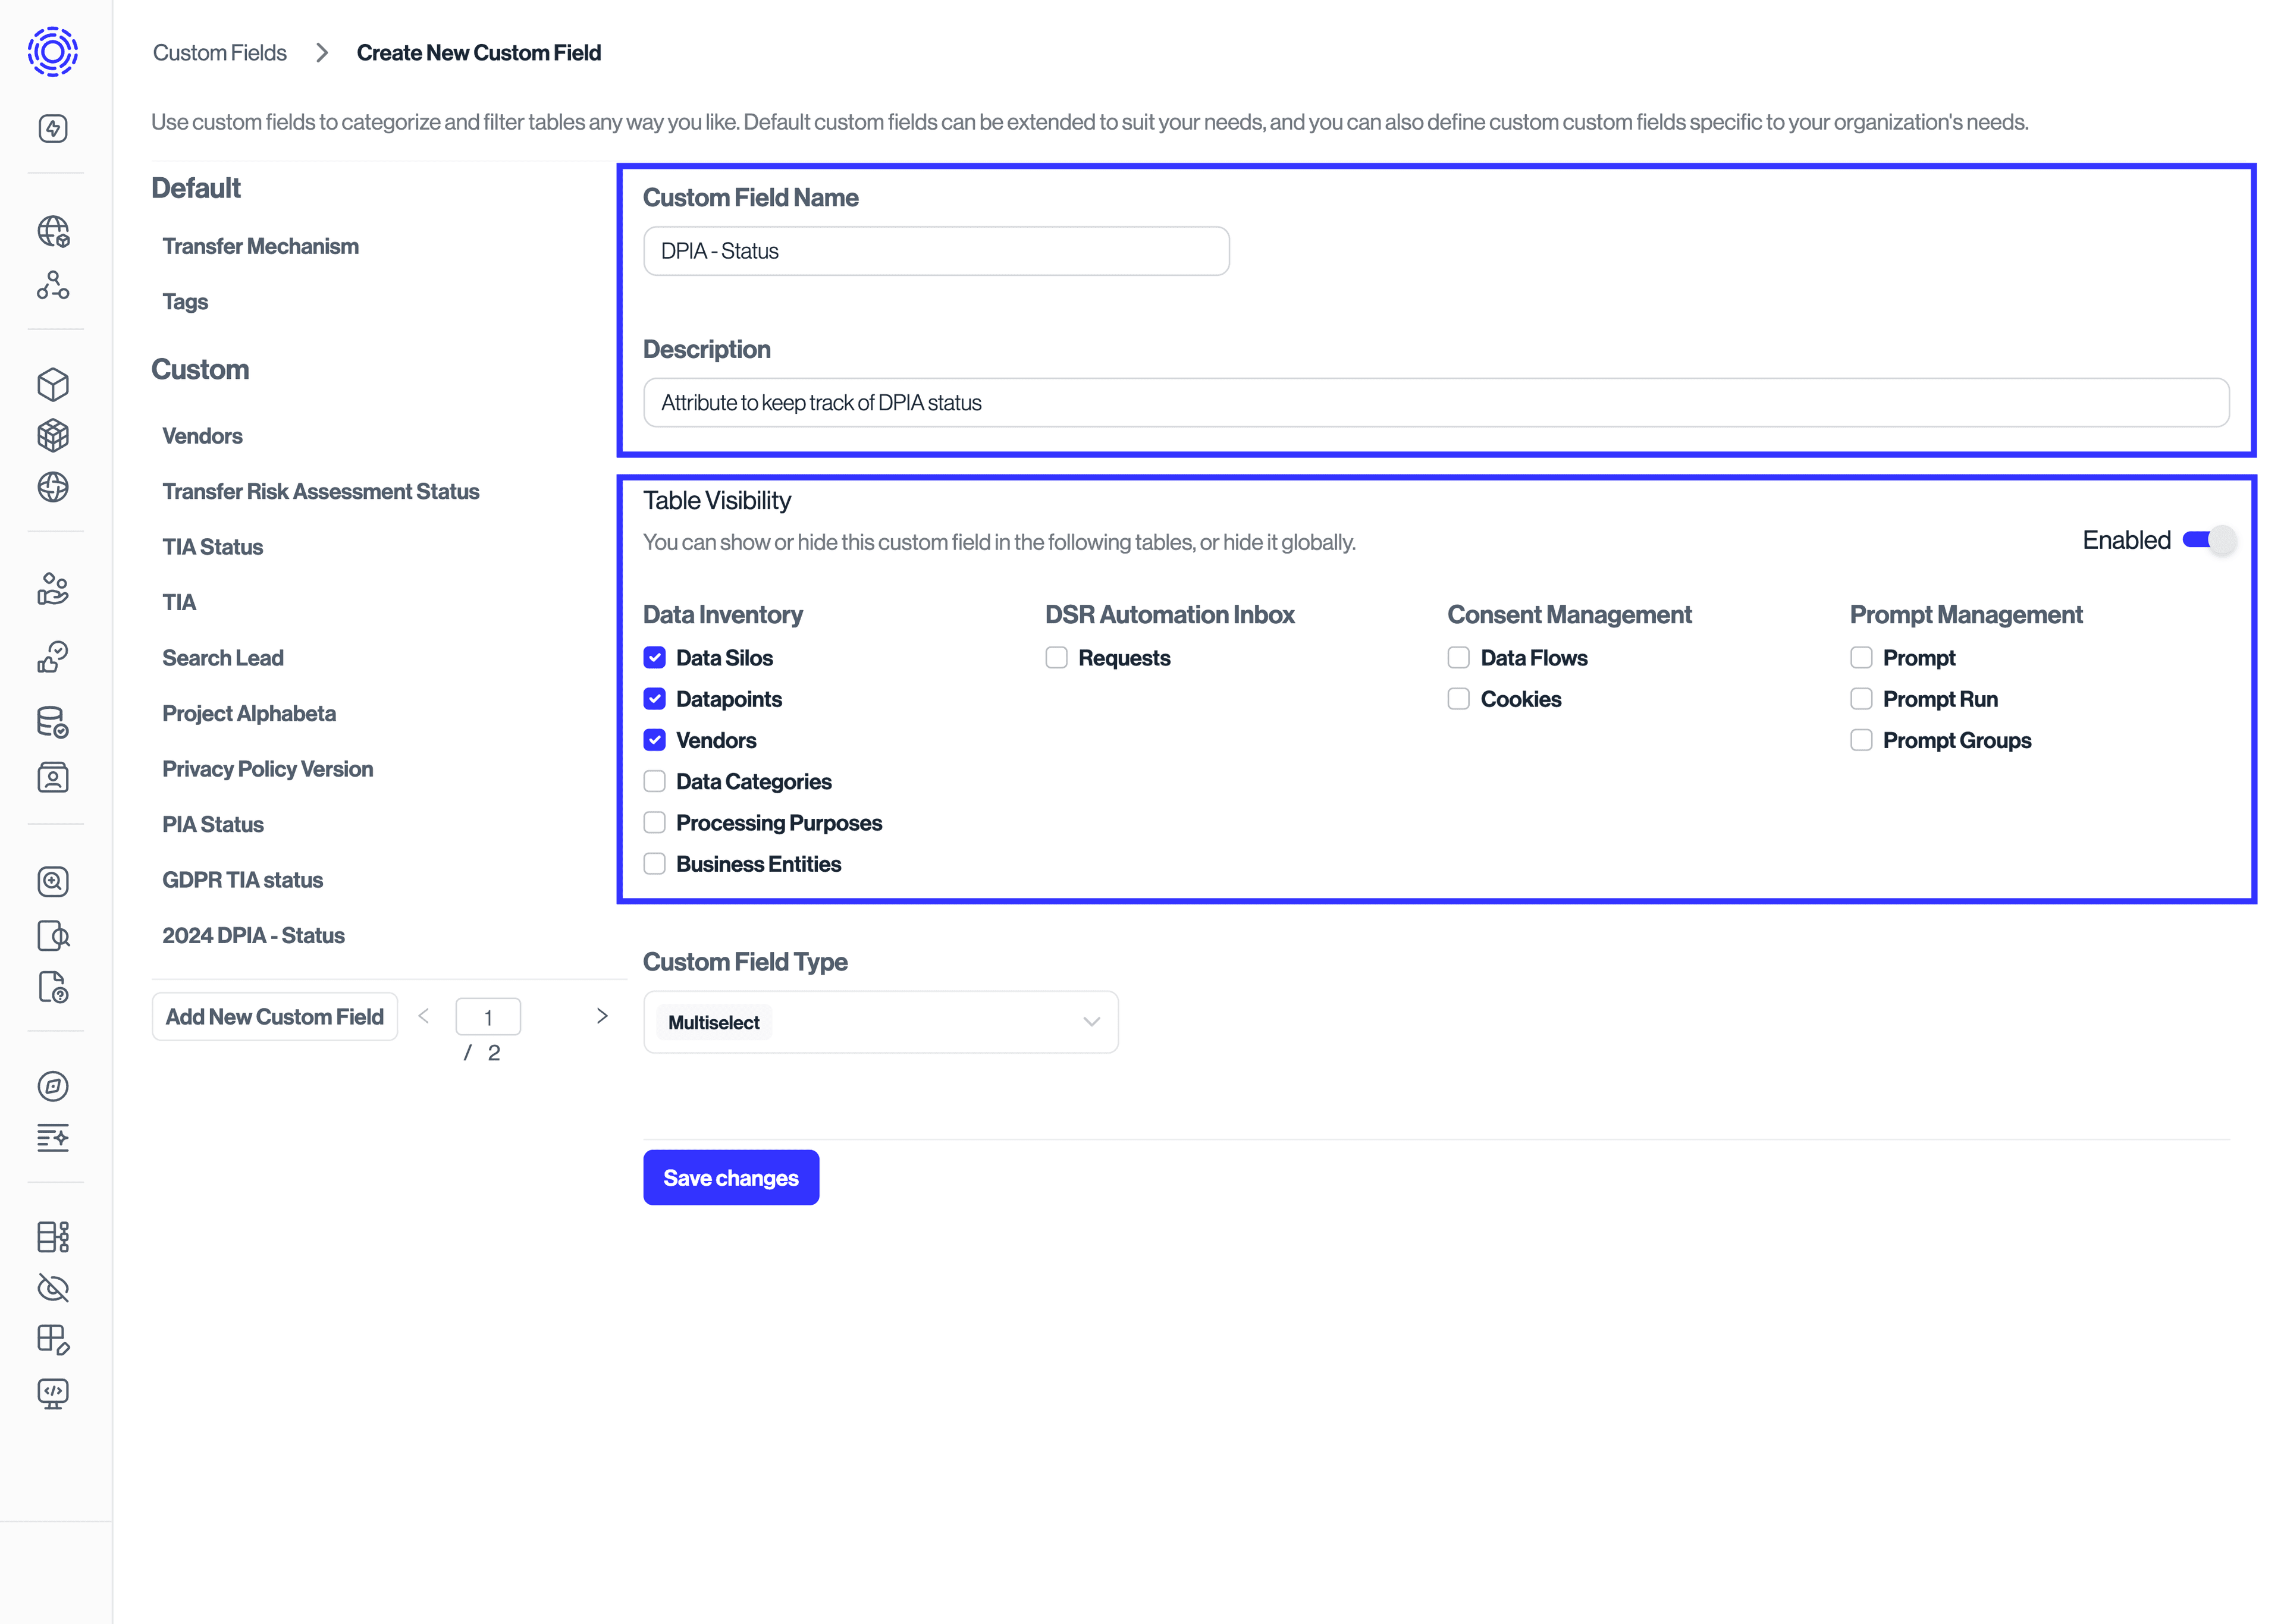
Note that you may add additional tables as desired, but the Assessment option is required for the purpose of this guide. Remember to click on "Save changes" to confirm your changes to the custom field.
If you'd like to track the status of several assessments, feel free to create new custom fields for each assessment template.
After you've configured your custom fields, you can visit the tables that you selected under "Table Visibility" to check your newly added custom field.
Within the desired table, you can select the specific assessment related to each row of the table as pictured below.
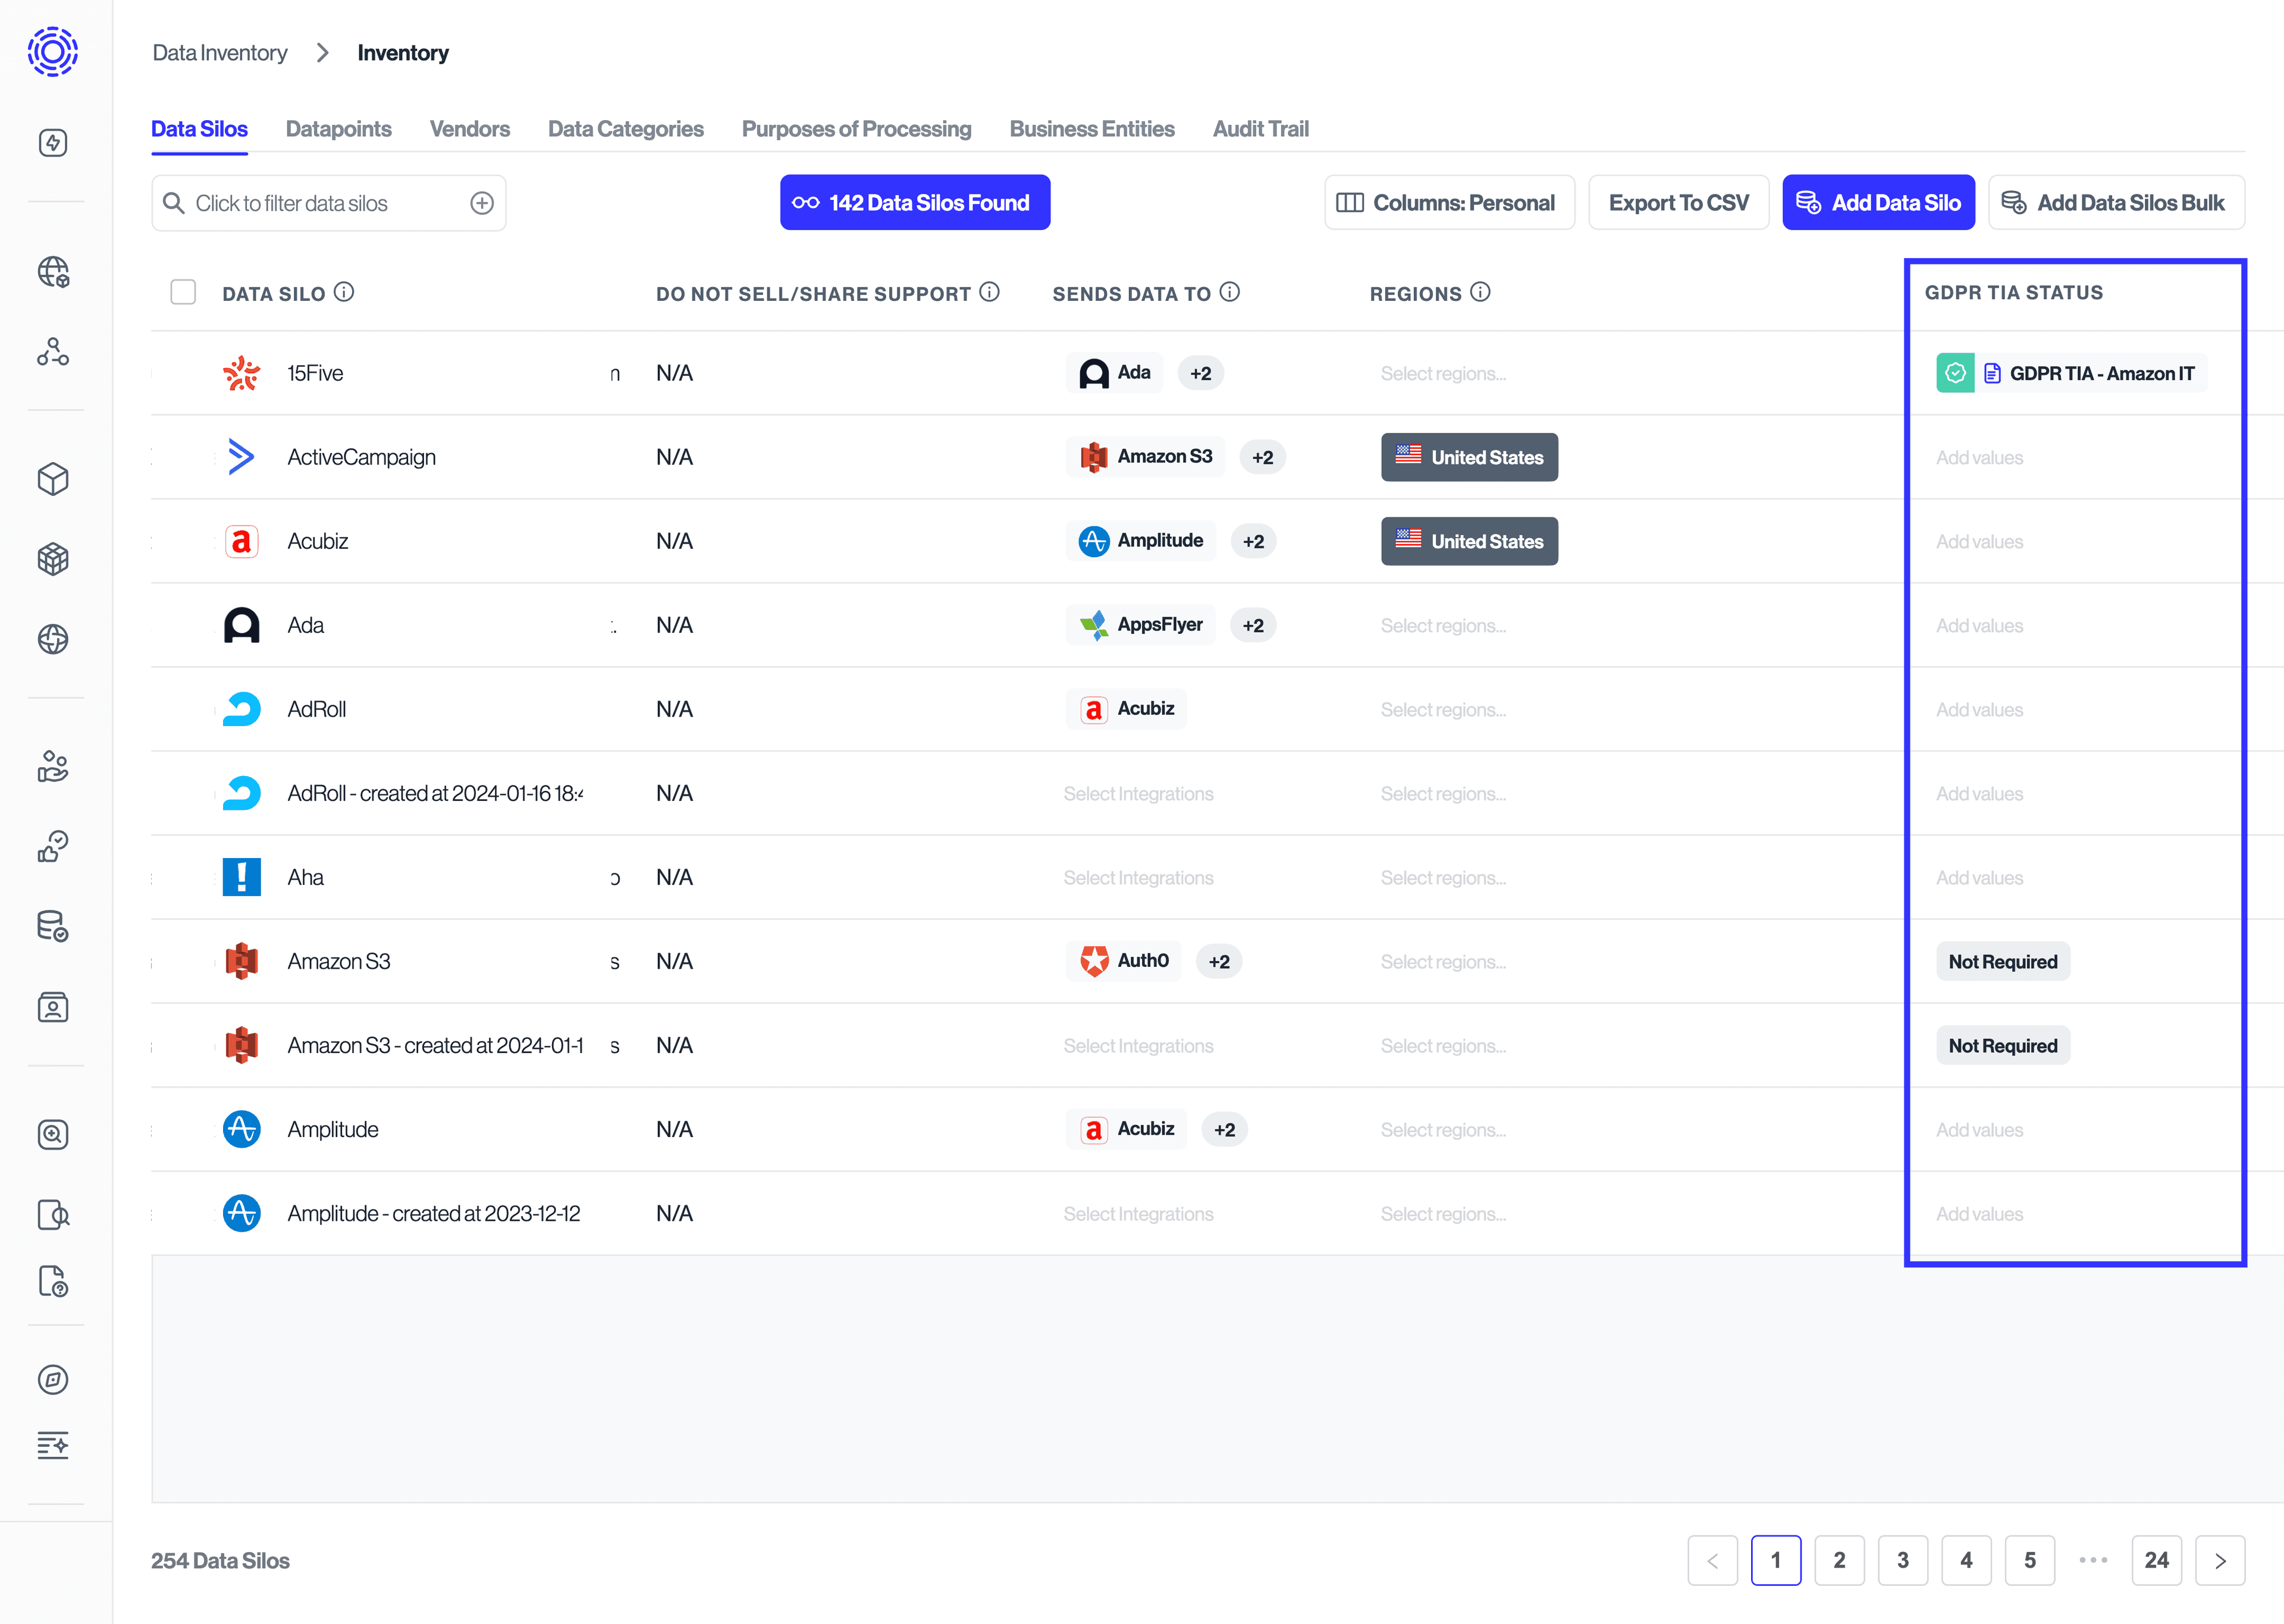
As assessments move through their statuses, their respective custom fields will update in the selected tables to display their current status.