Creating an Assessment
This guide covers the creation, sharing, reviewing, and finalization of assessments, serving as a foundational resource for integrating assessments into your data privacy program.
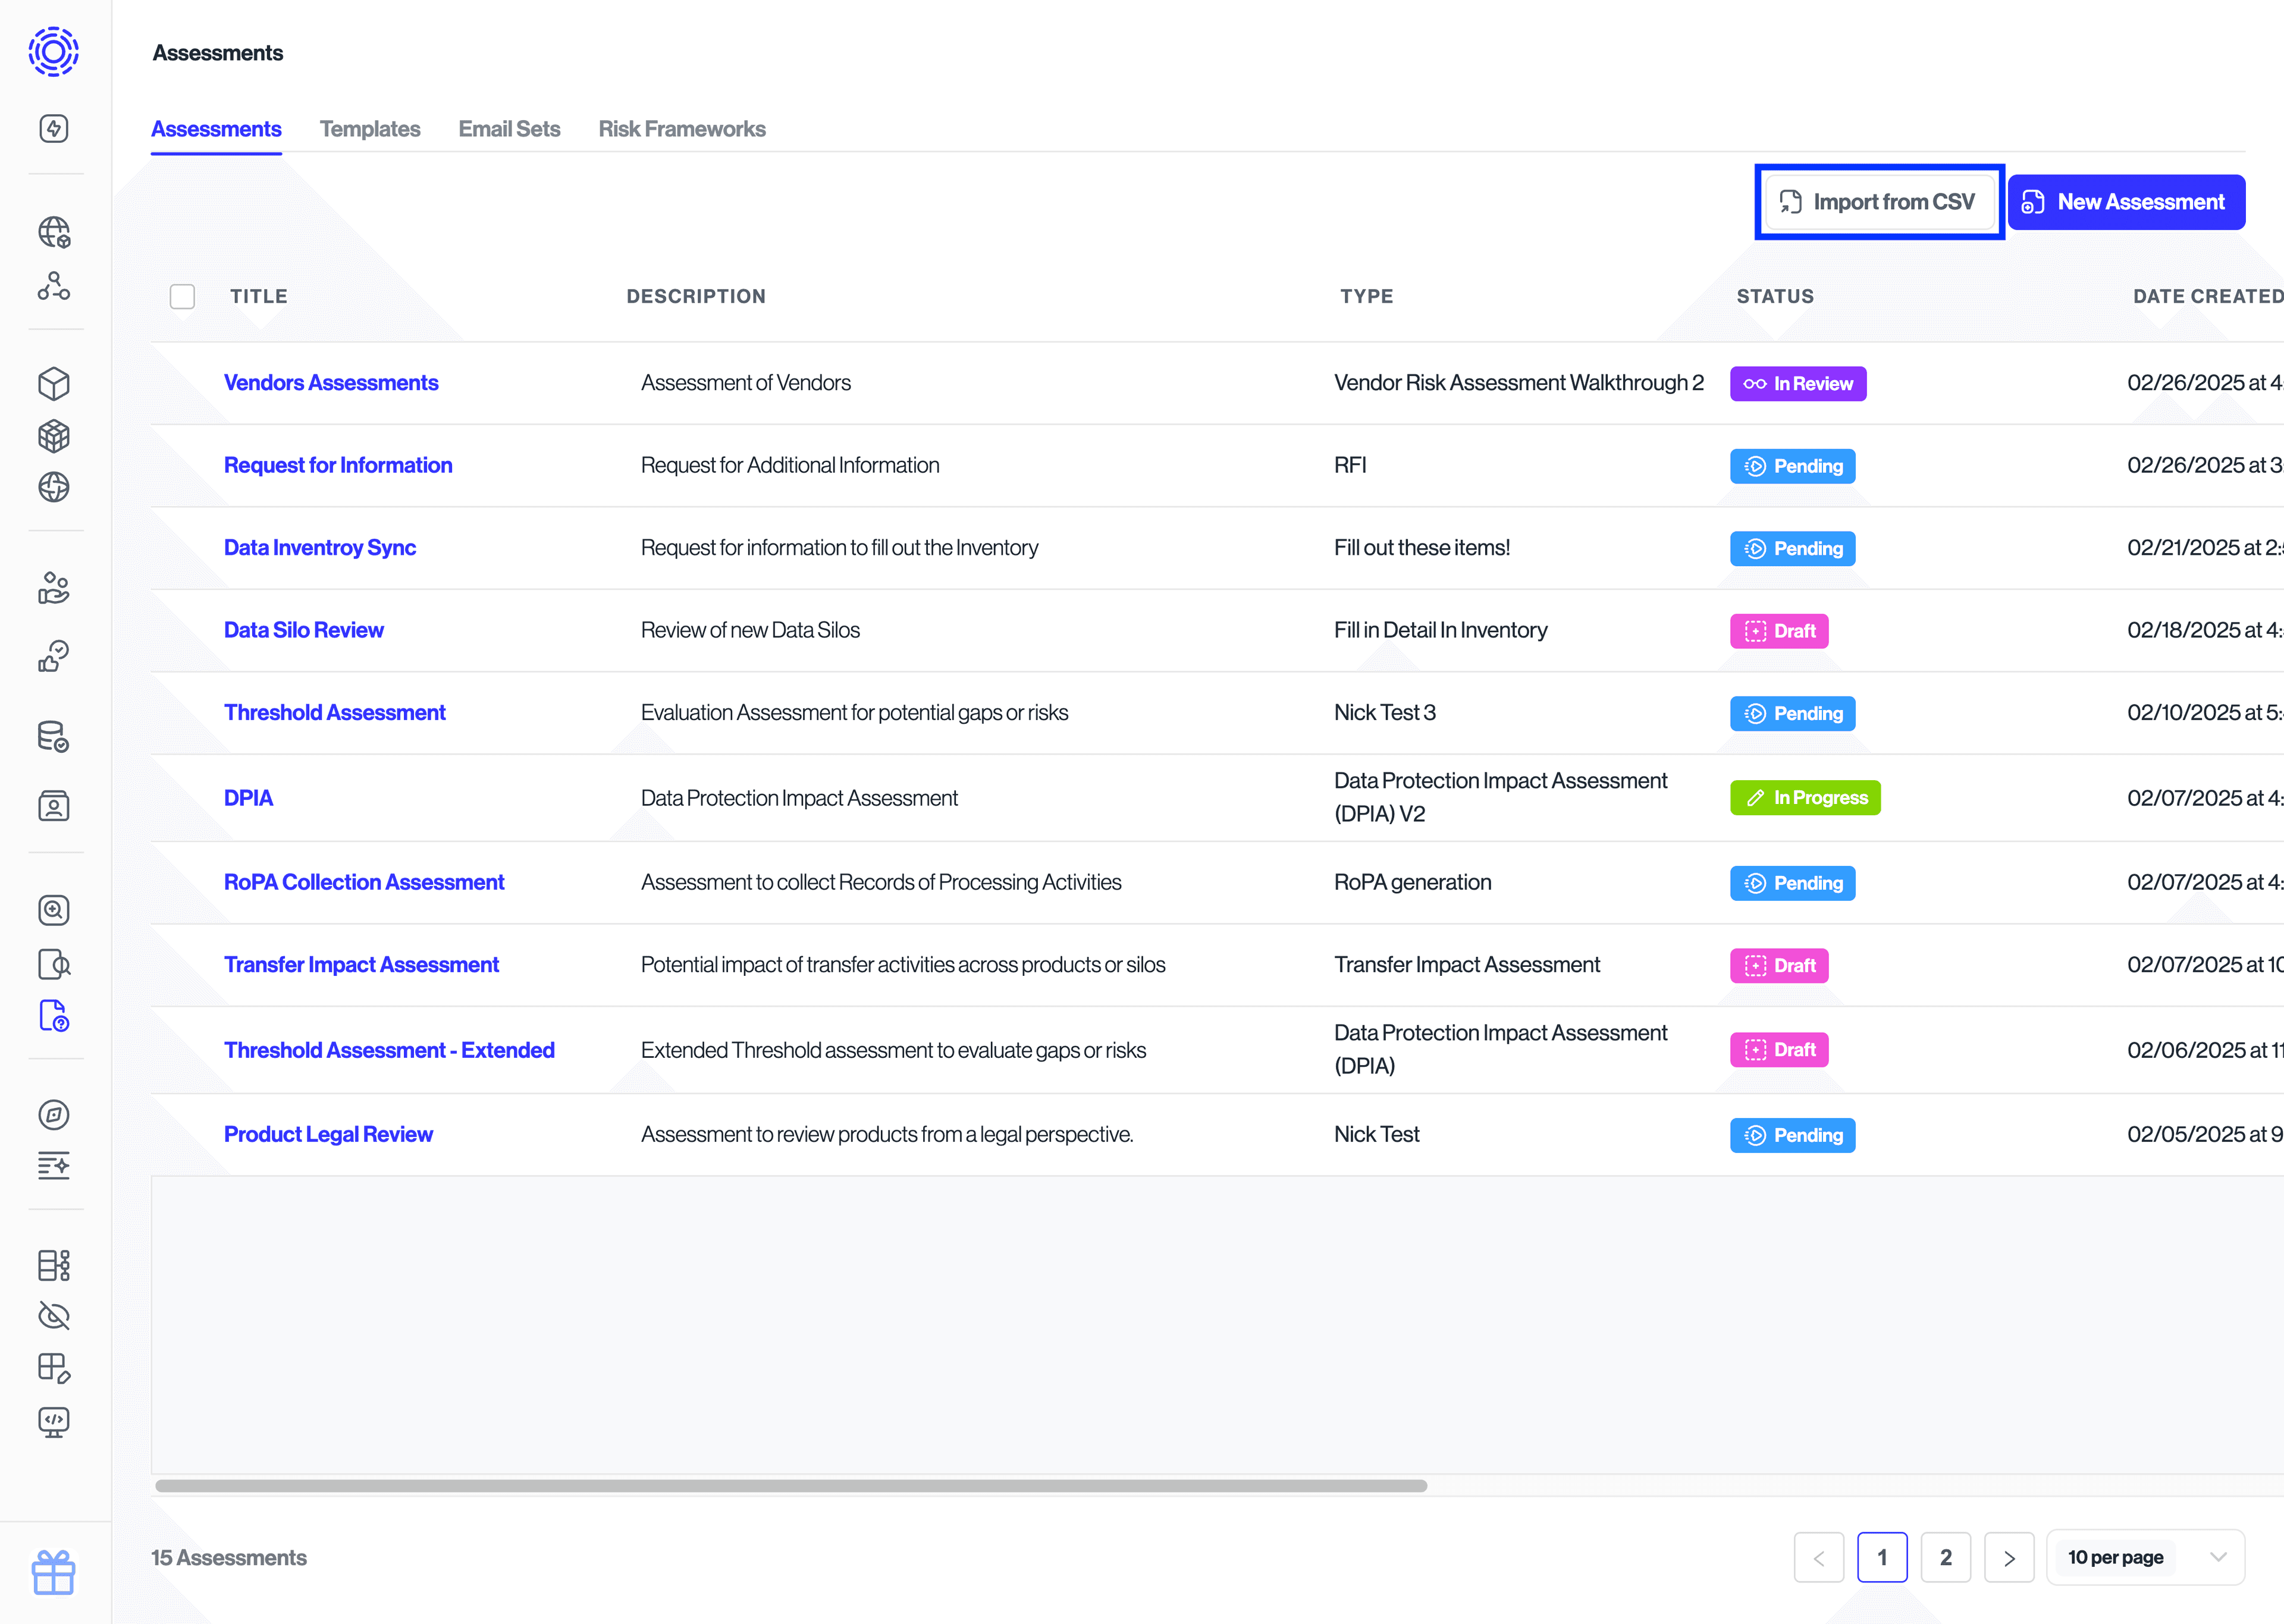
In the Assessments tab, you can import existing assessments or create new ones from templates. Assessments can be grouped based on your operational preferences (e.g., by timeframe or organization).
| Component | Location | Description |
|---|---|---|
| Template | assessments/form-templates | Predefined assessment structures with sections, questions, and logic. Example: "DPIA Template". |
| Assessment Group | assessments/groups | Collections of assessments for organized management. Example: "DPIA - Jan 2025". |
| Assessment Form | assessments/groups/id | Individual assessments within groups completed by respondents. Example: "DPIA - Jan 2025 - Product X". |
| Email Set | assessments/email-sets | Email templates linked to an assessment template for use throughout the assessment lifecycle. Example: "DPIA Email Set". |
| Email Template | assessments/email-sets | Specific email messages within a set, tailored for each assessment phase. Example: "DPIA Email Set - Assessment Assigned". |
| Risk Framework | assessments/risk-frameworks | Defines risk categories and scoring criteria. Example: "Security Risk Framework". |
| Risk Category | assessments/risk-frameworks | Risk types evaluated within a framework. Example: "Data Breach Risk". |
| Risk Score | assessments/risk-frameworks | Assigned numerical or qualitative risk values. Example: "Data Breach = Low Risk". |
| Risk Matrix | assessments/risk-frameworks | Calculates an overall risk score by combining various risk factors. Example: "Low likelihood + High severity = Medium overall risk". |
| Retention Schedule | assessments/form-templates/id | Defines data retention timelines for compliance and data minimization policies. |
For customers moving their Assessments process to Transcen, they can easily export their existing assessments, and import them directly to Transcend, without needing to make changes to the format.
To do so, follow the steps below
- Navigate to Assessments and click on Import from CSV.
- From this modal, click on "Upload from CSV" and select your exported OneTrust assessments.
The format of the exports should already match the expected format, meaning you don't need to make any changes to the files before uploading them. Alternatively you can download the sample CSV to see the expected structure of the files.
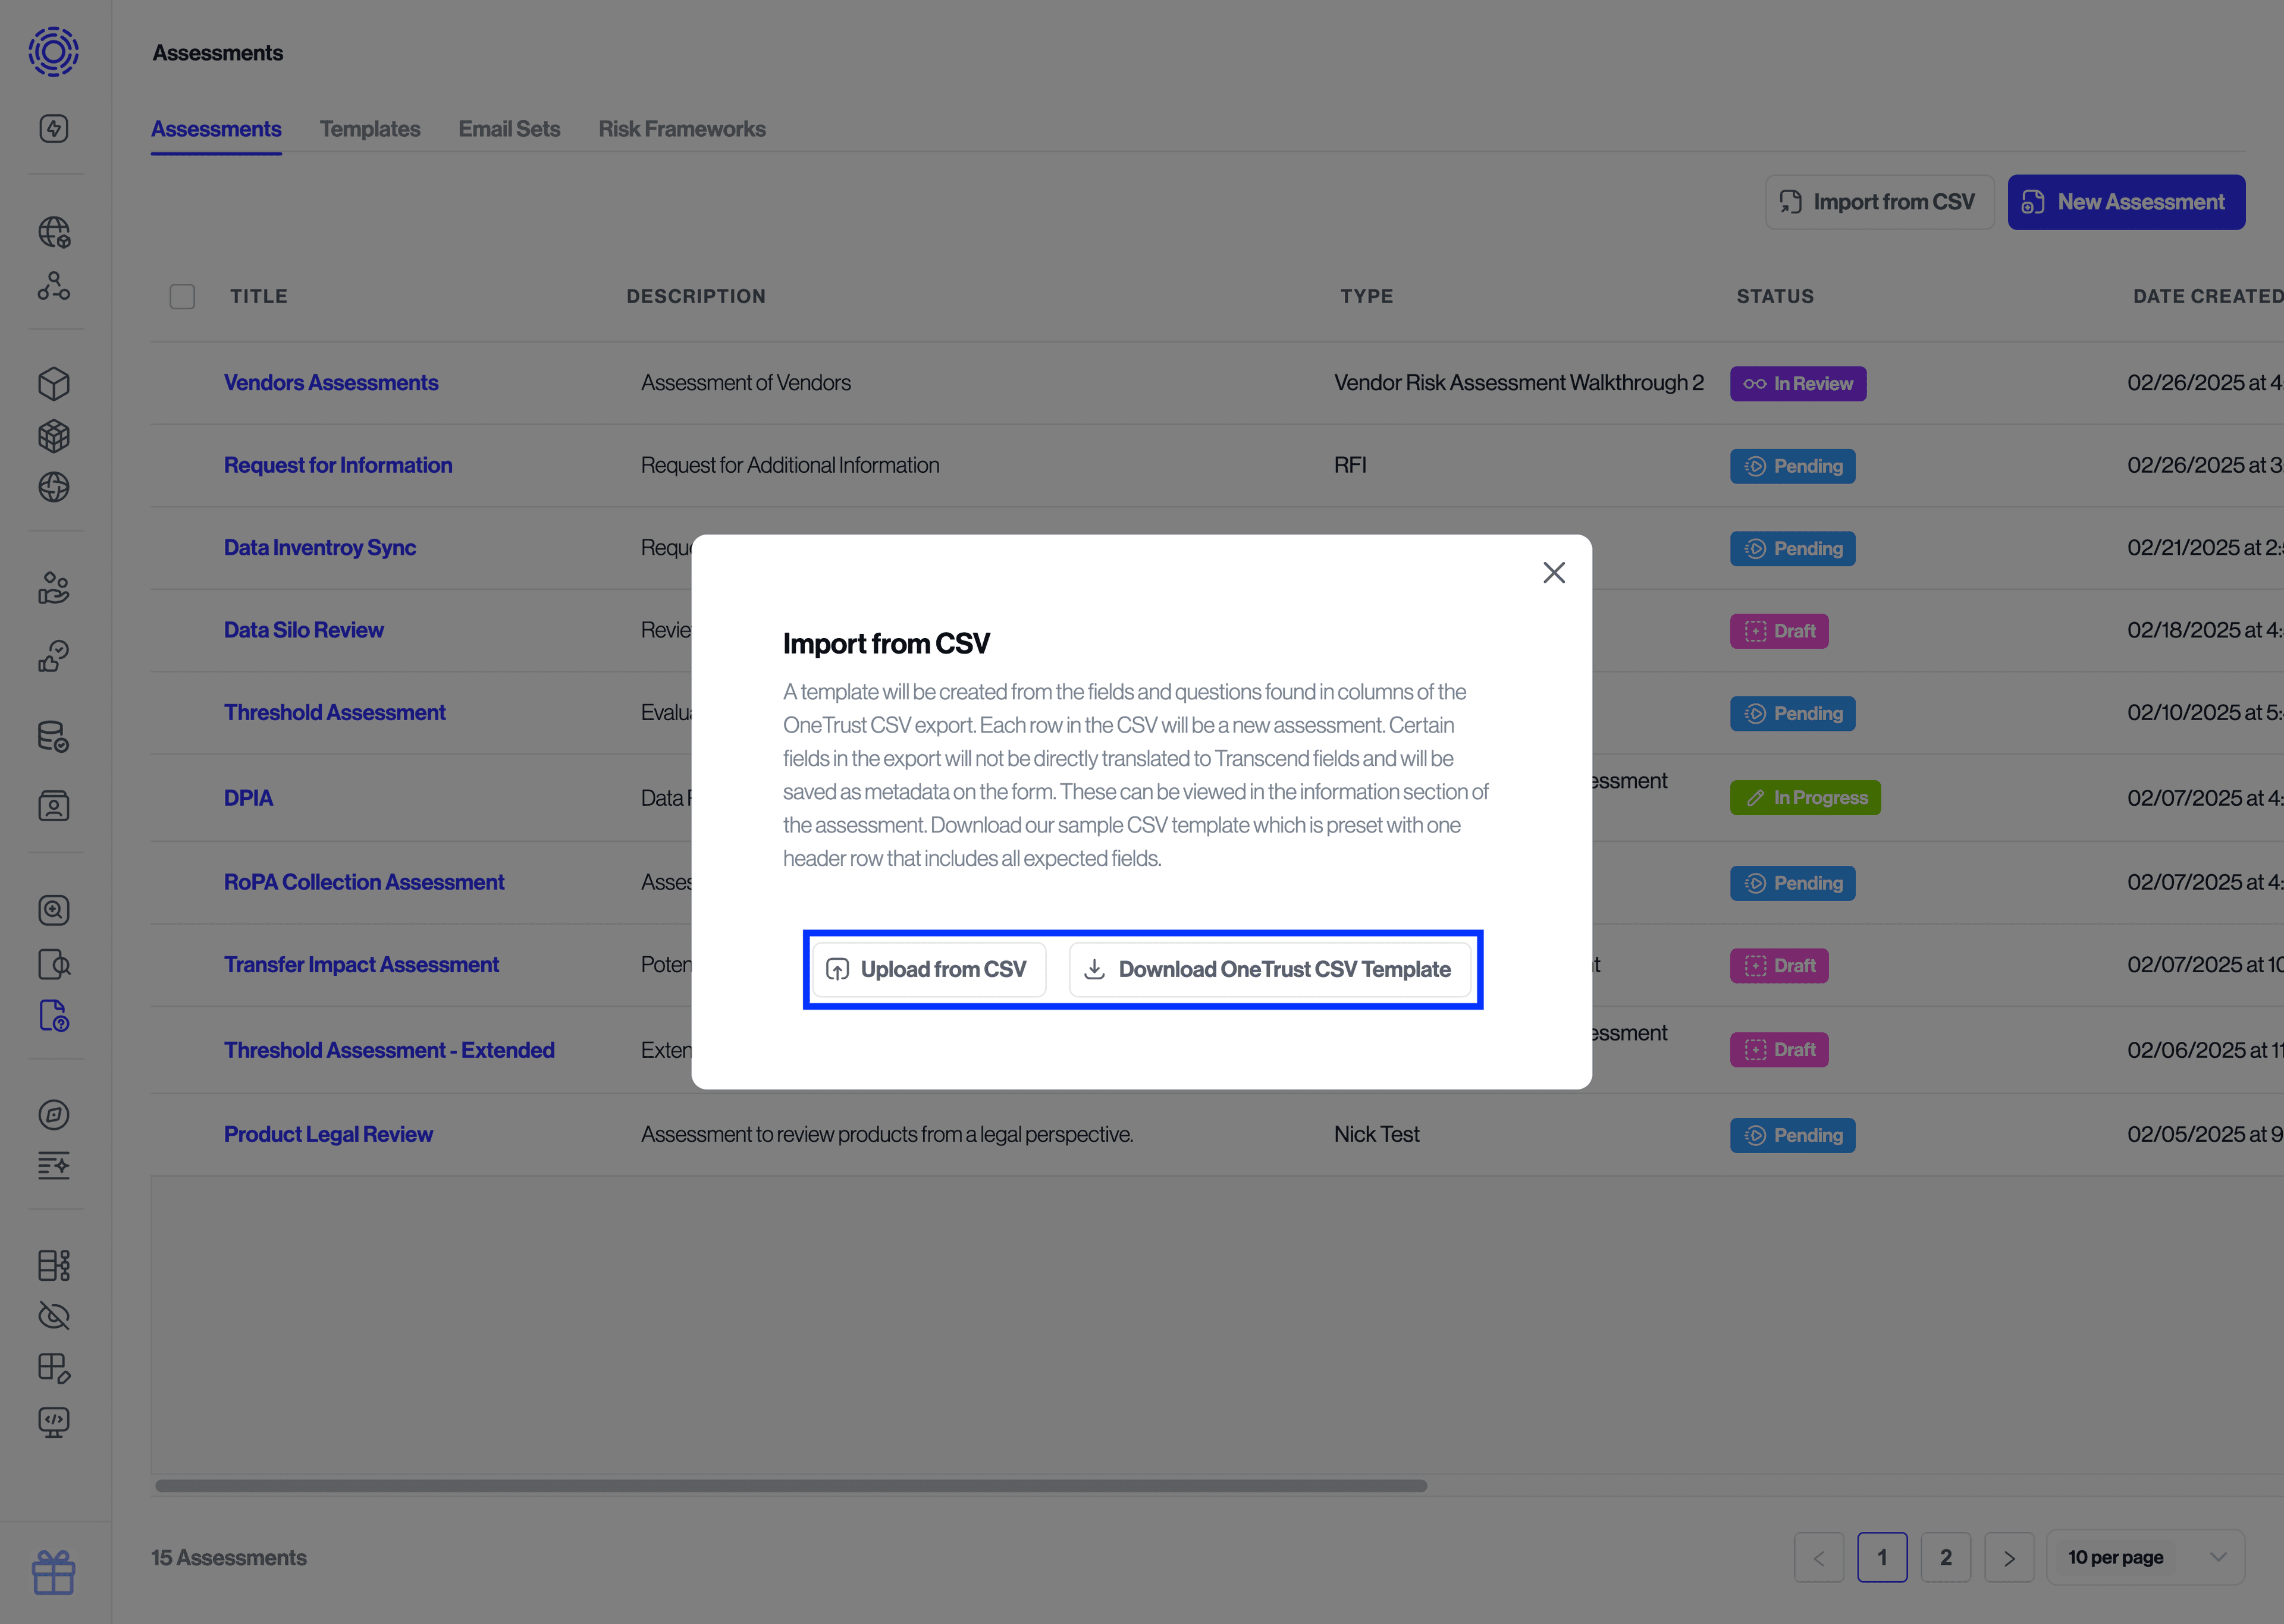
- You will then be able to see a table of all the assessments that will be imported. Here you can see if there were any issues mapping the values to Transcend's format, or if there are any items you'd like to remove from the import.
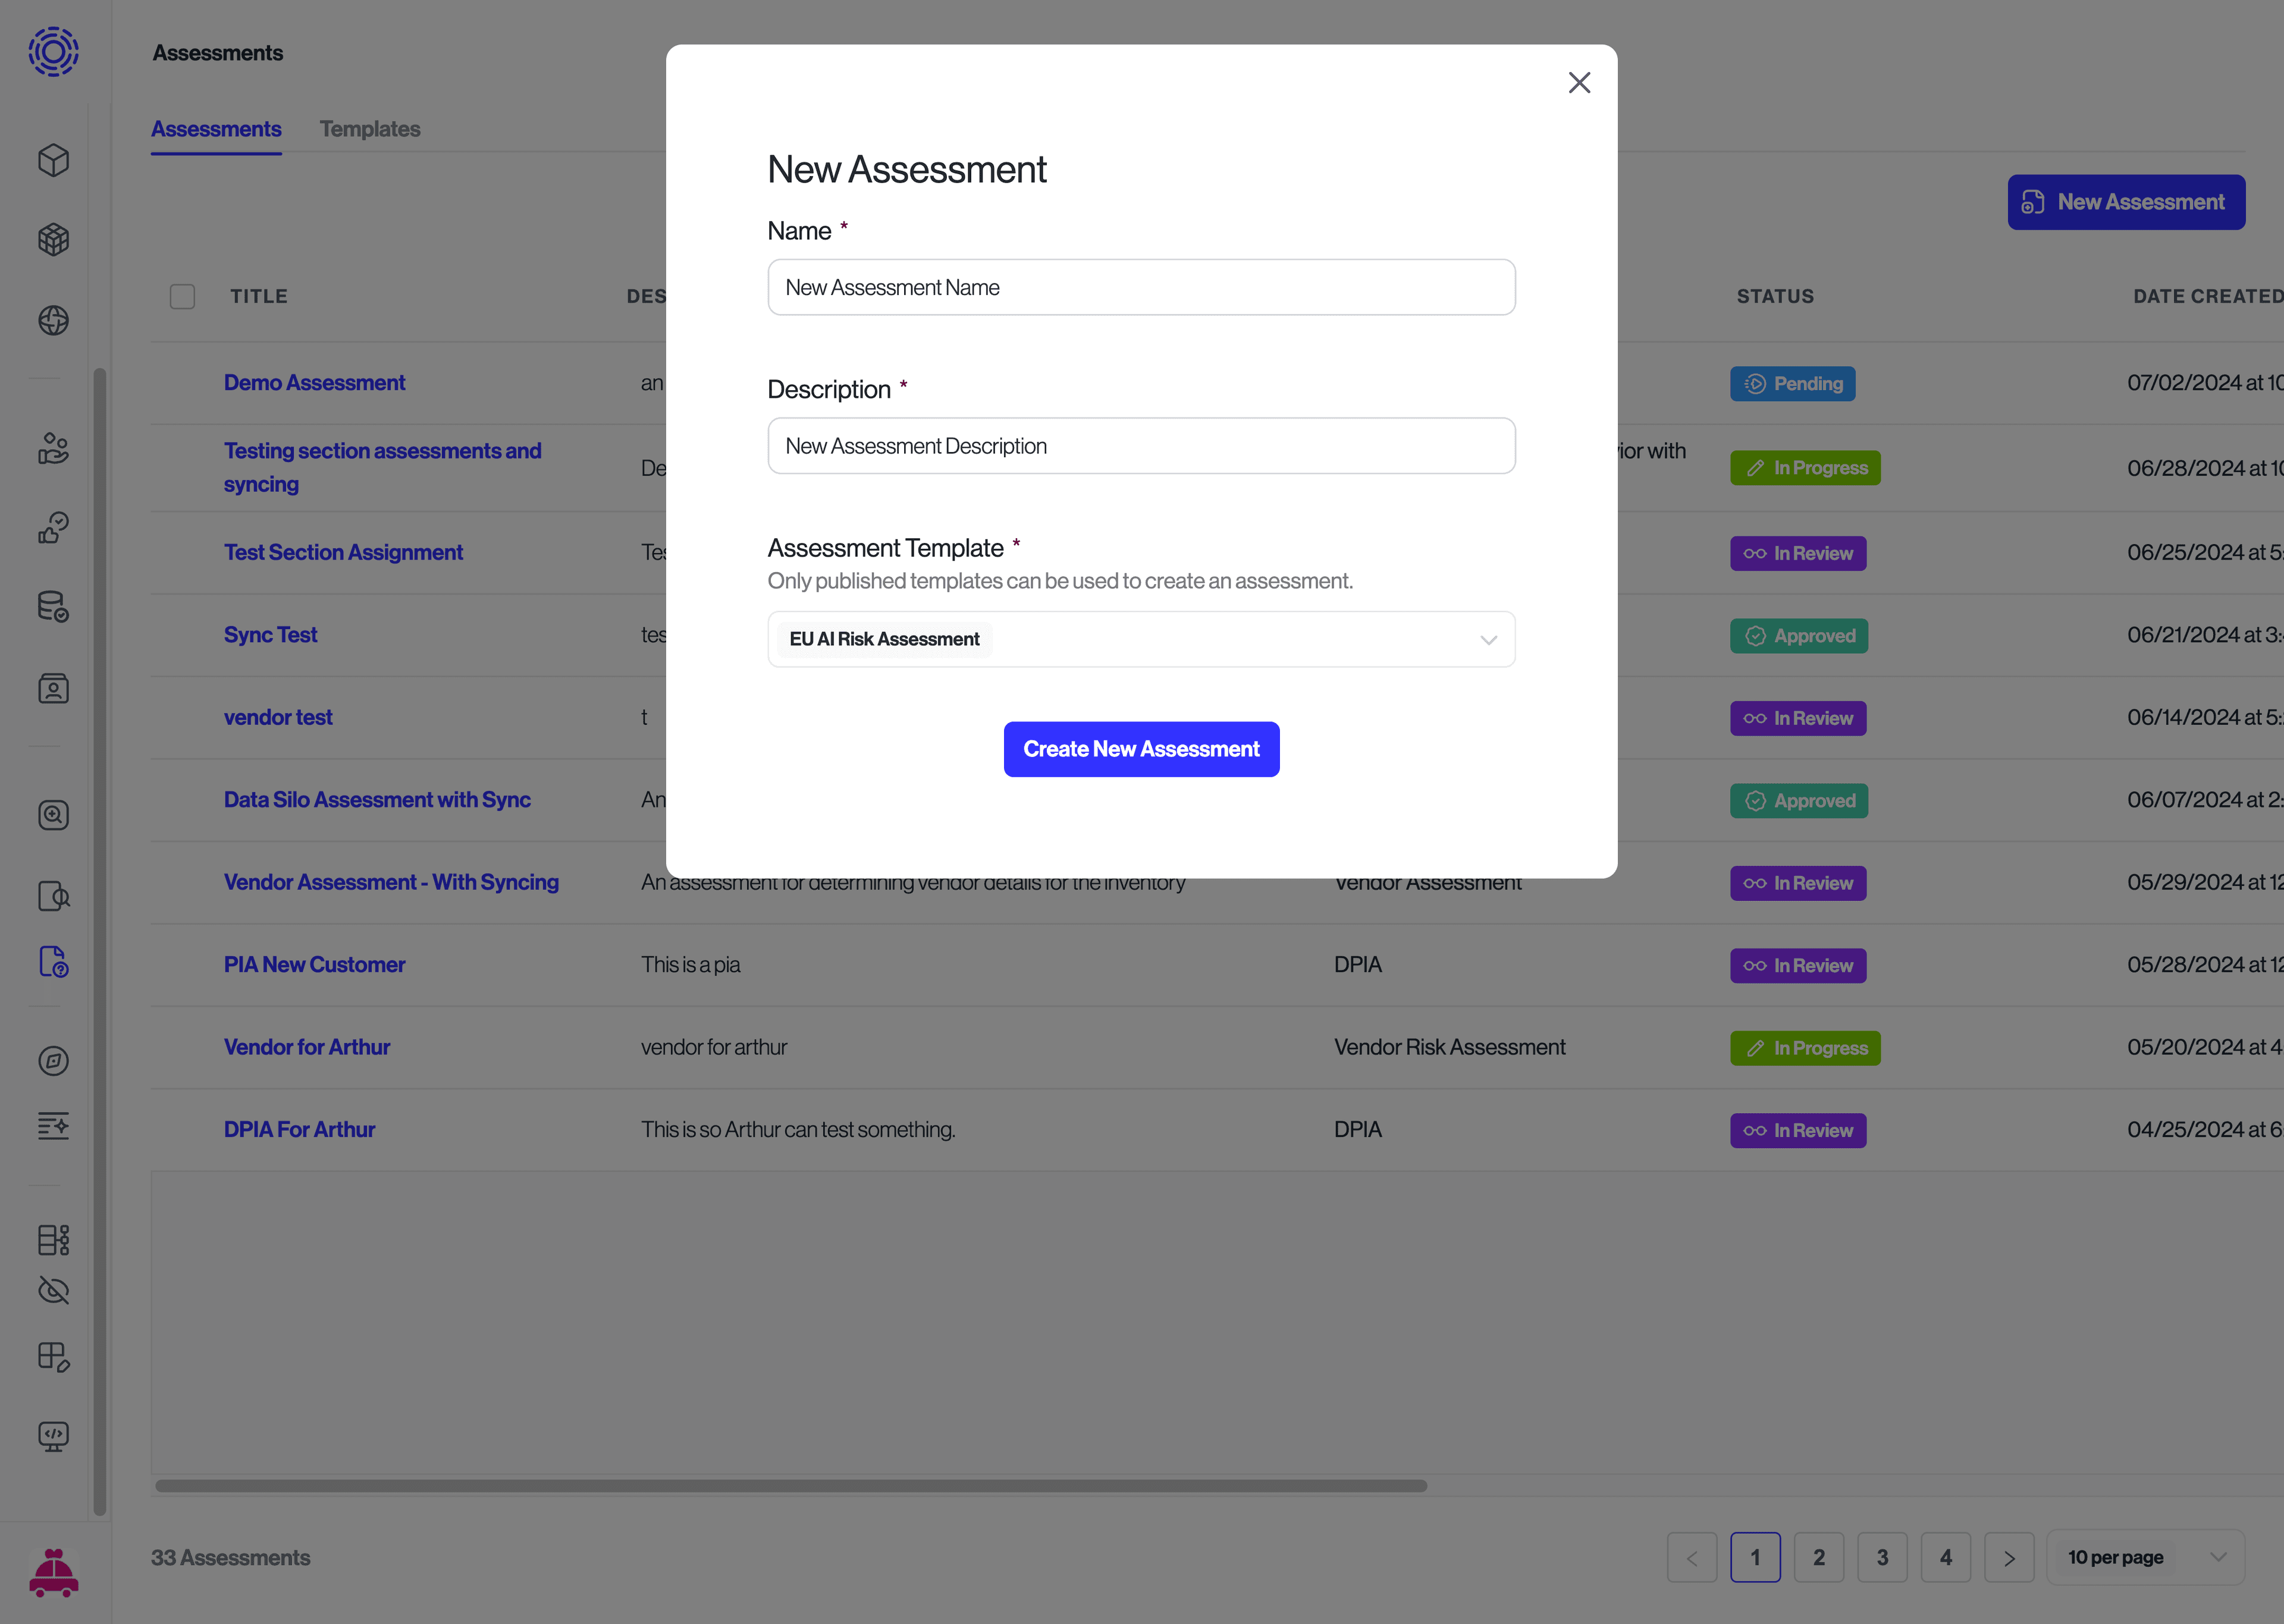
Note: Assessments rely on templates. You may use built-in templates or create/import your own under the Templates tab. For details, see the Templates guide.
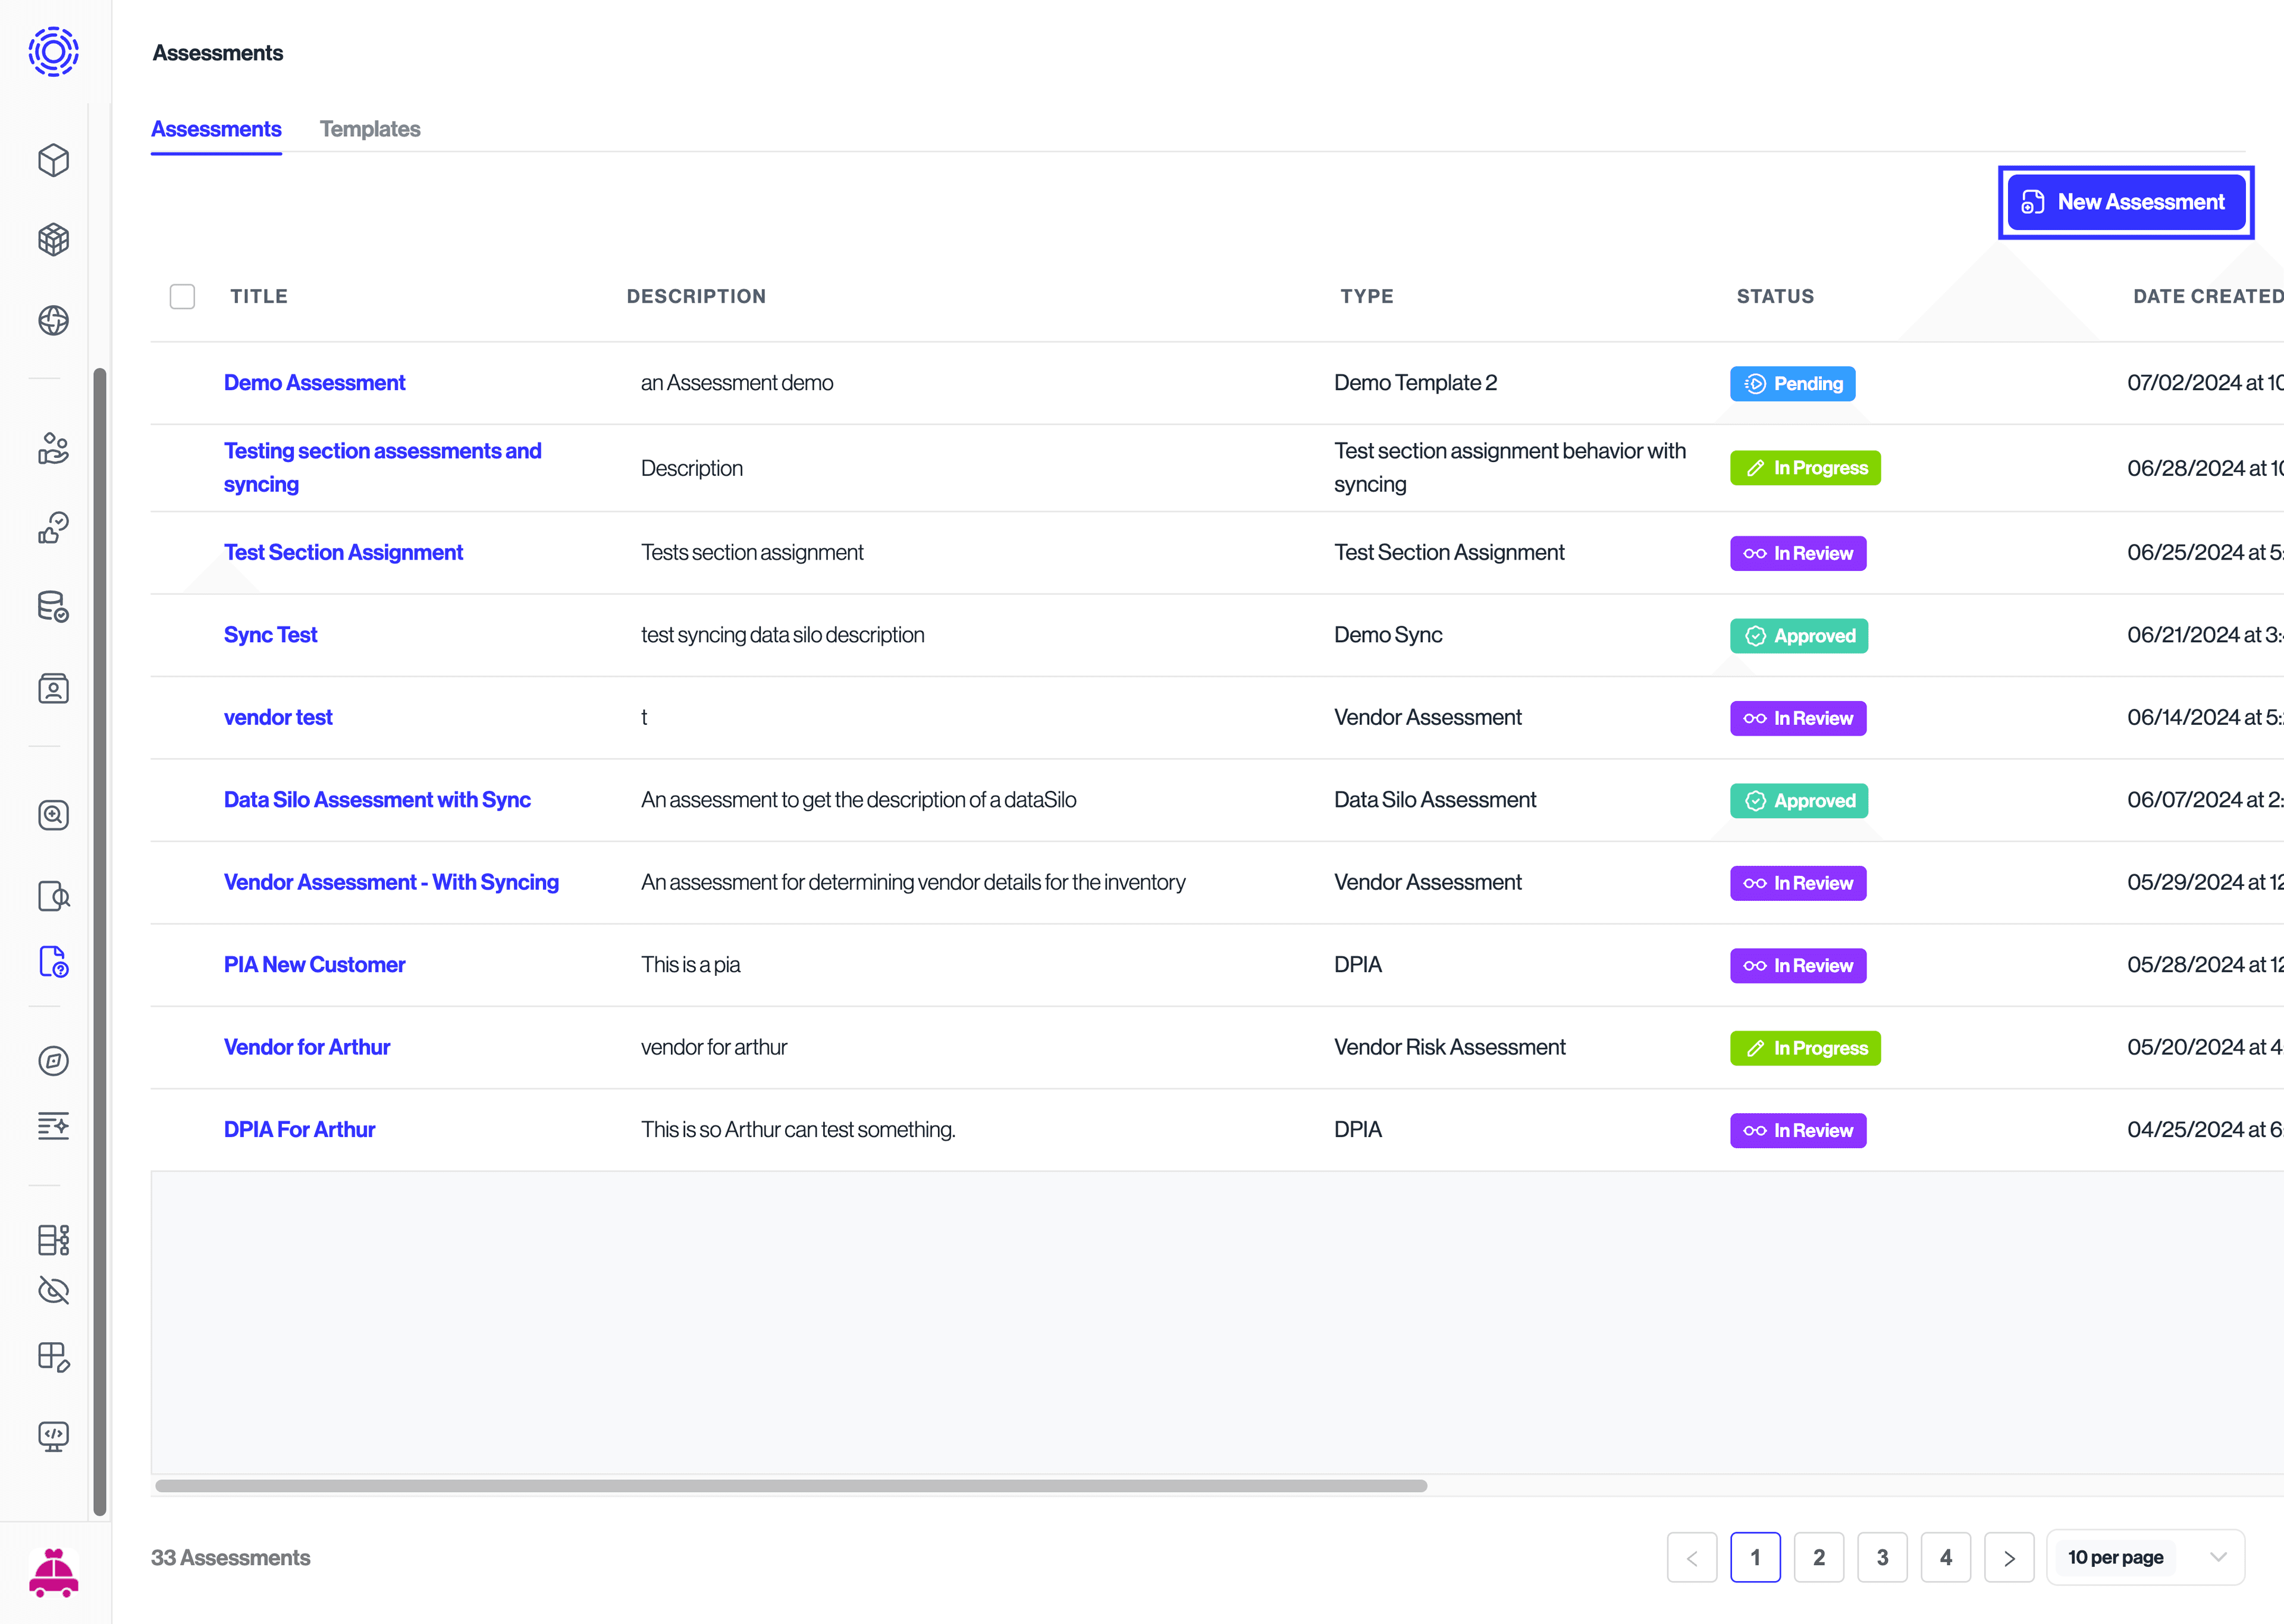
To create a new assessment:
- Go to the Assessments tab and click New Assessment.
- Enter a title and description, then associate it with a template.
Under Advanced Settings, you can configure Email Domains to restrict who can respond to assessments shared via copy links. This security feature ensures that only users with email addresses from approved domains can access your assessments.
When to use Email Domain Validation:
- Internal assessments - Limit access to employees with company email domains
- Partner assessments - Restrict access to specific vendor or partner domains
- Compliance requirements - Meet access control mandates for sensitive assessments
- Data security - Prevent unauthorized external users from accessing assessment forms
Configuration:
- Enter a comma-separated list of approved email domains (e.g.,
company.com, partner.org) - Use root domains (
company.com) to match all emails from that domain - Use specific subdomains (
hr.company.com) for more granular control - Leave blank to allow any external user to respond (default behavior)
Common examples:
mycompany.com- Only company employeesmycompany.com, vendor.com- Company employees and specific vendorpartner1.org, partner2.com, partner3.net- Multiple partner organizations
You have now successfully created your assessments. Refer to the "Assigning Assessments" document for more information on how to assign assessments.