ROPA: Quickstart Guide
RoPA in Transcend lets you generate, edit, version, and export audit‑ready Records of Processing Activities (RoPAs) directly from your Processing Activities table, in line with GDPR Article 30 and similar regulations. It’s accessed as “RoPA” under the Data Inventory navigation in the Admin Dashboard. RoPA is built on top of your Processing Activities and other inventory data so that your reports stay consistent with your live Data Inventory while still allowing tailored, point‑in‑time exports for regulators, auditors, and internal stakeholders.
- Automated RoPA generation based on the Processing Activities table, so you don’t have to manually assemble reports from multiple tables or exports.
- Document and table views that let you see each processing activity as a formatted “card” or as a tabular report, including per‑row details.
- Versioning and history so you can iteratively update RoPAs, autosave minor changes, manually snapshot important versions, and review or restore prior versions when needed.
- Customizable cover sheet (general information) for organization‑wide details (e.g., controller/processor info, DPO contact, representative details) that appear at the top of exports.
- Export to PDF and CSV, producing an audit‑ready RoPA that matches your chosen layout and includes your cover sheet and all selected processing activities.
- Re‑sync from Processing Activities so you can refresh a RoPA against the latest inventory, while preserving manually edited fields where desired.
- In the Admin Dashboard, go to Data Inventory → RoPA.
- You’ll see a RoPA list showing existing RoPA reports (if any currently exist), including their names and basic metadata (e.g., created/updated dates, owner).
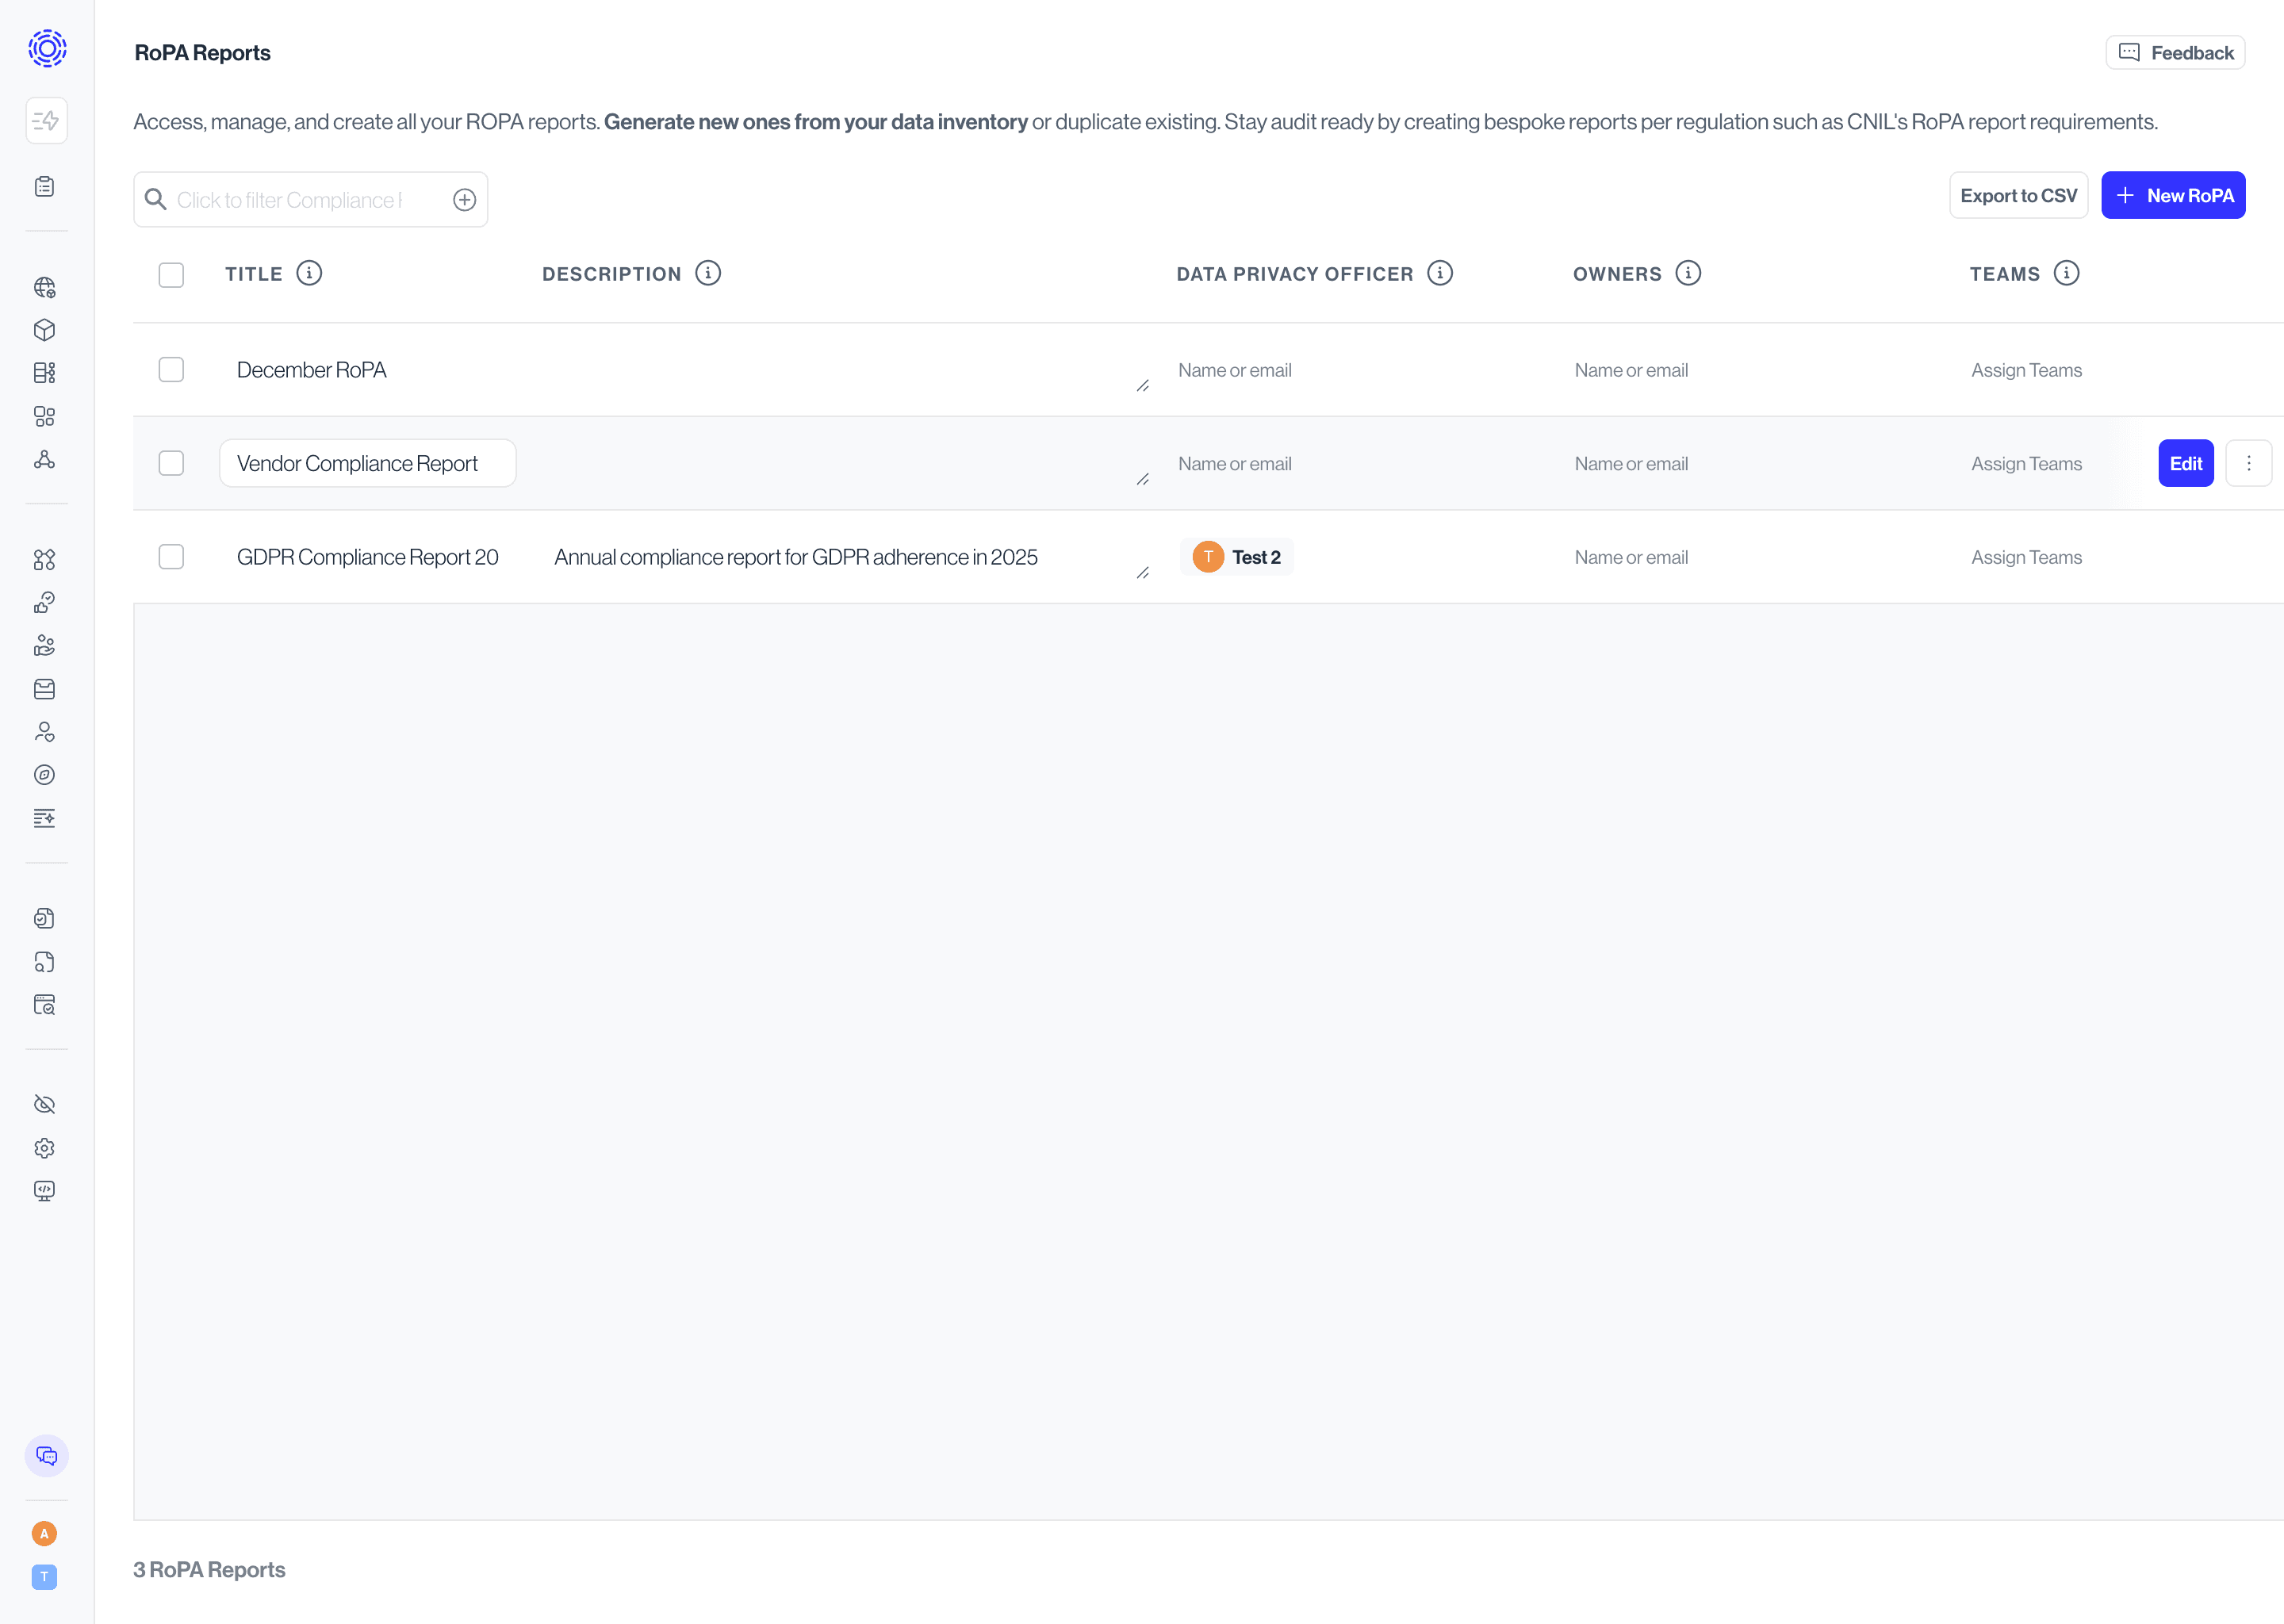
From here you can:
- Open an existing RoPA
- Create a new RoPA
- View version history for a specific RoPA
- Update metadata for each report.
When you create a new RoPA, you’re taking a point‑in‑time snapshot of one or more processing activities and formatting them into a regulator‑ready report.
- Click + New RoPA in the RoPA list view.
- Here you can provide metadata to recognize the report:
- RoPA name – e.g., “Article 30 – Controller RoPA 2025”
- Description – optional internal description of the report’s scope or intended audience
These values become part of the RoPA’s versioned metadata.
- You’ll see a Processing Activities‑based table where each row is a processing activity drawn from your Processing Activities table.
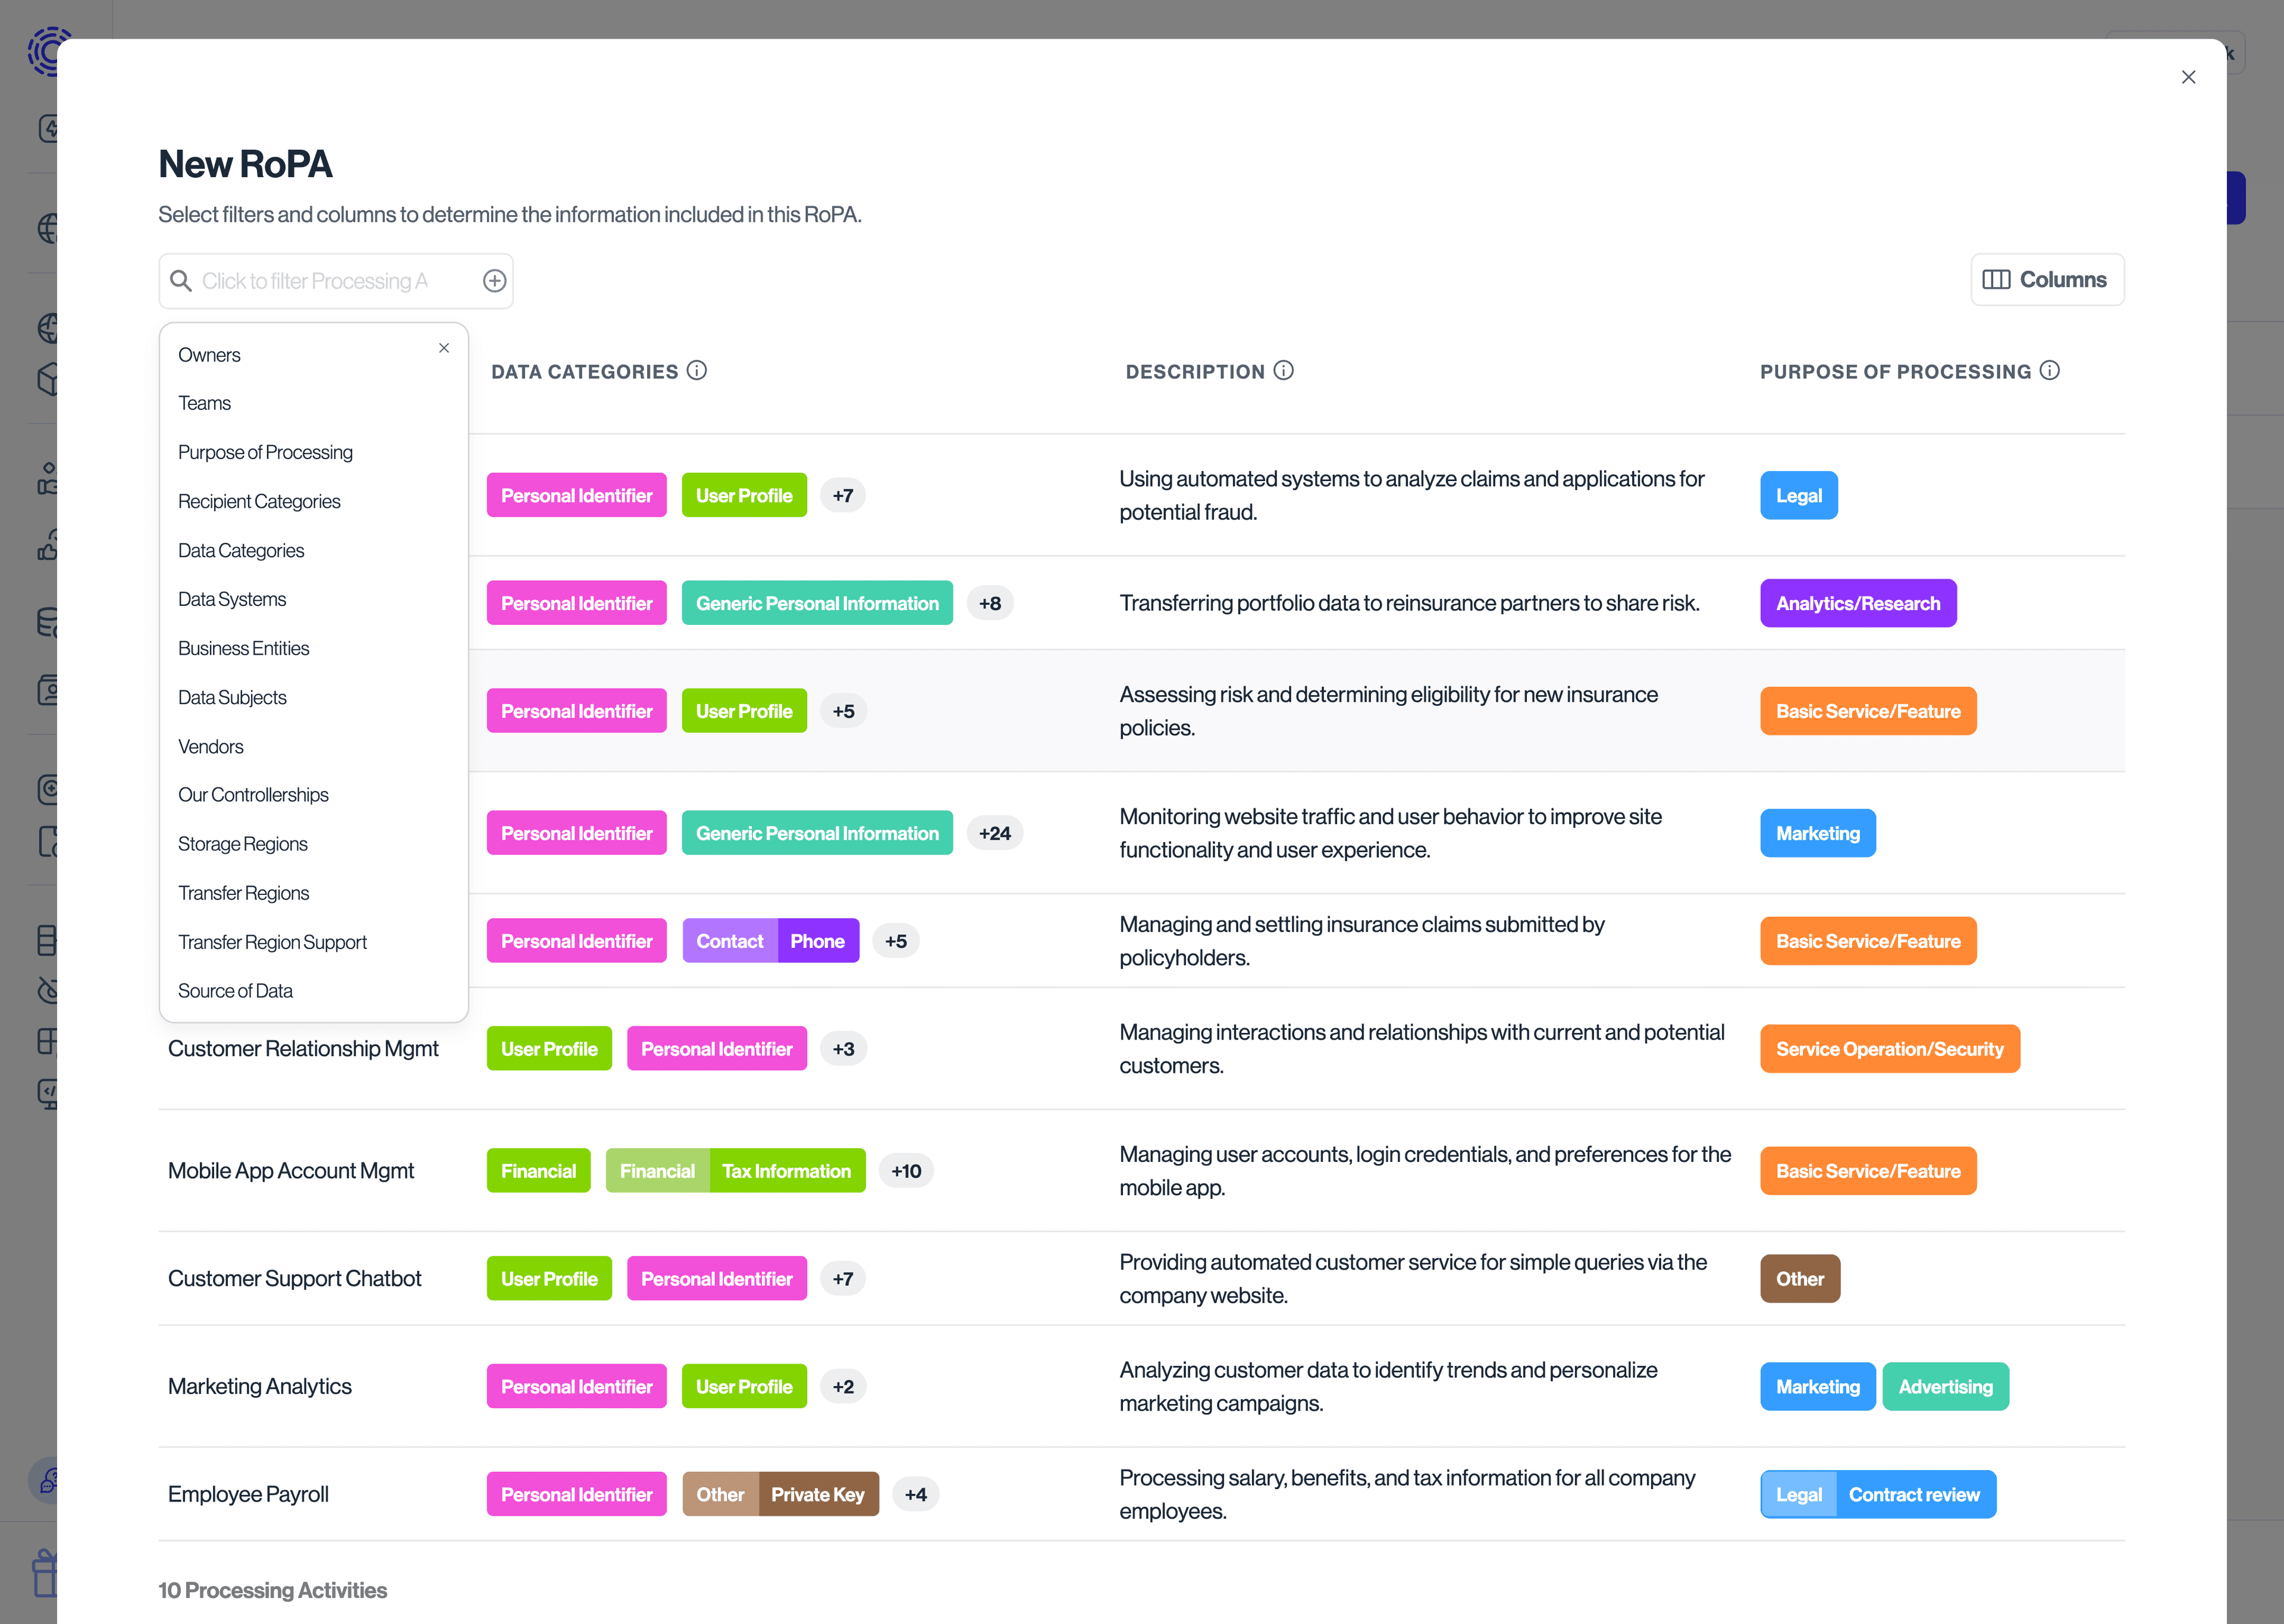
Here you can:
- Filter processing activities by title/description or other filters available in the Processing Activities table.
- Show/hide columns to control which fields will be included in the RoPA (e.g., data subjects, purposes, categories of data, recipients, transfers, retention, legal basis).
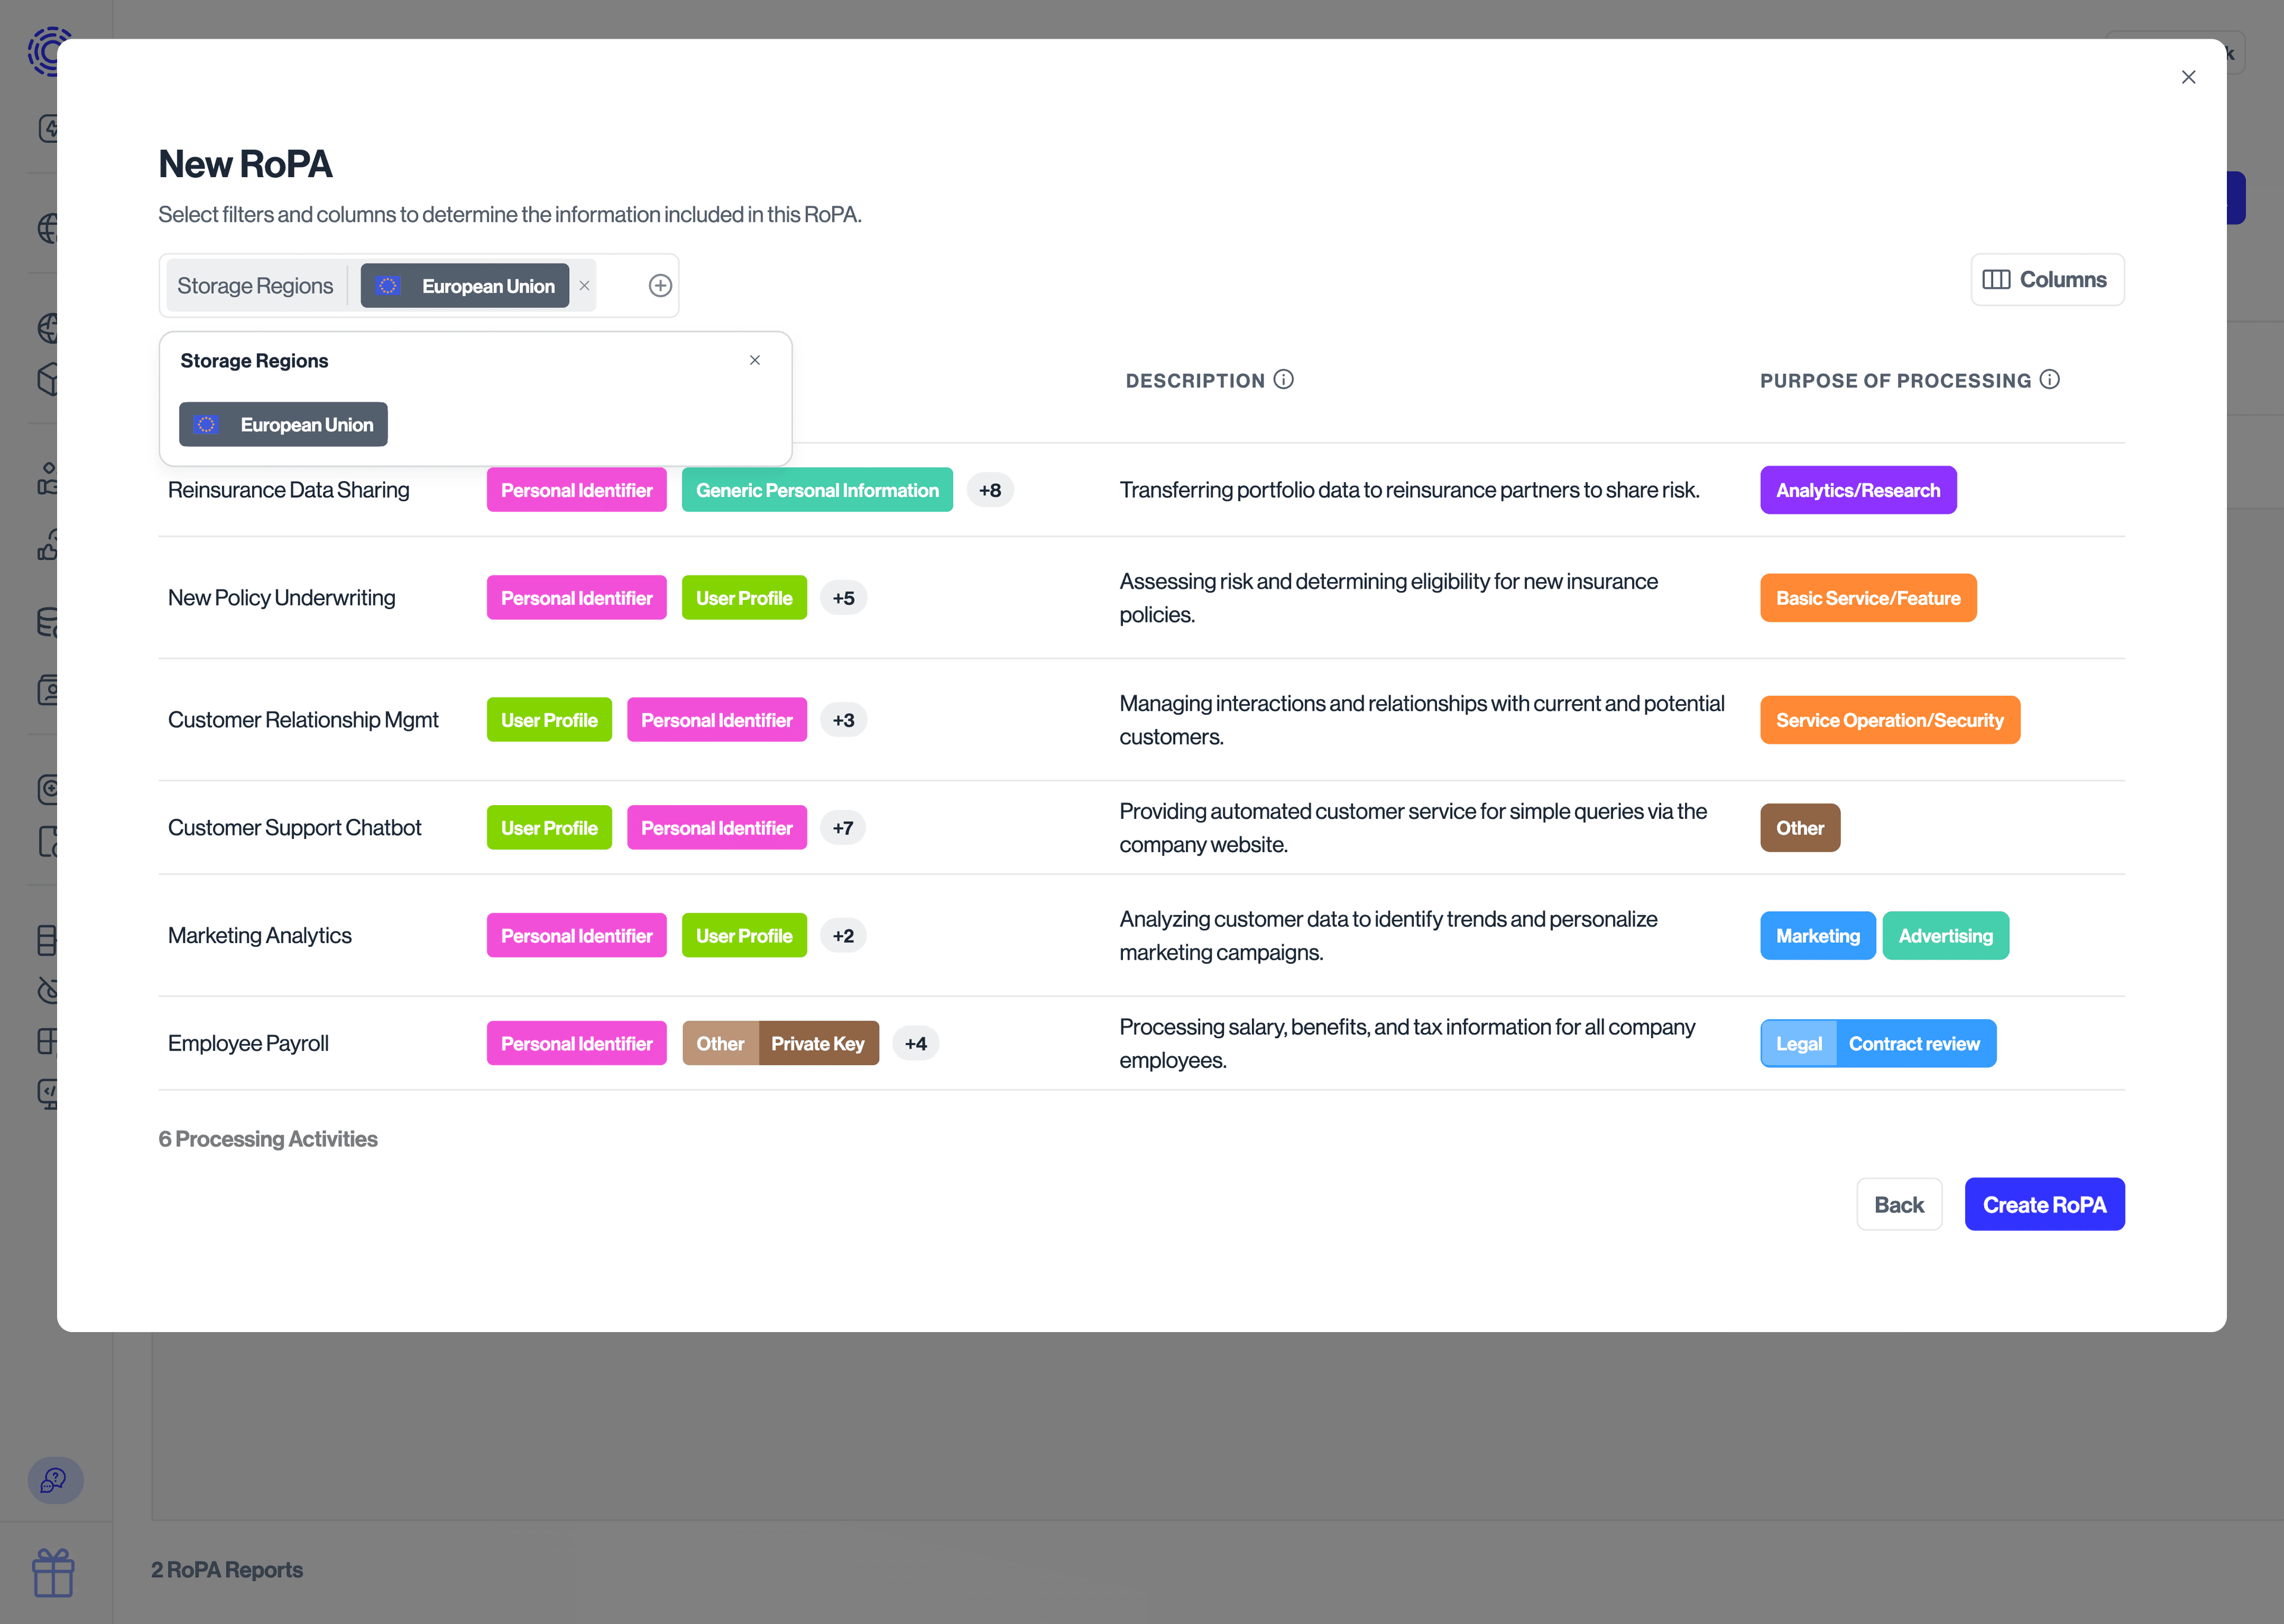
The processing activities and columns selected at this step determine the content of the RoPA.
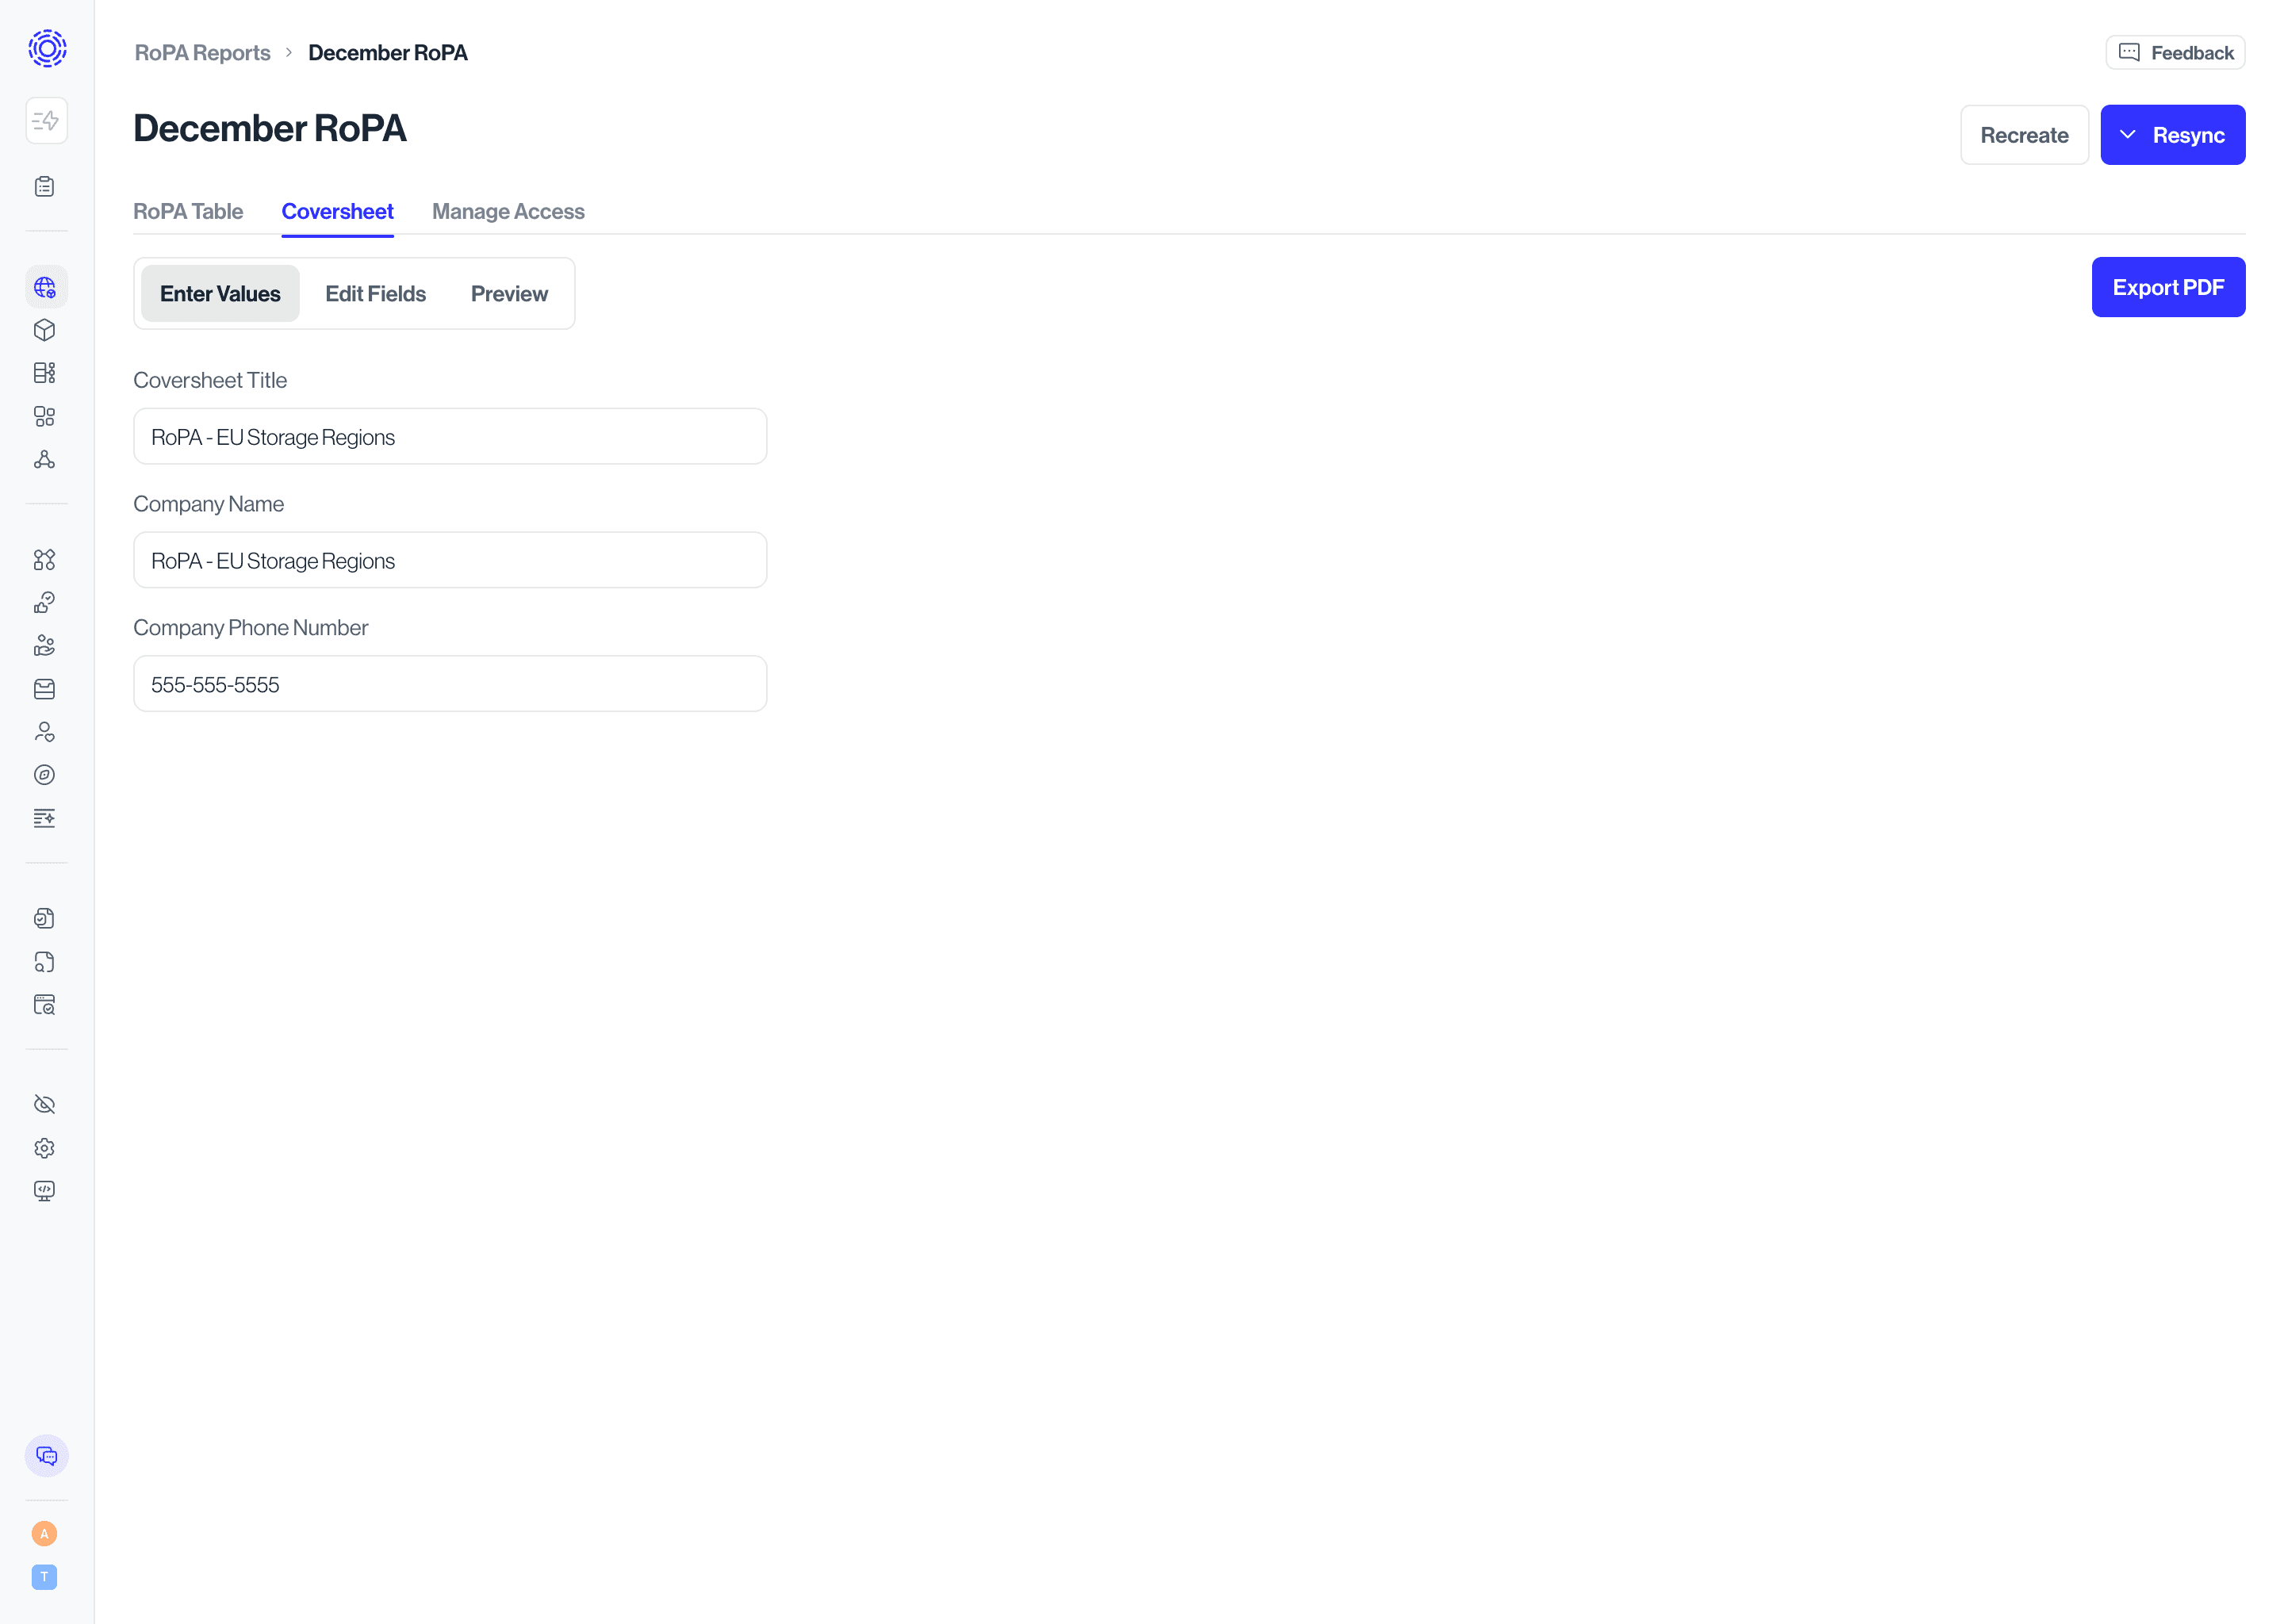
After selecting processing activities, configure the cover sheet fields that will appear at the top of your RoPA export, such as:
- Company information (name, website, description, role as controller/processor/joint controller, address)
- Contact details
- Data Protection Officer
- Representative
Users can:
- Add/edit field definitions (name and type: short text, long text, multi‑select, etc.).
- Fill in values for the current RoPA (these values are saved in the RoPA version).
- Preview the coversheet to make sure it aligns with expectations.
After creation, the RoPA opens into its main views.
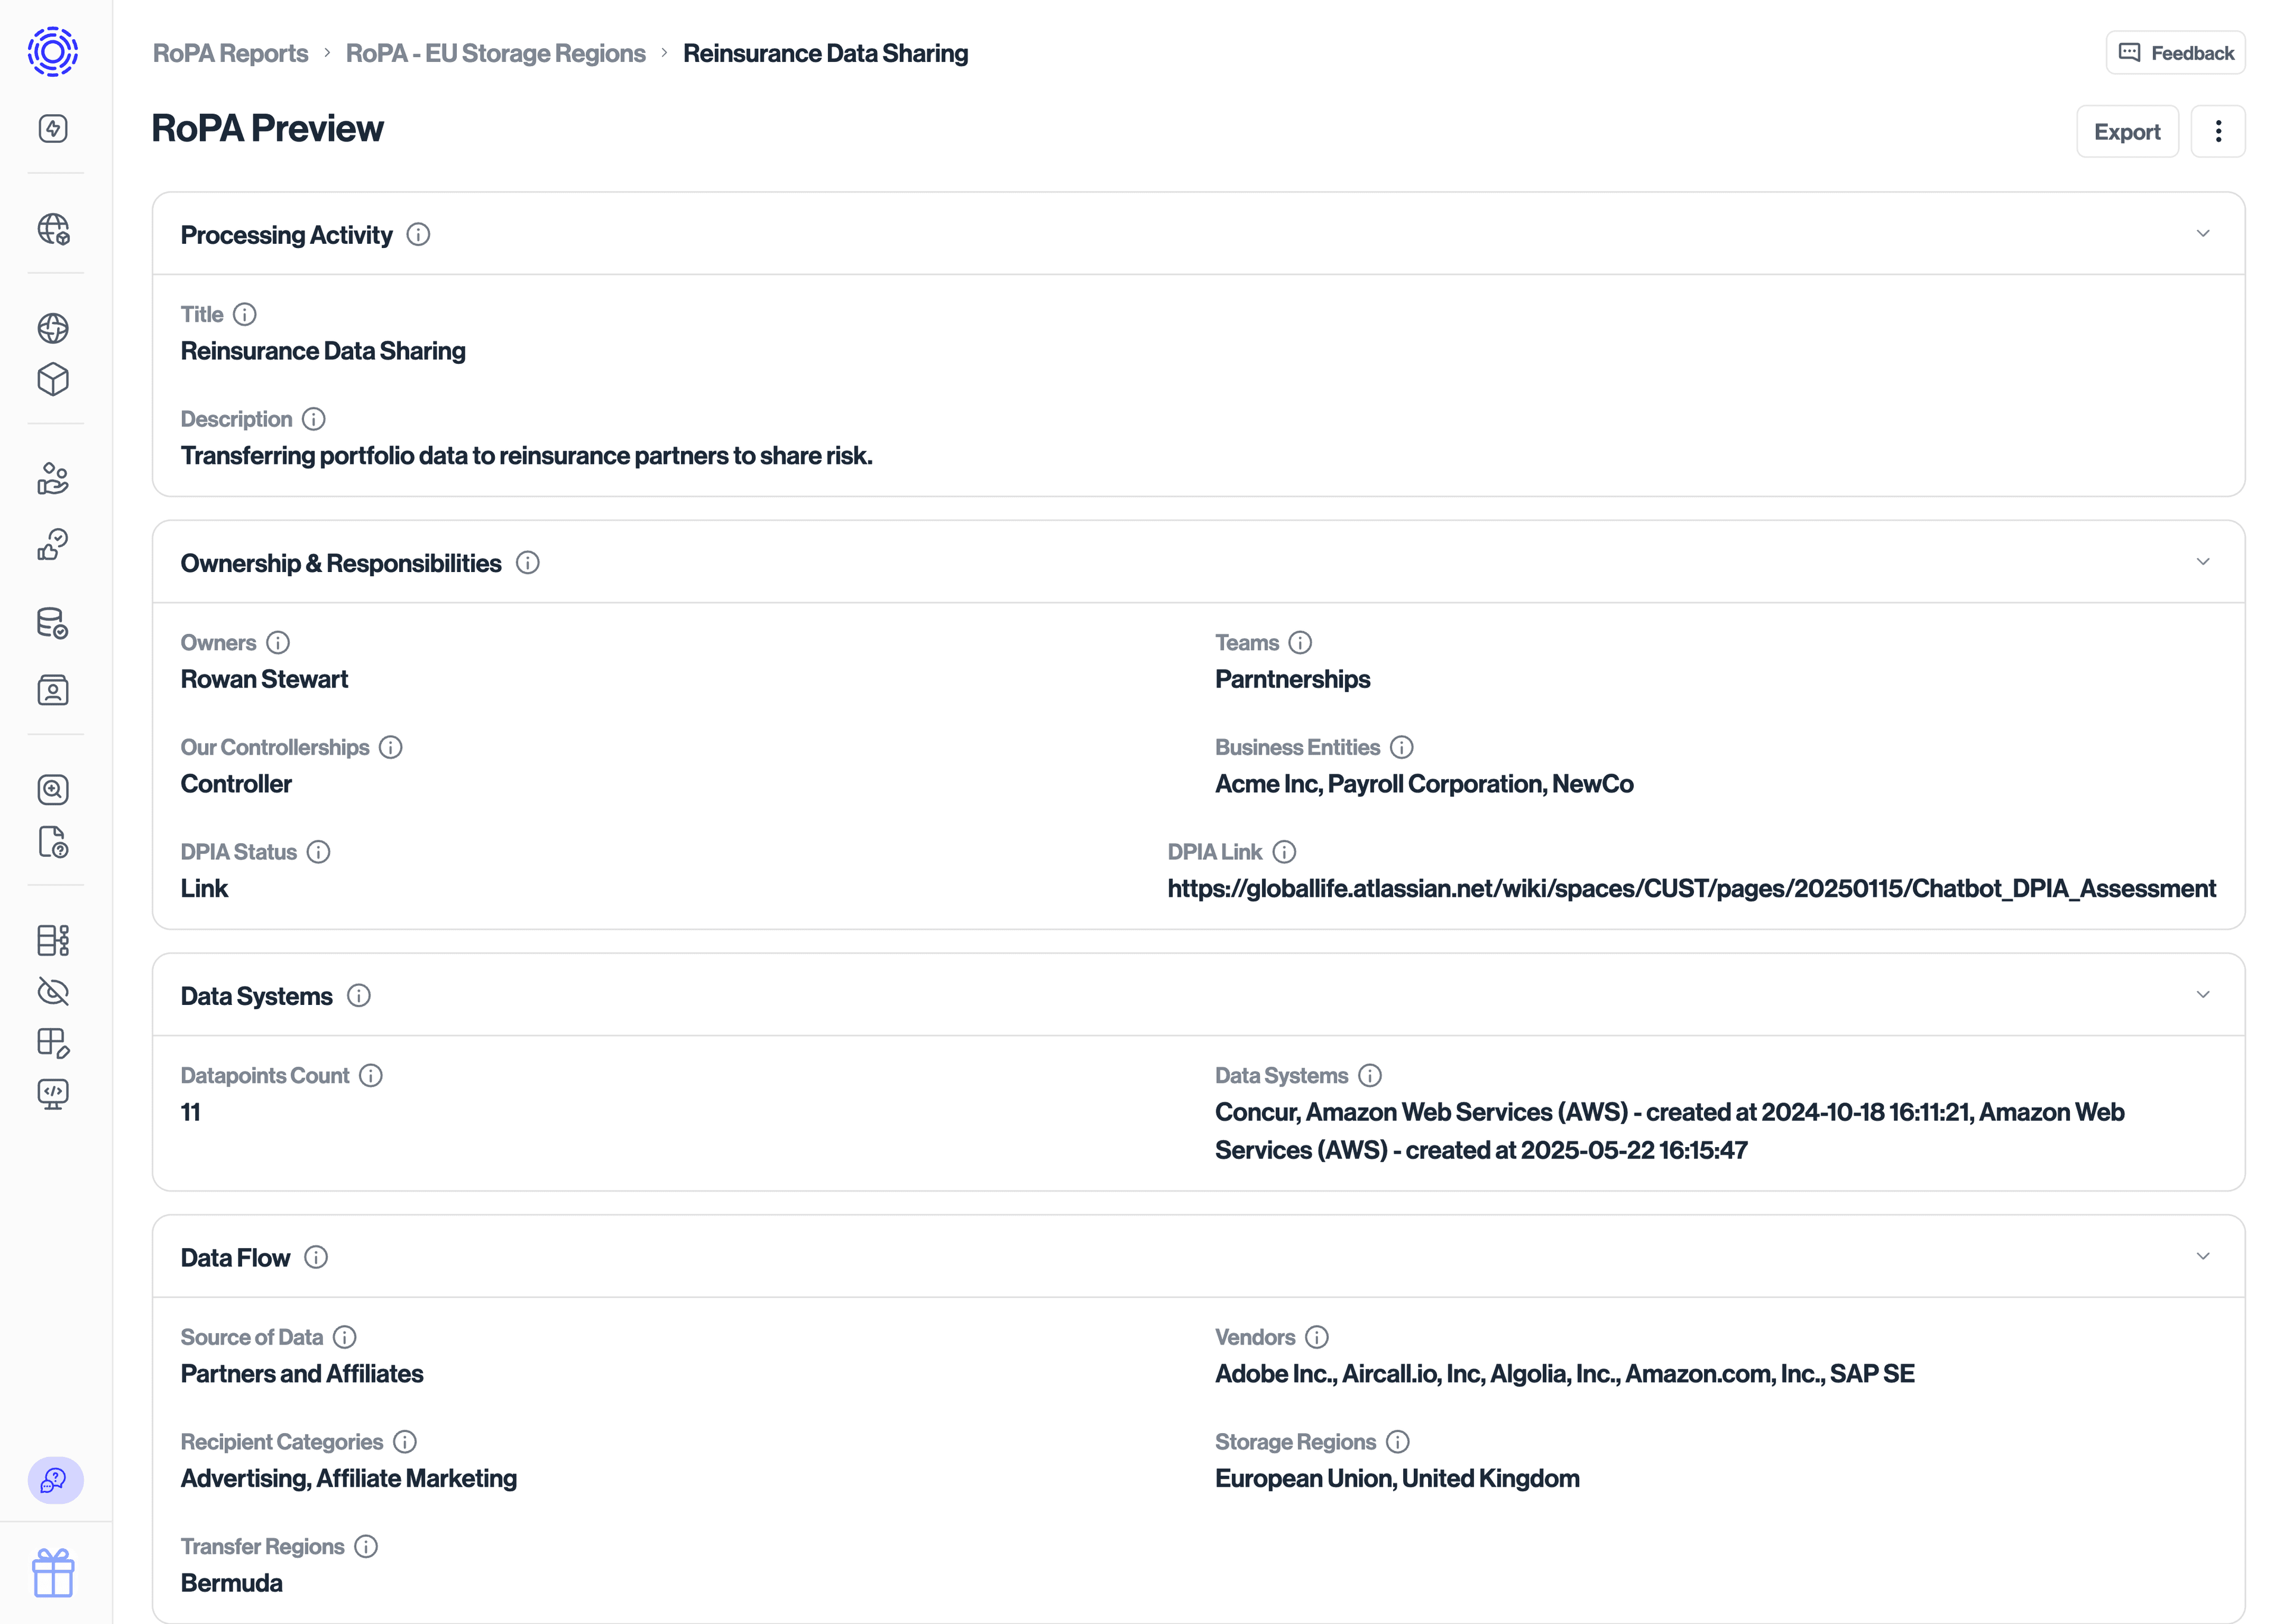
Document view lets you see each processing activity in a card‑style document layout:
- Each processing activity is rendered as its own “document section” with a header and grouped fields (e.g., metadata & classification, ownership & responsibilities, recipients, transfers).
This view is optimized for reading and export, not for changing your underlying Processing Activities table.
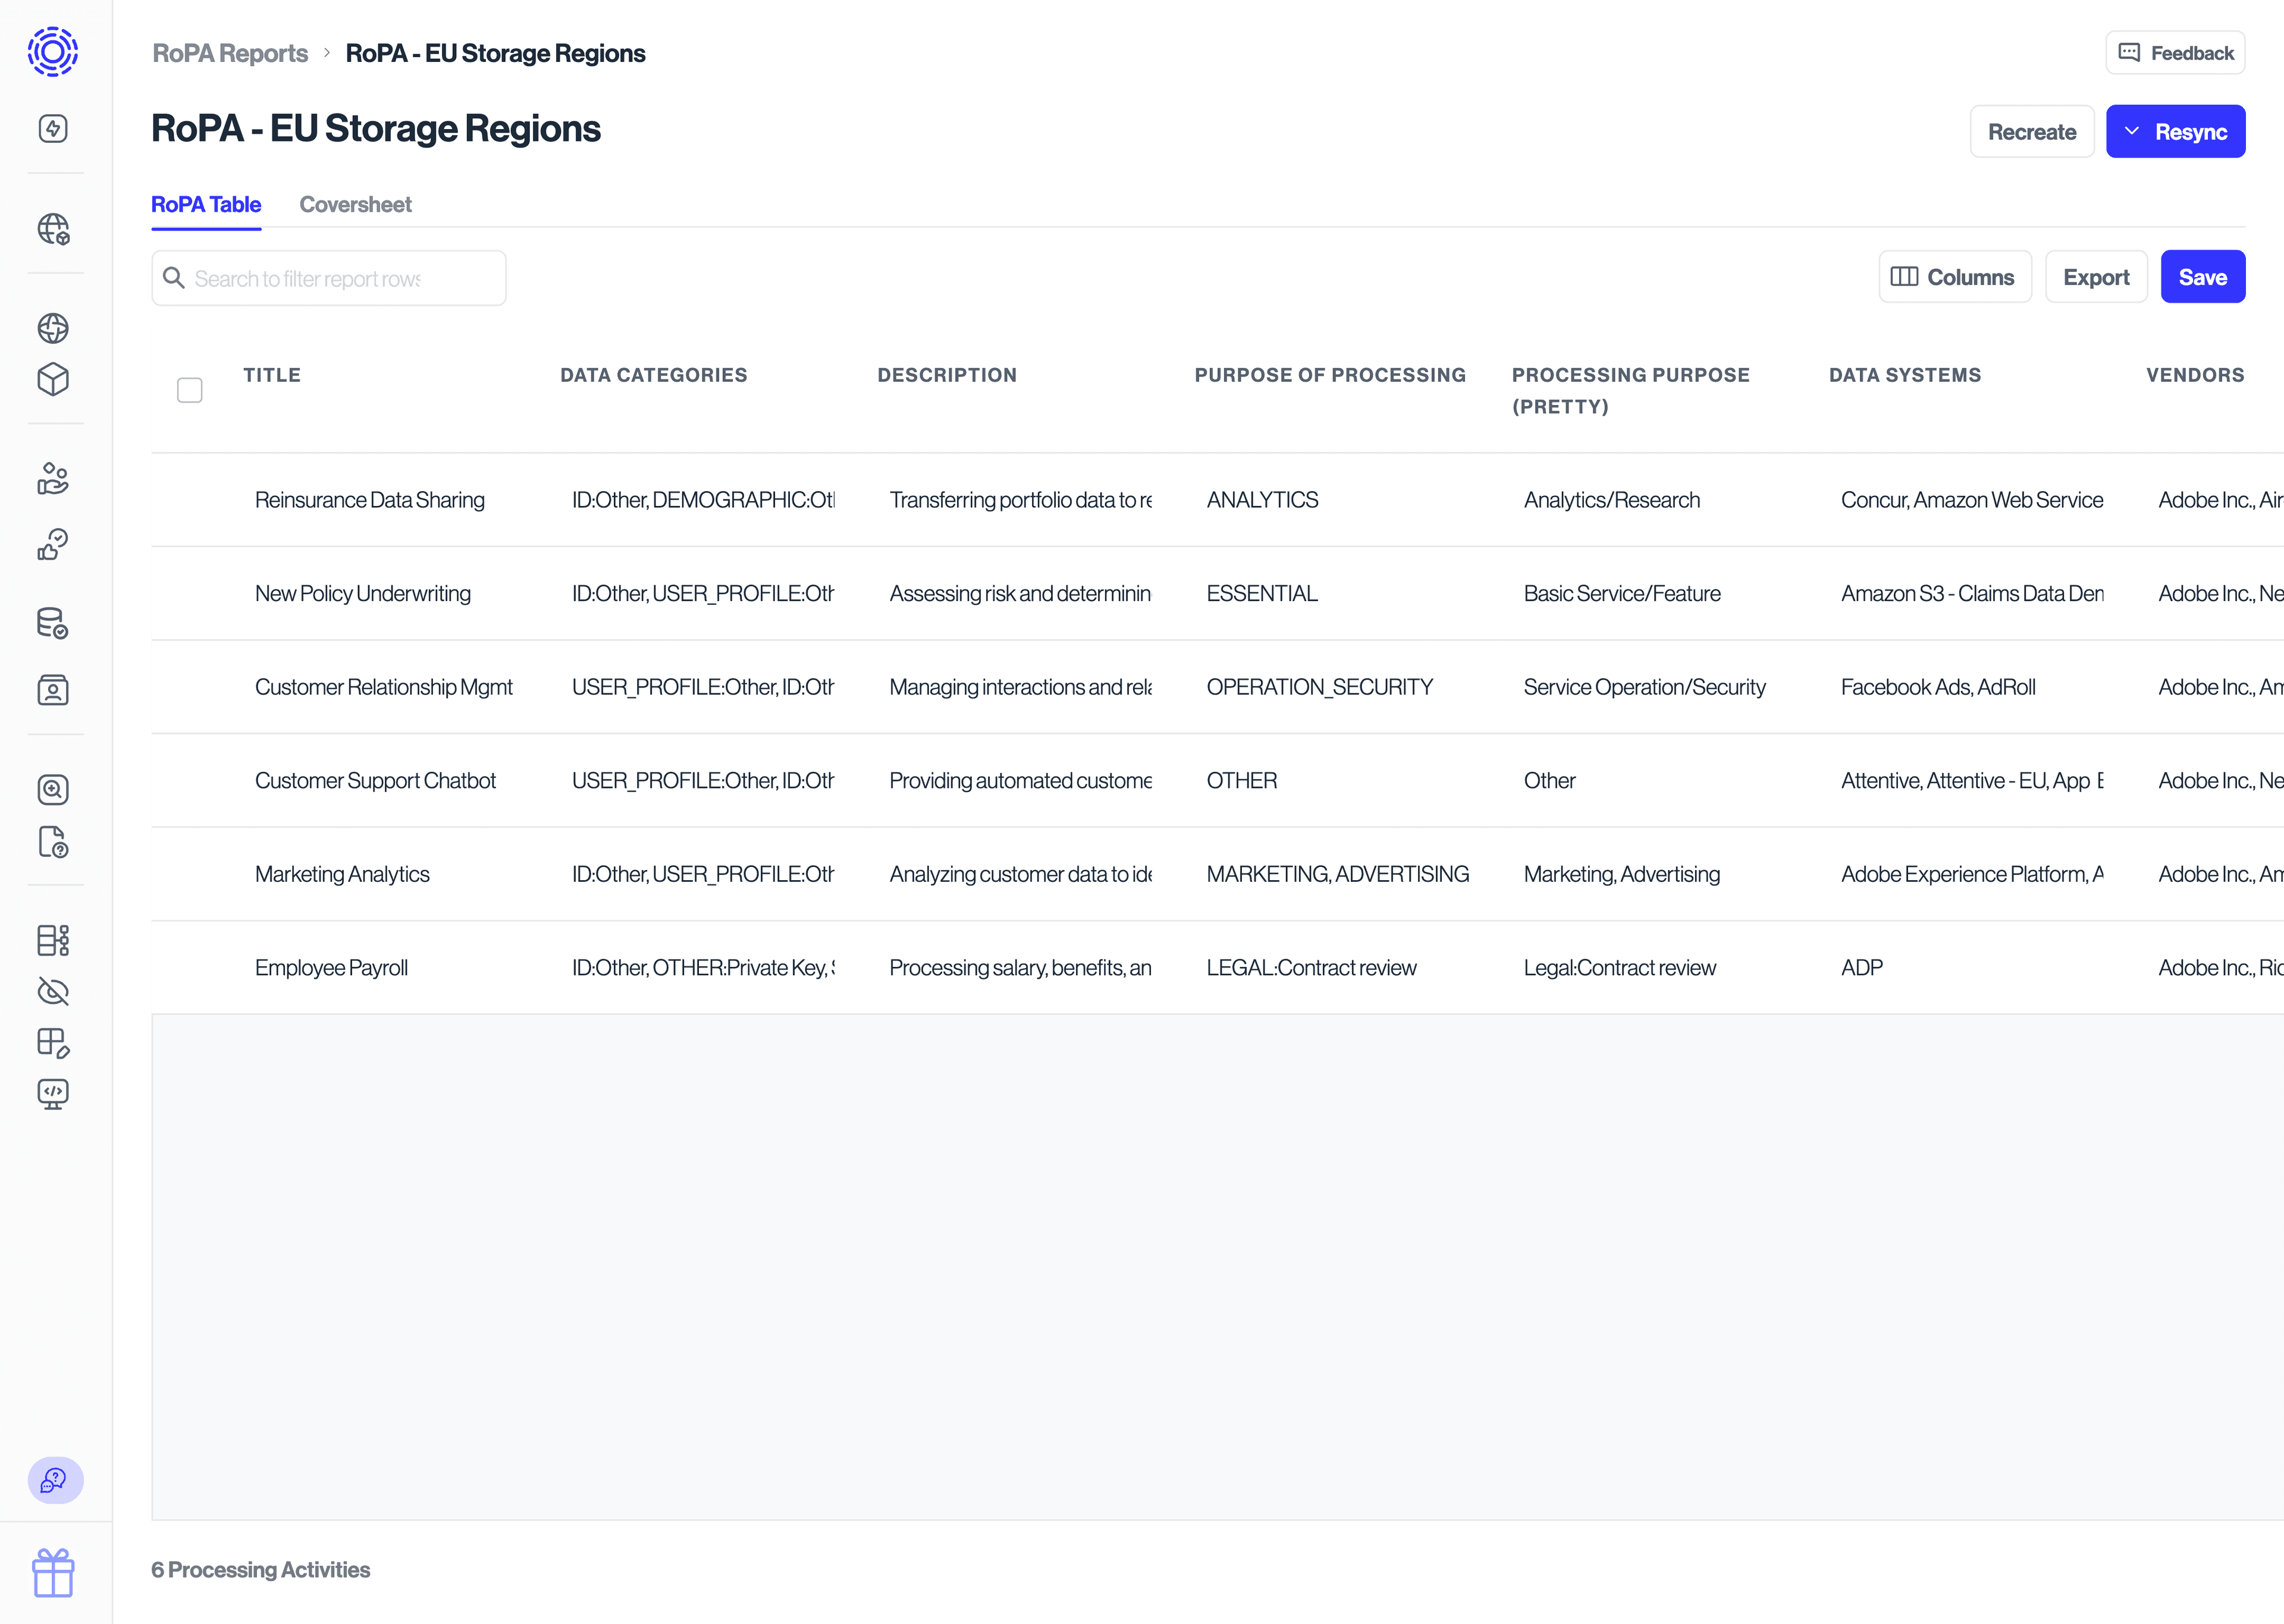
The RoPA table view shows the same data in a tabular format:
- Each row is a processing activity included in the RoPA.
- Each column corresponds to a configured field (pulled from the Processing Activities table and/or RoPA‑specific fields).
From here you can:
- Edit cell values (within the RoPA) for last‑mile corrections or clarifications, without changing the underlying Processing Activities table.
- Add or remove rows (if enabled) to narrow or expand which activities are in the RoPA snapshot.
- Hide/show columns for reporting‑only use cases.
Edits in the RoPA do not automatically overwrite your Processing Activities table; they are part of the RoPA’s versioned snapshot unless you explicitly re‑sync from Processing Activities.
RoPA V2 maintains a version history per RoPA so you can track changes and reference earlier states.
Key behaviors:
- A new version is created every 25 edits, 30 minutes have passed since last snapshot & if a different user makes a change. Some examples that count as "edits":
- Updates to report‑level metadata (title, owners, description).
- Edits to cover sheet (general information) fields.
- Edits to row/cell values or layout and save manually or hit a snapshot event (e.g., explicit “Save version”).
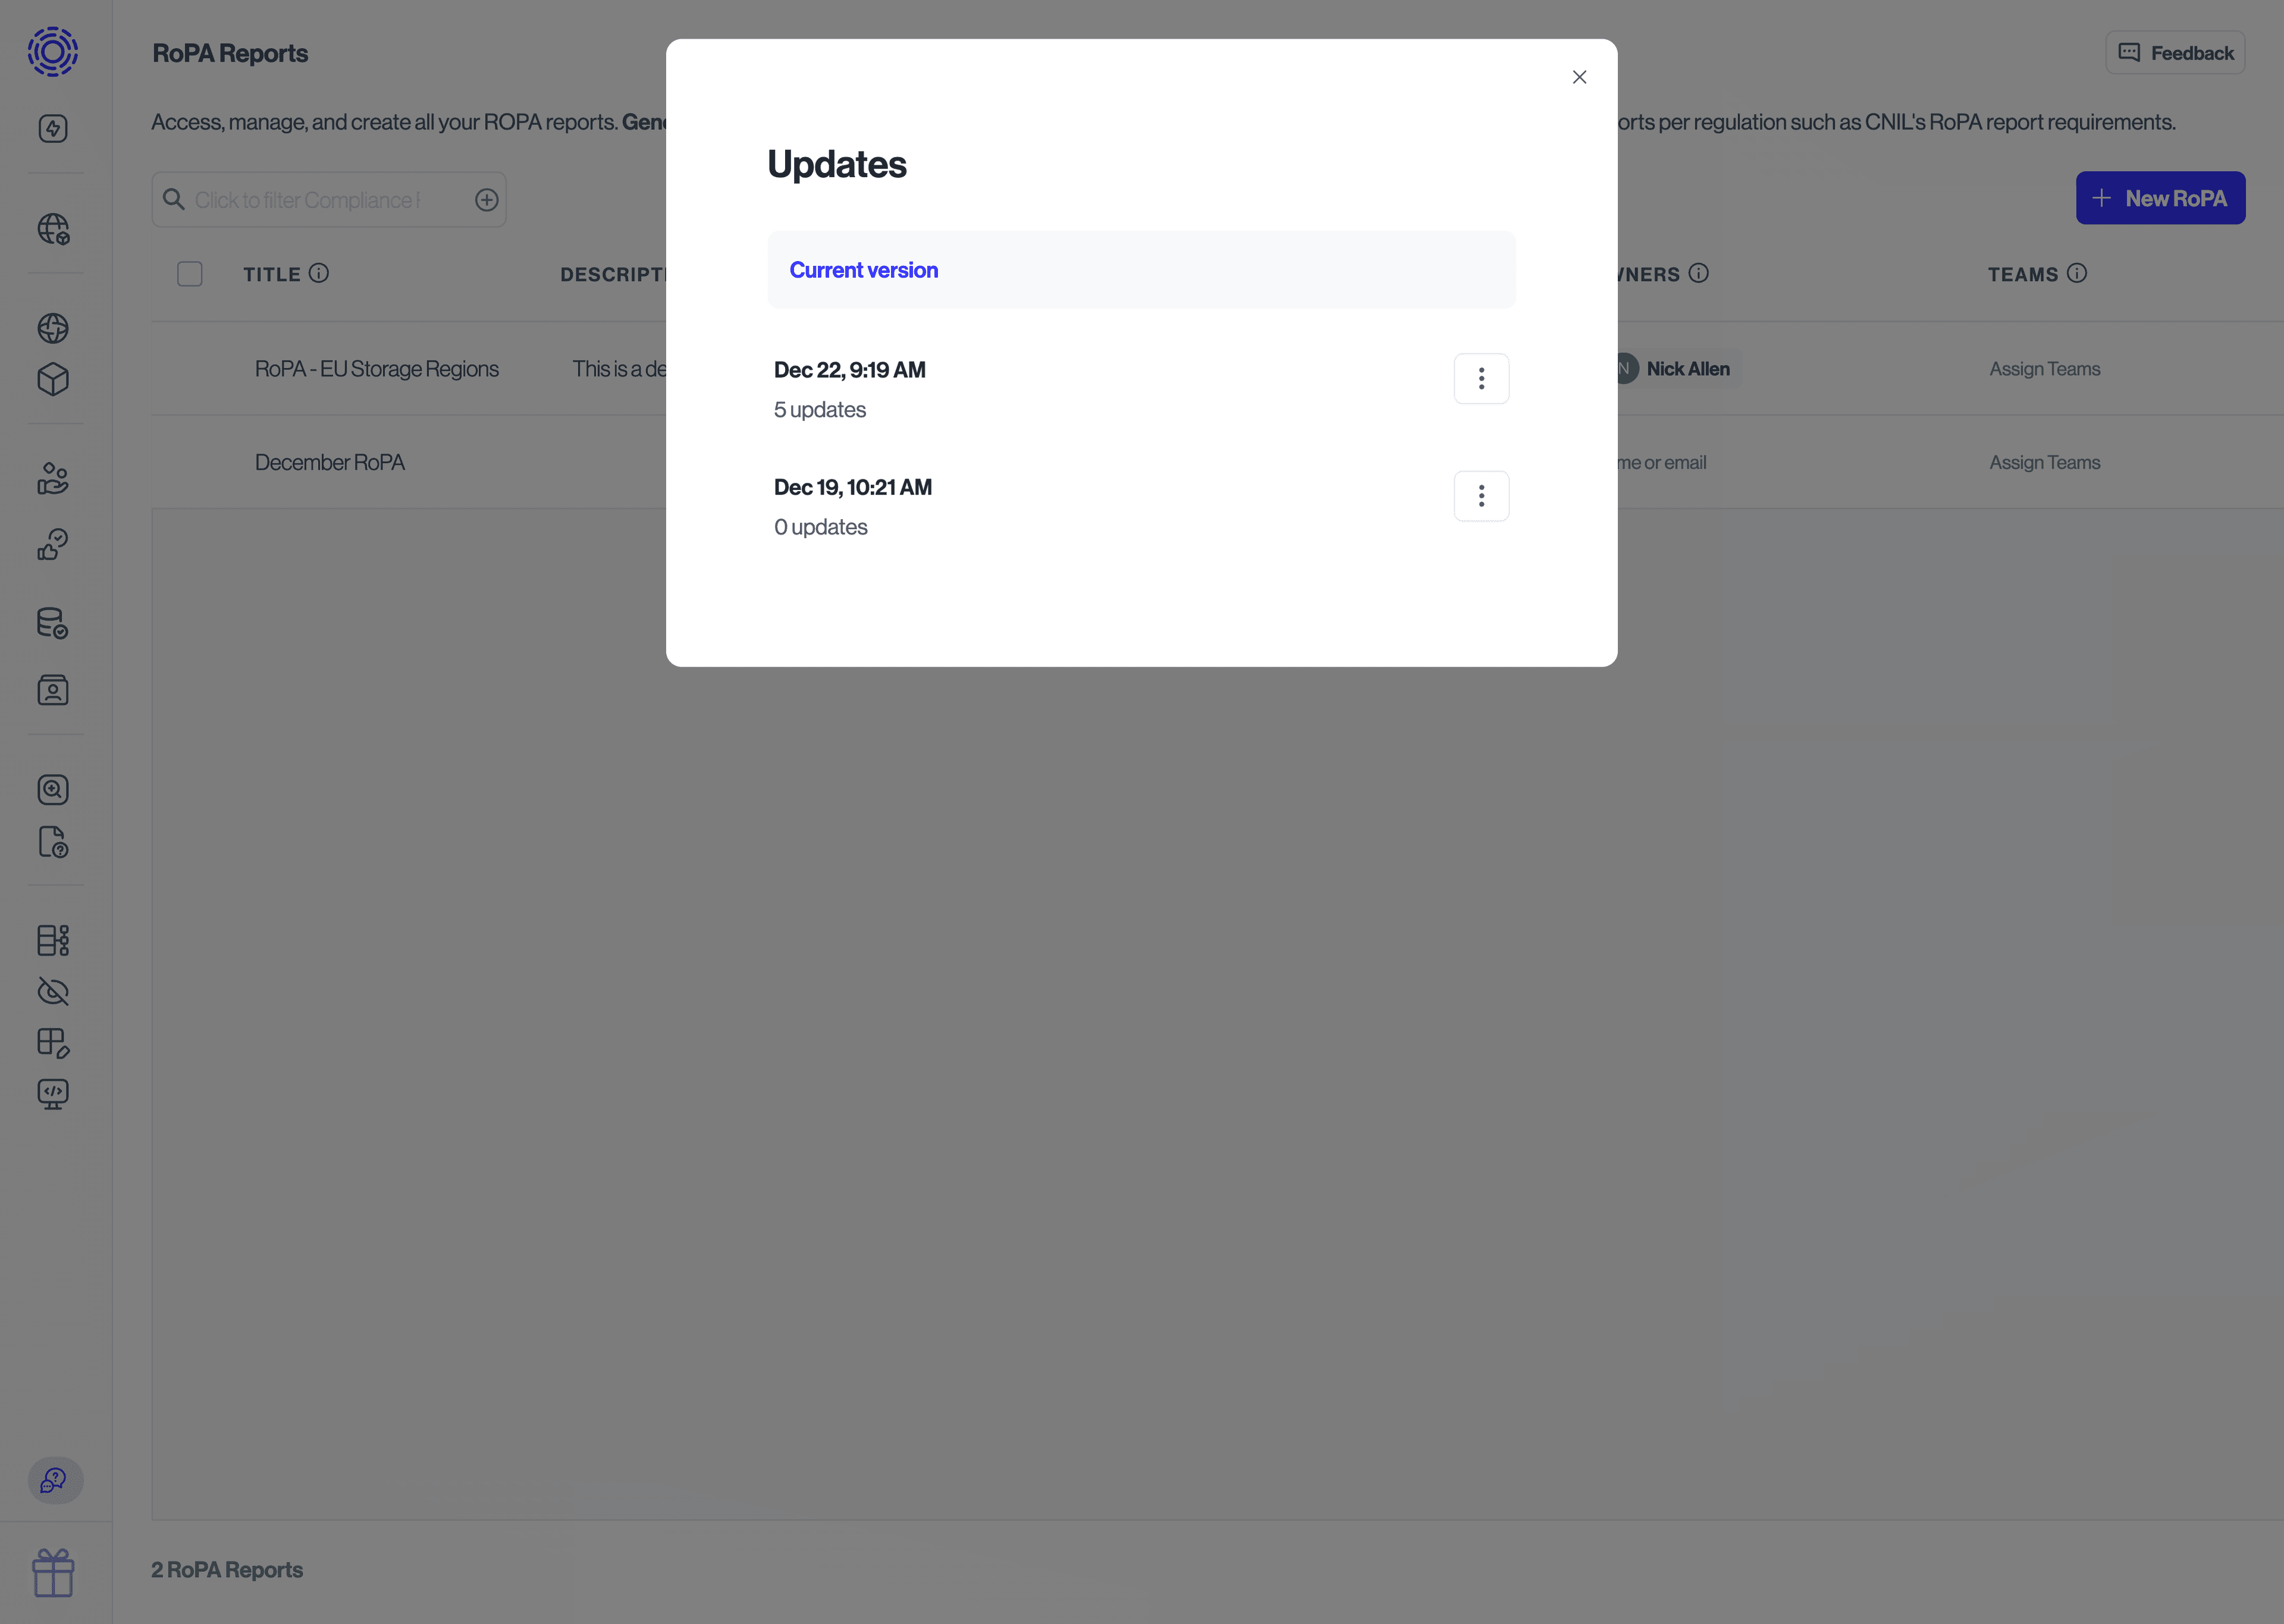
From the RoPA list or detail view you can:
- View history – see all versions, their timestamps, creators, and notes.
- Open a specific version – view what the RoPA looked like at that time.
Because RoPAs are built from the Processing Activities table, you can re‑sync or recreate a RoPA when your inventory changes (e.g., new activities, updated categories, new recipients).Typical behavior:
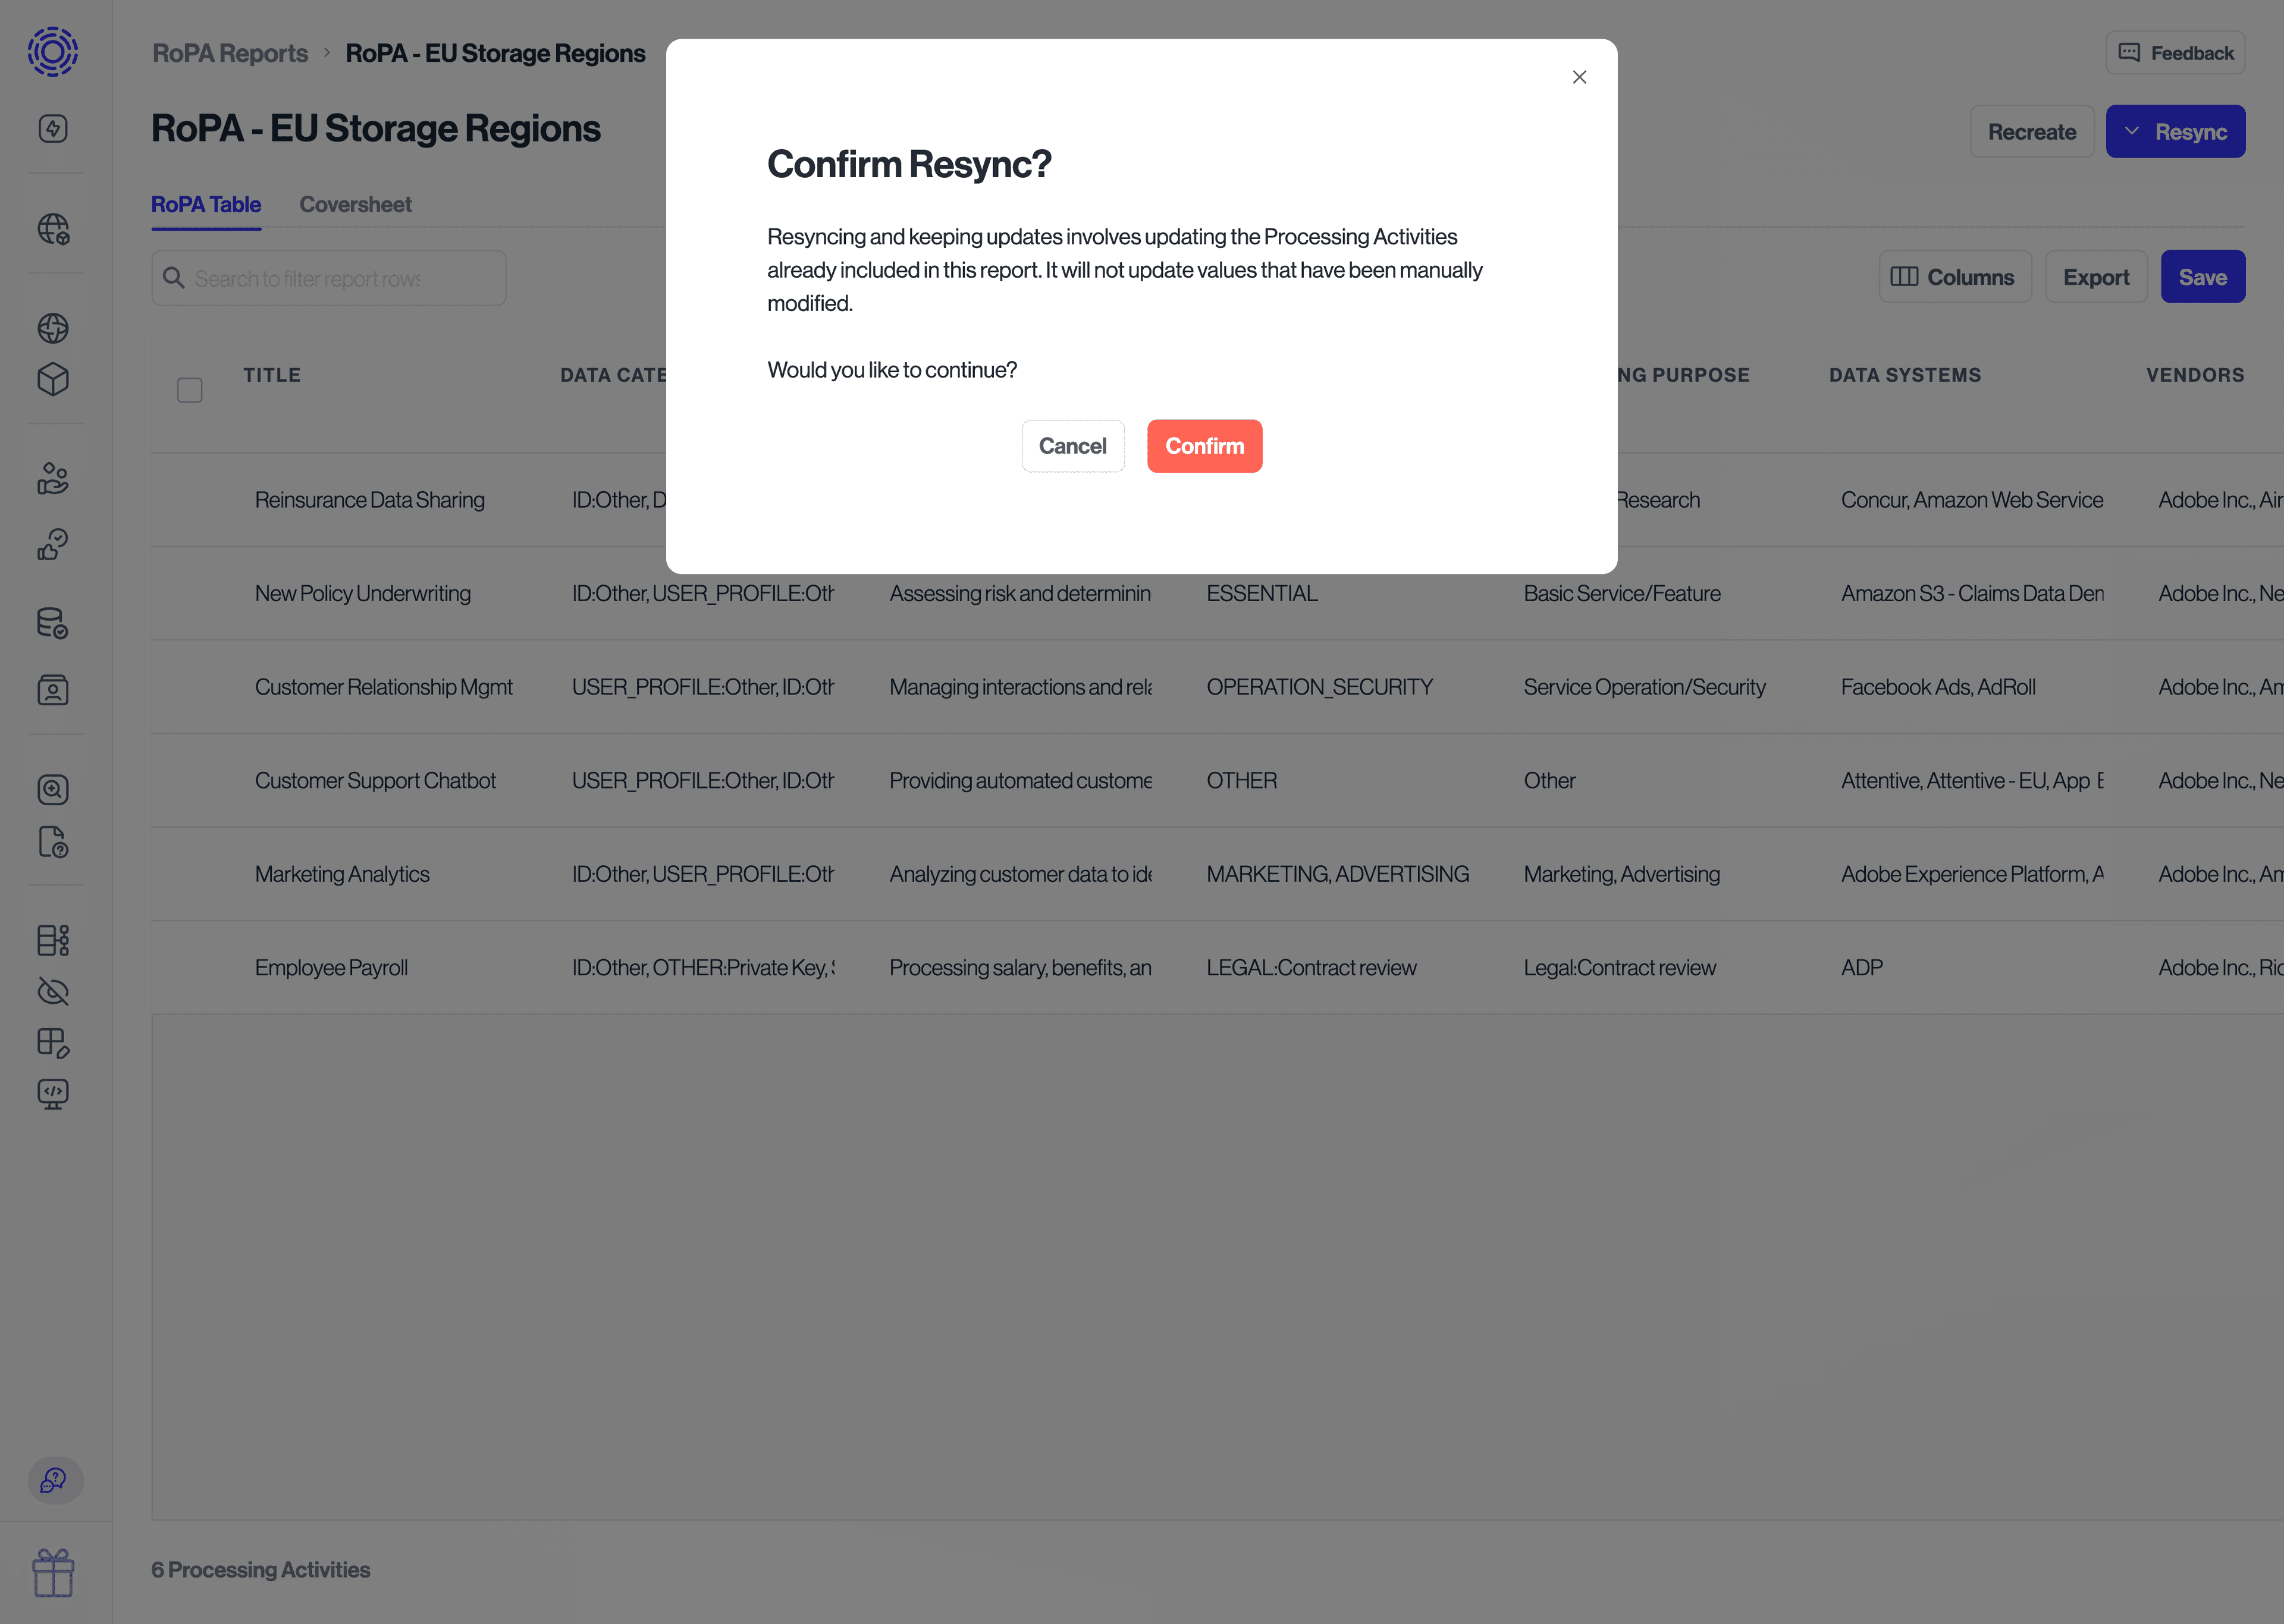
- When you click Re‑sync:
- Updated processing activities from the Processing Activities table are pulled in where they match the original selection logic.
- You can choose whether to overwrite previously edited values or preserve manual edits.
- Deleted processing activities are typically dropped from the RoPA snapshot unless configured otherwise.
- When you click Recreate:
- New procssing activities from the Processing Activities table that match the filters of the RoPA at added to the report
Re‑sync and recreate operations create new versions so you retain a full audit trail of past RoPAs.
- From the RoPA view, click Export.
- The PDF export includes:
- Cover sheet (general information)
- All included processing activities, rendered in document form
- Visual separators or headers so it’s clear where one processing activity ends and the next begins.
This is intended to be regulator‑ready and shareable with auditors or DPAs.
- From the RoPA view, click Export → CSV.
- The CSV contains:
- One row per processing activity
- One column per selected field (as configured in the RoPA table)
This is useful for further analysis, internal reporting, or transformation into downstream tools.
- Keep Processing Activities authoritative: model your activities thoroughly there first; RoPA should primarily be a formatted and point‑in‑time projection of that data.
- Use re‑sync to keep RoPAs evergreen: when your inventory changes meaningfully (new systems, new activities, new regions), re‑sync and snapshot again to maintain an “evergreen” RoPA while retaining historical copies.
Is RoPA V2 different from the old Data Reports approach?
Yes. Previously, RoPAs were assembled via Data Reports over generic inventory tables; RoPA V2 uses a dedicated Processing Activities table and a purpose‑built RoPA experience with versioning, cover sheets, and document‑style exports.
Does editing a RoPA change my underlying Processing Activities?
No. Edits inside a RoPA are part of that RoPA’s versioned snapshot. To change your inventory, update the Processing Activities table directly, then re‑sync your RoPA.
Can a single organization have multiple RoPAs?
Yes. For example, you might maintain separate RoPAs for different entities (controller vs processor), regions, business units, or regulatory templates (GDPR Art. 30, DORA, CNIL, etc.).This draft now consistently uses RoPA as the product and UI name, aligning with the current navigation and experience, while still reflecting the underlying RoPA V2 capabilities.