Marketo: Inbound Webhook Triggers
This guide will run you through how to setup a custom webhook trigger in Marketo to push consent changes into the Transcend Preference Store.
For other details about this integration, you can find documentation for that integration in the Transcend Dashboard. These instructions can also be found by selecting your integration from the Infrastructure -> Integrations page and clicking on the "Connection" tab to view the instructions.
Setting up webhook triggers into Transcend involves 4 steps:
- Create a new custom field on your lead object called
Unsubscribed_Inverted - Create a smart campaign that sets the value of
Unsubscribed_Invertedto the opposite of whateverUnsubscribedis set to whenever a new lead is created or theUnsubscribedfield is changed. - Create a webhook that calls the Transcend PUT /v1/preferences API that forwads the value of your
Unsubscribed_Invertedfield. - Create a smart campaign that triggers the webhook in (3) whenever the value of
Unsubscribed_Invertedis changed.
- Click on the
Admintop menu. - Go to
Database Management->Field Managementin left hand side menu
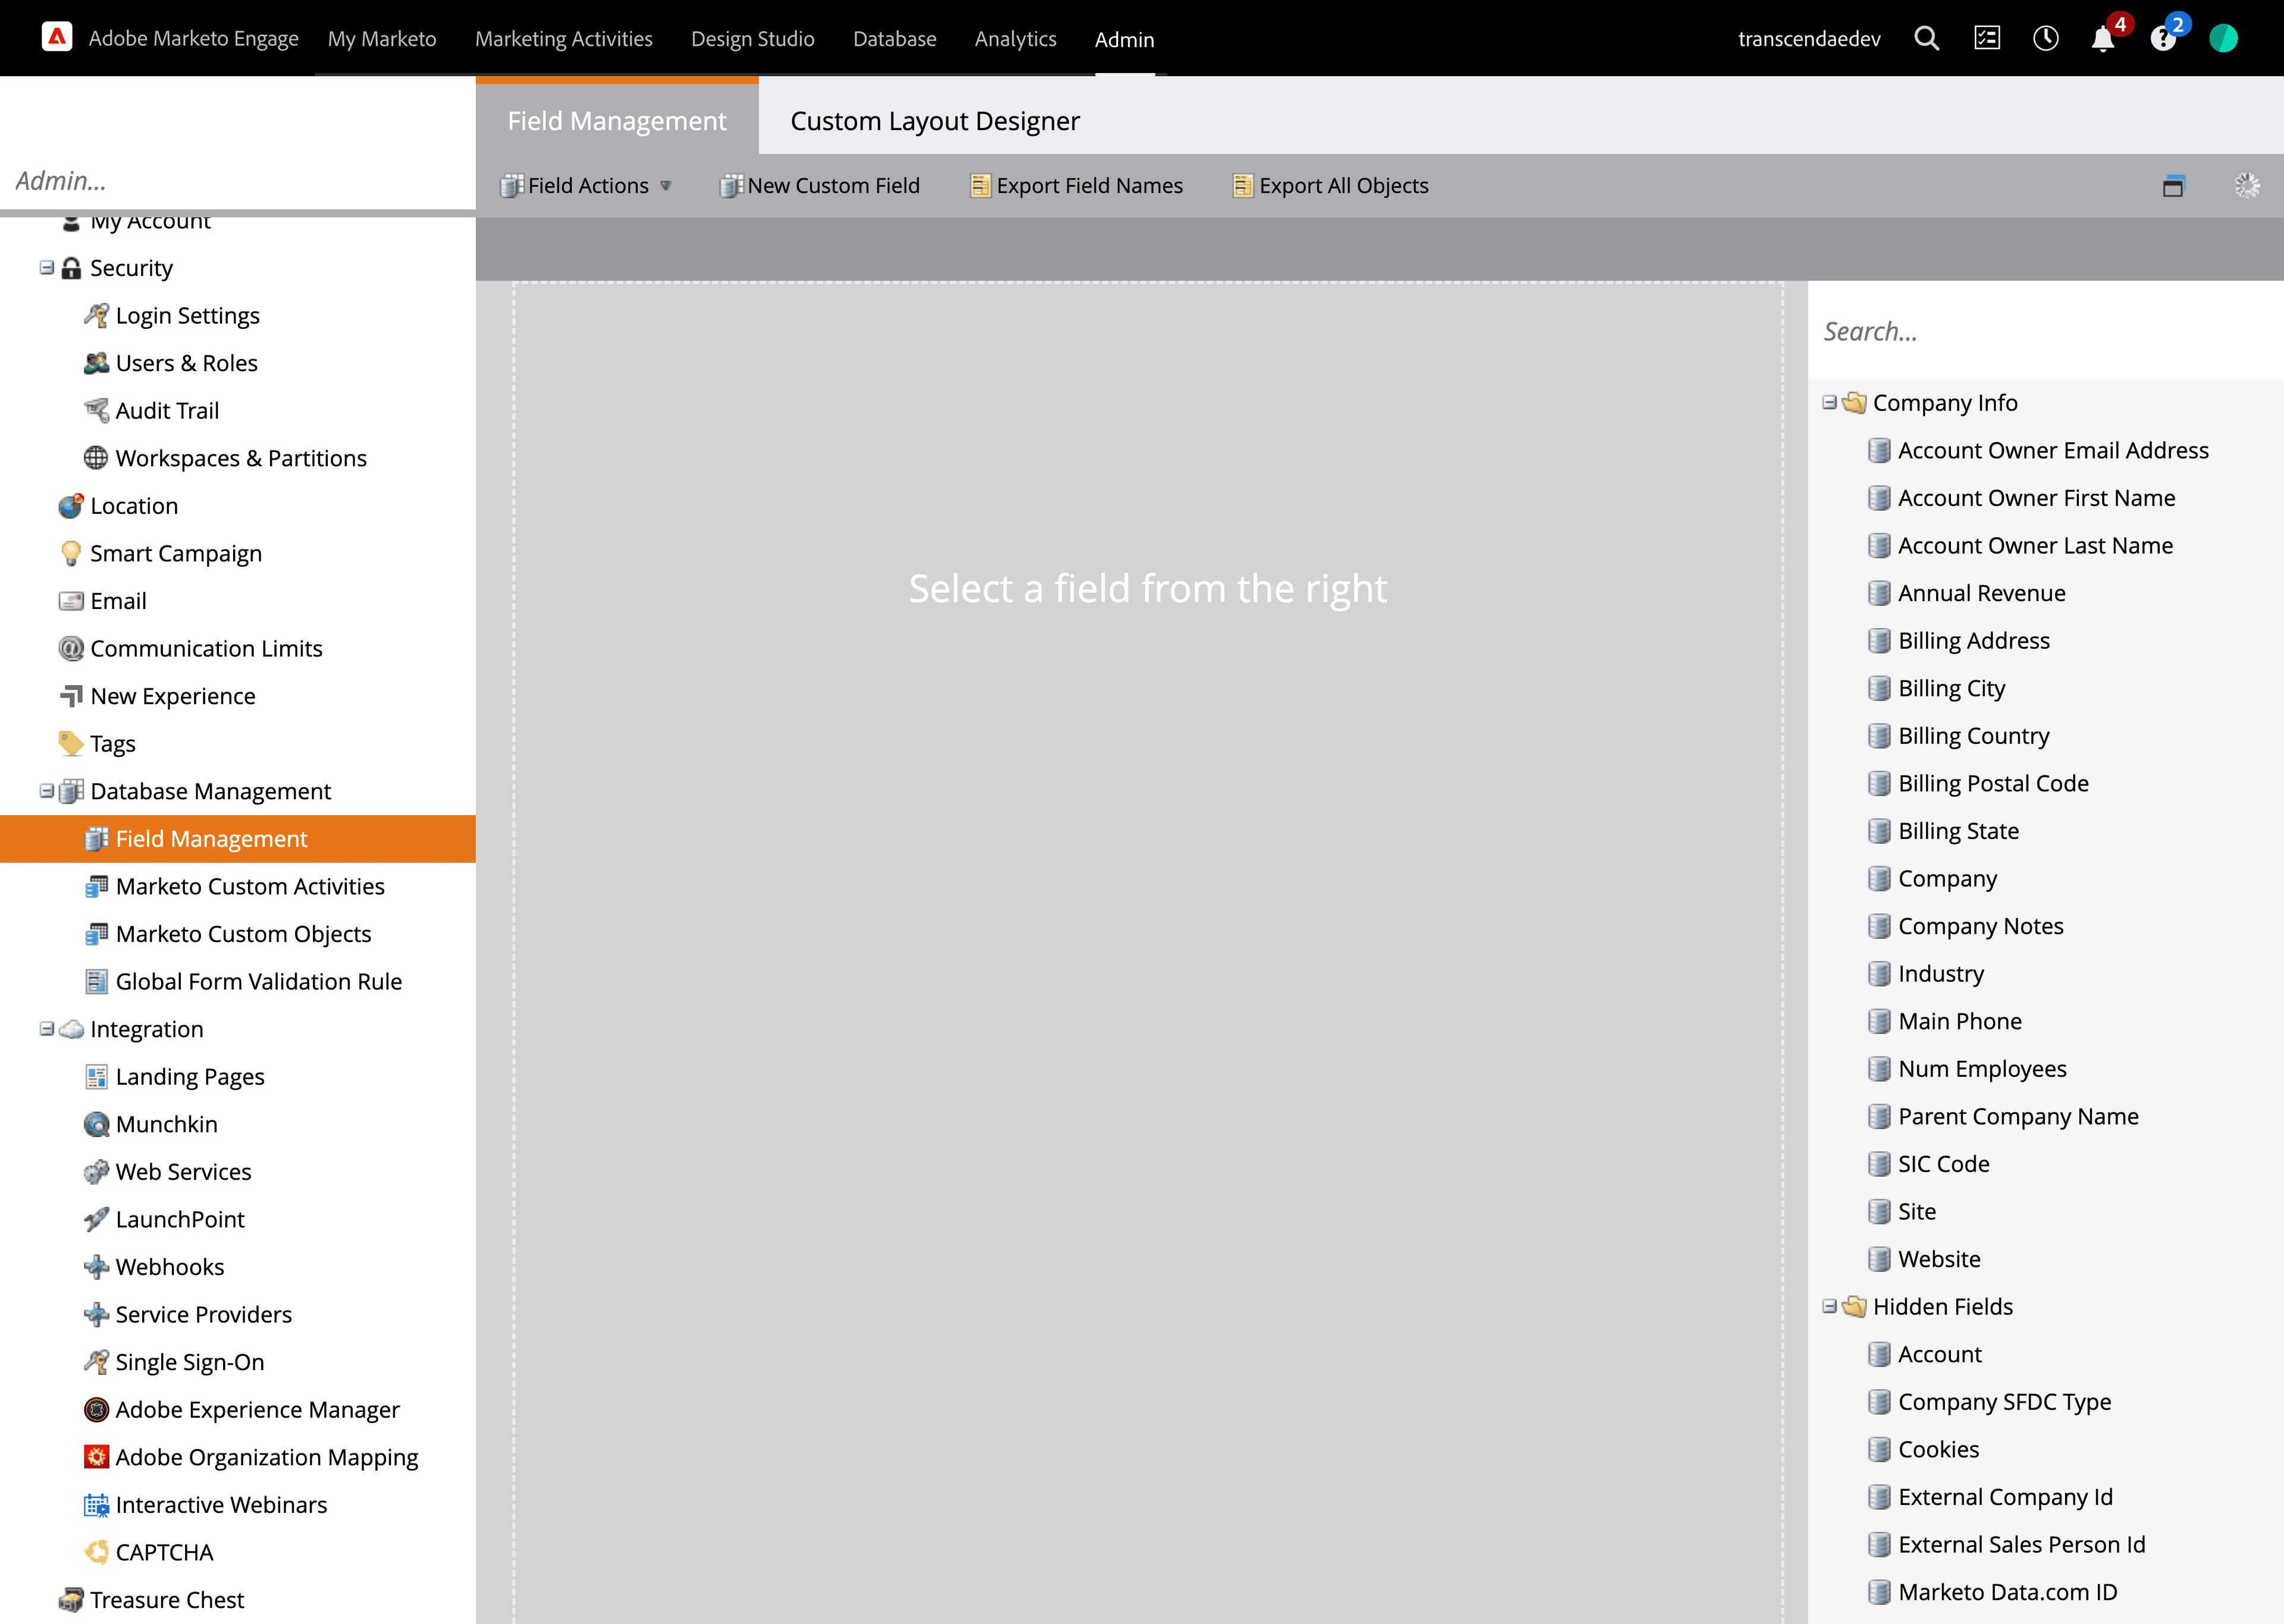
- Click
New Custom Fieldand specify following values- Object:
Person - Type:
Boolean - Name:
Unsubscribed_Inverted - API Name:
unsubscribedInverted
- Object:
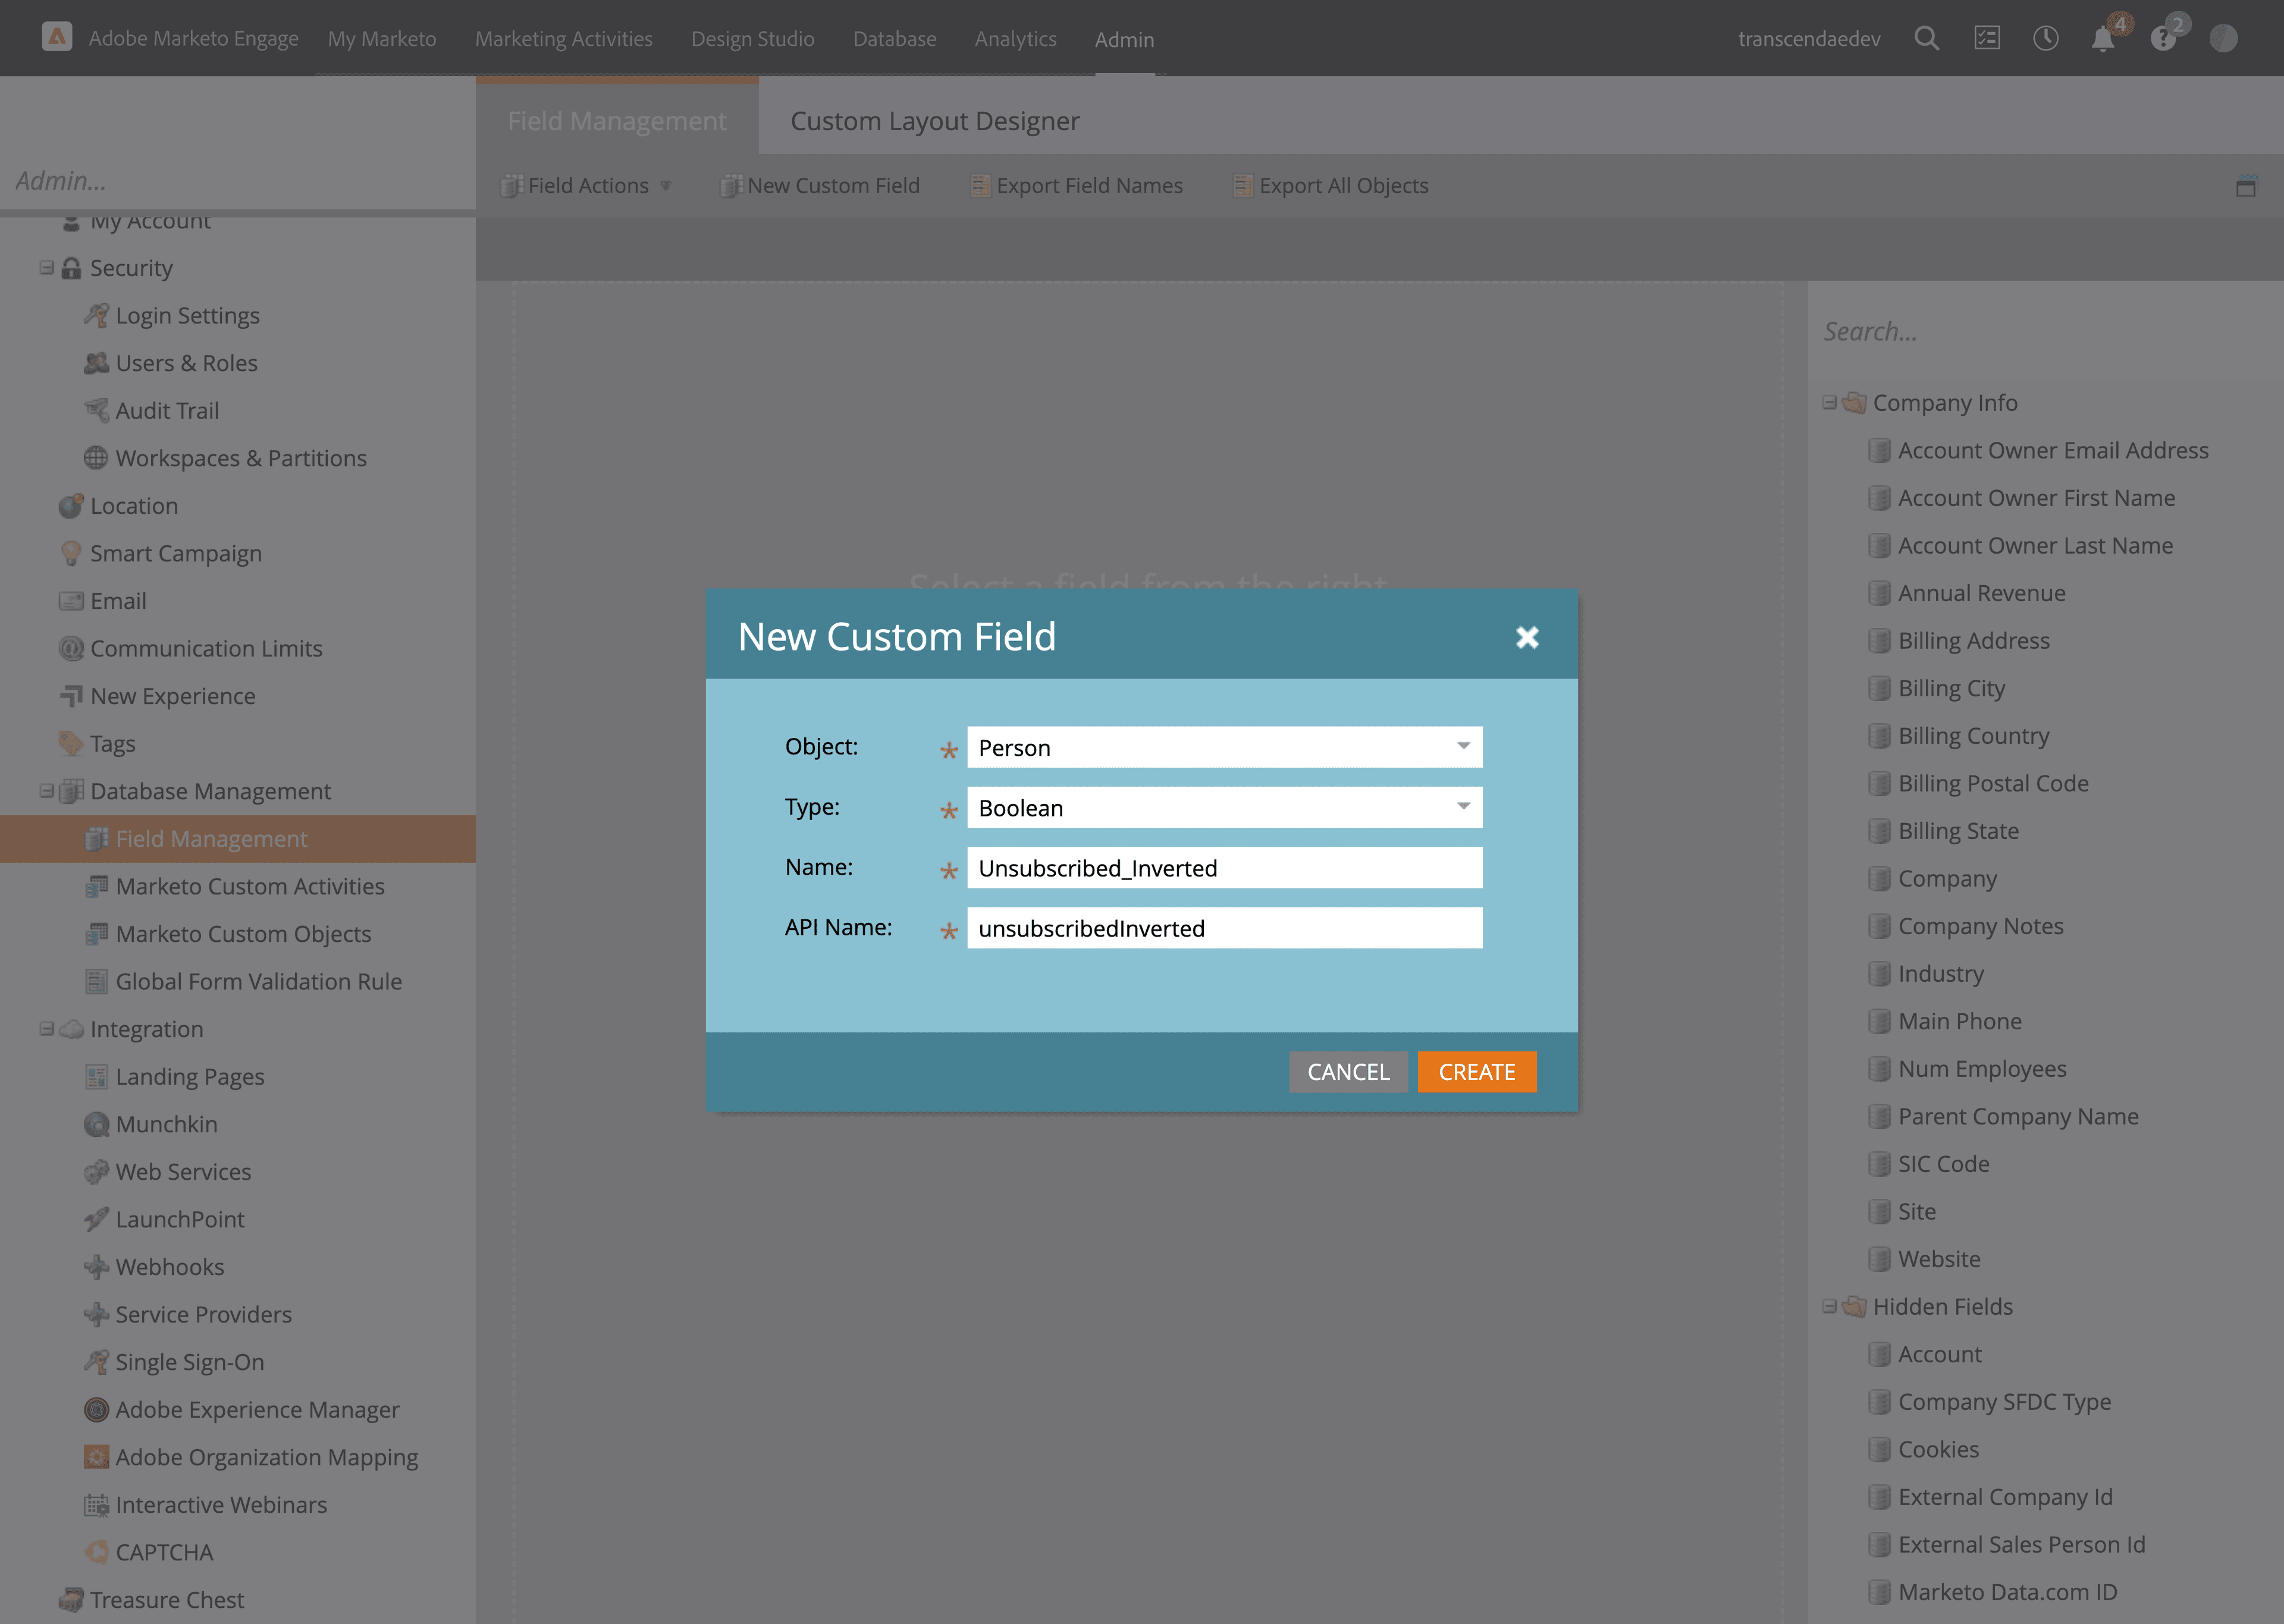
- Click
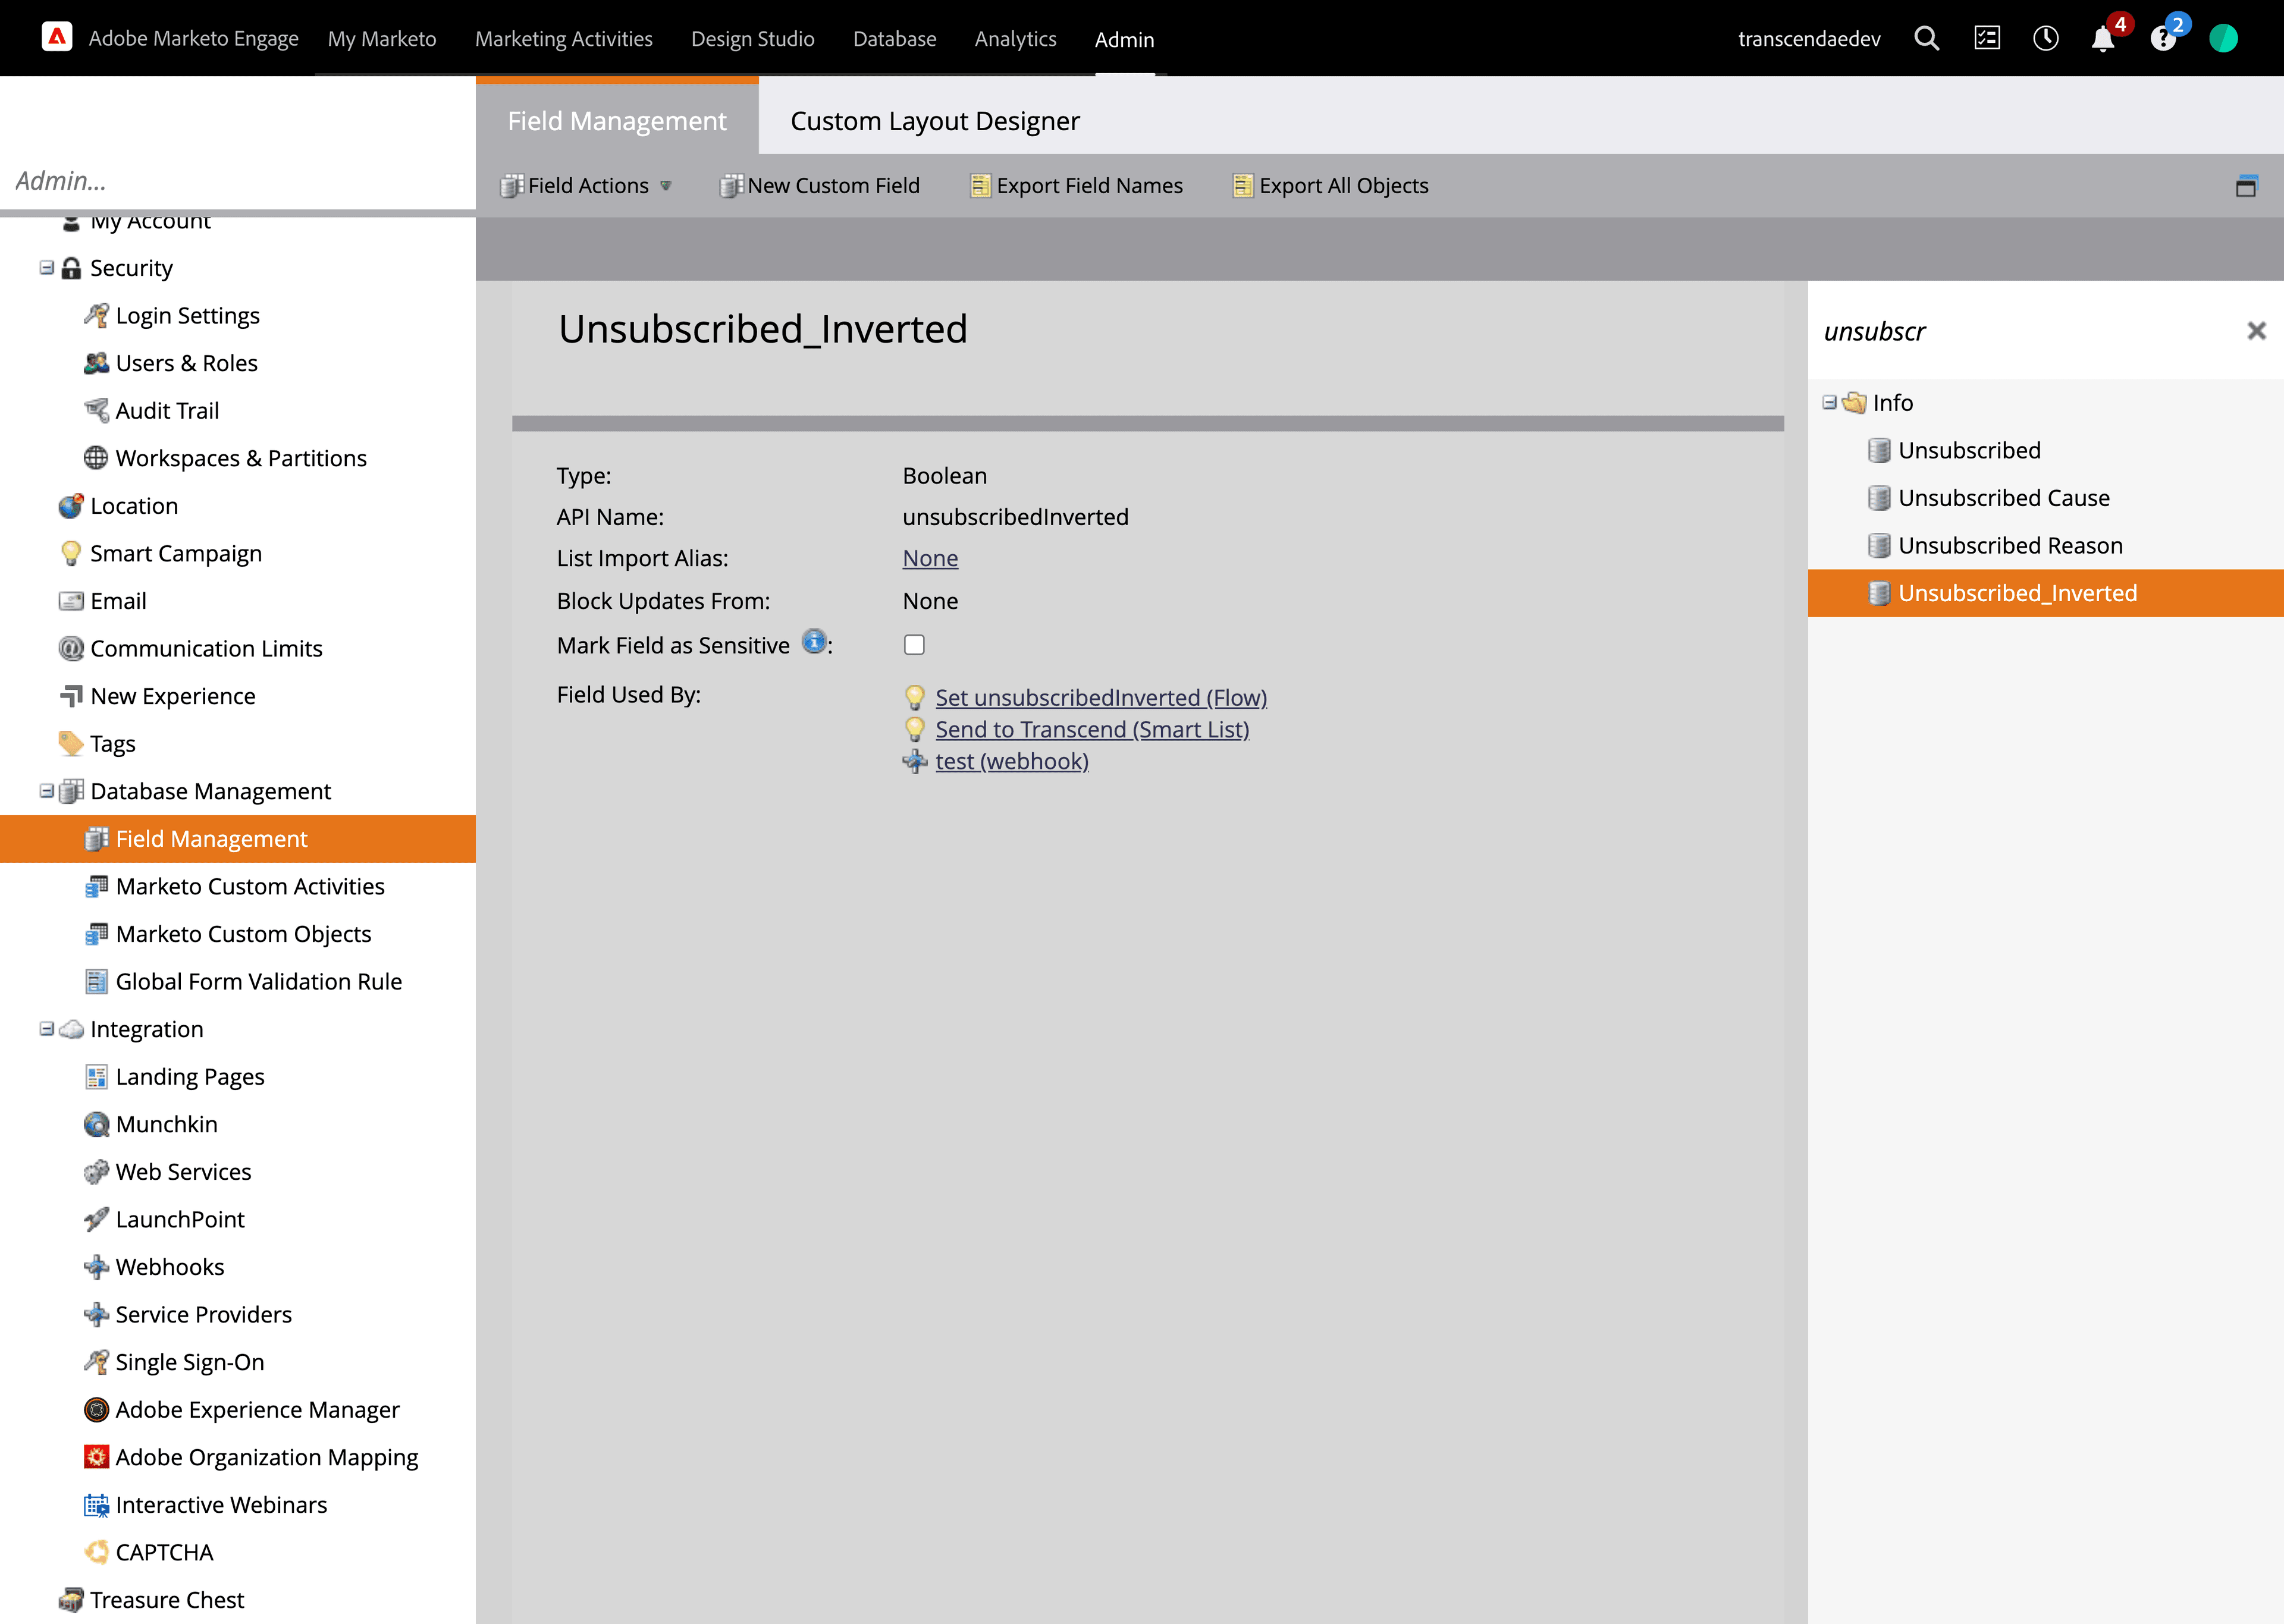
Create, after which you should be able to search for your newly created field in search menu on right hand side of the screen
- Click on the
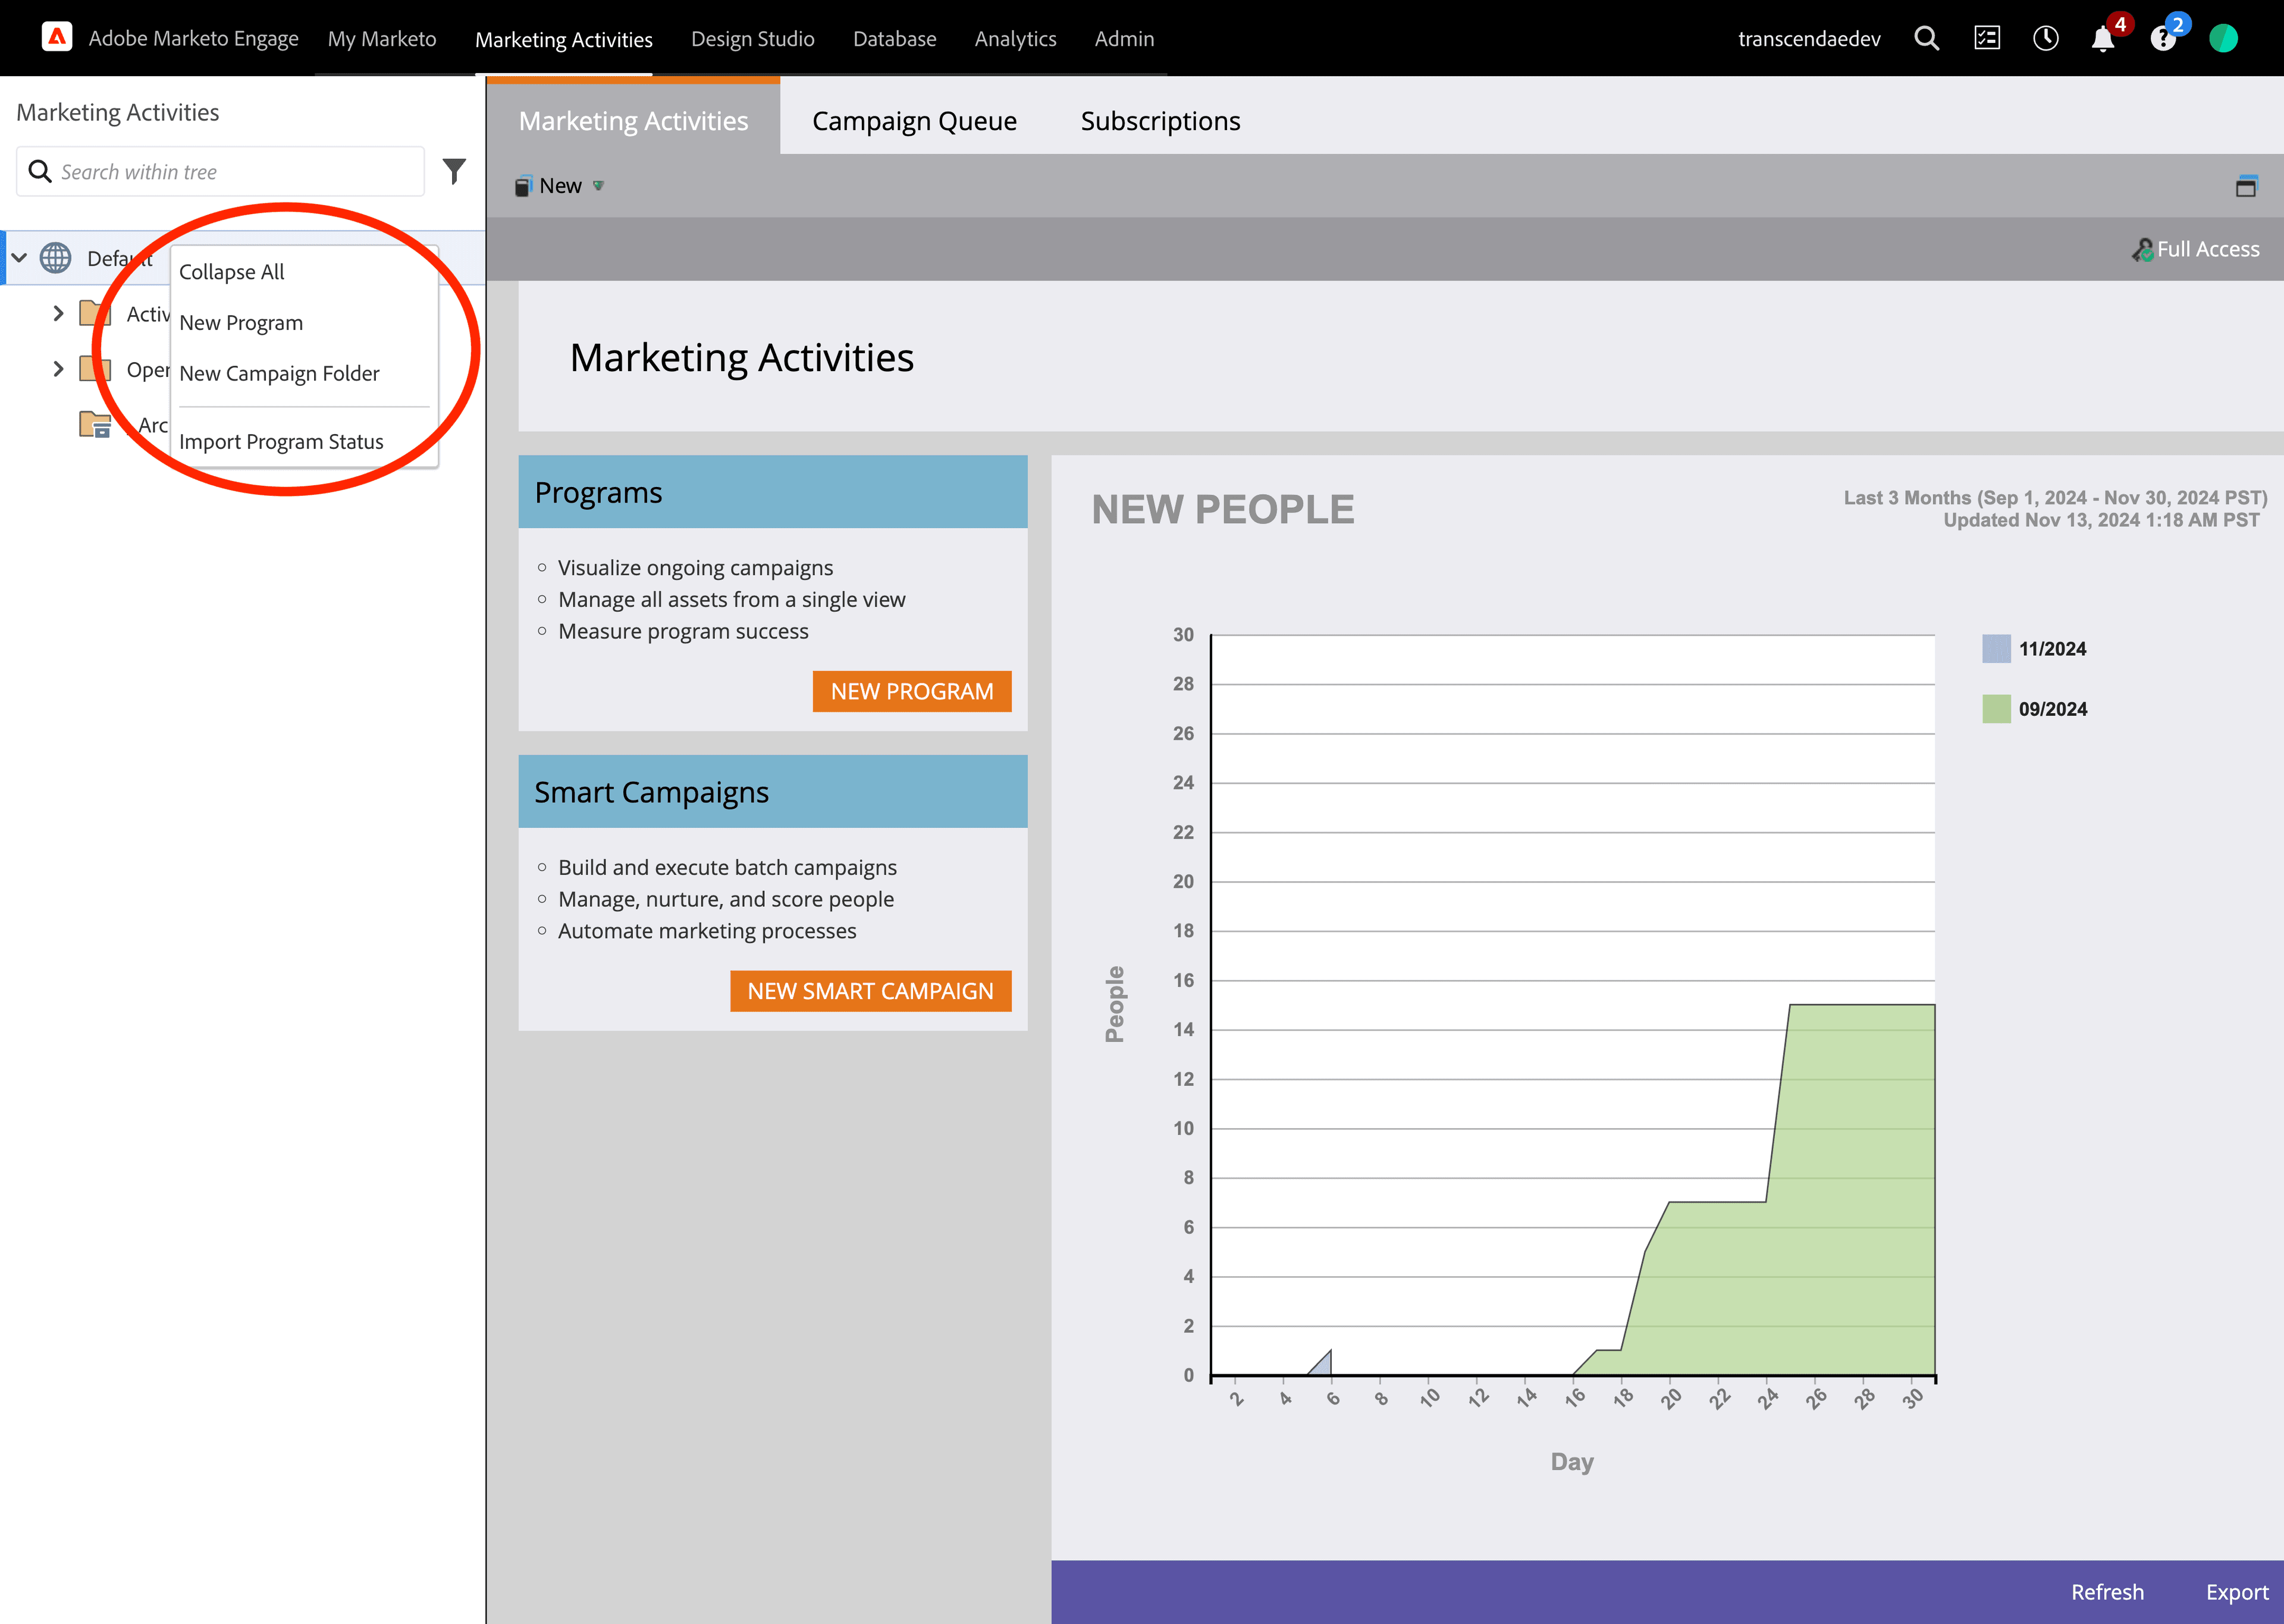
Marketing Activtiestop menu. - Right click on
Defaultin the left side menu and clickNew Campaign Folderto create a new folder to store Transcend smart campaigns
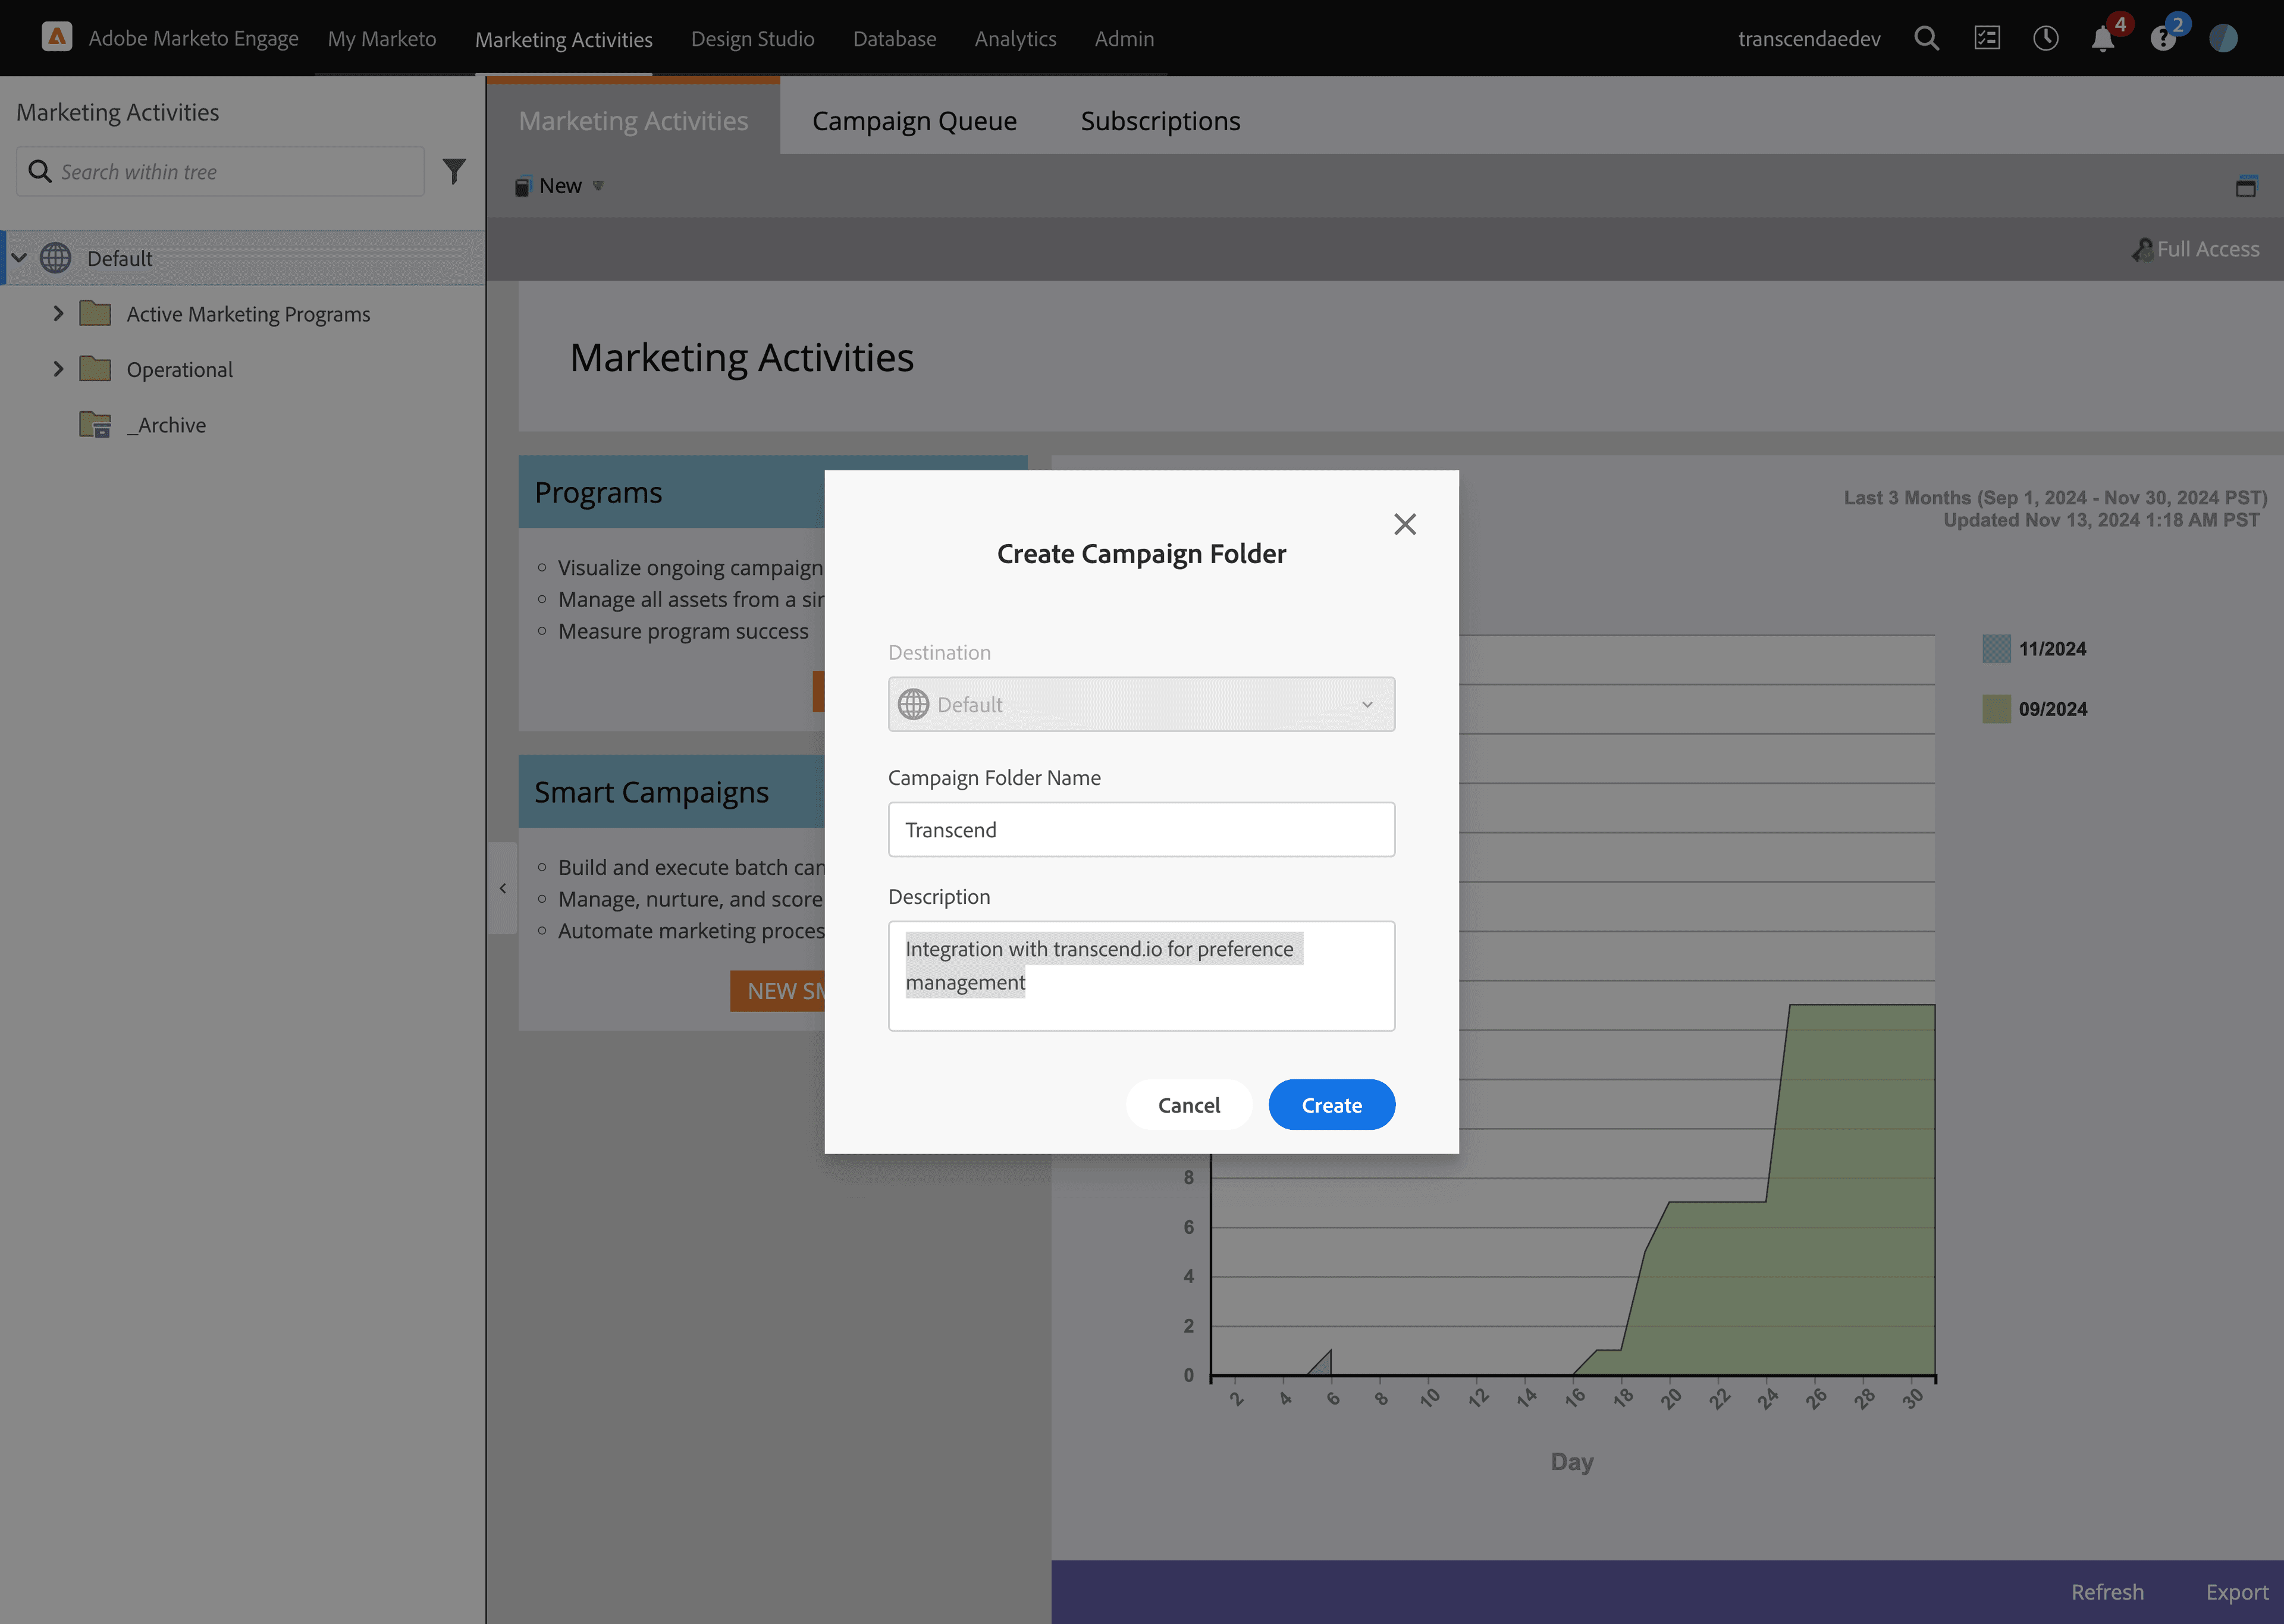
- Name the folder
Transcendwith a description something likeIntegration with transcend.io for preference management
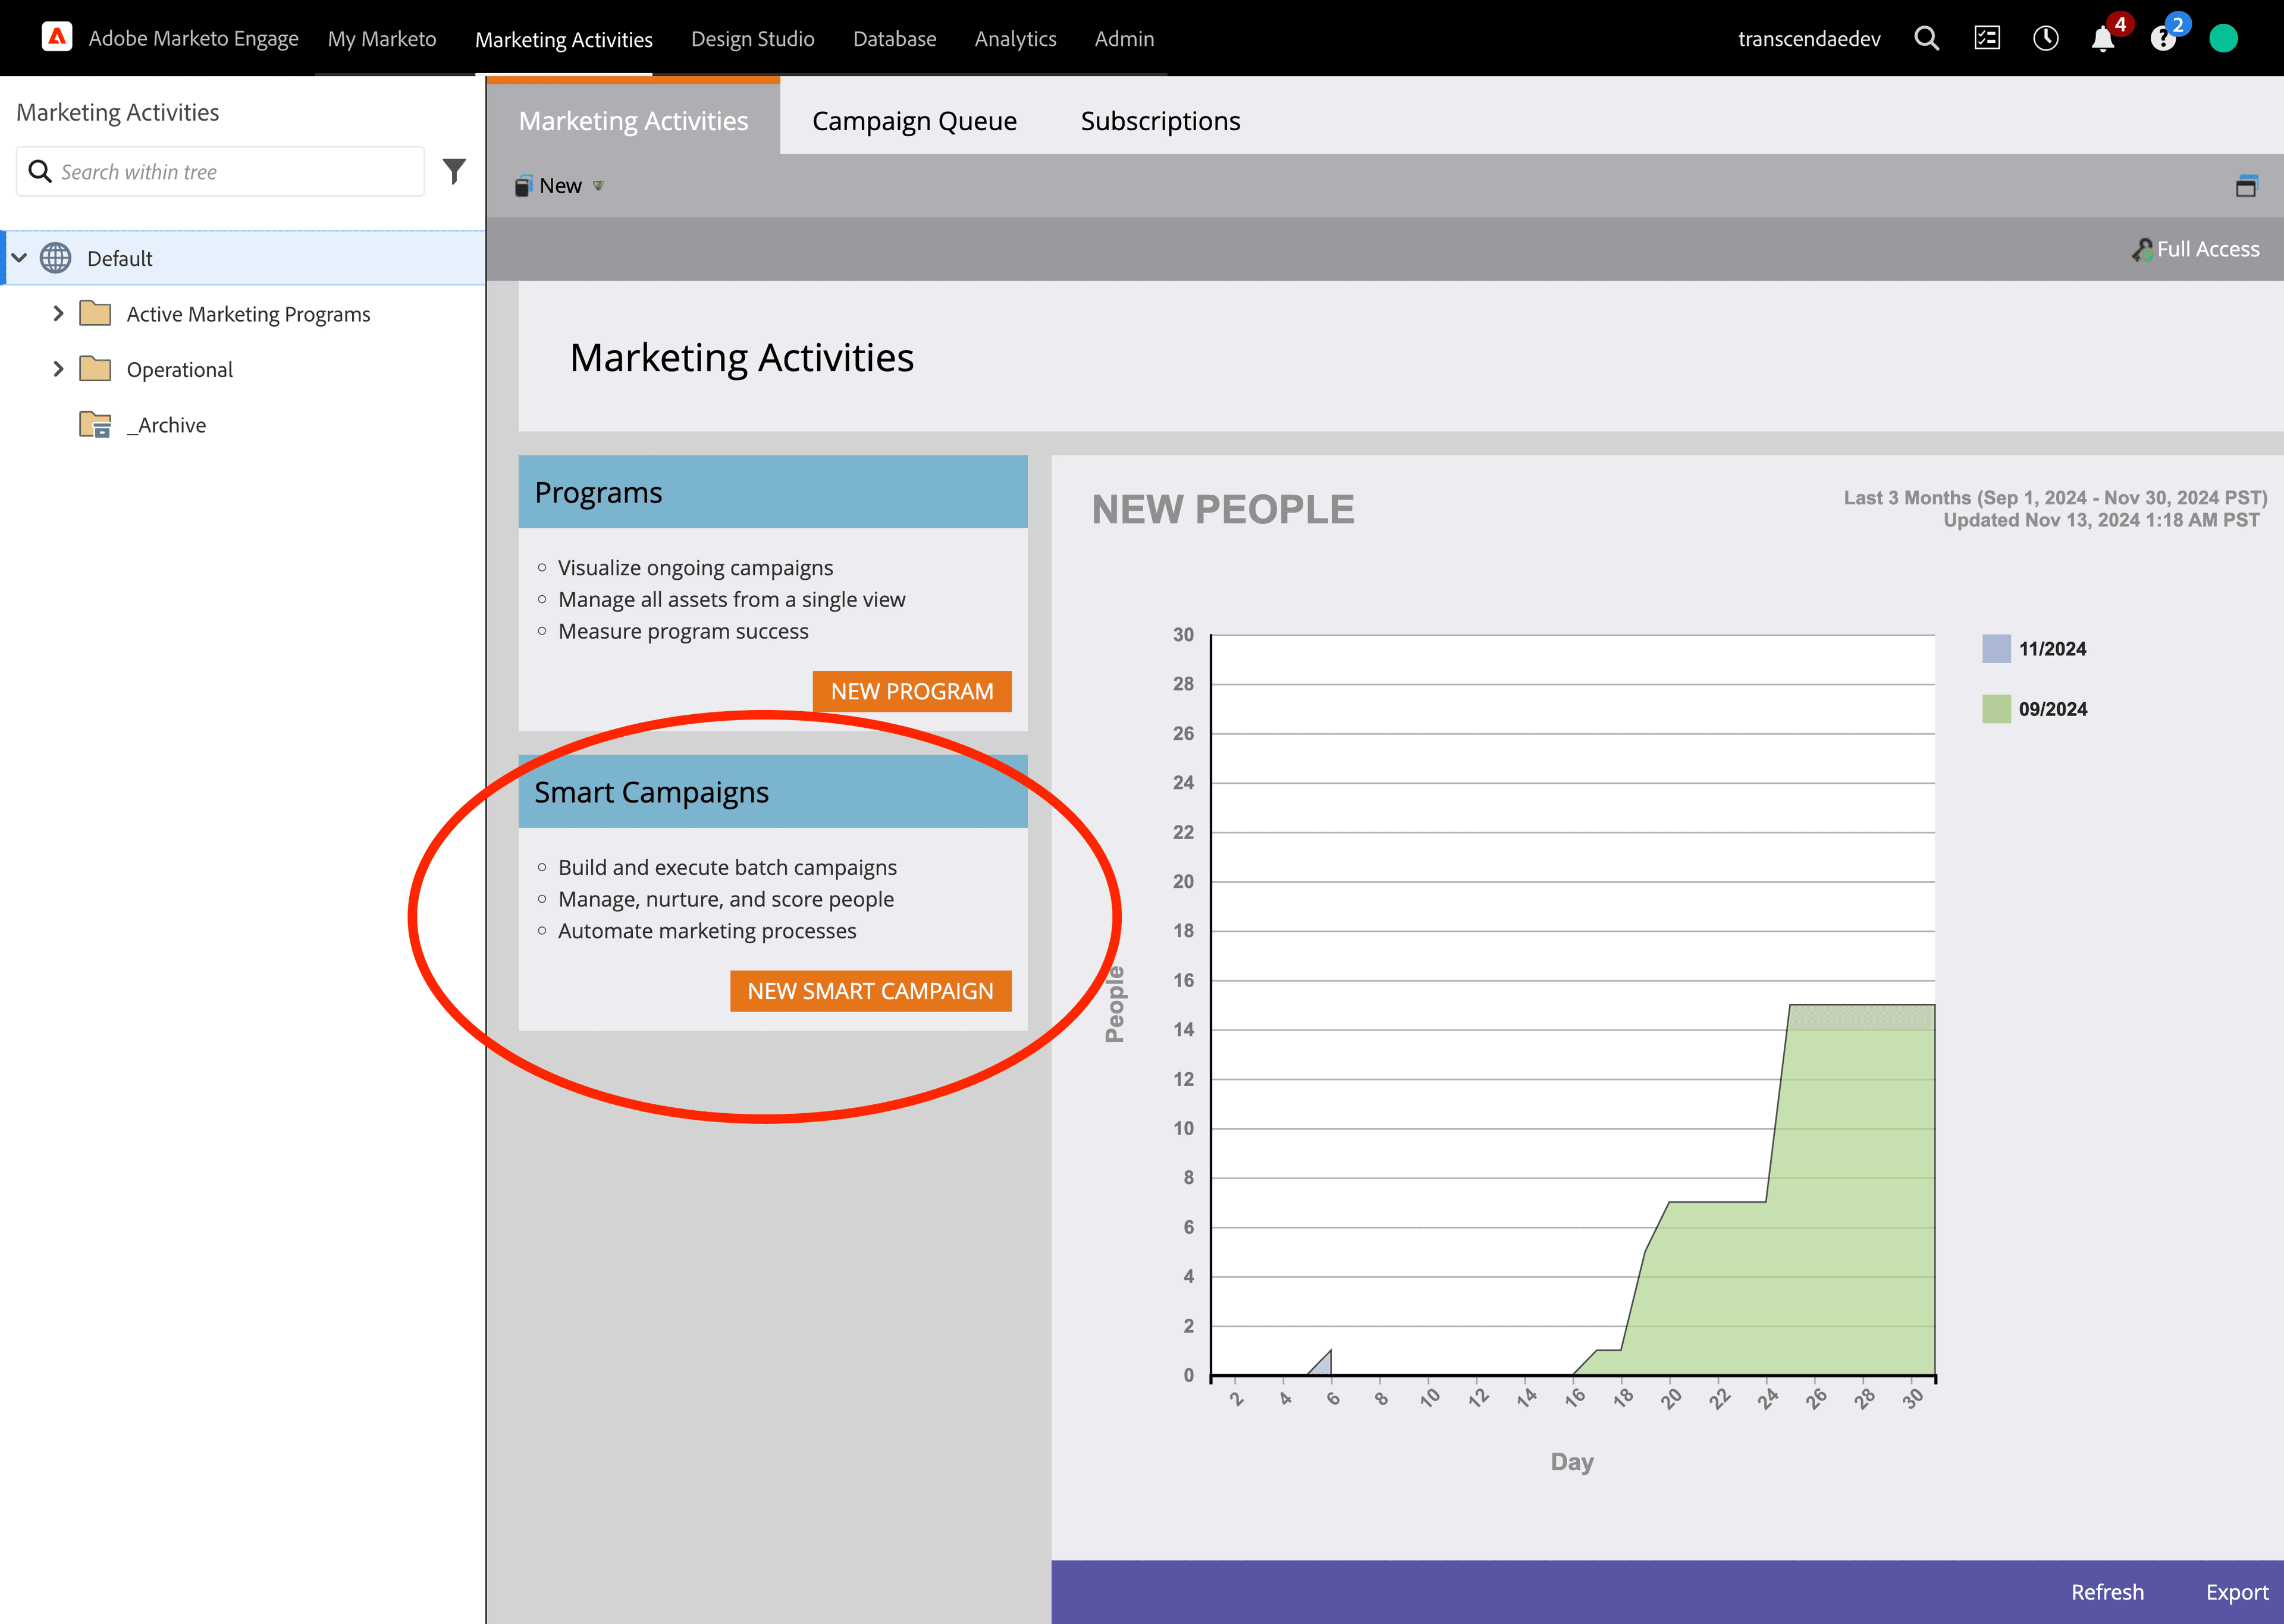
- Click back on
Defaultin top left corner and clickNew Smart Campaignbutton
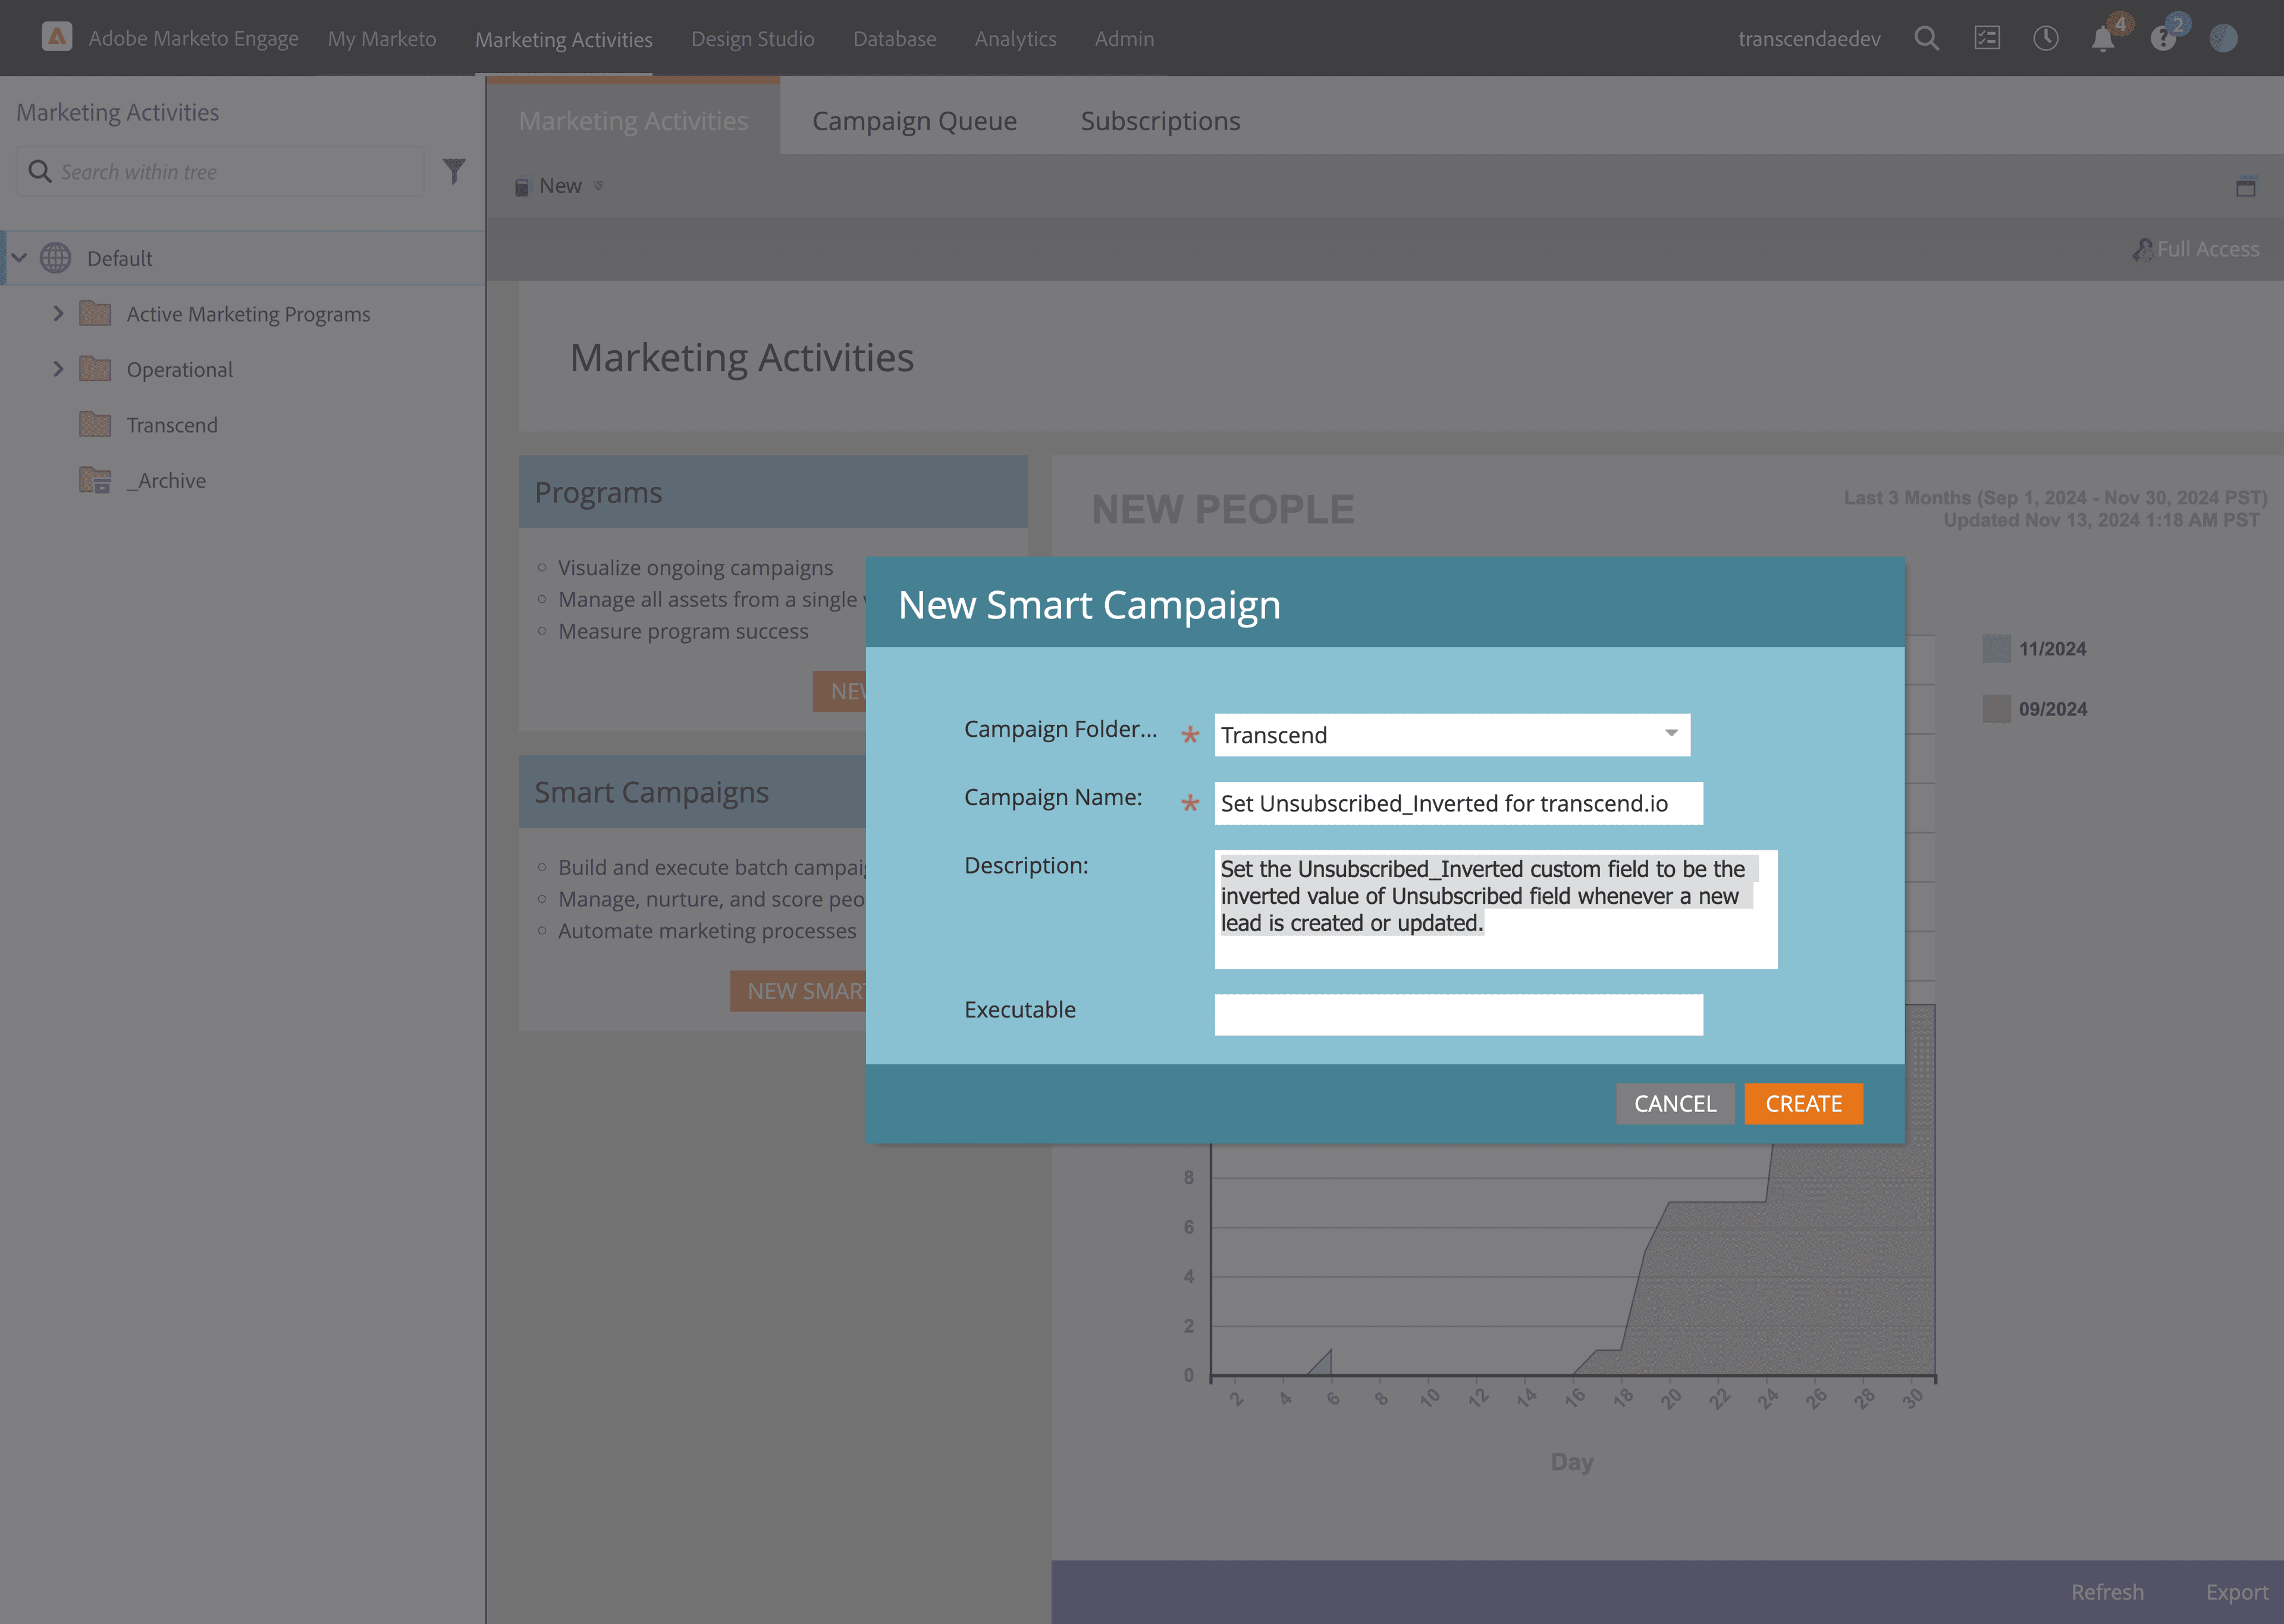
- Fill out the form to create the smart campaign
- Campaign Folder:
Transcend - Campaign Name:
Set Unsubscribed_Inverted for transcend.io - Description:
Set the Unsubscribed_Inverted custom field to be the inverted value of Unsubscribed field whenever a new lead is created or updated. - Executable: Leave blank
- Campaign Folder:
- Go to
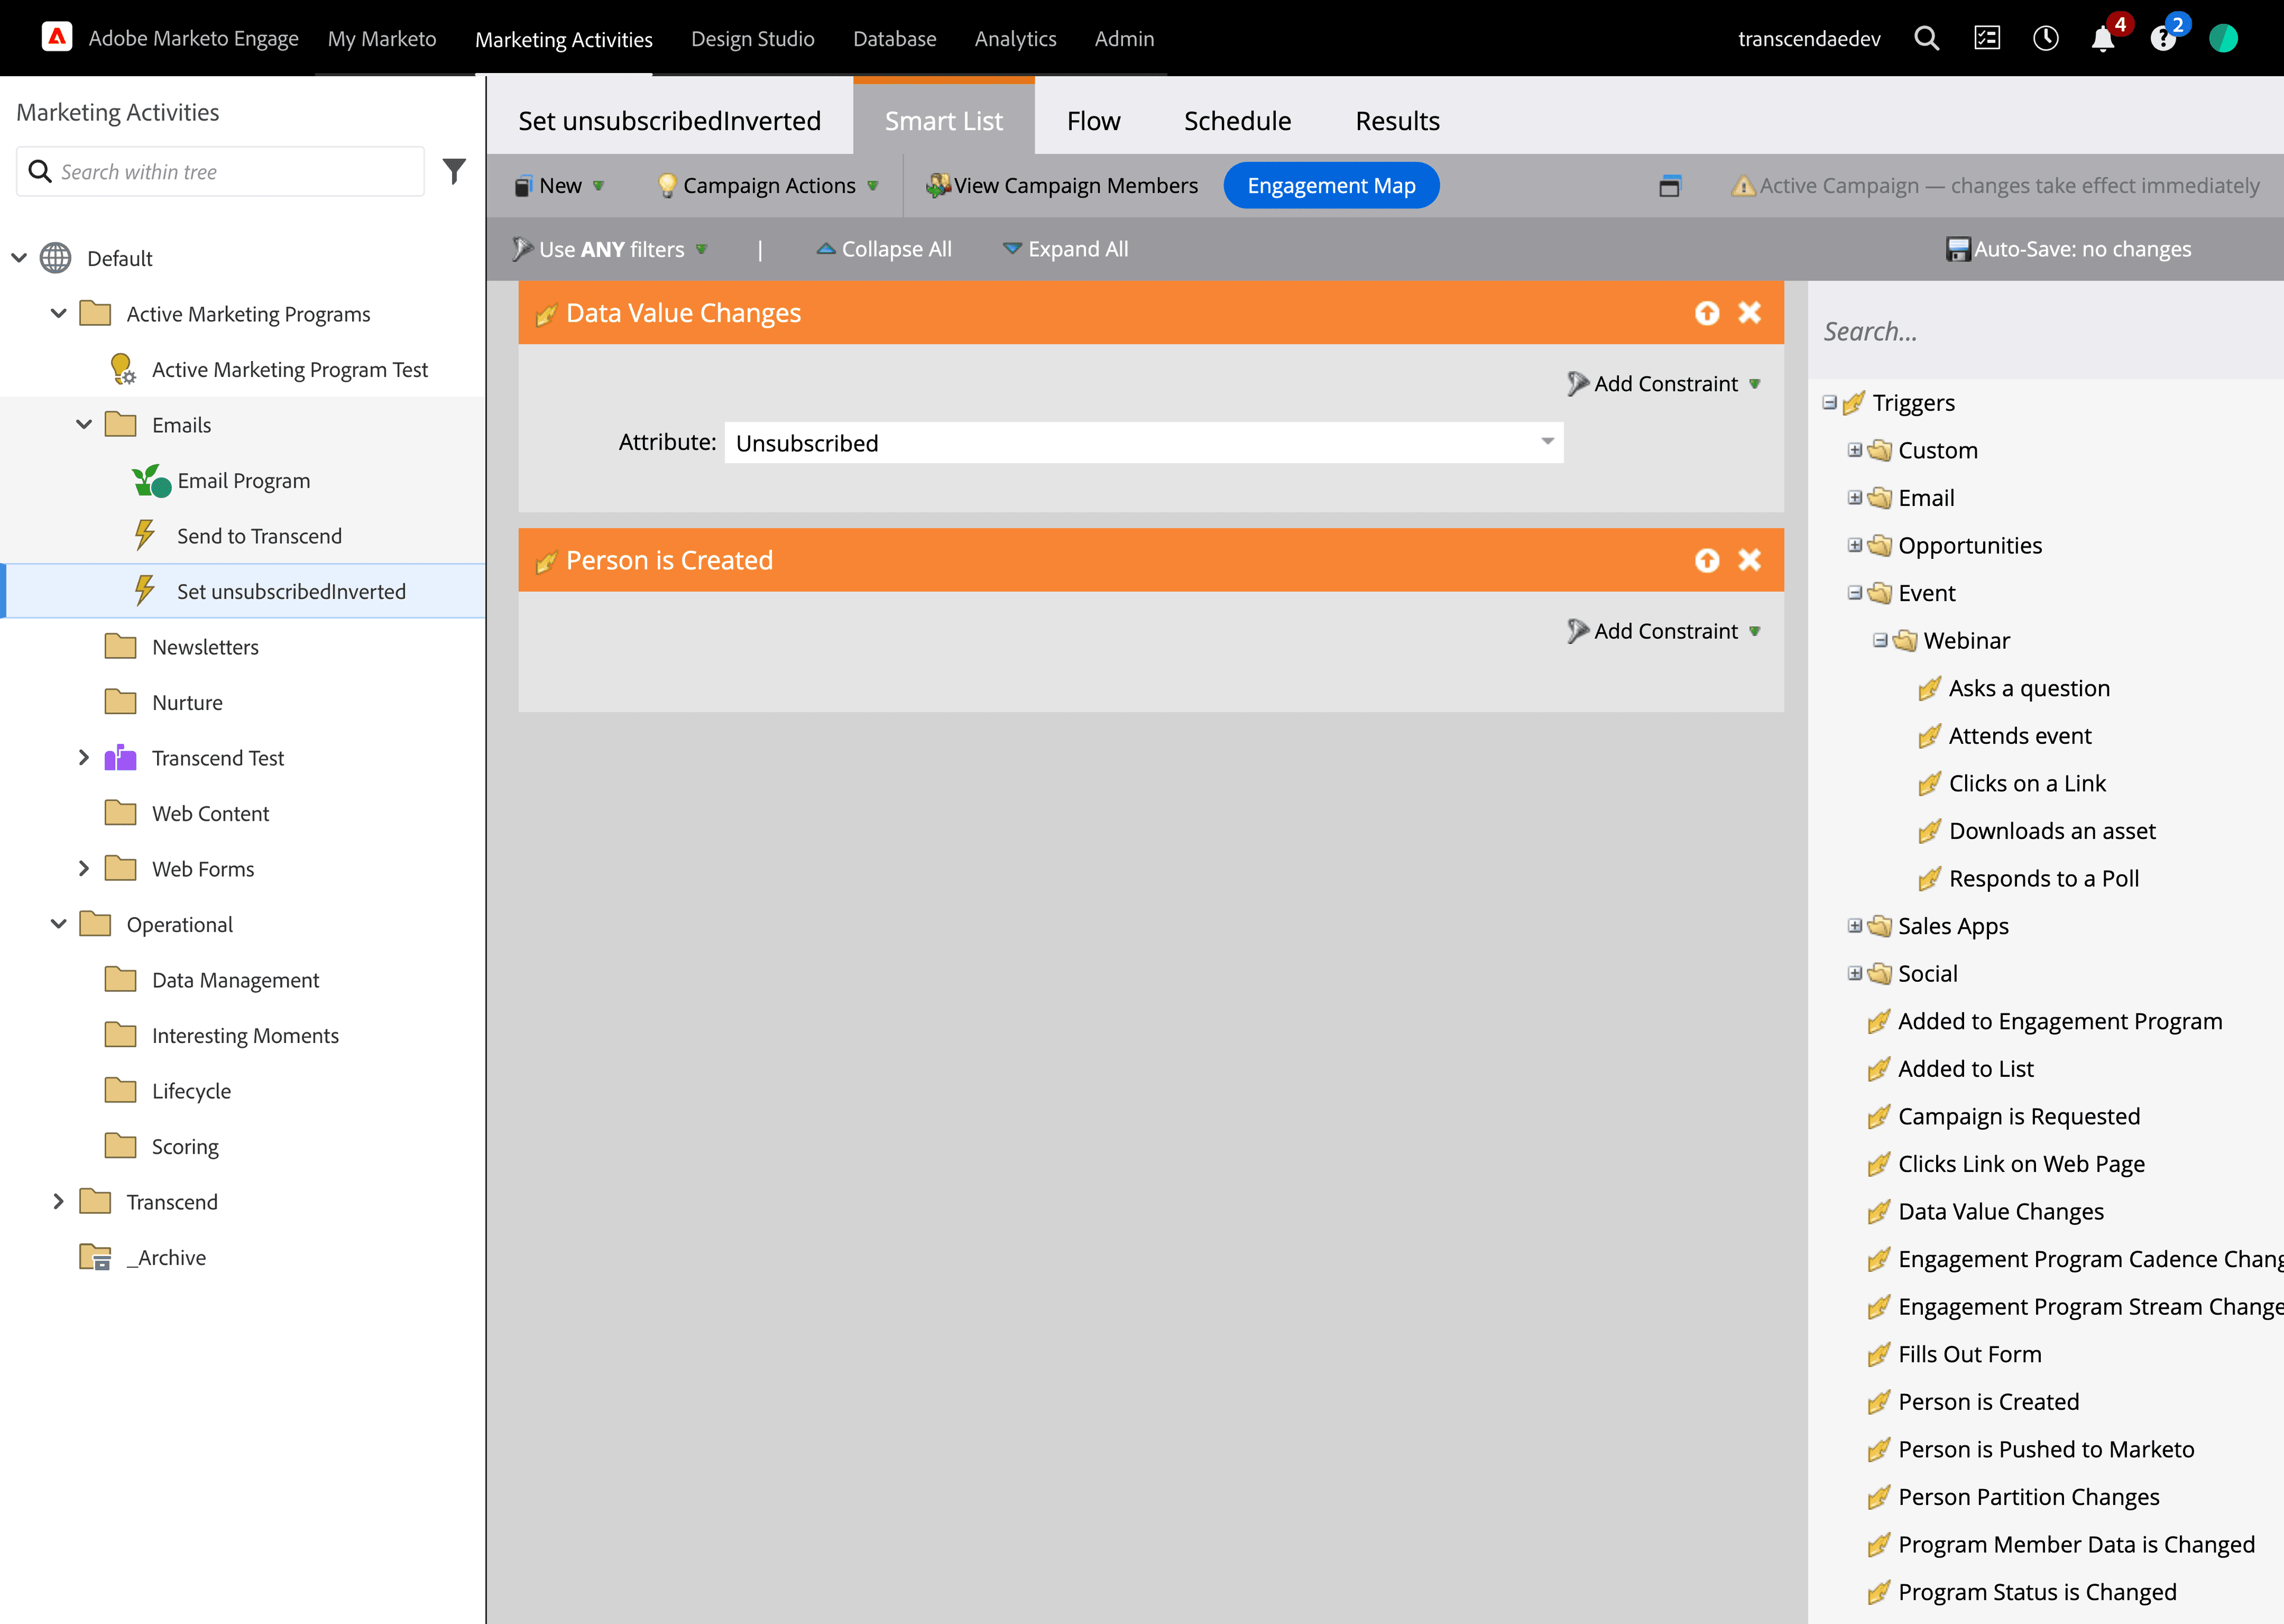
Smart Listtab and make the following changes:- Update filter to
Use ANY filtersinstead ofUse ALL filters - Add new rule for
Data Value ChangeswithAttributeselection ofUnsubscribed - Add additional rule for
Person is Created
- Update filter to
- Go to
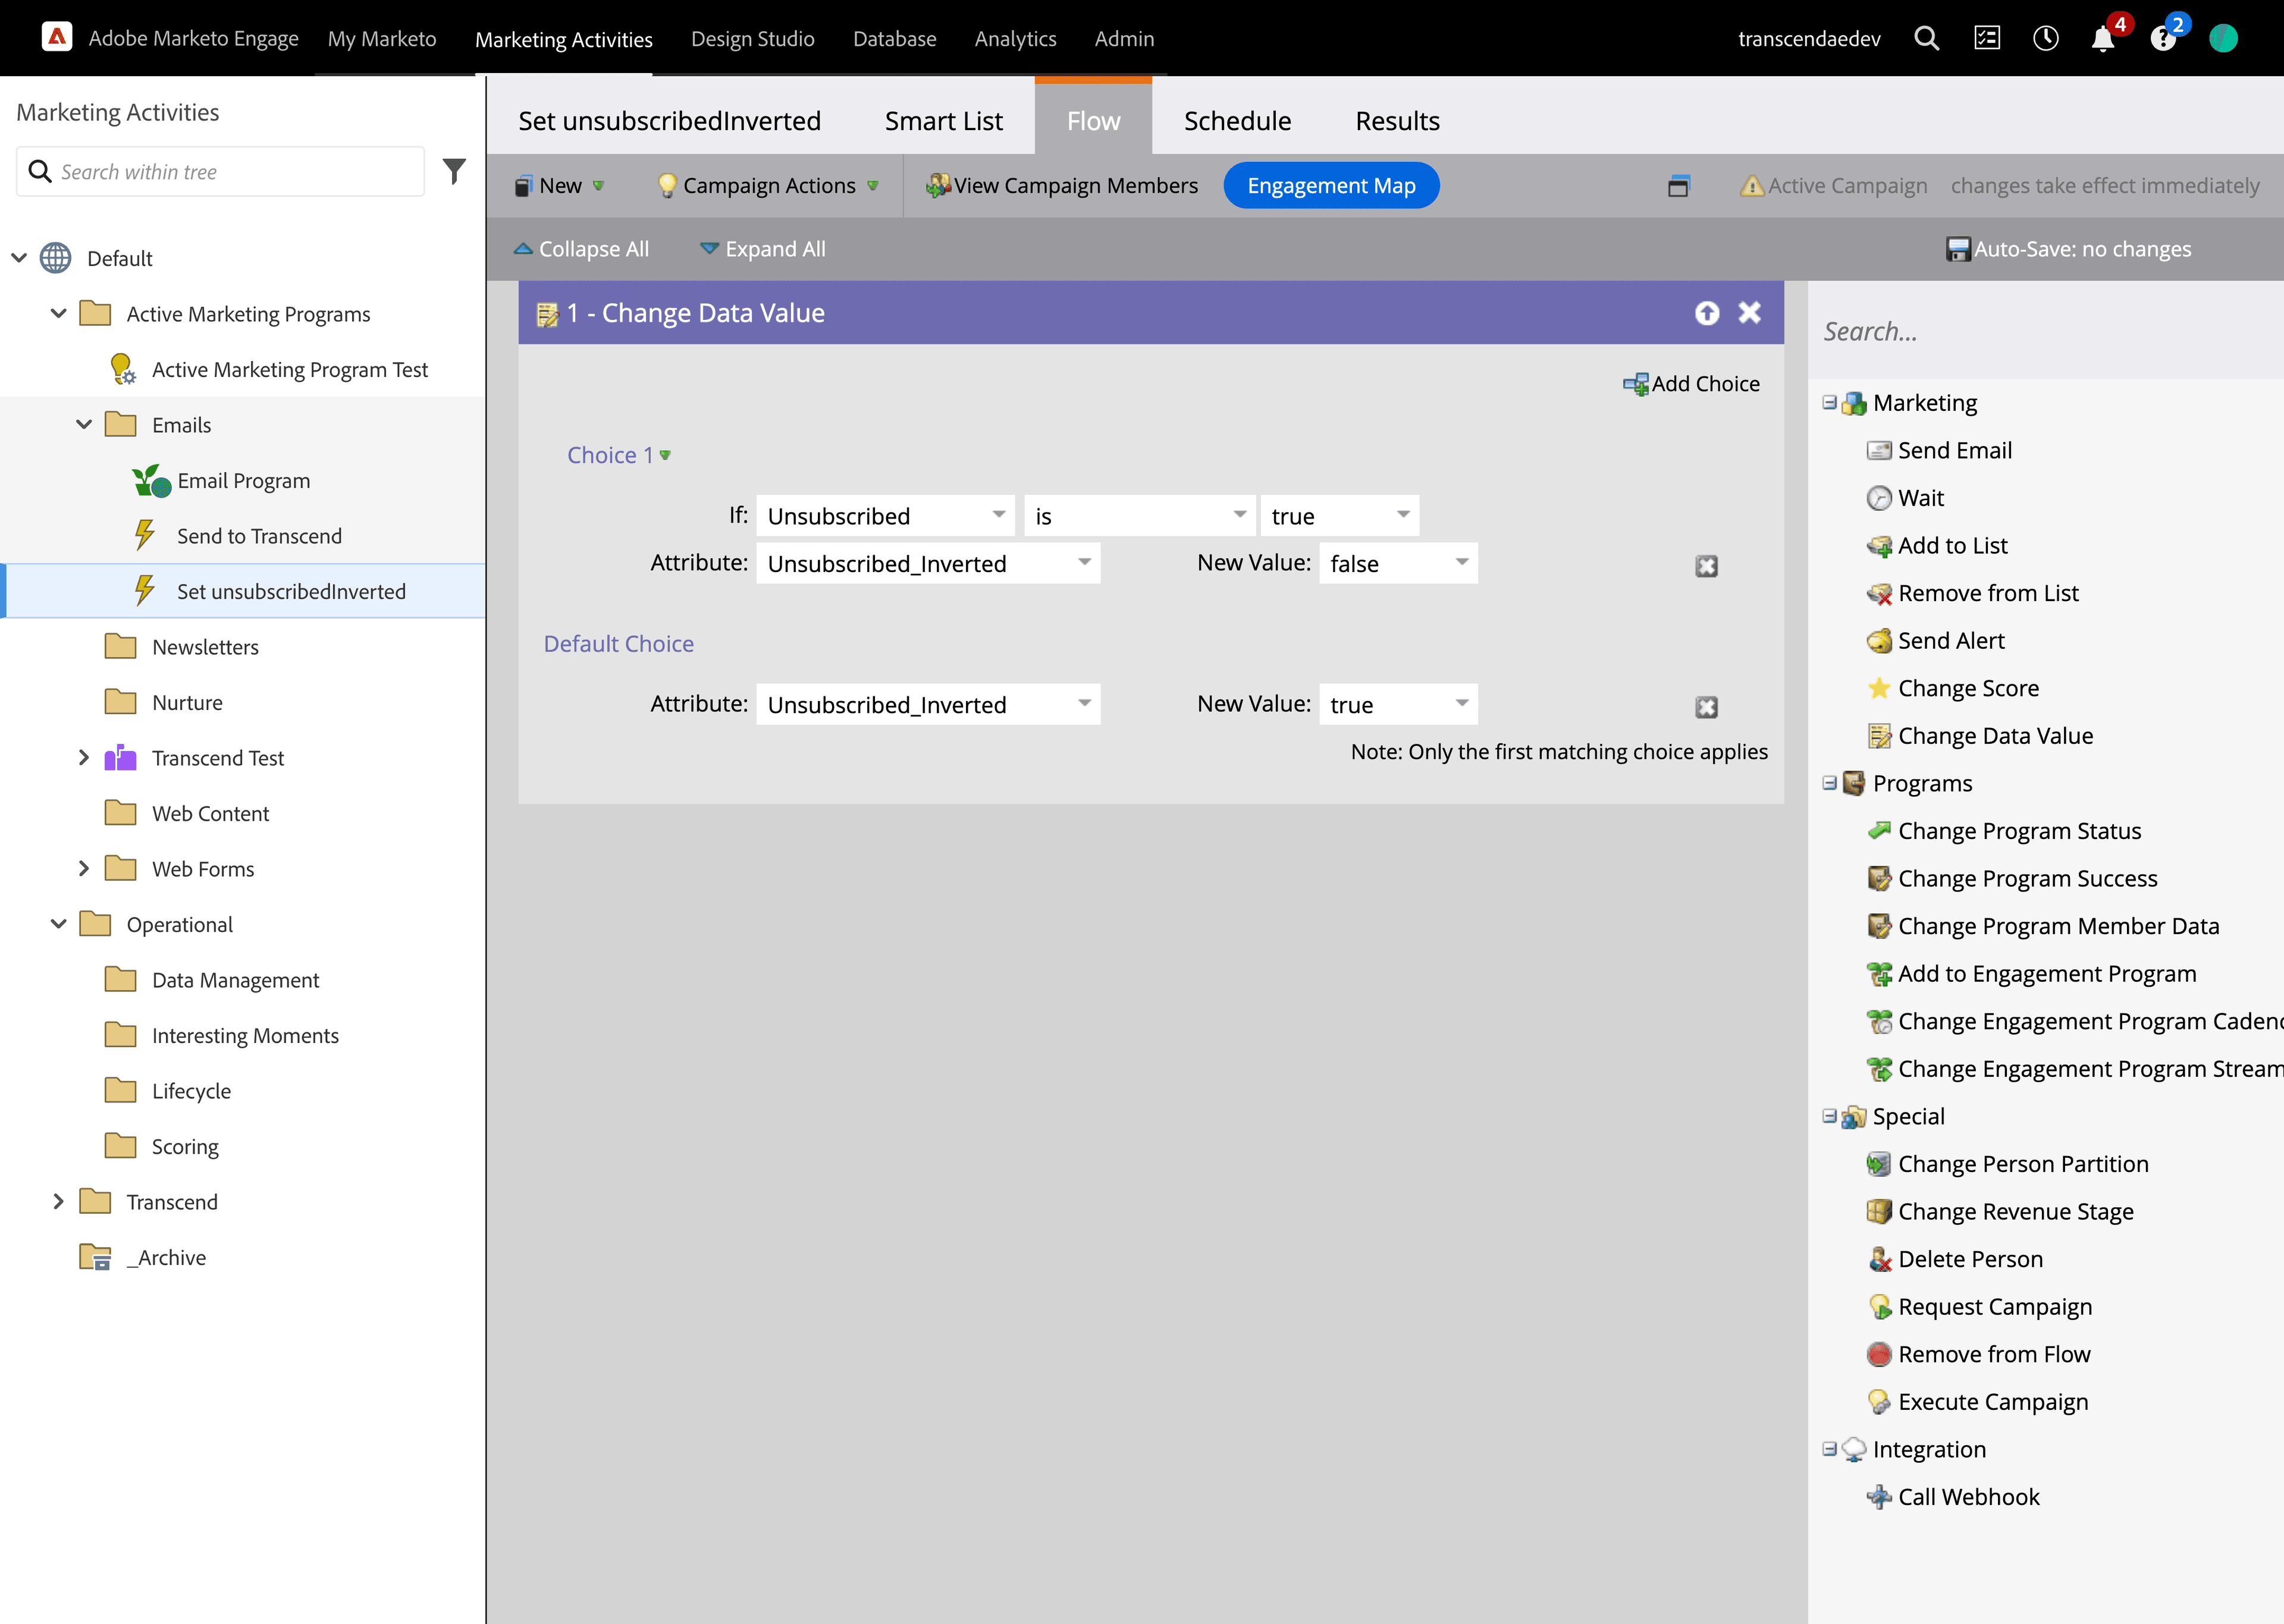
Flowtab and make following changes- Add rule for
Change Data Value - Set if statement logic to:
If Unsubscribed is true - Set first conditional to
Attribute: Unsubscribed_Inverted New Value: false - Set default choice to
Attribute: Unsubscribed_Inverted New Value: true
- Add rule for
- Go to
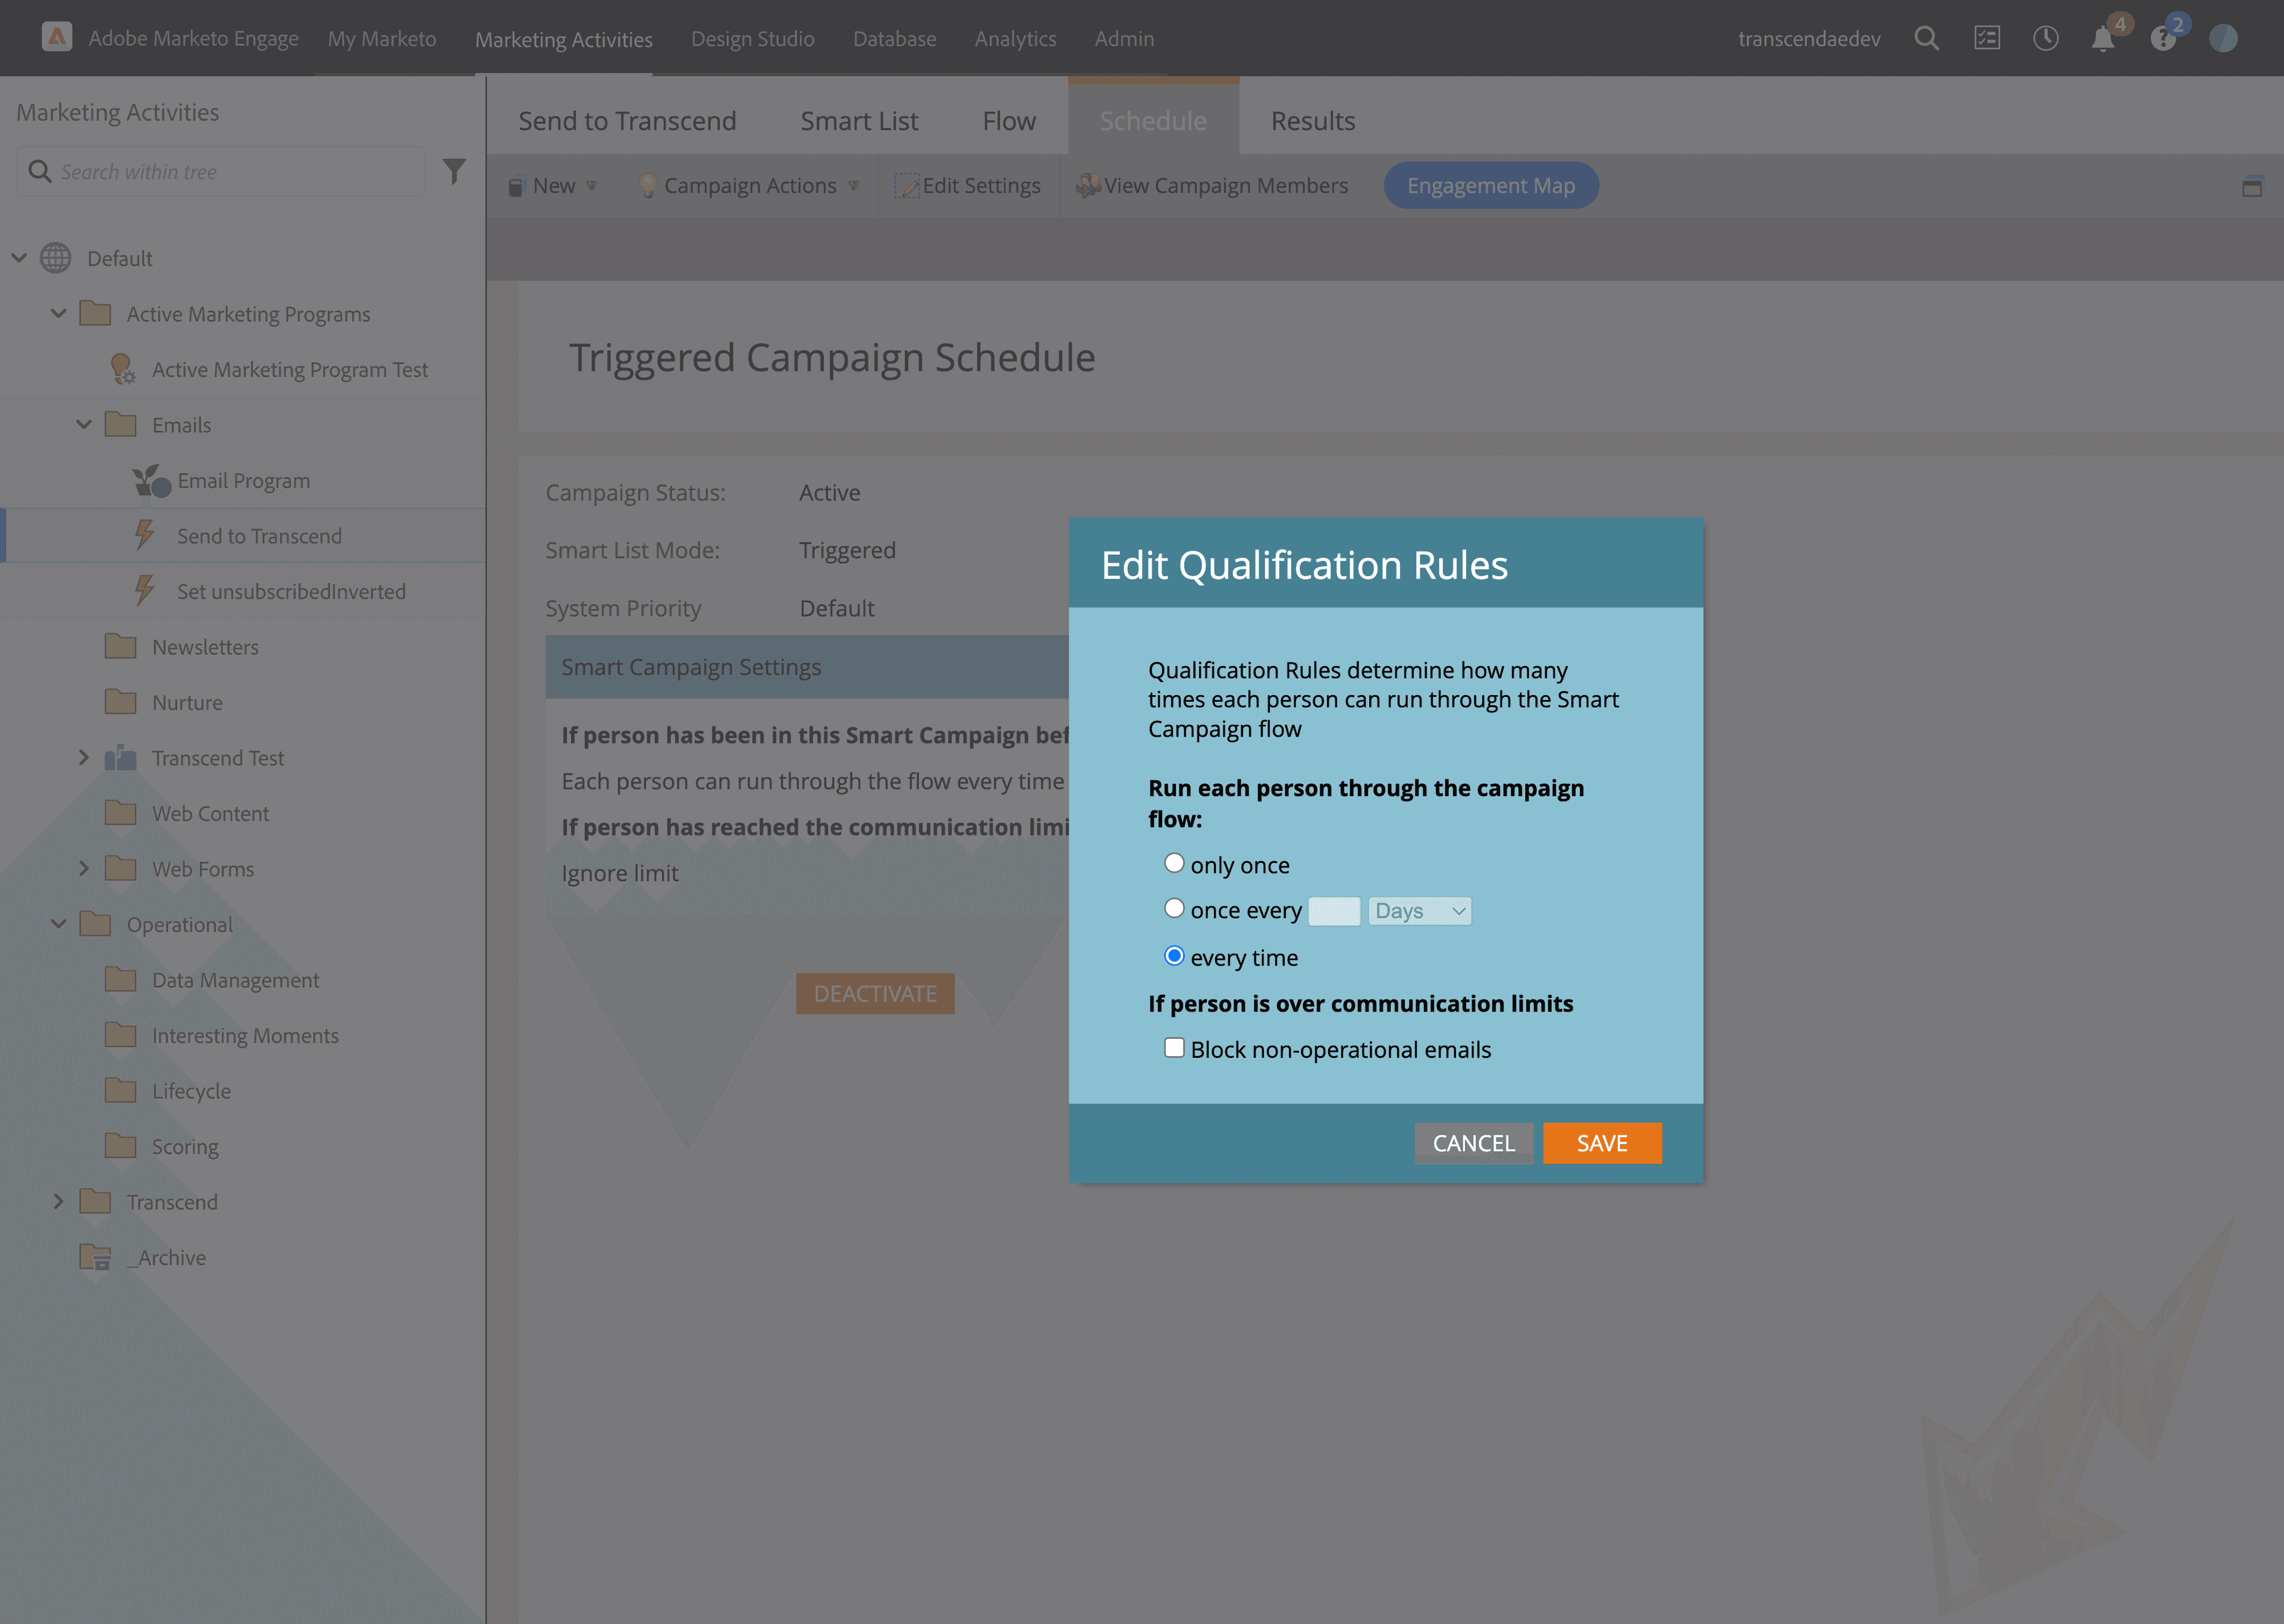
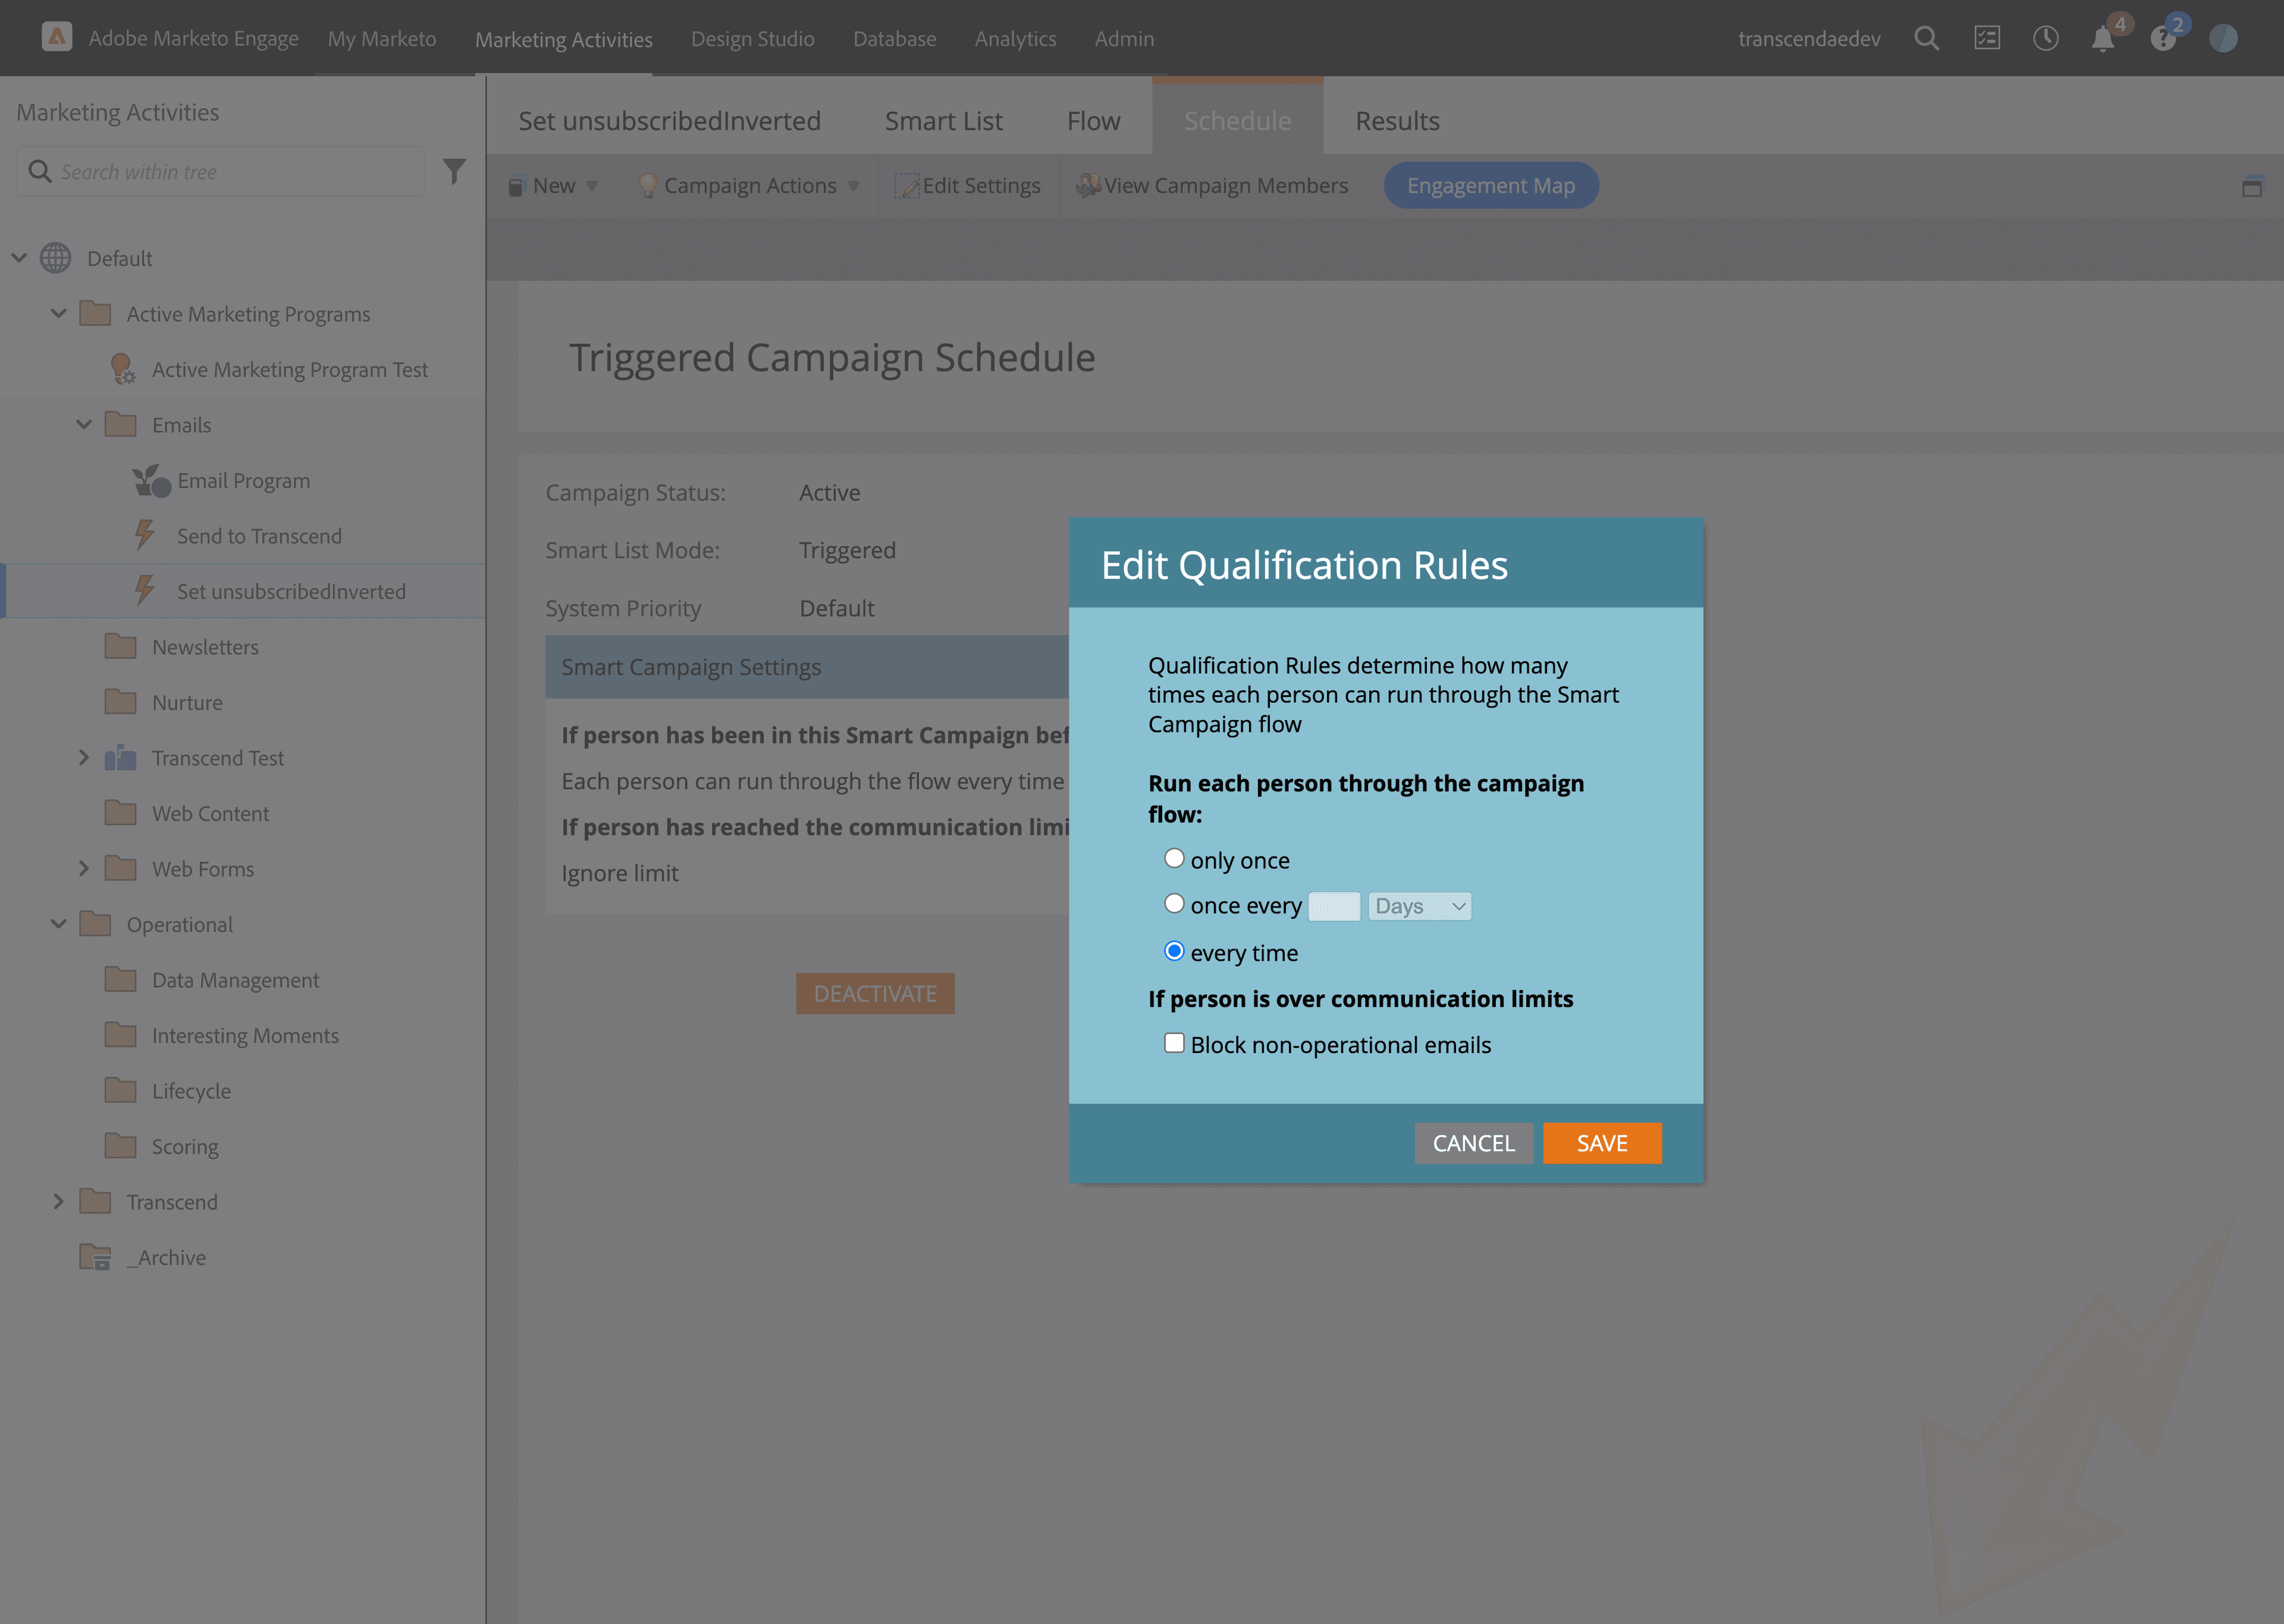
Scheduletab to activate campaign- Ensure Campaign Status is set to
Active - Ensure
Block non-operational emailsis not checked - Ensure
Run each person through the campaign flowis set toevery time
- Ensure Campaign Status is set to
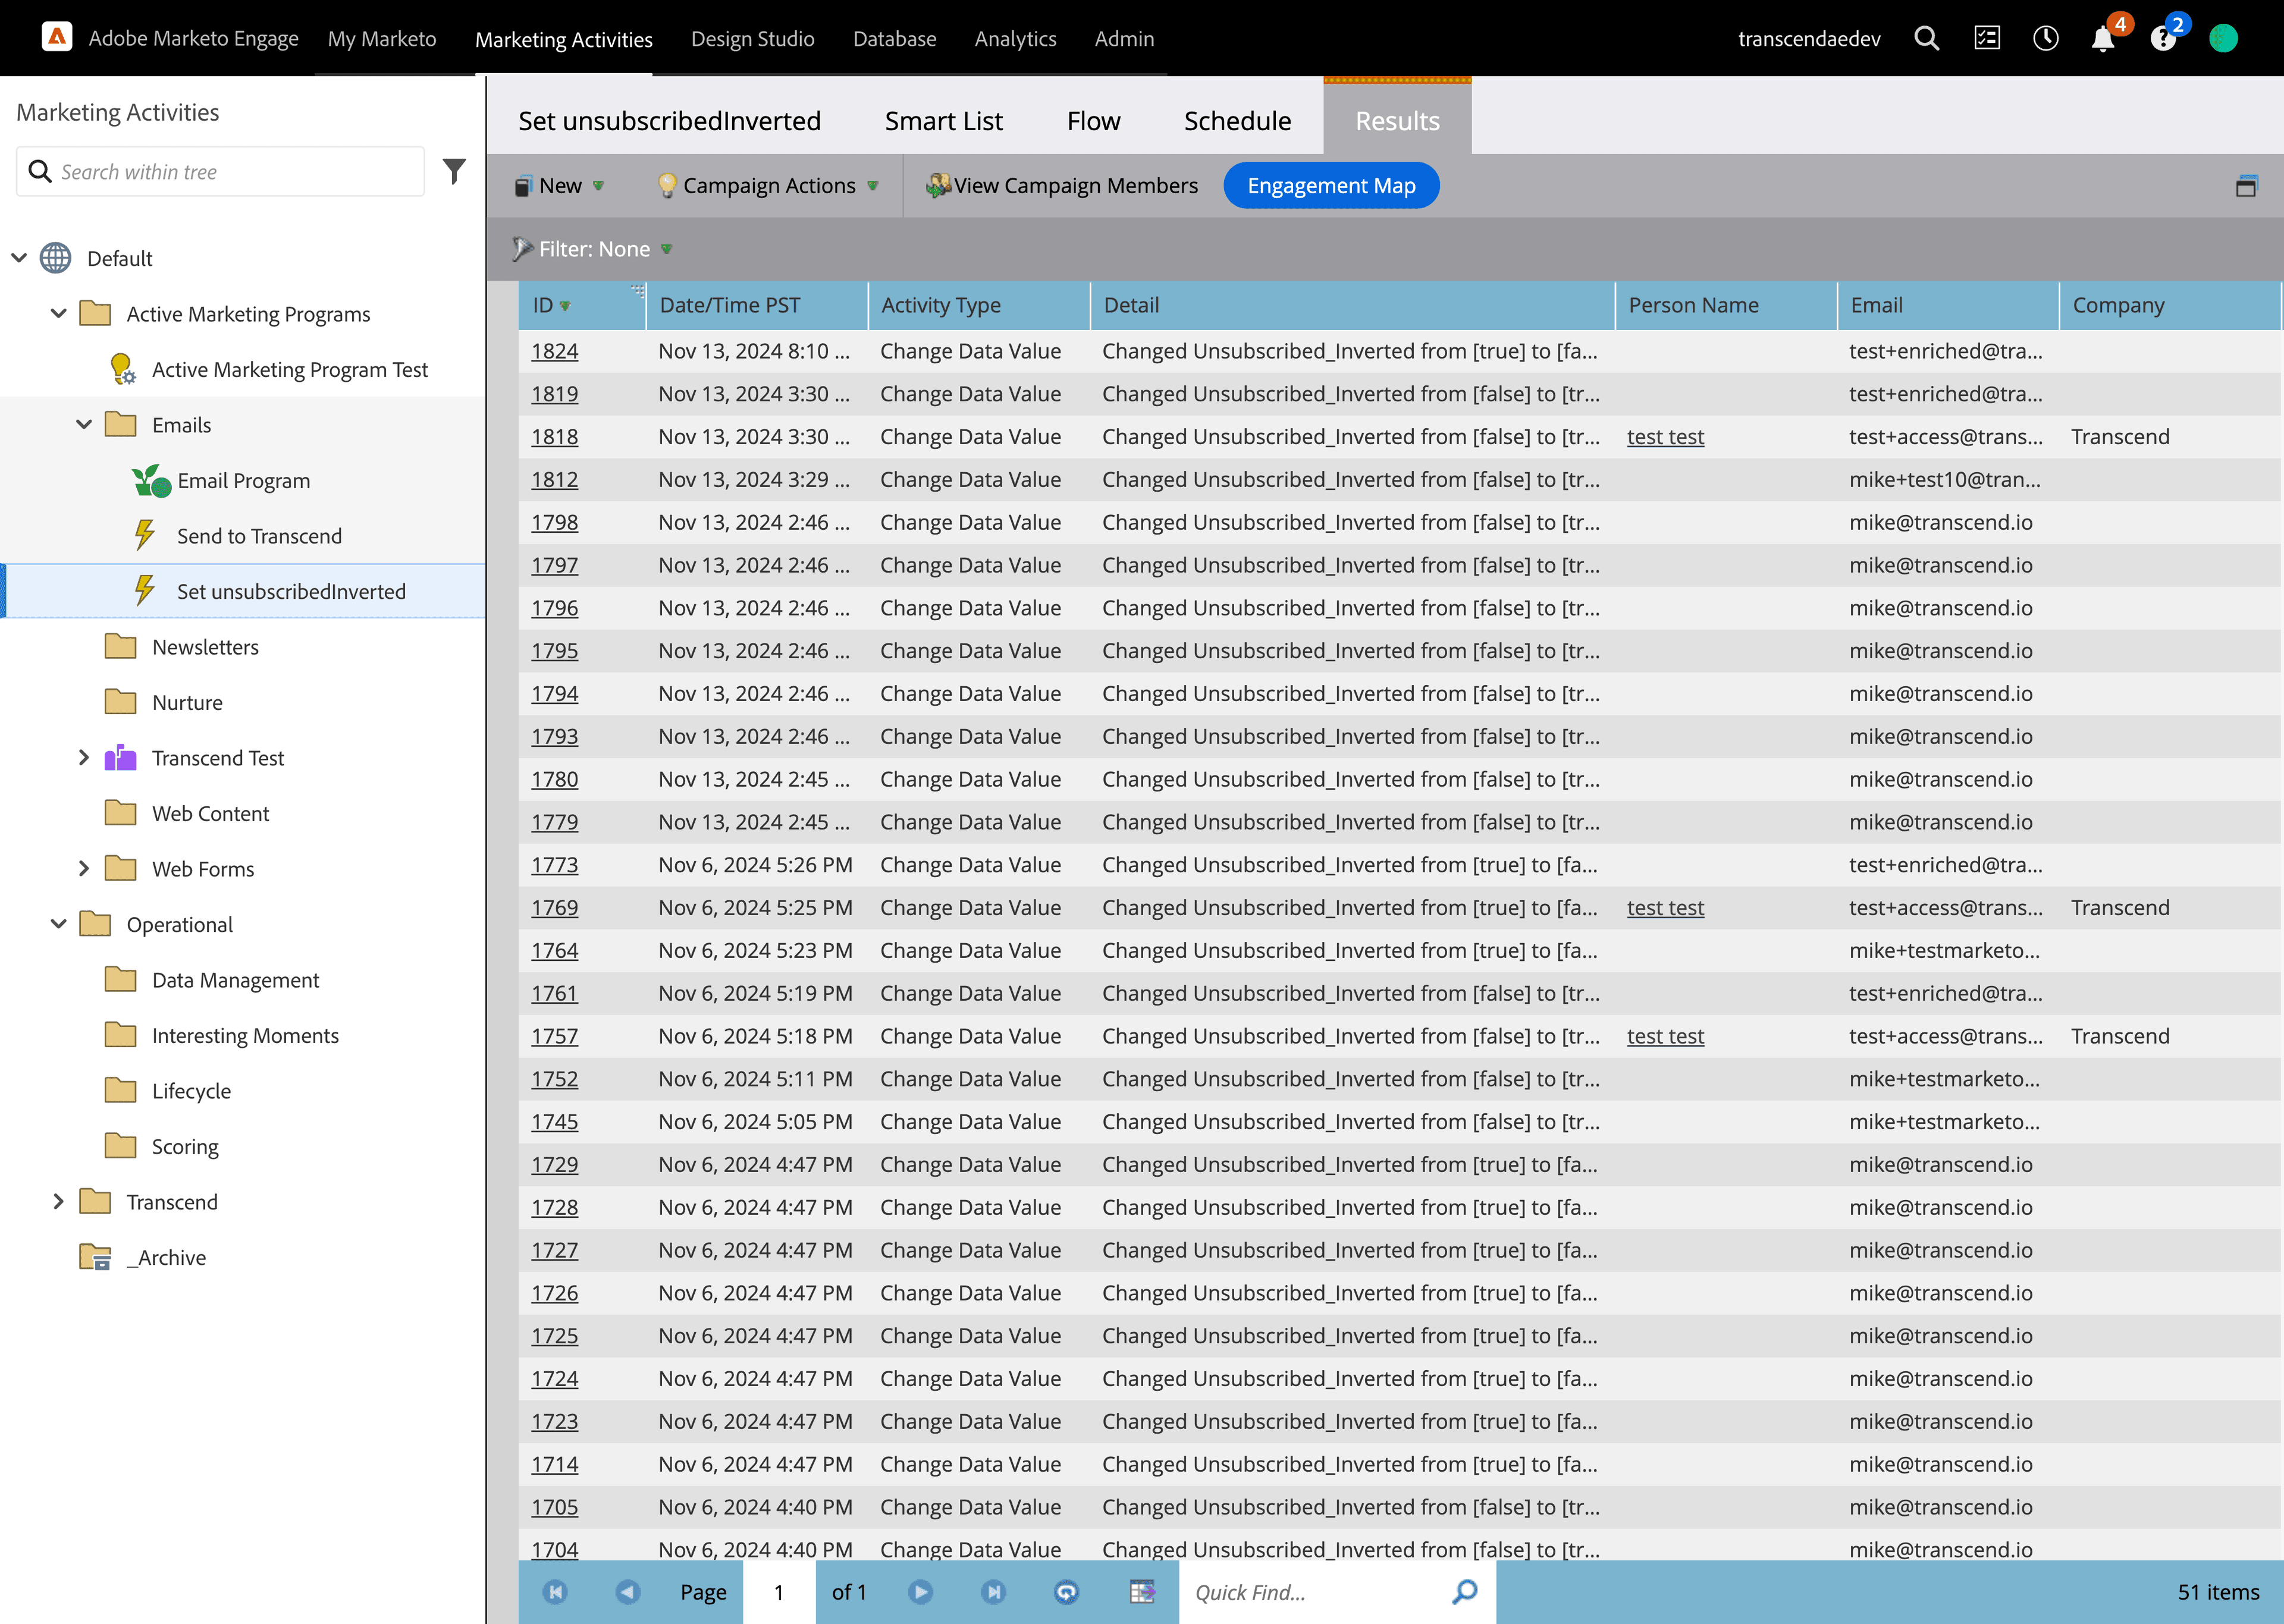
- At this point, you should be able to test that this is working
- You should start seeing triggers for this smart campaing in the
Resultstab - You can test this by going to a lead, toggle the
Unsubscribedfield and then check back on theResultstab to ensure the campaign triggers
- You should start seeing triggers for this smart campaing in the
- Click on the
Admintop menu. - Go to
Integration->Webhooksin left hand side menu - Click
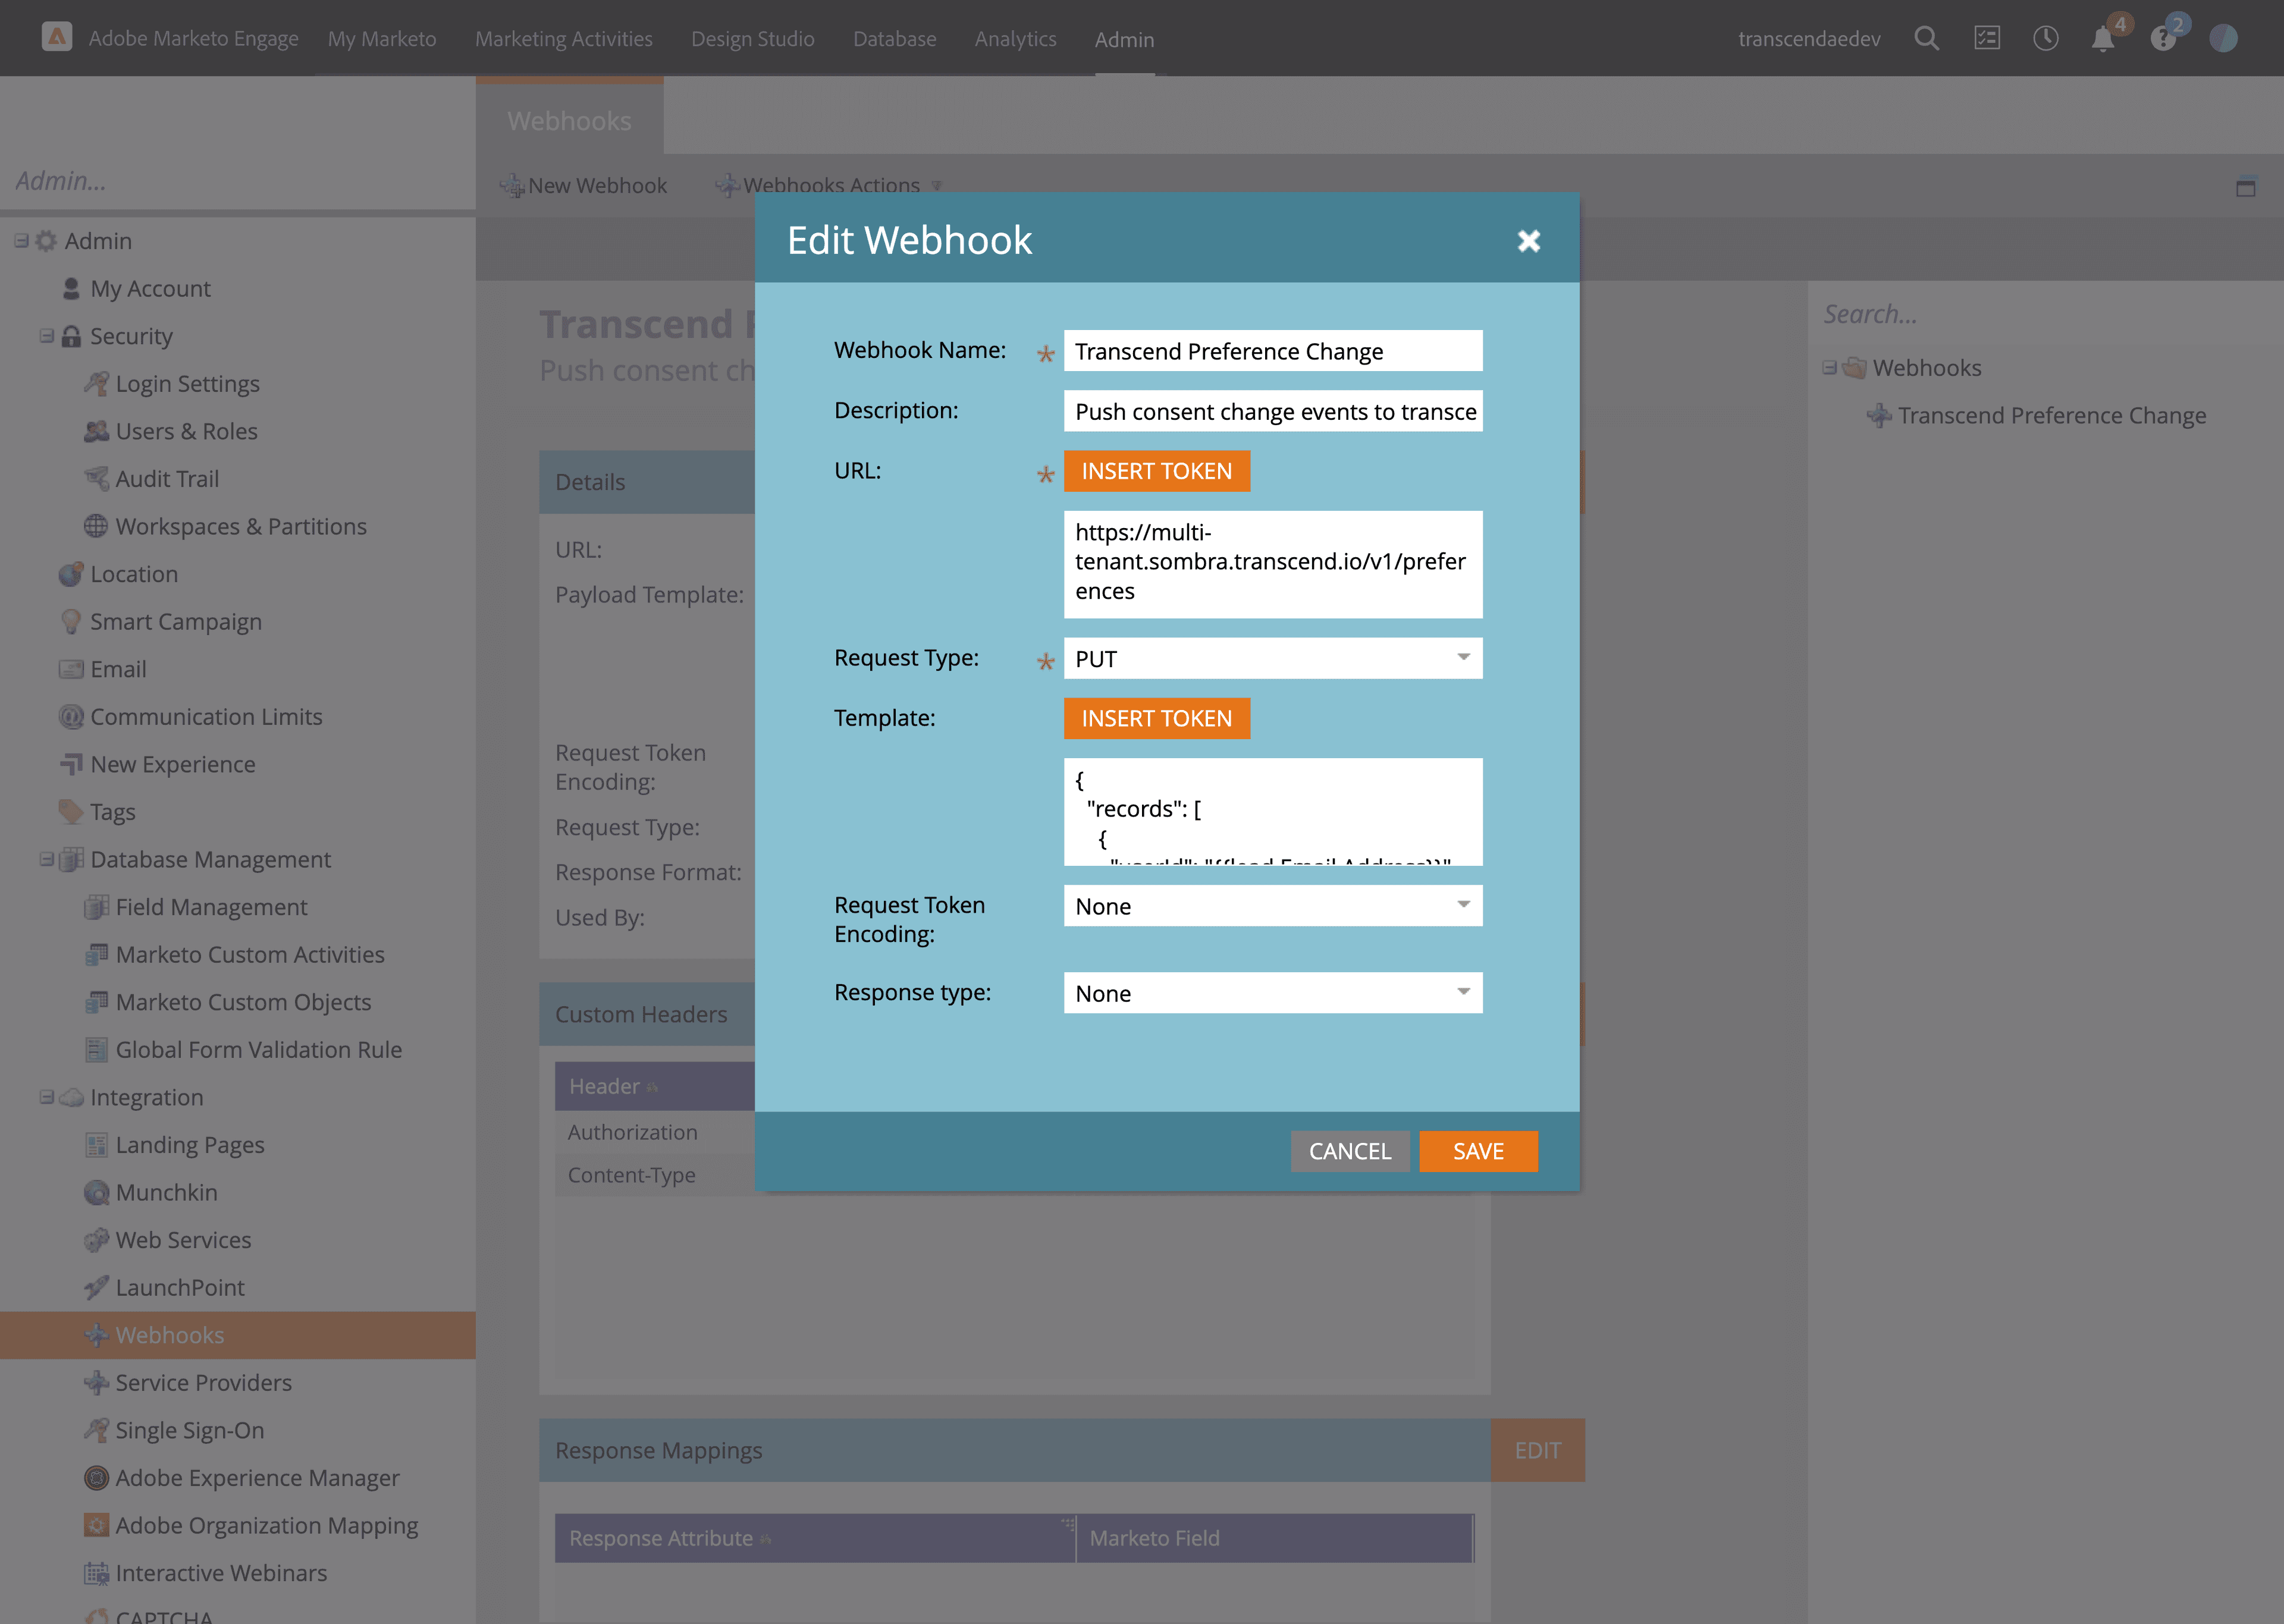
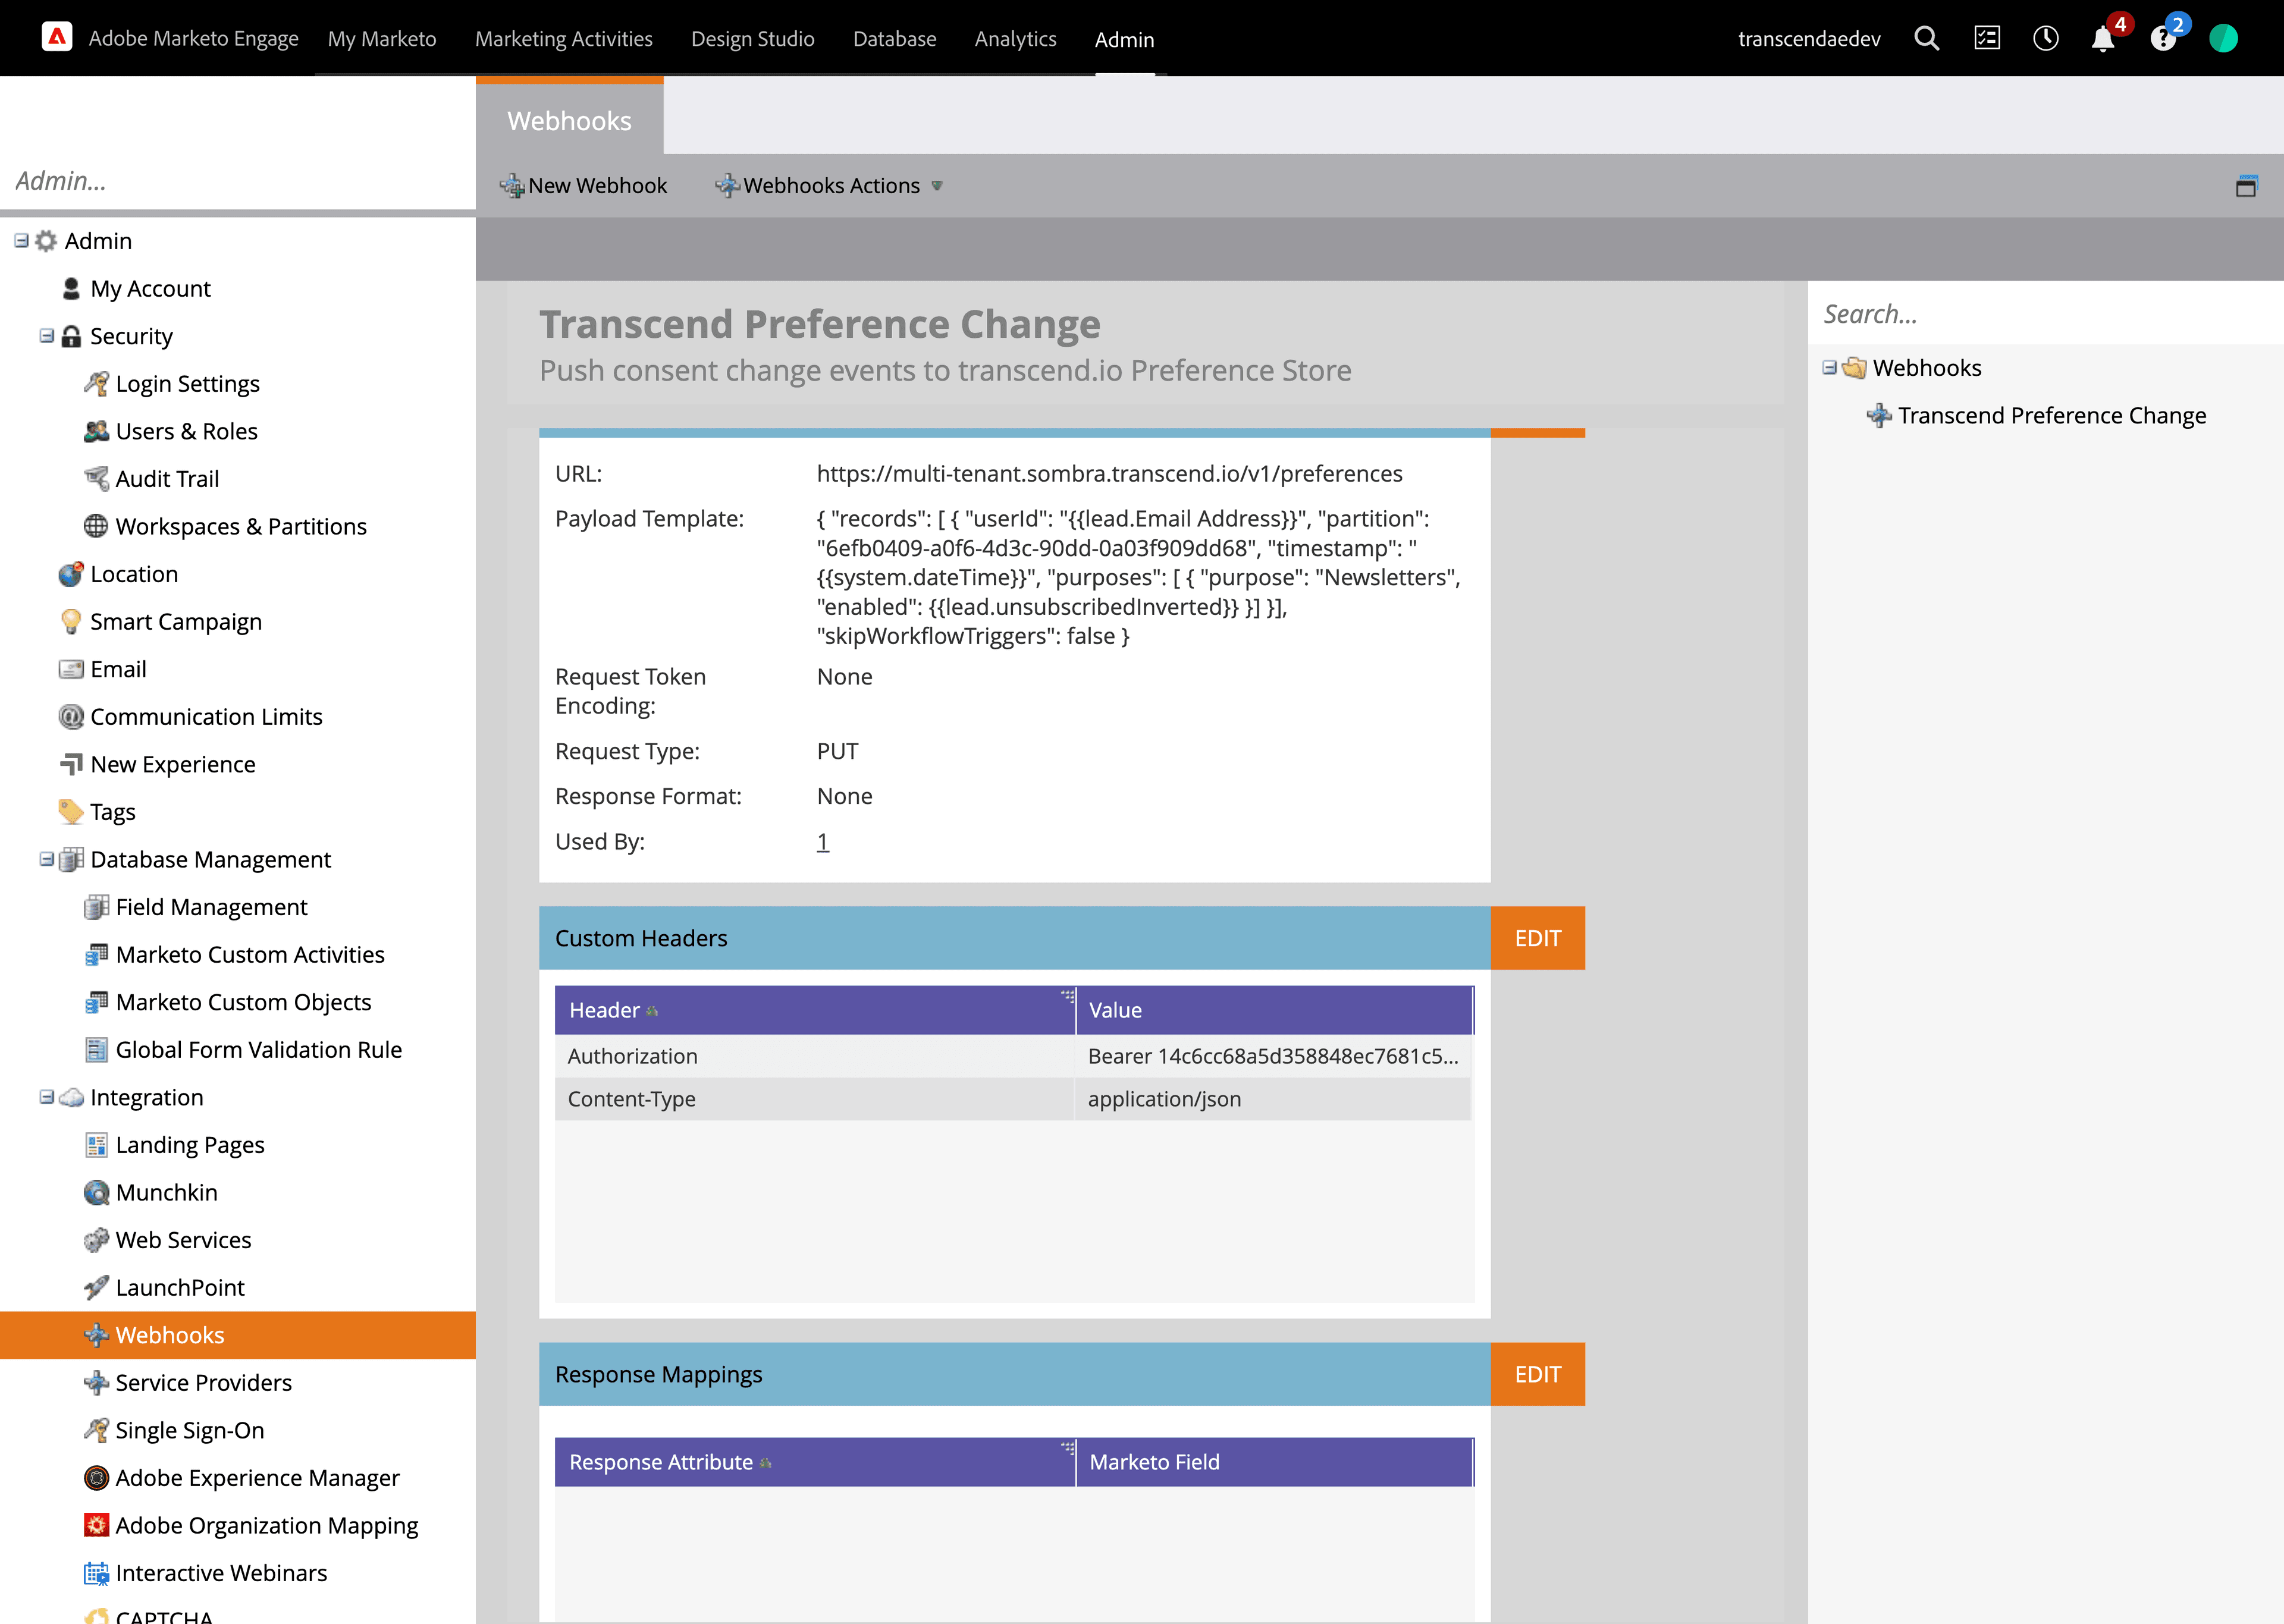
New Webhook- Webhook Name:
Transcend Preference Change - Description:
Push consent change events to transcend.io Preference Management - URL: This value can be found in the section below. If Transcend hosted, this value is
https://multi-tenant.sombra.us.transcend.io/v1/preferencesfor EU hosting andhttps://multi-tenant.sombra.transcend.io/v1/preferencesfor US hosting. - Request Type:
PUT - Template: See Below
- Request Token Encoding:
None - Response type:
None
- Webhook Name:
The request template will look like:
{
  "records": [
    {
      "userId": "{{lead.Email Address}}",
      "partition":  "6efb0409-a0f6-4d3c-90dd-0a03f909dd68",
      "timestamp": "{{system.dateTime}}",
      "purposes": [
        {
          "purpose": "Marketing",
          "enabled": {{lead.unsubscribedInverted}}
        }
      ]
    }
  ],
  "skipWorkflowTriggers": false
}
However you will need to adjust partition using the guide below and purpose using the guide below
- Lastly, you will want to add two Customer Headers
- Authorization: This is an API key created under Developer Settings -> API Keys and create a new API key with the scope
Modify User Stored Preferences. - Content-Type:
application/json
- Authorization: This is an API key created under Developer Settings -> API Keys and create a new API key with the scope
- Go to Infrastructure -> Sombra in your Transcend account
- Choose the Sombra™ gateway that makes sense for your use case (you most likely will want to use the Sombra marked as "Is Primary Sombra?")
- Copy the "Transcend Ingress URL" value as your Sombra base URL

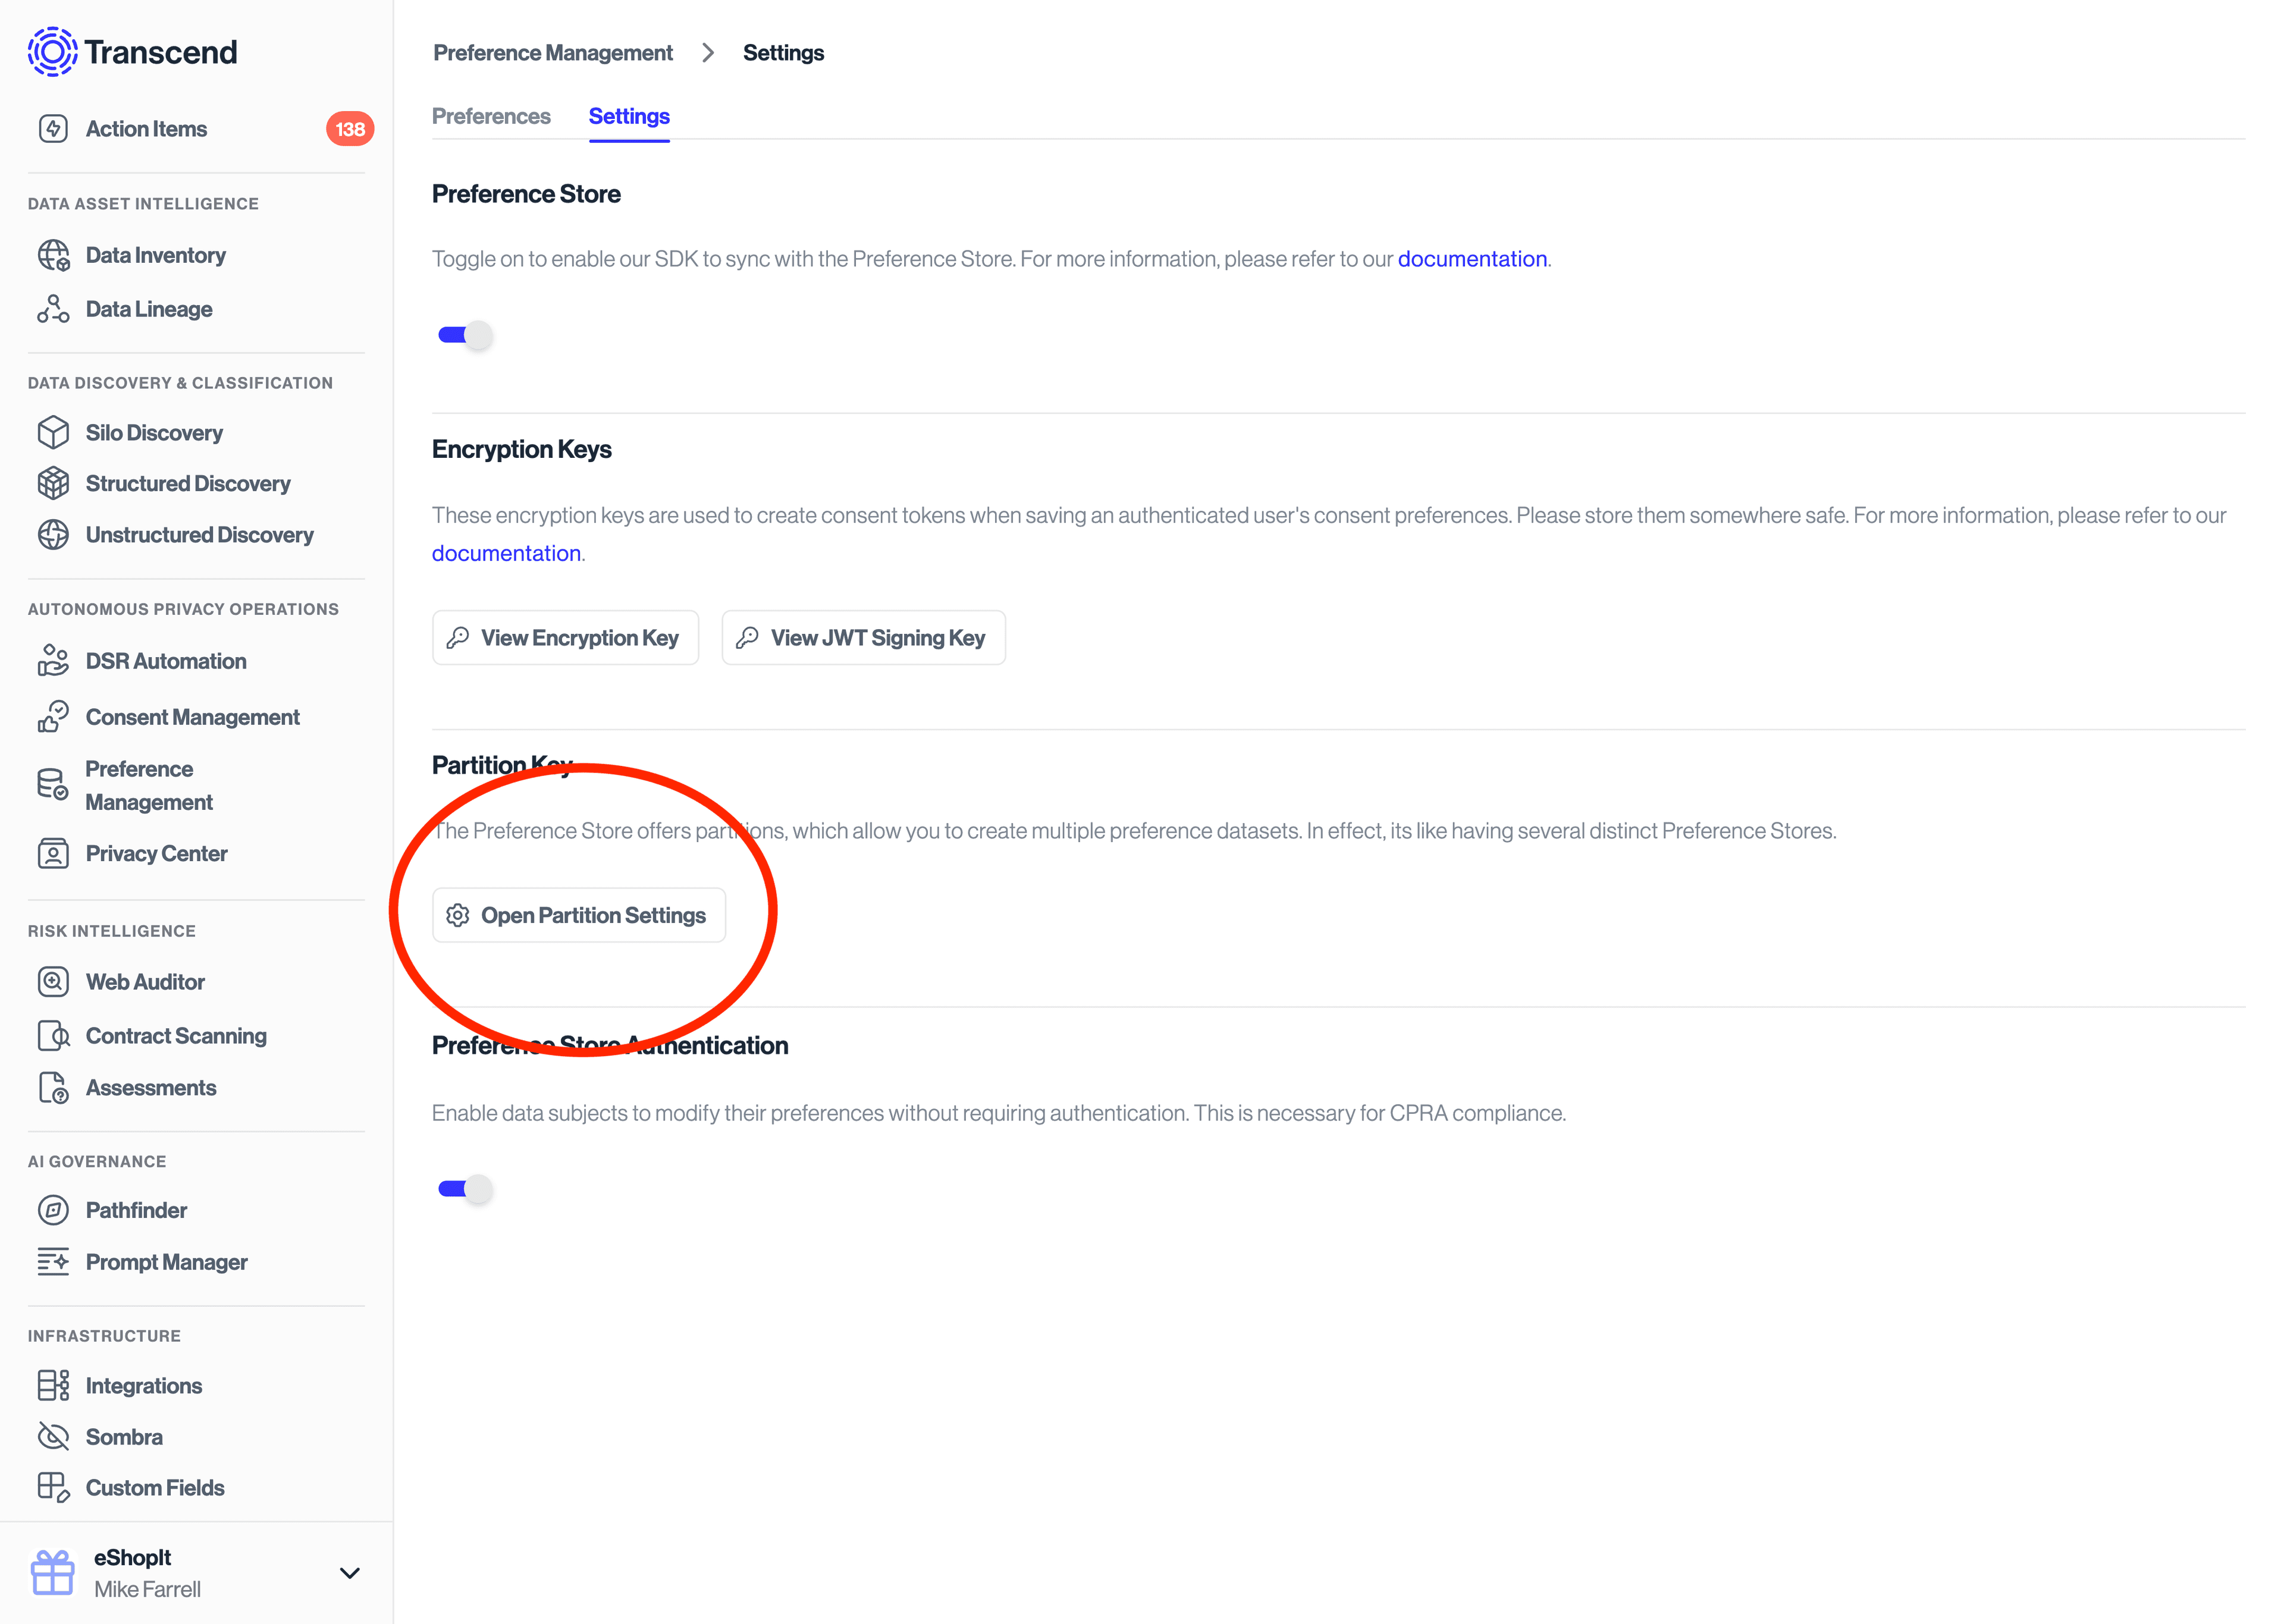
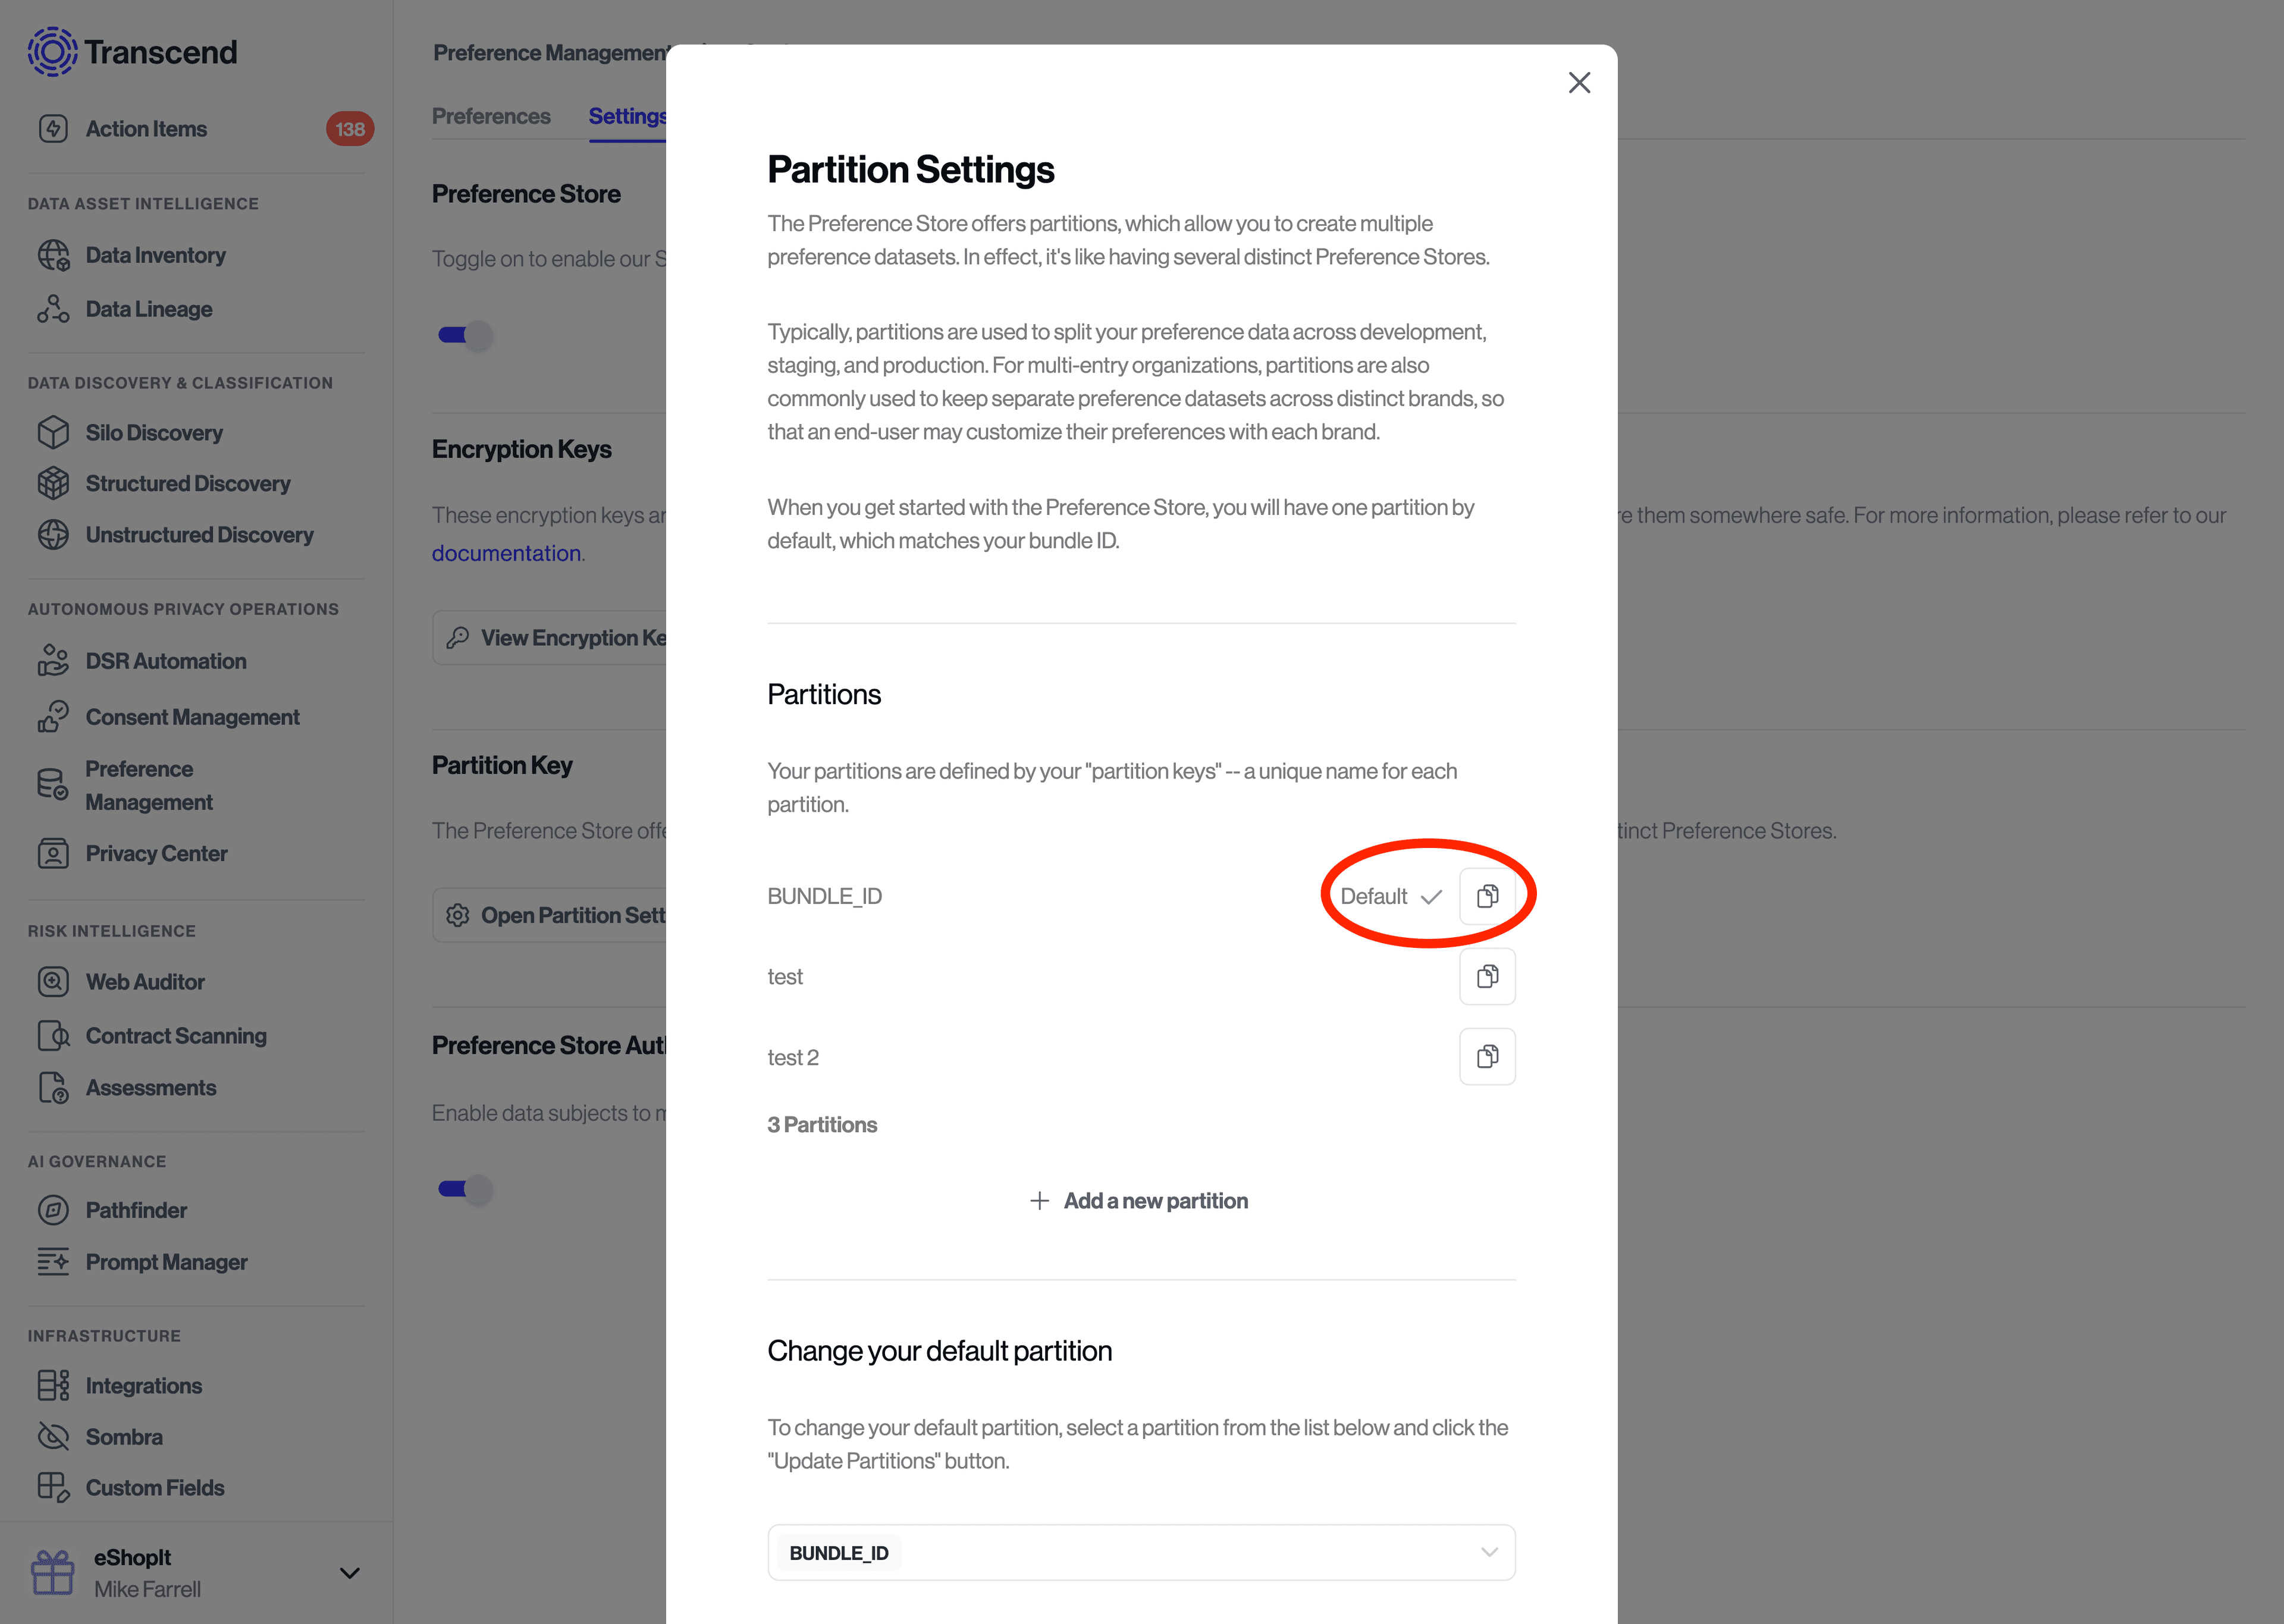
The partition can be thought of as the ID of the consent database to update. In most implementations, you will just have one unique partition in your account. Multiple partitions can be useful in situations where you have multiple brands, partners or data controllers for which you need to separately track consent preferences for.
To grab this value:
- Go to Preference Management -> User Preferences -> Settings
- Ensure Preference Store toggle is enabled.
- Click on the button "Open Partition Settings"
- Locate your desired partition and click the copy button. The default partition is labeled
BUNDLE_ID- this is most likely the value you will want to use.
When submitting requests to the Transcend API, you will want to update your purposes and preferences using their respective "Slug" values.
To find your purpose slugs, look at the "Slug" column under Consent Management -> Regional Experiences -> Purposes. To find your preference slugs, look at the "Slug" column under Preference Management -> Topics. To find your preference option slugs, look at the "Slug" column under Preference Management -> Preference Topics -> Options.
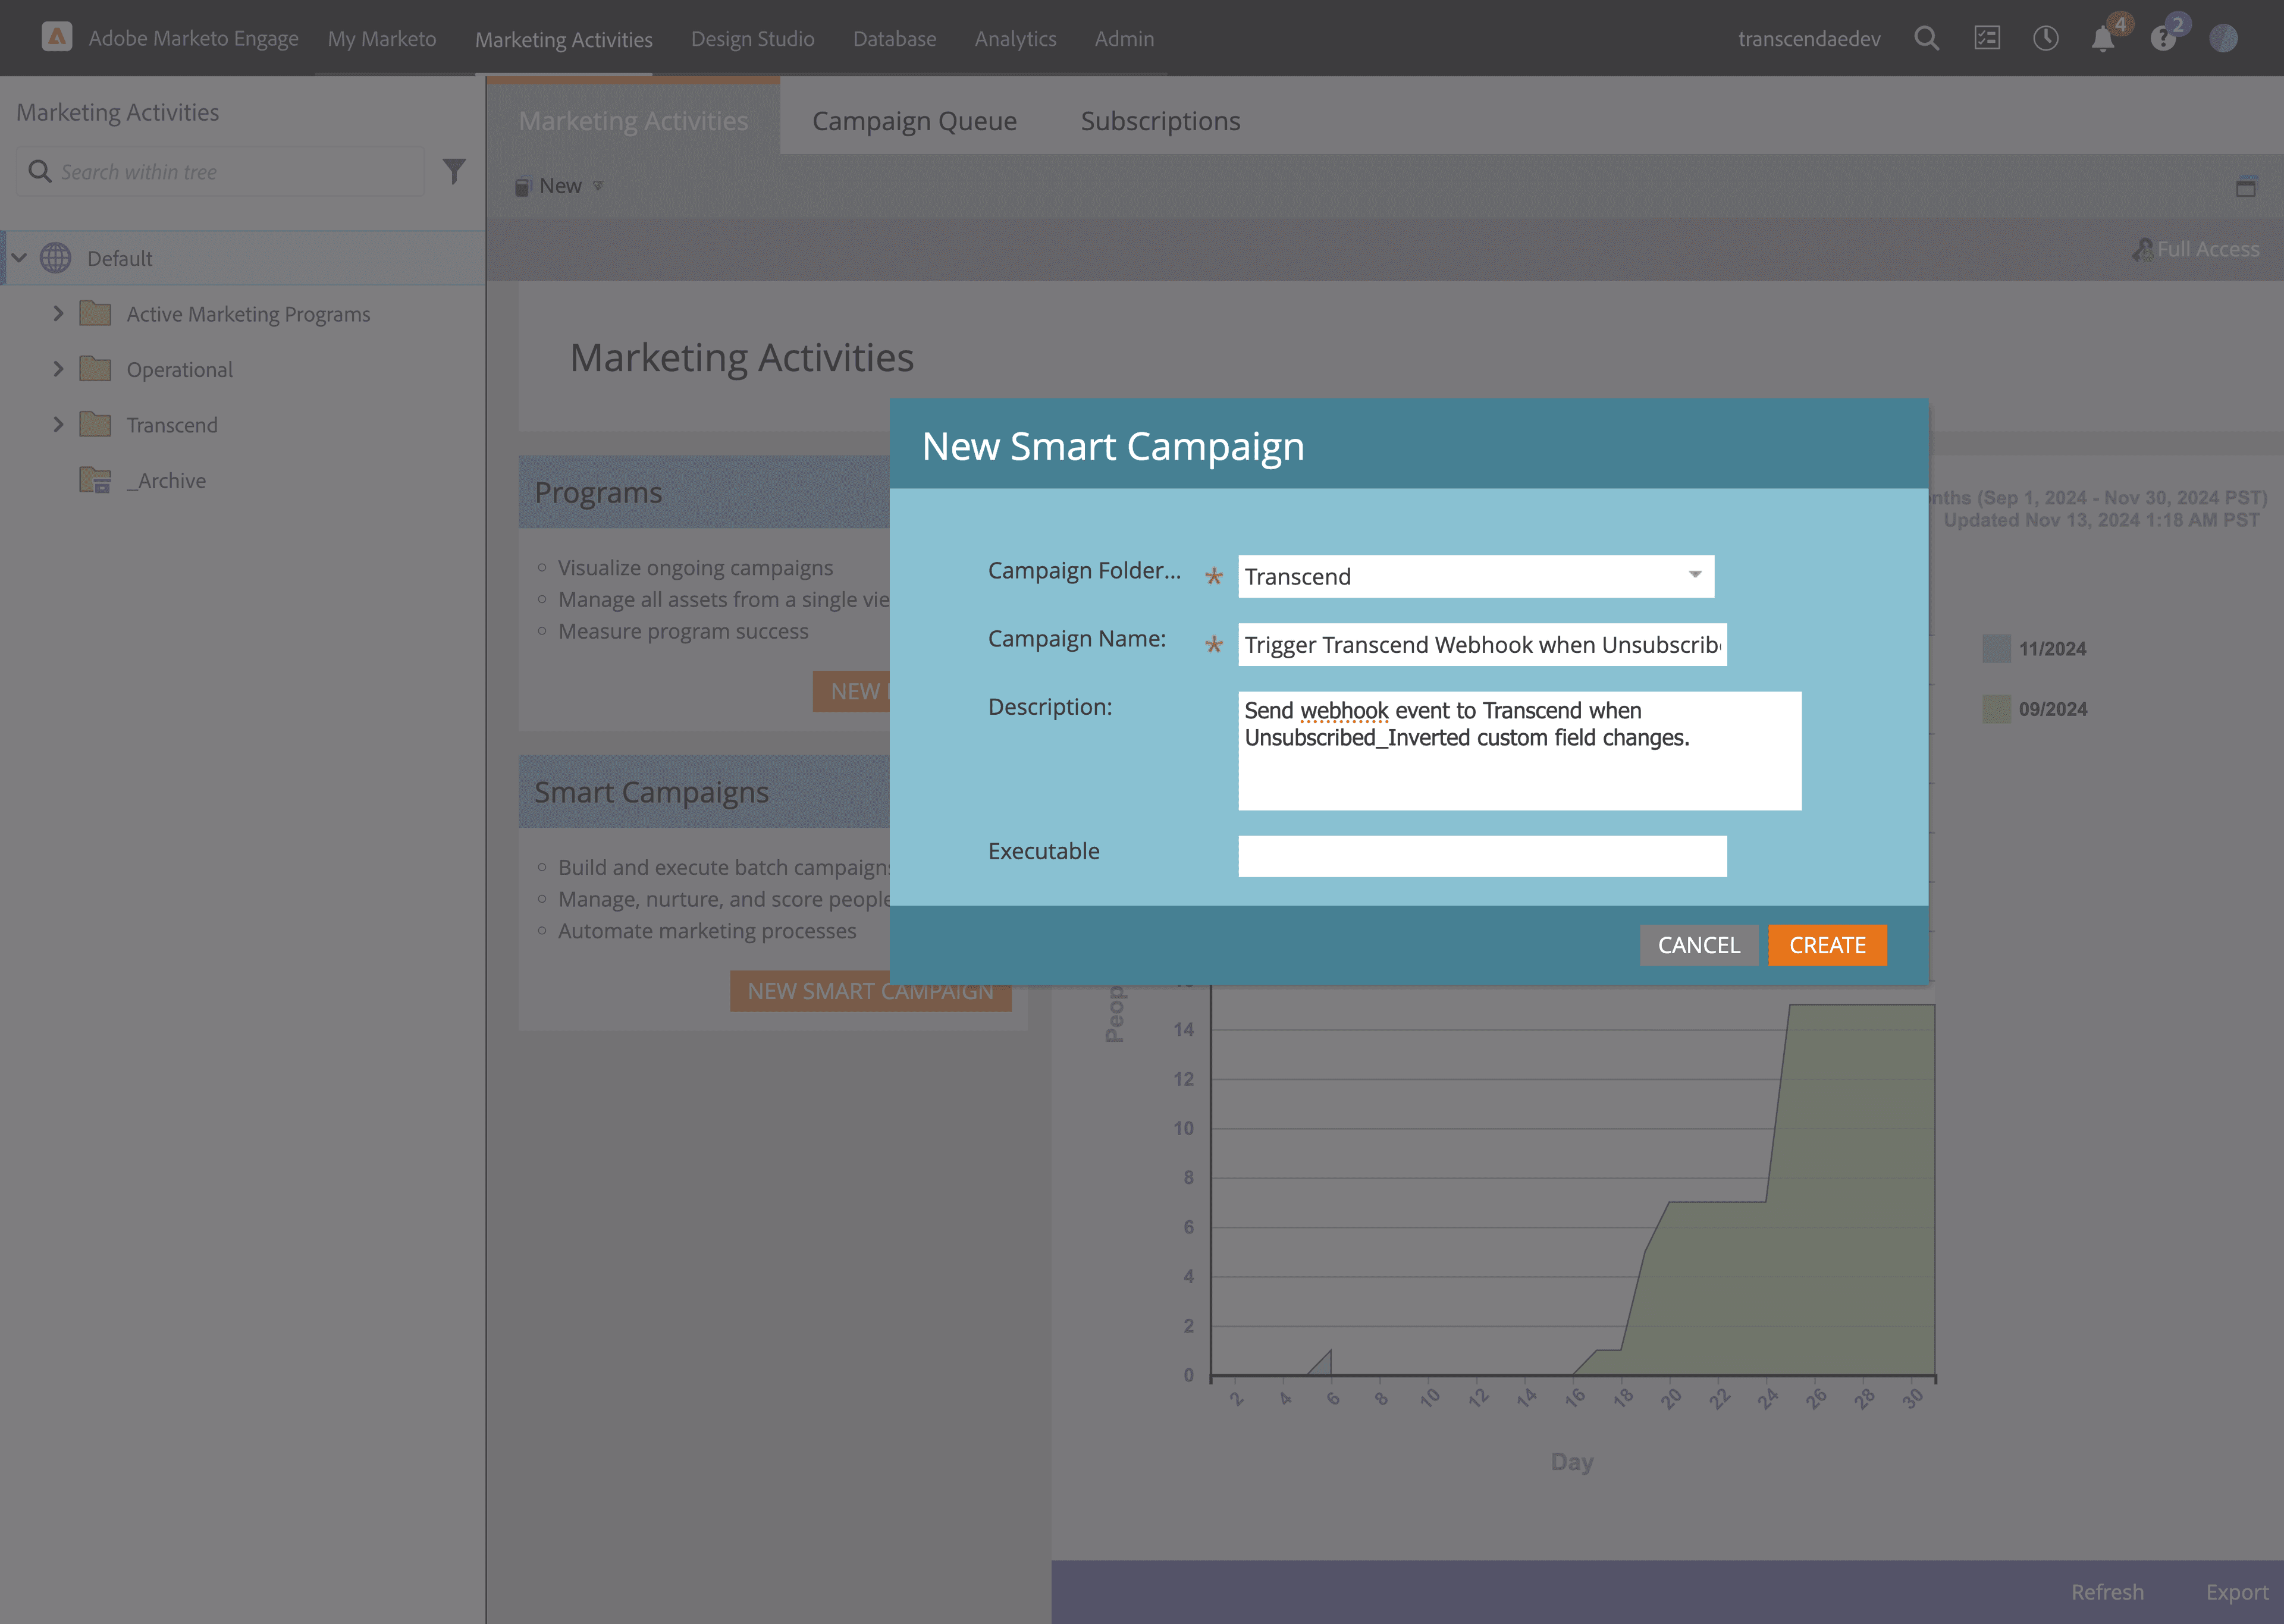
- Click on the
Marketing Activtiestop menu. - Fill out the form to create the smart campaign
- Campaign Folder:
Transcend - Campaign Name:
Trigger Transcend Webhook when Unsubscribed_Inverted changes - Description:
Send webhook event to Transcend when Unsubscribed_Inverted custom field changes. - Executable: Leave blank
- Campaign Folder:
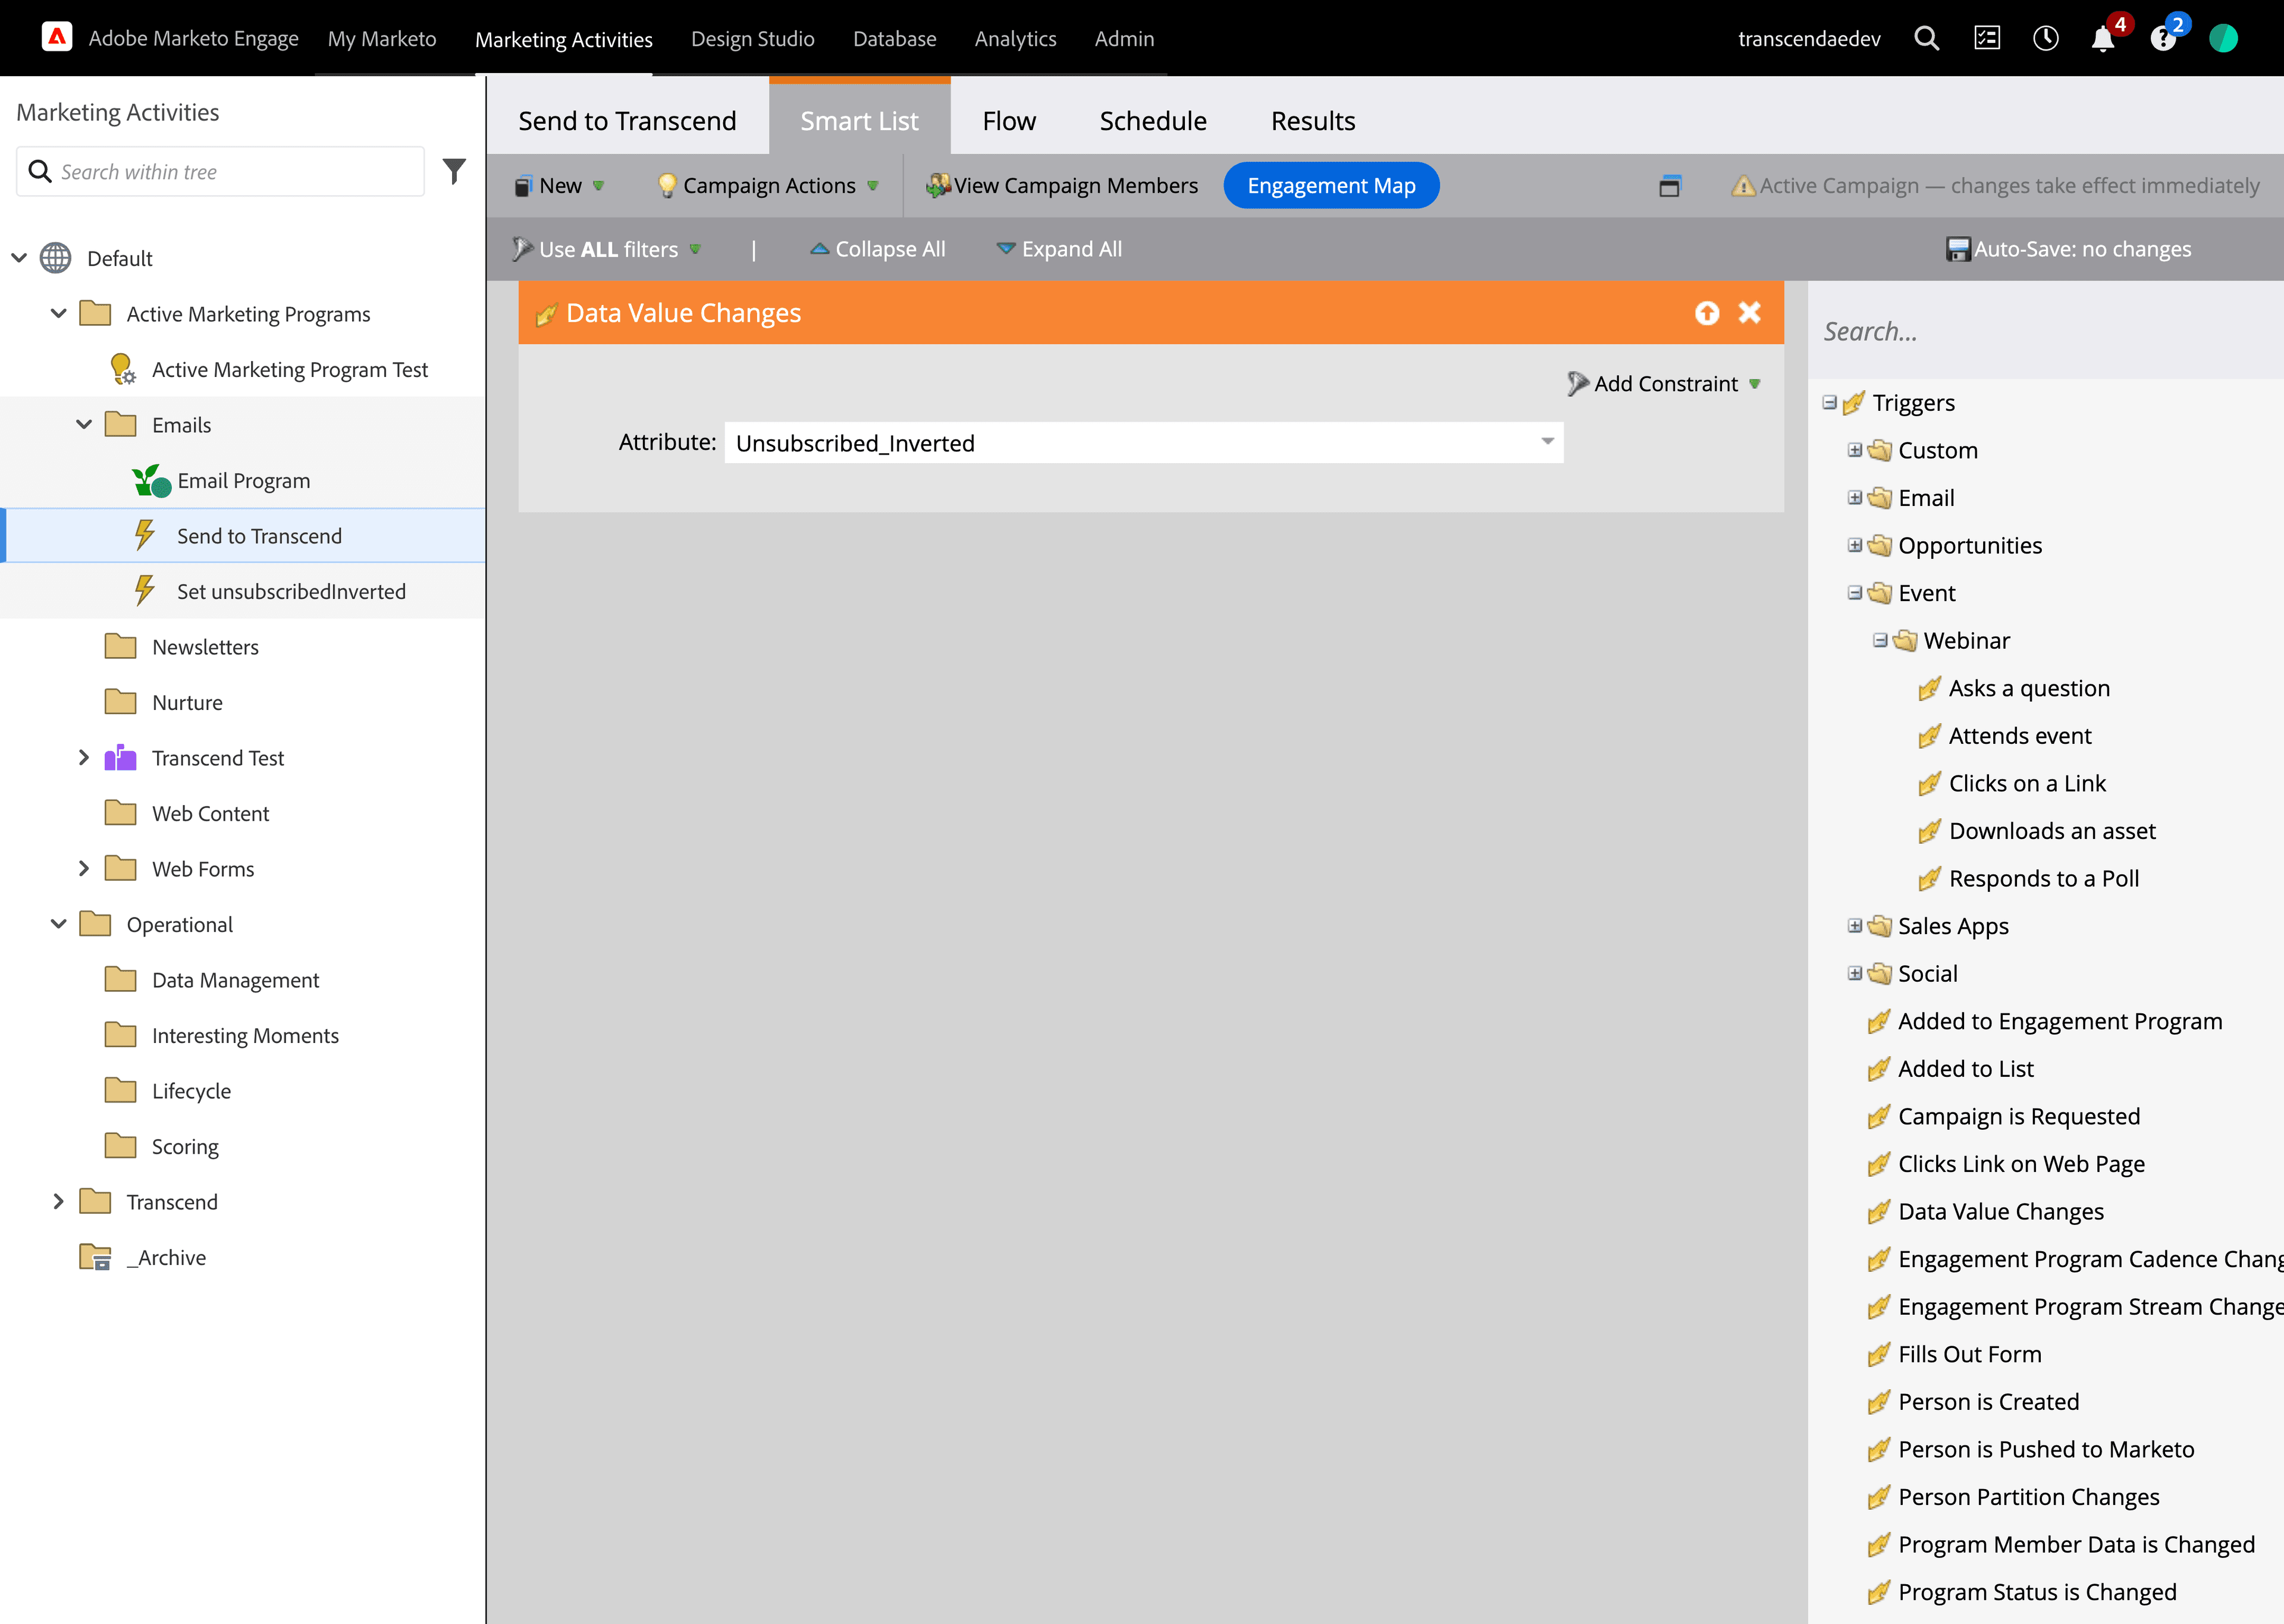
- Go to
Smart Listtab and make the following changes:- Add new rule for
Data Value ChangeswithAttributeselection ofUnsubscribed_Inverted
- Add new rule for
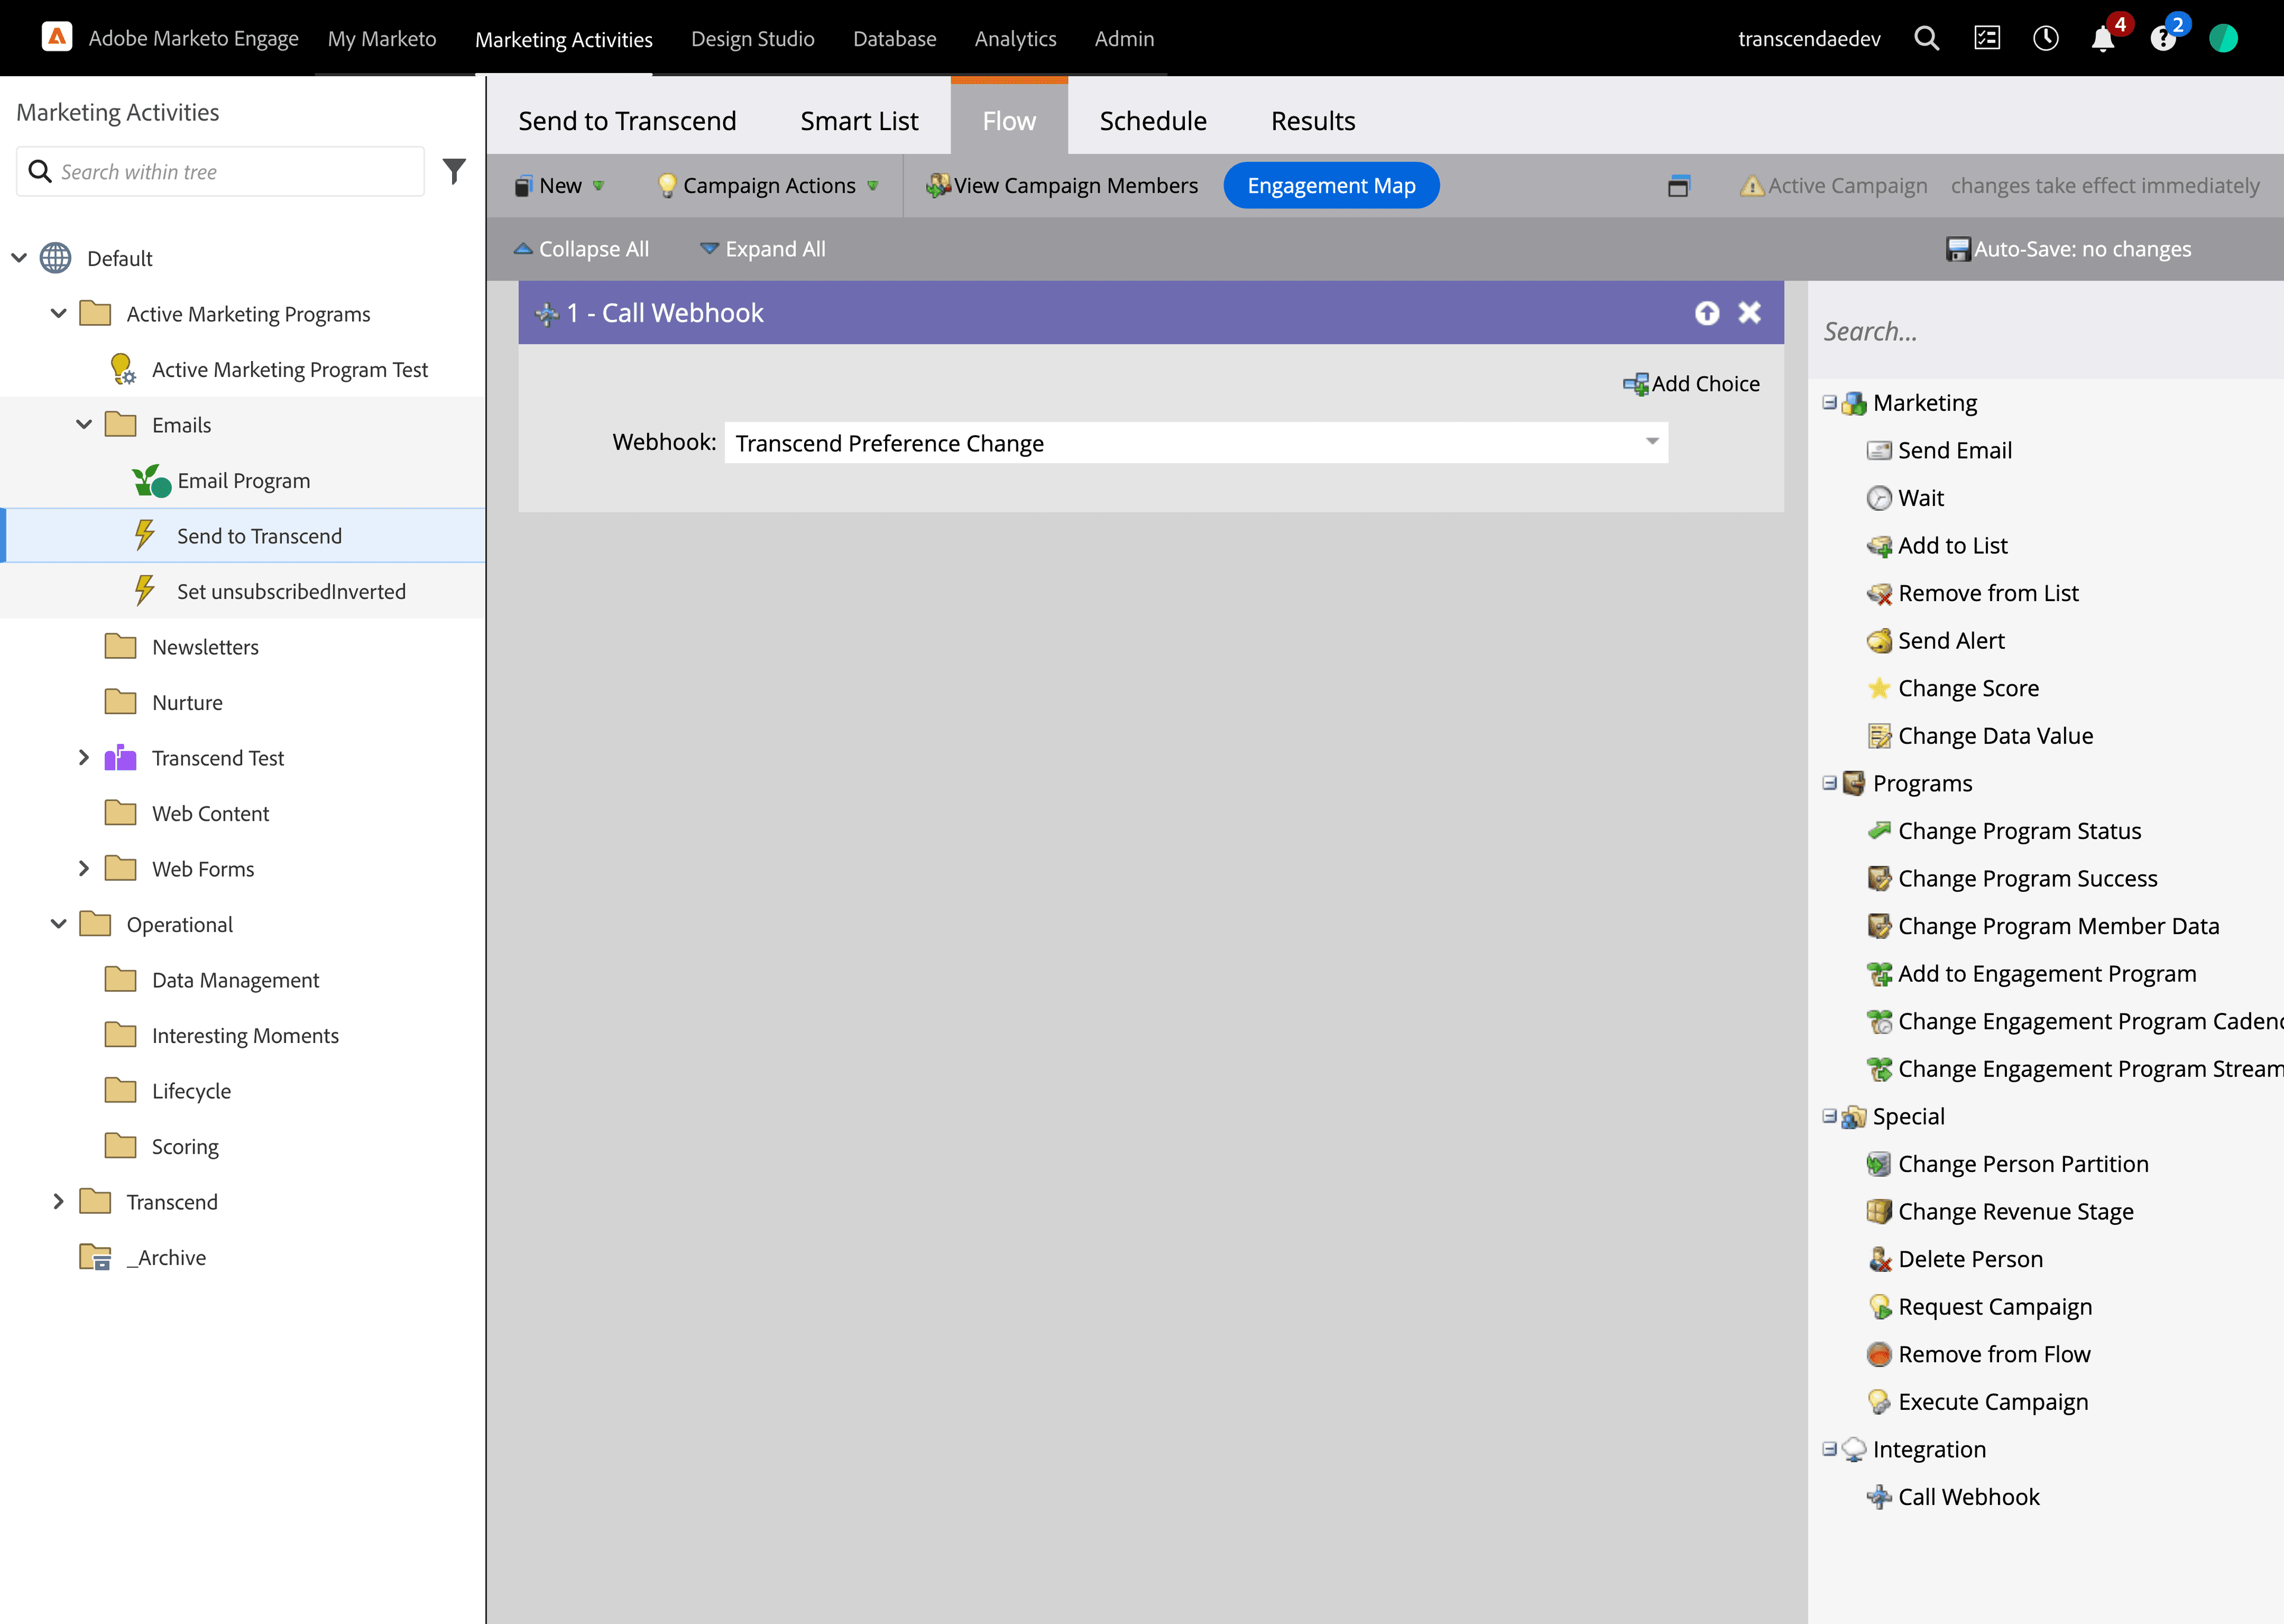
- Go to
Flowtab and make following changes- Add rule for
Call Webhookwith valueTranscend Preference Change(created in Step 3)
- Add rule for
- Go to
Scheduletab to activate campaign- Ensure Campaign Status is set to
Active - Ensure
Block non-operational emailsis not checked - Ensure
Run each person through the campaign flowis set toevery time
- Ensure Campaign Status is set to
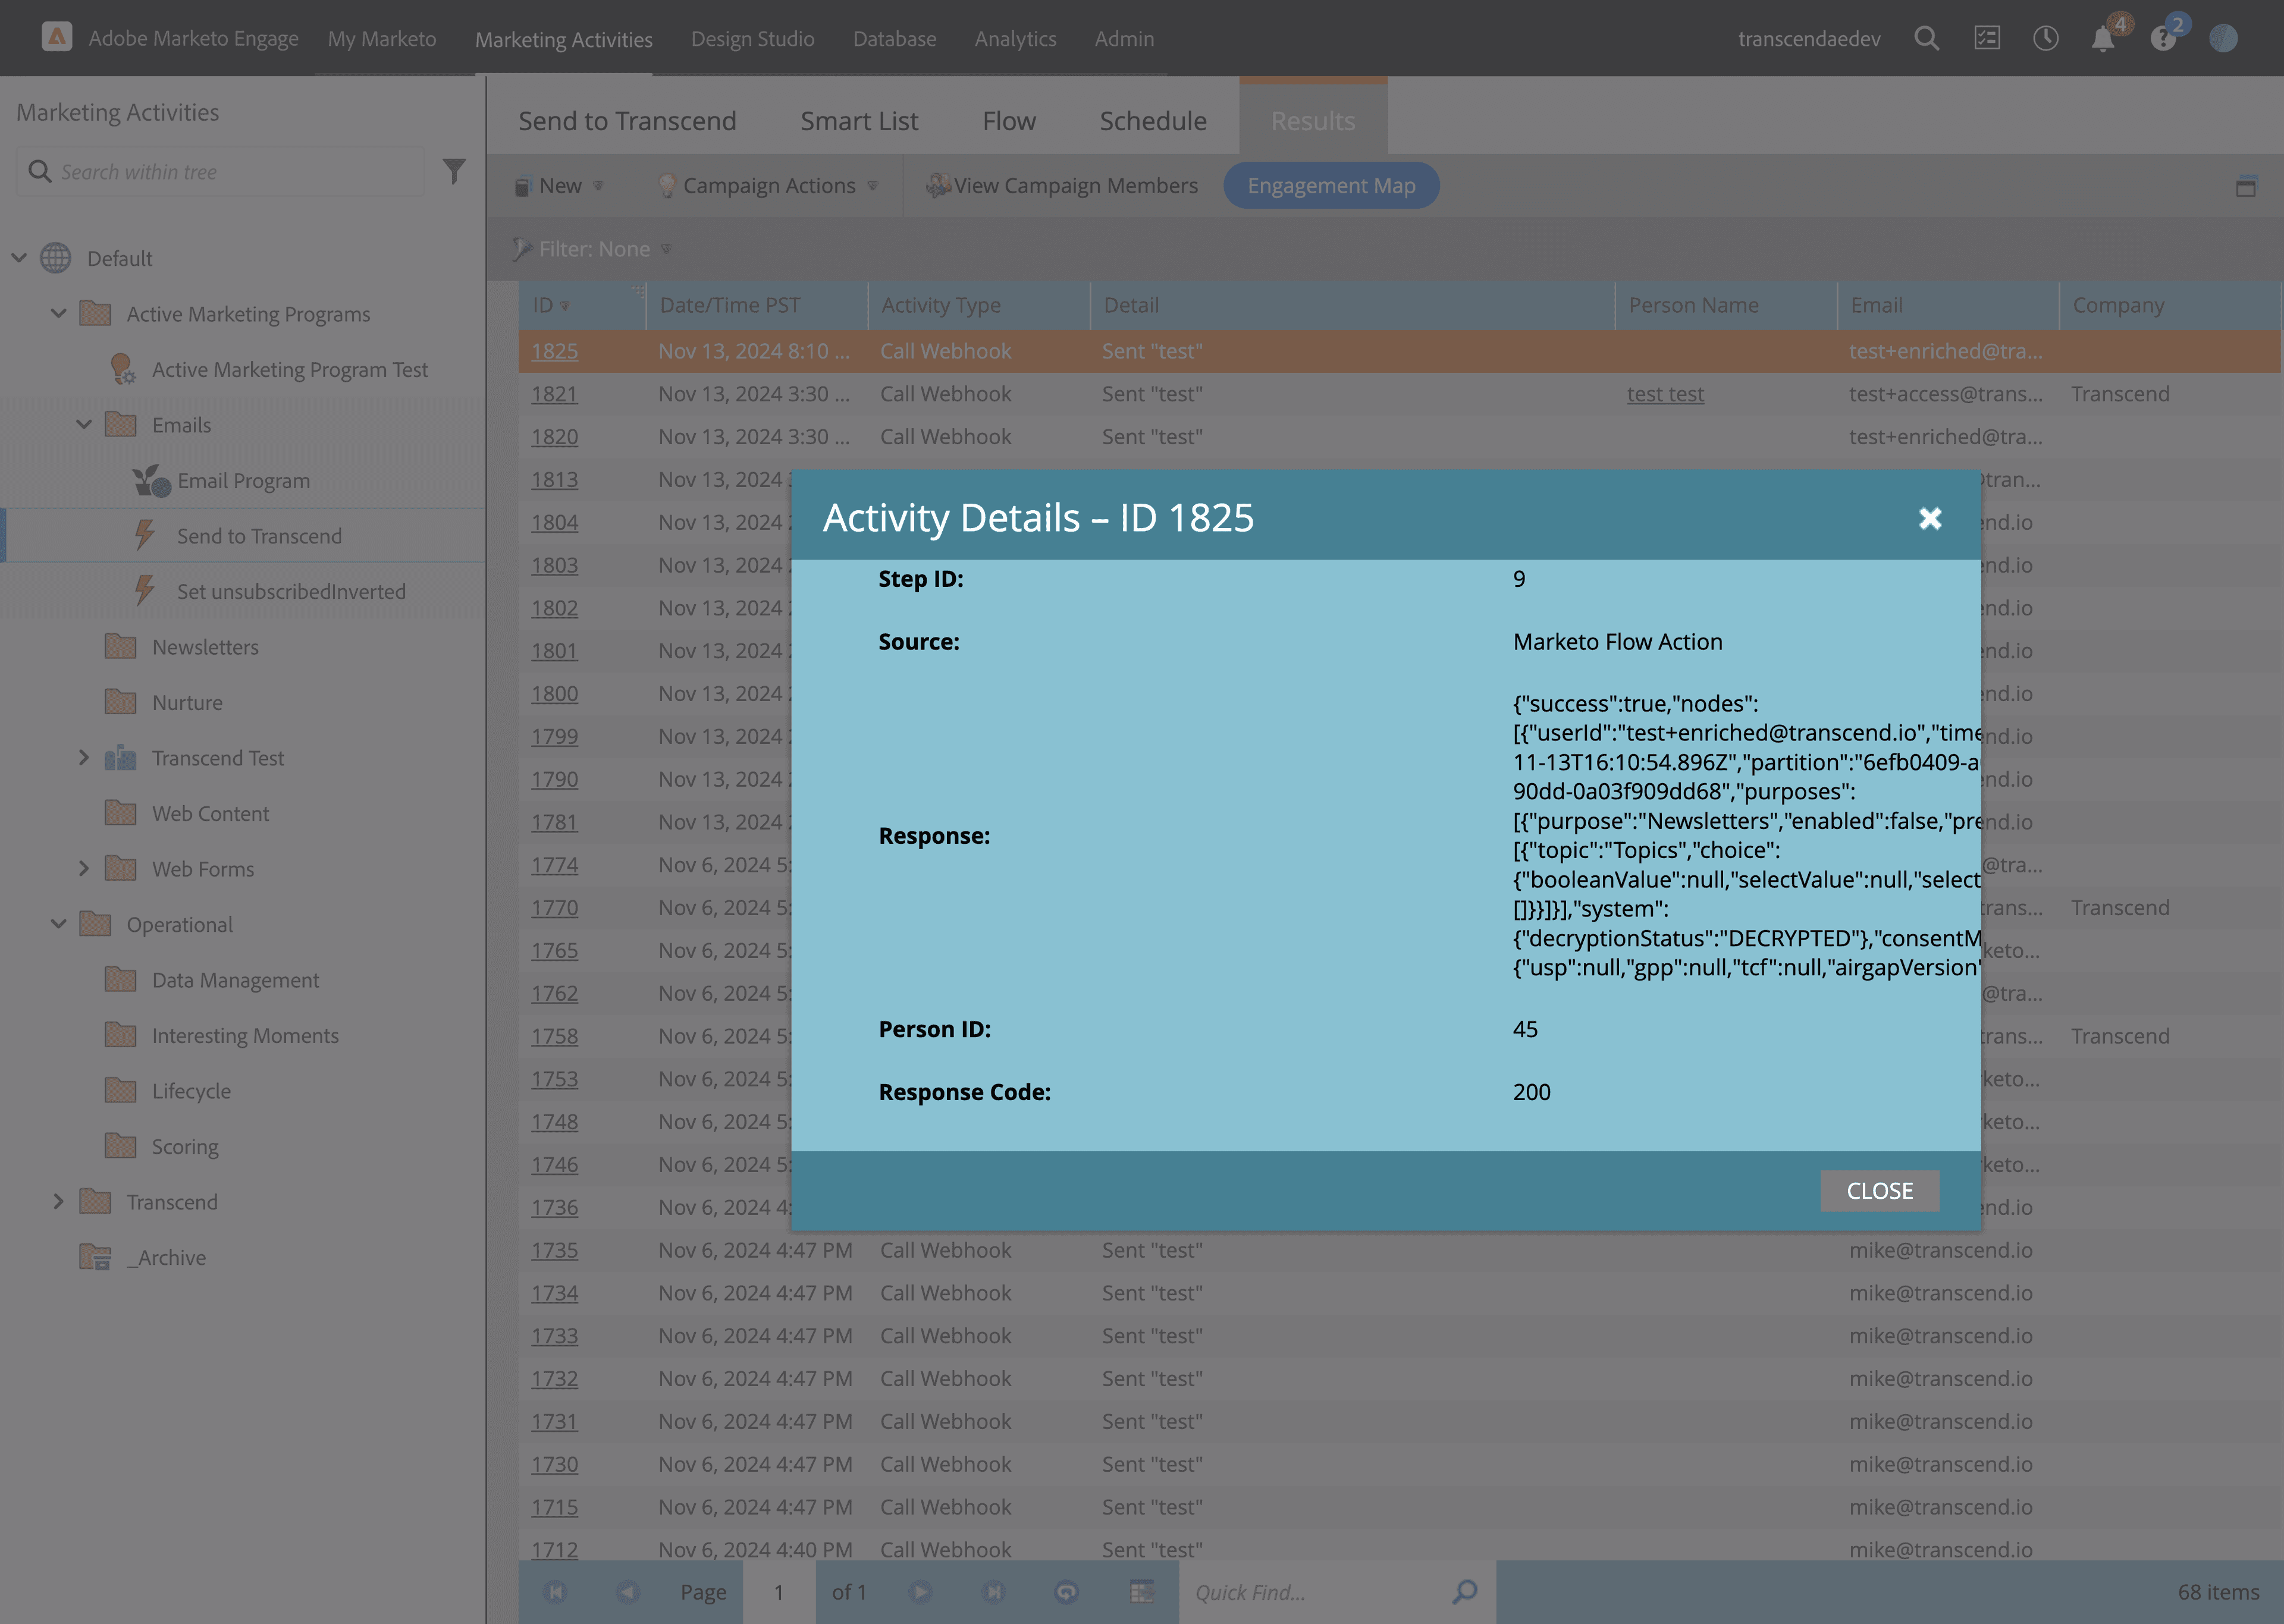
- At this point, you should be able to test that this is working
- You should start seeing triggers for this smart campaing in the
Resultstab - You can test this by going to a lead, toggle the
Unsubscribedfield - If you refresh the page you should see
Unsubscribed_Invertedset to the inverse ofUnsubscribed - Under the
Resultstab of the second smart campaign created in step (4) you should see webhooks sending. Check to m
and then check back on theResultstab to ensure the campaign triggers - Click on any
Resultsto ensure that Transcend API is returning a 200 status code
- You should start seeing triggers for this smart campaing in the
- Check Transcend Preference Management to ensure consent is synced in properly