Storing Consent Preferences
You can persist your users' consent preferences with Preference Management, and synchronize consent preferences across devices and apps.
Transcend-hosted vs. Self-hosted Sombra: The instructions in this guide vary depending on your Sombra deployment type. If you're using Transcend's hosted Sombra service, you can retrieve encryption keys from the Admin Dashboard. If you're self-hosting Sombra, you'll need to generate your own encryption keys (we recommend using OpenSSL for consistency).
When a user has signed in on your application, your backend will serve a token to your frontend, which allows Transcend's SDK to save this authenticated user's consent preferences.
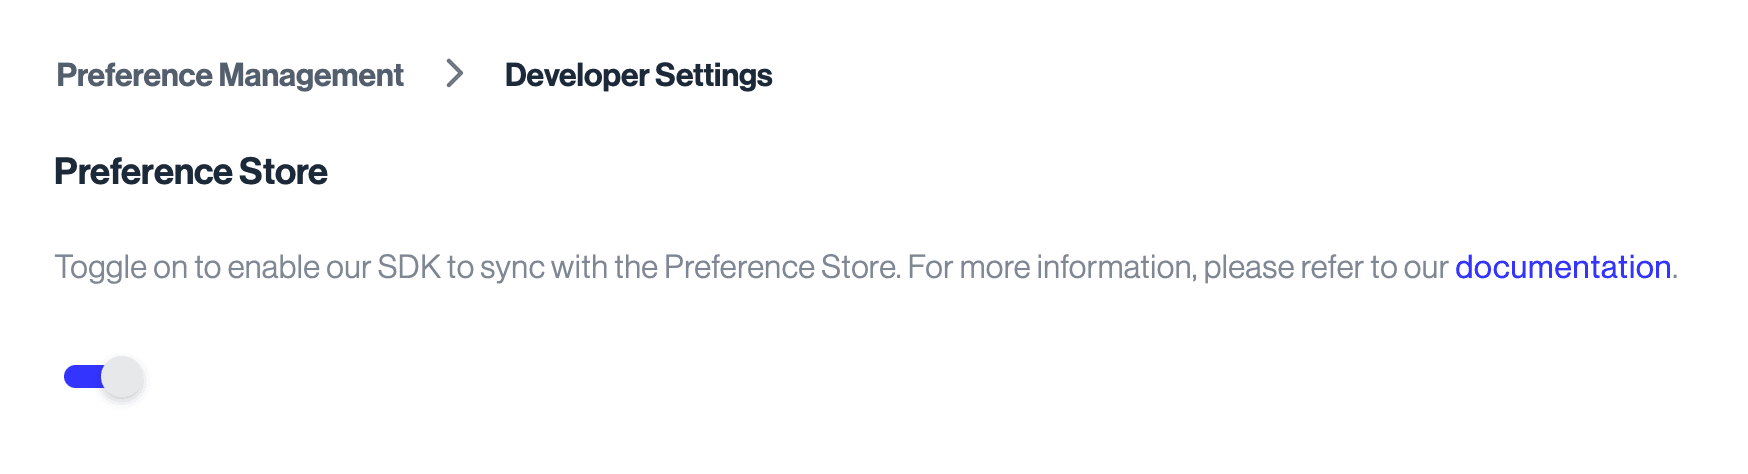
Go to the Preference Management Developer Settings page and toggle on the Preference Store. With that toggle flipped on and after your next airgap.js deploy, you will be able to start syncing user preferences.
The token you'll serve is a JSON Web Token (JWT) that carries encrypted identifier name/value pairs for this user.
On your backend, encrypt each identifier value with your Preference Store encryption key, put the encrypted values in the JWT payload, then sign the JWT with your signing key. Prefer the identifiers payload shape below. The legacy single encryptedIdentifier shape is still accepted but deprecated. Encryption and signing keys can be found in the Admin Dashboard. More info about these keys can be found here.
The encryption algorithm is AES-KWP. The signing algorithm is HMAC-SHA-384.
In addition to identifiers, you may include a creation or expiry date on the token's payload (see examples below). Ultimately this JWT can be stored locally on the user's device, and we recommend creating a new one for each logged-in session. Note: some libraries (ex. JWT in TypeScript) will automatically insert an issue time (iat) on your payload.
Normalize before encryption. Lowercase emails (and otherwise normalize identifiers) on your backend before AES-KWP encryption. Transcend never sees decrypted values and does not validate identifiers.
Encrypt, then sign. Encrypt each
identifiers[].valuewith the Preference Store encryption key (AES-KWP, base64). Then put those encrypted values in the JWT payload and sign with the JWT signing key (HS384). Never put plaintext identifier values in the JWT.Match your organization identifier setup. Each
namemust match an identifier configured for your organization in the Admin Dashboard (for examplephone, or a custom identifier). Do not invent names that are not set up on the organization.
Recommended JWT payload shape (after each value is AES-KWP encrypted). Use identifier names that match your organization setup. At least one identifier must be unique for the partition:
{
  "identifiers": [
    {
      "name": "email",
      "value": "<AES-KWP encrypted value>"
    }
  ]
}import * as crypto from 'crypto';
import * as jwt from 'jsonwebtoken';
type ConsentIdentifier = {
name: string;
value: string;
};
function createConsentToken(
identifiers: ConsentIdentifier[],
base64EncryptionKey: string,
base64SigningKey: string,
): string {
// Read on for where to find these keys
const signingKey = Buffer.from(base64SigningKey, 'base64');
const encryptionKey = Buffer.from(base64EncryptionKey, 'base64');
// NIST's AES-KWP implementation { aes 48 } - see https://tools.ietf.org/html/rfc5649
const encryptionAlgorithm = 'id-aes256-wrap-pad';
// Initial Value for AES-KWP integrity check - see https://tools.ietf.org/html/rfc5649#section-3
const iv = Buffer.from('A65959A6', 'hex');
// 1) Normalize + encrypt EACH identifier value with the encryption key
const encryptedIdentifiers = identifiers.map(({ name, value }) => {
const normalized = name === 'email' ? value.toLowerCase() : value;
const cipher = crypto.createCipheriv(
encryptionAlgorithm,
encryptionKey,
iv,
);
const encryptedValue = Buffer.concat([
cipher.update(normalized, 'utf8'),
cipher.final(),
]).toString('base64');
return { name, value: encryptedValue };
});
// 2) Put encrypted values in the JWT payload, then sign with the signing key
// jwt.sign will add an 'iat' (issued at) field to the payload
const jwtPayload = {
identifiers: encryptedIdentifiers,
};
return jwt.sign(jwtPayload, signingKey, {
algorithm: 'HS384',
});
}
// Example:
// createConsentToken(
// [{ name: 'email', value: 'User@Example.com' }],
// base64EncryptionKey,
// base64SigningKey,
// );N.B. pip install cryptography pyjwt
import base64
import jwt
from cryptography.hazmat.primitives.keywrap import aes_key_wrap_with_padding
from datetime import datetime

def create_consent_token(
    identifiers: list[dict[str, str]],
    base64_encryption_key: str,
    base64_signing_key: str,
) -> str:
    # Read on for where to find these keys
    encryption_key = base64.b64decode(base64_encryption_key)
    signing_key = base64.b64decode(base64_signing_key)

    # 1) Normalize + encrypt EACH identifier value with the encryption key
    encrypted_identifiers = []
    for identifier in identifiers:
        name = identifier["name"]
        value = identifier["value"]
        normalized = value.lower() if name == "email" else value
        encrypted_value = aes_key_wrap_with_padding(
            encryption_key, str.encode(normalized)
        )
        encrypted_identifiers.append(
            {
                "name": name,
                "value": base64.b64encode(encrypted_value).decode(),
            }
        )

    # 2) Put encrypted values in the JWT payload, then sign with the signing key
    jwt_payload = {
        "identifiers": encrypted_identifiers,
        "iat": datetime.now(),
    }

return jwt.encode(jwt_payload, signing_key, algorithm="HS384")Deprecated. Existing integrations may still mint JWTs with a single
encryptedIdentifierfield. Prefer migrating toidentifiersname/value pairs. The flow is the same conceptually: encrypt the identifier value with the encryption key, then sign the JWT with the signing key.
import * as crypto from 'crypto';
import * as jwt from 'jsonwebtoken';

function createConsentToken(
  userId: string,
  base64EncryptionKey: string,
  base64SigningKey: string,
): string {
  // Read on for where to find these keys
  const signingKey = Buffer.from(base64SigningKey, 'base64');
  const encryptionKey = Buffer.from(base64EncryptionKey, 'base64');

  // NIST's AES-KWP implementation { aes 48 } - see https://tools.ietf.org/html/rfc5649
  const encryptionAlgorithm = 'id-aes256-wrap-pad';
  // Initial Value for AES-KWP integrity check - see https://tools.ietf.org/html/rfc5649#section-3
  const iv = Buffer.from('A65959A6', 'hex');
  // Set up encryption algorithm
  const cipher = crypto.createCipheriv(encryptionAlgorithm, encryptionKey, iv);

  // Set an issued date for the token
  const issued: Date = new Date();

  // Encrypt the userId and base64-encode the result
  const encryptedIdentifier = Buffer.concat([
    cipher.update(userId),
    cipher.final(),
  ]).toString('base64');

  // Create the JWT content - jwt.sign will add a 'iat' (issued at) field to the payload
  // If you wanted to add something manually, consider
  // const issued: Date = new Date();
  // const isoDate = issued.toISOString();
  const jwtPayload = {
    encryptedIdentifier,
  };

  // Create a JSON web token and HMAC it with SHA-384
  const consentToken = jwt.sign(jwtPayload, signingKey, {
    algorithm: 'HS384',
  });

  return consentToken;
}Notes:
- PyJWT has namespace conflicts with JWT.
- Avoid naming your scripts the same name as a library (for ex
jwt.py).
N.B. pip install cryptography pyjwt
import base64
import jwt
from cryptography.hazmat.primitives.keywrap import aes_key_wrap_with_padding
from datetime import datetime

def create_consent_token(user_id: str, base64_encryption_key: str, base64_signing_key: str) -> str:
    # Read on for where to find these keys
    encryption_key = base64.b64decode(base64_encryption_key)
    signing_key = base64.b64decode(base64_signing_key)

    # encode user_id as bytes
    user_id_bytes = str.encode(user_id)

    # NIST's AES-KWP implementation { aes 48 } - see https://tools.ietf.org/html/rfc5649
    encrypted_identifier = aes_key_wrap_with_padding(encryption_key, user_id_bytes)

    # base64-encode the result
    base64_encrypted_identifier = base64.b64encode(encrypted_identifier)

    # Create the JWT content
    jwt_payload = { 'encryptedIdentifier': base64_encrypted_identifier.decode(),
                    'iat': datetime.now()}

    # Create a JSON web token and HMAC it with SHA-384
    consent_token = jwt.encode(jwt_payload, signing_key, algorithm="HS384")

return consent_tokenIf you encounter errors using your token, you may need to verify that the token was generated correctly. Grab your token plus the encryption and signing keys from the Admin Dashboard. The sample below verifies the preferred identifiers shape (decrypting each encrypted value). Legacy tokens that only include encryptedIdentifier can be unwrapped the same way from that single field.
import * as jwt from 'jsonwebtoken';
import * as crypto from 'node:crypto';

function parseConsentToken(
  token: string,
  base64EncryptionKey: string,
  base64SigningKey: string,
): Array<{ name: string; value: string }> {
  // Decode keys
  const signingKey = Buffer.from(base64SigningKey, 'base64');
  const encryptionKey = Buffer.from(base64EncryptionKey, 'base64');

  // 1) Verify JWT + extract payload
  const payload = jwt.verify(token, signingKey, {
    algorithms: ['HS384'],
  }) as {
    identifiers?: Array<{ name: string; value: string }>;
    encryptedIdentifier?: string;
  };

  // NIST AES Key Wrap with Padding (RFC 5649)
  const encryptionAlgorithm = 'id-aes256-wrap-pad';
  const iv = Buffer.from('A65959A6', 'hex');

  const decrypt = (encryptedValue: string): string => {
    const encryptedBytes = Buffer.from(encryptedValue, 'base64');
    const decipher = crypto.createDecipheriv(
      encryptionAlgorithm,
      encryptionKey,
      iv,
    );
    return Buffer.concat([
      decipher.update(encryptedBytes),
      decipher.final(),
    ]).toString('utf8');
  };

  // Preferred: decrypt each identifiers[].value
  if (payload.identifiers?.length) {
    return payload.identifiers.map(({ name, value }) => ({
      name,
      value: decrypt(value),
    }));
  }

  // Deprecated: single encryptedIdentifier
  if (payload.encryptedIdentifier) {
    return [{ name: 'legacy', value: decrypt(payload.encryptedIdentifier) }];
  }

  throw new Error('Token payload missing identifiers or encryptedIdentifier');
}Your server will generate the token and return it to the frontend (likely as part of the response payload for the login flow):
// When a user has authenticated
const consentToken = createConsentToken(
  userId,
  base64EncryptionKey,
  base64SigningKey
);

return {
  status: 200,
  body: {
    user: authenticatedUserData,
    consentToken,
  }
}
On the frontend, you will then pass this token to Transcend:
// Authenticate the user to airgap, and sync their consent with Transcend Preference Management
airgap.sync({ auth: consentToken });The process for obtaining the encryptionKey and signingKey depends on whether you're using Transcend-hosted or self-hosted Sombra.
If you're using Transcend-hosted Sombra, the keys can be retrieved from the Admin Dashboard, under the "Developer Settings" section on the Preferences page.
- Toggle "on" the Preference Store feature
- Click on View Encryption Key to see the
encryptionKeyin the code example above. Save the contents somewhere safe! - Click on View JWT Signing Key to see the
signingKeyin the code example above. Again, please save the contents somewhere safe!
If you're self-hosting Sombra, you need to generate your own encryption keys:
Generate the encryption key:
ENCRYPTION_KEY=$(openssl rand -base64 32)
echo "Use this as your encryptionKey: $ENCRYPTION_KEY"
Generate the JWT signing key:
JWT_SIGNING_KEY=$(openssl rand -base64 32)
echo "Use this as your signingKey: $JWT_SIGNING_KEY"
Alternative generation methods: While we recommend OpenSSL for consistency with other Transcend documentation, you can generate these keys using any method that produces cryptographically secure base64-encoded 32-byte keys.
Important for self-hosted Sombra:
- You must configure the
CONSENT_IDENTIFIER_ENCRYPTION_KEYenvironment variable in your Sombra deployment using the same value as yourencryptionKey - Keep both keys secure and backed up, as losing them will make existing consent preferences unreadable
- Use the same keys consistently across all your Sombra instances
For detailed instructions on configuring these environment variables, see the Sombra Environment Variables documentation.
- Make sure Reporting Only mode is off
- Your domain is included in the Domains List (e.g.
localhost:3033if you're using the backend-consent-example) - Navigate to Regional Experiences and make sure that you are in a region with an experience defined. (e.g. if you are in New York, set an experience using either the region of New York or the New York time zone (or both) and add a purpose (e.g. Advertising) to it.)
- If you haven't already, copy the HTML Snippet into the page you want to test this on (using the Test bundle)
Now that you've collected the user consent from the web, you may need to look up their consent record as part of executing backend data processes. This can be easily done using our Sombra™ API.
Endpoint reference: Query User Consent
Your backend server may need to gate tracking/data-processing logic based on the user consent preferences. An example of how to do so for user with email foo@example.com:
const request = require('request');

const PARTITION = 'ee1a0845-694e-4820-9d51-50c7d0a23467'; // Admin Dashboard > Consent > Developer Settings

const result = request.post(
  `{{yourOrganizationSombraURL}}/v1/preferences/${PARTITION}/query`,
  {
    headers: {
      // use the scope for viewing Preference Store / Managed Consent Database Admin API
      authorization: 'Bearer {{apiKey}}',
      // only required for single-tenant Sombra
      'x-sombra-authorization': 'Bearer {{sombraApiKey}}',
      'content-type': 'application/json',
    },
    body: {
      filter: {
        identifiers: [
          { name: 'email', value: 'foo@example.com' },
        ],
      },
    },
    json: true,
  },
);

const consentPreference = result.nodes[0];

// May be undefined/empty list if the user has never given consent
const isPurposeEnabled = (record, purpose) =>
  record?.purposes?.find((entry) => entry.purpose === purpose)?.enabled;

if (isPurposeEnabled(consentPreference, 'Advertising')) {
  // The user has given consent to Advertising, perform some custom logic...
}

if (isPurposeEnabled(consentPreference, 'Functional') !== false) {
  // The user has NOT explicitly opted out of Functional tracking purpose, perform some custom logic...
}A common scenario: your company uploads a list of users to Facebook once a week, and you need to filter this list to exclude users who have opted out of targeted advertising. Here's an example of how you might do so:
const request = require('request');

const PARTITION = 'ee1a0845-694e-4820-9d51-50c7d0a23467'; // Admin Dashboard > Consent > Developer Settings

const { nodes: userConsentPreferences } = request.post(
  `{{yourOrganizationSombraURL}}/v1/preferences/${PARTITION}/query`,
  {
    headers: {
      // use the scope for viewing Preference Store / Managed Consent Database Admin API
      authorization: 'Bearer {{apiKey}}',
      'x-sombra-authorization': 'Bearer {{sombraApiKey}}',
      'content-type': 'application/json',
    },
    body: {
      filter: {
        identifiers: userIdentifiers.map((value) => ({
          name: 'email',
          value,
        })),
      },
    },
    json: true,
  },
);

const isPurposeEnabled = (record, purpose) =>
  record?.purposes?.find((entry) => entry.purpose === purpose)?.enabled;

const usersToUpload = userIdentifiers.filter((identifier) => {
  const record = userConsentPreferences.find((data) =>
    data.identifiers?.some(
      (entry) => entry.name === 'email' && entry.value === identifier,
    ),
  );

  // Make sure the user has not explicitly opted out.
  // You may also require explicit opt-in instead.
  return (
    isPurposeEnabled(record, 'Advertising') !== false &&
    isPurposeEnabled(record, 'SaleOfInfo') !== false
  );
});

// Now you can safely upload `usersToUpload`Use timestampAfter and timestampBefore to find preference records based on when the user set their consent (the preference timestamp field). This is different from filter.system.updatedAfter / updatedBefore, which filter on when the database record was last updated. You cannot combine identifier filters with timestamp filters in the same query.
const request = require('request');

const PARTITION = 'ee1a0845-694e-4820-9d51-50c7d0a23467'; // Admin Dashboard > Consent > Developer Settings

const timestampBefore = new Date().toISOString();
const timestampAfter = new Date(
  Date.now() - 1 * 24 * 60 * 60 * 1000,
).toISOString();

const { nodes: consentPreferences } = request.post(
  `{{yourOrganizationSombraURL}}/v1/preferences/${PARTITION}/query`,
  {
    headers: {
      // use the scope for viewing Preference Store / Managed Consent Database Admin API
      authorization: 'Bearer {{apiKey}}',
      'x-sombra-authorization': 'Bearer {{sombraApiKey}}',
      'content-type': 'application/json',
    },
    body: {
      // Preferences whose consent timestamp falls in the last 24 hours
      filter: {
        timestampAfter,
        timestampBefore,
      },
      limit: 50,
    },
    json: true,
  },
);

// Process records collected in that window
for (const record of consentPreferences) {
  // record.timestamp — when the user set this preference
  // record.identifiers, record.purposes, ...
}To walk every preference record whose system metadata was updated in a window (for daily sync jobs), use filter.system.updatedAfter / updatedBefore with cursor pagination:
const request = require('request');

const PARTITION = 'ee1a0845-694e-4820-9d51-50c7d0a23467'; // Admin Dashboard > Consent > Developer Settings

async function paginateThroughConsentPreferences() {
  let cursor = undefined;
  const data = [];

  while (true) {
    const { nodes, cursor: nextCursor } = await request.post(
      `{{yourOrganizationSombraURL}}/v1/preferences/${PARTITION}/query`,
      {
        headers: {
          // use the scope for viewing Preference Store / Managed Consent Database Admin API
          authorization: 'Bearer {{apiKey}}',
          'x-sombra-authorization': 'Bearer {{sombraApiKey}}',
          'content-type': 'application/json',
        },
        body: {
          // Preferences updated in the last 24 hours (system metadata timestamps)
          filter: {
            system: {
              updatedBefore: new Date().toISOString(),
              updatedAfter: new Date(
                Date.now() - 1 * 24 * 60 * 60 * 1000,
              ).toISOString(),
            },
          },
          limit: 50,
          // Pass the opaque cursor from the previous response to fetch the next page
          cursor,
        },
        json: true,
      },
    );

    if (!nodes || nodes.length === 0) {
      break;
    }

    data.push(...nodes);

    // If there is no cursor, we have reached the end of the data
    if (!nextCursor) {
      break;
    }

    cursor = nextCursor;
  }

  return data;
}

// Call the function to start paginating through the API data
const consentPreferences = await paginateThroughConsentPreferences();

// Now you can loop through user preferences and use the data to trigger any internal processes!