Double Opt-In Requests
Double opt-in is a two-step verification process that requires users to confirm their consent choices before they take effect. This approach:
- Provides stronger proof of consent by requiring users to verify their identity
- Ensures that the email address provided is valid and accessible by the user
- Creates an additional audit trail record for compliance purposes
- Helps meet regulatory requirements in regions like the EU
When you implement double opt-in with Transcend, the process works like this:
- A user initiates a preference change (such as subscribing to marketing communications)
- Instead of immediately applying the change, Transcend sends a verification email
- The user clicks the confirmation link in the email
- They are brought to a confirmation page in your Privacy Center
- Once confirmed, the preference is updated in the Preference Store and any connected systems
This guide will walk you through implementing double opt-in for preference changes using the Transcend API.
Before implementing double opt-in, you'll need to gather these key values:
The partition is the ID of the specific consent database you want to update. Most implementations use a single partition, but you might have multiple if you manage preferences separately for different brands or environments.
To find your partition value:
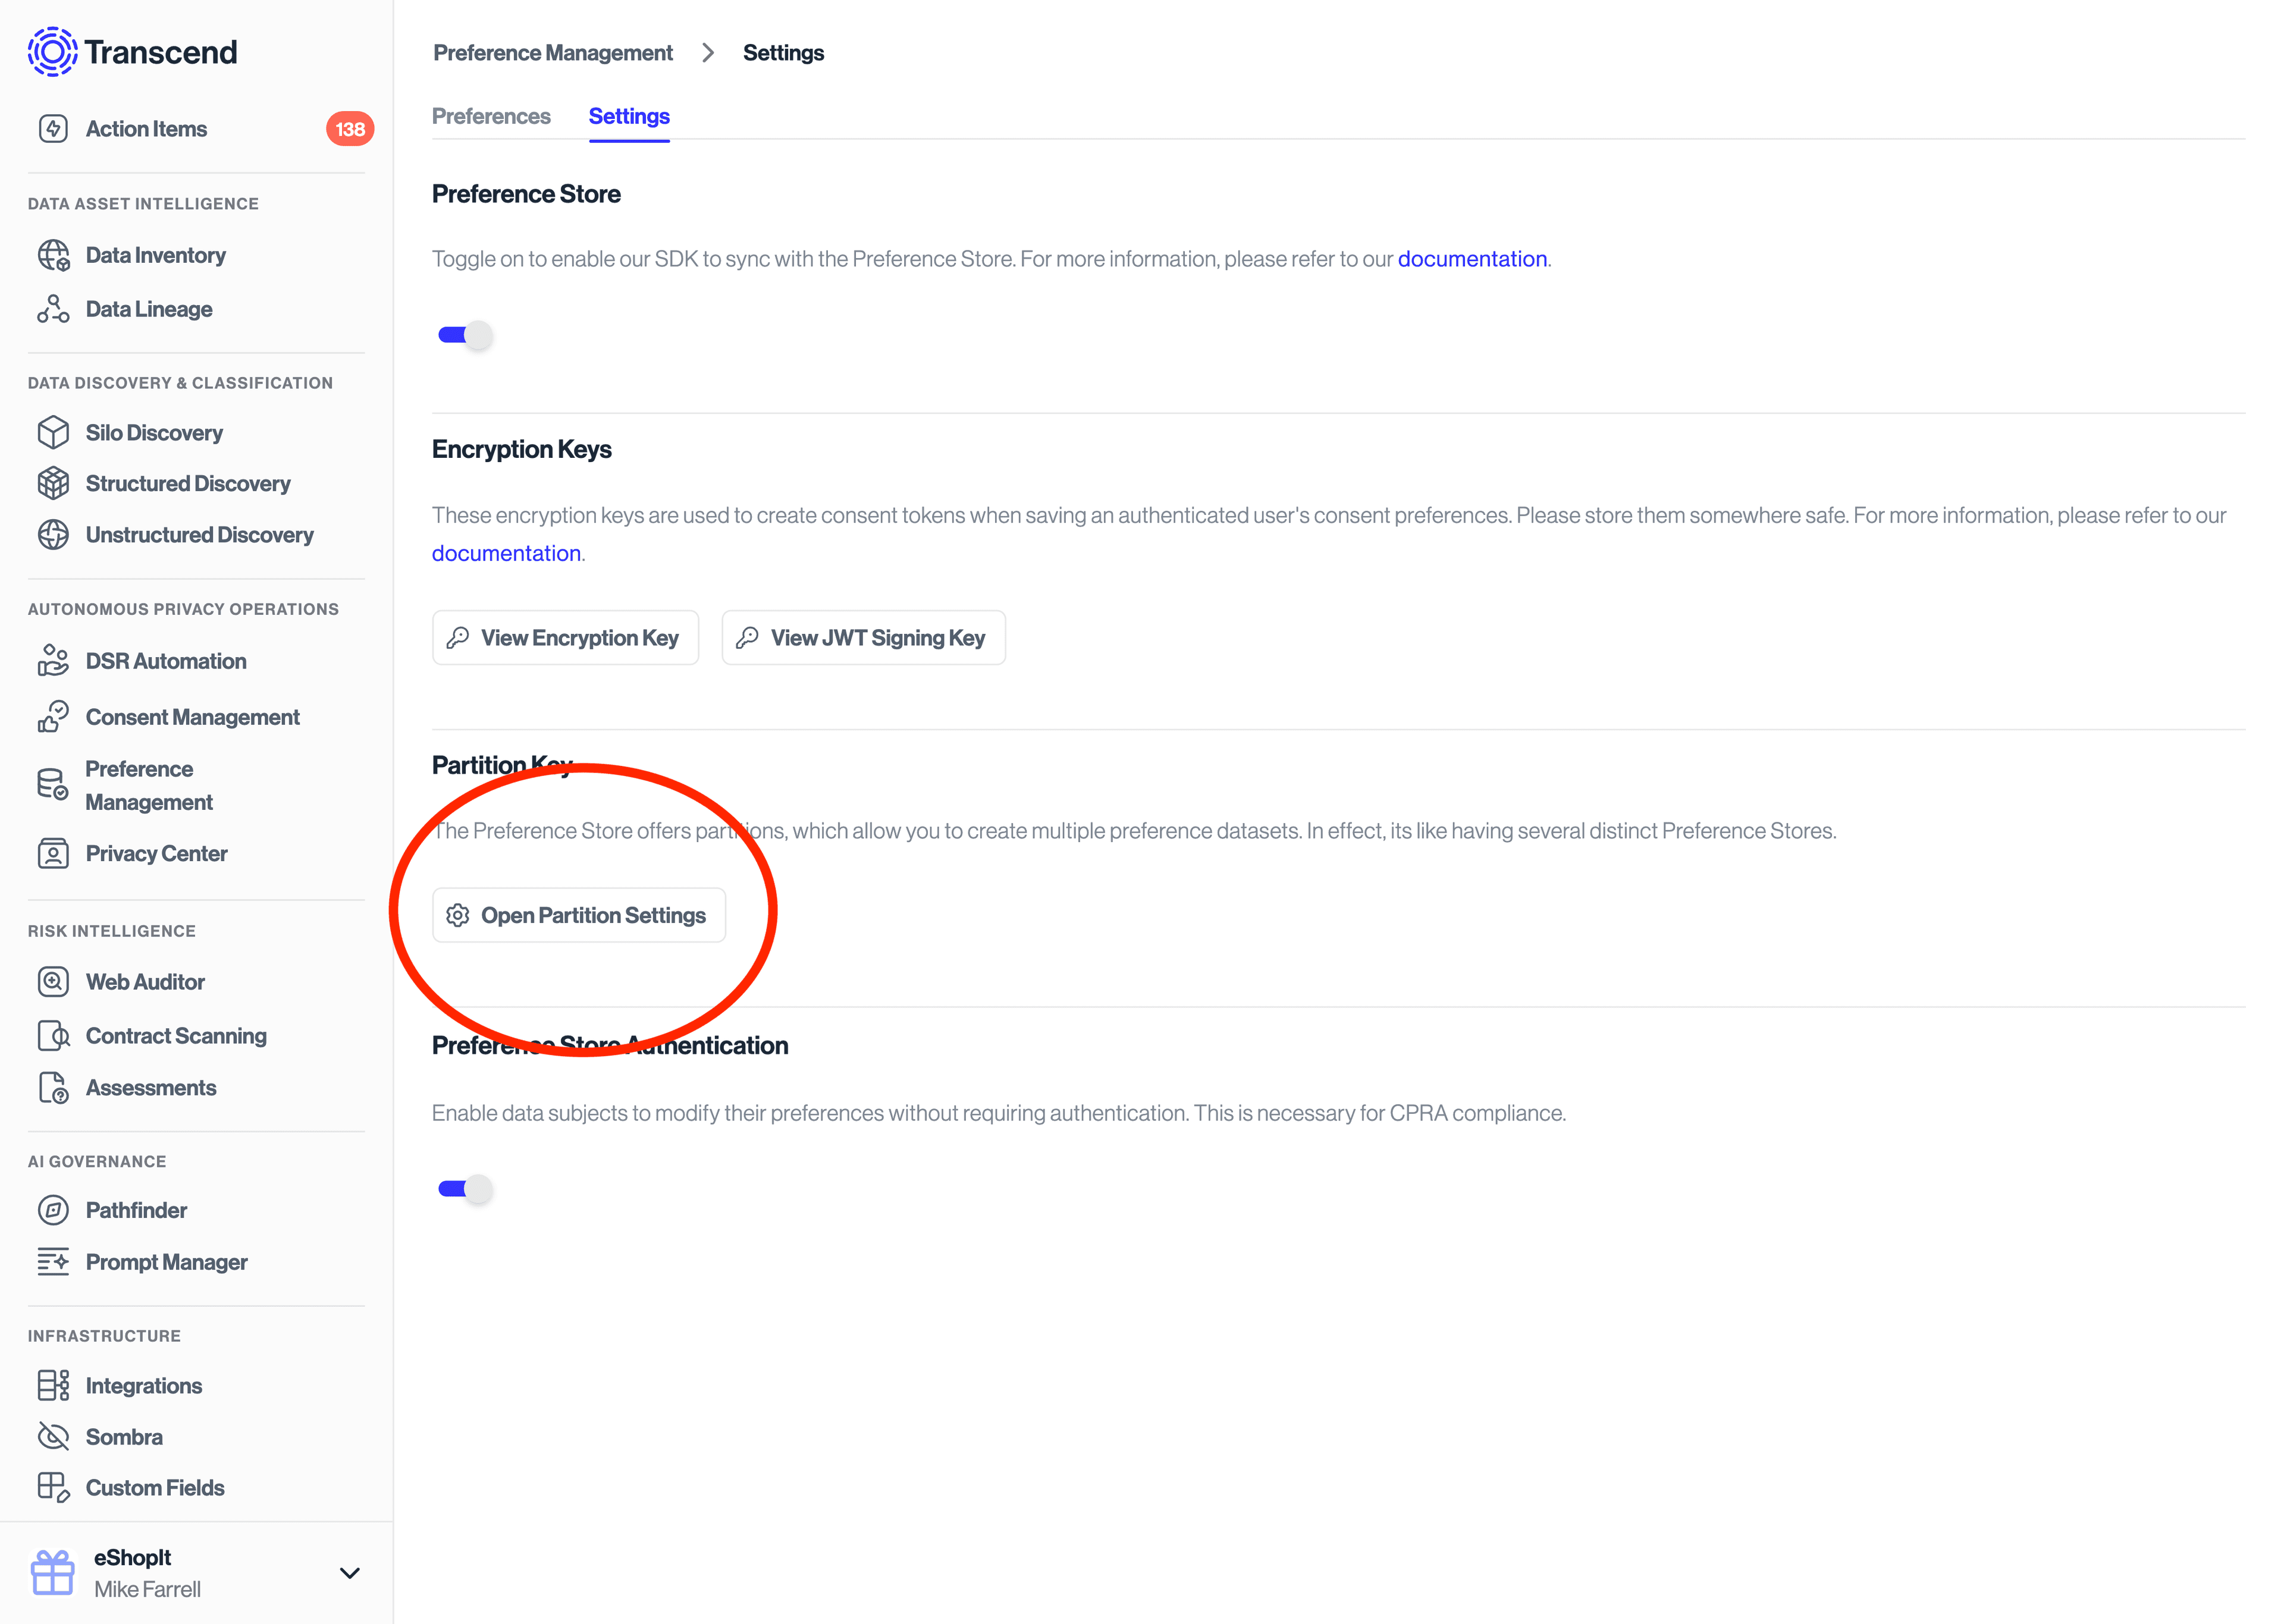
- Go to Preferences -> Developer Settings
- Ensure the Preference Store toggle is enabled
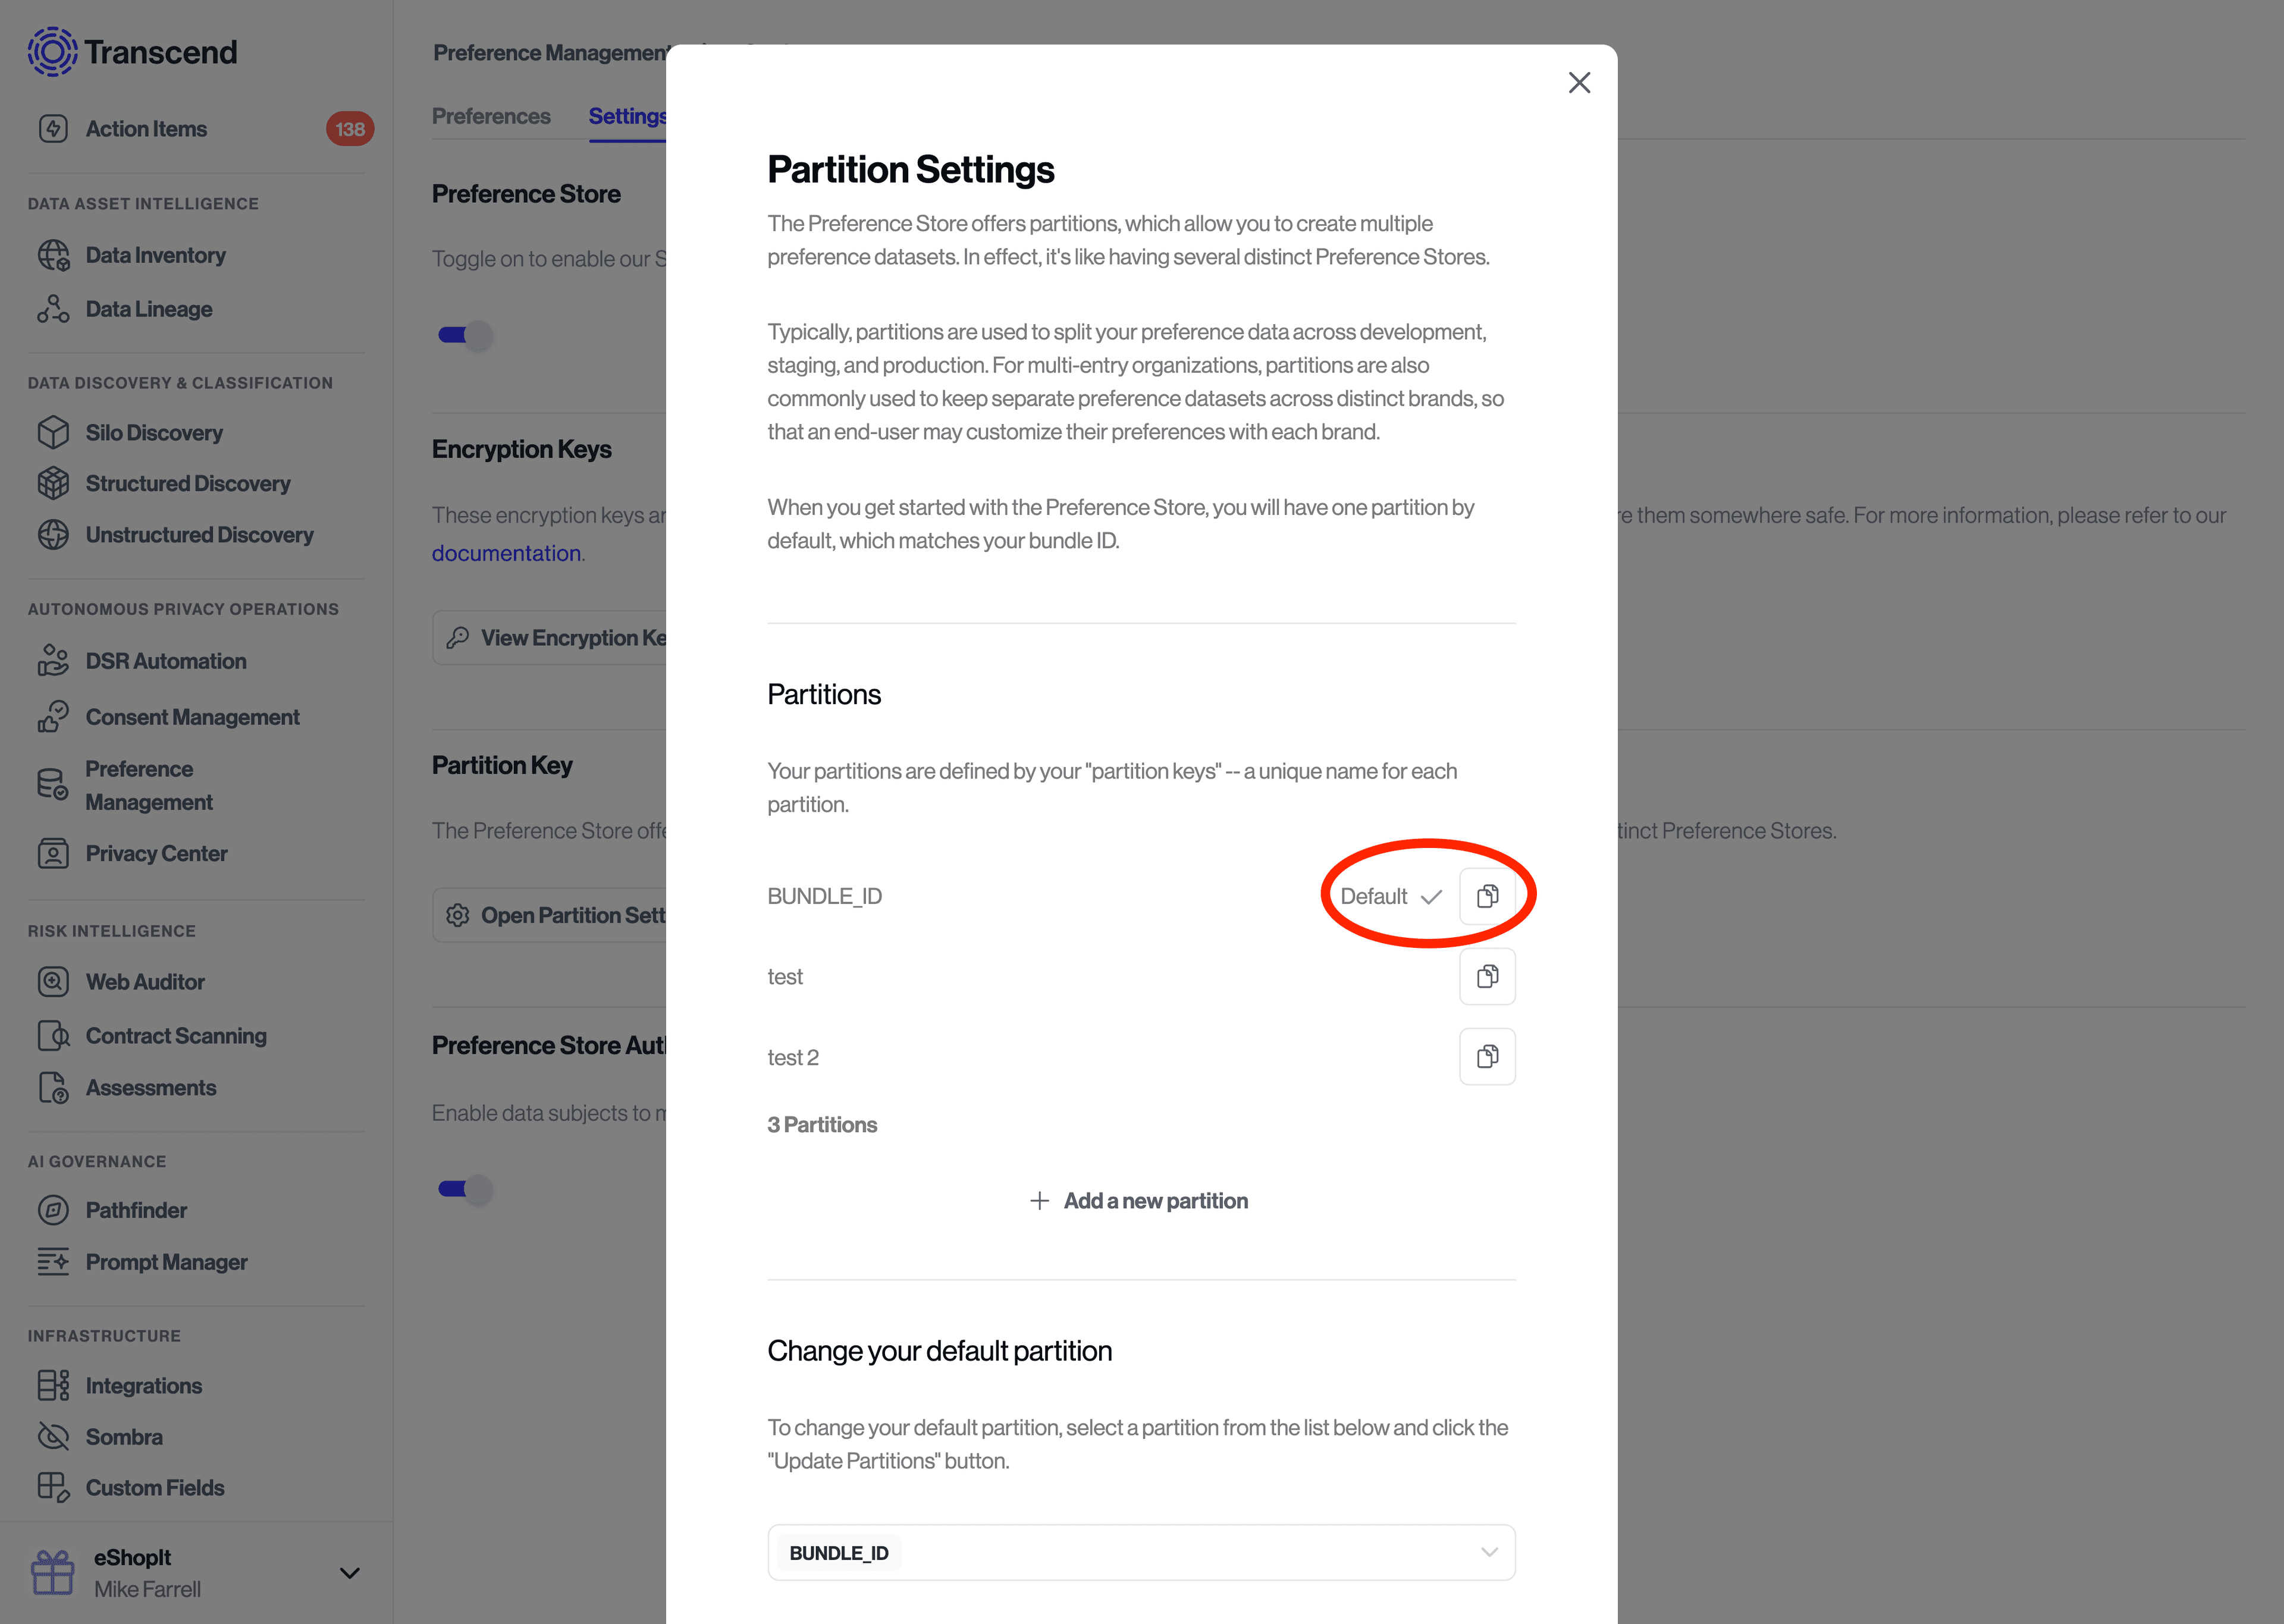
- Click the Open Partition Settings button
- Locate your desired partition and click the copy button
- The default partition is labeled
BUNDLE_ID- this is usually the one you'll want to use
- The default partition is labeled
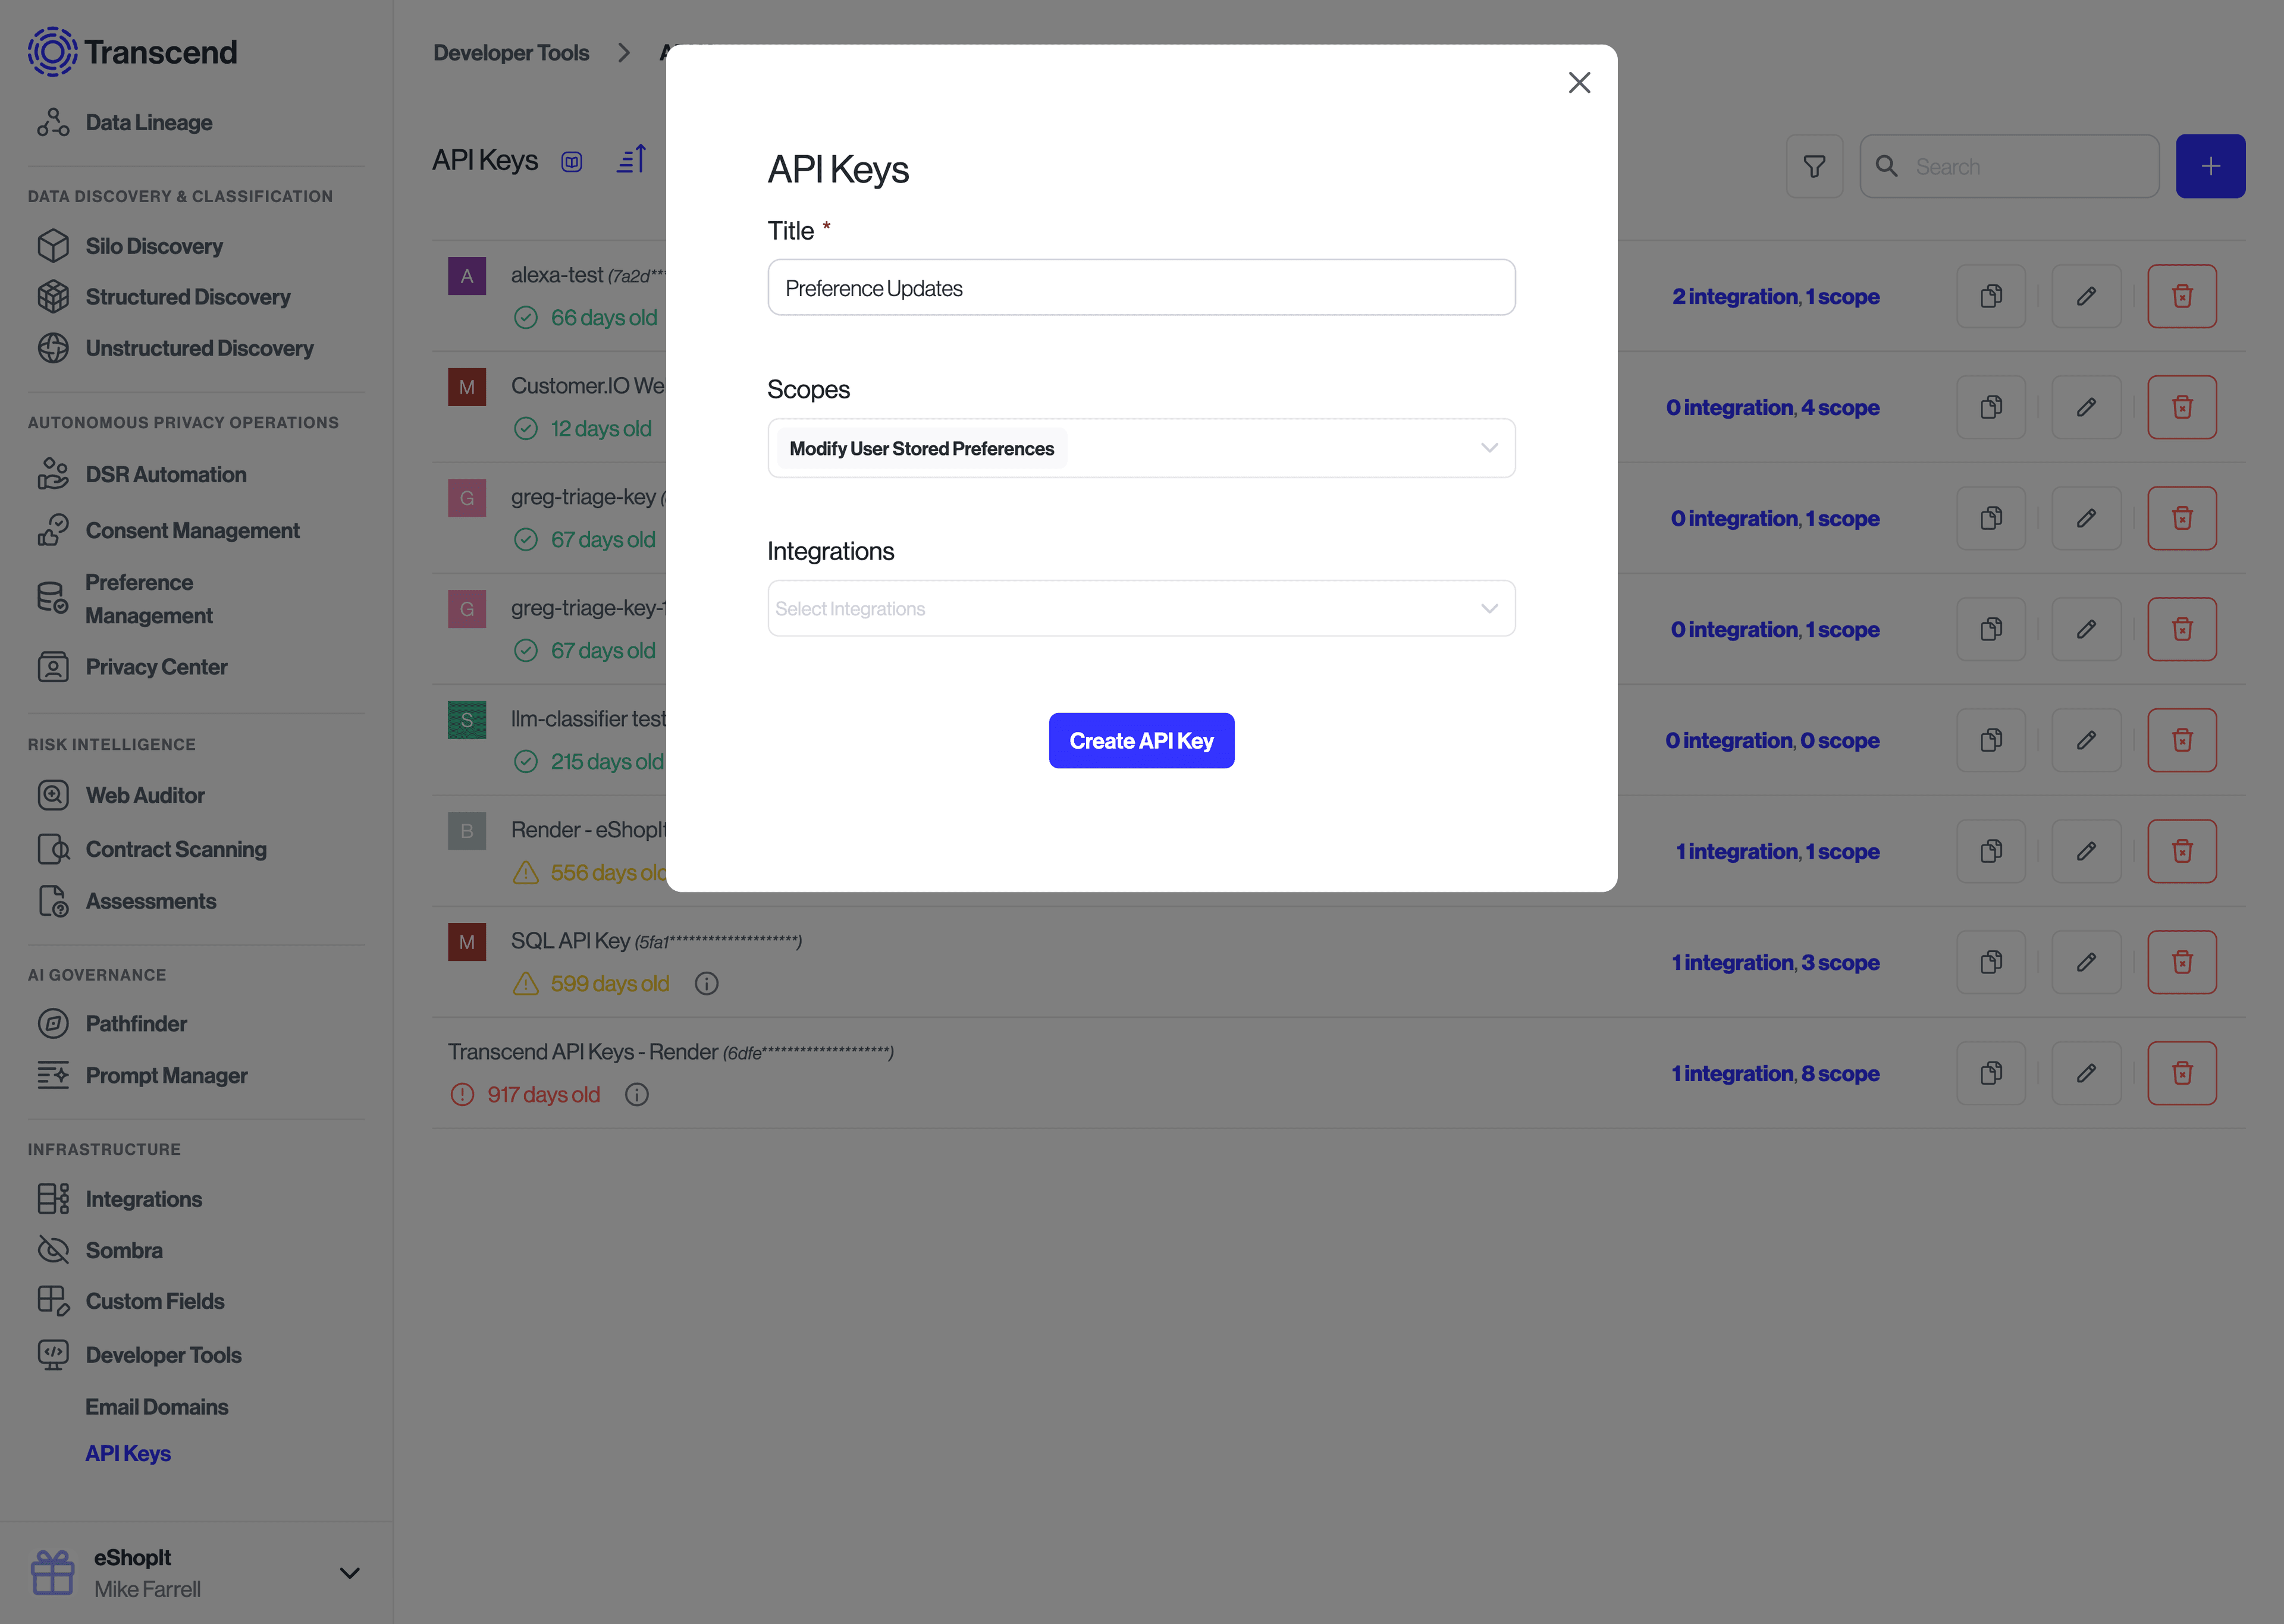
To create an API key, you will want to go to Developer Tools -> API Keys and create a new API key with the scope Modify User Stored Preferences.
Once created, you will only have one opportunity to save this API key. Please store the API key securely.
In order to perform a double opt-in, you will need to tag your consent changes with this custom field.
To begin:
- Go to Workspace Configuration -> Custom Fields
- Ensure that there is a custom field called
Double Opt-In. - If no field exists with that name, create a new custom field of type
Single Selectthat is enabled for theDSR Automation Inbox -> Requeststable.
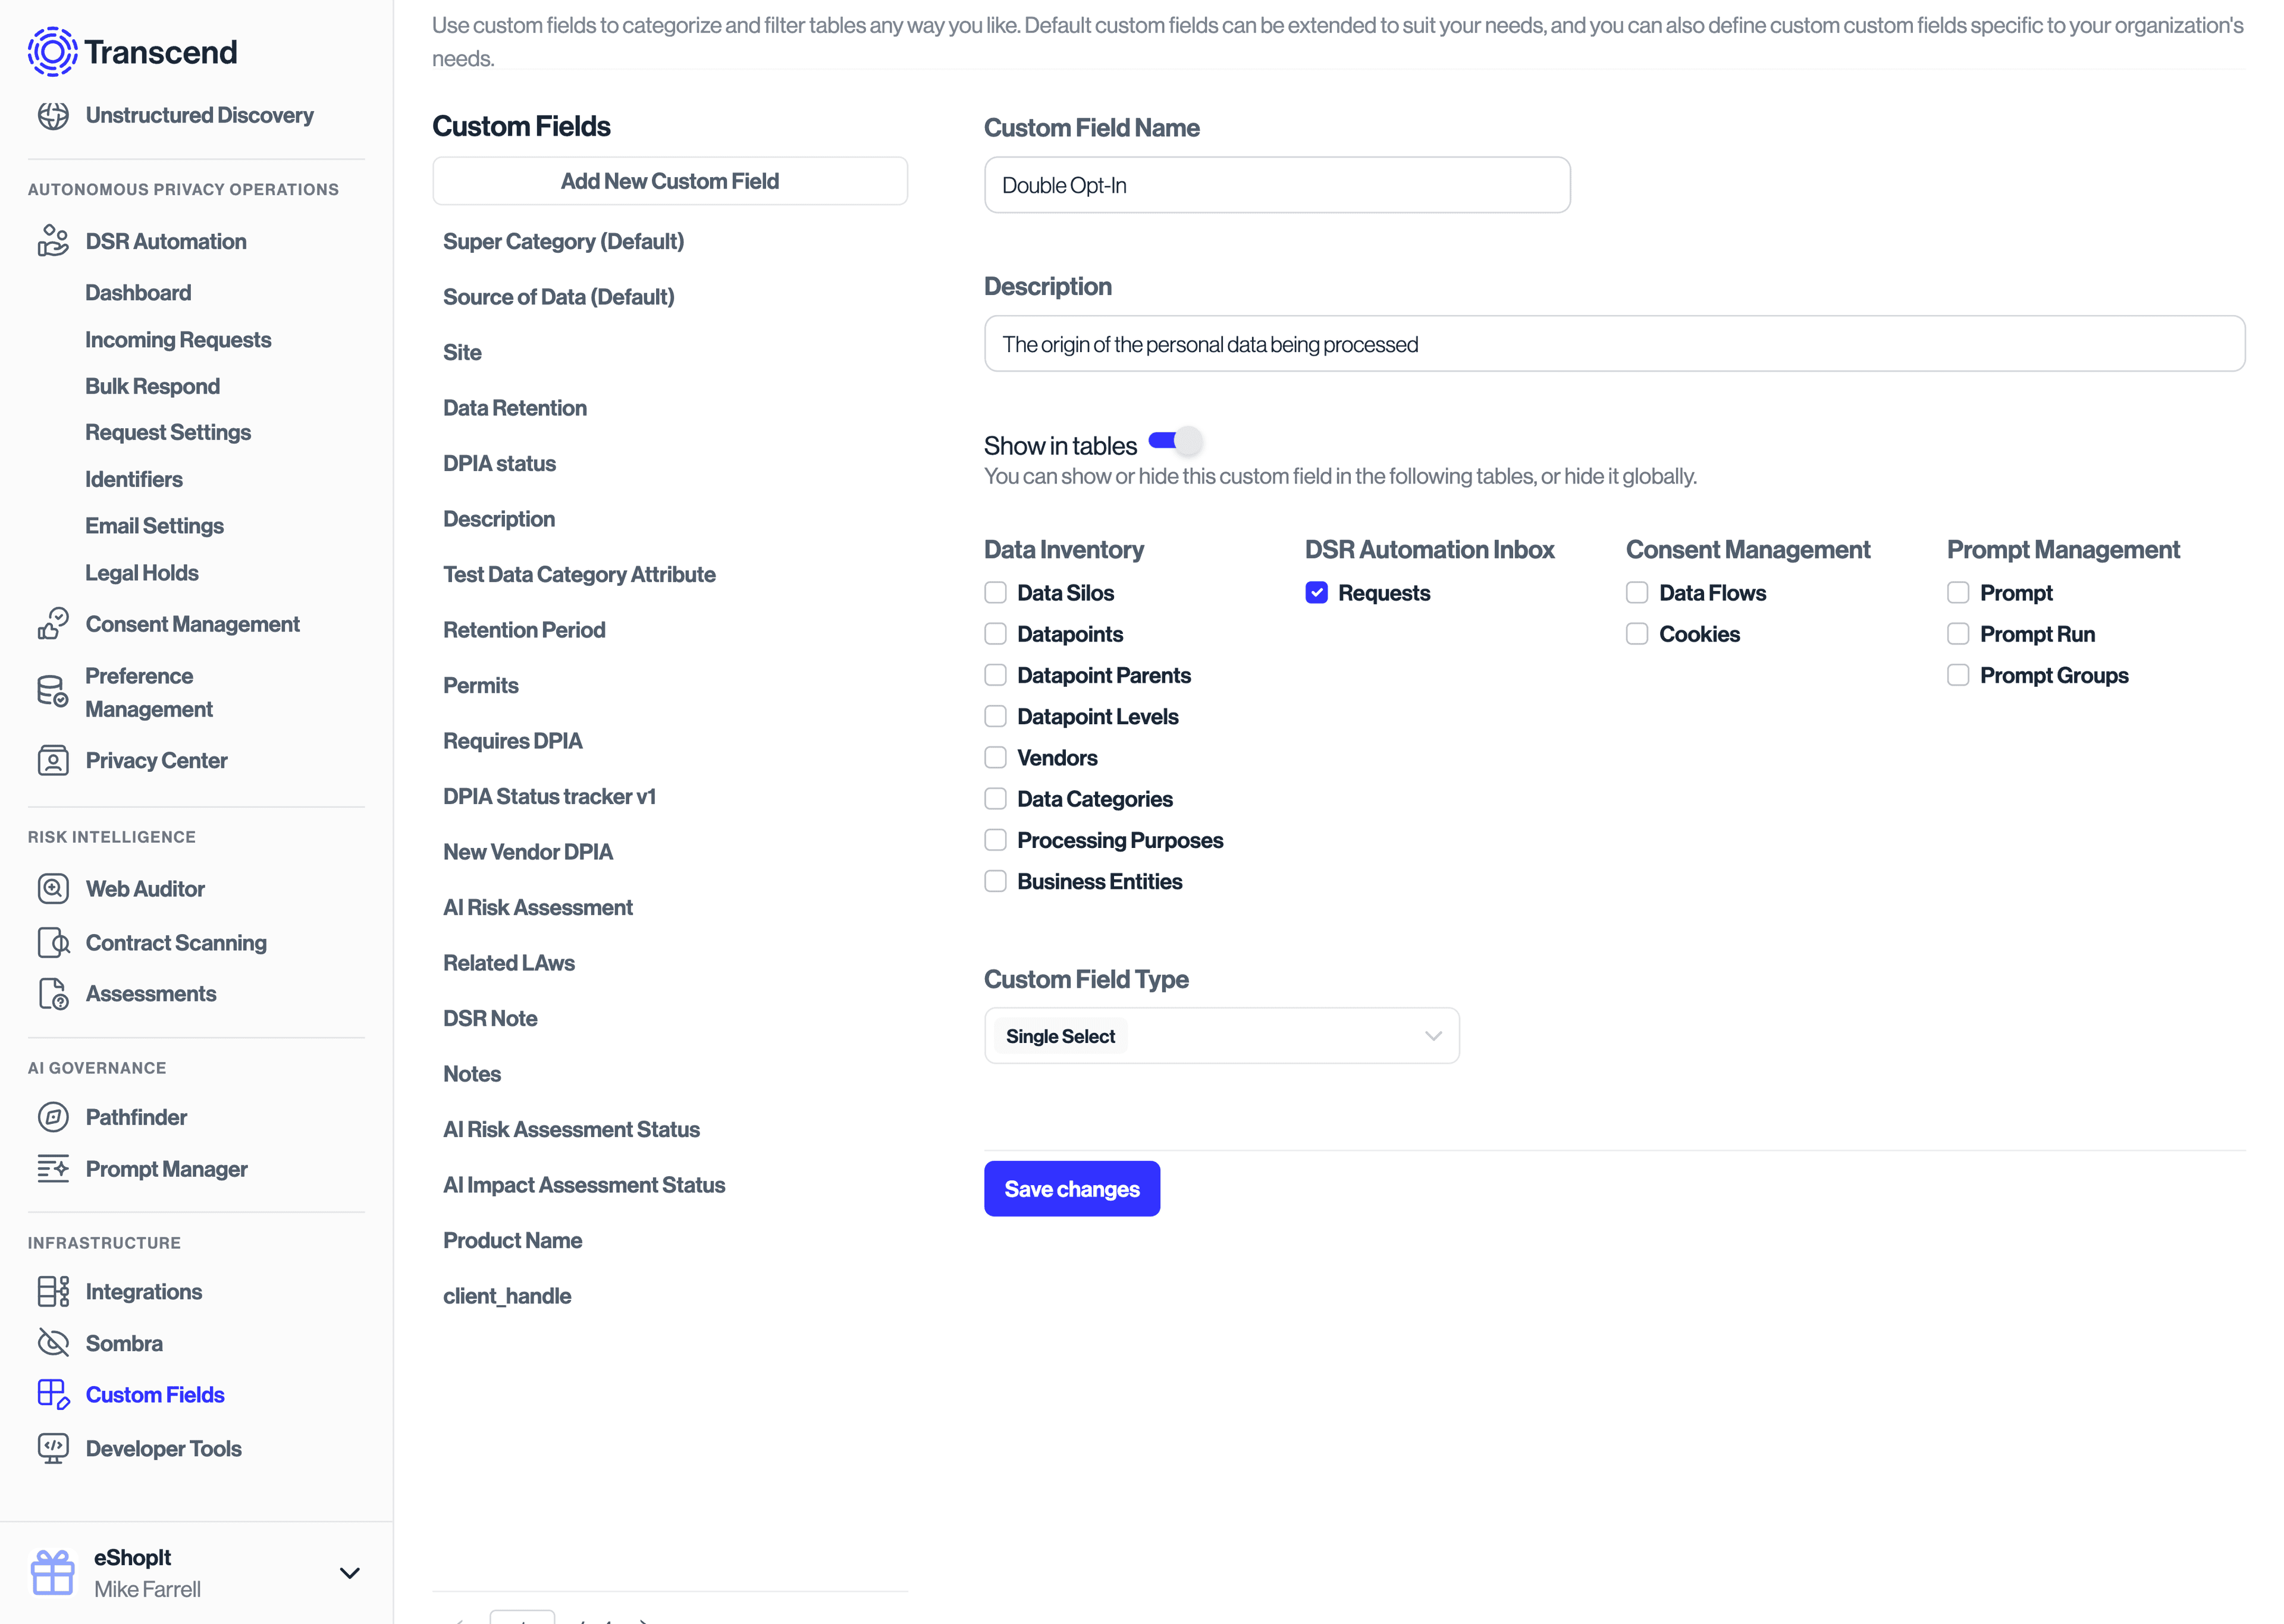
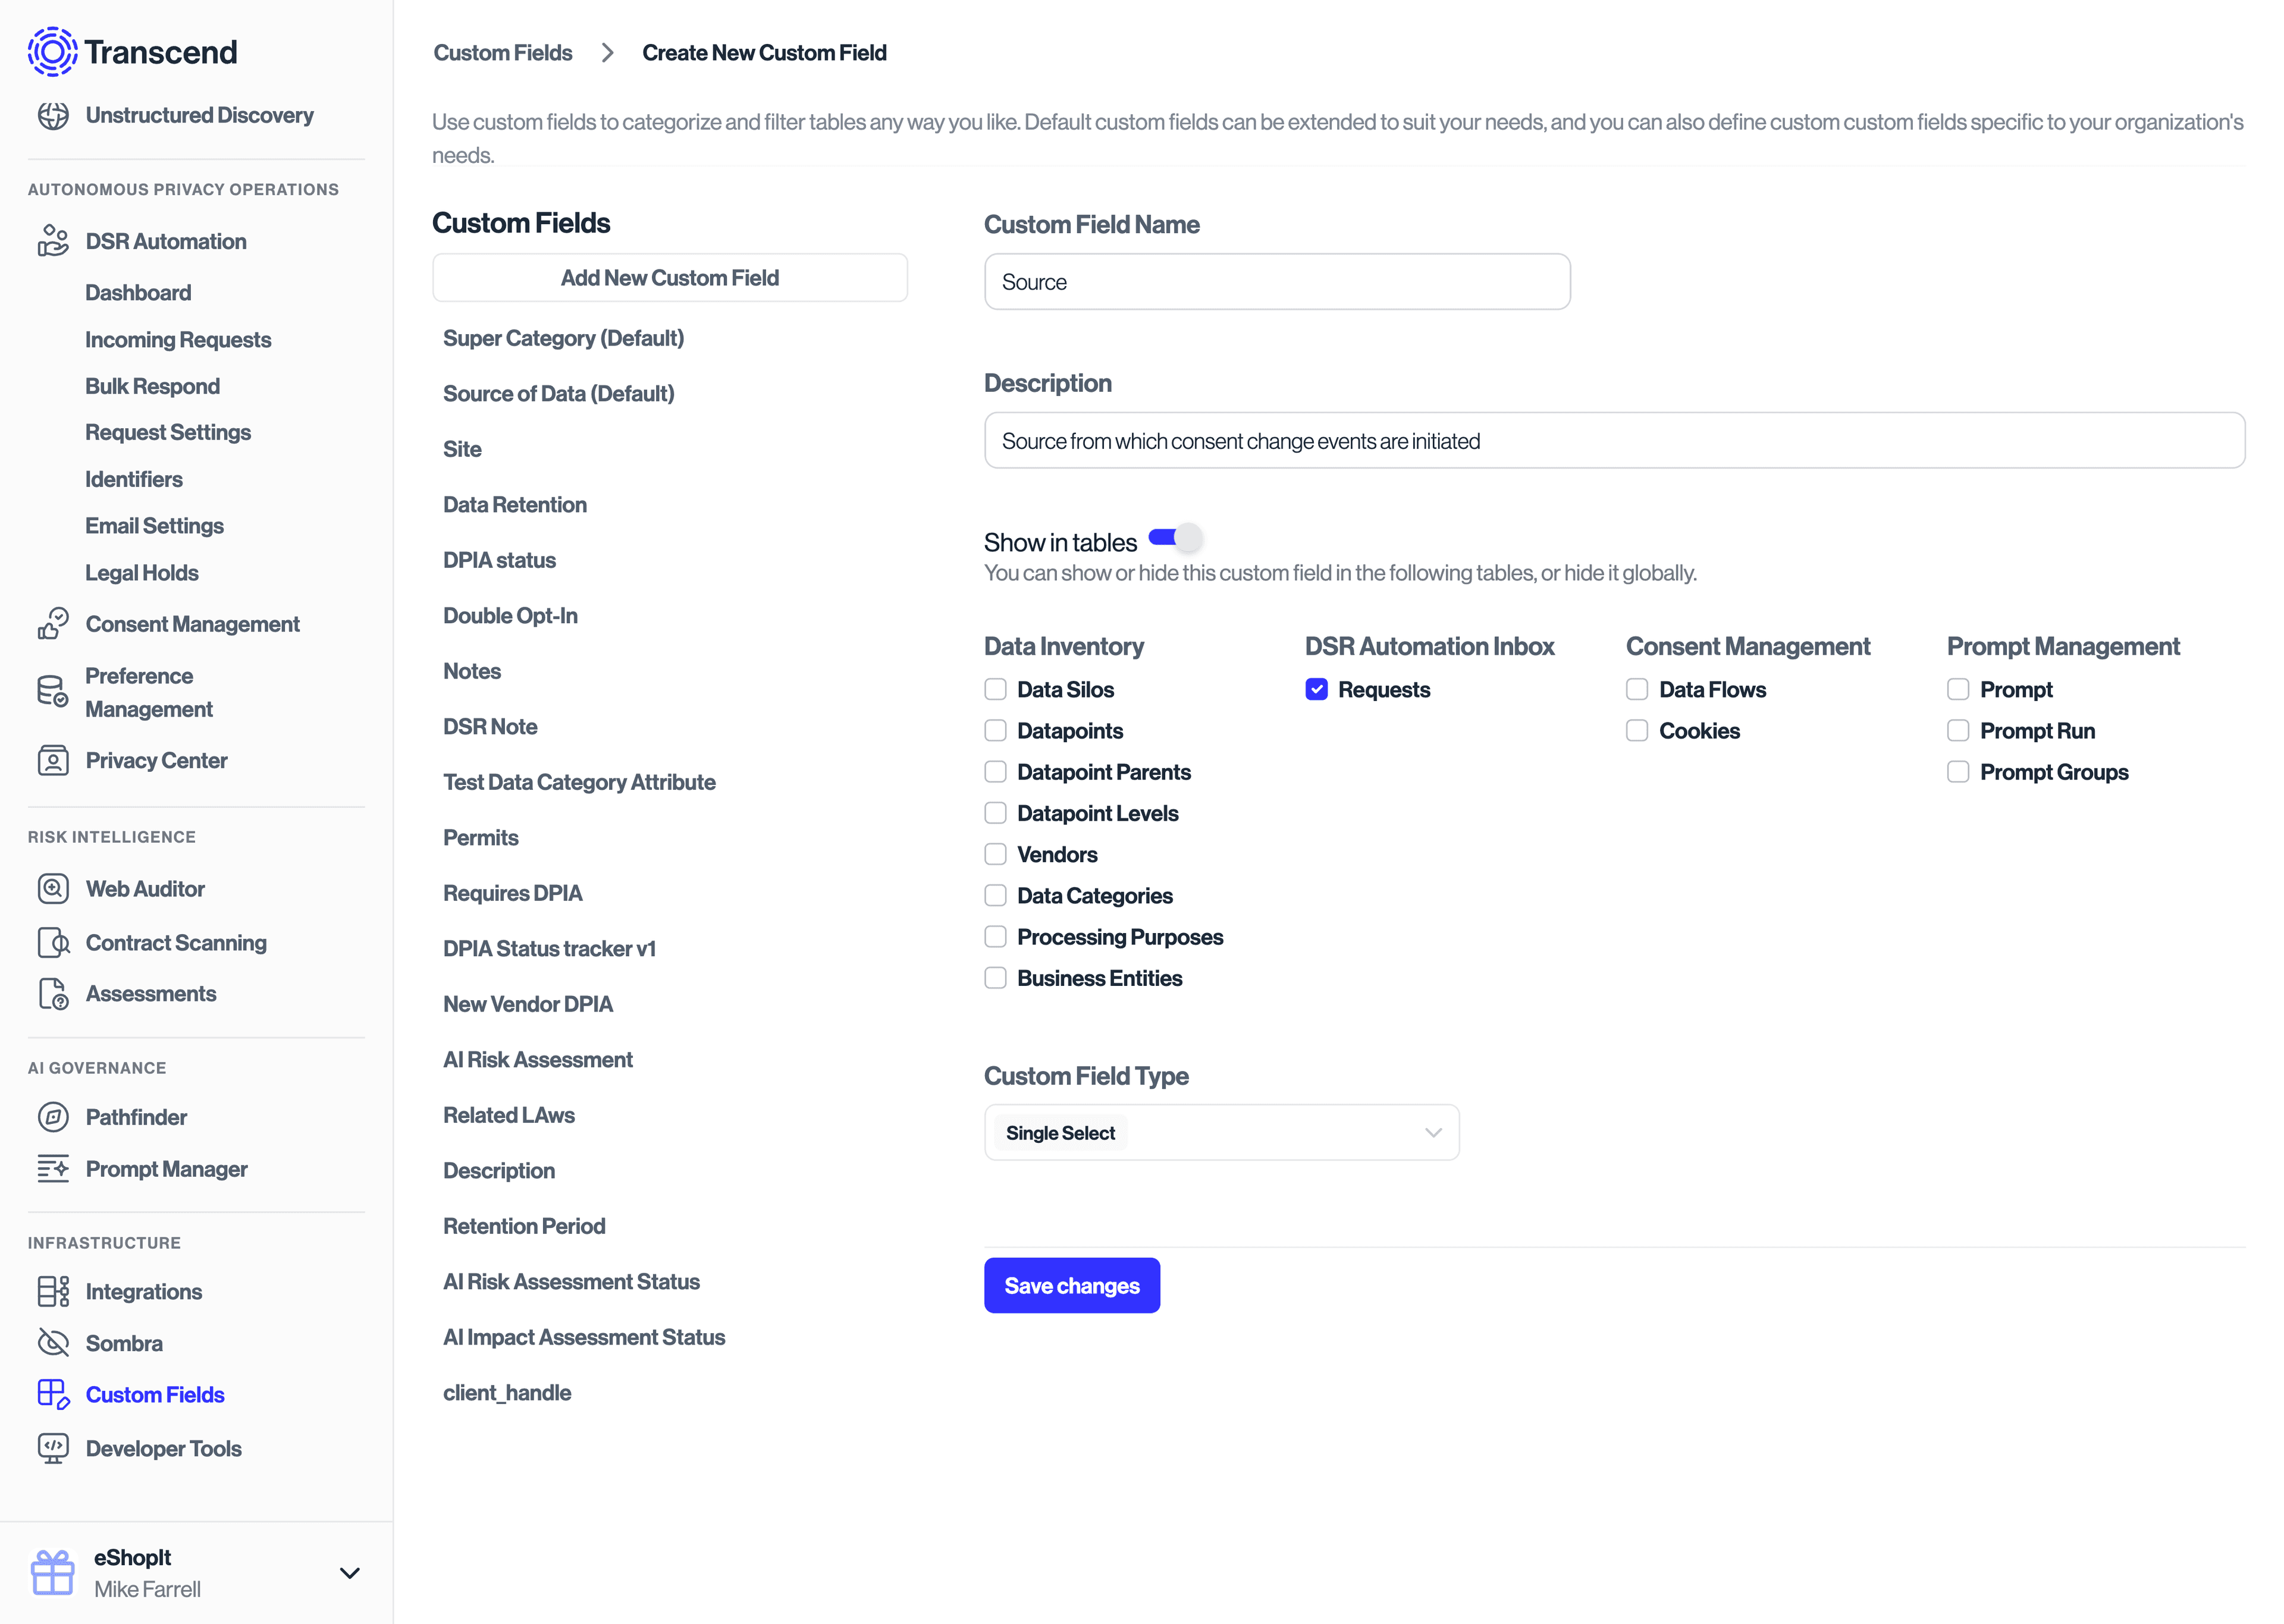
You may also add other tags for your consent change events that would be valuable for reporting and filtering. For example, you may want to create a custom field for the Source of a consent change event.
To determine which API endpoint you should use:
- Go to Sombra in your Transcend account
- Choose the Sombra™ gateway that makes sense for your use case (you most likely will want to use the Sombra marked as "Is Primary Sombra?")
- Copy the "Transcend Ingress URL" value as your Sombra base URL

If you are self-hosting Sombra:
- Please ensure you are using a Sombra version >=
v7.253.0. - Add the
INTERNAL_KEYbearer token in thex-sombra-authorizationheader. If you are using the bash commands below, you can do this by adding an additional header:
-H "x-sombra-authorization: Bearer $SOMBRA_API_KEY" \When submitting requests to the Transcend API, you will want to update your purposes and preferences using their respective "Slug" values.
To find your purpose slugs, look at the "Slug" column under Consent -> Regional Experiences -> Purposes. To find your preference slugs, look at the "Slug" column under Preferences -> Preference Topics. To find your preference option slugs, look at the "Slug" column under Preferences -> Preference Topics -> Options.
A single opt-in request can be submitted to Transcend via the PUT /v1/preferences API endpoint.
SOMBRA_BASE_URL="https://multi-tenant.sombra.transcend.io"
# SOMBRA_BASE_URL="https://multi-tenant.sombra.us.transcend.io"
PARTITION="776230e4-0fc7-4f62-9f35-44b71efdf8c3"
TRANSCEND_API_KEY="YOUR_API_KEY"
curl -X PUT "$SOMBRA_BASE_URL/v1/preferences" \
-H "Content-Type: application/json" \
-H "Authorization: Bearer $TRANSCEND_API_KEY" \
-d '{
  "records": [
    {
      "userId": "no-track@example.com",
      "partition": "'"$PARTITION"'",
      "timestamp": "2023-05-11T19:32:31.707Z",
      "purposes": [
        {
          "purpose": "Marketing",
          "enabled": true
        }
      ]
    }
  ]
}'
These requests will return a successful response that shows all purposes and preference updates have been applied immediately.
It will look like:
{
  "success": true,
  "nodes": [
    {
      "userId": "no-track@example.com",
      "decryptionStatus": "DECRYPTED",
      "purposes": [
        { "purpose": "Marketing", "enabled": true, "preferences": [] }
      ],
      "partition": "776230e4-0fc7-4f62-9f35-44b71efdf8c3",
      "timestamp": "2024-11-12T02:03:53.175Z",
      "usp": null,
      "gpp": null,
      "tcf": null,
      "airgapVersion": null
    }
  ]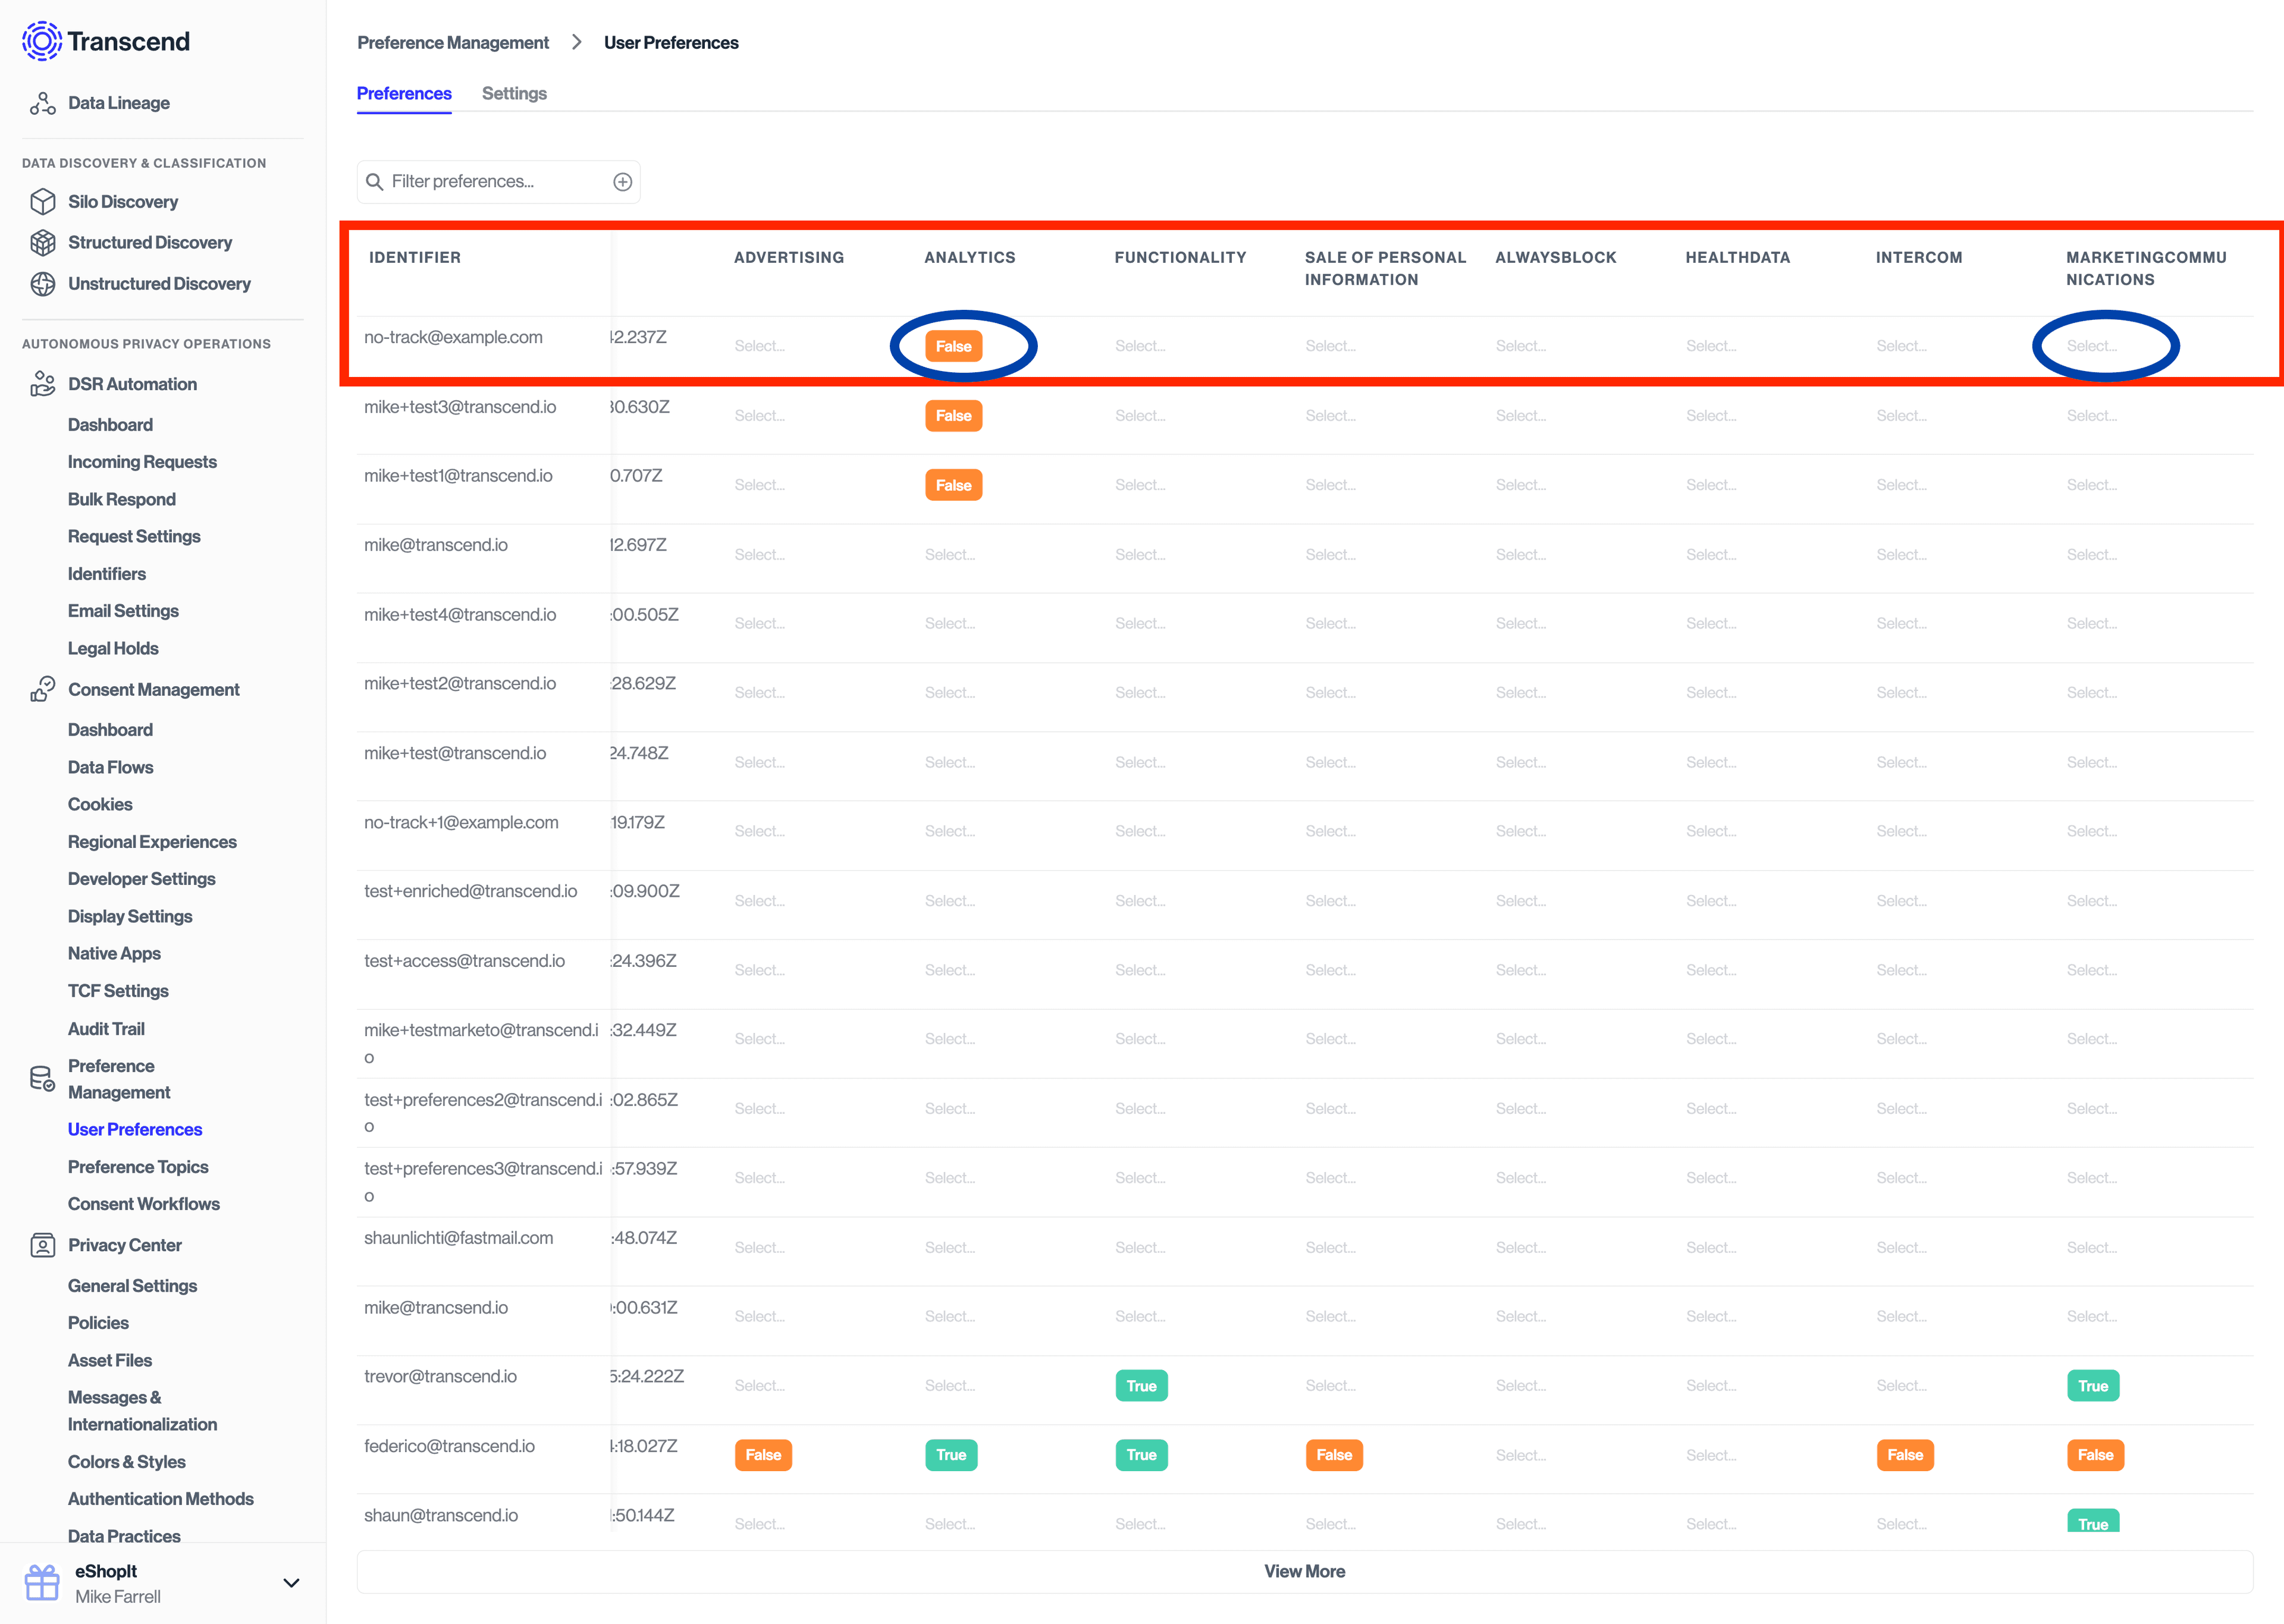
}After making the API calls above, you will then be able to navigate to Preferences -> User Preferences to see the resulting preference updated immediately in the Preference Store.

If you have configured a consent workflow to run on consent change, you will see that new request under DSR Automation -> Incoming Requests.
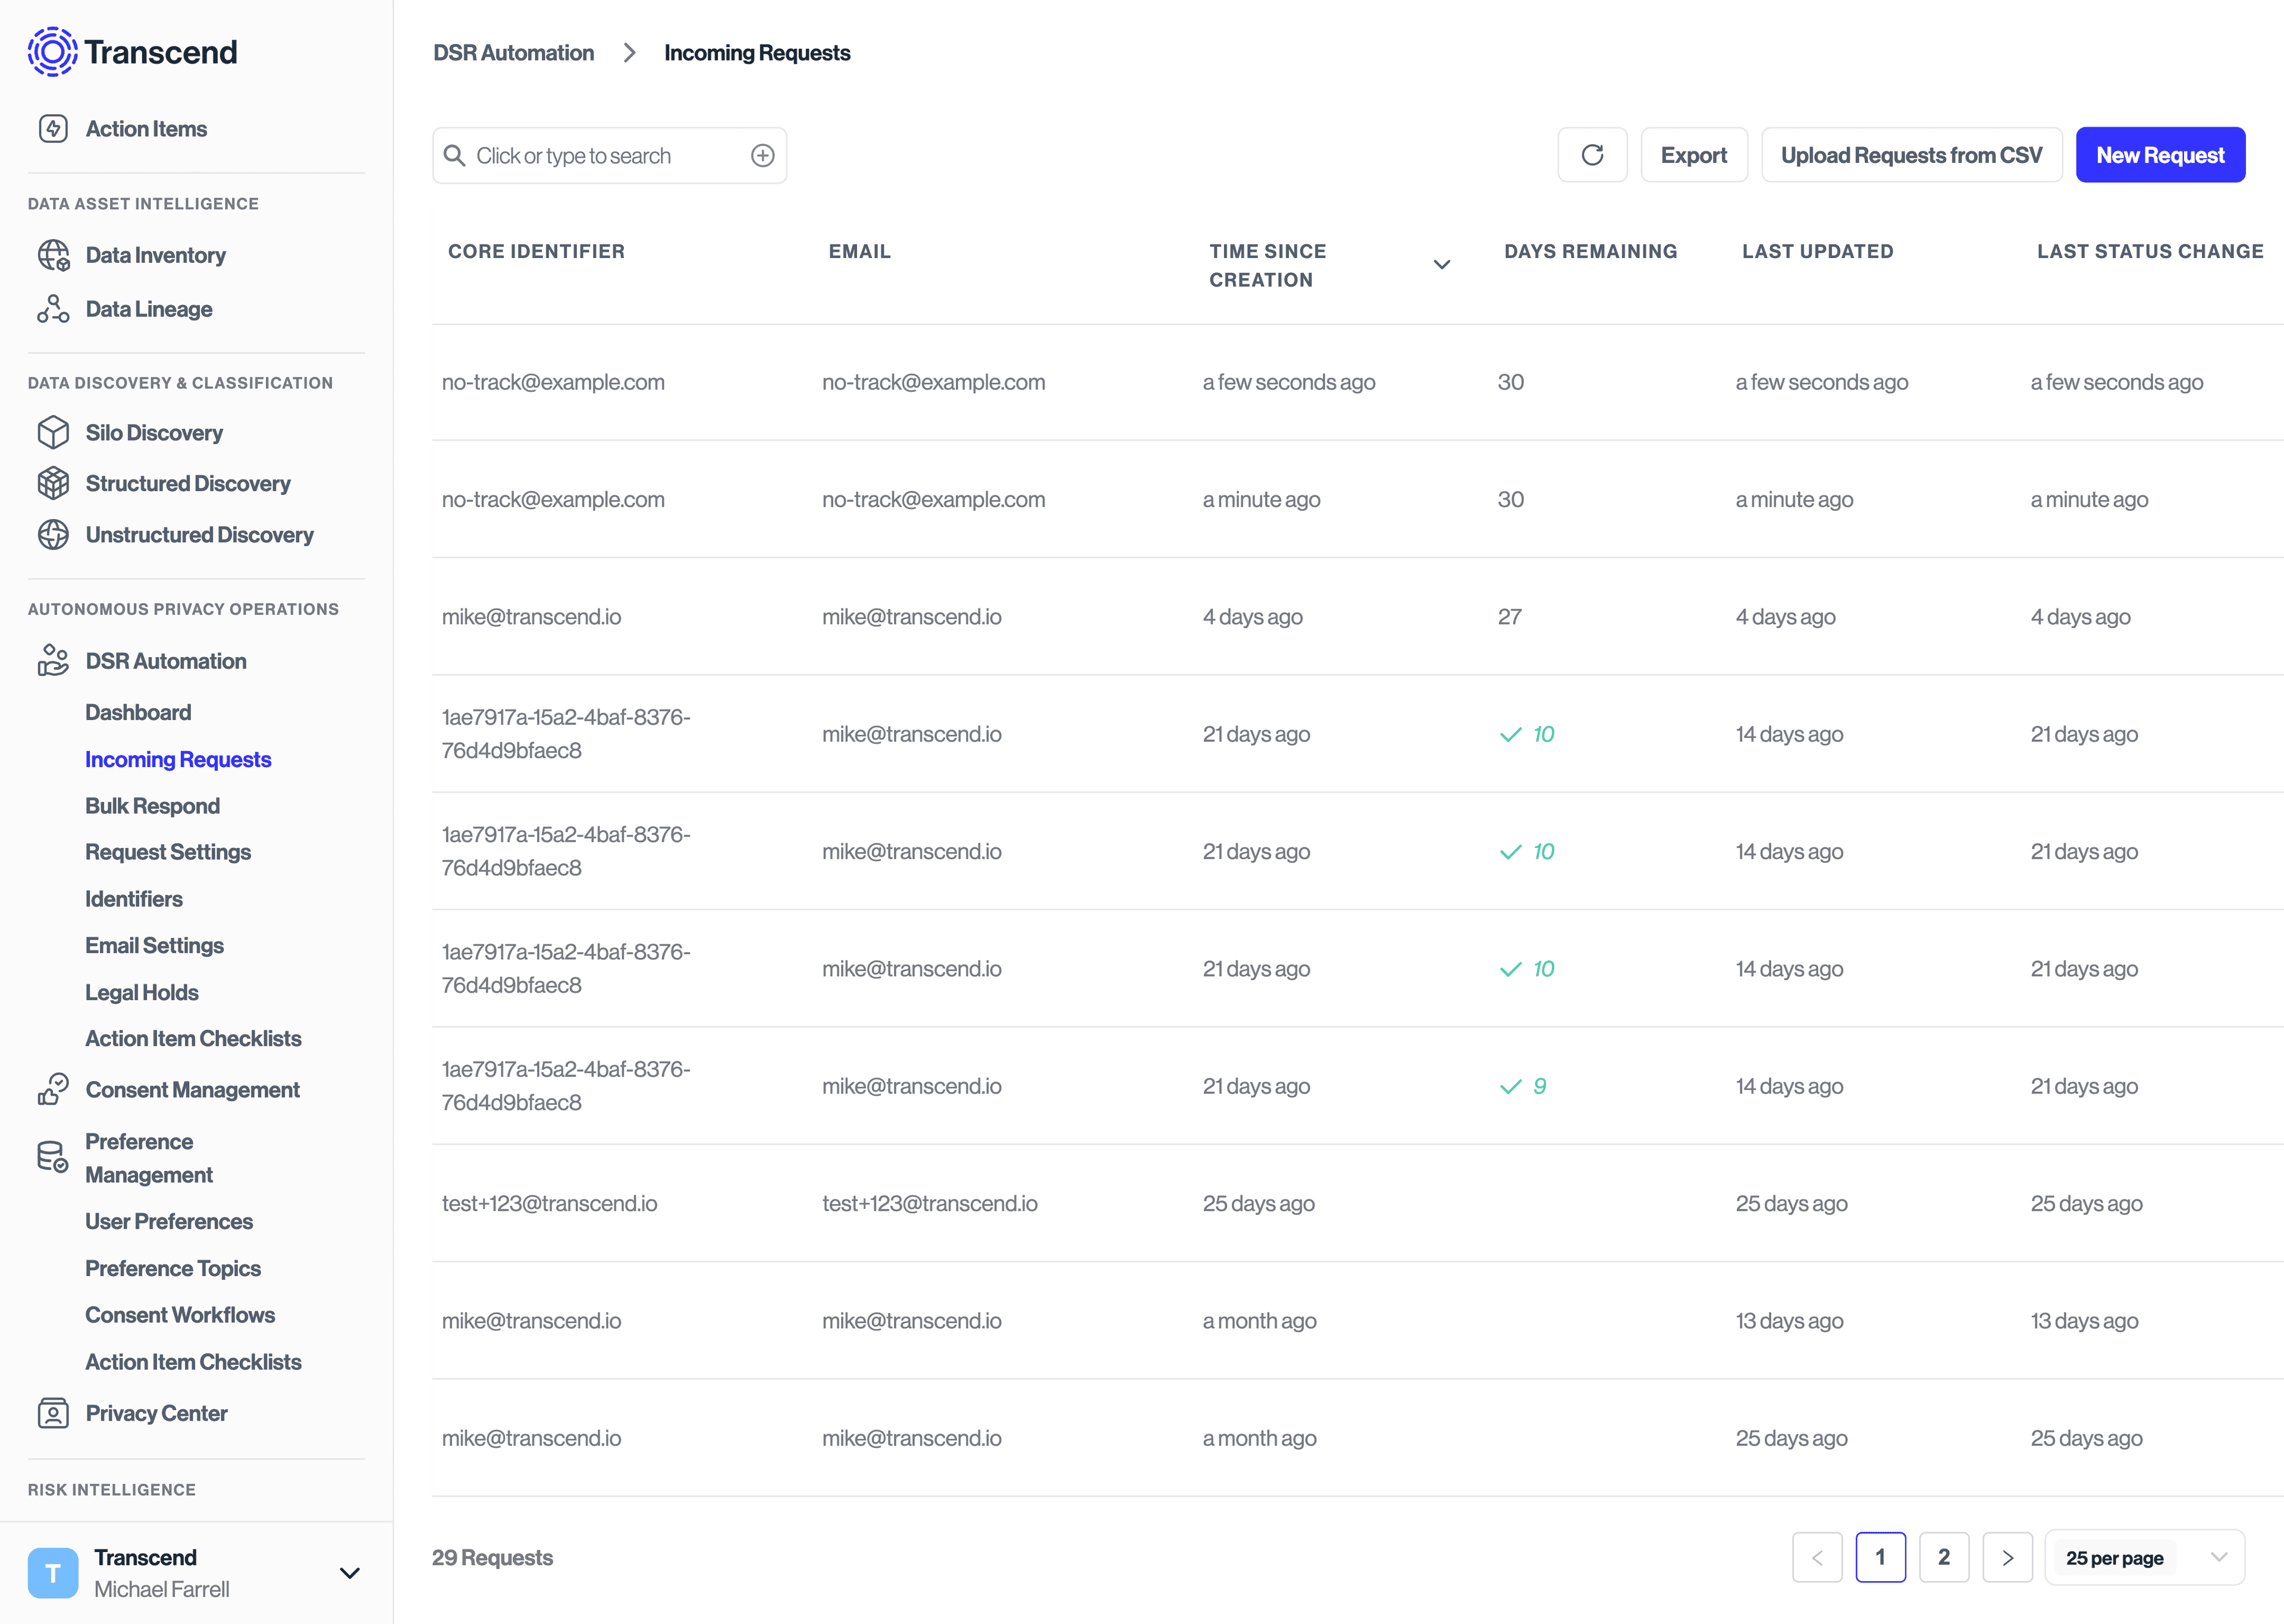
Because double opt-in has not been enabled for this request, the request made under "DSR Automation" will continue processing without sending an email confirmation to the user. You can optionally still choose to send an email receipt to the user confirming that their request is being processed.
A double opt-in request can be submitted to Transcend via the PUT /v1/preferences API endpoint.
SOMBRA_BASE_URL="https://multi-tenant.sombra.transcend.io"
# SOMBRA_BASE_URL="https://multi-tenant.sombra.us.transcend.io"
PARTITION="776230e4-0fc7-4f62-9f35-44b71efdf8c3"
TRANSCEND_API_KEY="YOUR_API_KEY"
curl -k -X PUT "$SOMBRA_BASE_URL/v1/preferences" \
-H "Content-Type: application/json" \
-H "Authorization: Bearer $TRANSCEND_API_KEY" \
-d '{
  "records": [
    {
      "userId": "no-track@example.com",
      "partition": "'"$PARTITION"'",
      "locale": "fr-FR",
      "timestamp": "2023-05-11T19:32:31.707Z",
      "purposes": [
        {
          "purpose": "Marketing",
          "enabled": true,
          "attributes": [{
             "key": "Double Opt-In",
             "values": ["true"]
          }, {
            "key": "Source",
            "values": ["Android App"]
          }]
        },
        {
          "purpose": "Analytics",
          "enabled": true
        }
      ]
    }
  ]
}'
These requests will return a successful response that shows all purpose and preference values have been accepted except for any purposes that require a double opt-in.
Note that Analytics has been updated immediately, while Marketing is set to its previous value, which was enabled: false.
{
  "success": true,
  "nodes": [
    {
      "userId": "no-track@example.com",
      "timestamp": "2024-11-12T03:16:36.118Z",
      "partition": "776230e4-0fc7-4f62-9f35-44b71efdf8c3",
      "purposes": [
        { "purpose": "Analytics", "enabled": true, "preferences": [] },
        { "purpose": "Marketing", "enabled": false, "preferences": [] }
      ],
      "system": { "decryptionStatus": "DECRYPTED" },
      "consentManagement": {
        "usp": null,
        "gpp": null,
        "tcf": null,
        "airgapVersion": null
      }
    }
  ]
}
If this user had not previously opted in or out of the Marketing purpose, the response would show no entry for the Marketing purpose.
{
  "success": true,
  "nodes": [
    {
      "userId": "no-track@example.com",
      "timestamp": "2024-11-12T03:16:36.118Z",
      "partition": "776230e4-0fc7-4f62-9f35-44b71efdf8c3",
      "purposes": [
        { "purpose": "Analytics", "enabled": true, "preferences": [] }
      ],
      "system": { "decryptionStatus": "DECRYPTED" },
      "consentManagement": {
        "usp": null,
        "gpp": null,
        "tcf": null,
        "airgapVersion": null
      }
    }
  ]
}Note that in the above requests, the locale key can be provided to specify which translation of the email template should be used when sending the user a double opt-in.
Before calling the API with a specific locale, you must first update the set of allowed locales under the Privacy Center -> General Settings tab on the Admin Dashboard.
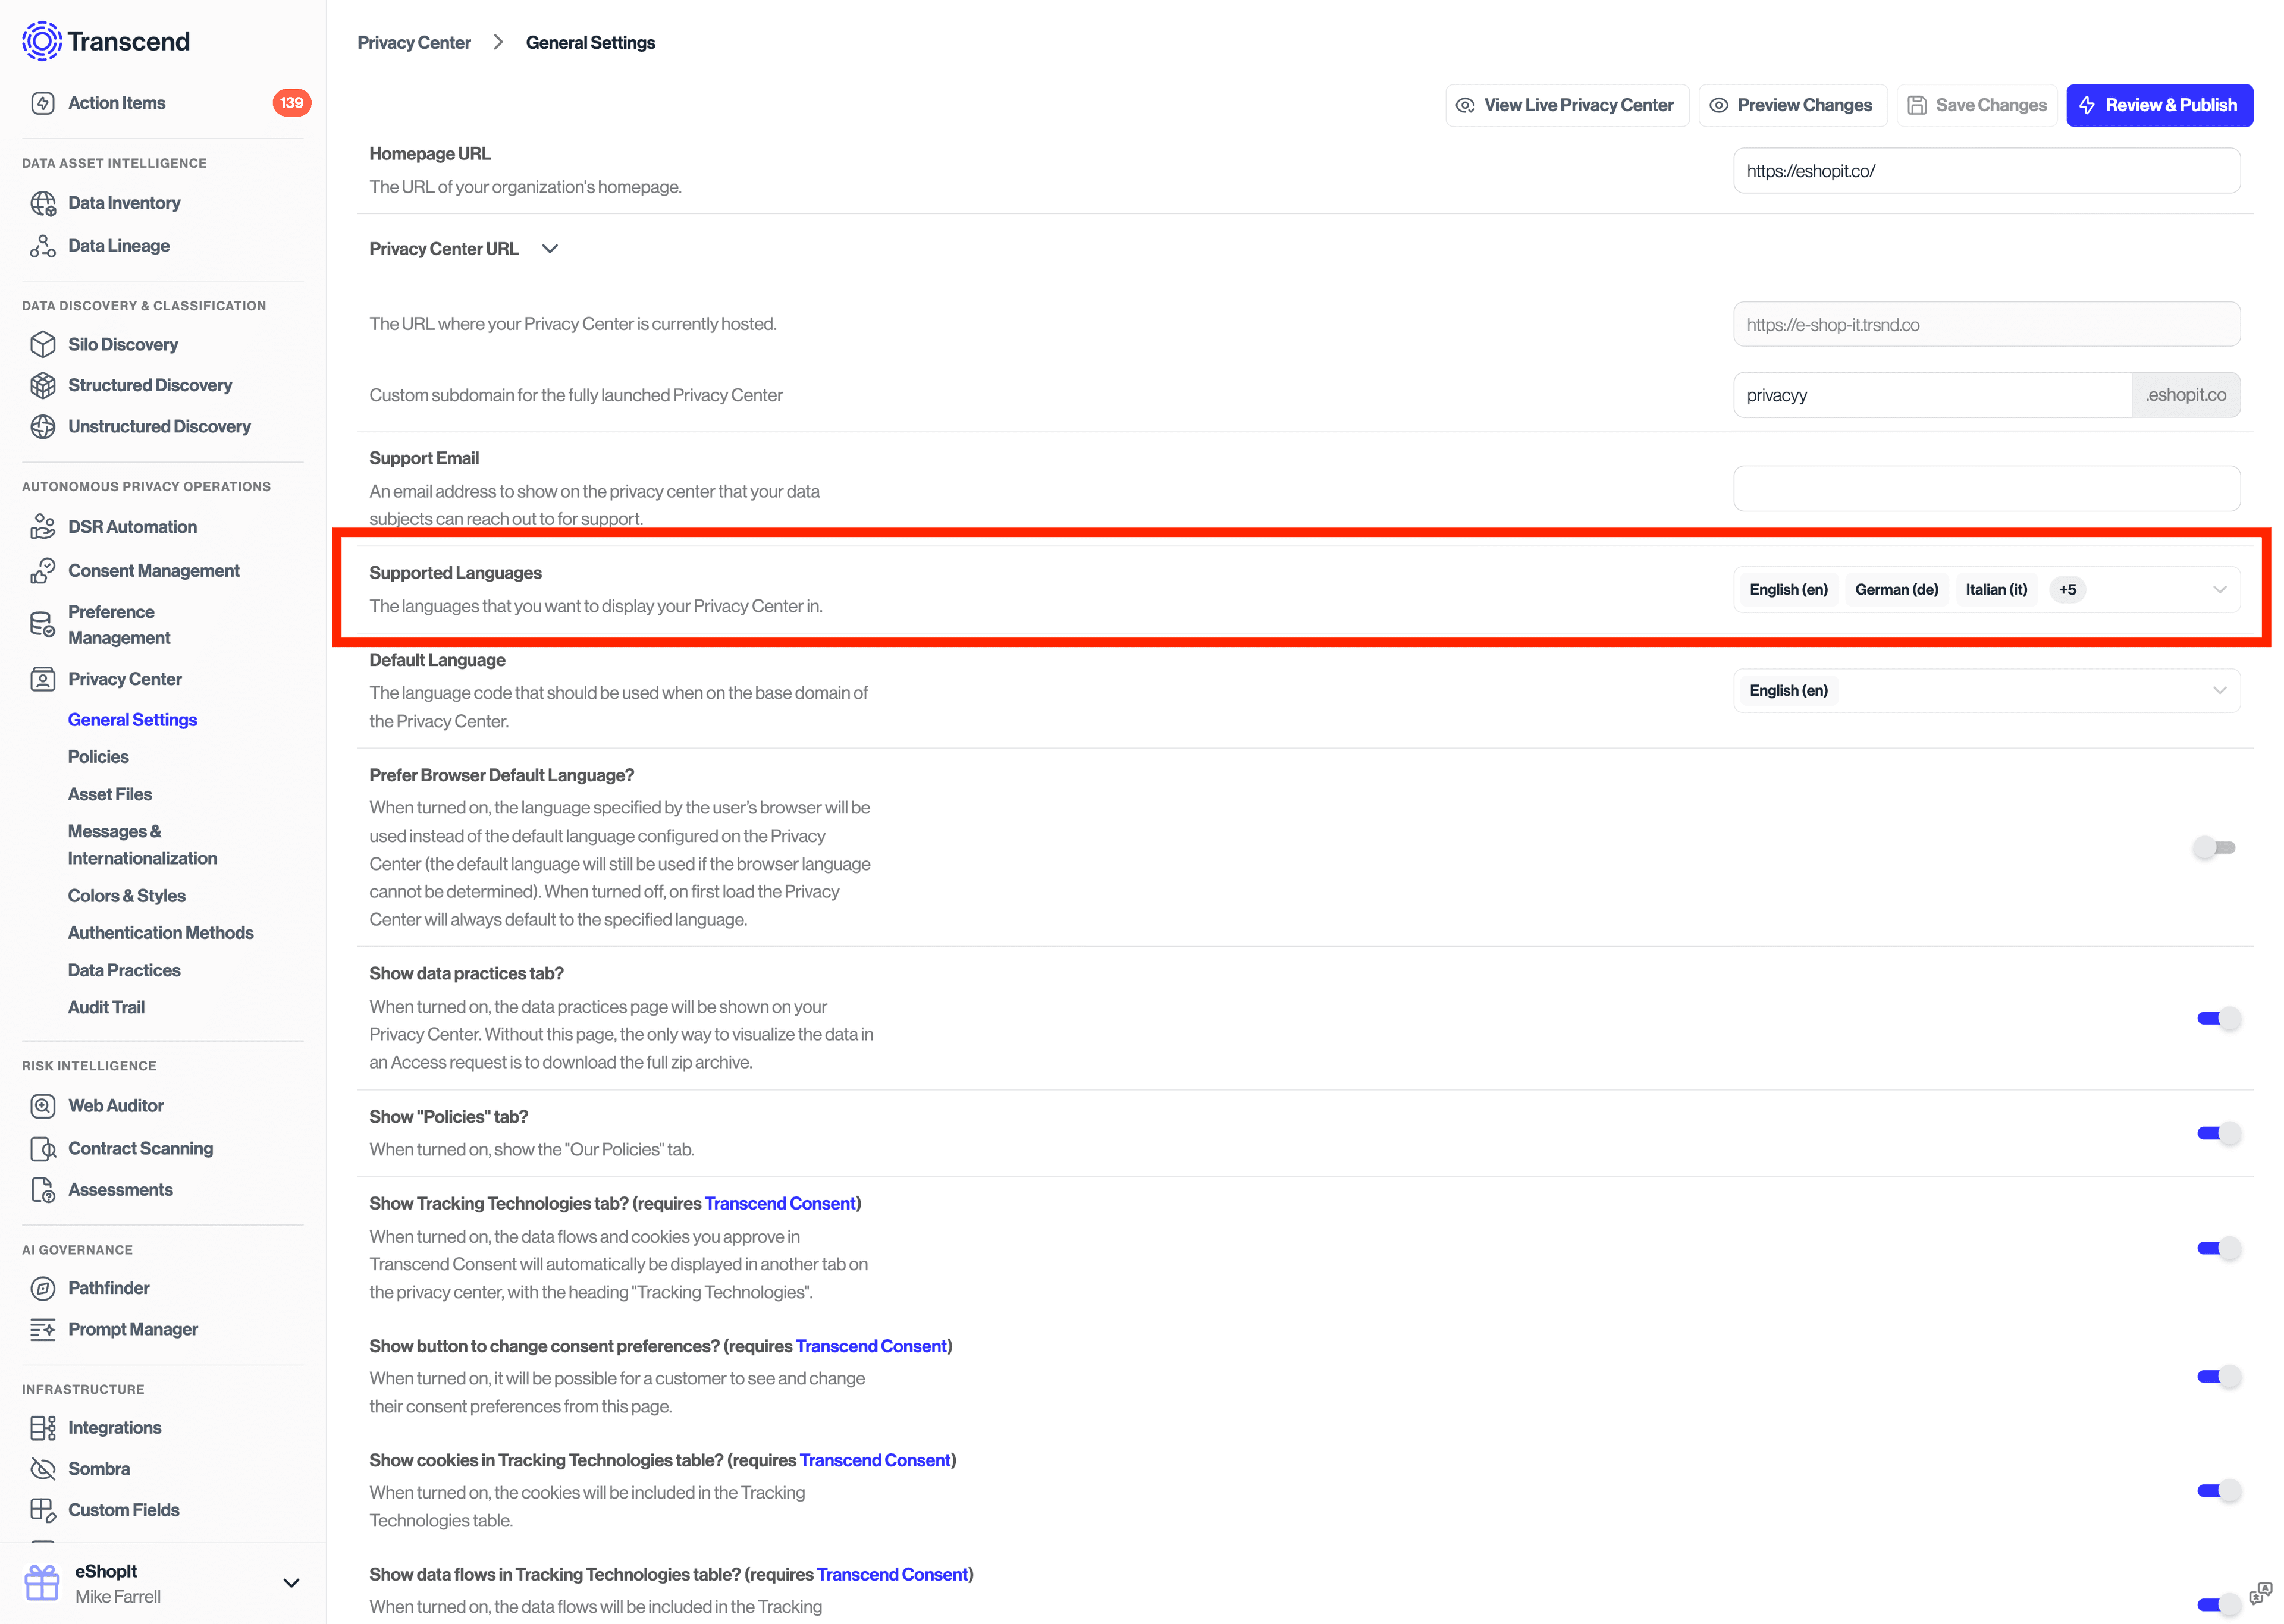
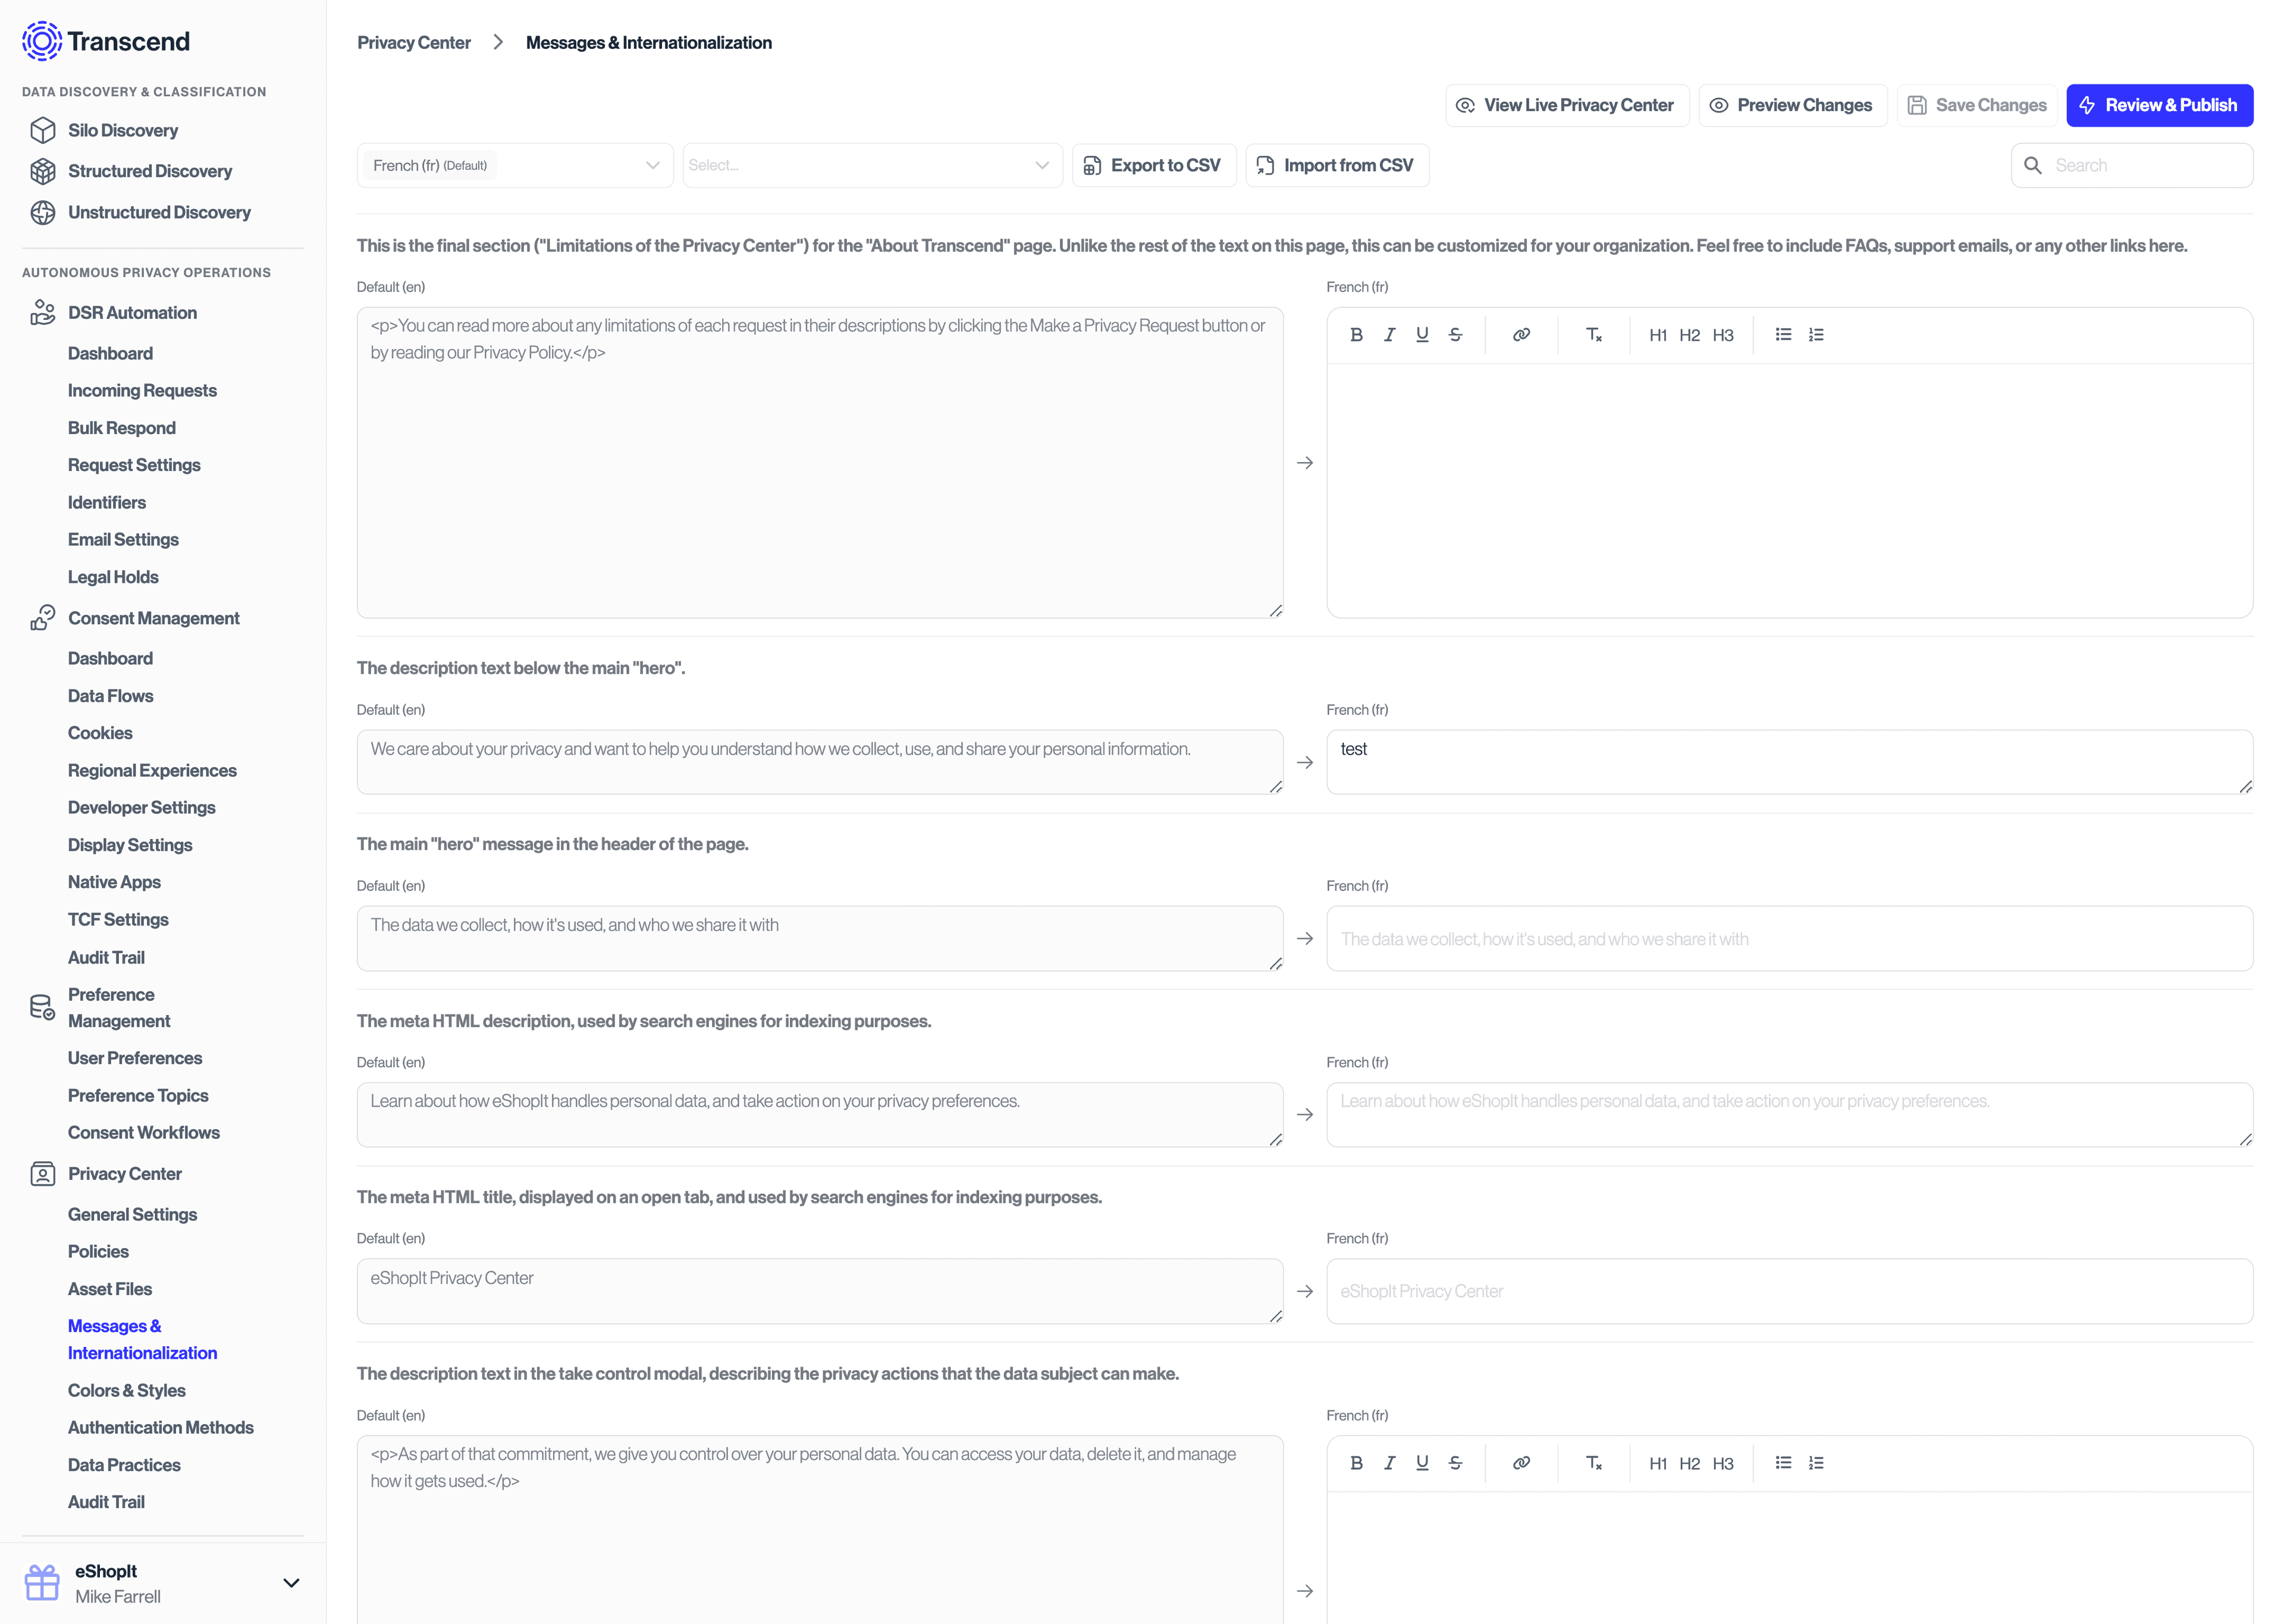
Note that all content on the Privacy Center and emails can be customized and translated from Privacy Center -> Content section of the Admin Dashboard.
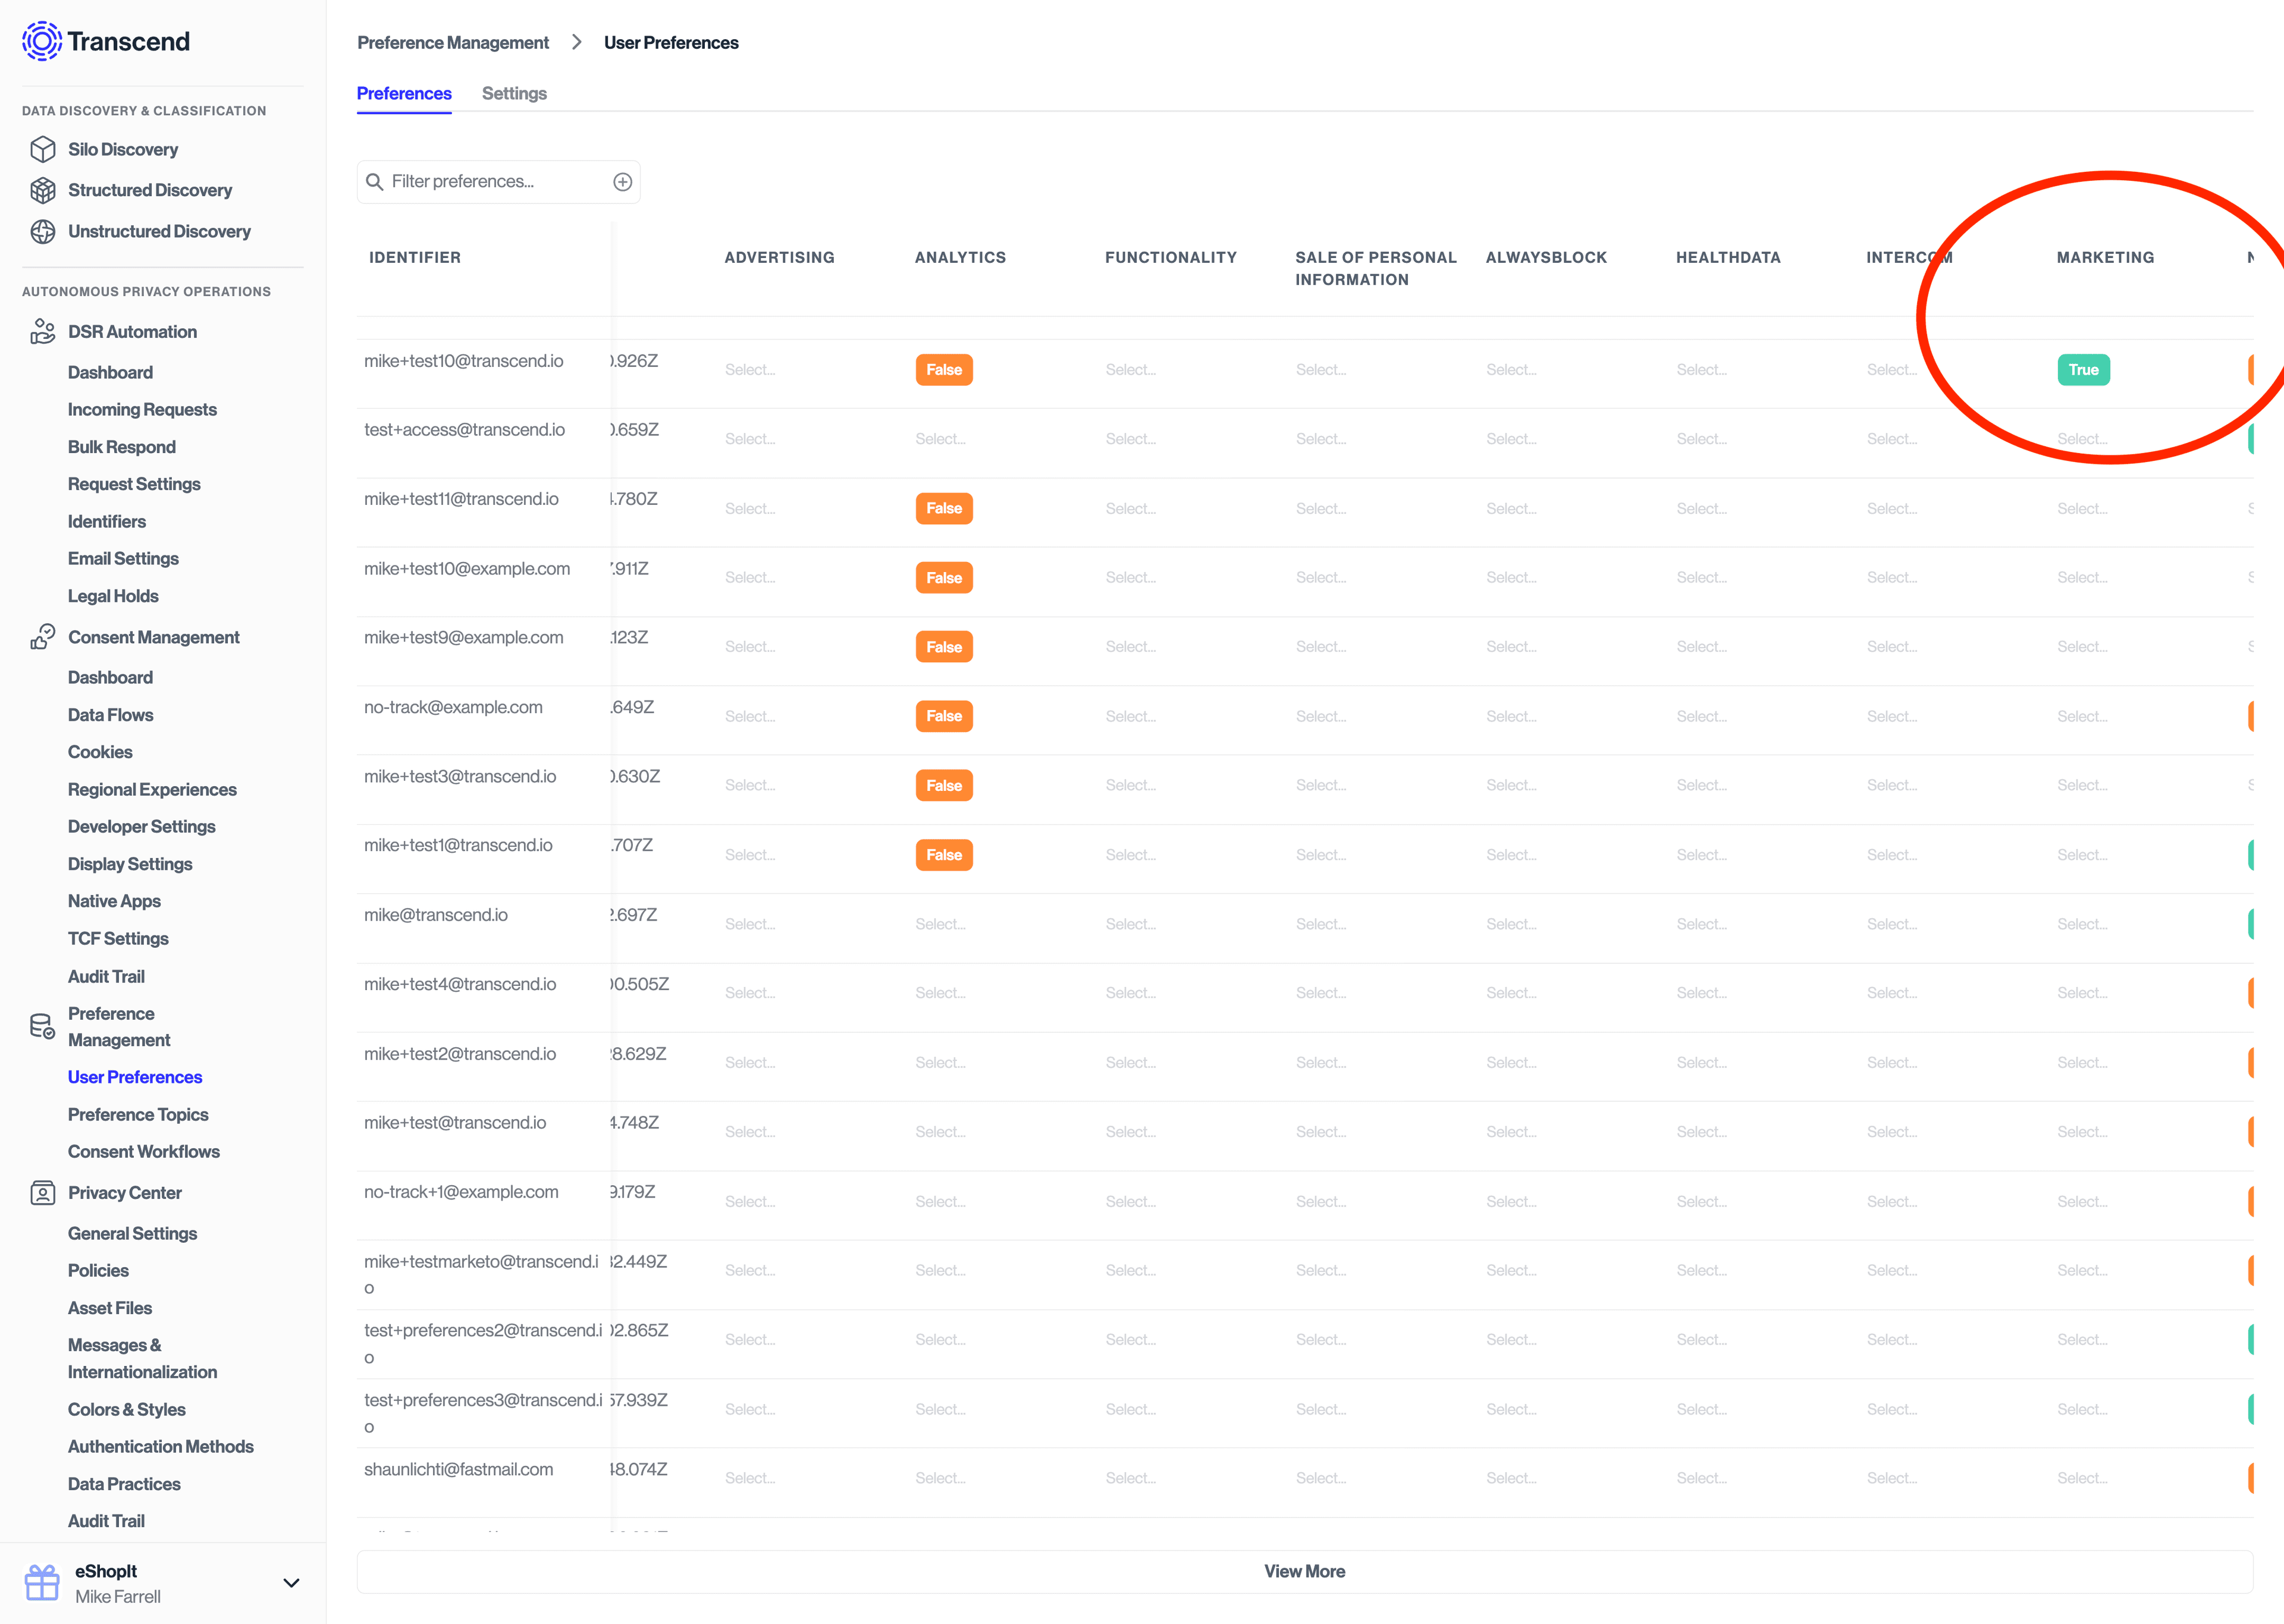
After making the API calls above, you will then be able to navigate to Preferences -> User Preferences to see the user inserted into the Preference Store. However you will notice that the purpose flagged for double opt-in has not yet changed in the Preference Store.
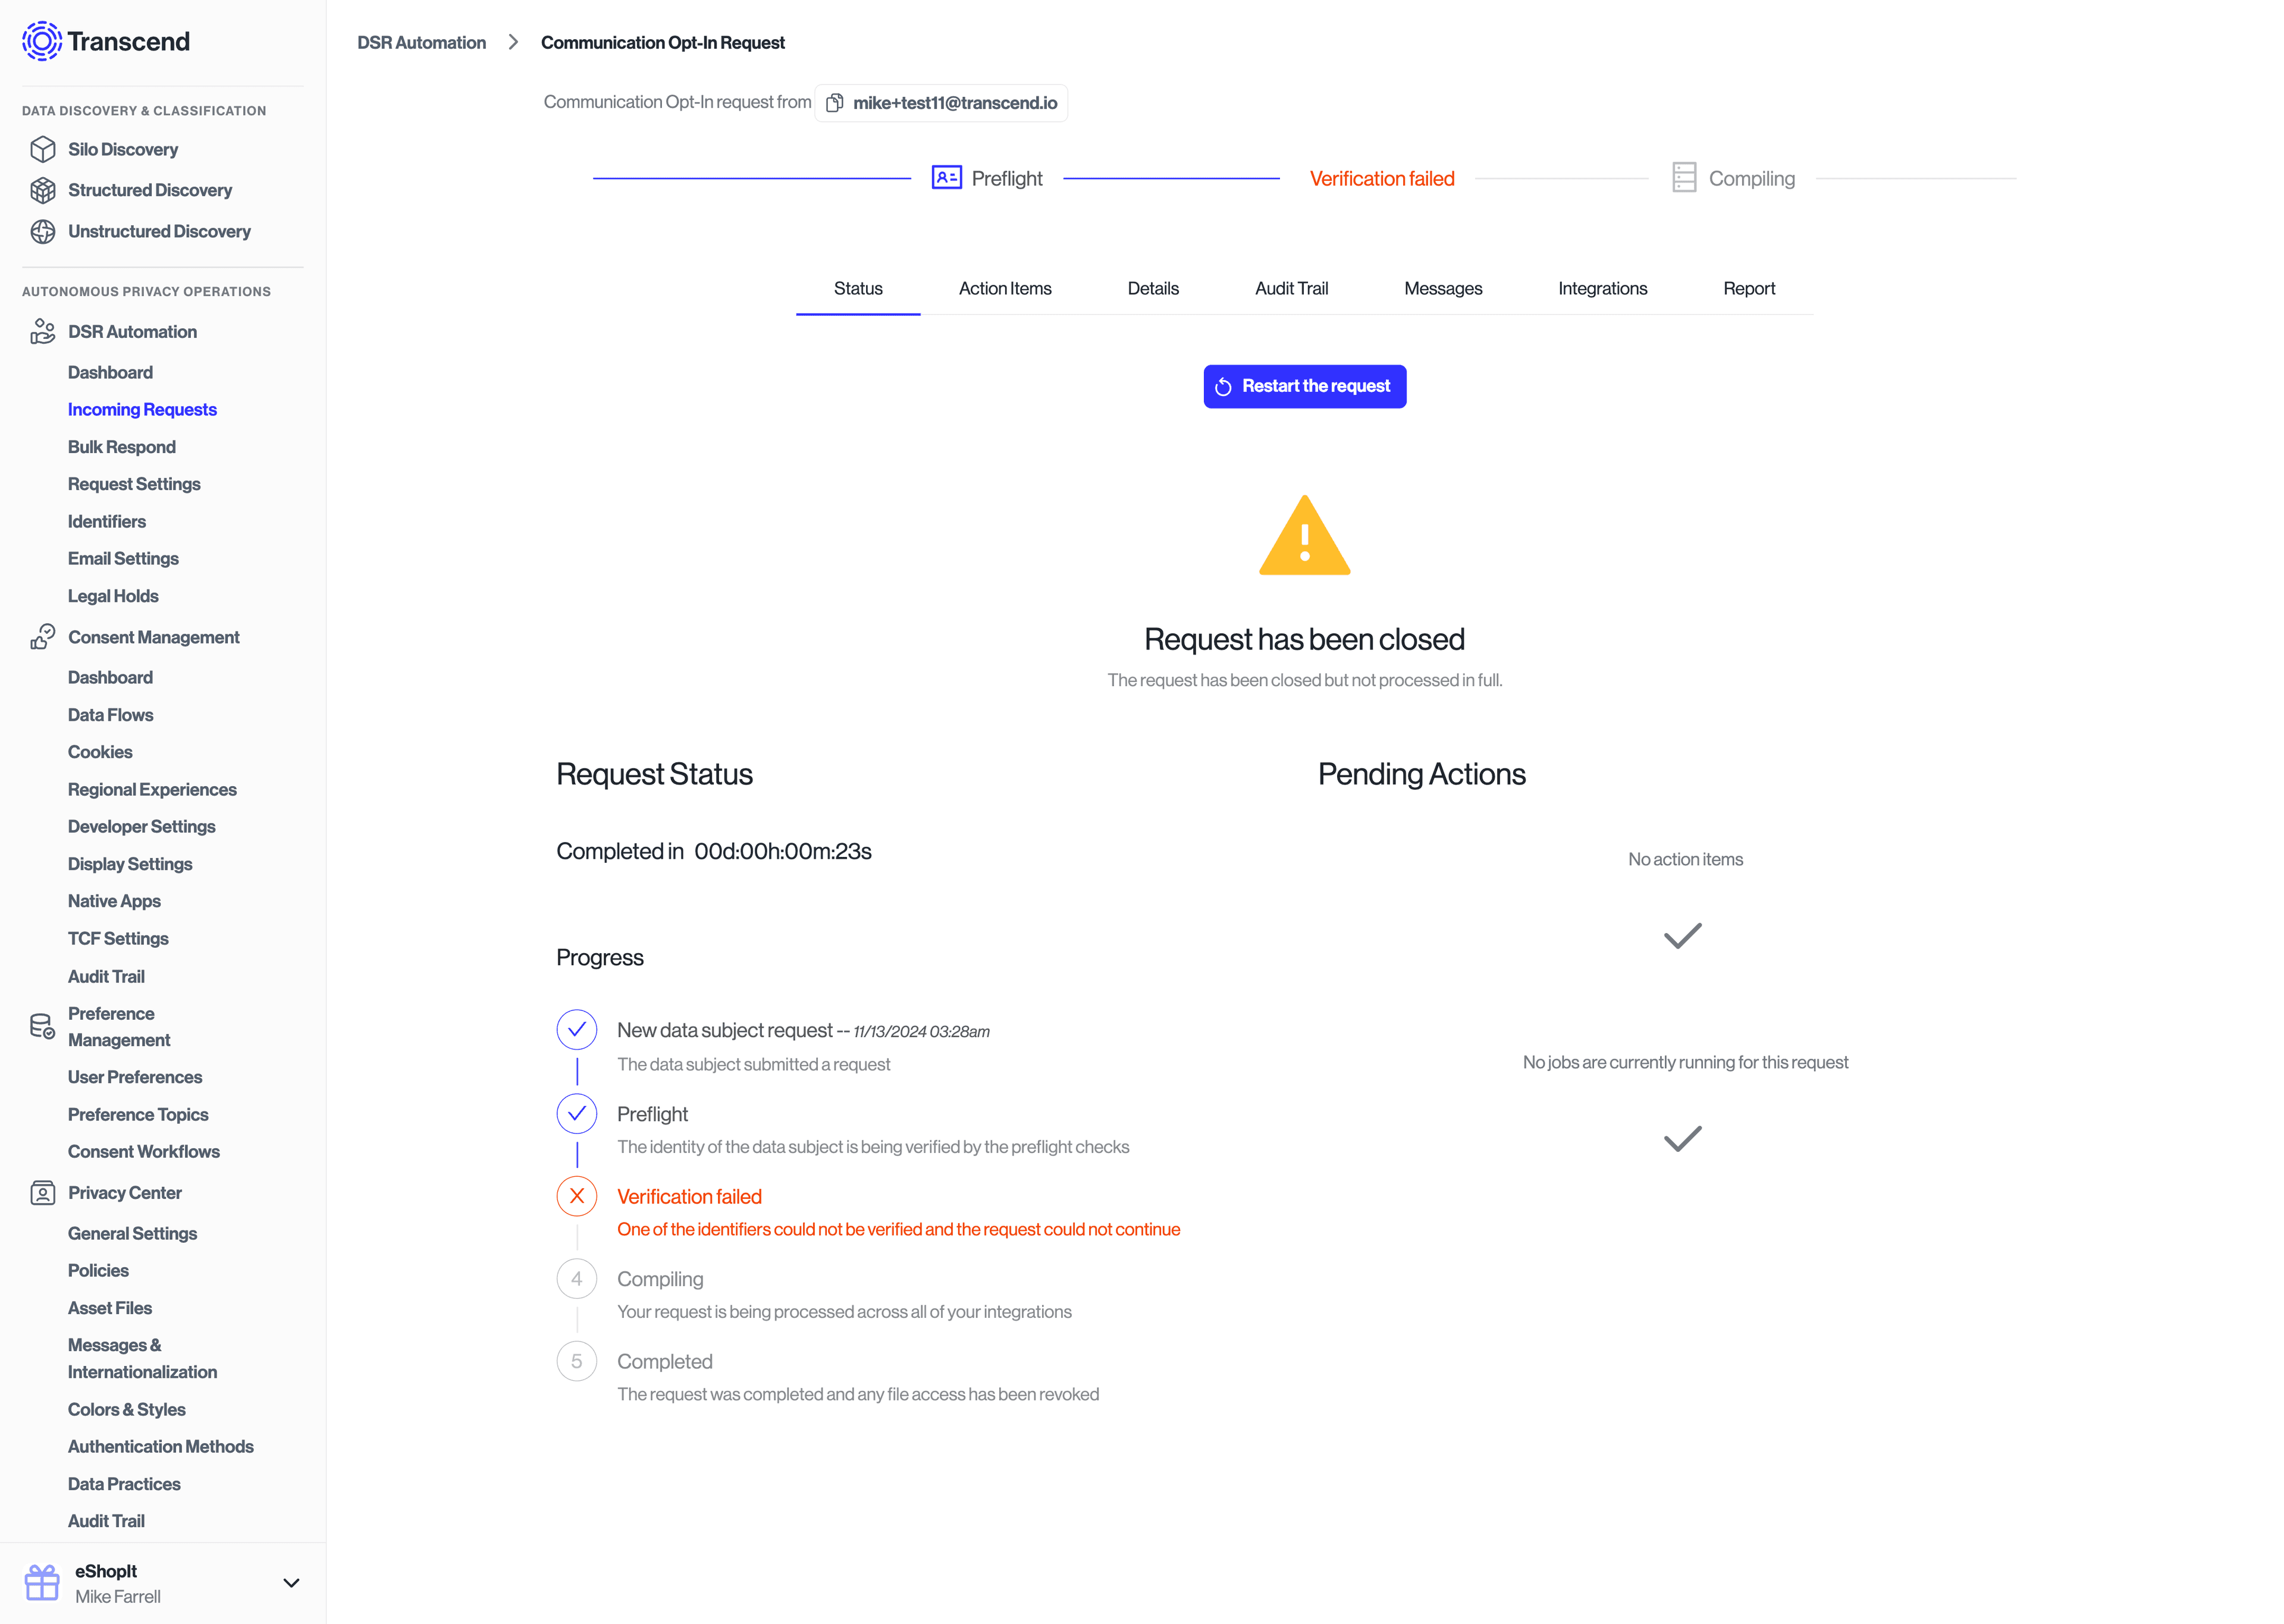
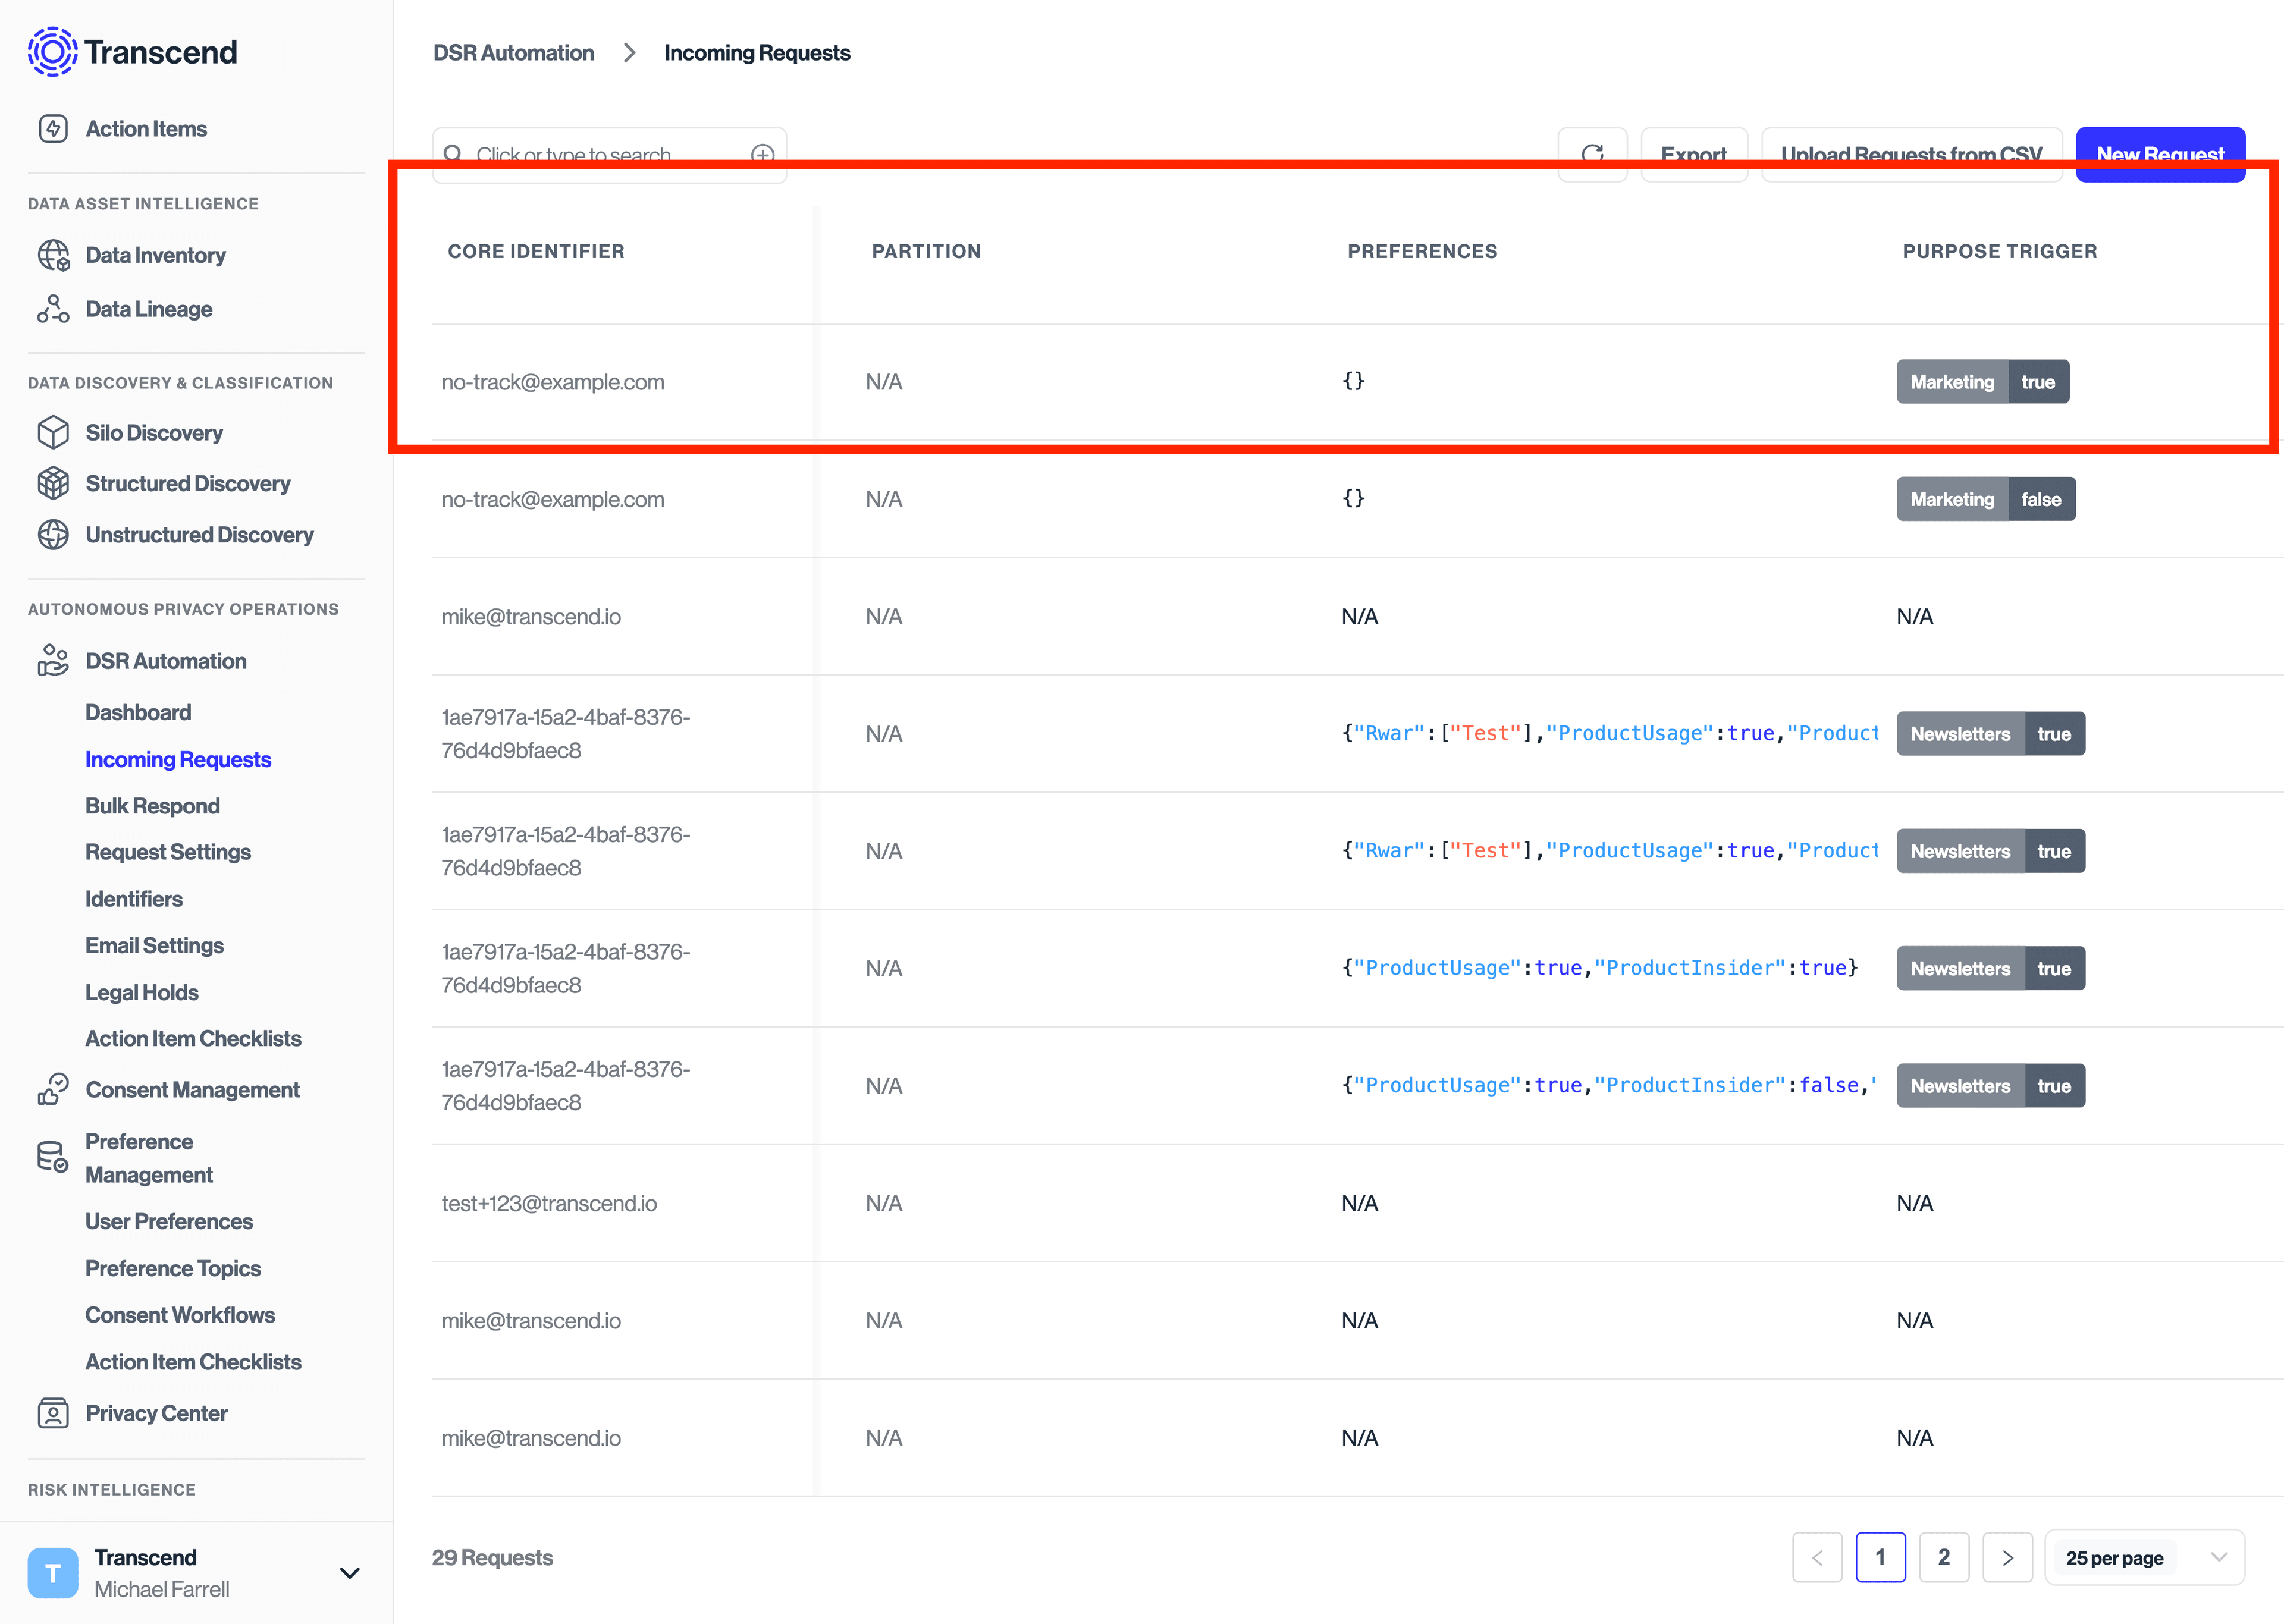
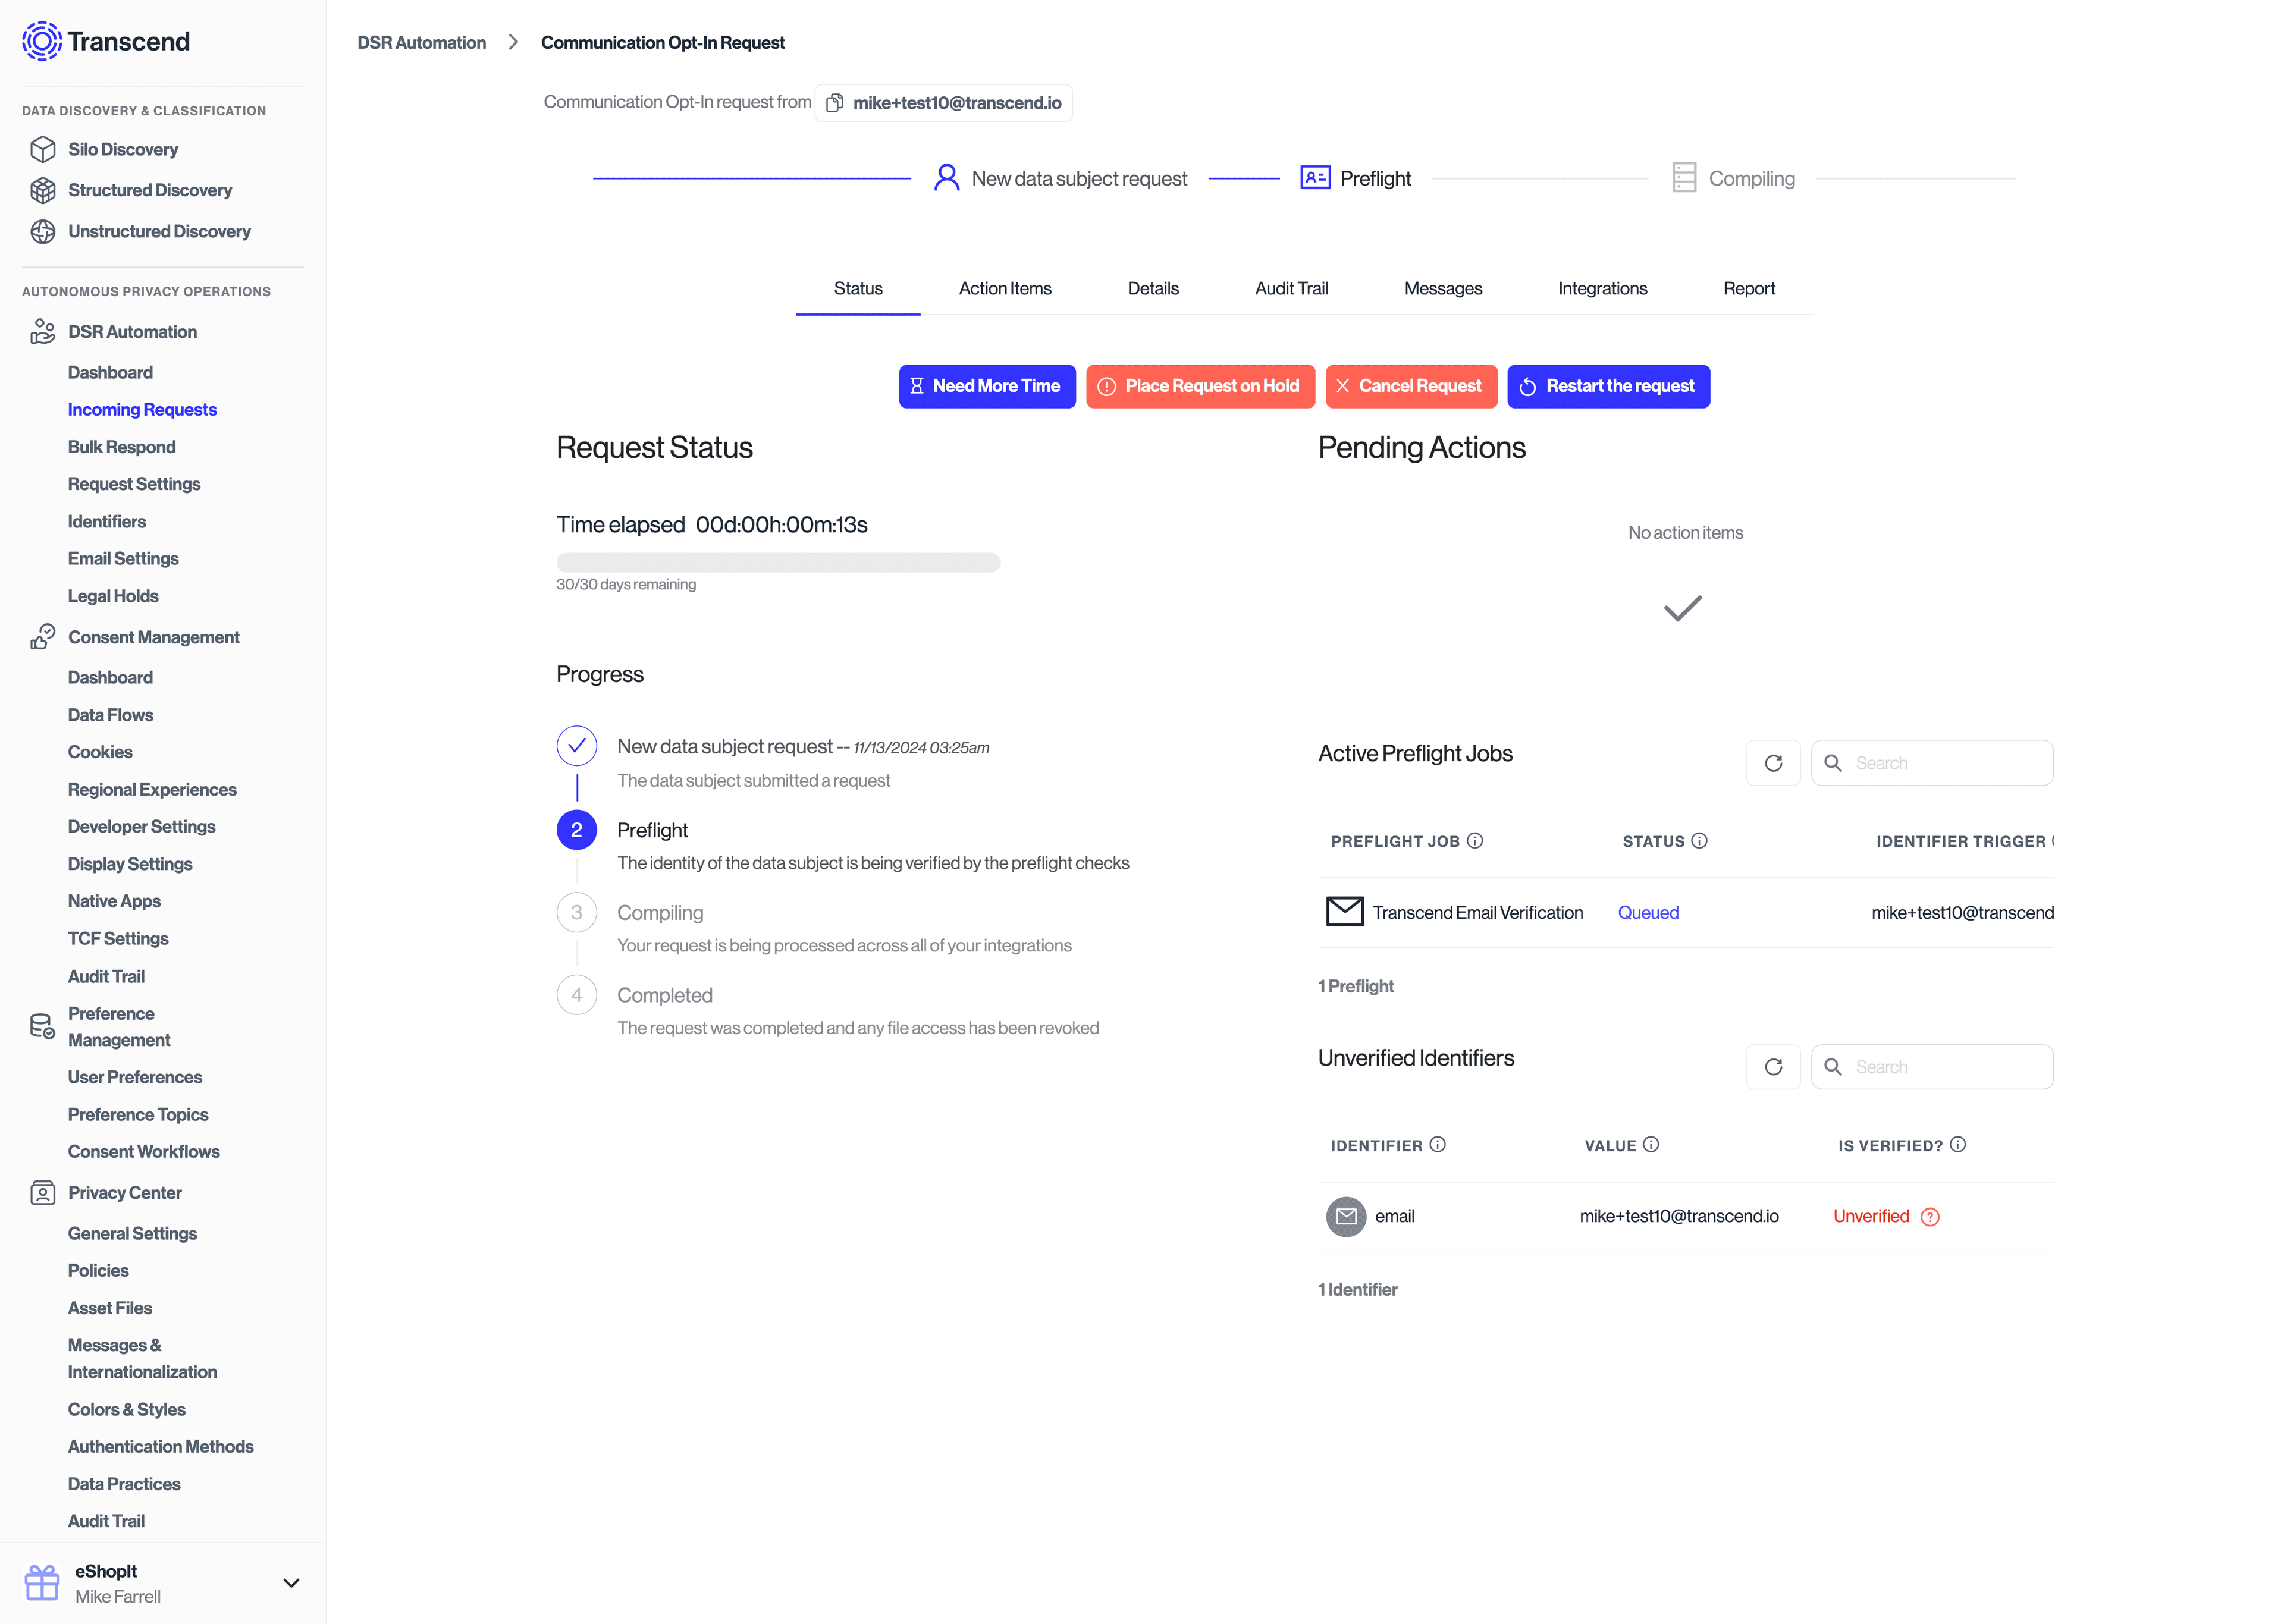
If you have configured a consent workflow to run on consent change, you will see that new request under DSR Automation -> Incoming Requests with the "Double Opt-In" tag.
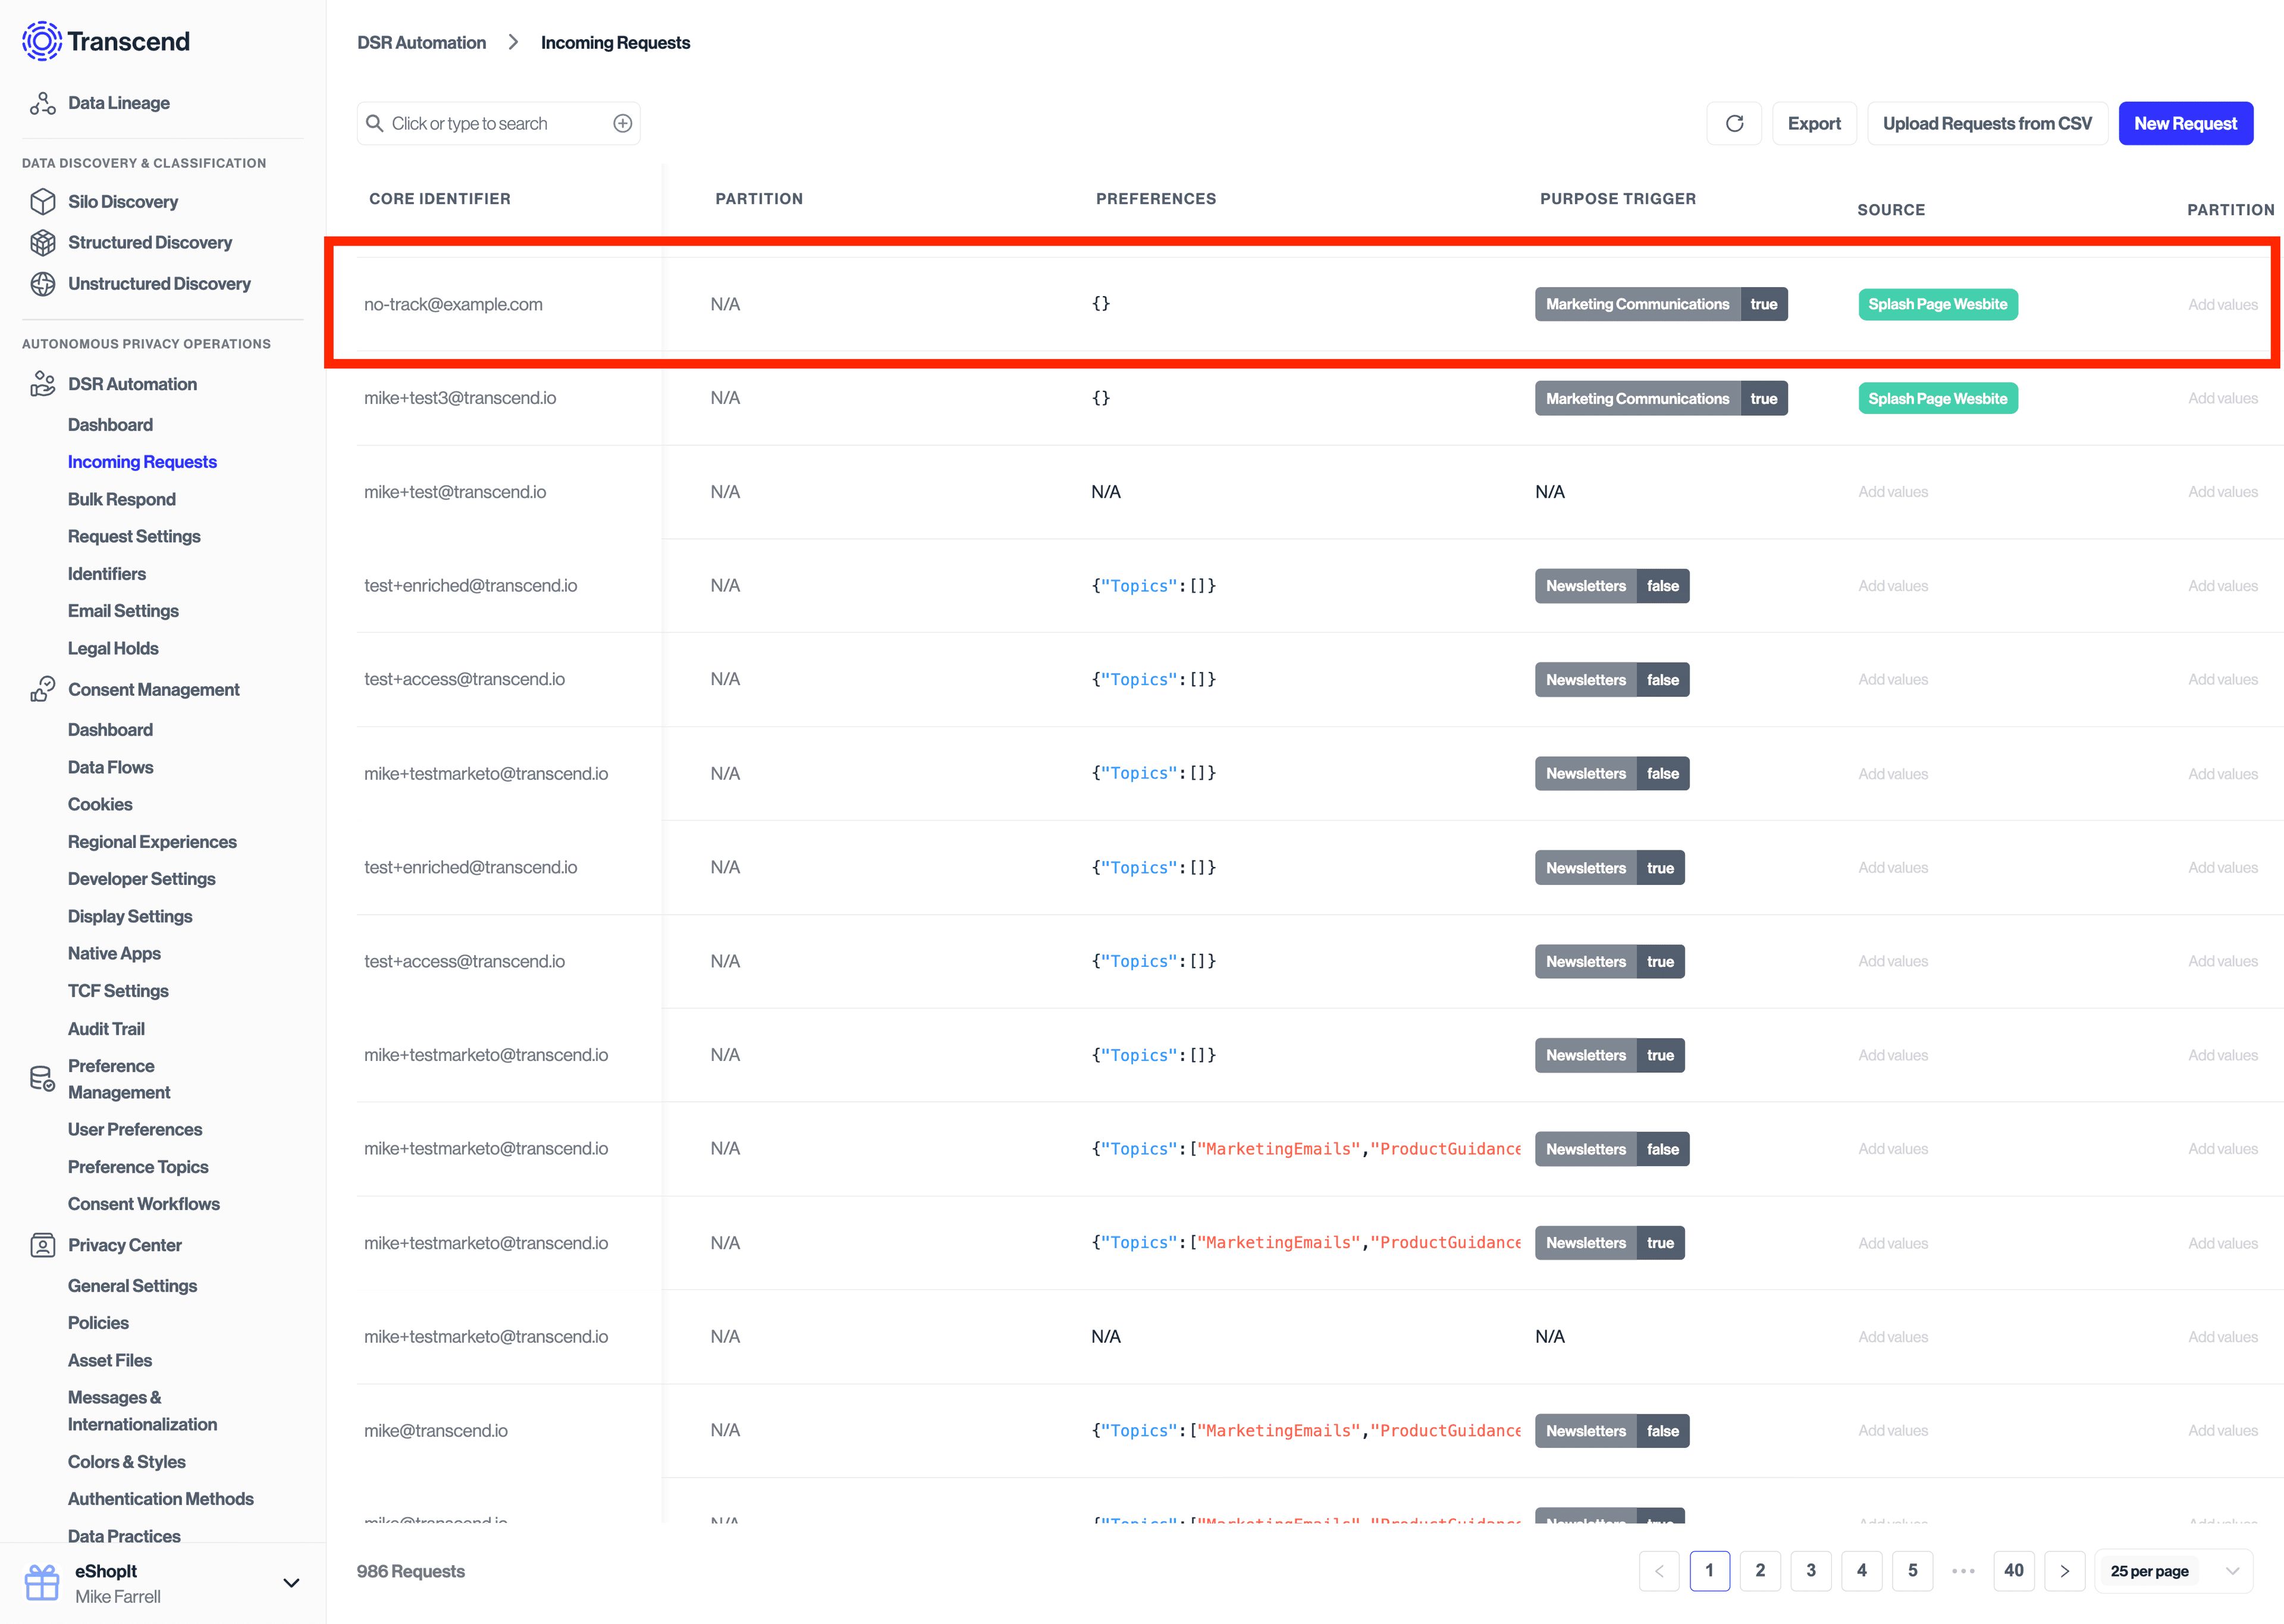
Because the request has been flagged as a double opt-in, the request made under "DSR Automation" will send a confirmation email to the user and sit in a Preflight state until the user clicks the link in their email to confirm the request change.
The request will look like the following on the Admin Dashboard:
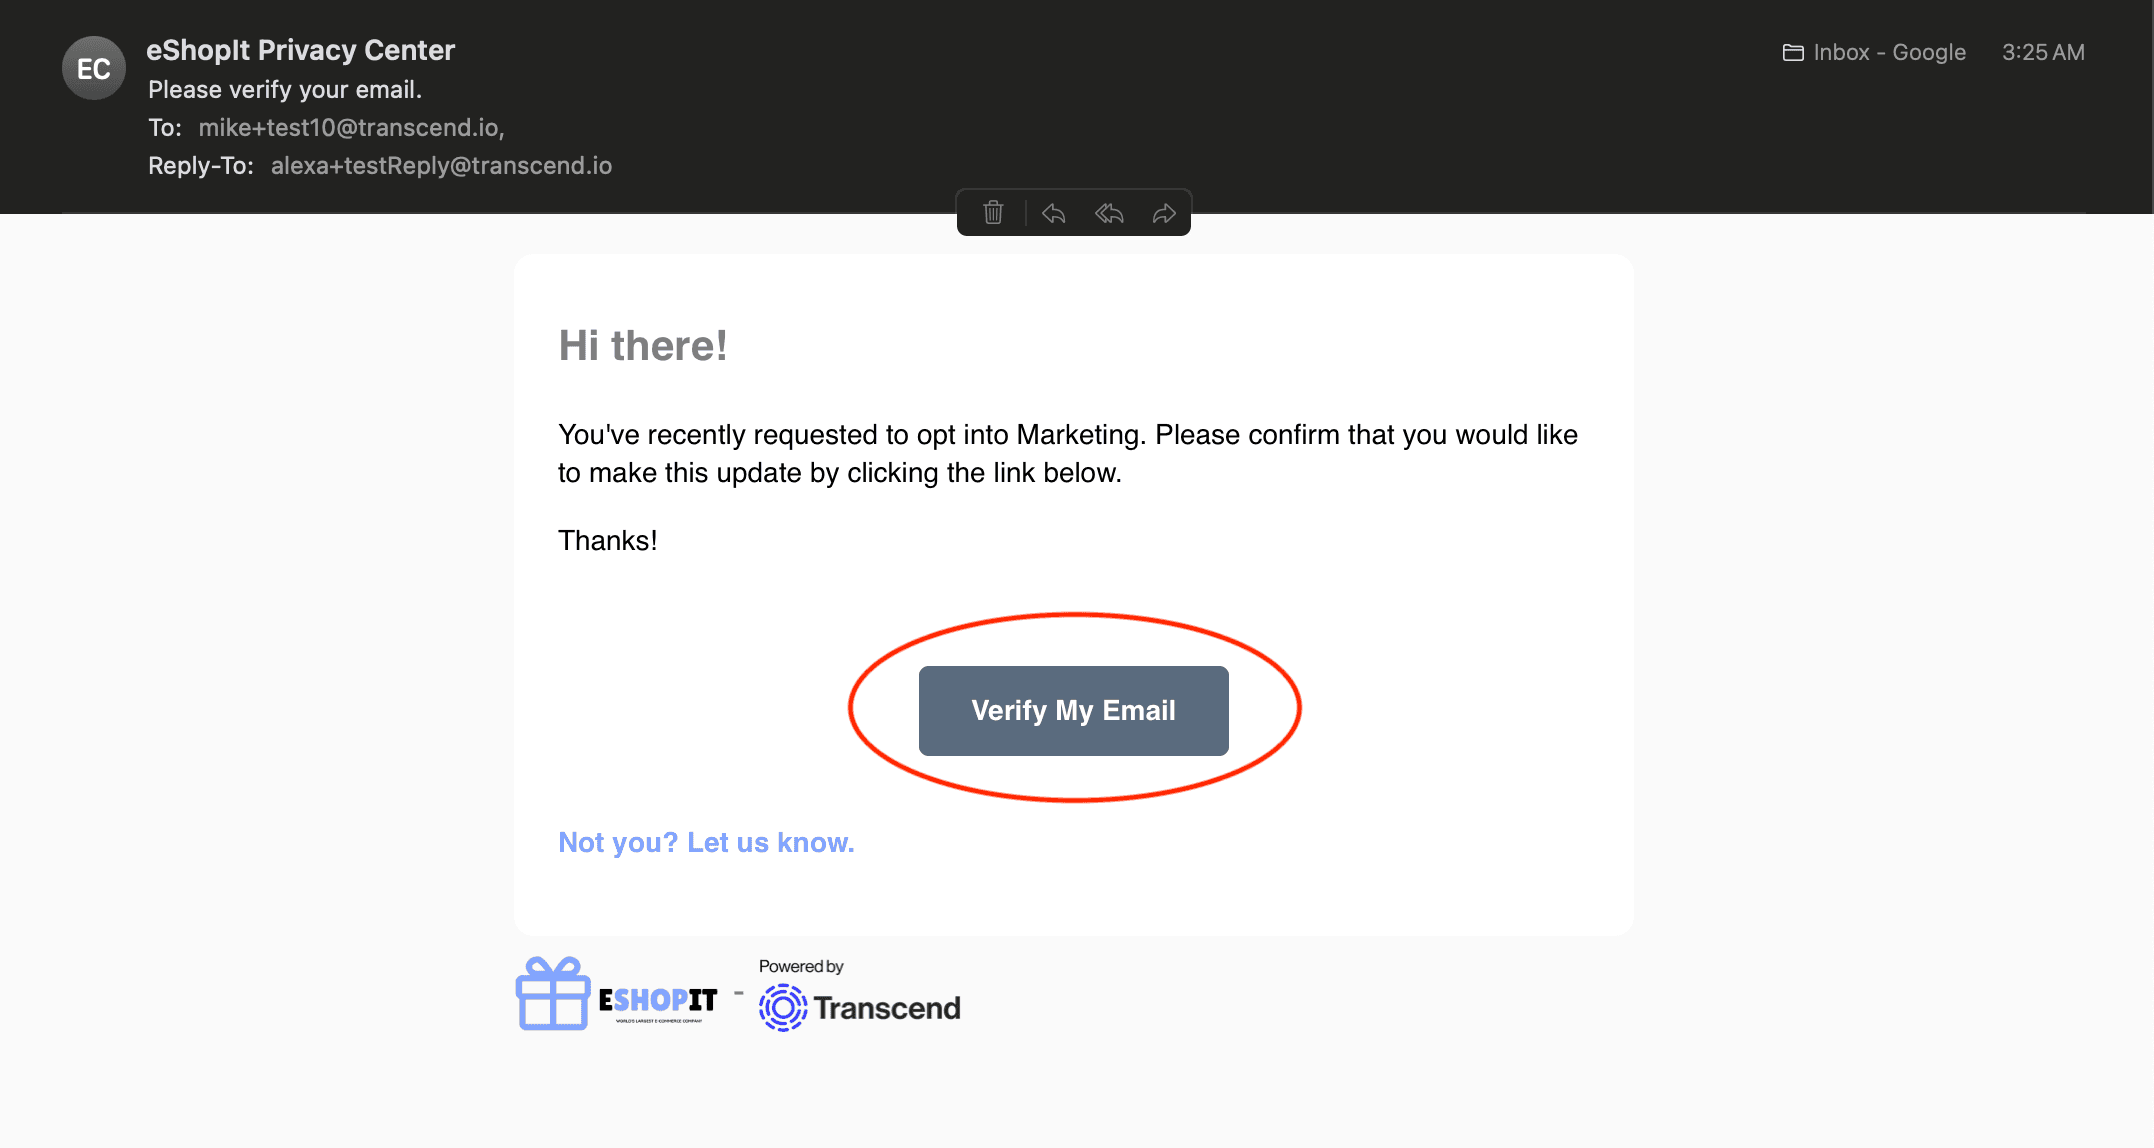
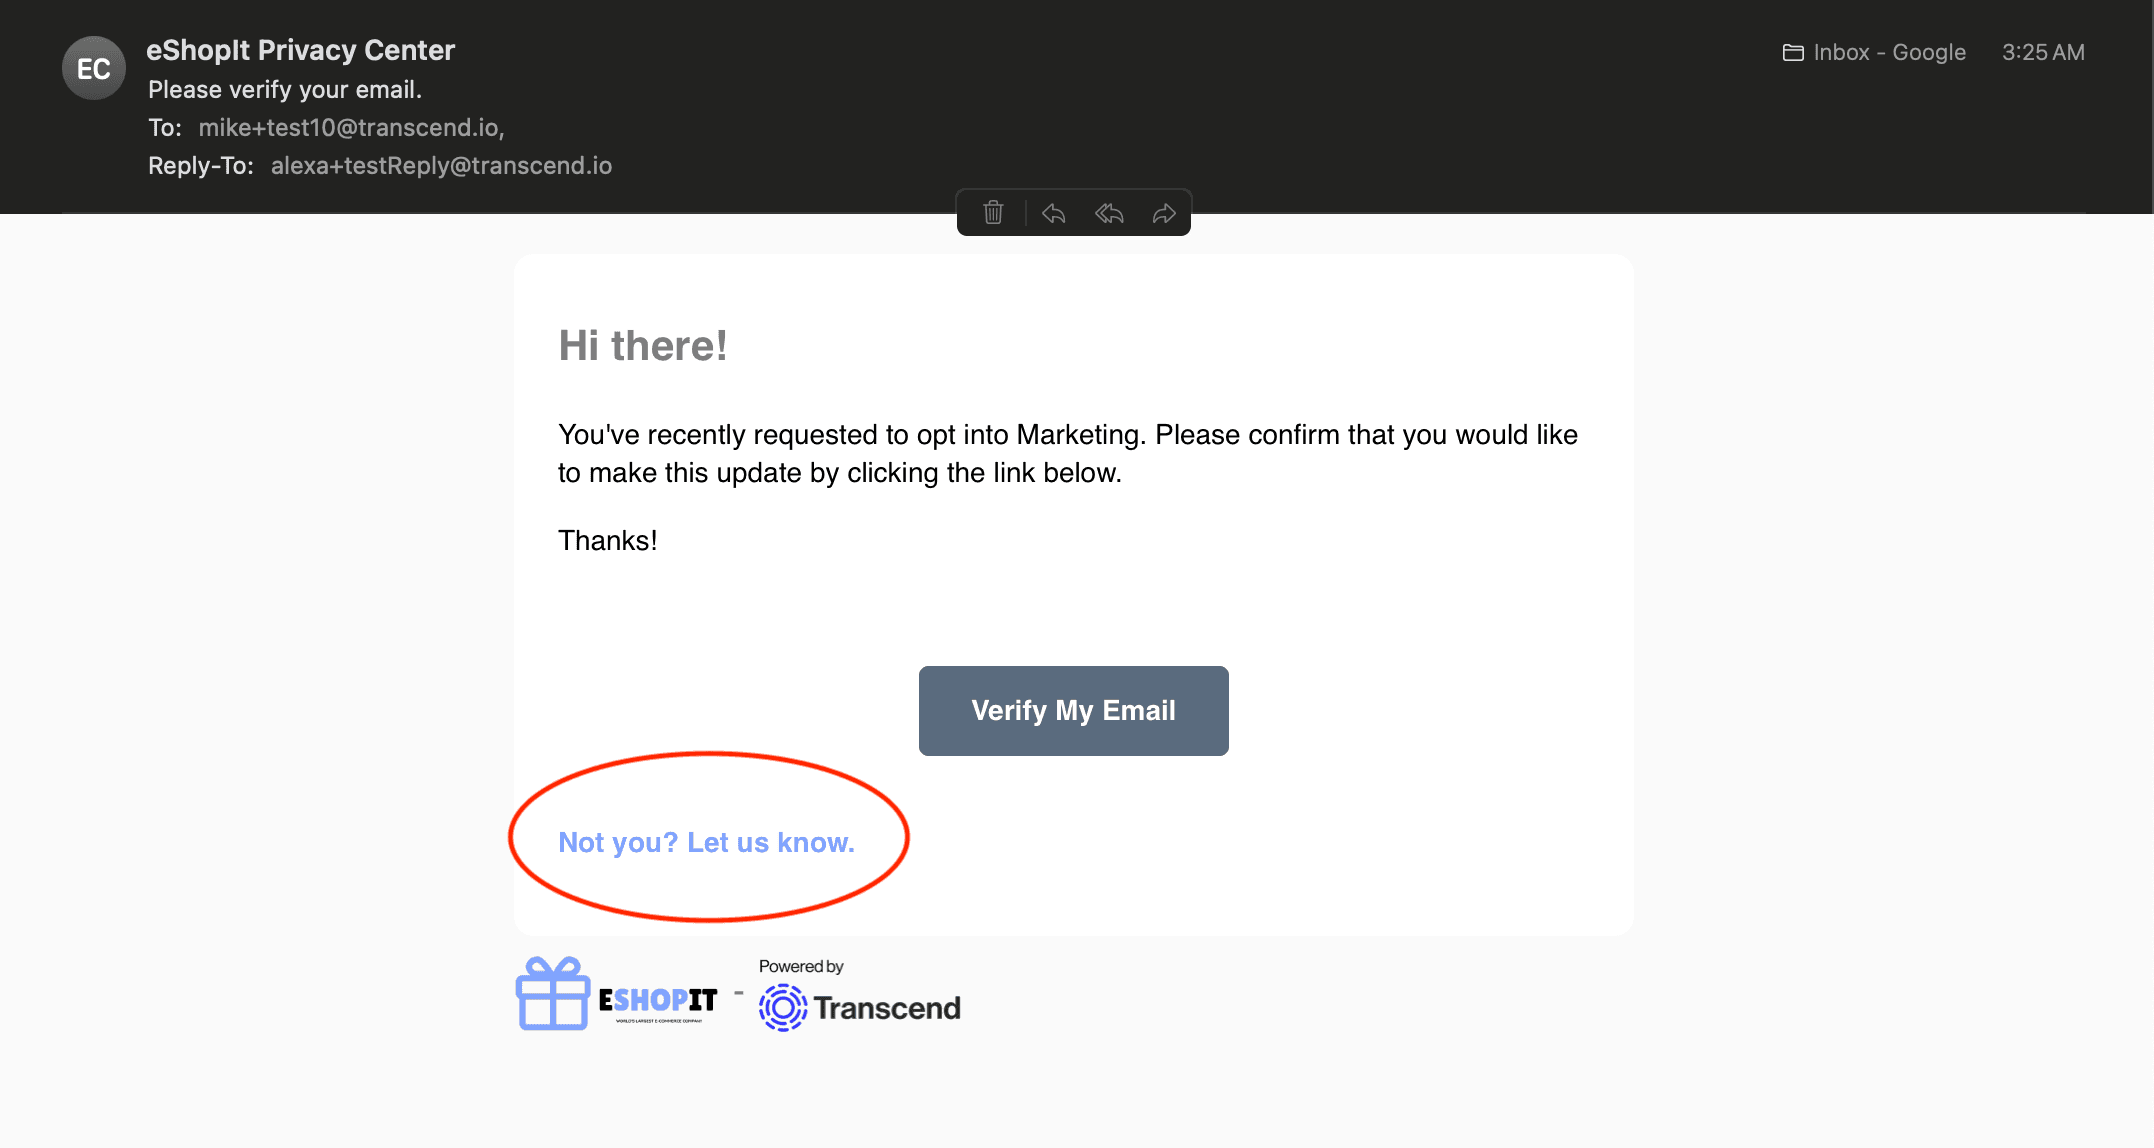
The requestor will get a link in their inbox where they will be prompted to confirm their request.
Clicking this link will bring them back to your Transcend Privacy Center where they will be presented with a confirmation screen:
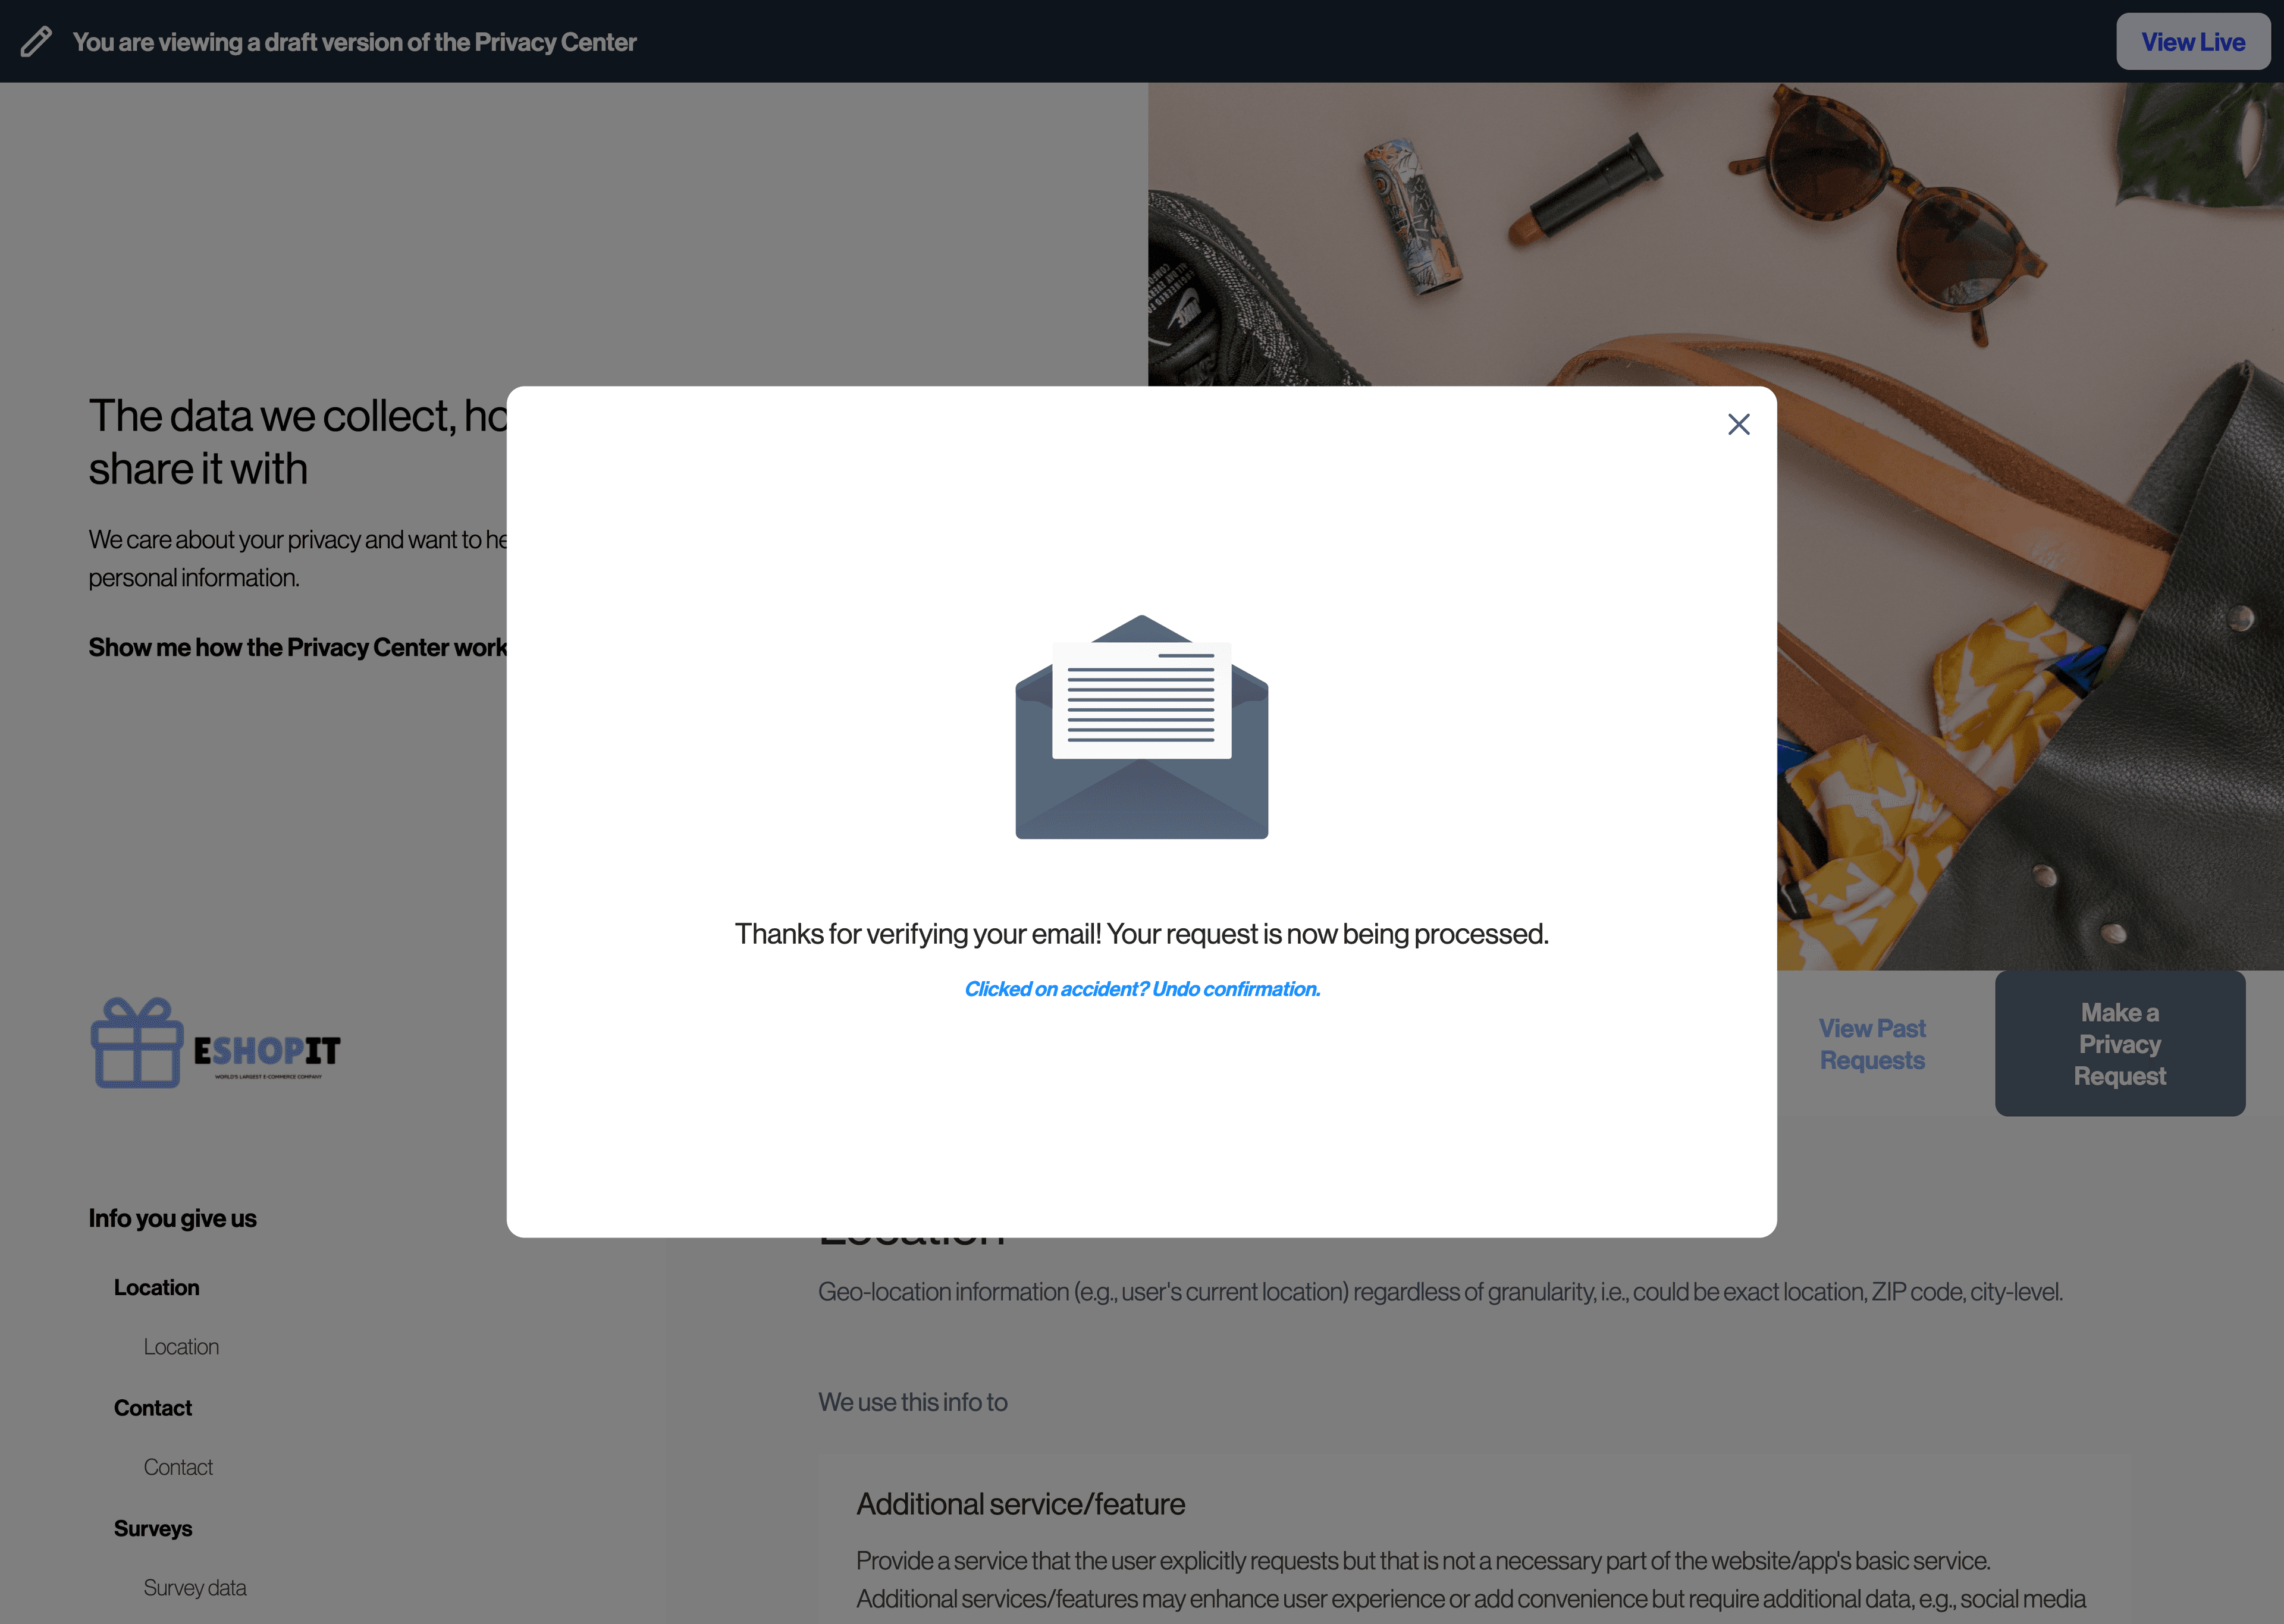
After confirmation, the request will enter the Compiling phase and queue up any updates in downstream systems.
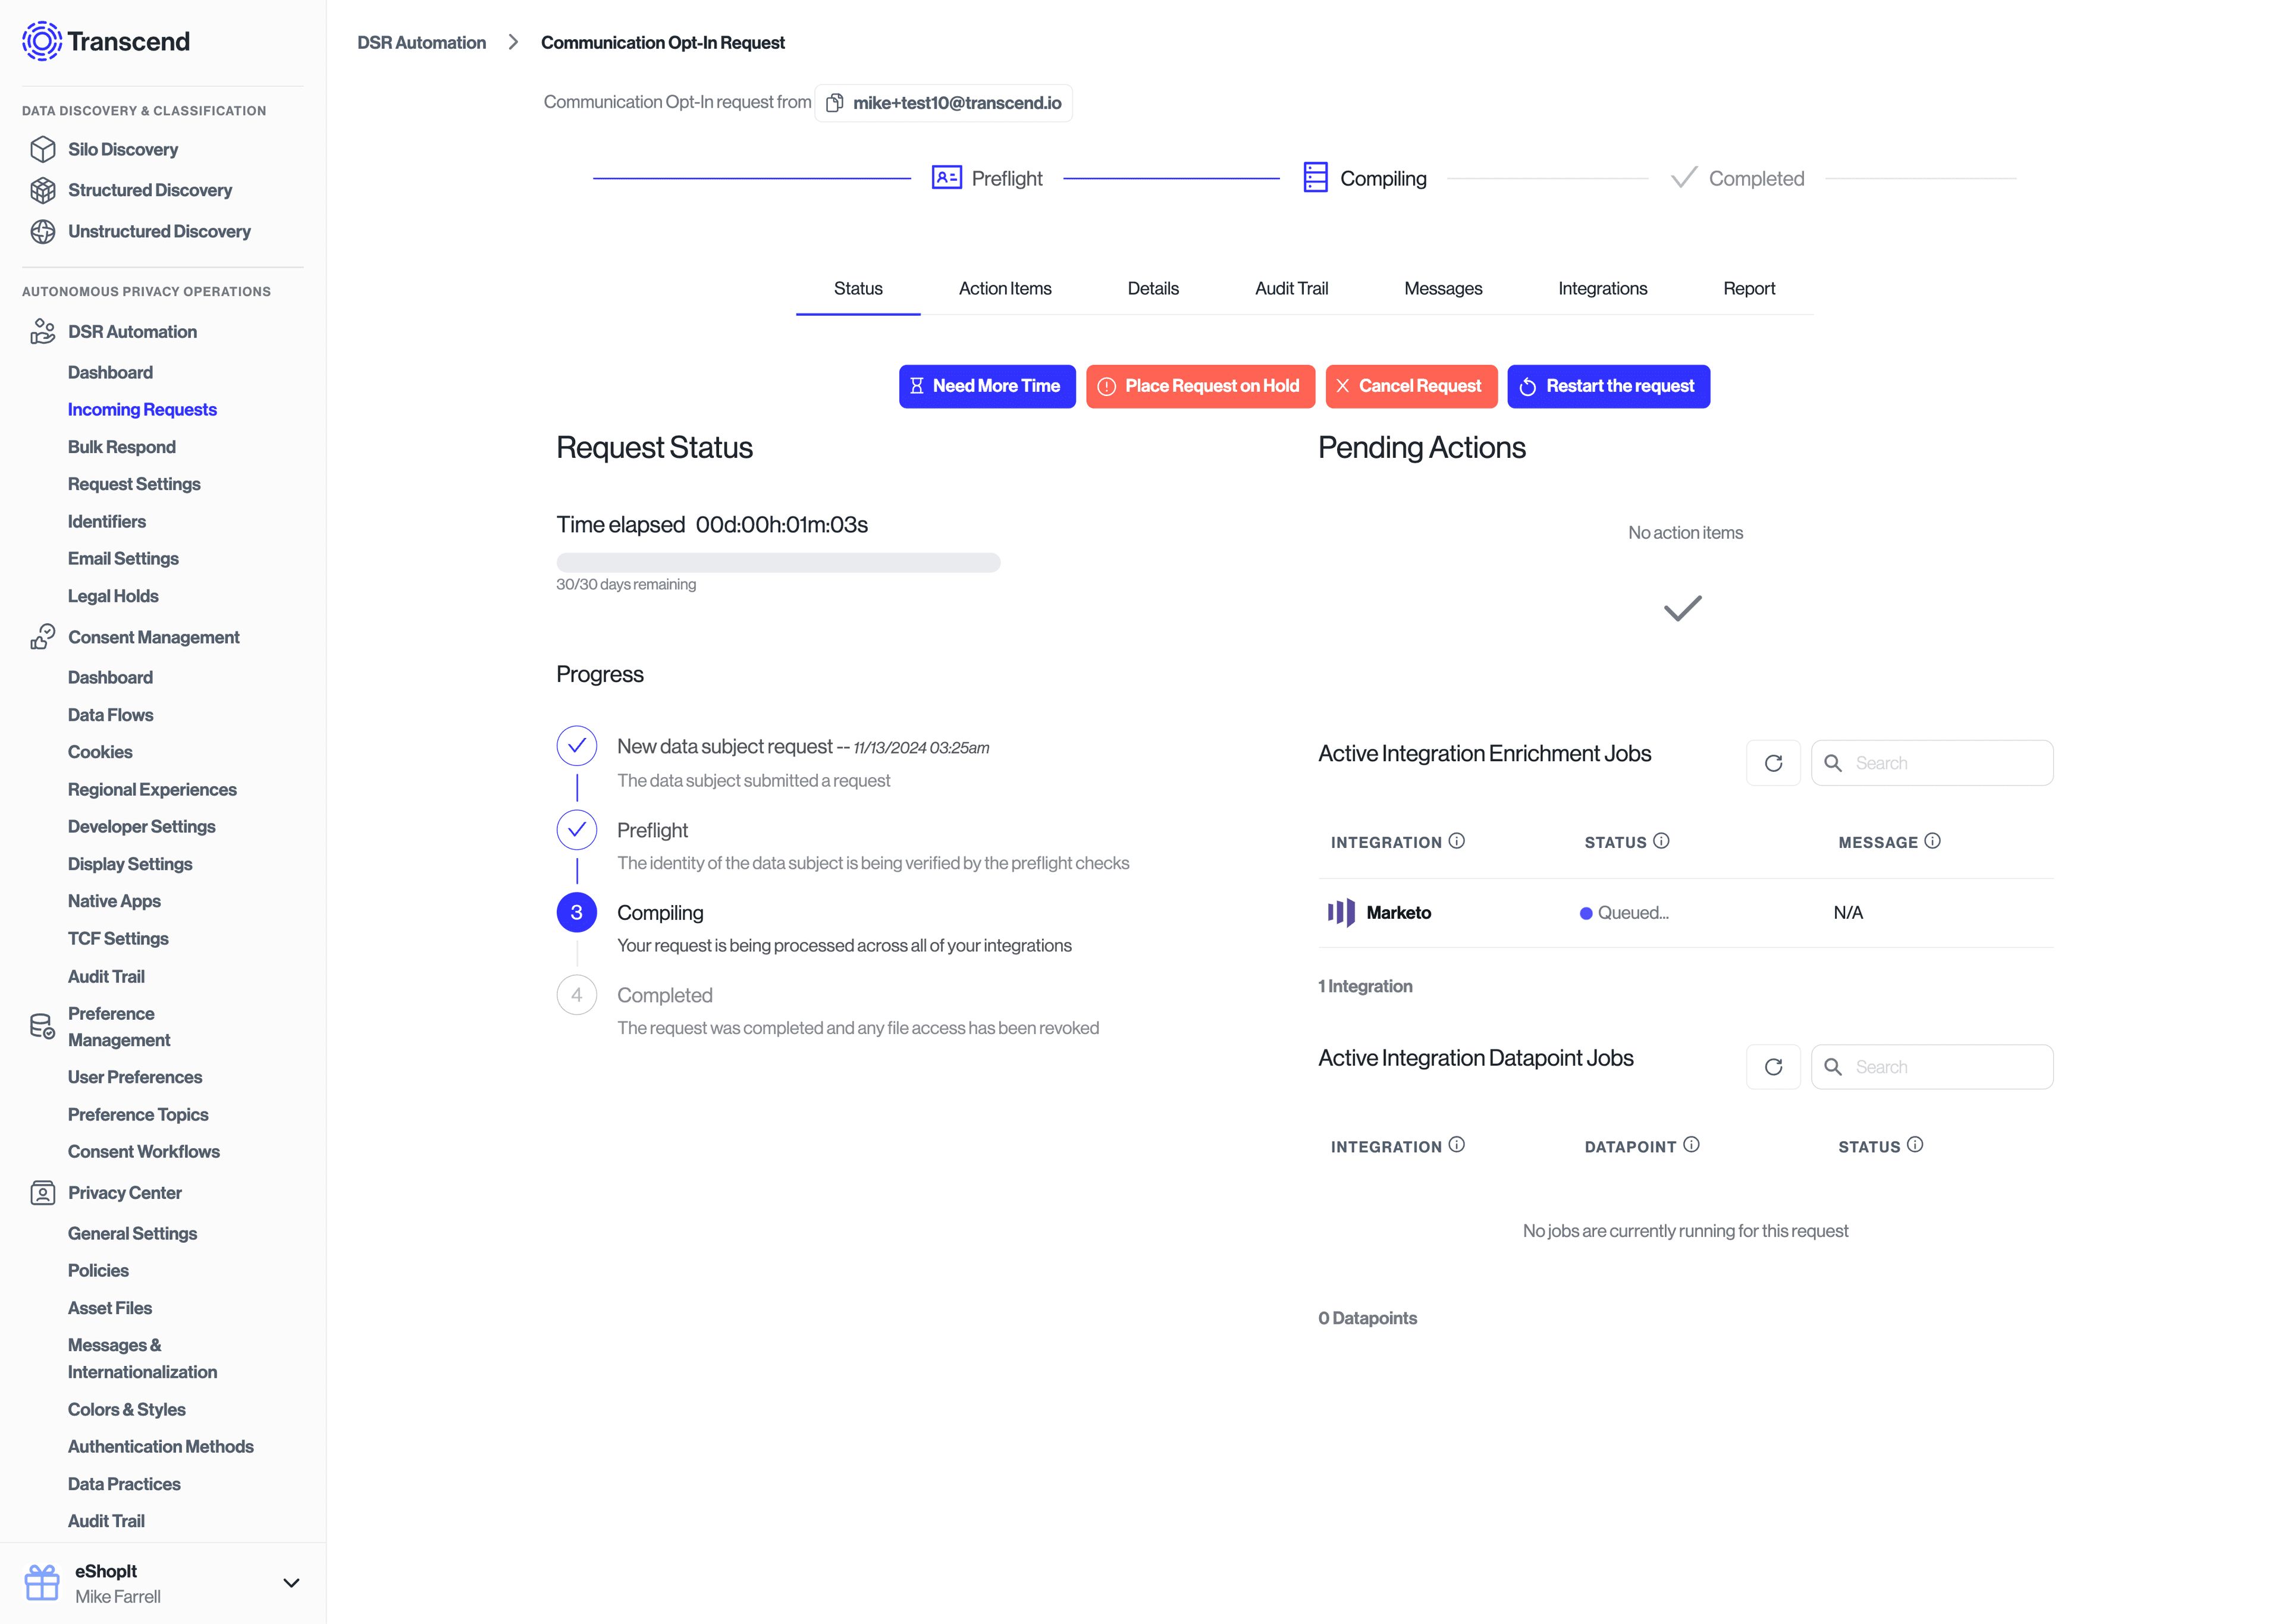
Additionally, the Preference Store will be updated to reflect the purpose and preference values that were consented to.
If the requestor changed their mind or did not want to confirm their changes, they can reject the request by clicking the "Not you? Let us know." link in the email.
Clicking this link will bring them back to your Transcend Privacy Center where they will be presented with a confirmation screen:
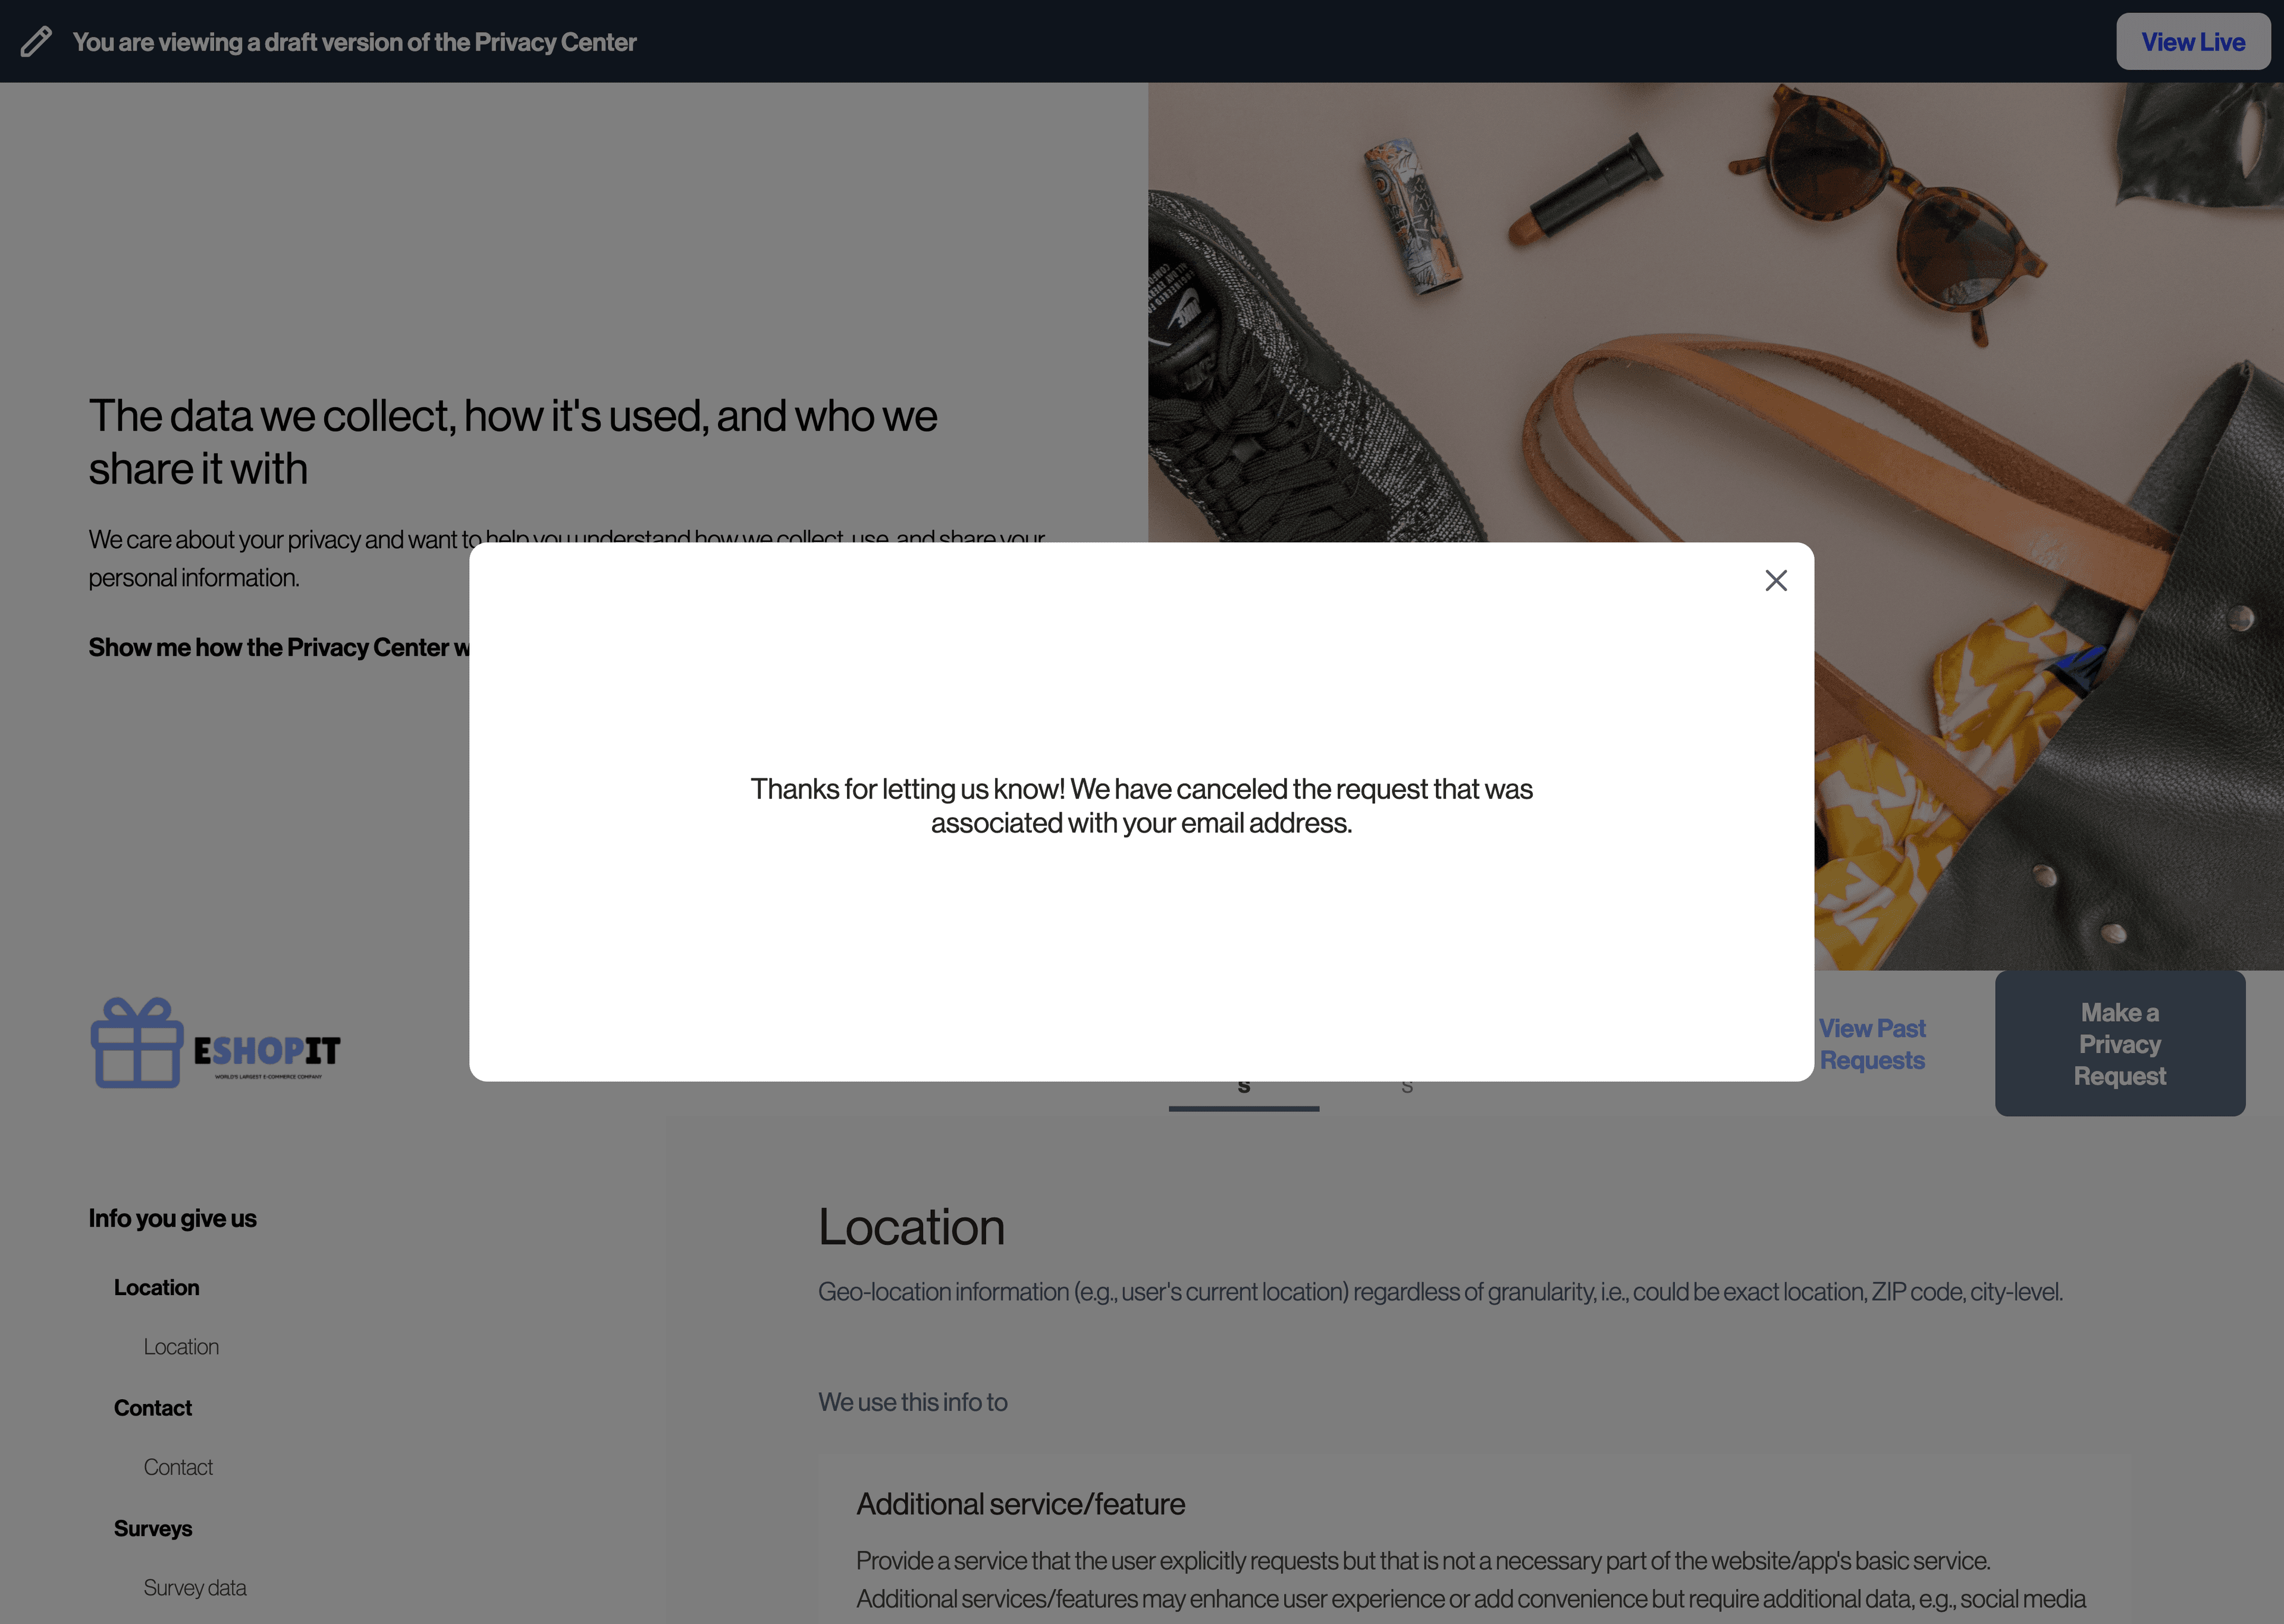
The request will enter the Verification Failed phase and queue up any updates in downstream systems.