Preference Management Implementation
Transcend's Preference Management empowers businesses to optimize compliant customer outreach by efficiently handling user permissions and preferences. This solution seamlessly collects, reconciles, stores, and updates user data across all systems and channels, ensuring that your customer interactions are both compliant and personalized.
Setting up Transcend Preference Management involves the following main steps:
- Configure Preference Store: Establish a centralized repository for managing user preferences.
- Configure Your Data Model: Purposes and Preference Topics: Define and organize the purposes and topics for which you collect user preferences.
- Configure Your Consent Workflows: Design workflows to manage how user consent is obtained and updated.
- Optional: Enable Privacy Settings: Optionally configure an additional tab in the Privacy Center where users can control other purposes related to their data and privacy choices.
Organizations can generate purpose and preference data from a variety of user-facing collection points (e.g. marketing forms, e-commerce checkout flows, retail kiosks, etc.) You can learn more about how collection points work with Transcend's Preference Management here.
This guide details the process of setting up the Privacy Center as the primary collection point for user preferences. It does not cover the use of the Transcend API for integrating Transcend Preference Management into other user-facing collection points. For instructions on integrating other collection points, please refer to our API documentation here.
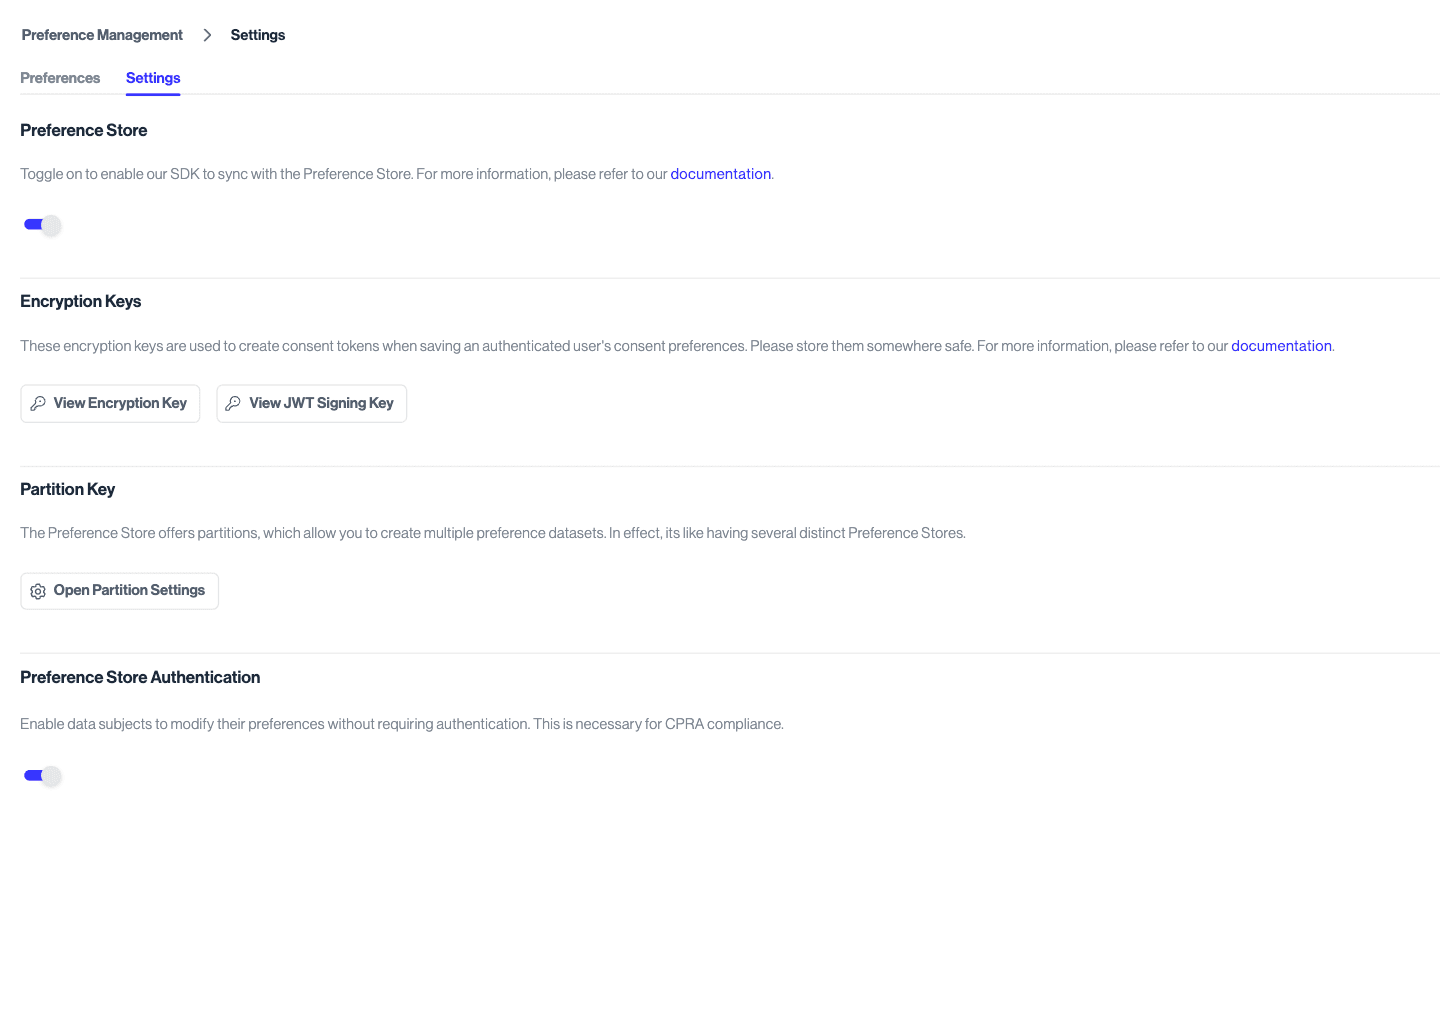
The initial step in setting up Preference Management is enabling the Preference Store. This feature ensures the persistence of users' consent preferences and synchronizes them across devices and applications.
- Enable Preference Store: Navigate to "Preference Management" > "Settings" and toggle the "Preference Store" option on.
- Enable Preference Store Authentication: On the same "Preference Management" > "Settings" page, toggle "Preference Store Authentication" on. This setting allows you to configure the authentication type for user preferences later. If you are using self-hosted Sombra™, you'll need to generate and configure your own encryption keys (see step 3 below).
- Configure Encryption Keys:
For Transcend-hosted Sombra: Click on "View Encryption Key" and "JWT Signing Key" to configure your encryption keys in the Admin Dashboard.
For self-hosted Sombra: You need to generate your own encryption keys and configure them in your Sombra deployment. See the Storing Consent Preferences documentation for detailed instructions on generating these keys and the Sombra Environment Variables documentation for configuration details. - Show Communication Preferences: Navigate to "Privacy Center" > "General Settings" and enable the "Show Communication Preferences" toggle to make the Privacy Center the primary point for users to manage their preferences.
After gaining a solid understanding of your business's data practices and the permissions and preferences you wish to collect from users (learn more about this exercise here), you can proceed to configure your Purposes and Preference Topics in Transcend.
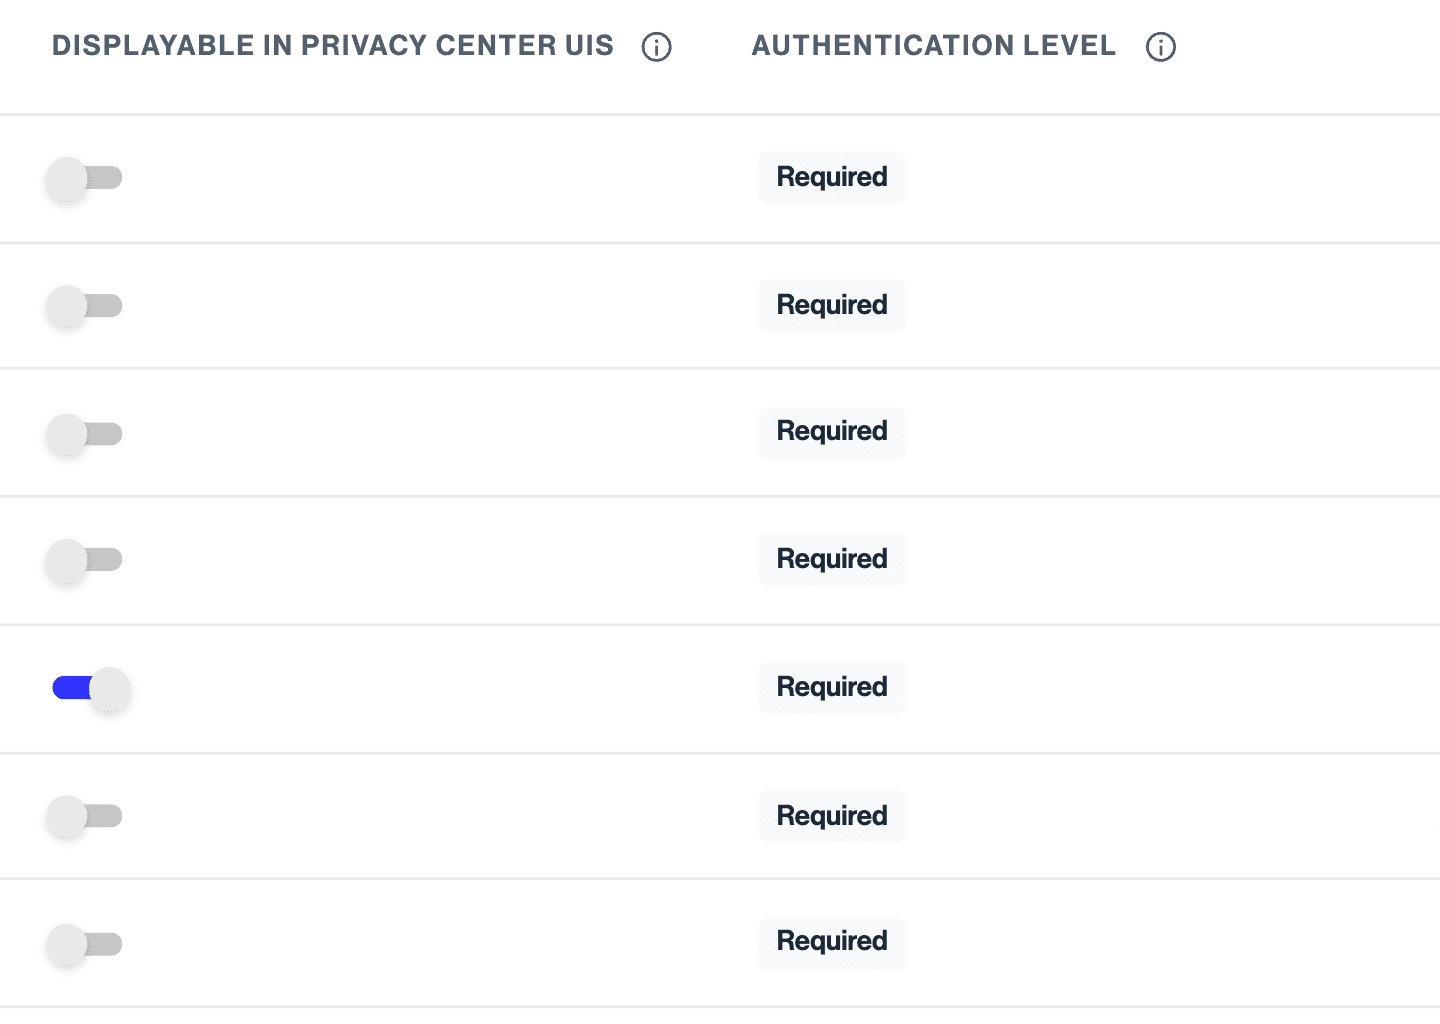
- Create Purposes: Navigate to "Consent Management" > "Regional Experiences" > "Purposes" to create the Purposes you want to display in the Privacy Settings tab.
- Enable Display: To show these Purposes in the Communication Preferences tab, activate the 'Displayable in Privacy Center UIs' toggle.
- Set Authentication Level: Ensure the Authentication Level is set to
Required. - Save Changes: Click Review Changes & Publish on the same page to save and publish your changes onto your Privacy Center. You can visualize your changes by going to "Privacy Center" > "General Settings" and clicking 'View Live Privacy Center'.
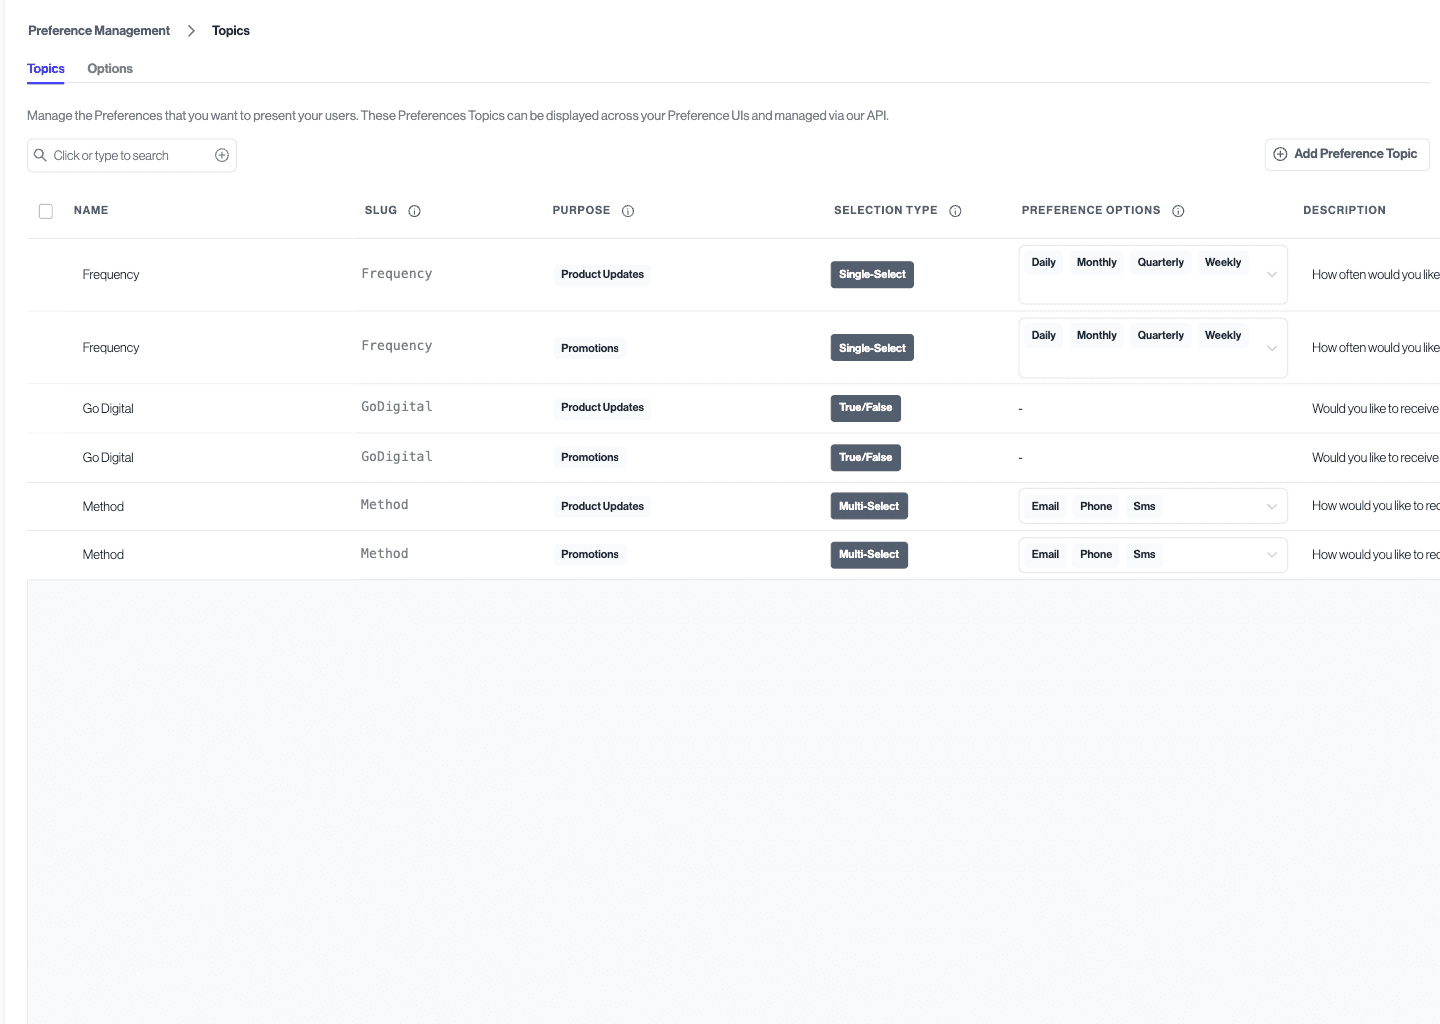
- Manage Preference Topics: Navigate to "Preference Management" > "Preference Topics" to manage the preference topics associated with each previously defined Purpose you wish to present to your users.
- Create Options for Each Topic: Each topic requires you to create options. If you haven't done so already, add the options you want users to select from when making a choice for this Preference Topic. You can create new Preference Options under the Options tab.
- Create Topics: Click on "+ Add Preference Topic" and complete the fields in the modal to create the topics you want to display. You will need to provide the Name, Slug, Description, Purpose, Preference Topic Selection Type, Preference Options, and indicate whether this will be shown in the Privacy Center.
- Enable Topics: Activate each topic by toggling on "Show in Privacy Center." You can then visualize your changes by going to Privacy Center > General Settings and clicking 'View Live Privacy Center'.
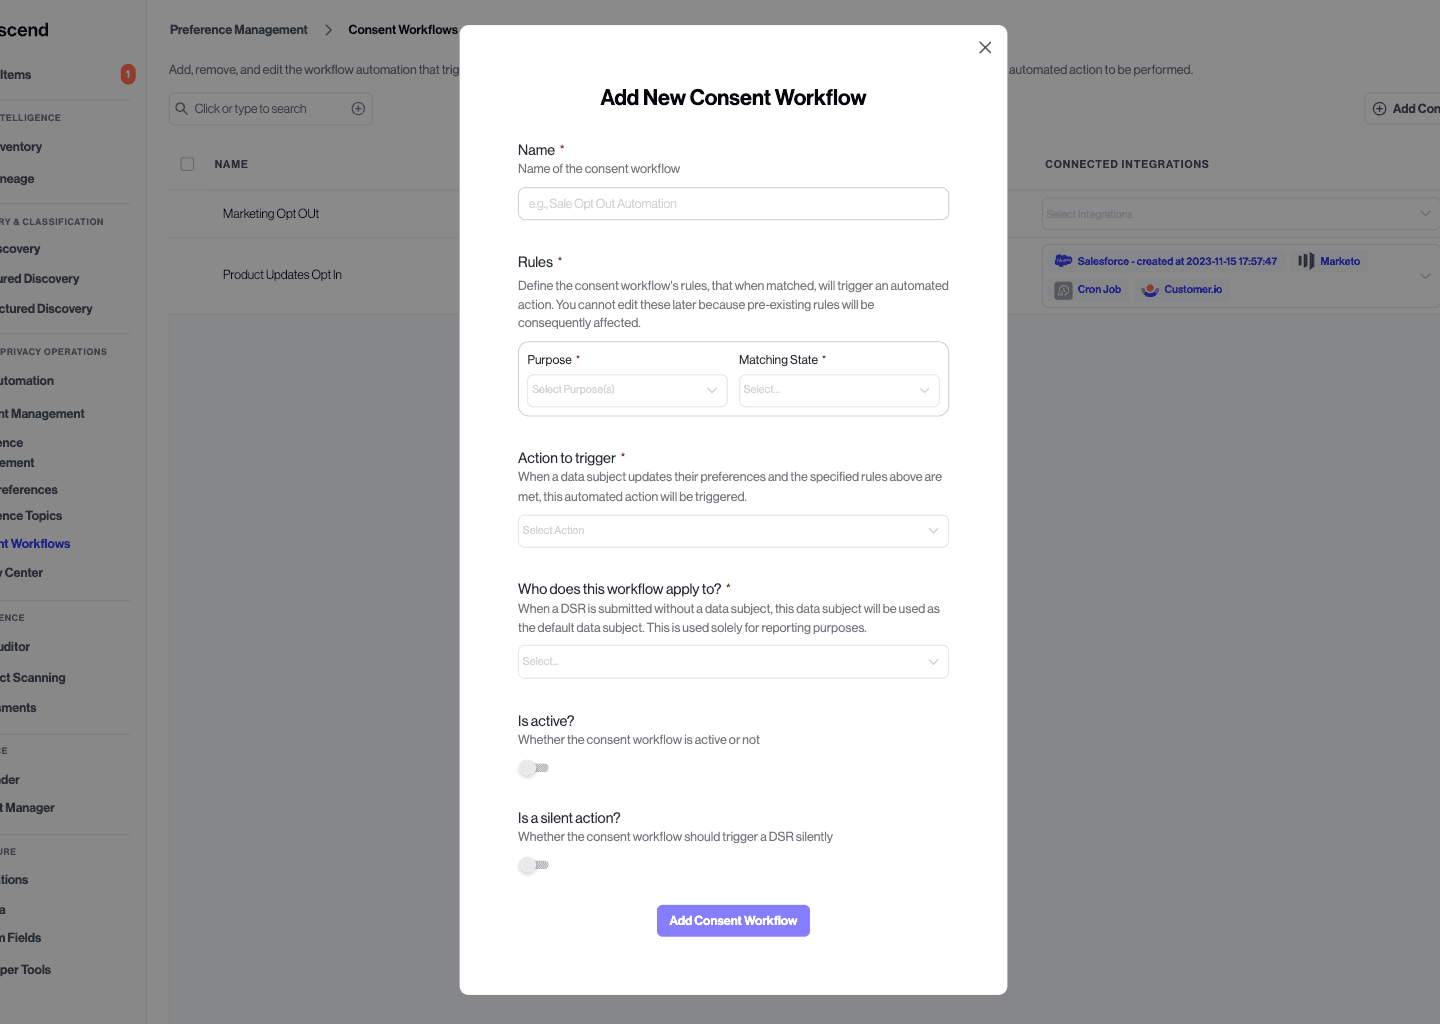
In this step you'll configure the workflows that will power automating preference and purpose changes across your connected downstream systems. You can learn more about this concept here.
- Prepare for Consent Workflows: Before setting up your Consent workflows, ensure that outbound integrations are connected and your DSR Automation is configured. If this hasn't been done yet, please refer to our DSR Automation Quickstart Guide.
- Create Your Consent Workflows: Navigate to "Preference Management" > "Consent Workflows". Click "+ Add Consent Workflow" to establish a new workflow that activates when data subjects specify their preferences. You will need to define a Name, Rules, Action to trigger, applicable data subject, active status, and whether a DSR will be triggered silently.
For each active Purpose (such that 'Displayable in Privacy Center UIs' is enabled), we recommend creating 2 consent workflows, one for when the Purpose matching state is True and one for when the Purpose matching state is False.
Whenever a Purpose choice is updated, the workflow that corresponds to its new value (True or False) will be run. If a Preference Topic choice is updated, the workflow that corresponds to the current value of its parent Purpose will be run.
- Select Integrations: Choose the integrations relevant to this consent workflow. Only integrations with the data action enabled will be available as options. If no integrations are selected, all integrations with the assigned request type will be triggered downstream.
In addition to setting up marketing preferences as outlined above, we offer an additional optional tab in the Privacy Center called Privacy Settings where Purposes can also be presented to users. The goal is to maximize the flexibility and options you have for how you want to display the various controls and choices you choose to offer. For example, you may choose to display explicitly privacy-related settings (e.g. Targeted Advertising, AI Training, or Sale/Sharing of Information) on the Privacy Settings tab and reserve the Communications Preferences tab for choices and granular preferences related to how they wish to be marketed to.
The Privacy Settings tab differs from the Communications Preferences section of the Privacy Center in several ways:
- Only Purposes can be displayed here: no Preference Topics will be displayed on this tab, even if their parent purpose is displayed.
- Authentication can be made optional on a per-purpose basis for purposes displayed on this page. For example, Privacy Settings can be configured such that a Do Not Sell choice can be processed for their email address without requiring them to first authenticate or demonstrate that the email address is theirs to comply with laws like CCPA.
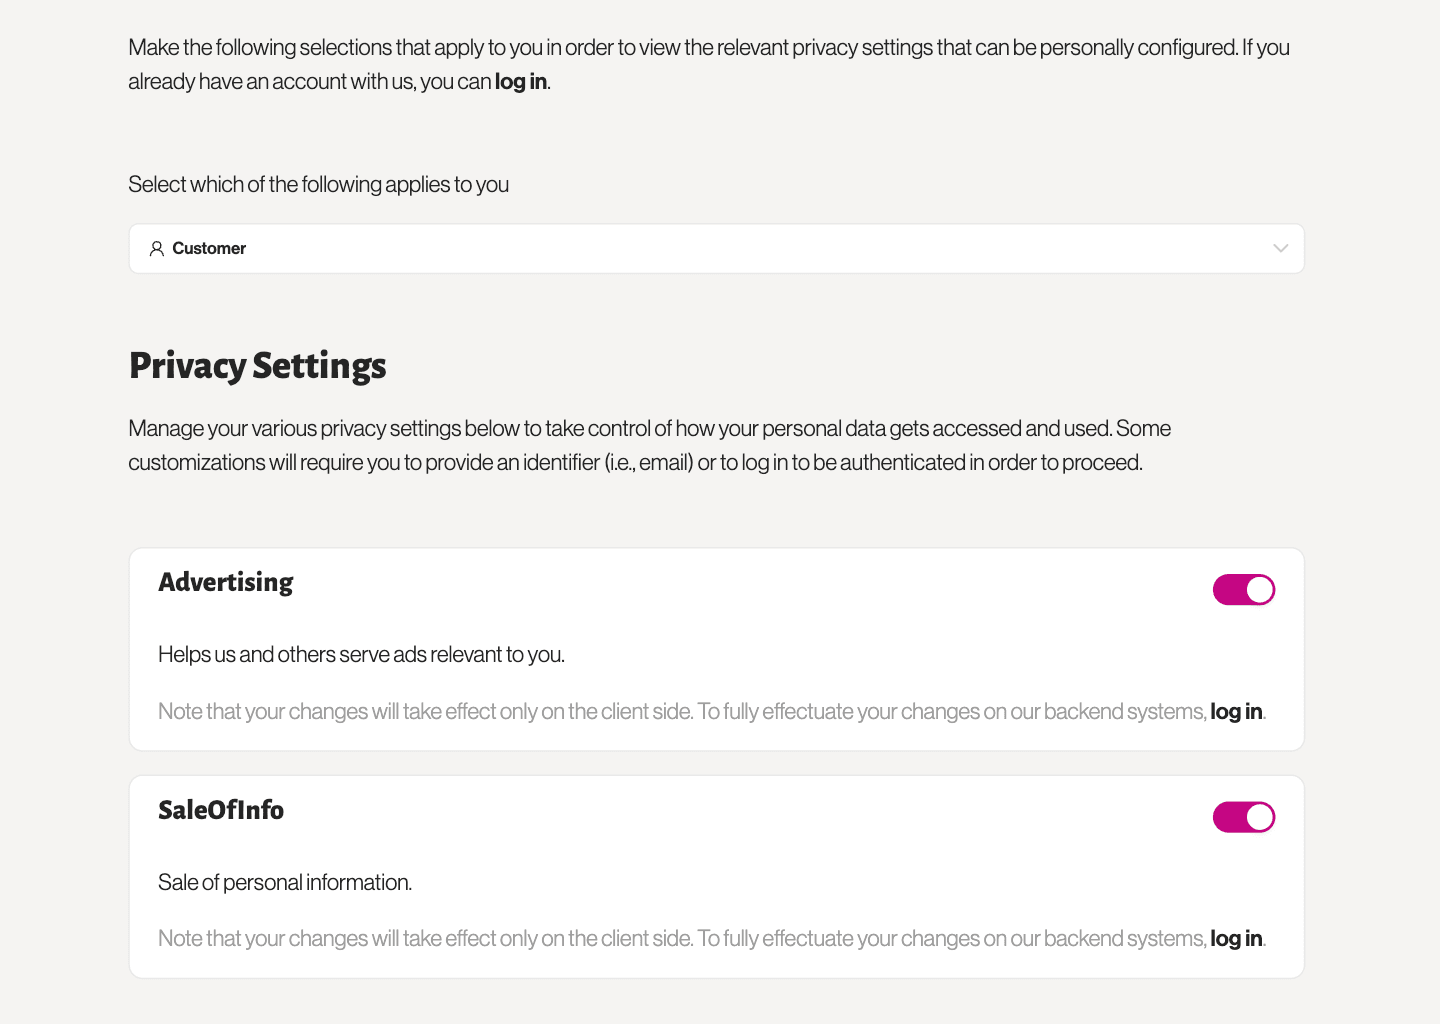
To set up the Privacy Settings tab:
- Create Purposes: Navigate to "Consent Management" > "Regional Experiences" > "Purposes" to create the Purposes you want displayed in the Privacy Settings tab.
- Create Regional Consent Experience: To establish a new regional consent experience, go to the Regional Consent Experiences page in the Transcend Dashboard, click "+ Add Experience," and configure the experience attributes as desired. The Privacy Settings tab will display whatever Purposes are applicable based on the user's detected Regional Experience.
- Set Authentication Requirements: Specify whether authentication is required for users to update the purpose in the Preference Store by selecting one of the following options: Required, Optional, or Allow opt-outs.
Required: The user must be authenticated in the Privacy Center in order to opt in or out of the purpose. (The authentication method is dependent on your configuration. Could be account login, email address verification via magic link, etc.)Optional: Users can opt in or out of the purpose even if they aren't authenticated.Allow opt-outs: Unauthenticated users can opt out of the purpose, but authentication is required to opt in. (Useful in situations where regulations may mandate allowing a user to opt out without authentication being required, but where you still want to require auth for opt-ins.)
- Review and Publish: Click "Review Changes & Publish" to save and publish your changes.