Salesforce: Inbound Webhook Triggers
This guide will run you through how to setup a custom webhook trigger in Salesforce to push consent changes into the Transcend Preference Store.
For other details about this integration, you can find documentation for that integration in the Transcend Dashboard. These instructions can also be found by selecting your integration from the Infrastructure -> Integrations page and clicking on the "Connection" tab to view the instructions.
Setting up webhook triggers into Transcend involves 4 steps:
- Write an Apex class to send a PUT request to the Transcend API.
- Create an Apex Trigger to invoke the webhook when your consent fields changes.
- Add your Sombra endpoint to the Salesforce Remote Site Settings
- Test the integration.
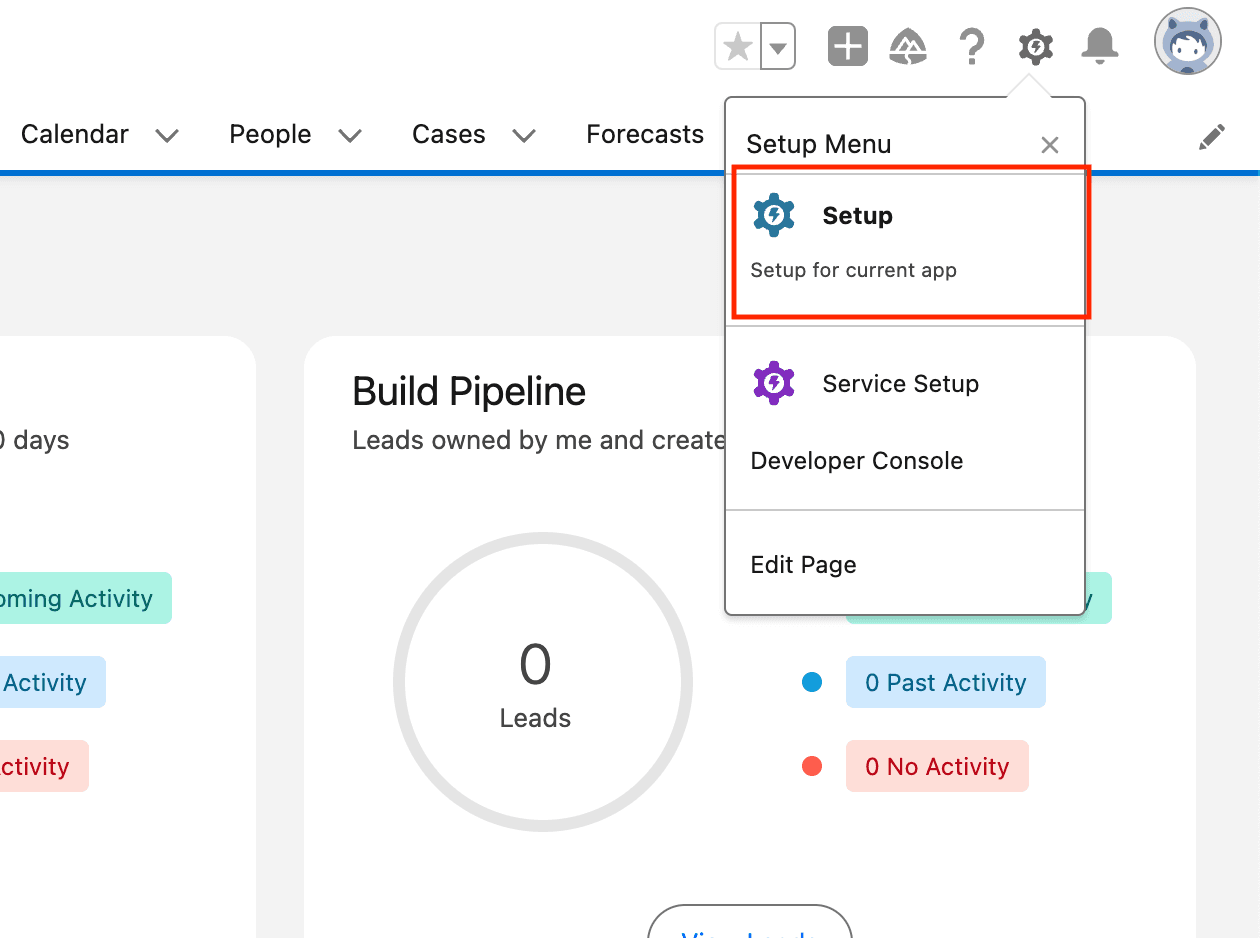
- Log in to Salesforce and click the gear in the top right hand corner of the screen and click "Setup"
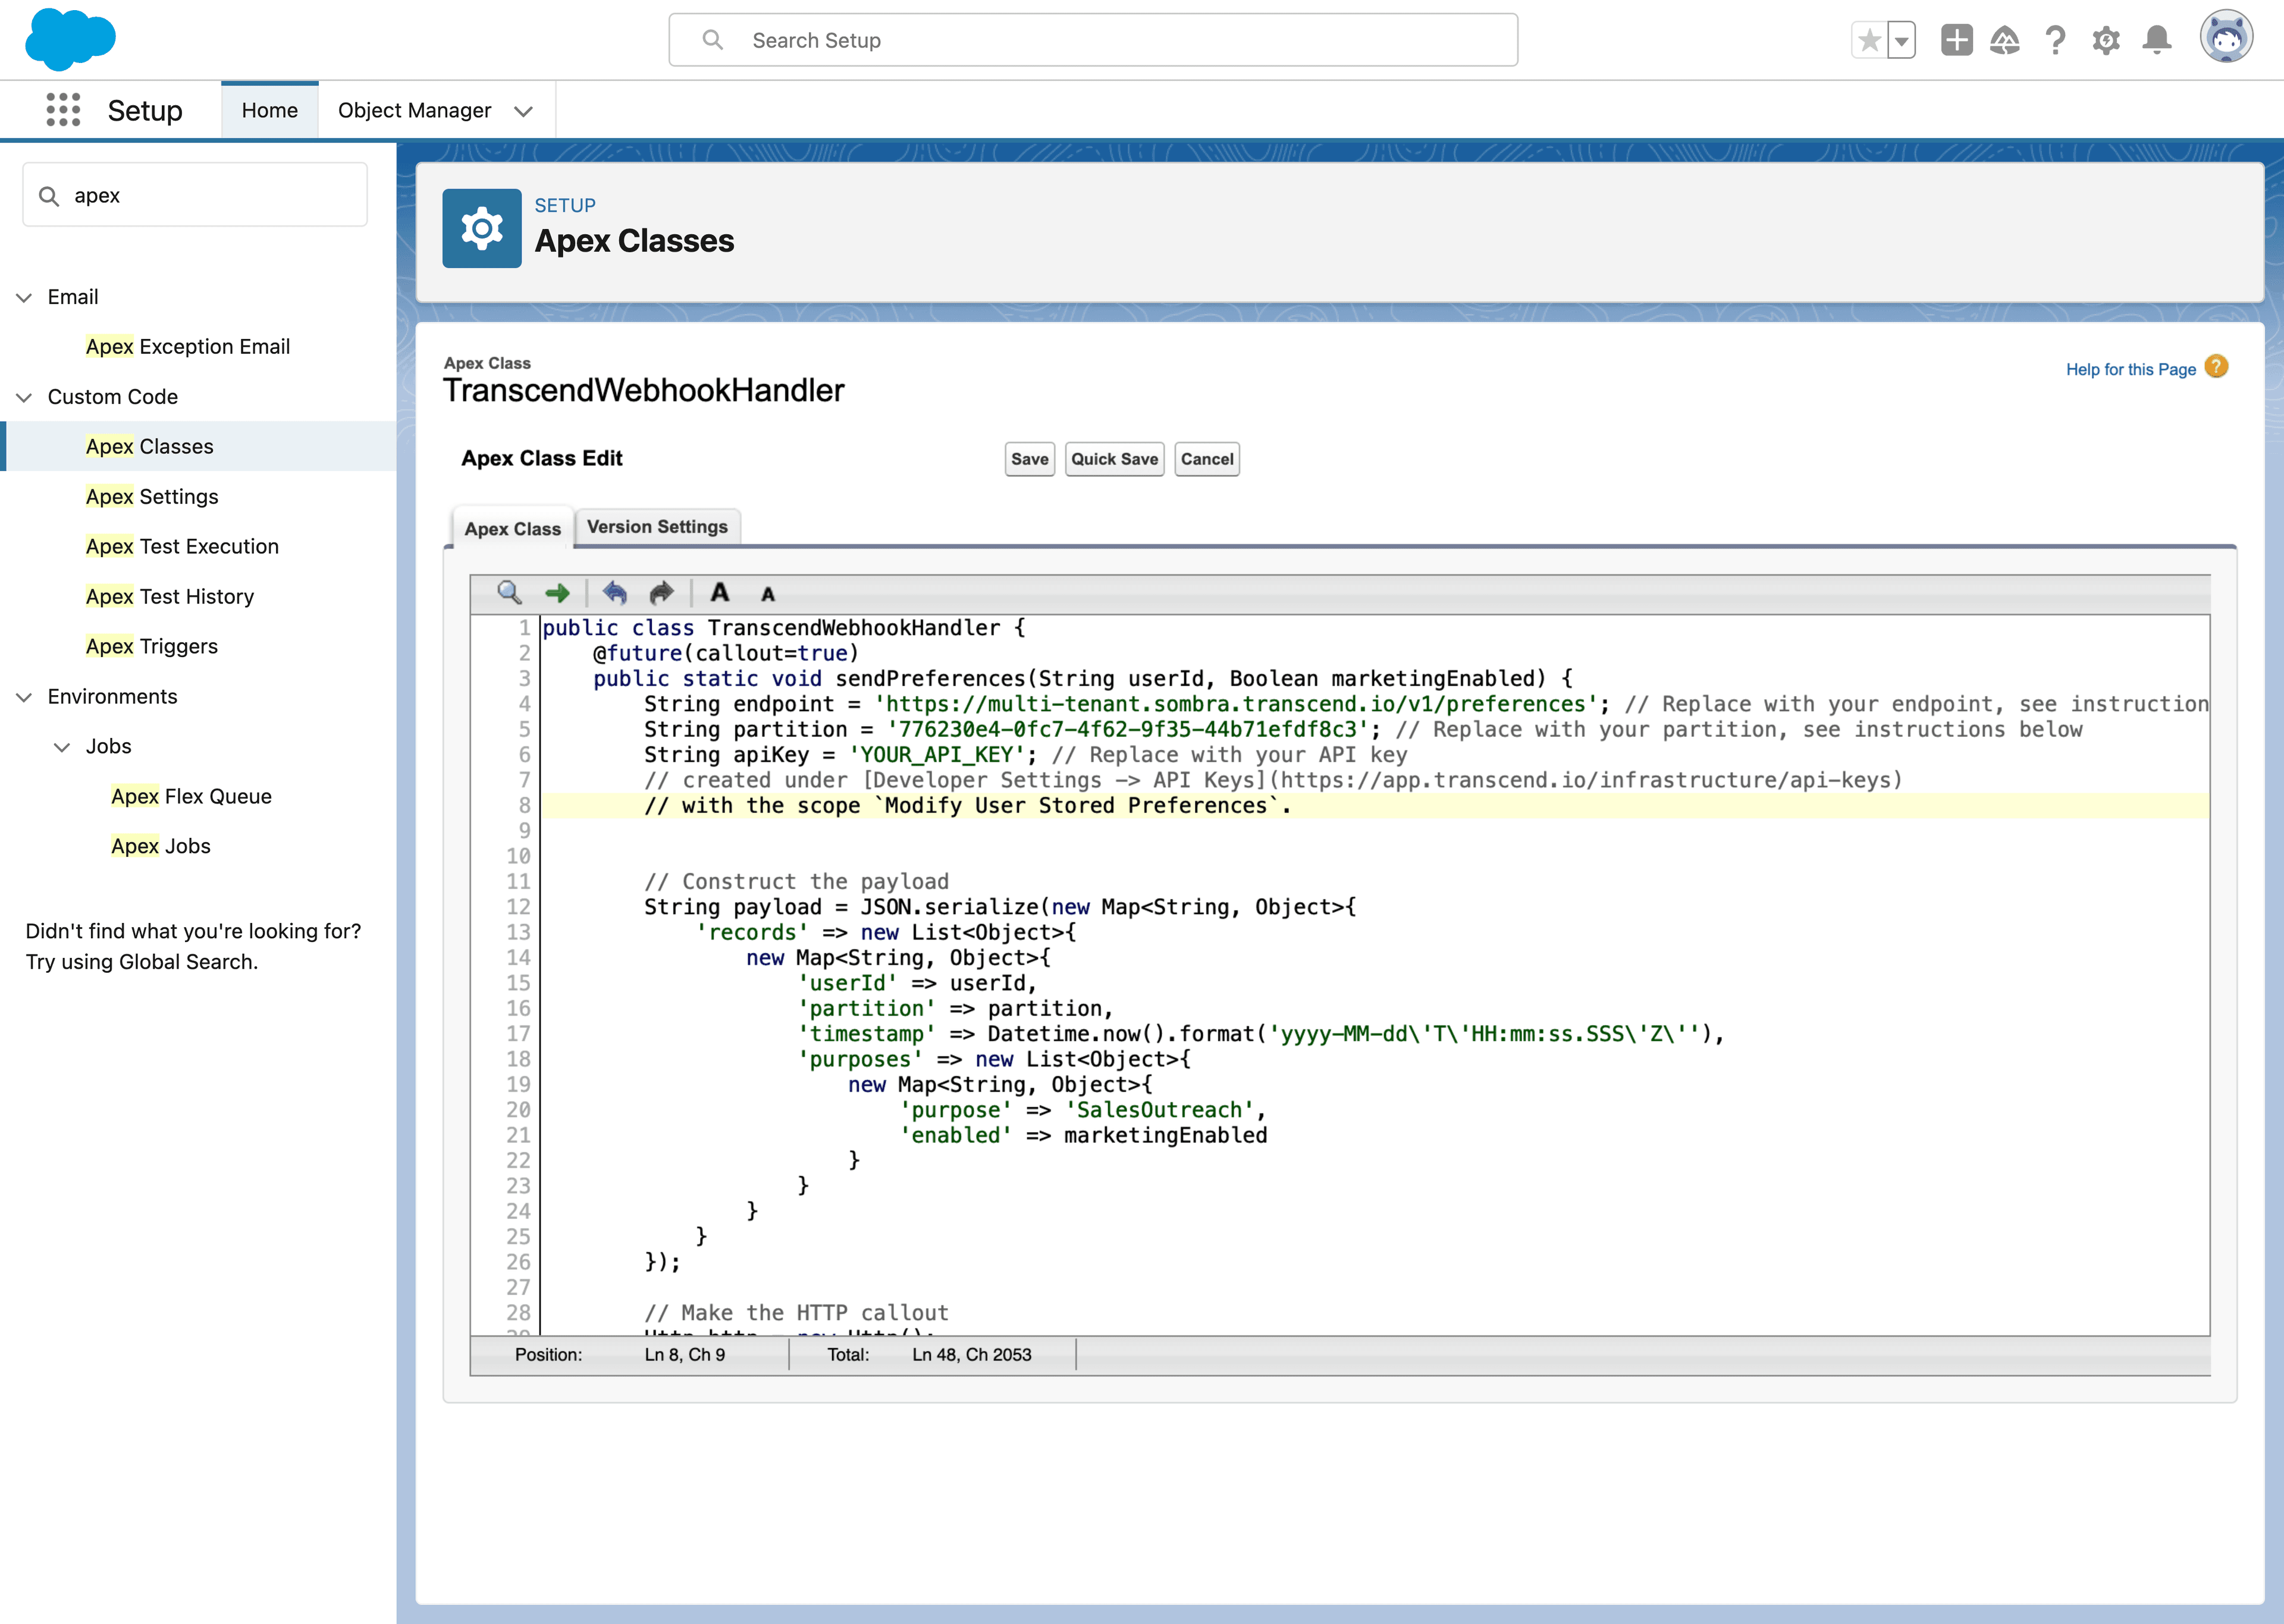
- In the left hand side menu, search "Apex Classes" and select the option "Custom Code -> Apex Classes".

- Click "New"

- Paste the following code. You will need to switch out:
- Your parition
- Your API key
- Your purpose/preference API shape
Once completed, hit save:
public class TranscendWebhookHandler {
  @future(callout=true)
  public static void sendPreferences(String userId, Boolean salesOutreachEnabled) {
    String endpoint = 'https://multi-tenant.sombra.transcend.io/v1/preferences'; // Replace with your endpoint, see instructions below
    String partition = '776230e4-0fc7-4f62-9f35-44b71efdf8c3'; // Replace with your partition, see instructions below
    String apiKey = 'YOUR_API_KEY'; // Replace with your API key
    // created under [Developer Settings -> API Keys](https://app.transcend.io/infrastructure/api-keys)
    // with the scope `Modify User Stored Preferences`.

    // Construct the payload
    String payload = JSON.serialize(new Map<String, Object>{
      'records' => new List<Object>{
        new Map<String, Object>{
          'userId' => userId,
          'partition' => partition,
          'timestamp' => Datetime.now().format('yyyy-MM-dd\'T\'HH:mm:ss.SSS\'Z\''),
          'purposes' => new List<Object>{
            new Map<String, Object>{
              'purpose' => 'SalesOutreach',
              'enabled' => salesOutreachEnabled
            }
          }
        }
      }
    });

    // Make the HTTP callout
    Http http = new Http();
    HttpRequest request = new HttpRequest();
    request.setEndpoint(endpoint);
    request.setMethod('PUT');
    request.setHeader('Content-Type', 'application/json');
    request.setHeader('Authorization', 'Bearer ' + apiKey);
    request.setBody(payload);

    try {
      HttpResponse response = http.send(request);
      if (response.getStatusCode() != 200) {
        System.debug('Error from API: ' + response.getBody());
      } else {
        System.debug('Webhook sent successfully: ' + response.getBody());
      }
    } catch (Exception e) {
      System.debug('Error during API call: ' + e.getMessage());
    }
  }
}
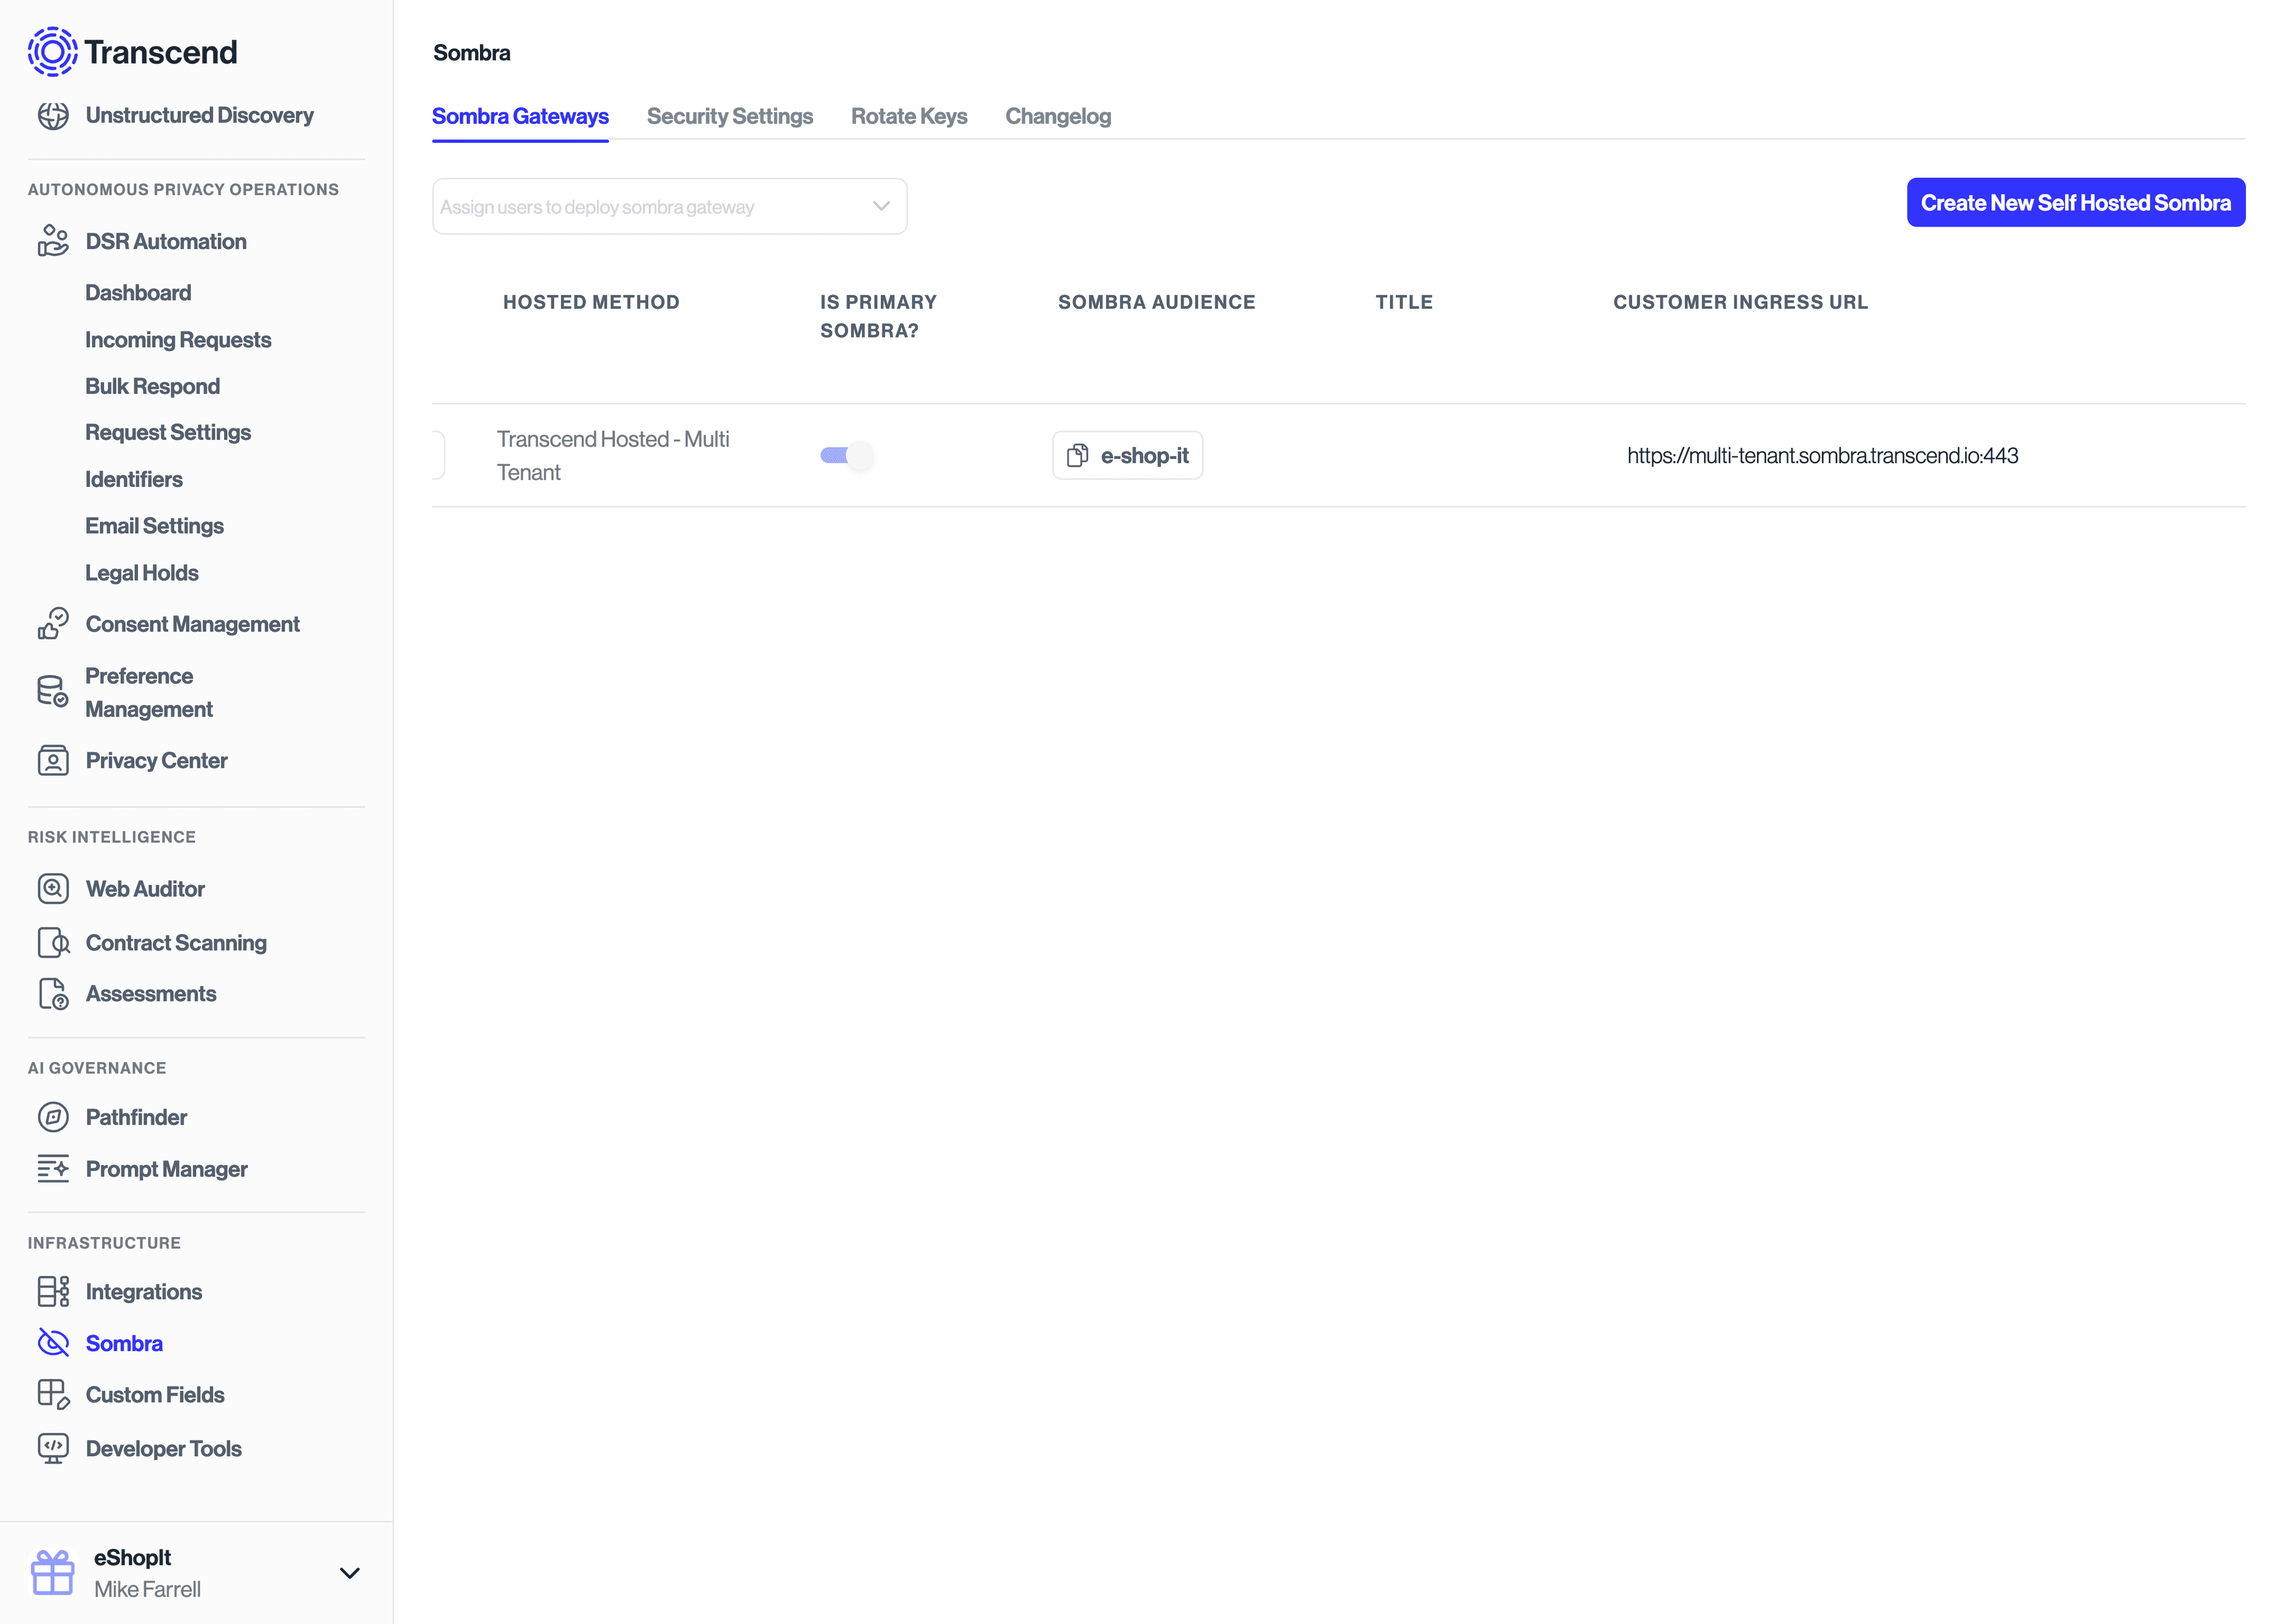
- Go to Infrastructure -> Sombra in your Transcend account
- Choose the Sombra™ gateway that makes sense for your use case (you most likely will want to use the Sombra marked as "Is Primary Sombra?")
- Copy the "Transcend Ingress URL" value as your Sombra base URL
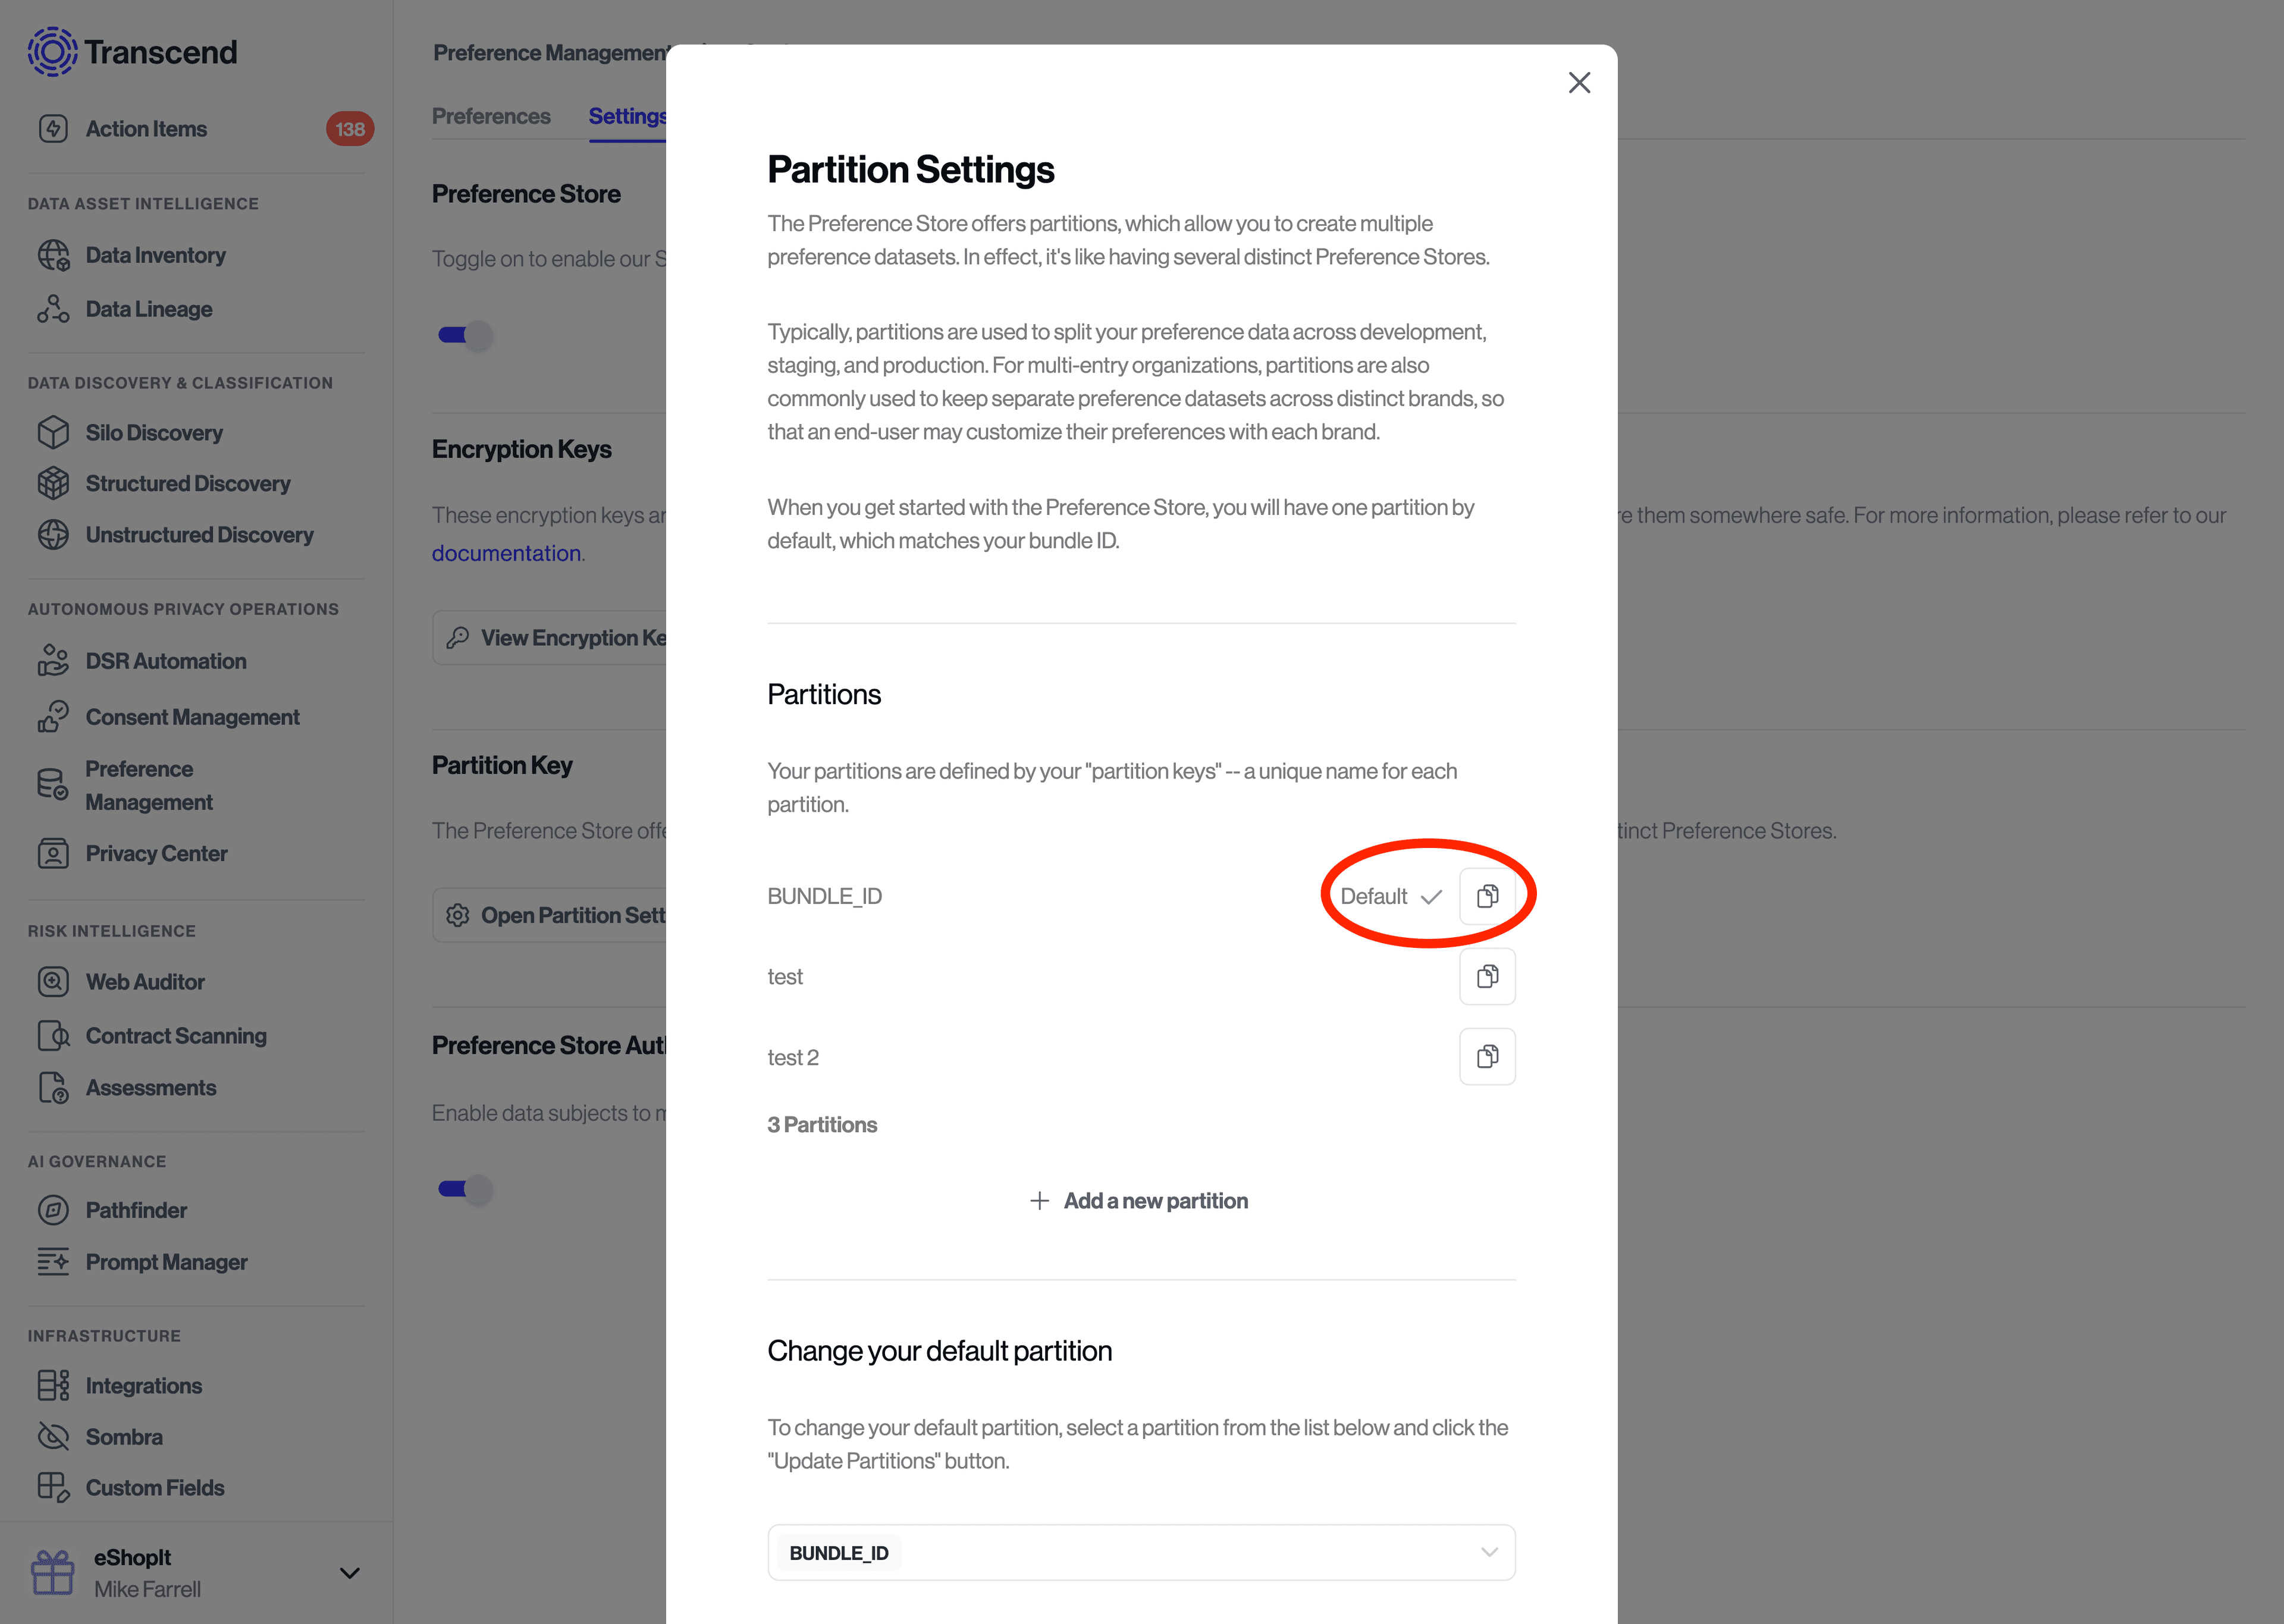
The partition can be thought of as the ID of the consent database to update. In most implementations, you will just have one unique partition in your account. Multiple partitions can be useful in situations where you have multiple brands, partners or data controllers for which you need to separately track consent preferences for.
To grab this value:
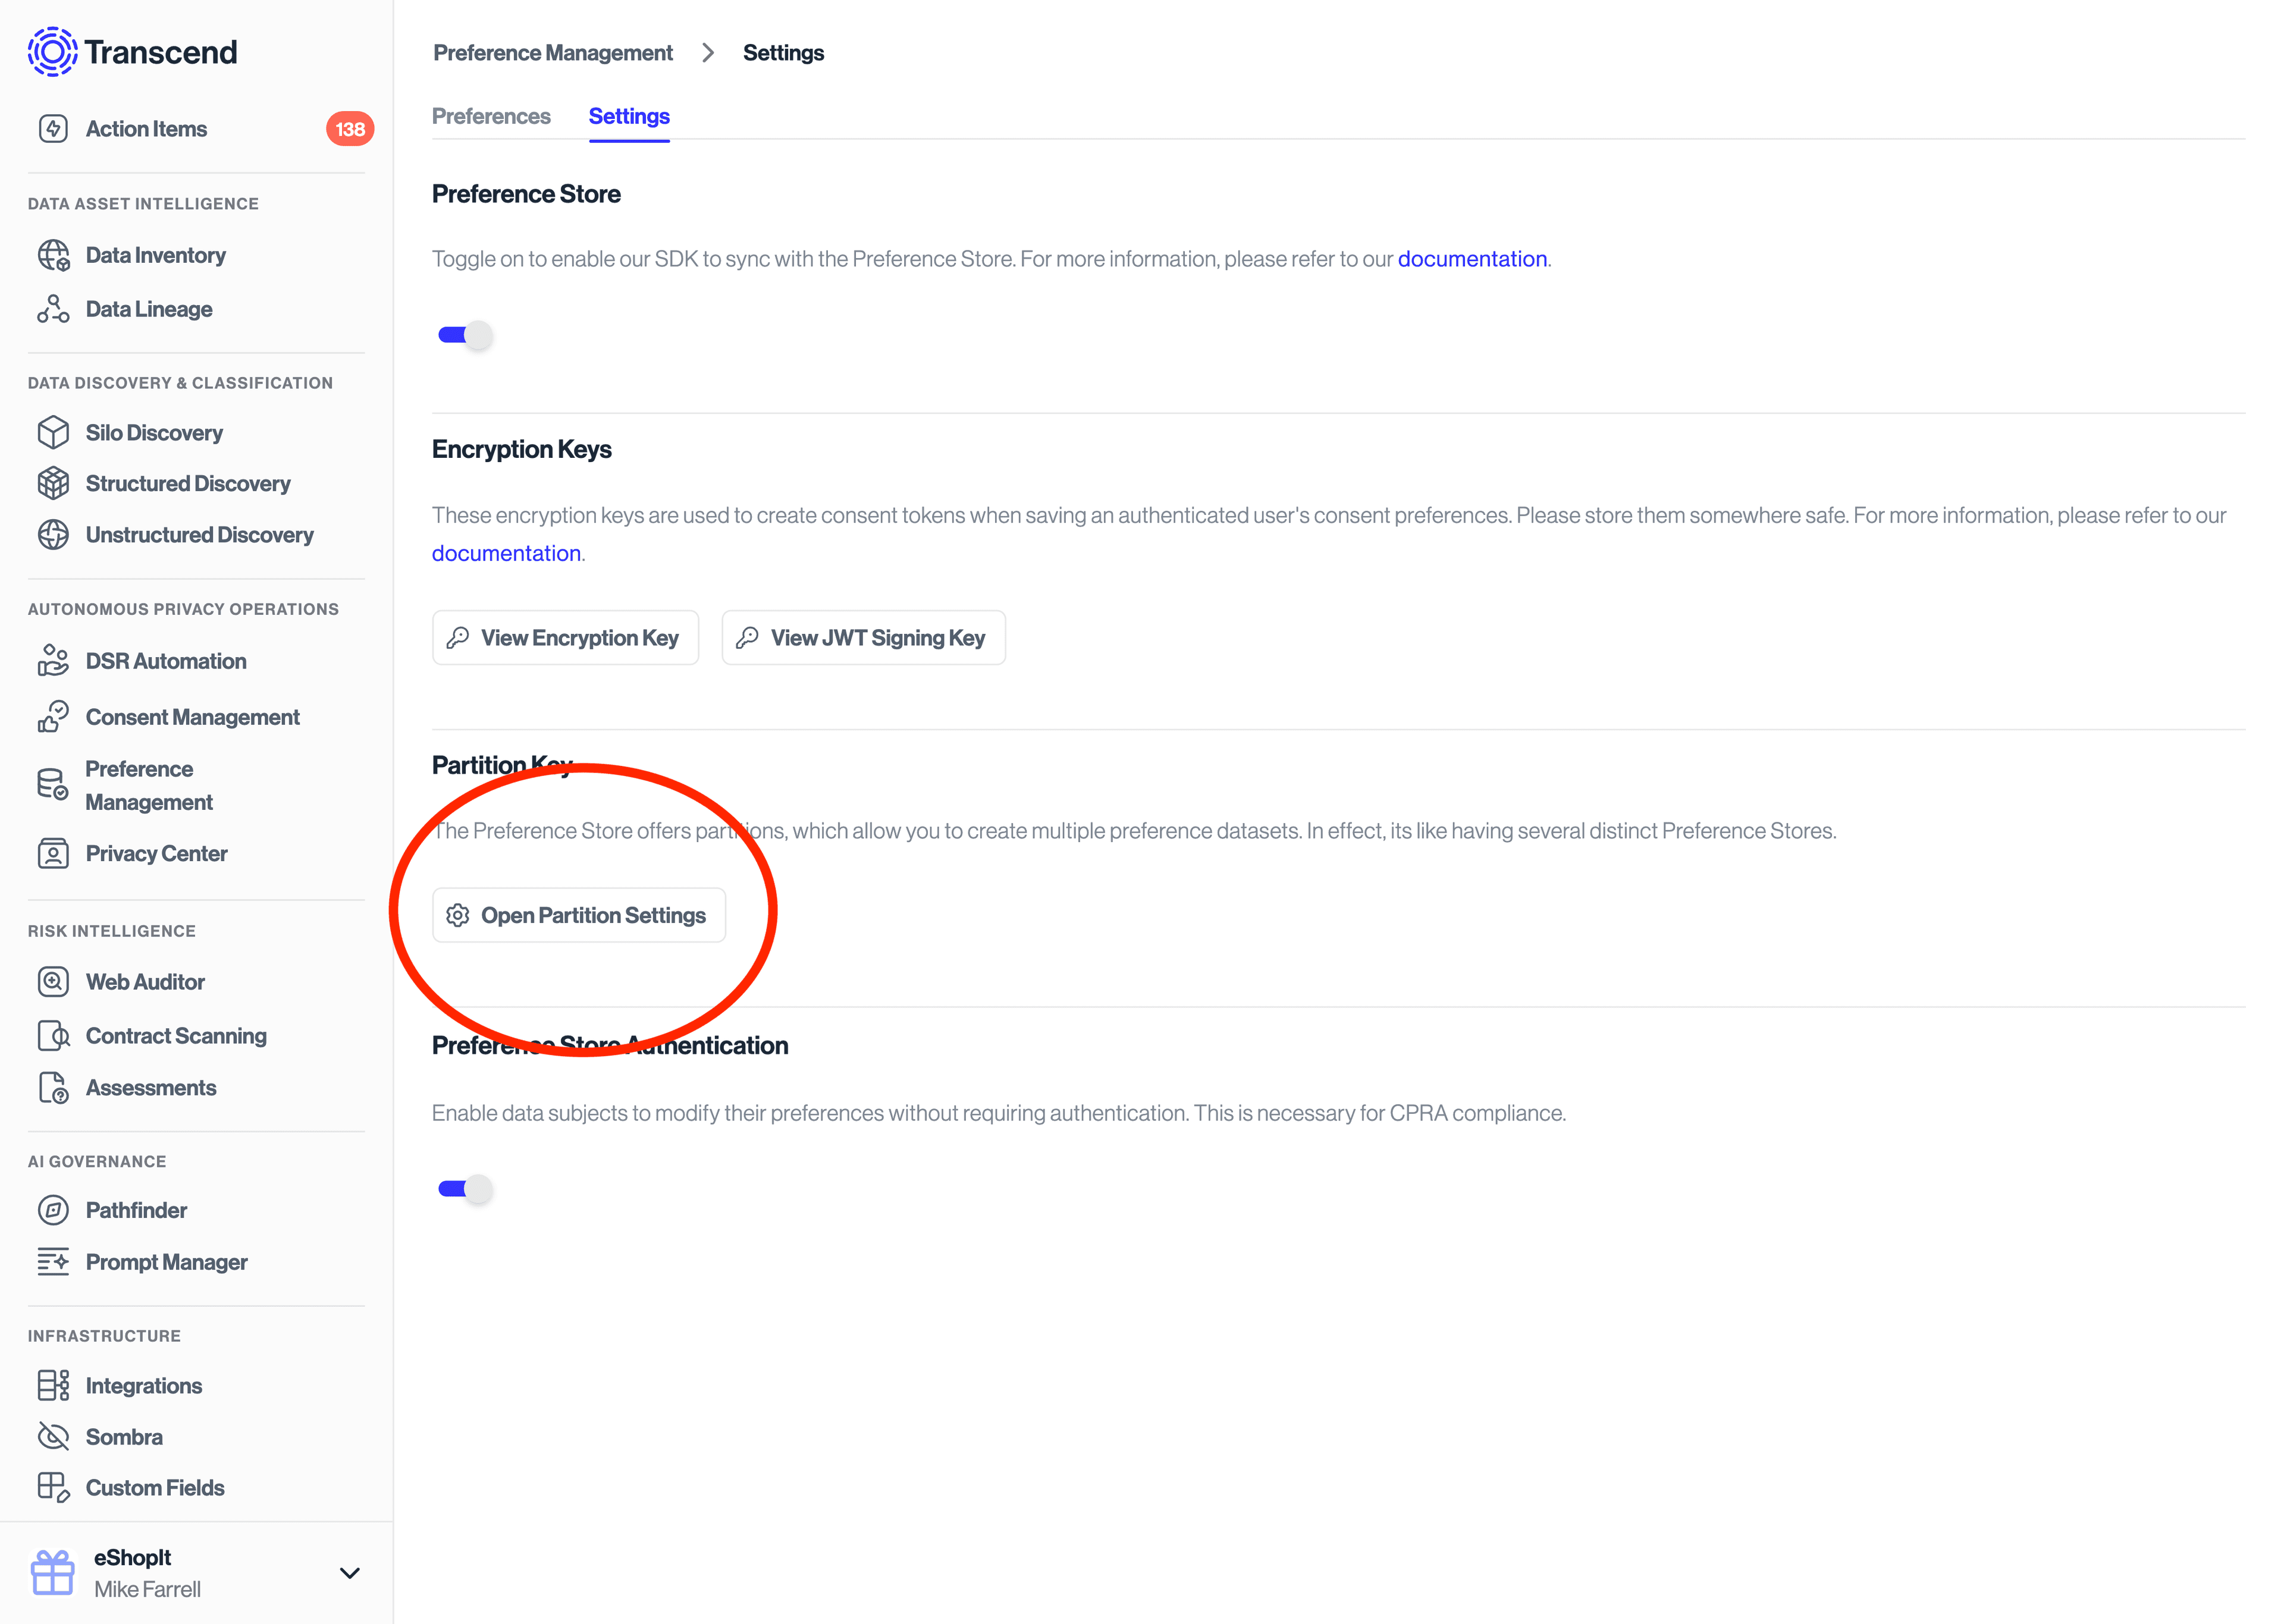
- Go to Preference Management -> User Preferences -> Settings
- Ensure Preference Store toggle is enabled.
- Click on the button "Open Partition Settings"
- Locate your desired partition and click the copy button. The default partition is labeled
BUNDLE_ID- this is most likely the value you will want to use.
- Navigate to "Custom Code -> Apex Triggers"

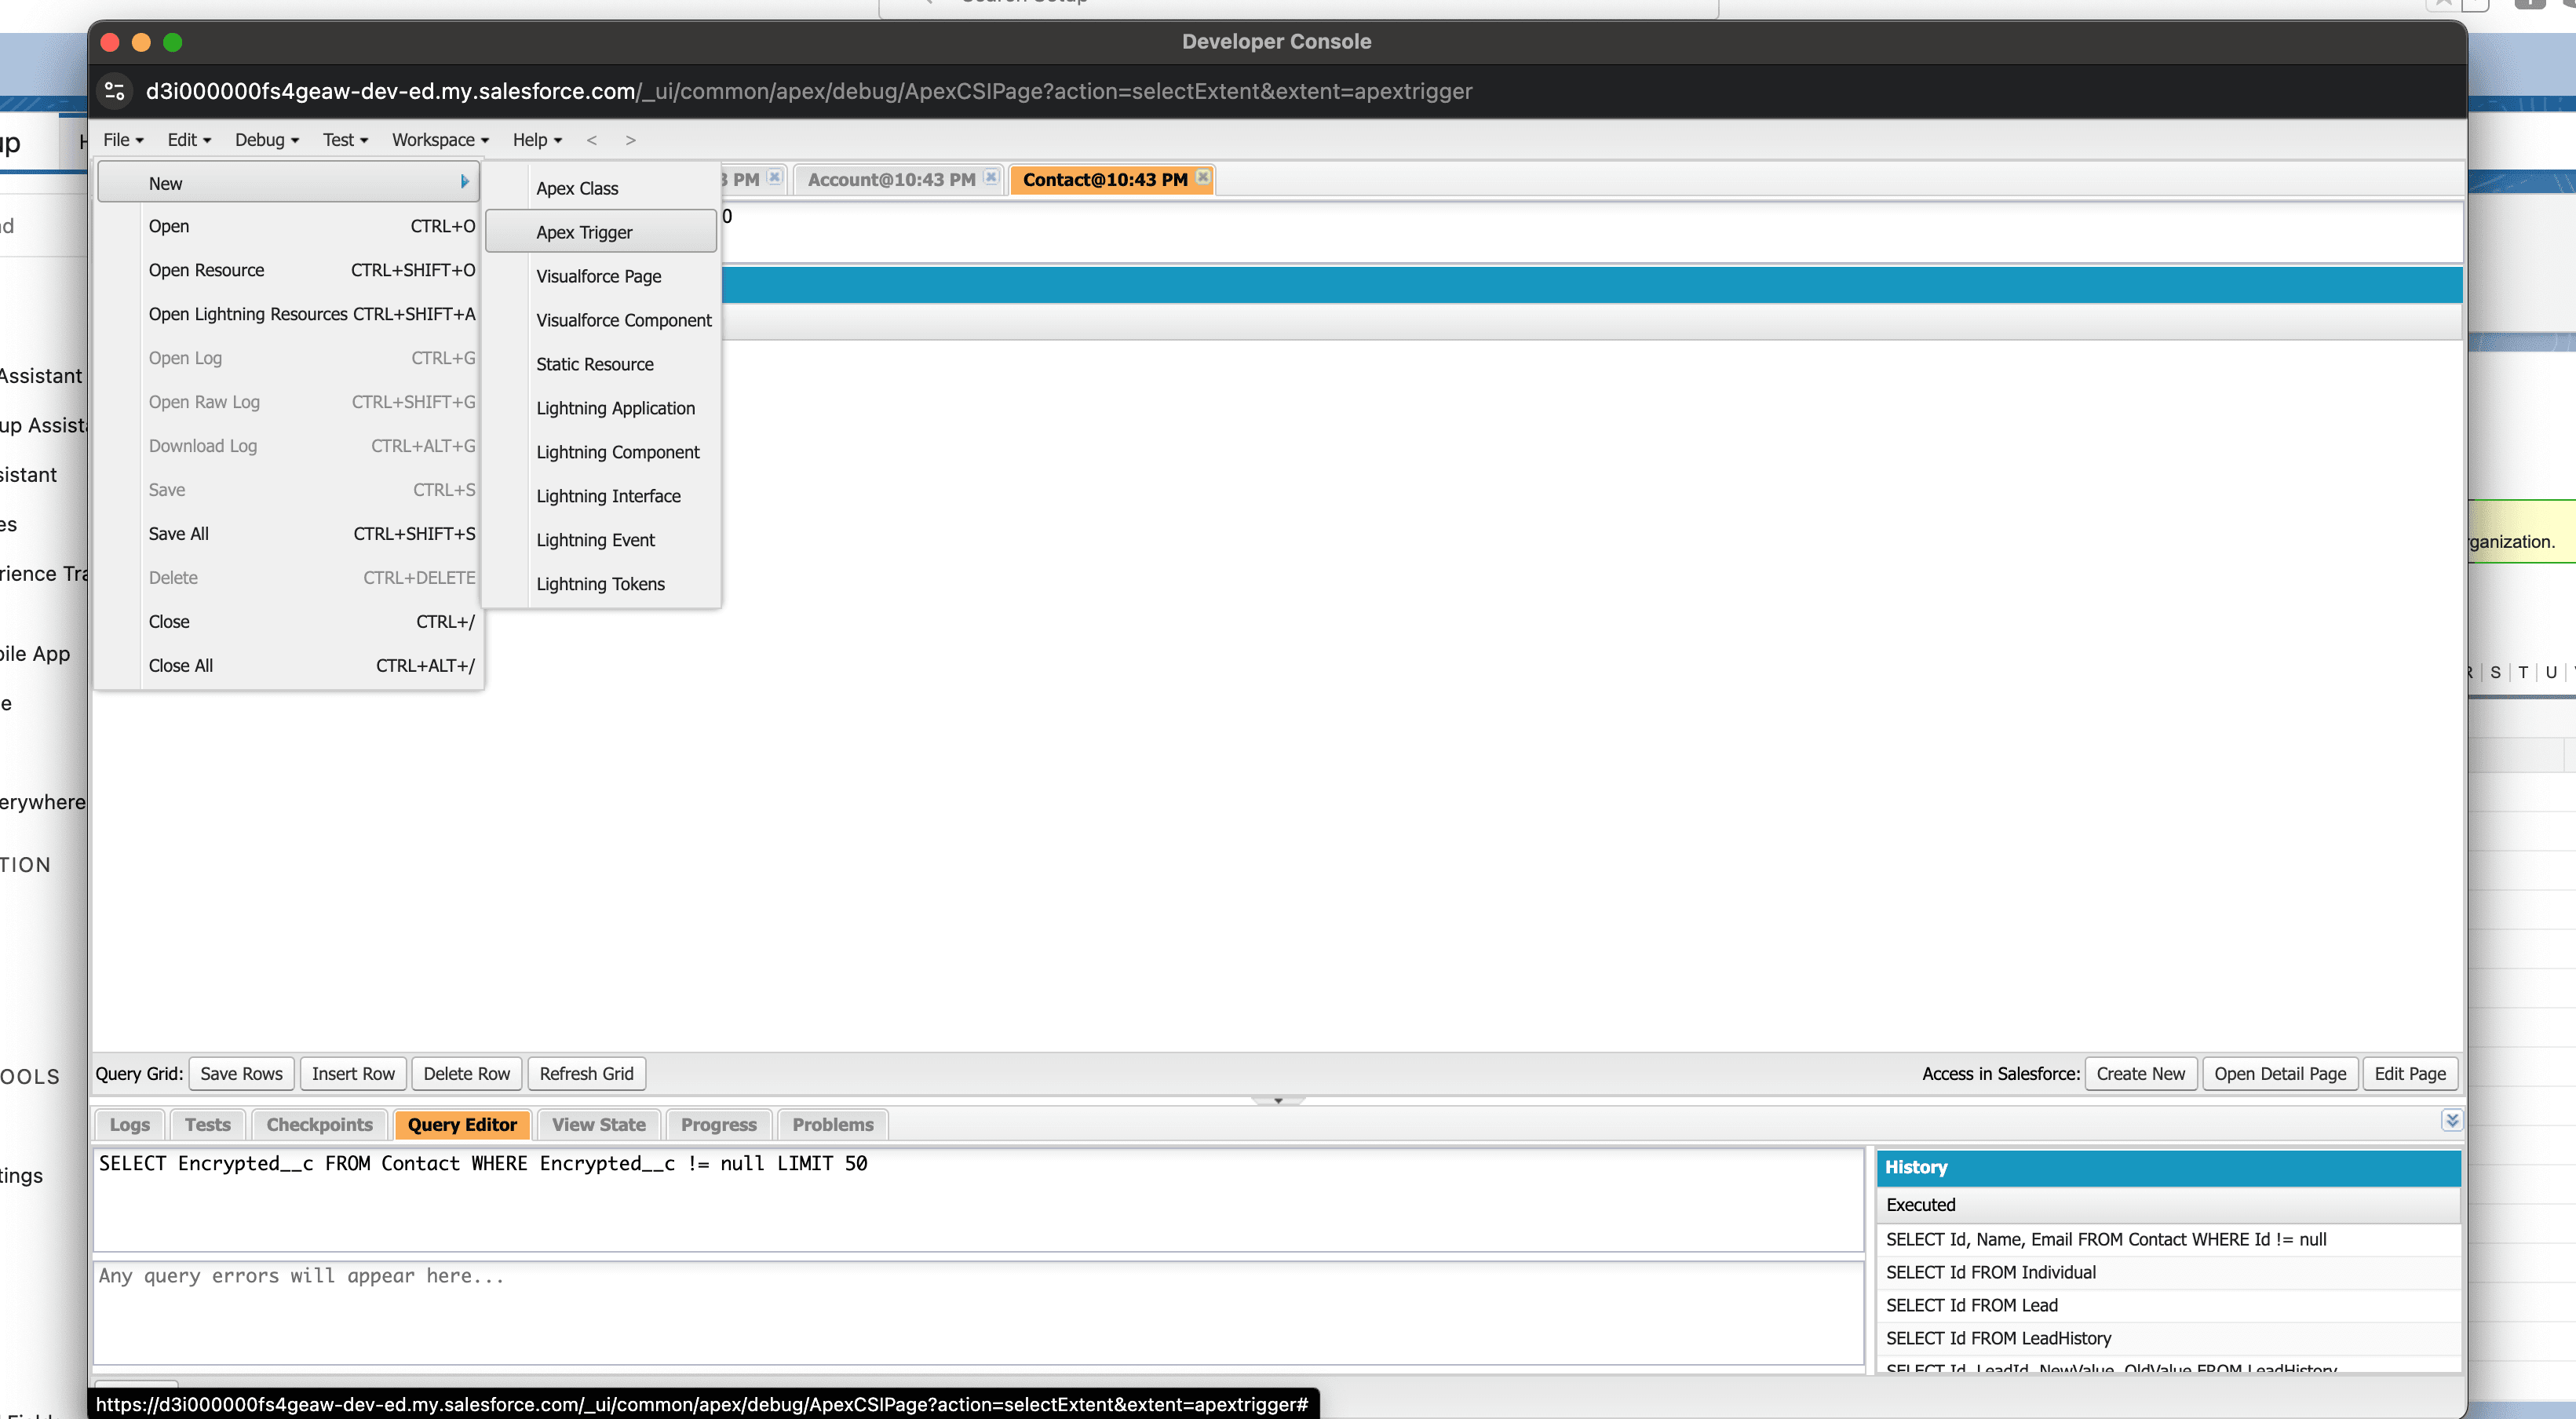
- Click "Developer Console"

- Navigate to "File -> New -> Apex Trigger"
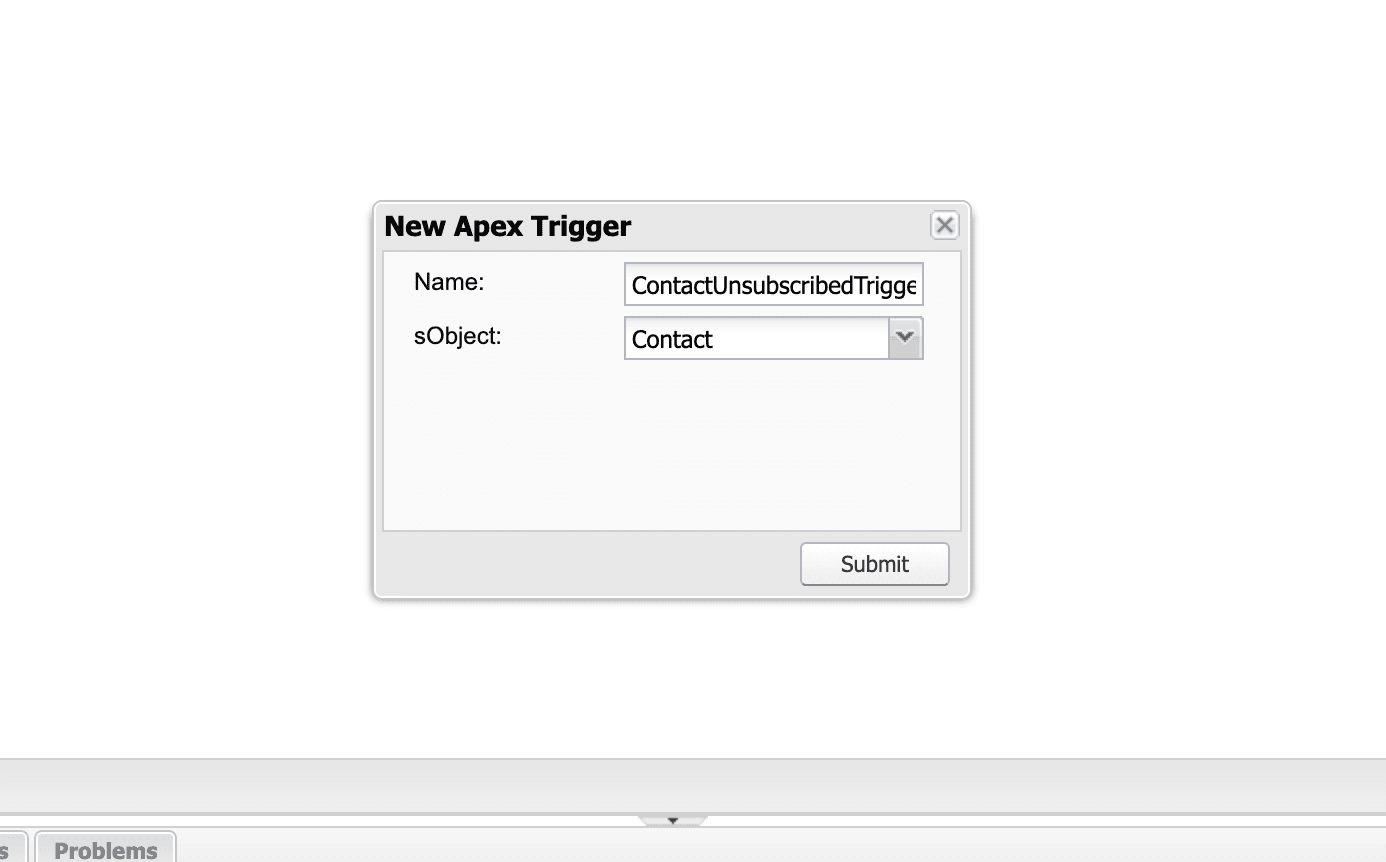
- Fill out the form for "New Apex Trigger"
- Name:
ContactDoNotCallTrigger - sObject:
Contact - Click "Submit"
- Name:
- Paste the following code. You can edit this code to update consent in Transcend based on a combination of field values.
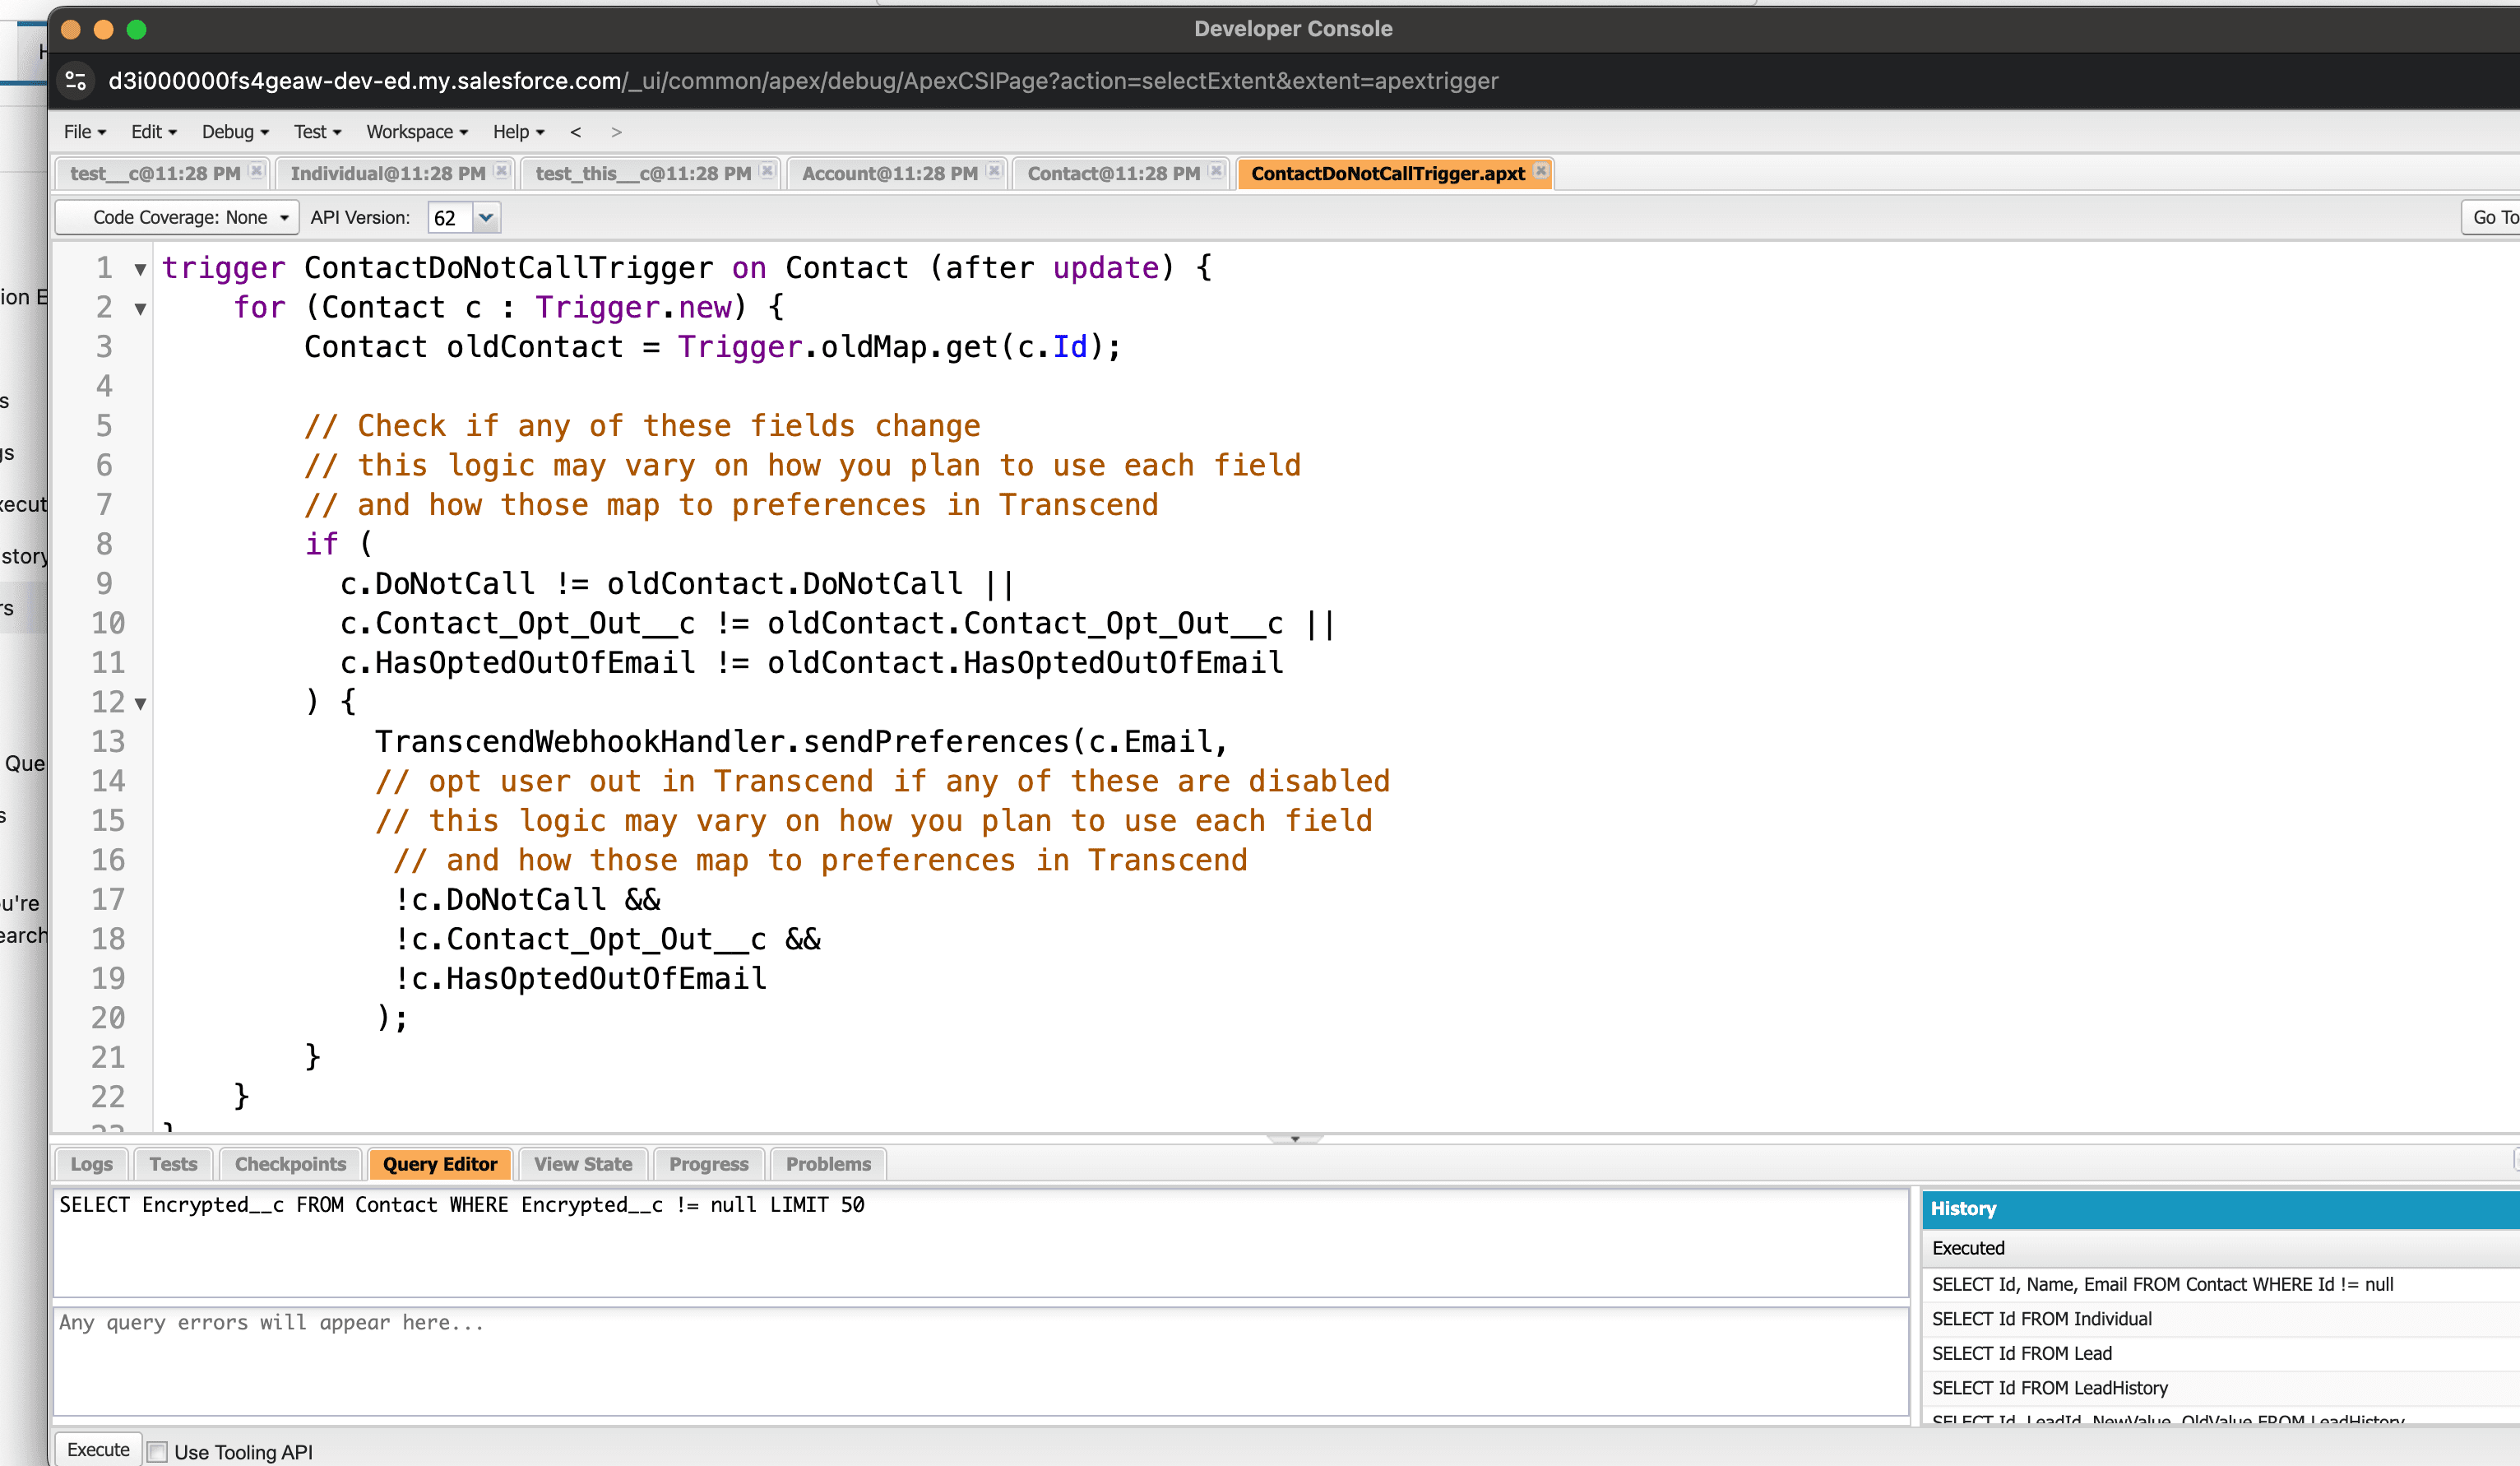
trigger ContactDoNotCallTrigger on Contact (after update) {
    for (Contact c : Trigger.new) {
        Contact oldContact = Trigger.oldMap.get(c.Id);

        // Check if any of these fields change
        // this logic may vary on how you plan to use each field
        // and how those map to preferences in Transcend
        if (
          c.DoNotCall != oldContact.DoNotCall ||
          c.Contact_Opt_Out__c != oldContact.Contact_Opt_Out__c ||
          c.HasOptedOutOfEmail != oldContact.HasOptedOutOfEmail
        ) {
            TranscendWebhookHandler.sendPreferences(c.Email,
            // opt user out in Transcend if any of these are disabled
            // this logic may vary on how you plan to use each field
             // and how those map to preferences in Transcend
             !c.DoNotCall &&
             !c.Contact_Opt_Out__c &&
             !c.HasOptedOutOfEmail
            );
        }
    }
}
- Go back to Setup settings and search "Remote Site Settings" and navigate to "Security -> Remote Site Settings"
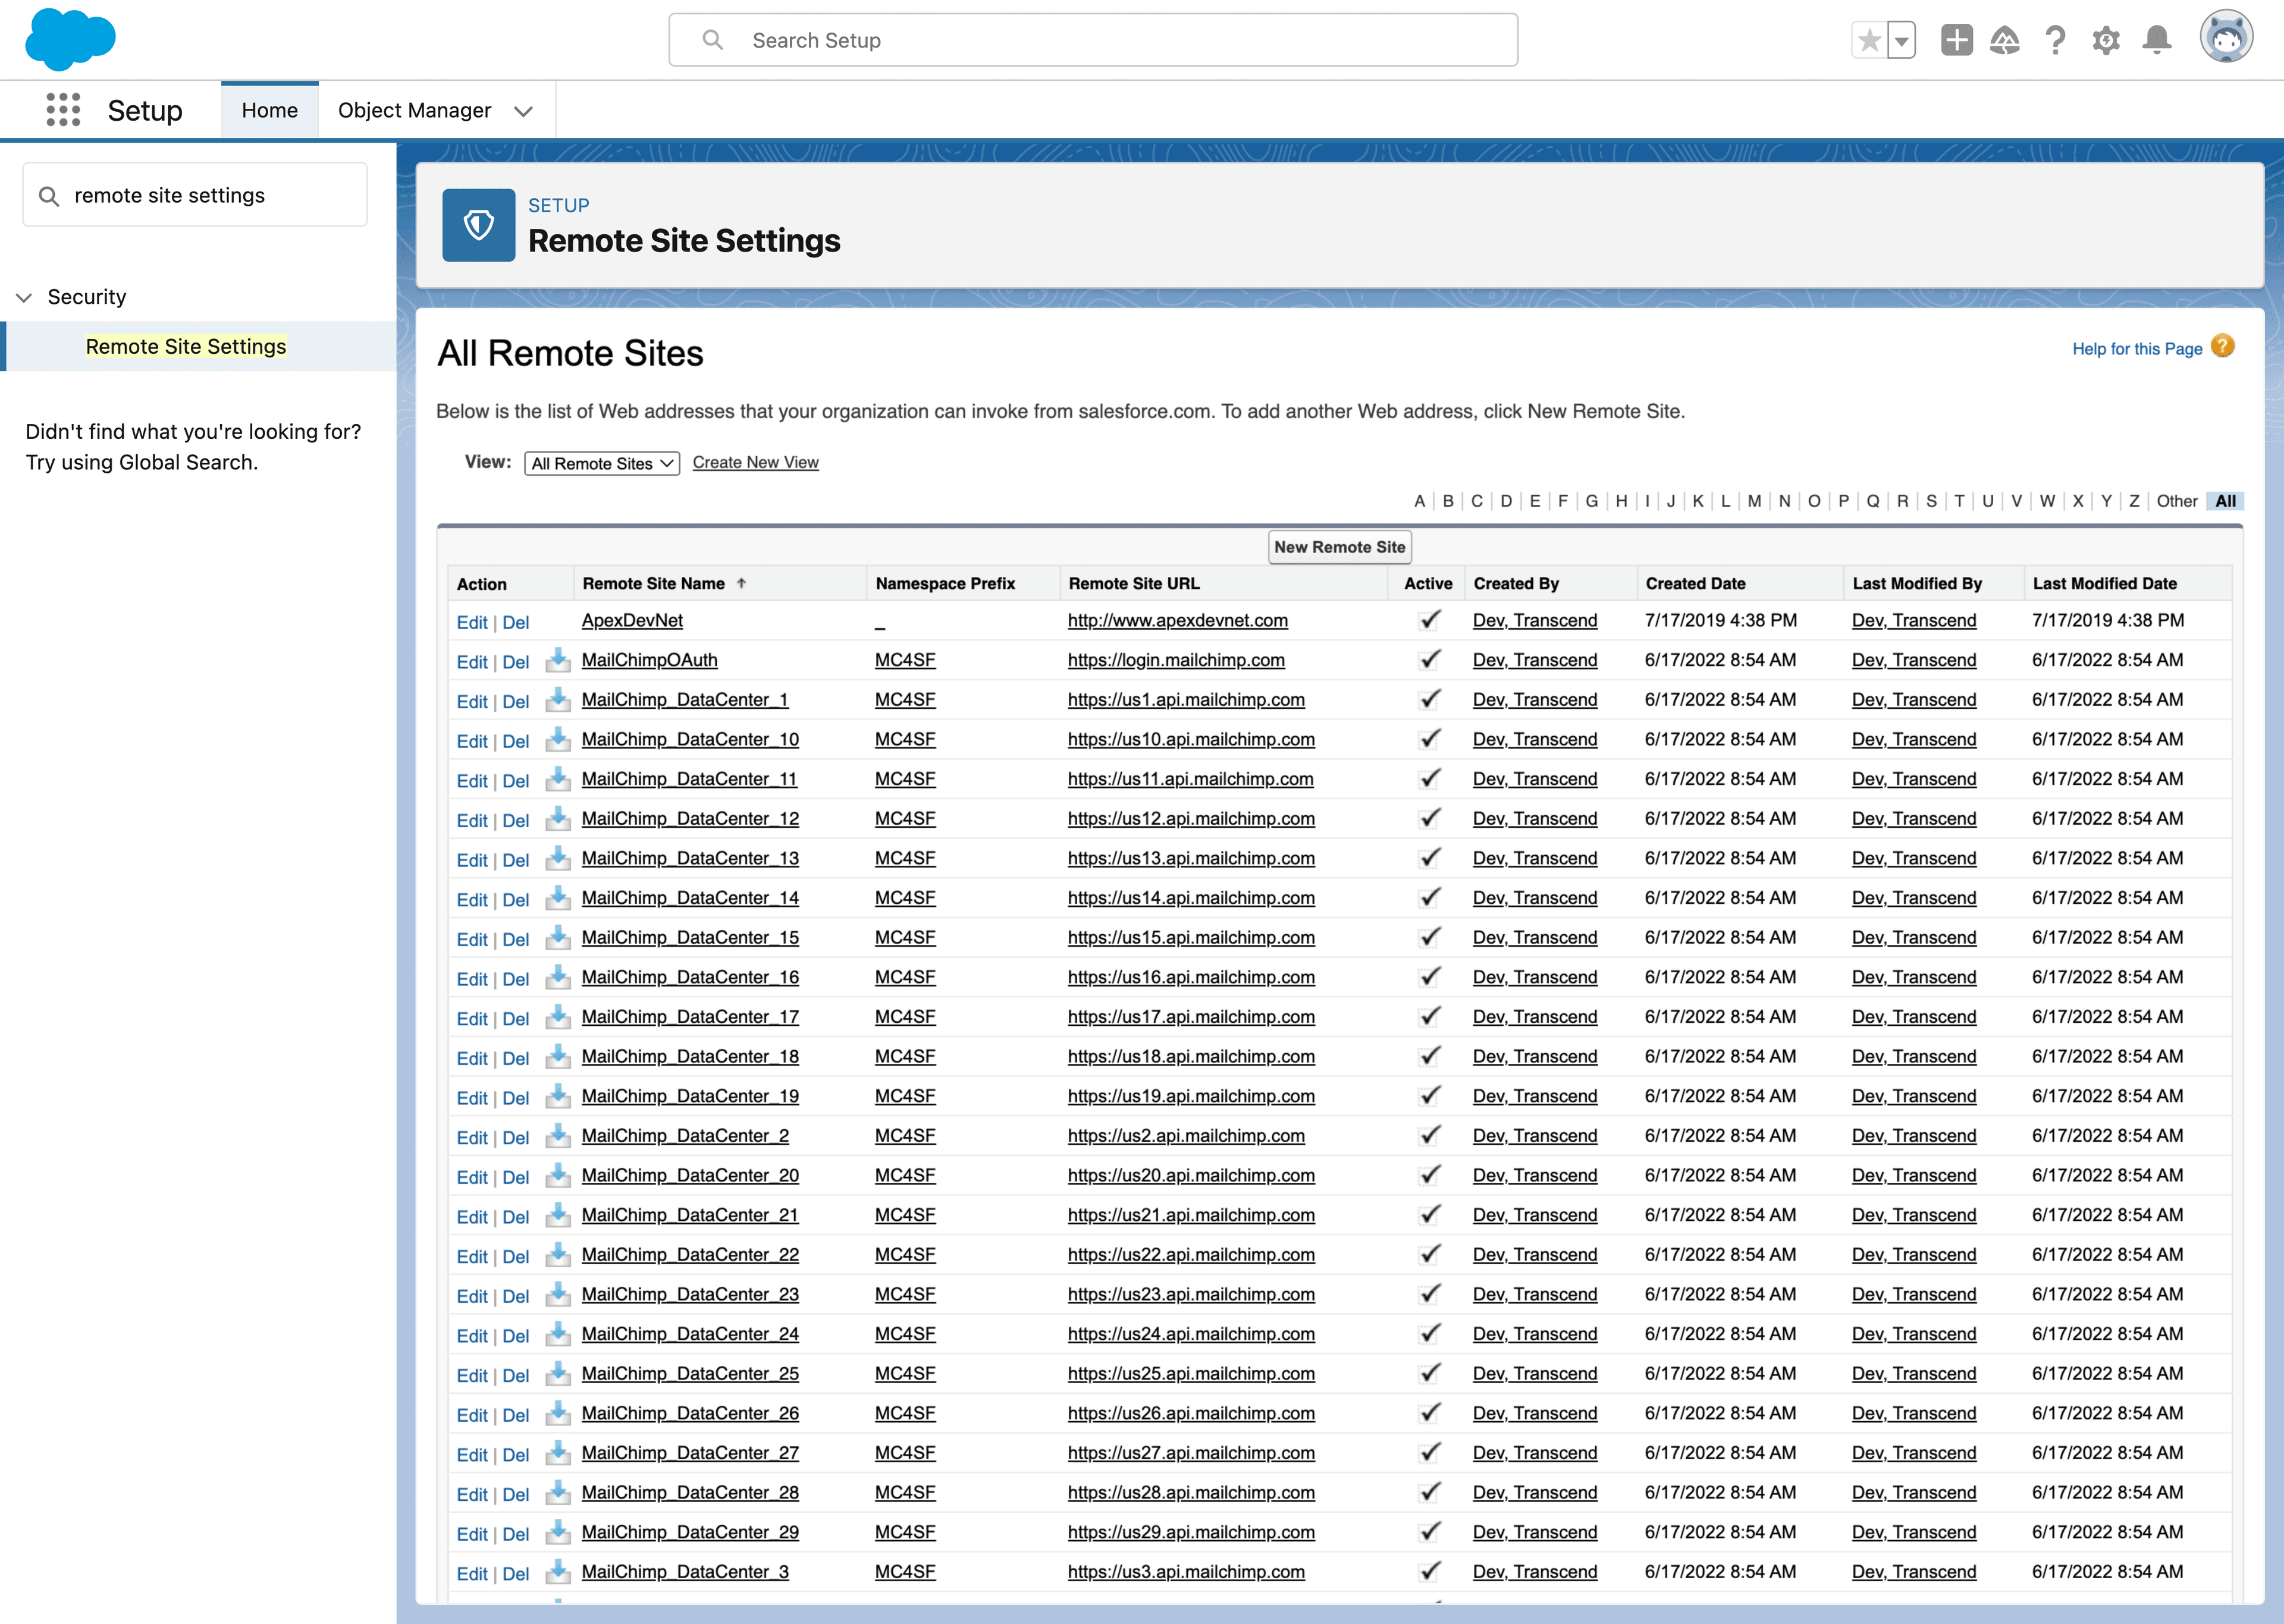
- Click "New Remote Site" and fill out form and hit "Save"
- Remote Site Name:
TranscendAPI - Remote Site URL: This value can be found in section below. If Transcend hosted, this value is
https://multi-tenant.sombra.us.transcend.iofor EU hosting andhttps://multi-tenant.sombra.transcend.iofor US hosting. - Description:
Privacy vendor used to manage consent preferences. - Active:
true
- Remote Site Name:

- Go back to Salesforce Home
- Navigate to
Contacts - Change one of the fields that you included in your Apex Trigger code above
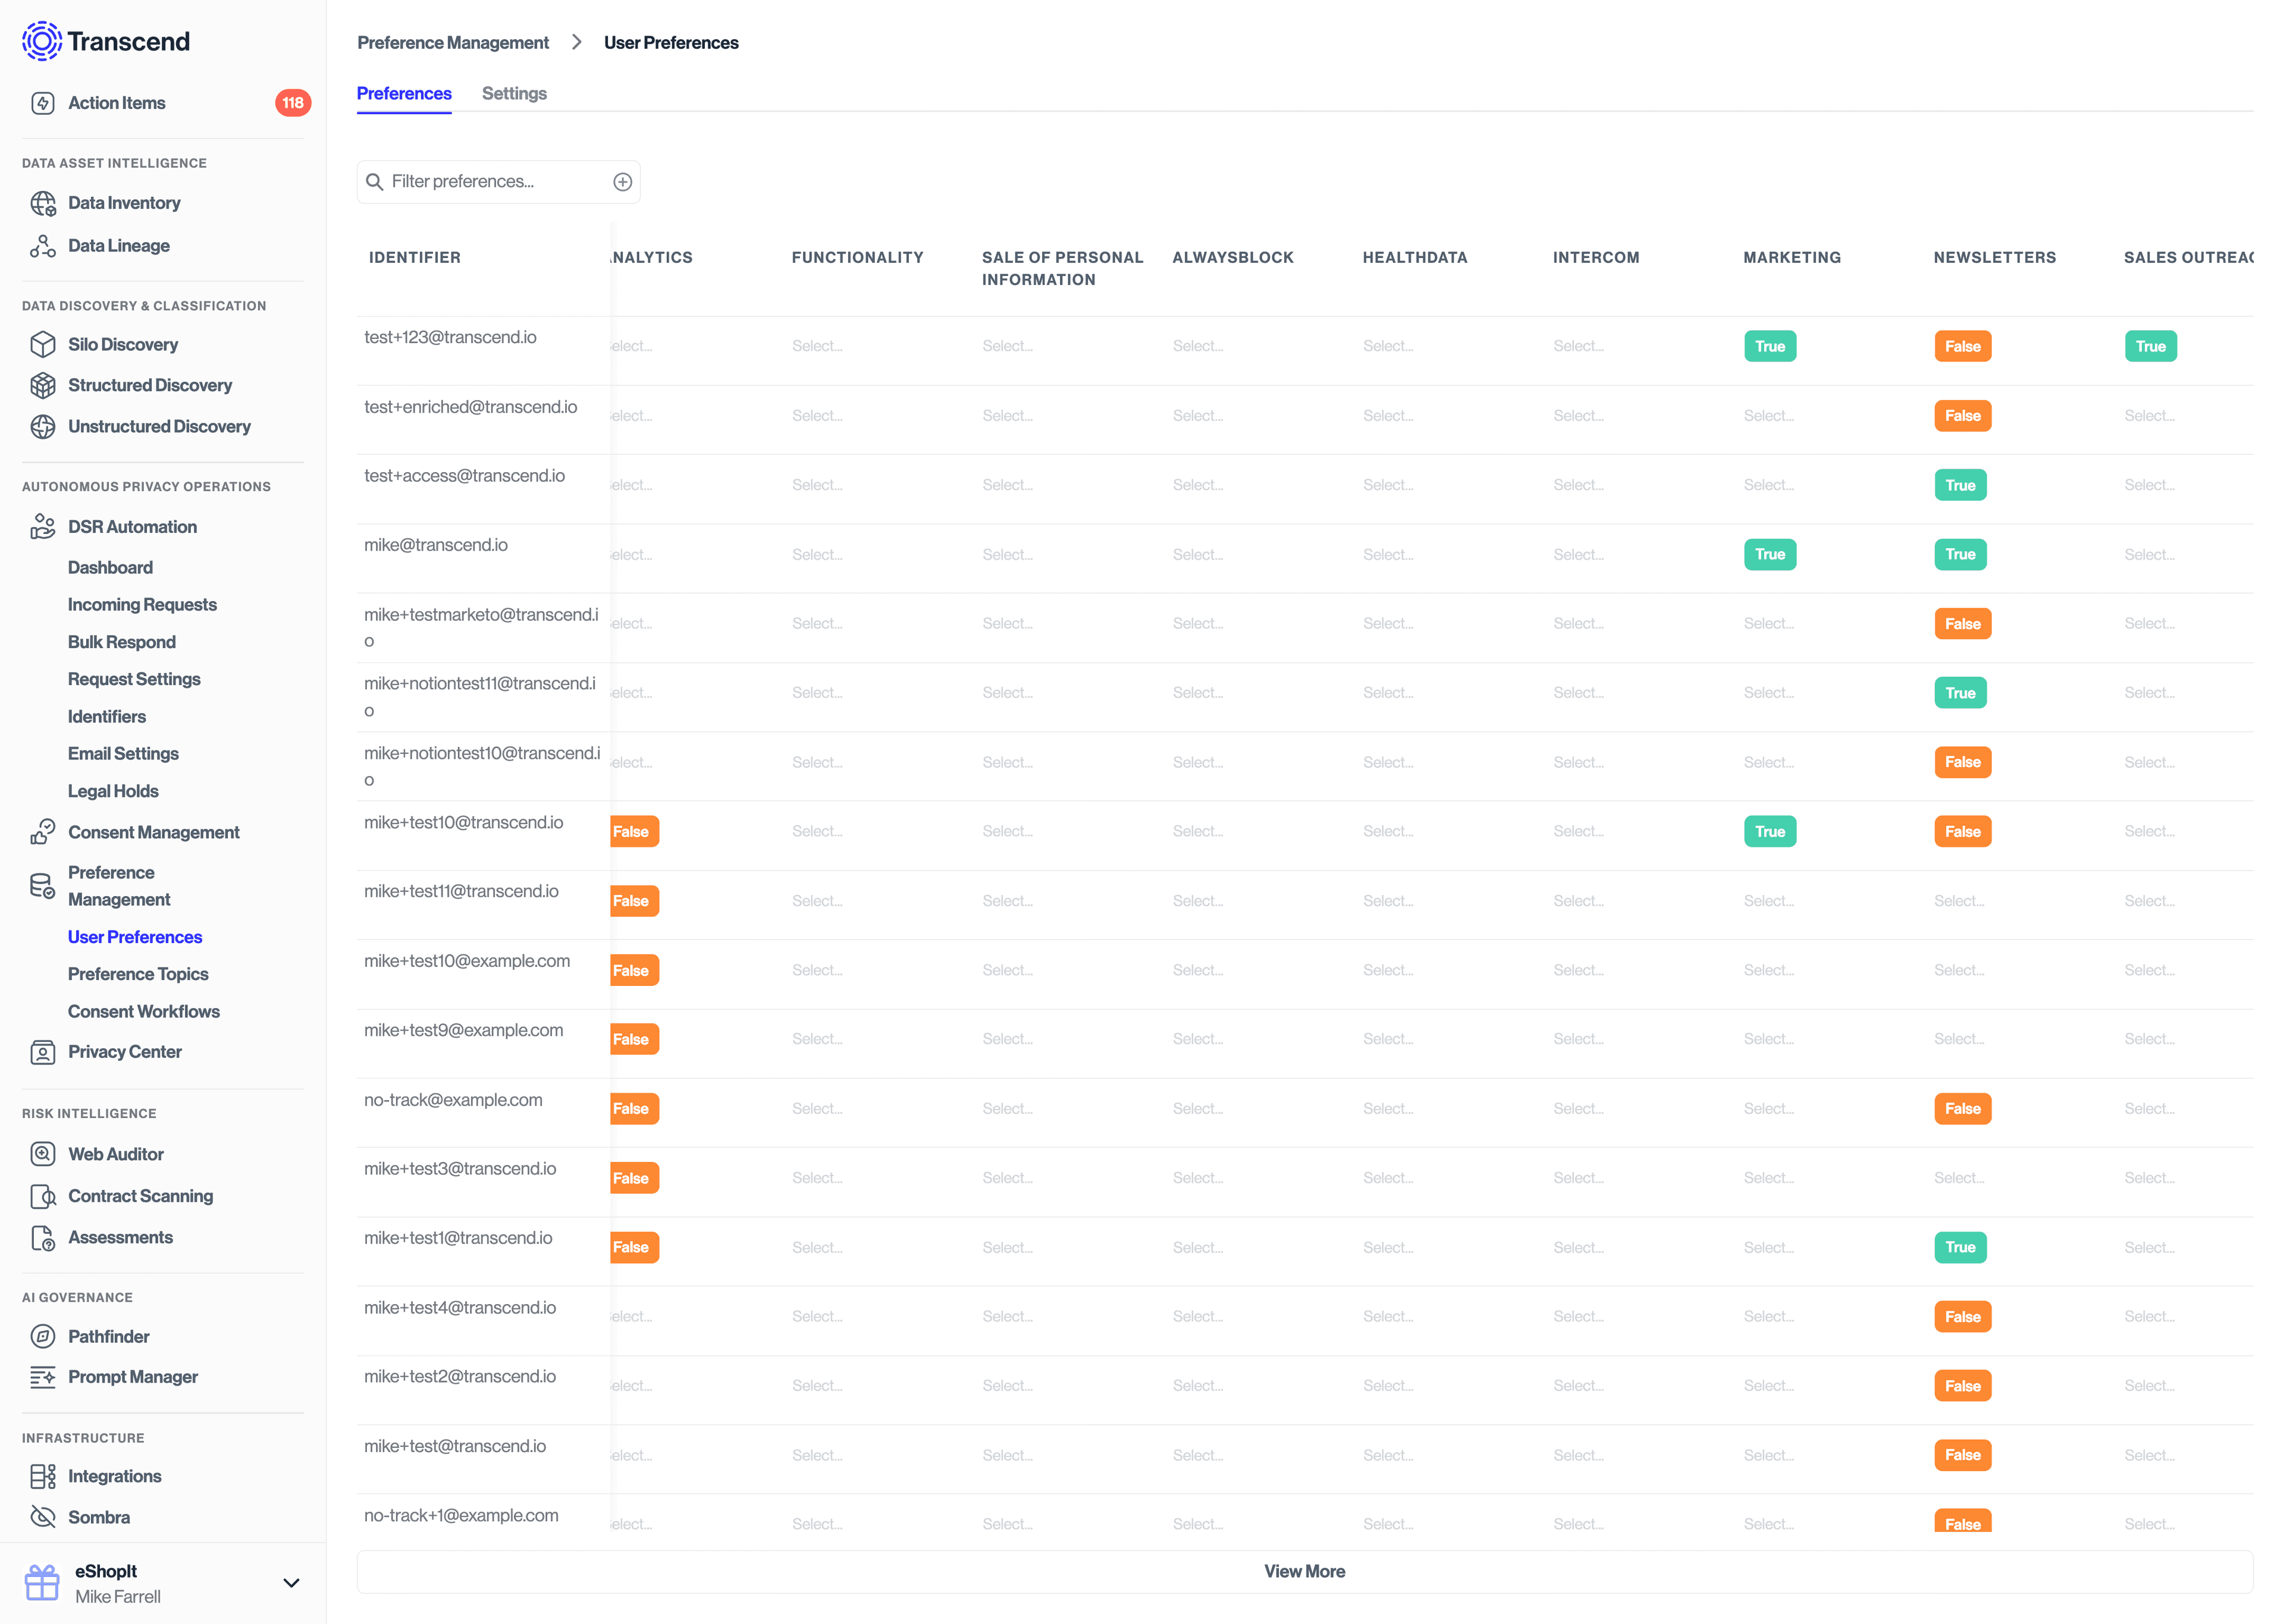
- Navigate to Preference Management -> User Preferences in the Transcend Admin Dashboard
