Adding and Managing Data Flows / Cookies
Most data flows and cookies will be picked up automatically by the airgap.js script on your site through telemetry and will be available for review in the dashboard. However, there may be cases when it’s worth manually adding a data flow with a tracking purpose to be regulated by the consent manager. For example, you may know that the marketing team is adding an Intercom chat widget to your website to offer a live chat option for users on the site. Instead of waiting for airgap.js telemetry to pick up the Intercom data flows that users have encountered unregulated, you can add the necessary data flows with the correct tracking purpose directly to Transcend so the consent manager can regulate these flows against users’ consent preferences as soon as the widget goes live on your site.
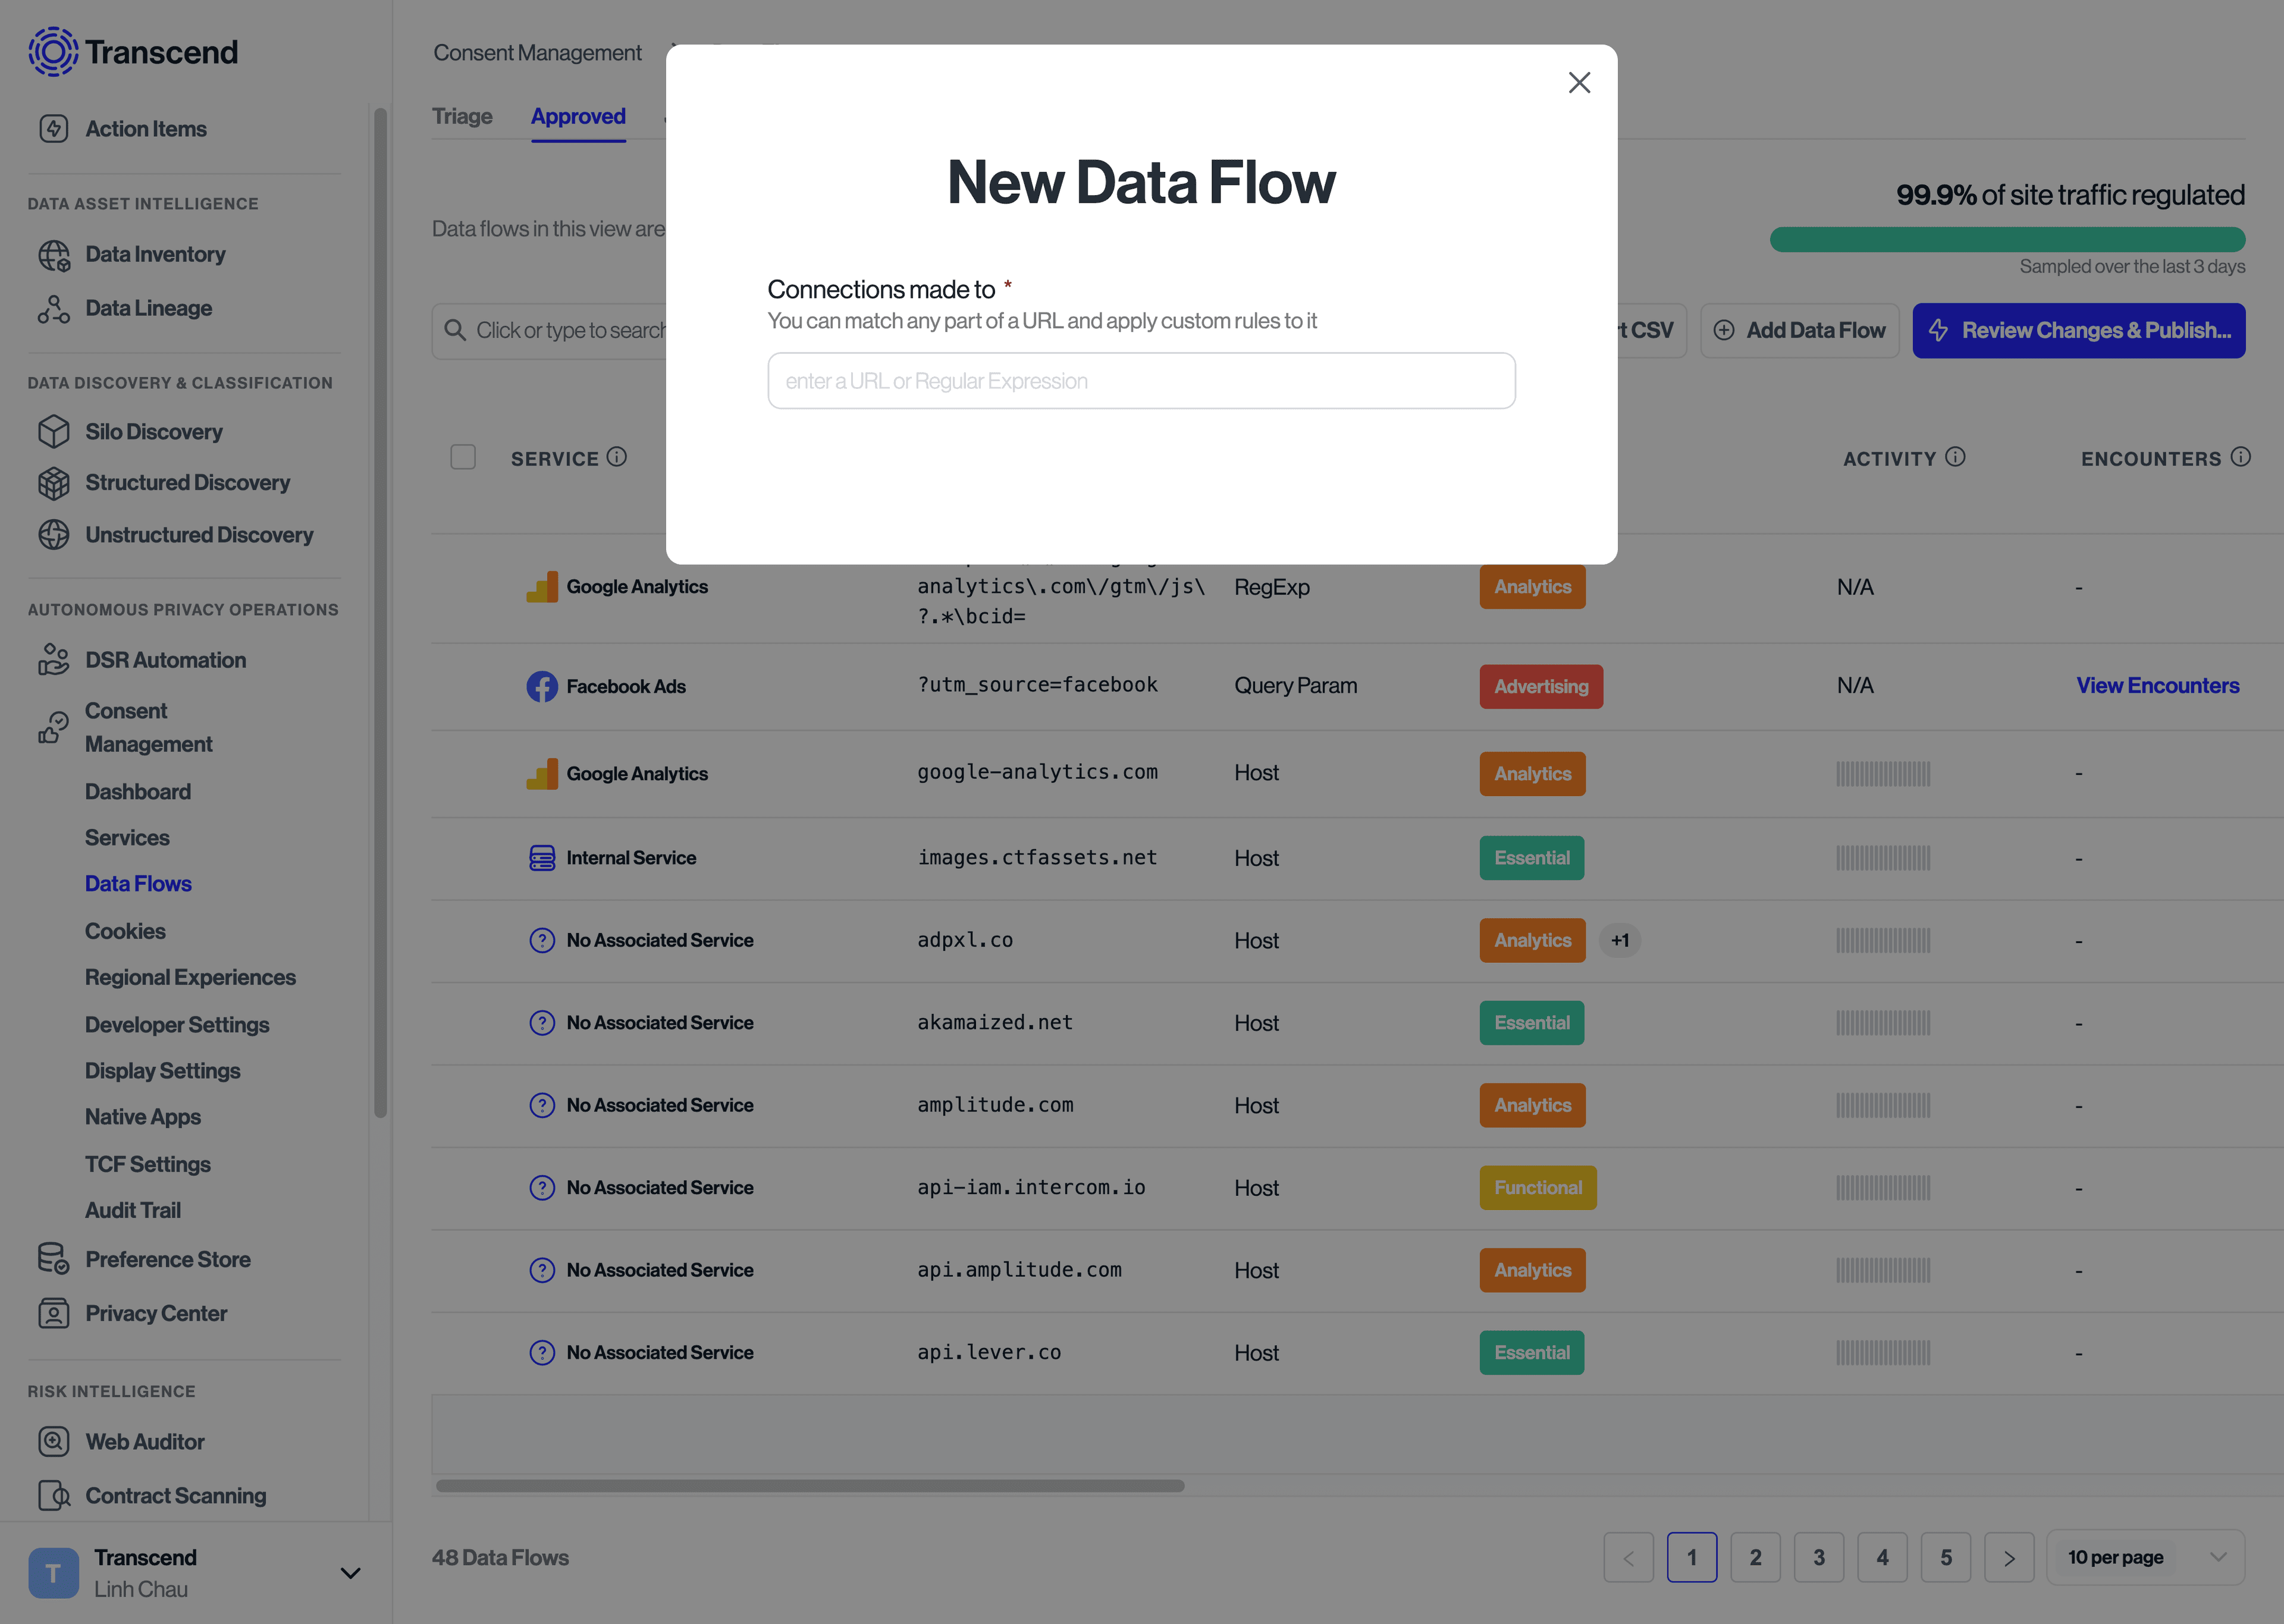
To add a new data flow:
- Navigate to the Data Flows pages and go to the Approved tab
- Select the button to Add Data Flow
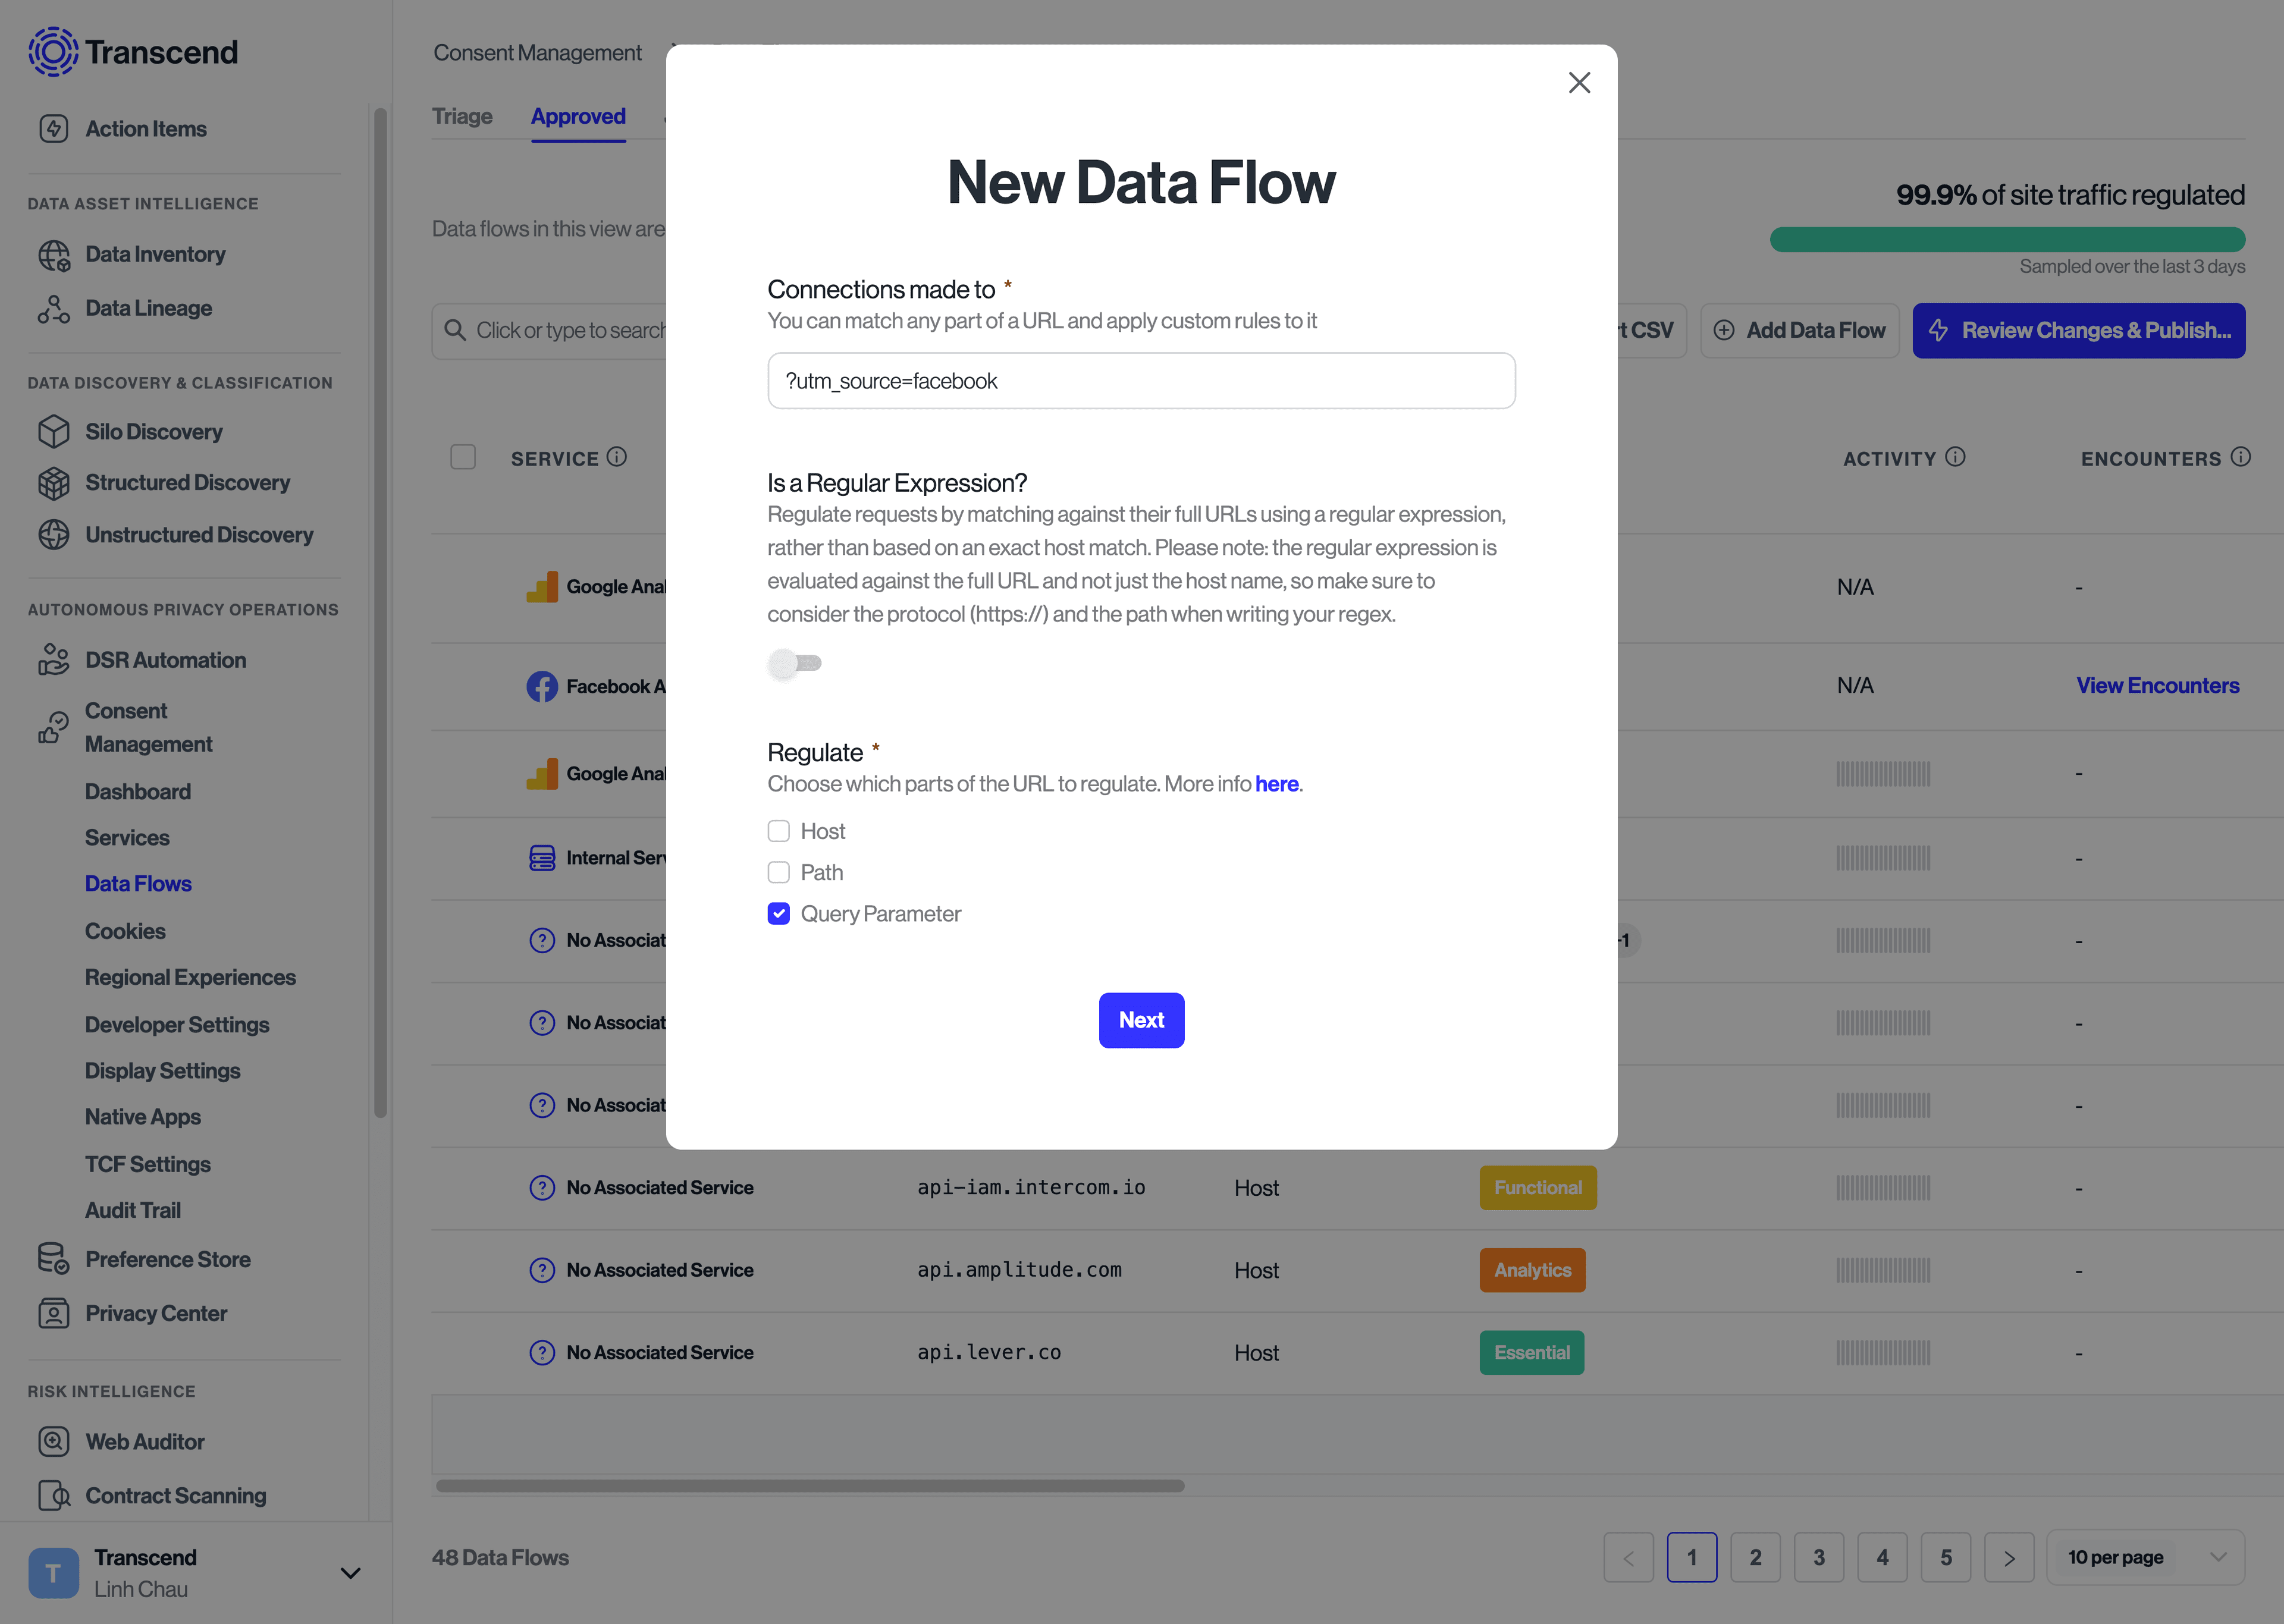
- Enter the domain, resource path, or regular expression that matches the data flow you want to regulate.
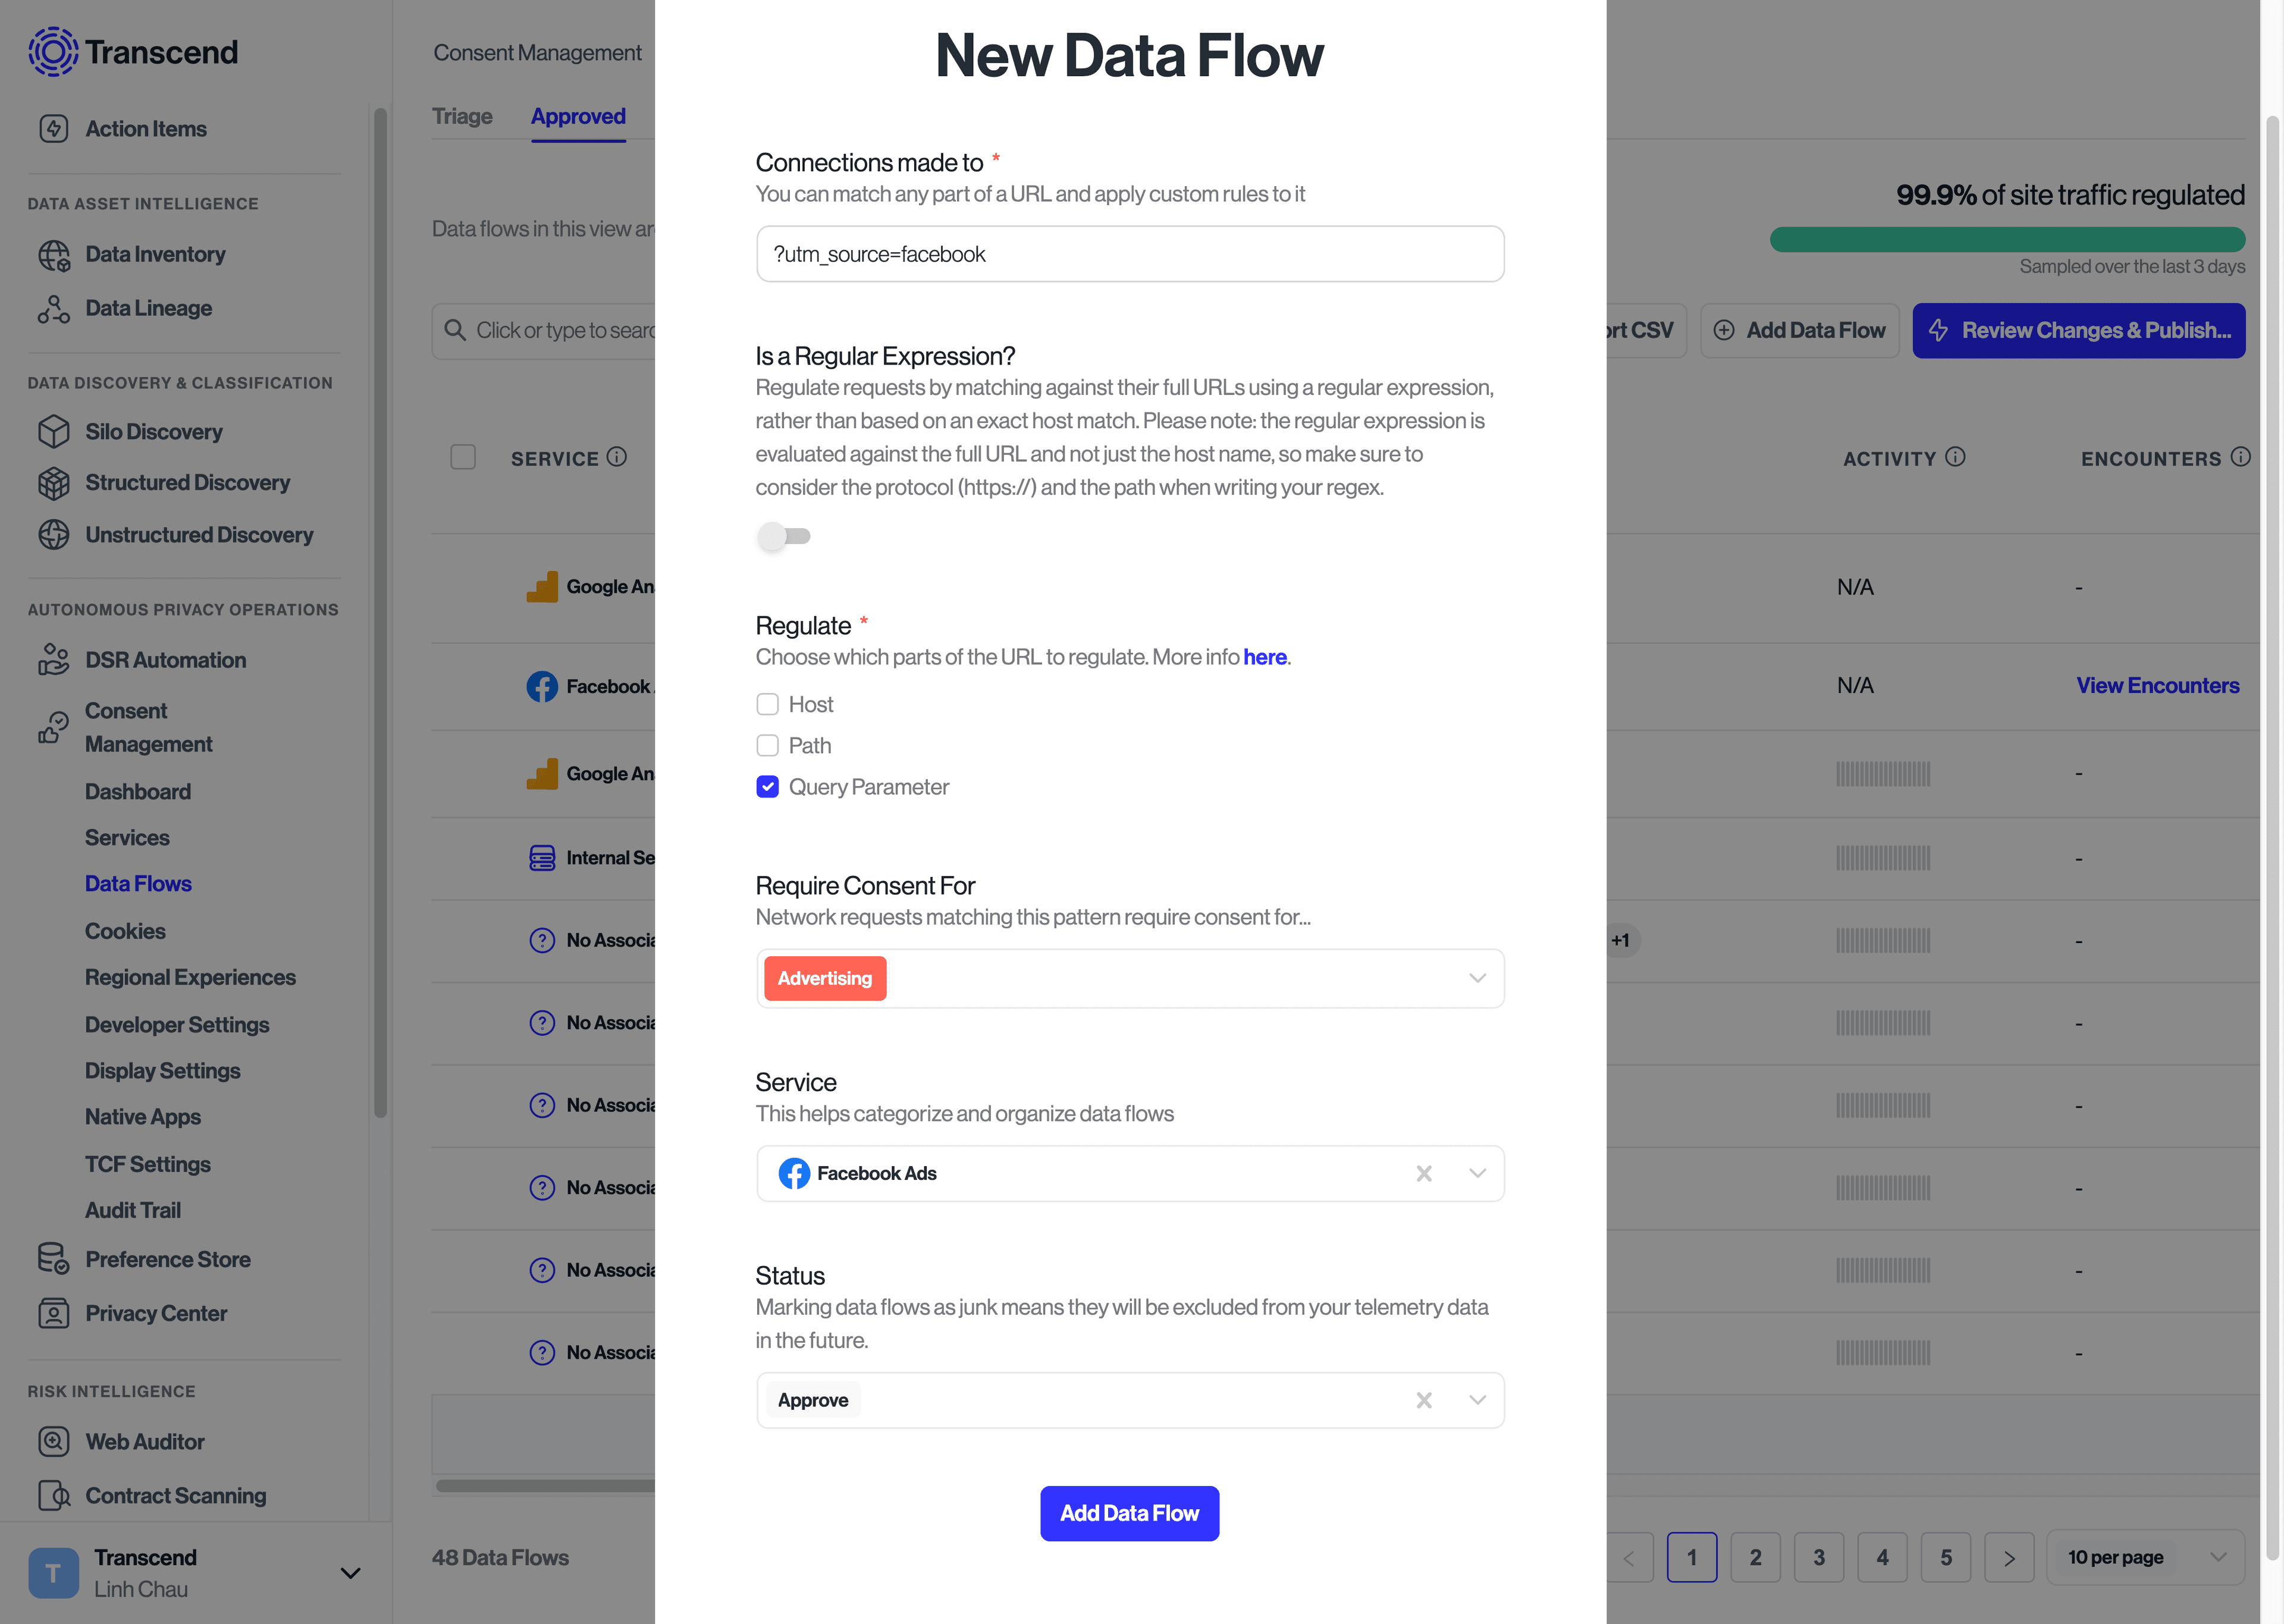
- Select the 'Next' button to populate in the domain, purpose, service, and other associated information with suggestions based on known data flows. These suggestions can be edited or added to as needed.
- Select the 'Add' button to save the new data flow.
- Once your changes and additions have been inputted, click Review Changes & Publish in the top right corner to sync these changes to your website.
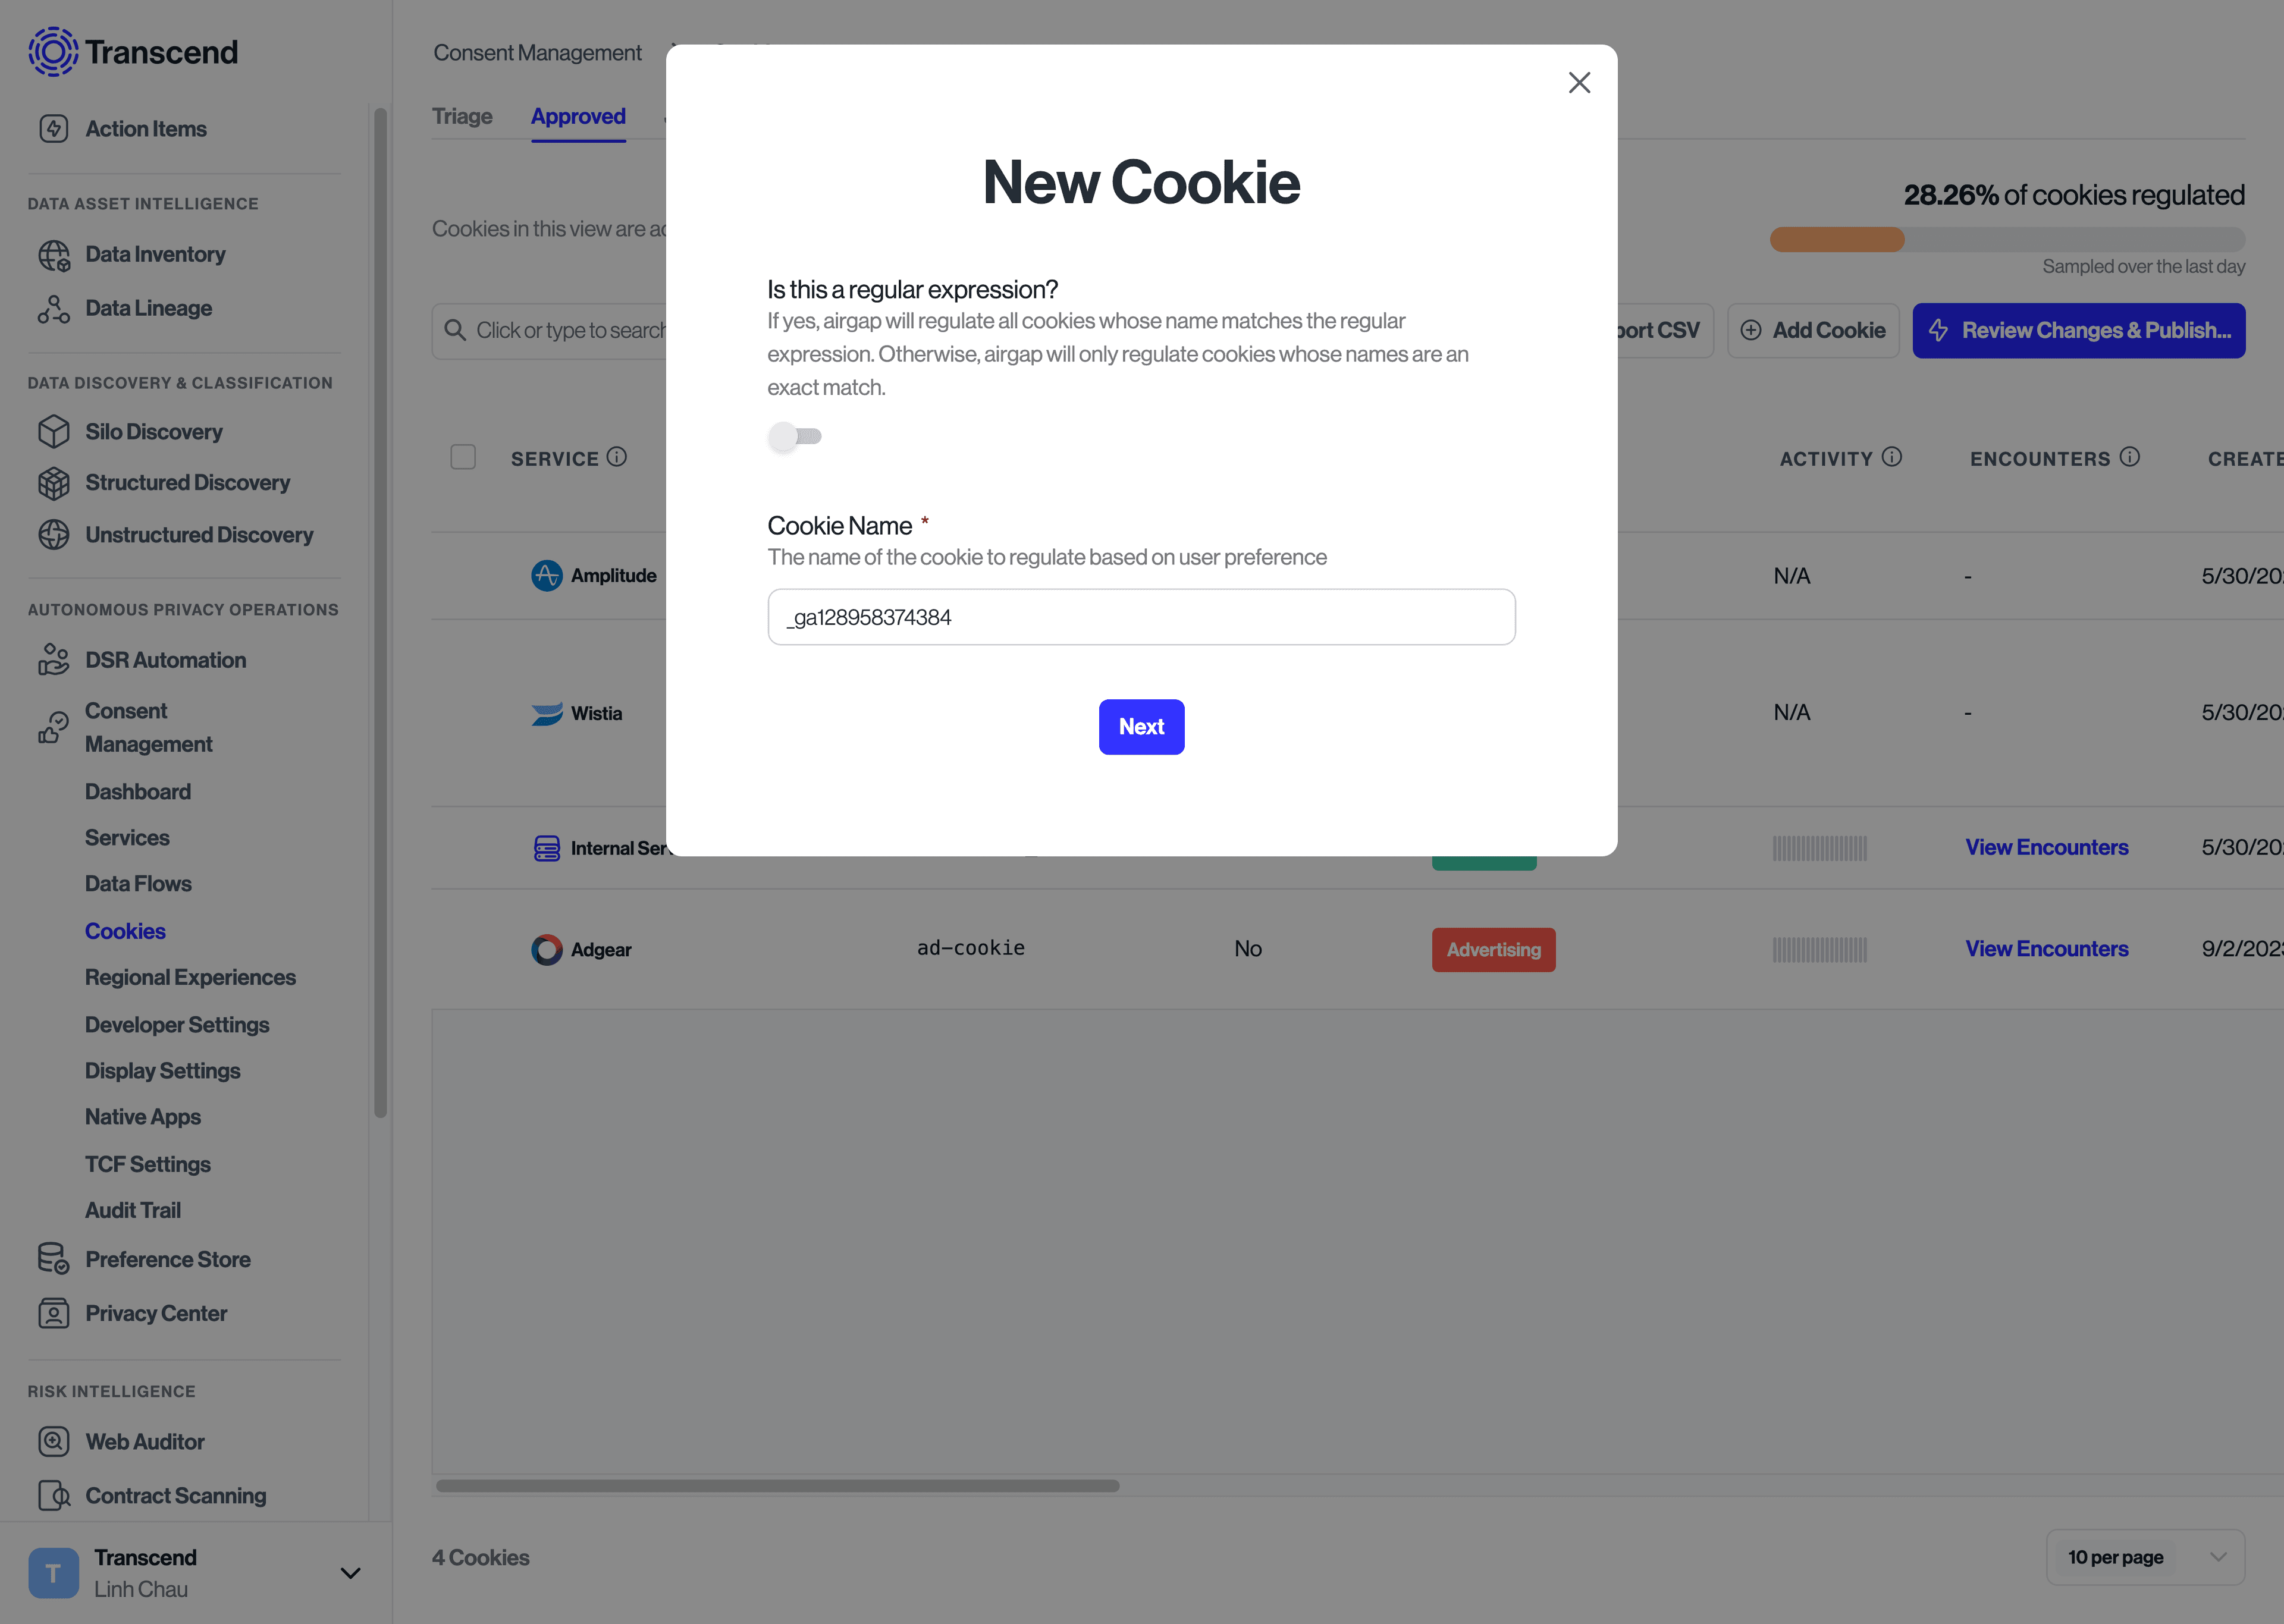
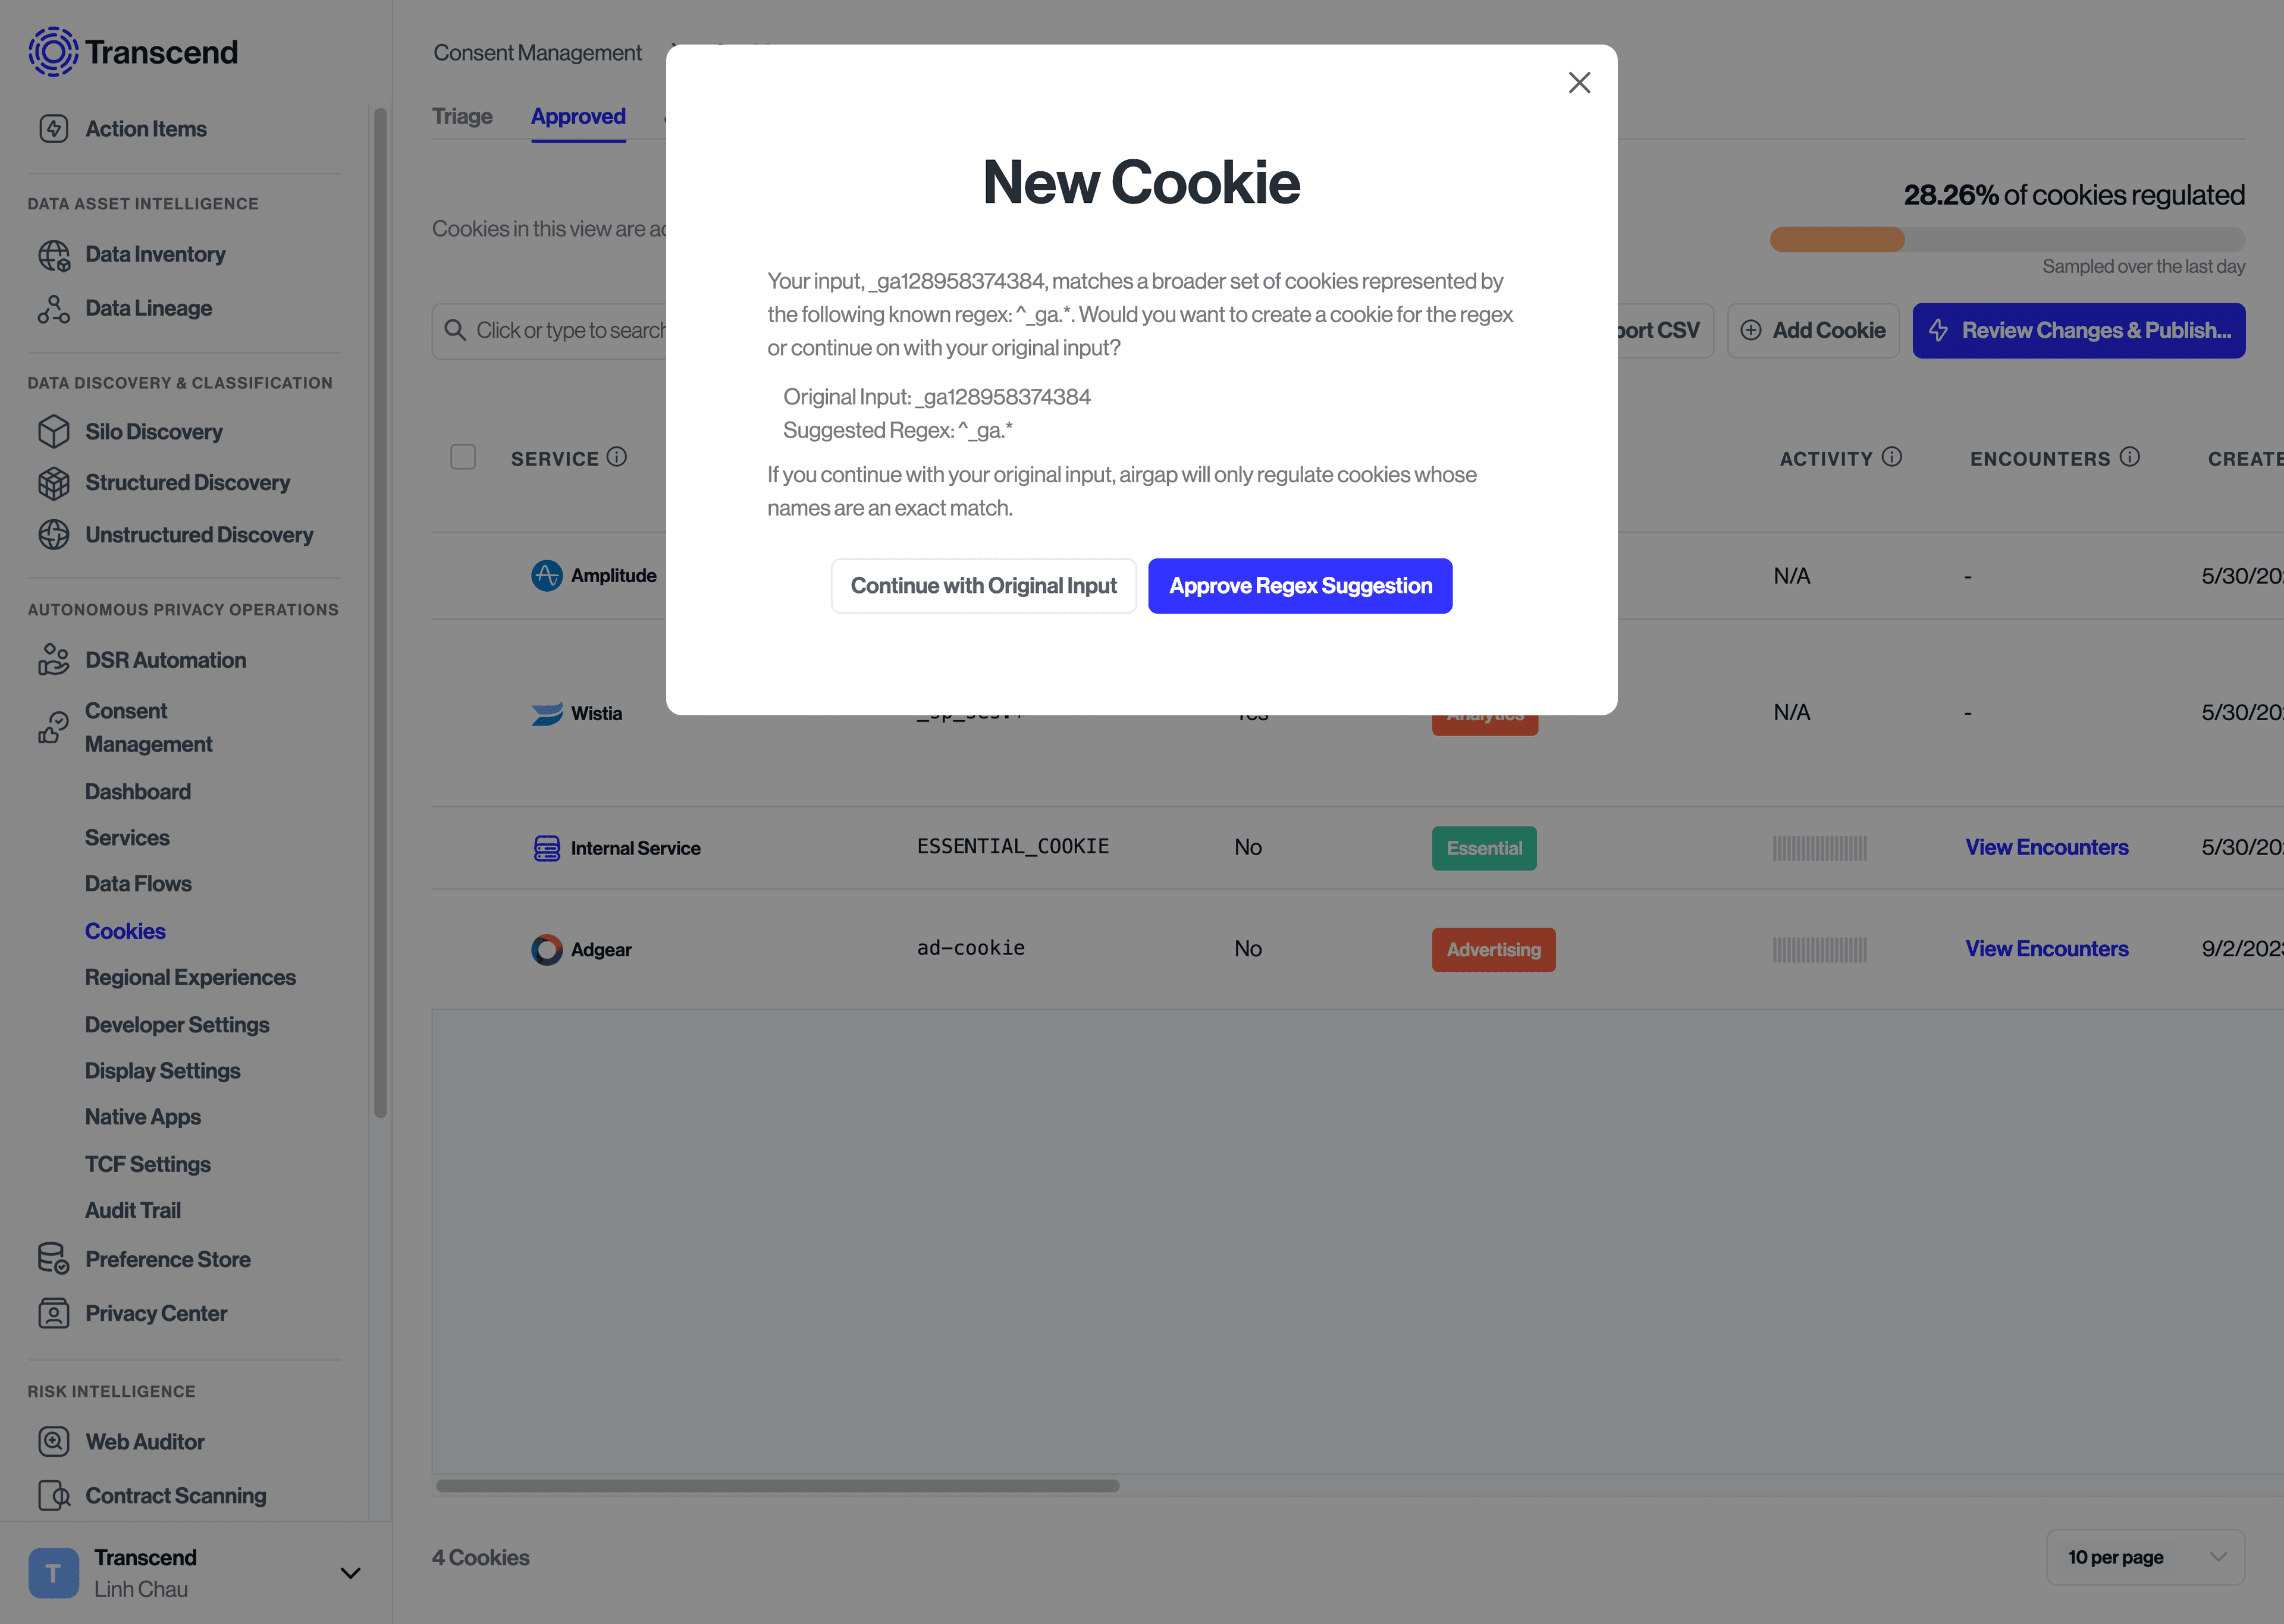
There will be cases where multiple versions of the same data flow/cookie are present on your site. It’s not uncommon to see some cookies being set hundreds of times. For example, the Google Analytics script sets a cookie, _ga{{UUID}} to track a user's page views and clicks with a unique ID. This cookie gets set with a unique ID for every distinct user on the site - ex: _ga128958374384. Because we expect the tracking purpose and consent options to be the same for every instance of this cookie, it doesn’t make sense to manually assign a tracking purpose to each unique occurrence and approve them every time a new occurrence happens.
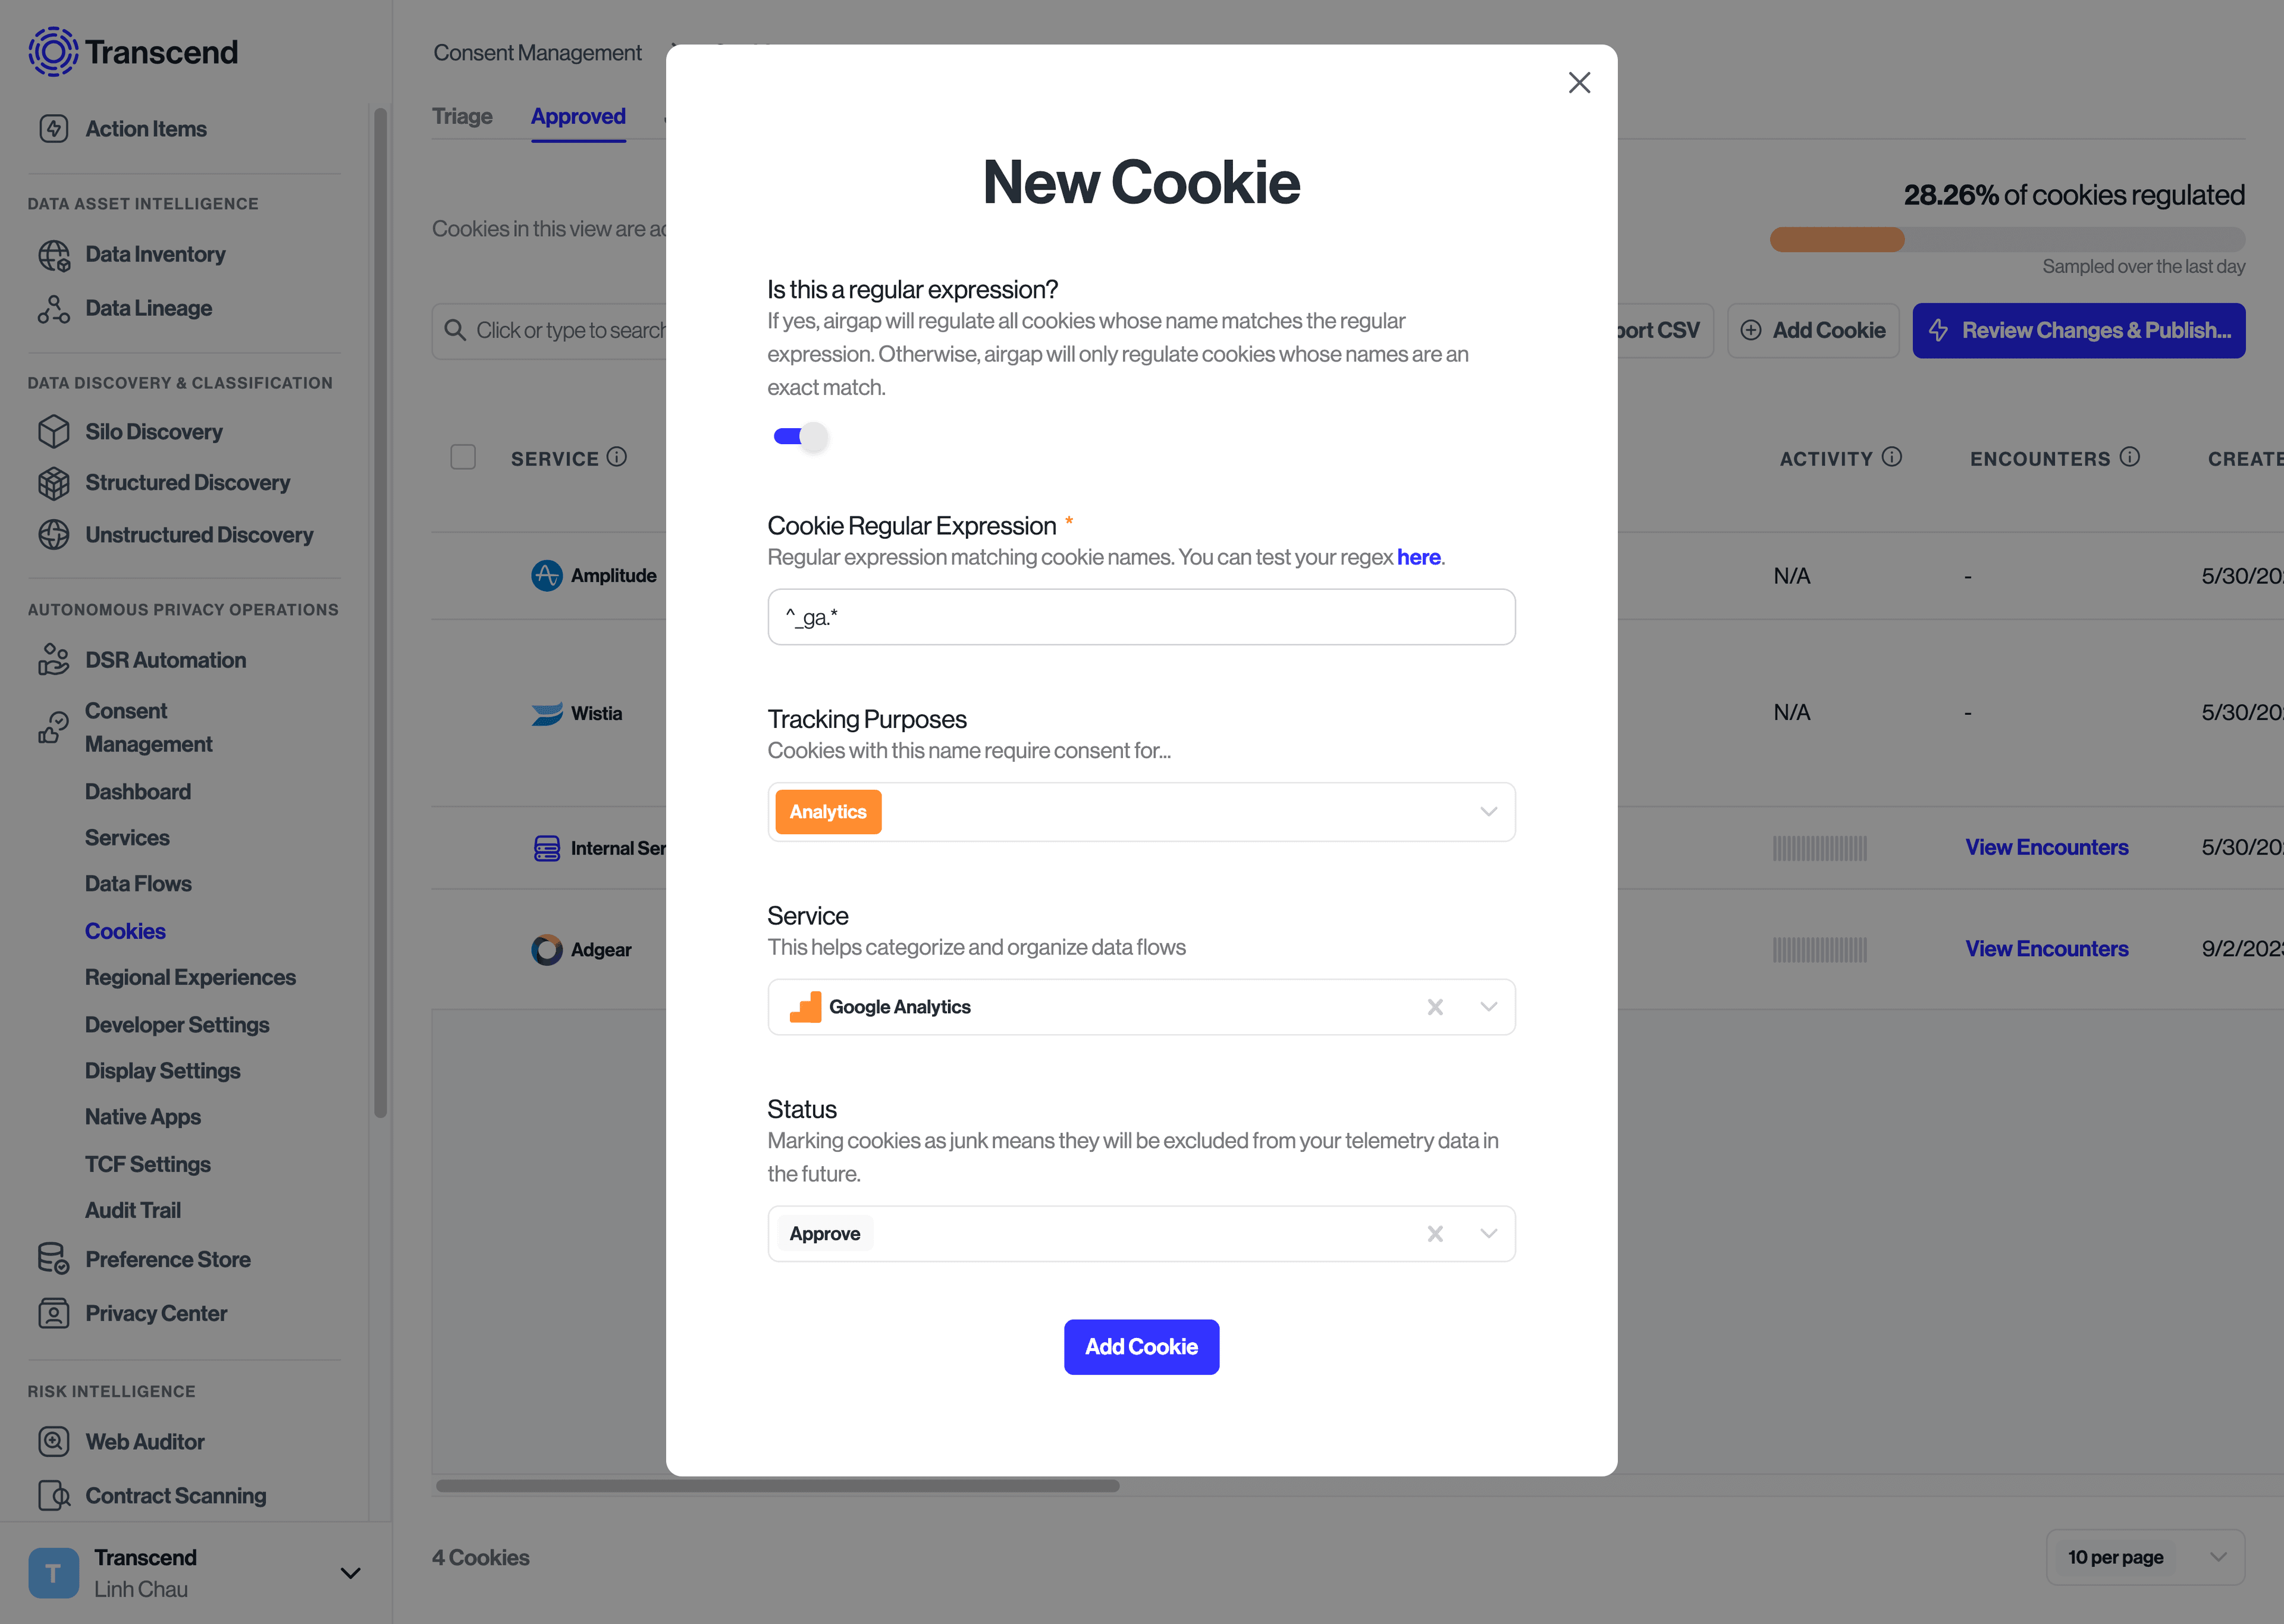
Instead, you can create a New Cookie with a Regular Expression rule to proactively match every occurrence of that cookie. To do so:
- Select the button to add a new cookie
- Enable the “regular expression” toggle
- Enter the regular expression to match cookies on. Regex101 is a helpful tool to test whether a regular expression will match the desired cookie name
- Select the "Next" button to add the tracking purposes and service to the cookie/data flow. Suggestions for Tracking Purposes and Service will be provided based on the known cookies/data flows.
- Edit or add the Tracking Purposes and Service to the Cookie/Data Flow
- Select the “Add button” to save the new Rule
If a new cookie is similar to a known cookie regex - e.g. __ga128958374384 is similar to __ga{{UUID}} - the option to create a cookie based on known cookie regex is provided after selecting the 'Next' Button.
If it becomes necessary to edit an existing data flow or cookie, say to add a new tracking purpose, it’s possible to do so by:
- Navigate to the Data Flows/Cookies Page and select the Approved tab.
- Select the data flow to be updated.
- This will bring up the “Edit Data Flow” dialog where you can adjust the domain, resource path, or regular expression which is being matched.
