Consent Management Quickstart Guide
Transcend Consent Management is a client-side Consent Management Platform (CMP) that lets you manage tracking events generated by third-party trackers integrated into your site. With it your site can allow some tracking events, and quarantine others and replay them only if and when your user later consents, at an appropriate place in their user journey. You can also block unwanted tracking events entirely.
NOTE: Airgap works by regulating requests made in or forwarded to the main thread of the browser. If you’re considering moving scripts that require consent regulation (e.g., analytics or advertising scripts) out of the main thread and into a web worker (e.g., Partytown) we recommend carefully testing to ensure their requests are still being effectively regulated. Please reach out to your CX contact if you have any questions.
Setting up the Transcend Consent Management includes:
- Initial set up and Data Flow collection
- Configuring your Data Flows
- Configuring your UI. This can include custom UI or integrating Transcend’s prebuilt UI banners into an appropriate place in your user journey
- Setting it live!
With optional steps:
- Debugging and testing with the user script
- Creating an API endpoint in your backend to store the consent information generated by the consent manager. This is applicable if you want to store user consent information yourself (vs. stored with Transcend).
For small sites, we recommend that you do these steps in sequence. For larger sites, you may need to do them somewhat in parallel. Reach out to Transcend Support if you have questions about your rollout plan.
Maintenance of the Transcend Consent Management involves:
- Adding and classifying new data flows
- Understanding the ongoing analytics
Transcend Consent Management manages tracking events by communicating with the Transcend airgap.js JavaScript library, which needs to be integrated to your site. This JS code snippet runs on your site and regulates outgoing requests based on the user consent and a set of configured “Data Flows”. A Data Flow represents some network request sent from your website, with some associated tracking purposes. It’s information about where data is flowing from your site, and why.
For example, if your site makes requests to googleadservices.com with user data for the purpose of advertising, our consent manager considers this a Data Flow with the value of googleadservices.com and the associated tracking purpose of Advertising. Transcend Consent Management would block the request(s) to googleadservices.com if your user hasn’t consented to giving up their data for the Advertising tracking purpose, or allow it if the user has given consent to Advertising tracking purposes.
A critical part of correctly implementing Consent is to label your site’s Data Flows correctly. This can be a sizable effort for any given website, but fortunately Consent is built with telemetry collection which makes this task easy.
Consent’s primary method for managing tracking events is through the regulation of data flows.
A Data Flow represents a rule which matches network requests sent from your website with associated tracking purposes. By regulating these requests at the network-level, Consent is able to go beyond cookies and effectively manage 200+ tracking technologies. This helps ensure tracking technologies like XHR, Fetch, Pixels, Web Beacons, iframe elements and more don’t go unregulated and emit data that users have not consented to sharing.
Consent’s data flow regulation setup can also implicitly regulate third-party cookies when network requests that include cookies are categorized and regulated through the same network-level regulation engine.
Consent’s Cookies tab allows for the identification and categorization of individual cookies to give additional flexibility when configuring regulation.
This can be especially helpful when configuring first-party cookies. Once you configure your cookie regulation settings, Consent will regulate modifications to these cookies in accordance with consent. If a user who has opted-in later changes their mind and opts-out of tracking, Consent will handle clearing the cookies that have been set on the client device.
When you begin setup, our onboarding steps will surface the exact <script> tag you need and ask you to add it to your site.

You can also find the exact <script> tag to add to the <head> tag section of your site under Developer Settings > Installation.
Once the tag is added to your site, Consent is in “Reporting Only” mode by default and is only collecting telemetry data (the number of requests made to different domains) for the purpose of automatically filling out your Data Flows page. It does not regulate or block any requests yet, and should have no impact on your site functionality.
Once your script is set up, telemetry data is sent to our backend to be processed and classified, and will show up in your “Data Flows” and “Cookies” tables. Now, all you have to do is wait for enough telemetry data to come in -- the more visitors you have, the more pages they visit, the more quickly your data flows will fill up.
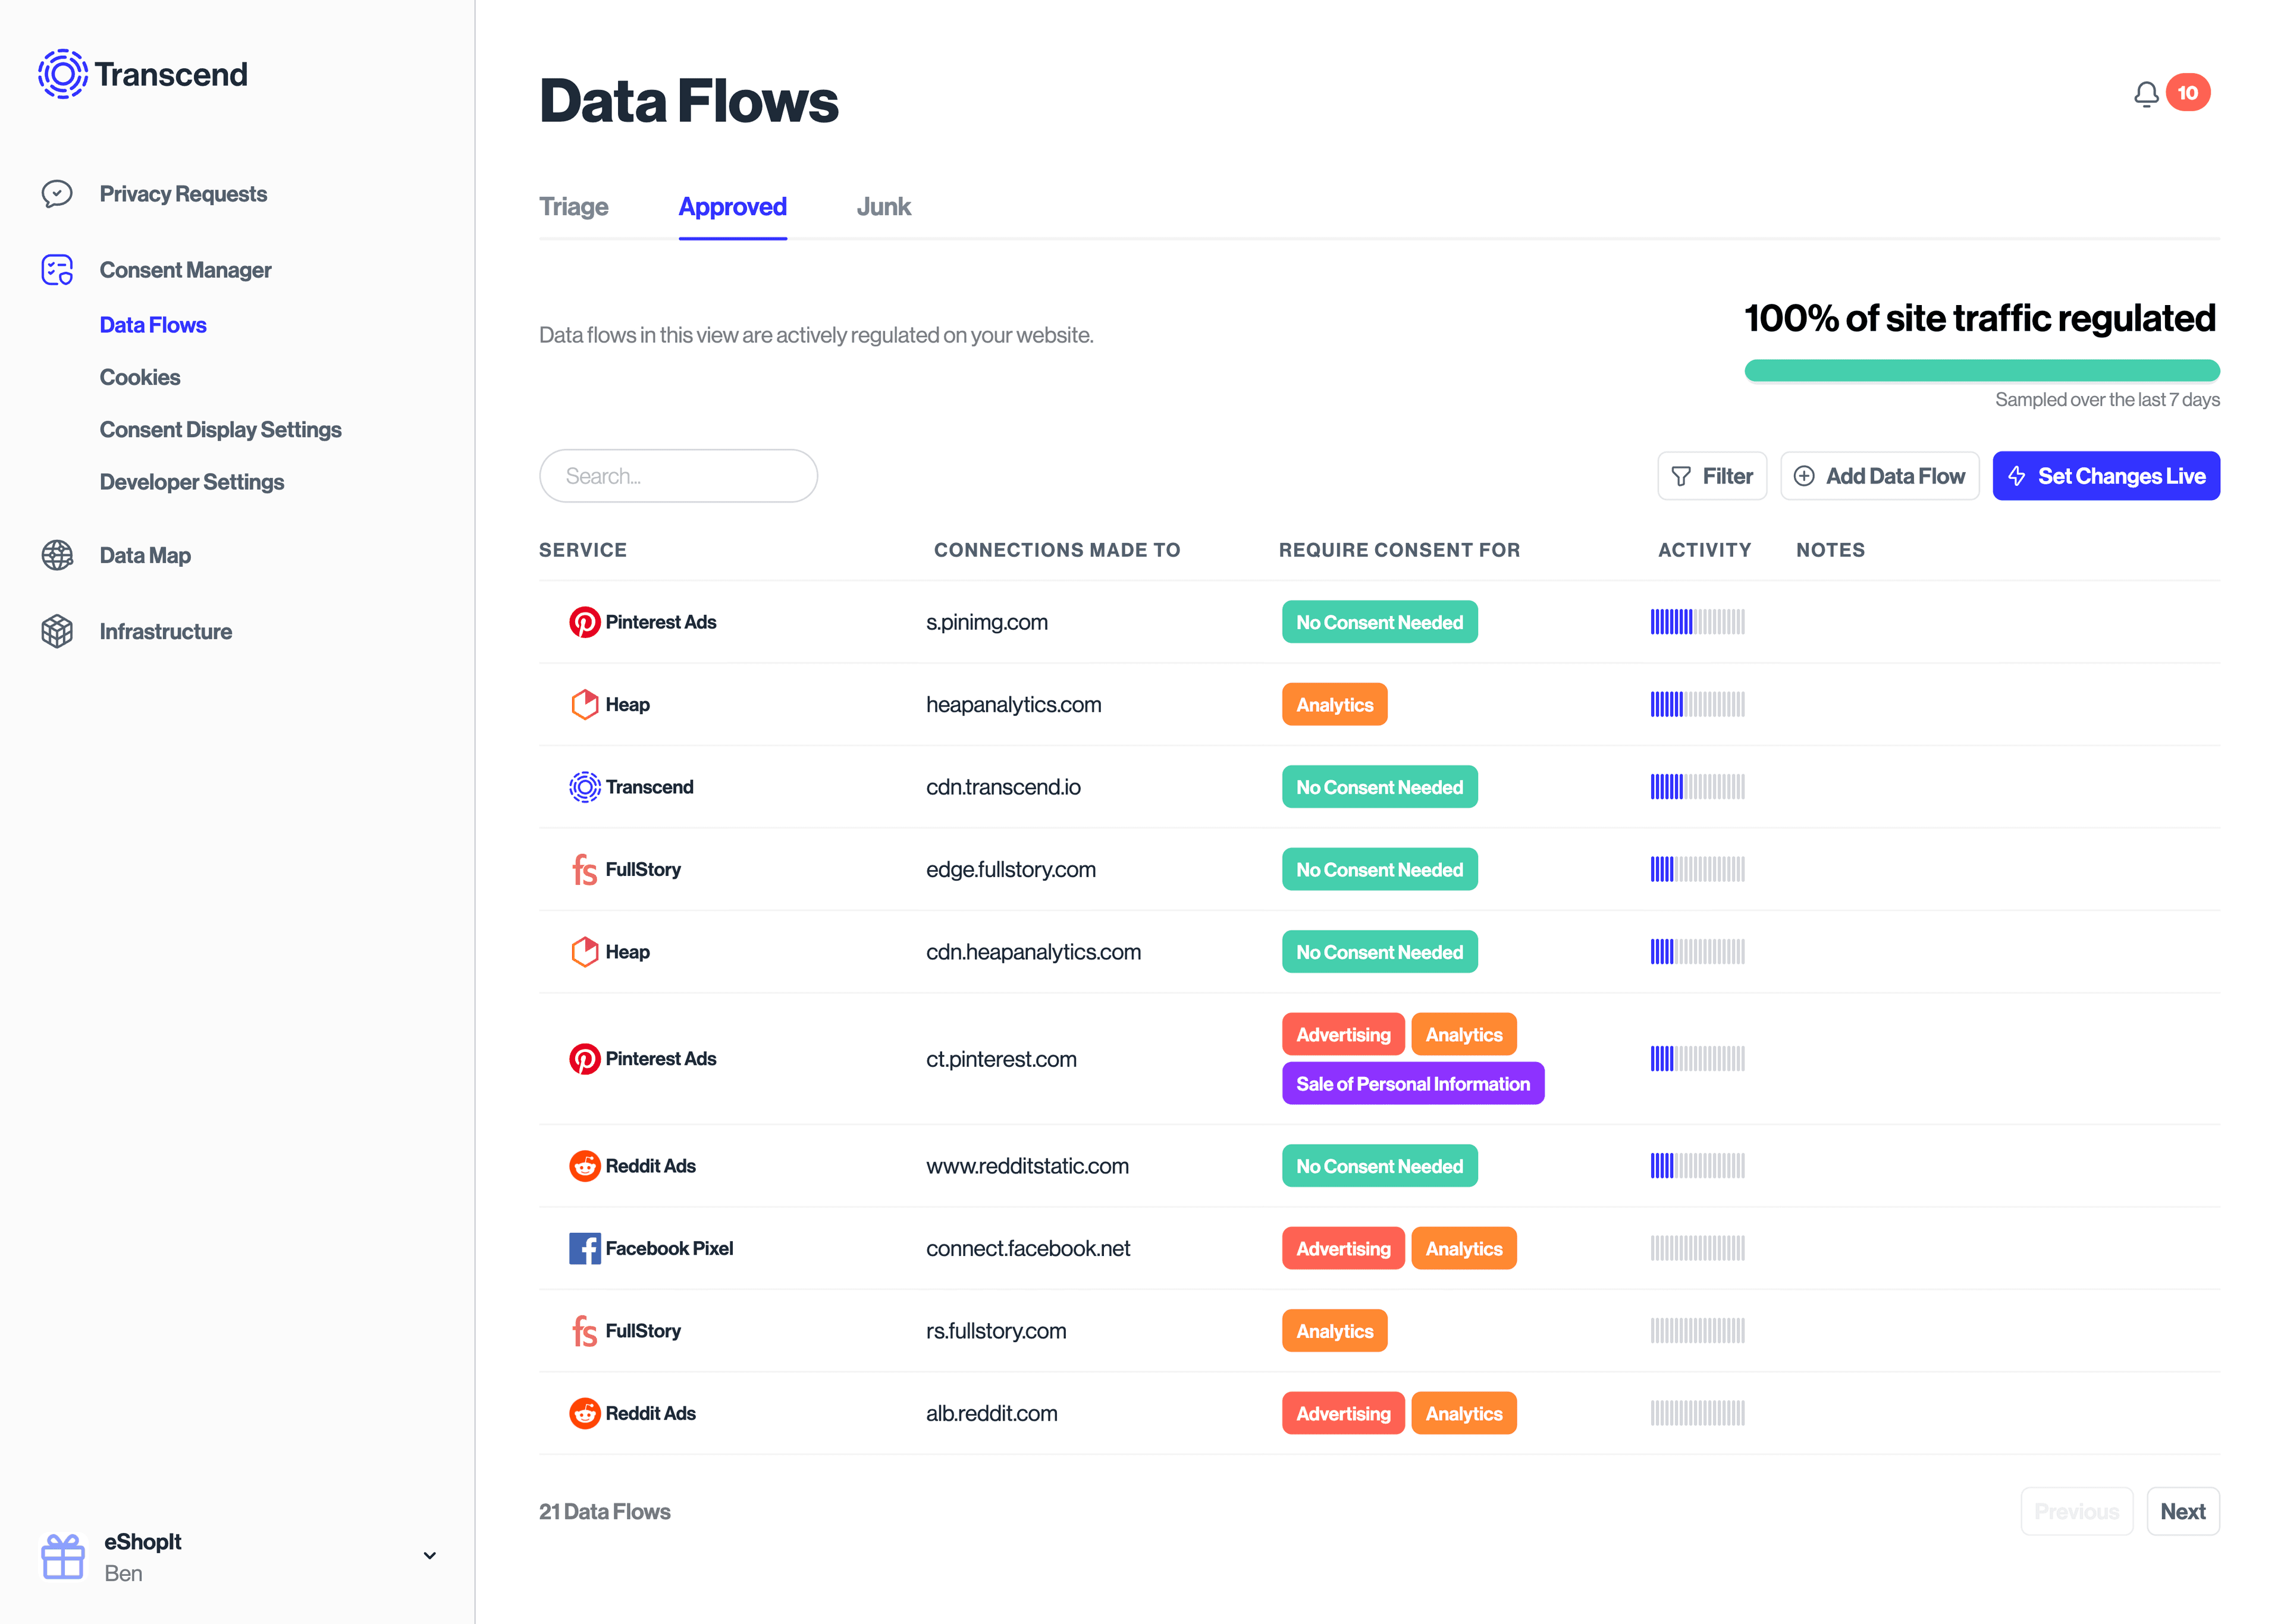
Note: The activity bar measures how many requests were made to a given domain, relative to the total # of requests we detected.
Occasionally, our backend may not be able to auto-classify the tracking purpose for a given domain. In these case, you’ll be prompted for help in the Consent Management dashboard:

Note: Your dashboard will let you know if there are data flows (in this case, 2) without any tracking purposes that require your review.
If you use popular trackers such as Facebook or Google, you should check out our additional documentation on how to manually configure the data flows for them.
For the moment, we’re assuming that you aren’t using a third-party web framework or content management system and have very precise control of the HTML your site generates, because you will need to be able to strictly control the order in which scripts and other content are loaded in order for Consent to be most effective.
If you’re integrating Consent with a site built using a templating framework or with a third-party content management system, you will need to go through more steps specific to your web framework or content management systems. Please consult with Transcend Support for help.
For a site you’ve built from the ground up, integrating the airgap.js library is as simple as adding a <script> tag referencing the airgap.js library to the base HTML template of your site. The goal is to:
- To ensure that the airgap.js script is loaded on every page of your site; and
- To ensure that the airgap.js script is loaded first on every page of your site, before any other content or scripts which might result in network requests, e.g. images, even the favicon, CSS, or other JavaScript libraries.
To the extent possible, we strongly encourage you to add the airgap.js script to as few places as possible in your codebase. e.g. if your site has an inheritance hierarchy of HTML page templates, you add it as close to the top as possible, so ideally to the base or root template, and not to each individual leaf template.
Transcend's engineering frequently adds new features, bug fixes and optimizations to new versions of Airgap. The version deployed on your websites can be easily modified with a few simple steps explained in details below.
- Notice the version currently deployed, under
Deploy Statusin the top left corner ofConsent Management > Developer Settings.
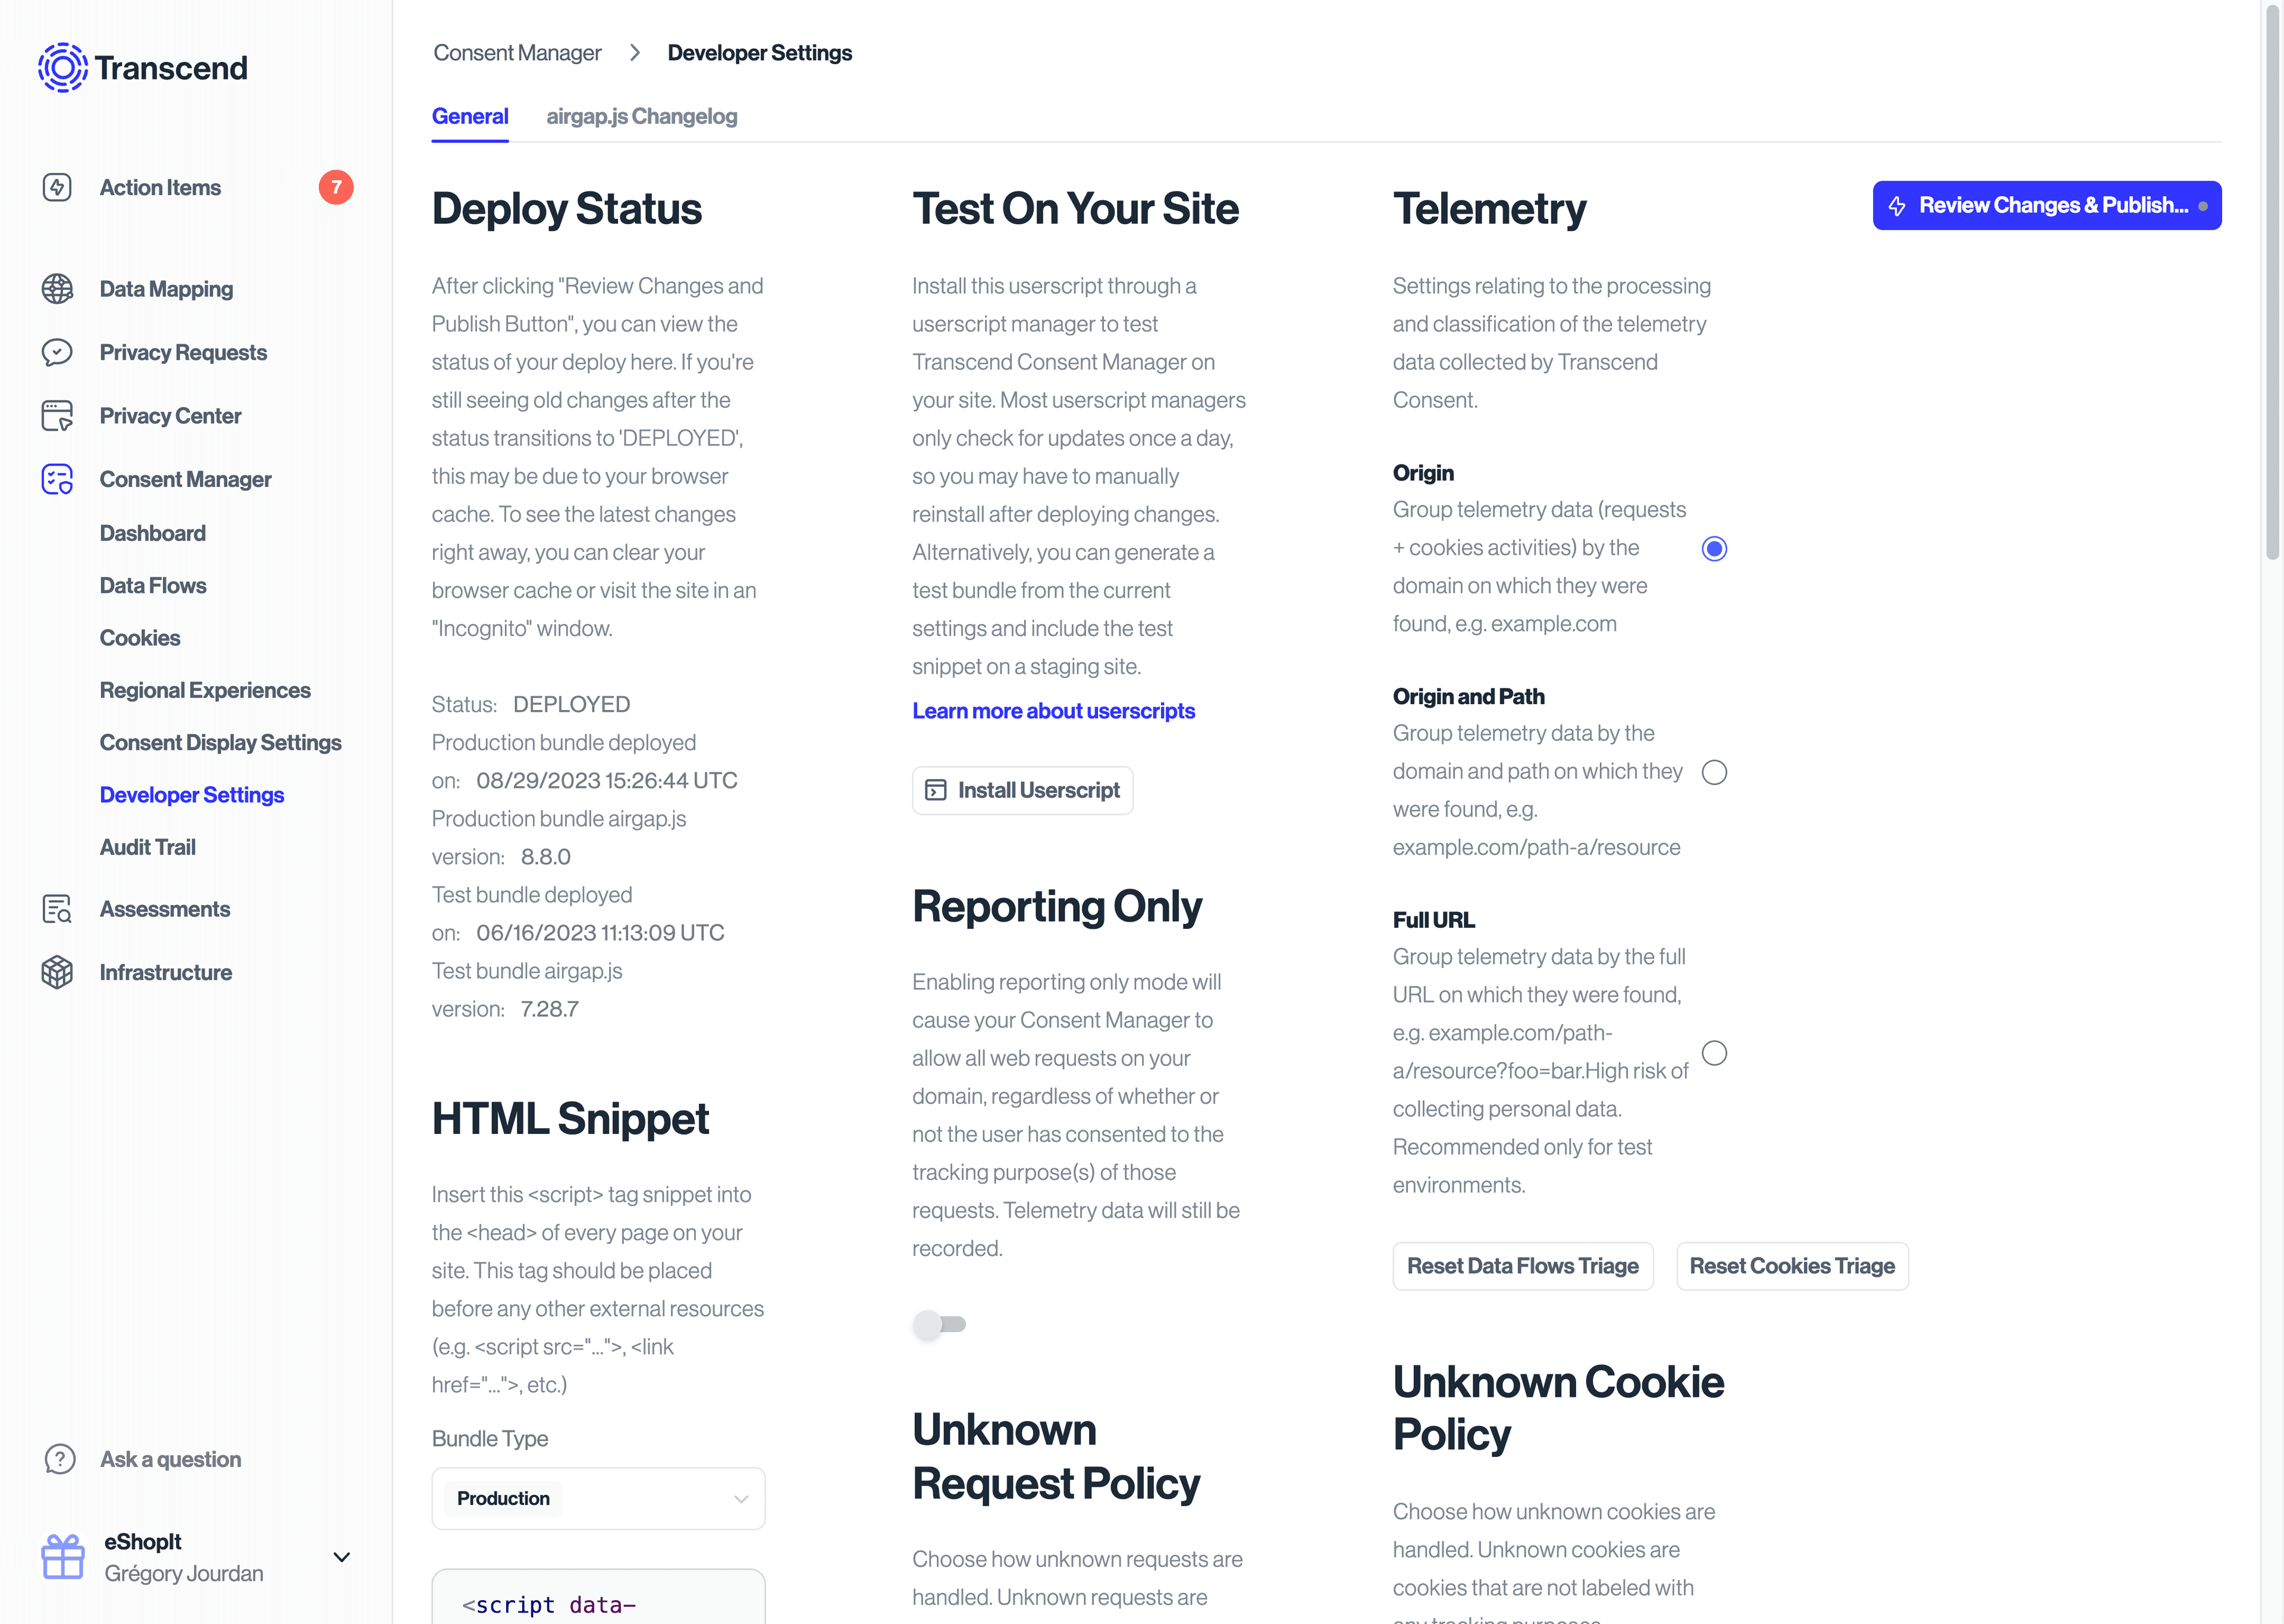
- Go to the
airgap.js Changelogtab and review the latest versions and their respective notes. - Select a version from the dropdown, or click
Update to latest version.
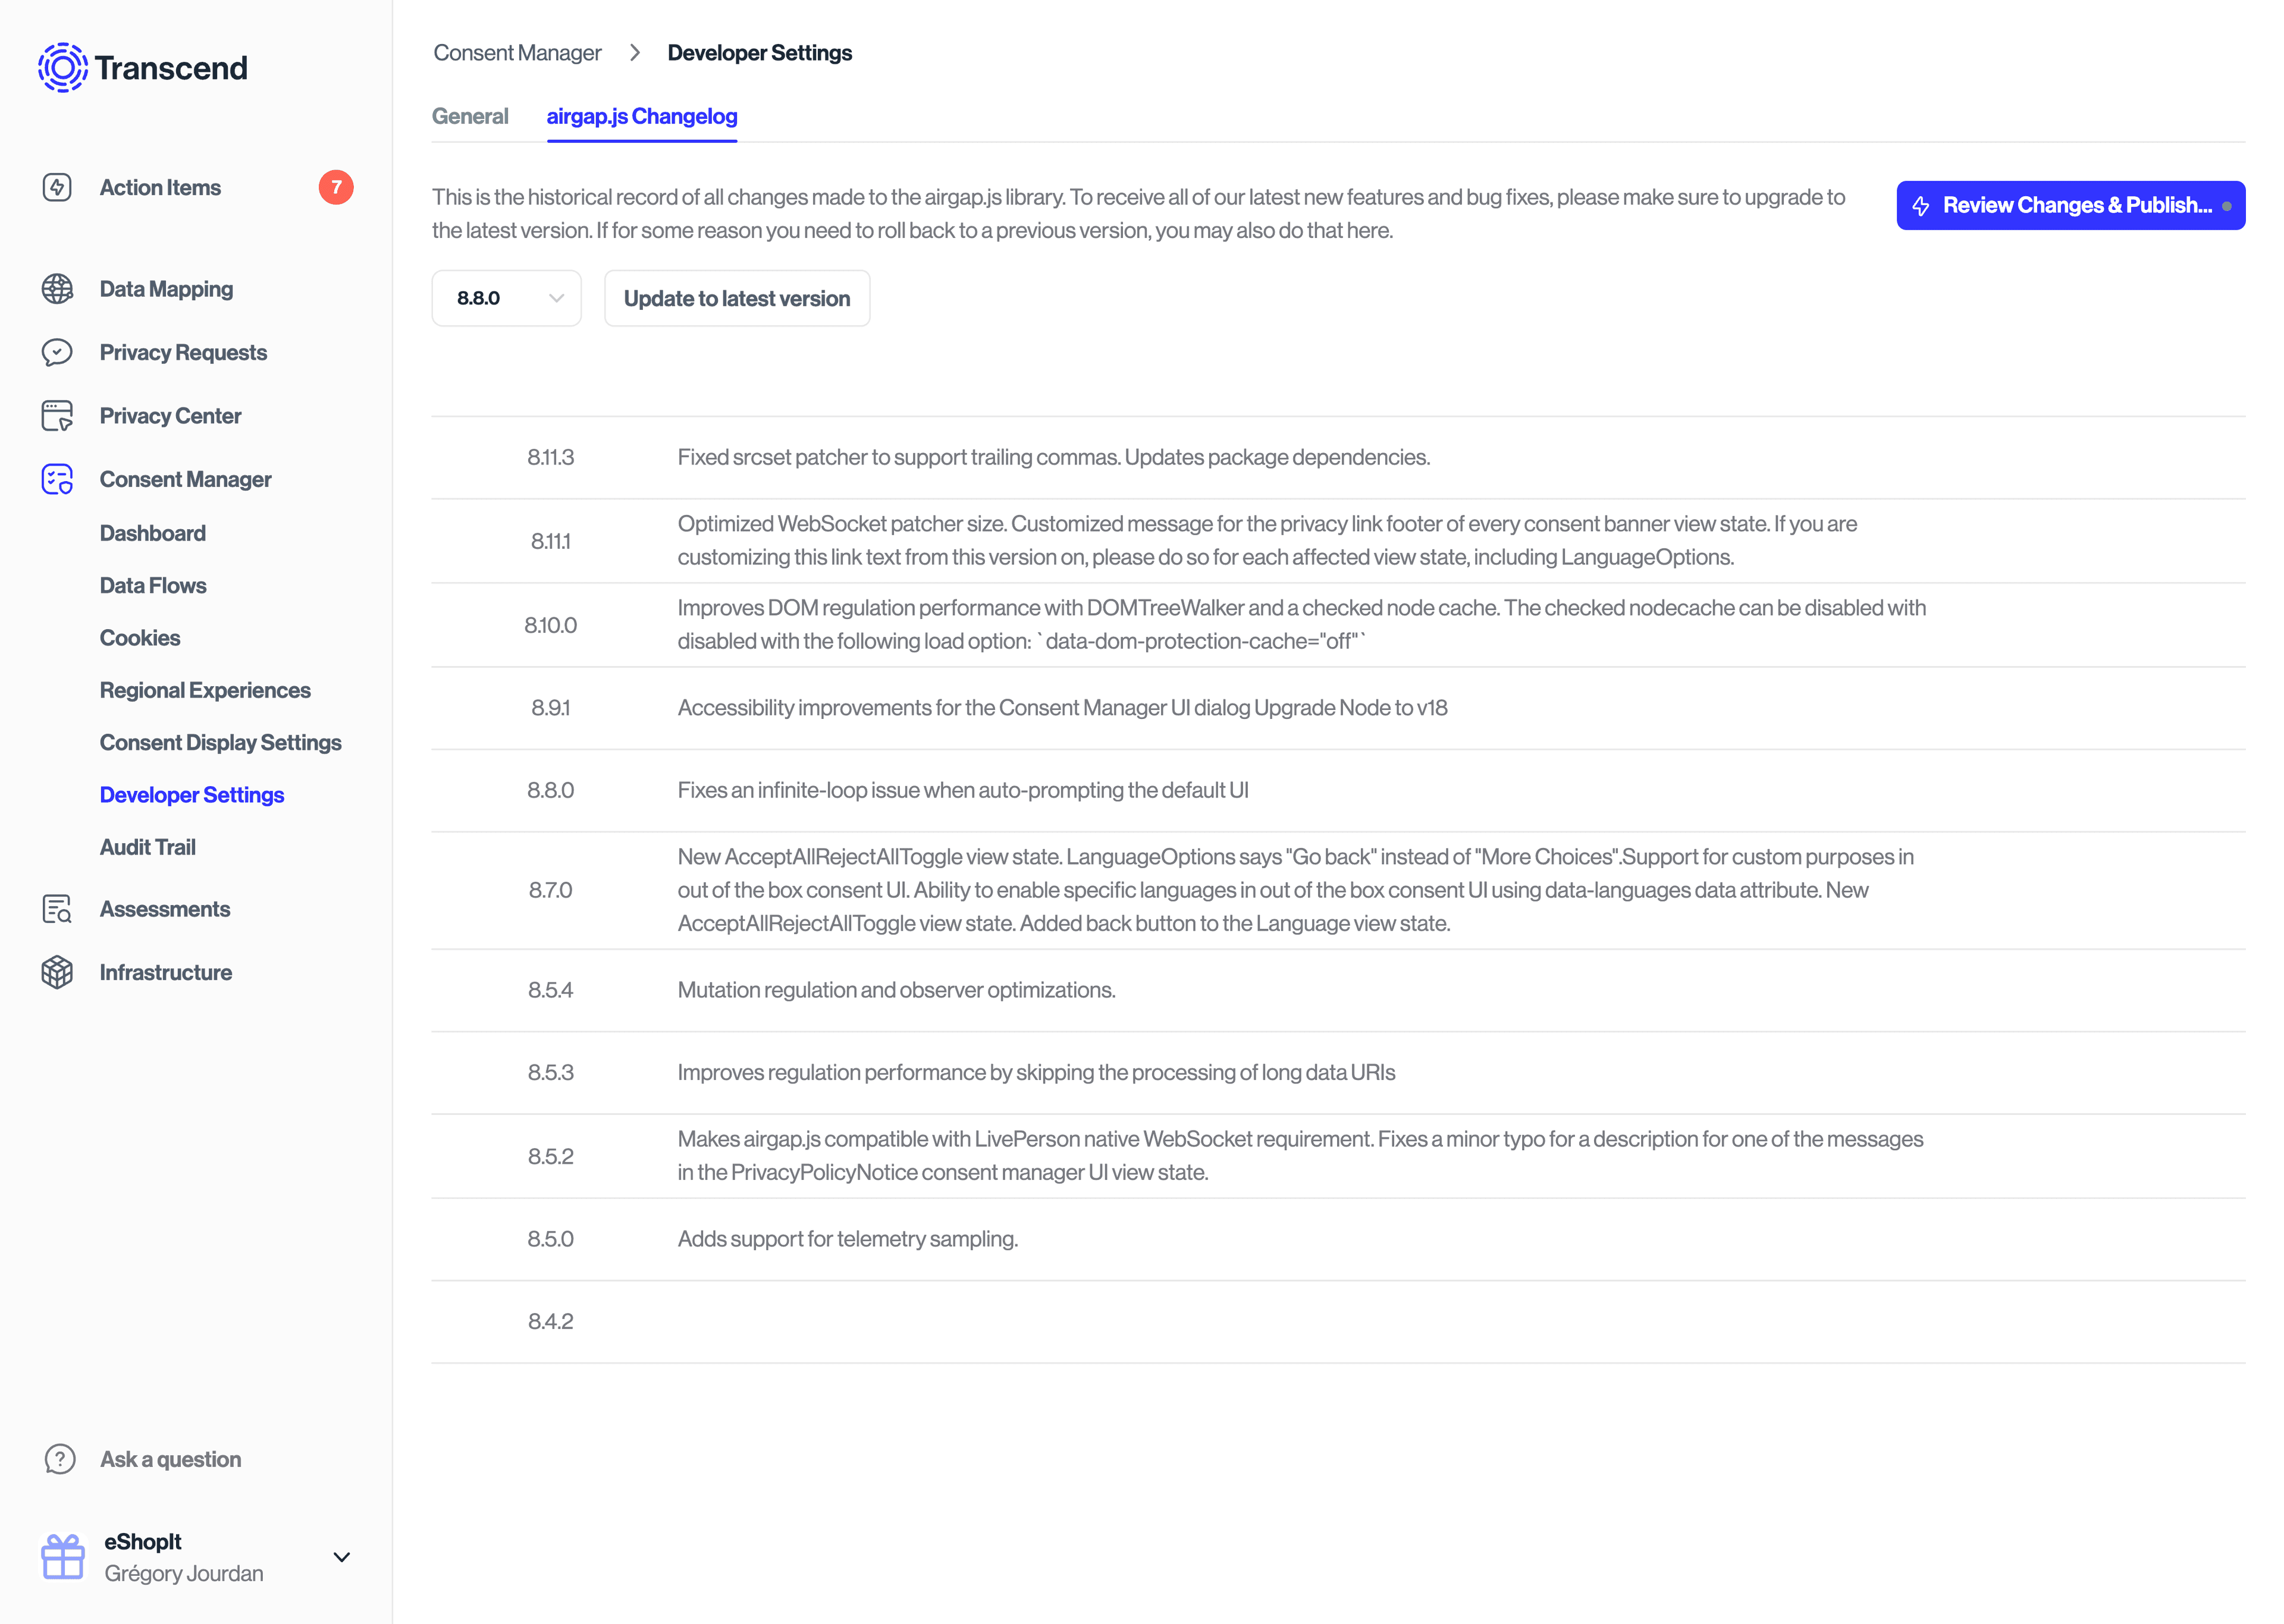
- Review the change by clicking the
Review Changes and Publishbutton in the top right corner. - Make sure to select the correct bundle (Test or Prod) and review any previously staged changes that will apply along with this update, then click
Set Consent Manager Liveat the bottom of the review window. - Like with all changes published on your airgap.js bundle, you will be able to see its status in
Consent Management > Developer Settings. Your bundle status will briefly change toDEPLOY_PENDING, thenDEPLOYED, at which point your airgap.js script will be configured to use the version you selected.