Manually Responding to Requests
Once an AVC integration is set to "live for Data Subject Requests", DSRs will be added to the queue for that integration and the email address configured for that integration will start getting notified of incoming requests. In order to process access requests, responders will need to upload user data back into Transcend so that it can be collated and sent to the end user.
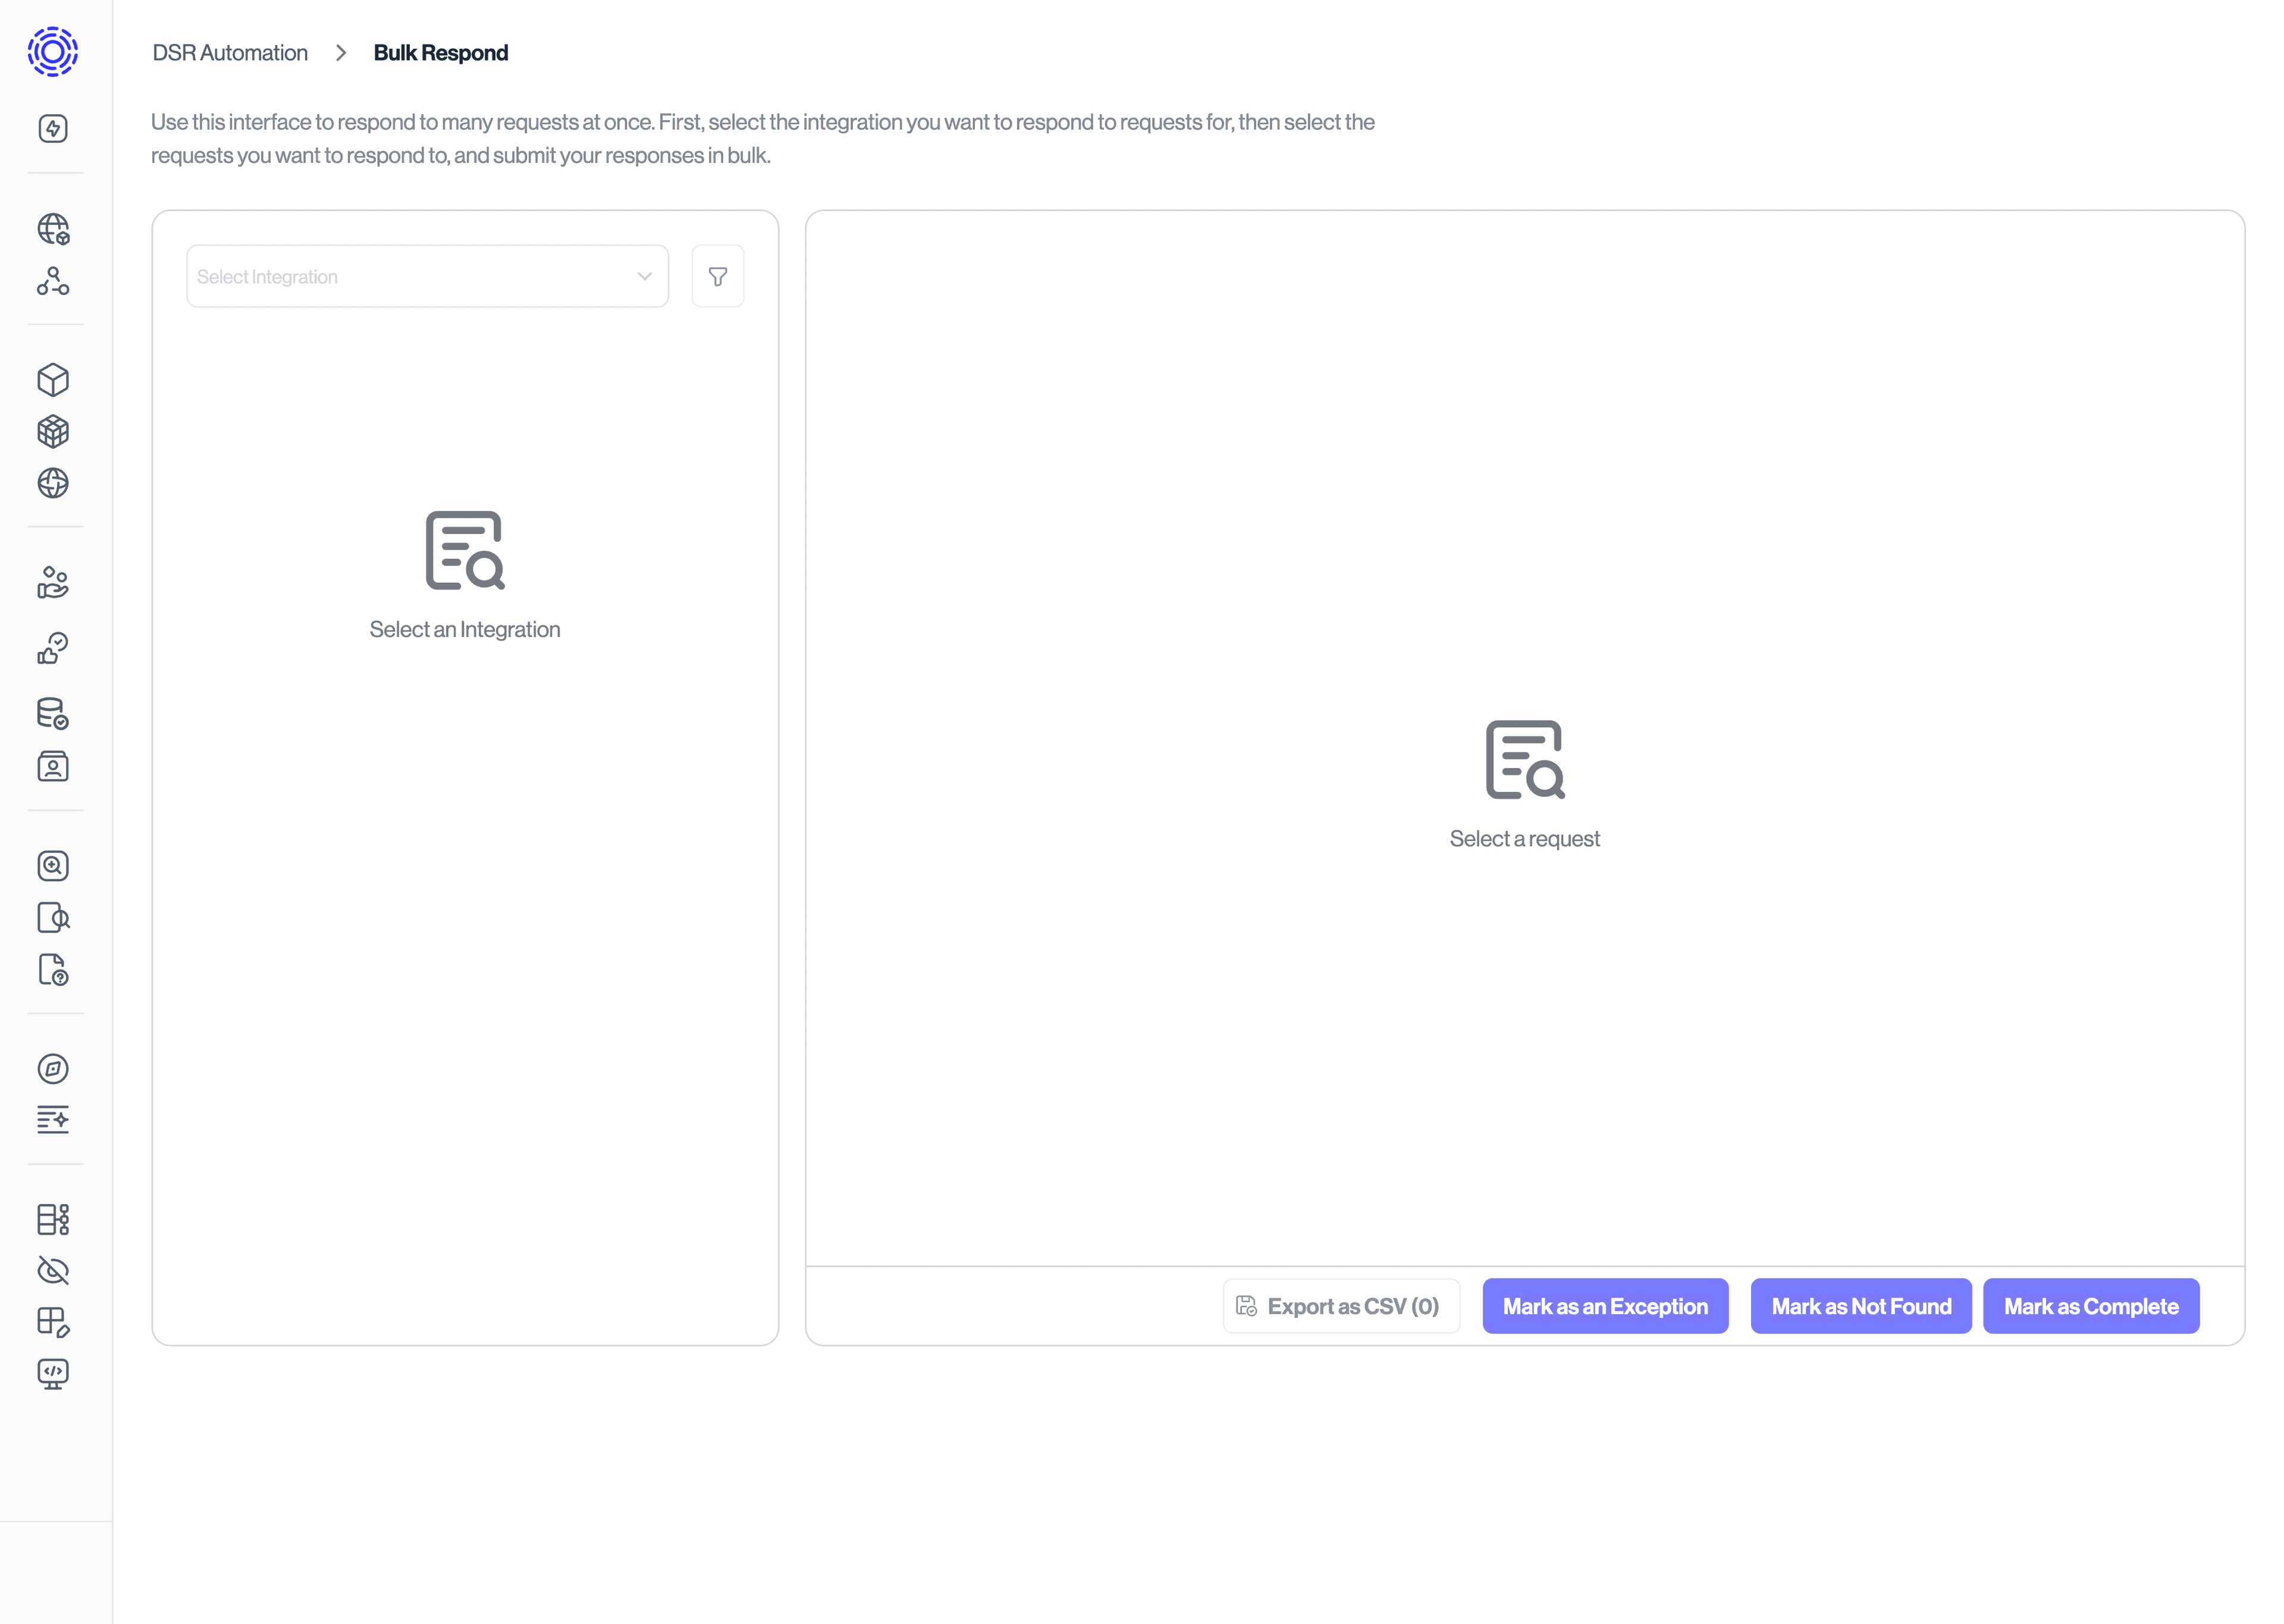
The best place to manage the status of these requests is by using our bulk respond interface. To navigate to the Bulk Respond interface:
a) If you are logged in, go to DSR Automation > Bulk respond and use the dropdown to find your integration.
b) If you are logged in on the settings page for an integration, open the "Connection" tab dropdown and click "Manage requests for this integration"
c) If you are a third party vendor, or do not have an account log in to Transcend, you will need to click the magic link from your email and it will bring you to the interface.
From the bulk respond interface, you will be able to see the list of active requests that require your attention, as well as past requests that have already been resolved.
Using the checkboxes next to each request, you can select the requests that you want to process. Once selected you can:
- View the type of request (Access, Erasure, Opt Out…)
- View the identifiers associated with the request
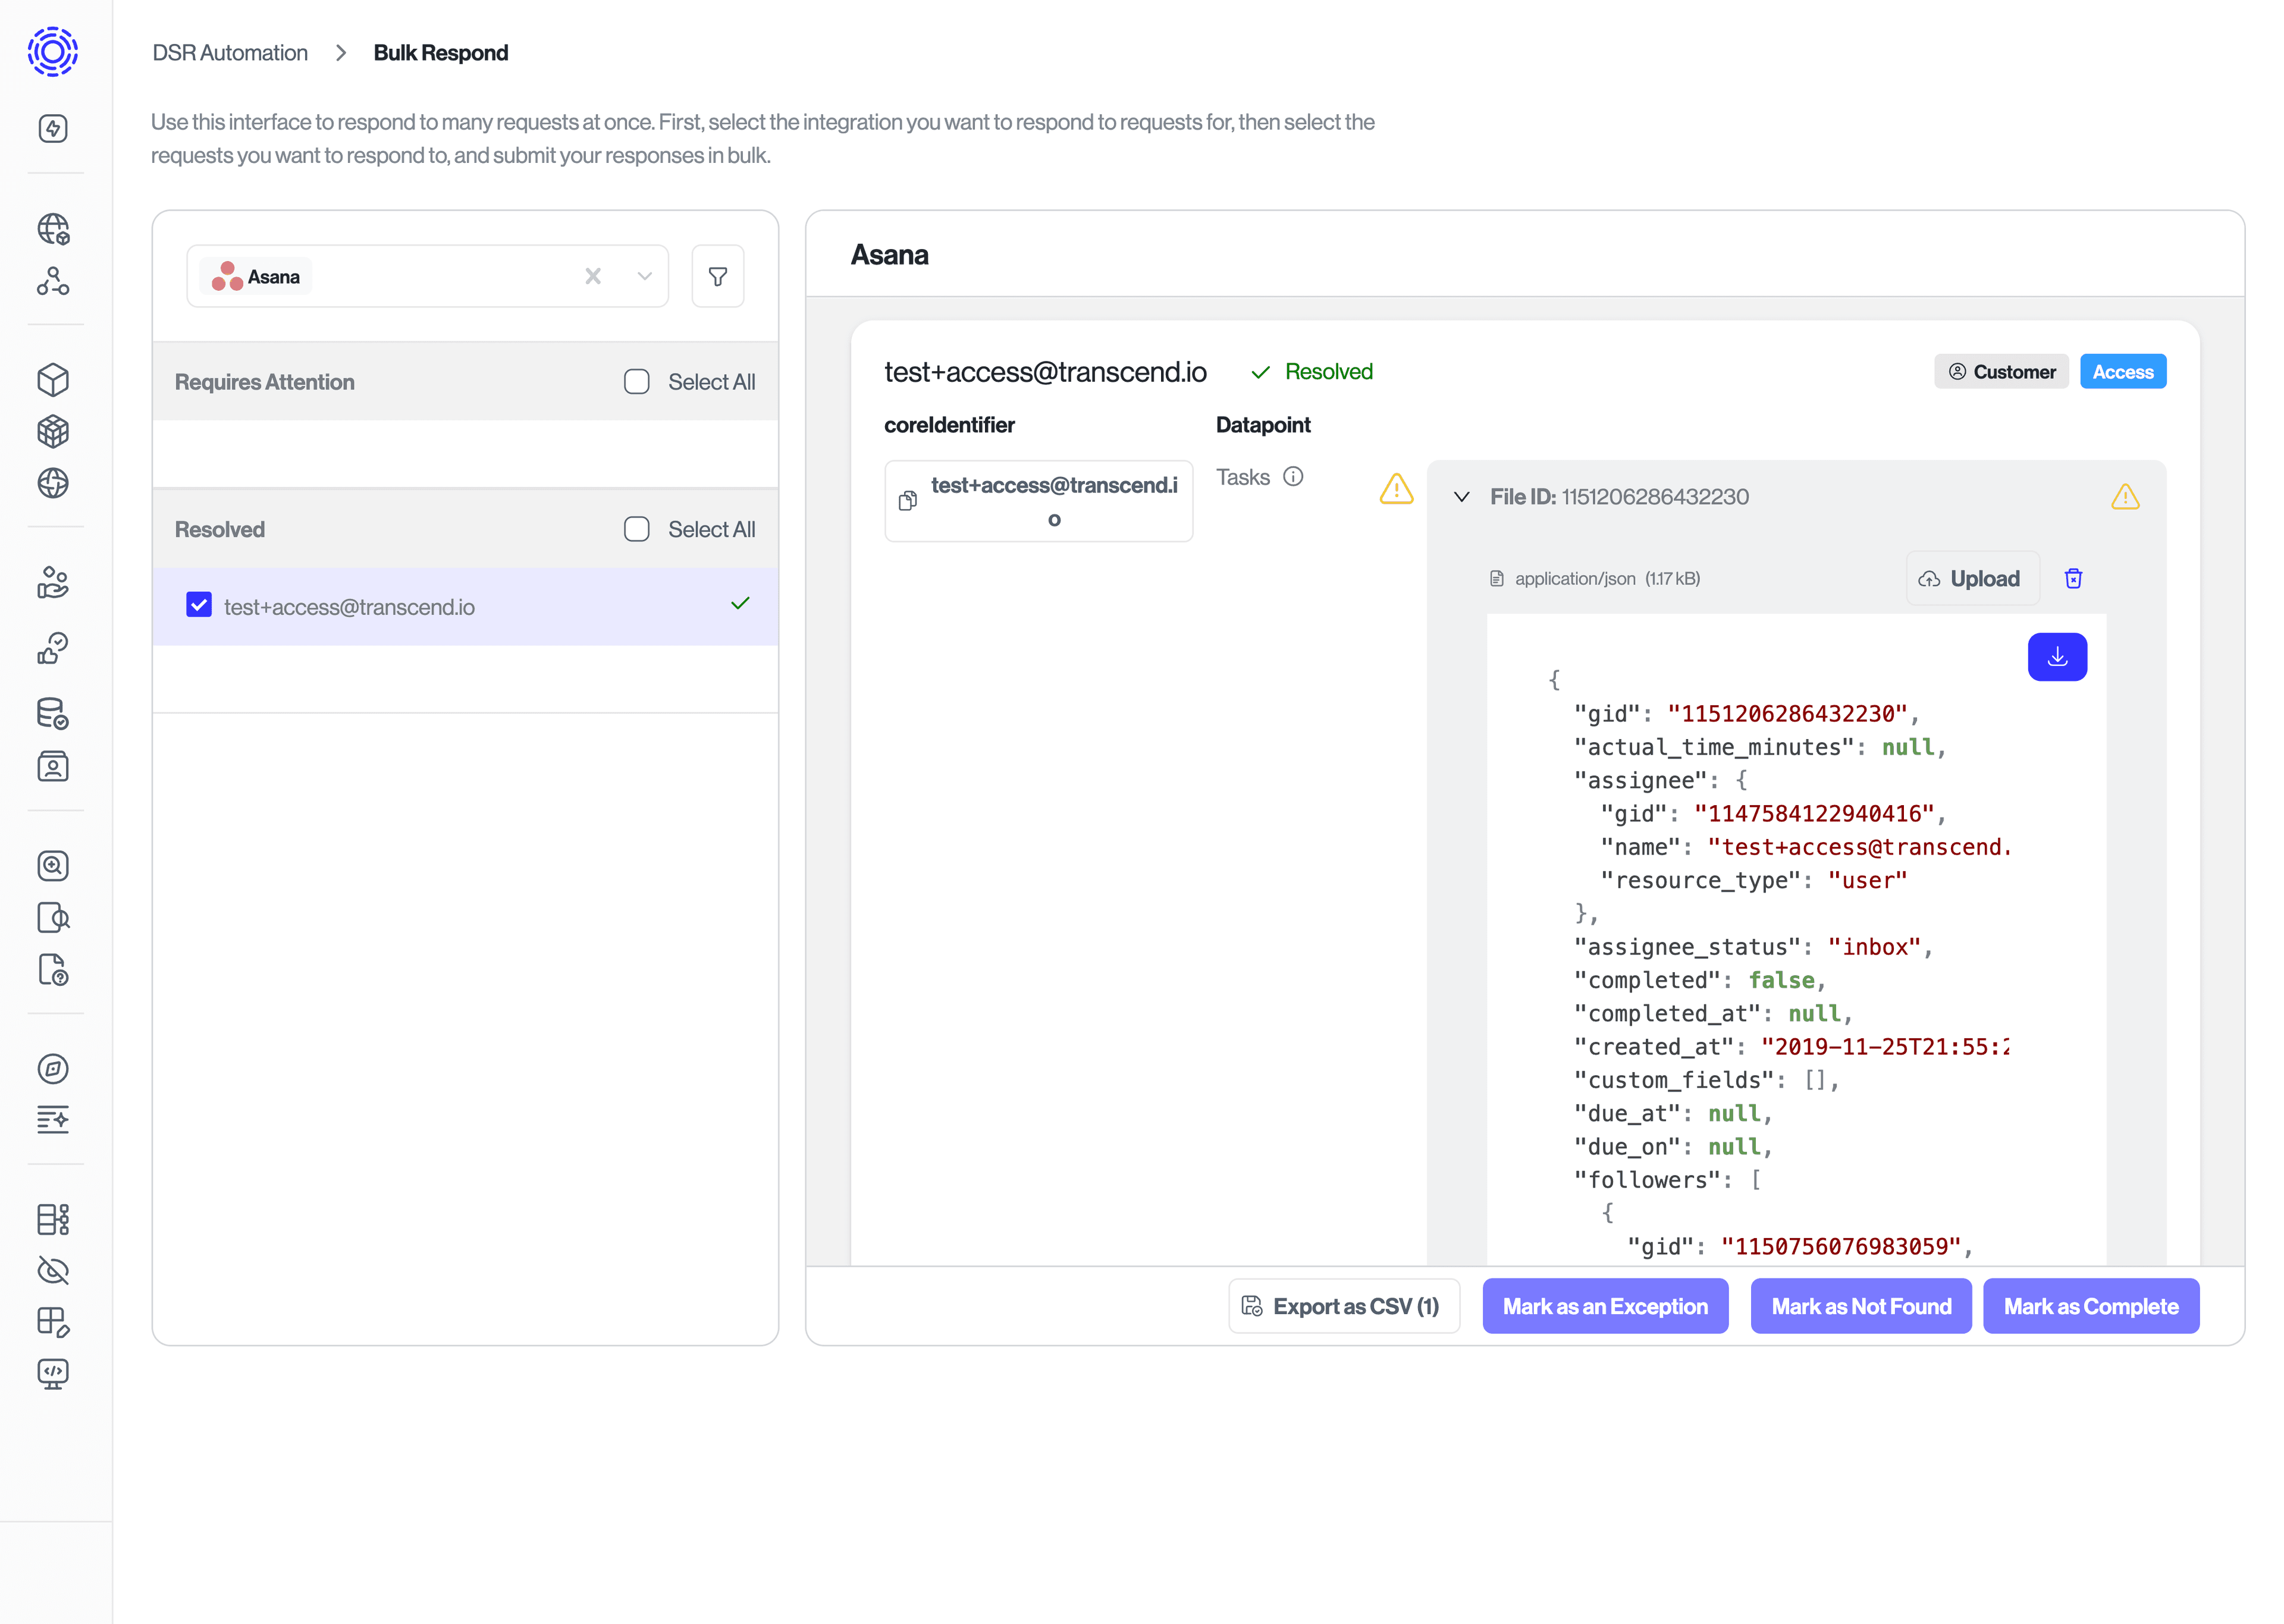
- Upload files to the access requests
- Export the selected requests to a CSV
- Add notes on how the requests need to be processed
- Mark all selected requests as Exception
- Mark all selected requests as Not Found
- Mark all selected requests as Completed
Additionally, you can apply a set of filters across the requests:
- Filter by the type of request (Access, Erasure, Sale Opt Out…)
- Filter by the email batch. When receiving email notifications for an integration, the link in the email will include a filter for that email batch. This means that if you set up the integration to send weekly emails, the link in the email would show all the requests that were received within the past week. Note: if a request fails to be responded to after 2 weeks, it will be re-queued in the next email batch.
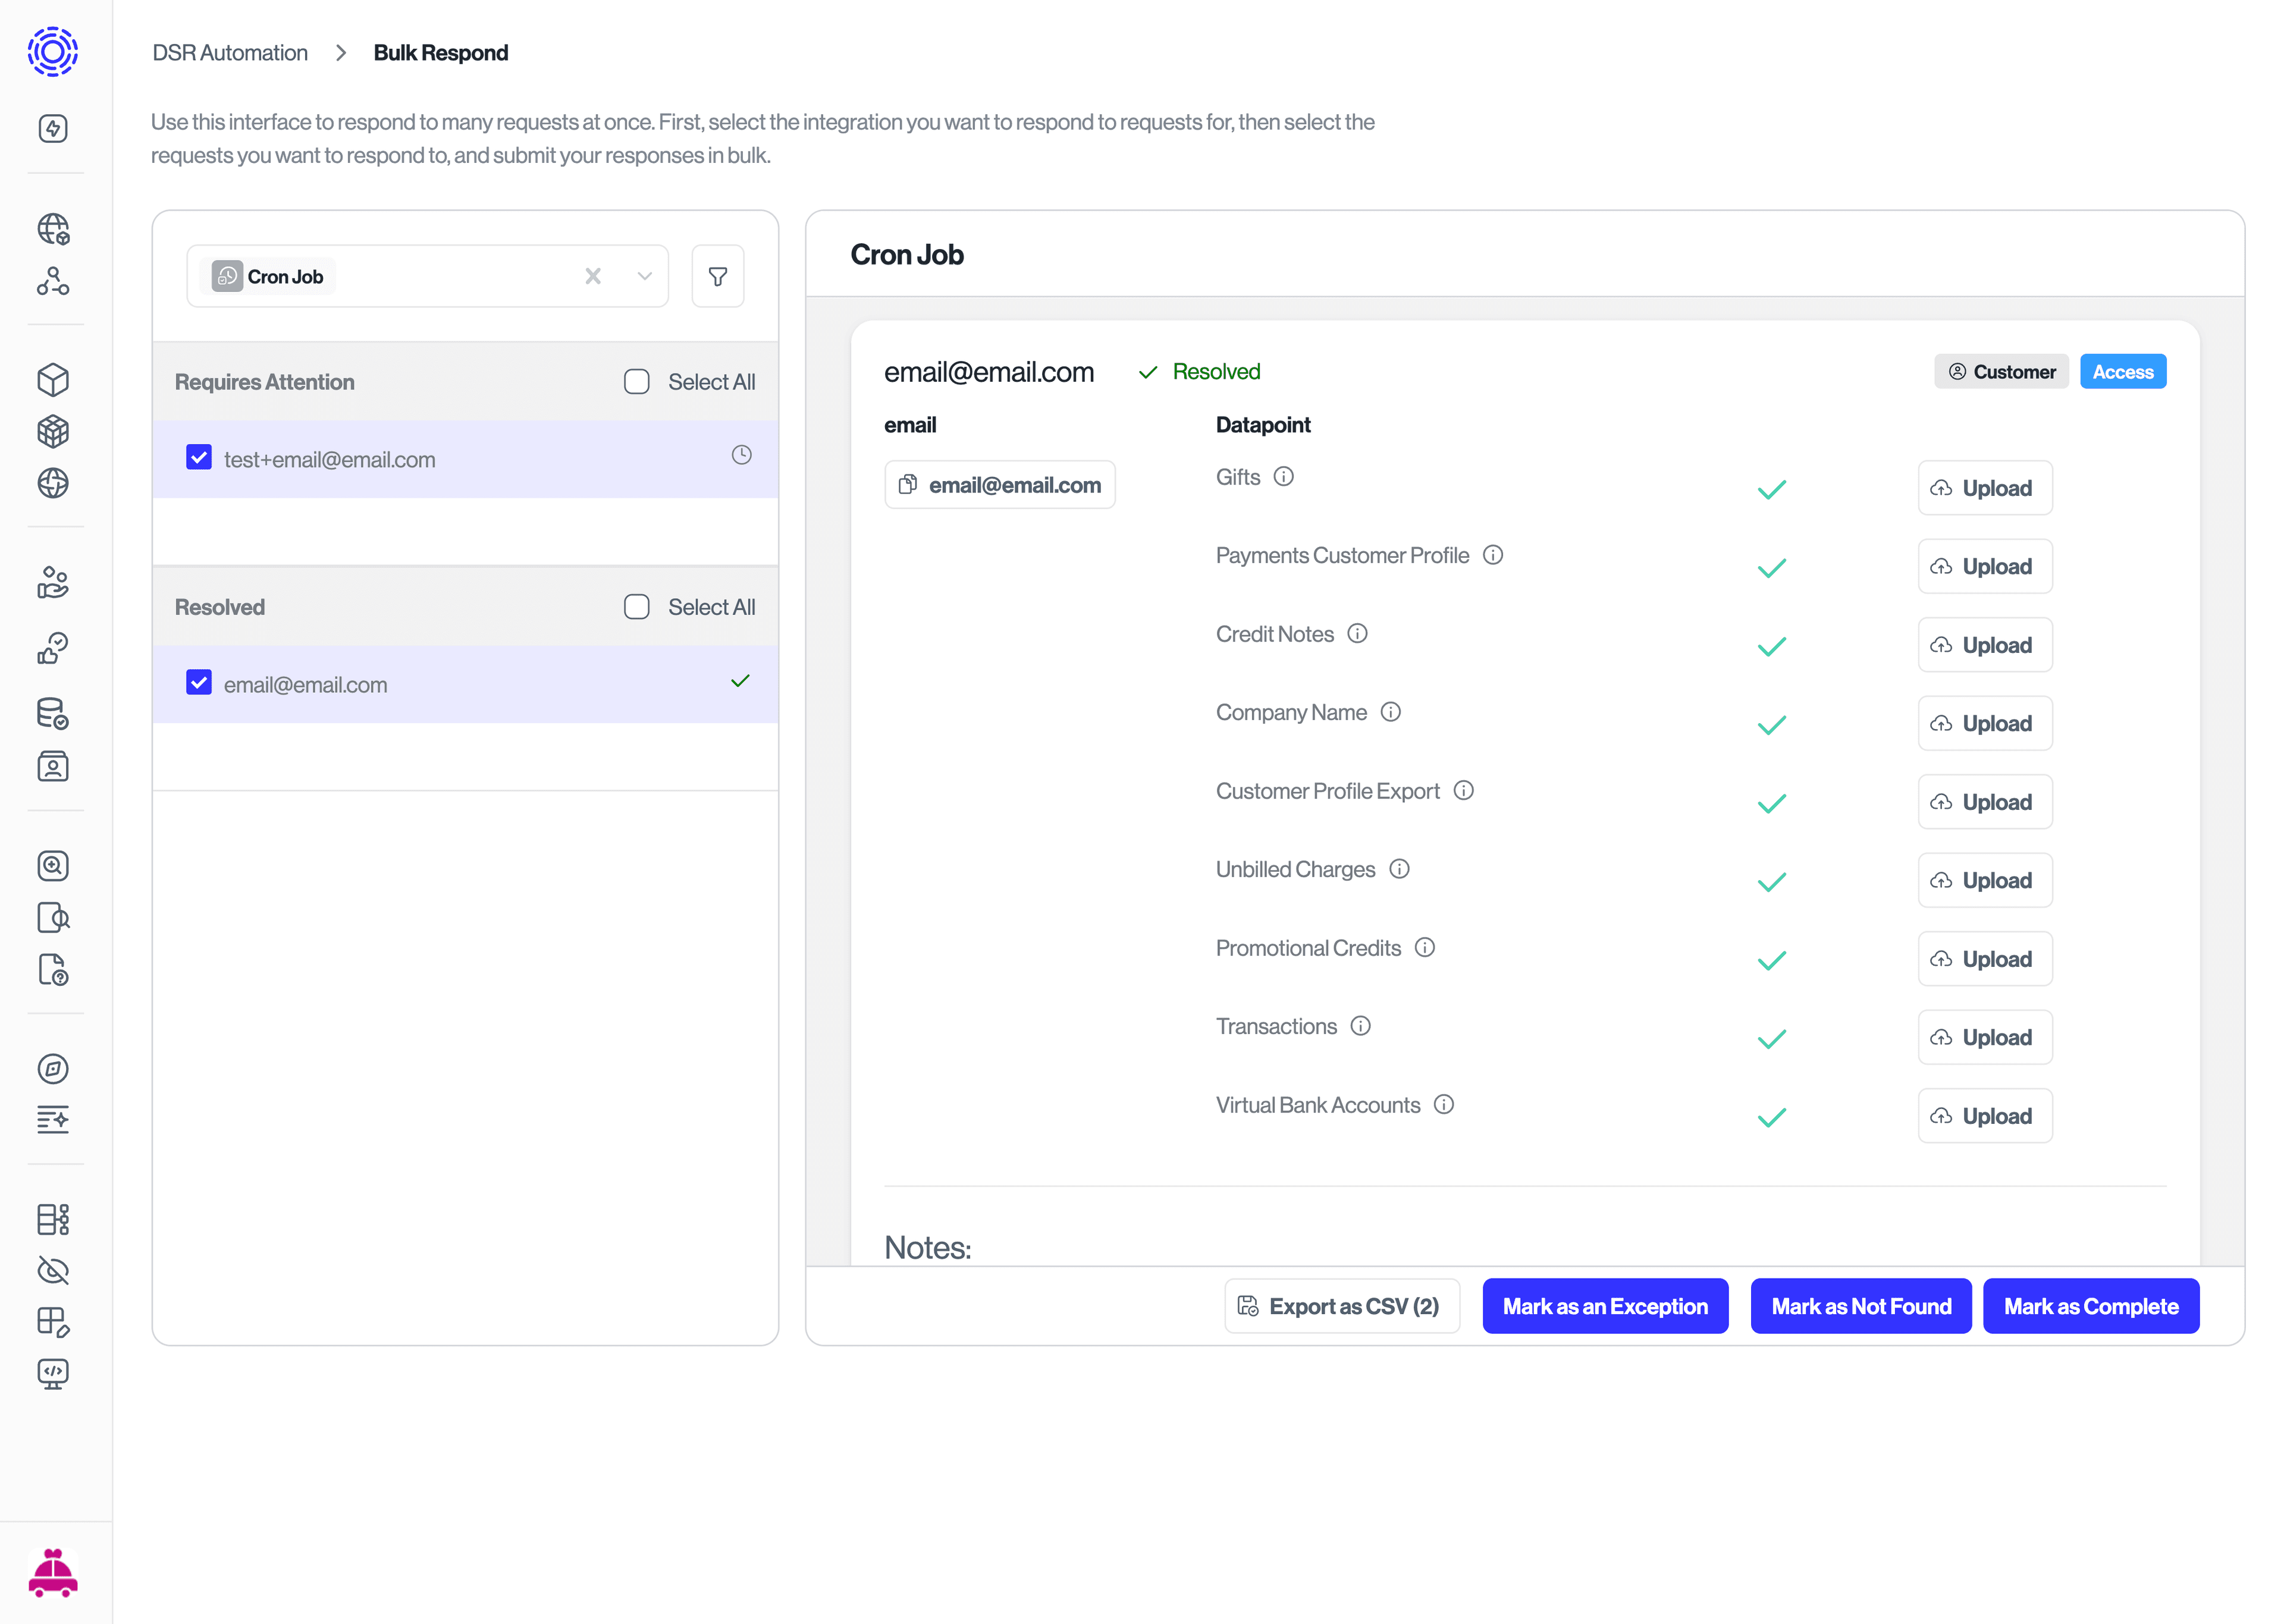
Putting it all together, you'll use the Bulk Respond interface to perform the actions against Access requests requiring manual action. Start by naivgating to the "Bulk Respond" tab under DSR Automation, then find and select the relevant integration you would like to process requests for.
- Select the relevant integration.
- Select all the Access requests you would like to process.
- Add all the data relevant to the request, by using the "upload" option for each datapoint.
- Once all the files have been uploaded for the selected requests, click on "Mark as Complete" to complete the request.
You may want to allow specific users to access Bulk Respond, but only for a specific Integration or set of Privacy Requests. This can be accomplished with special scopes assigned to the user.
There are two sets of scopes that can be picked from:
- Assigned integrations:
a.View Assigned Data Inventory- This grants the ability to view all requests for any systems that are assigned to the user. This is a read-only permission.
b.Manage Assigned Data Inventory- This grants the ability to view and modify all requests for any systems that are assigned to the user. - Assigned Requests:
a.View Assigned Requests- This grants the ability to view all requests that are assigned to the user. This is a read-only permission. (Needs additional scope to view data systems)
b.Manage Assigned Requests- This grants the ability to view and modify all requests that are assigned to the user. (Needs additional scope to view data systems)
Note: Both of the Assigned Requests scopes will also need some level of access to view the data system for those specific requests, so one of the following scopes will also be necessary:
View Data Map,View Data Inventory,View Assigned Data Inventory.