Data subjects and data actions

A DSR workflow is a customizable process for handling Data Subject Requests. With Transcend DSR Automation, you can choose to customize several aspects of your DSR workflow according to your needs, depending on the details of the request. These customizations include things like different authentication methods, different identity enrichment steps, custom legal holds or waiting periods, and much more.

This section will focus on customizing data subjects and data actions, which can be done on the "Request Settings" tab of the DSR Automation page.

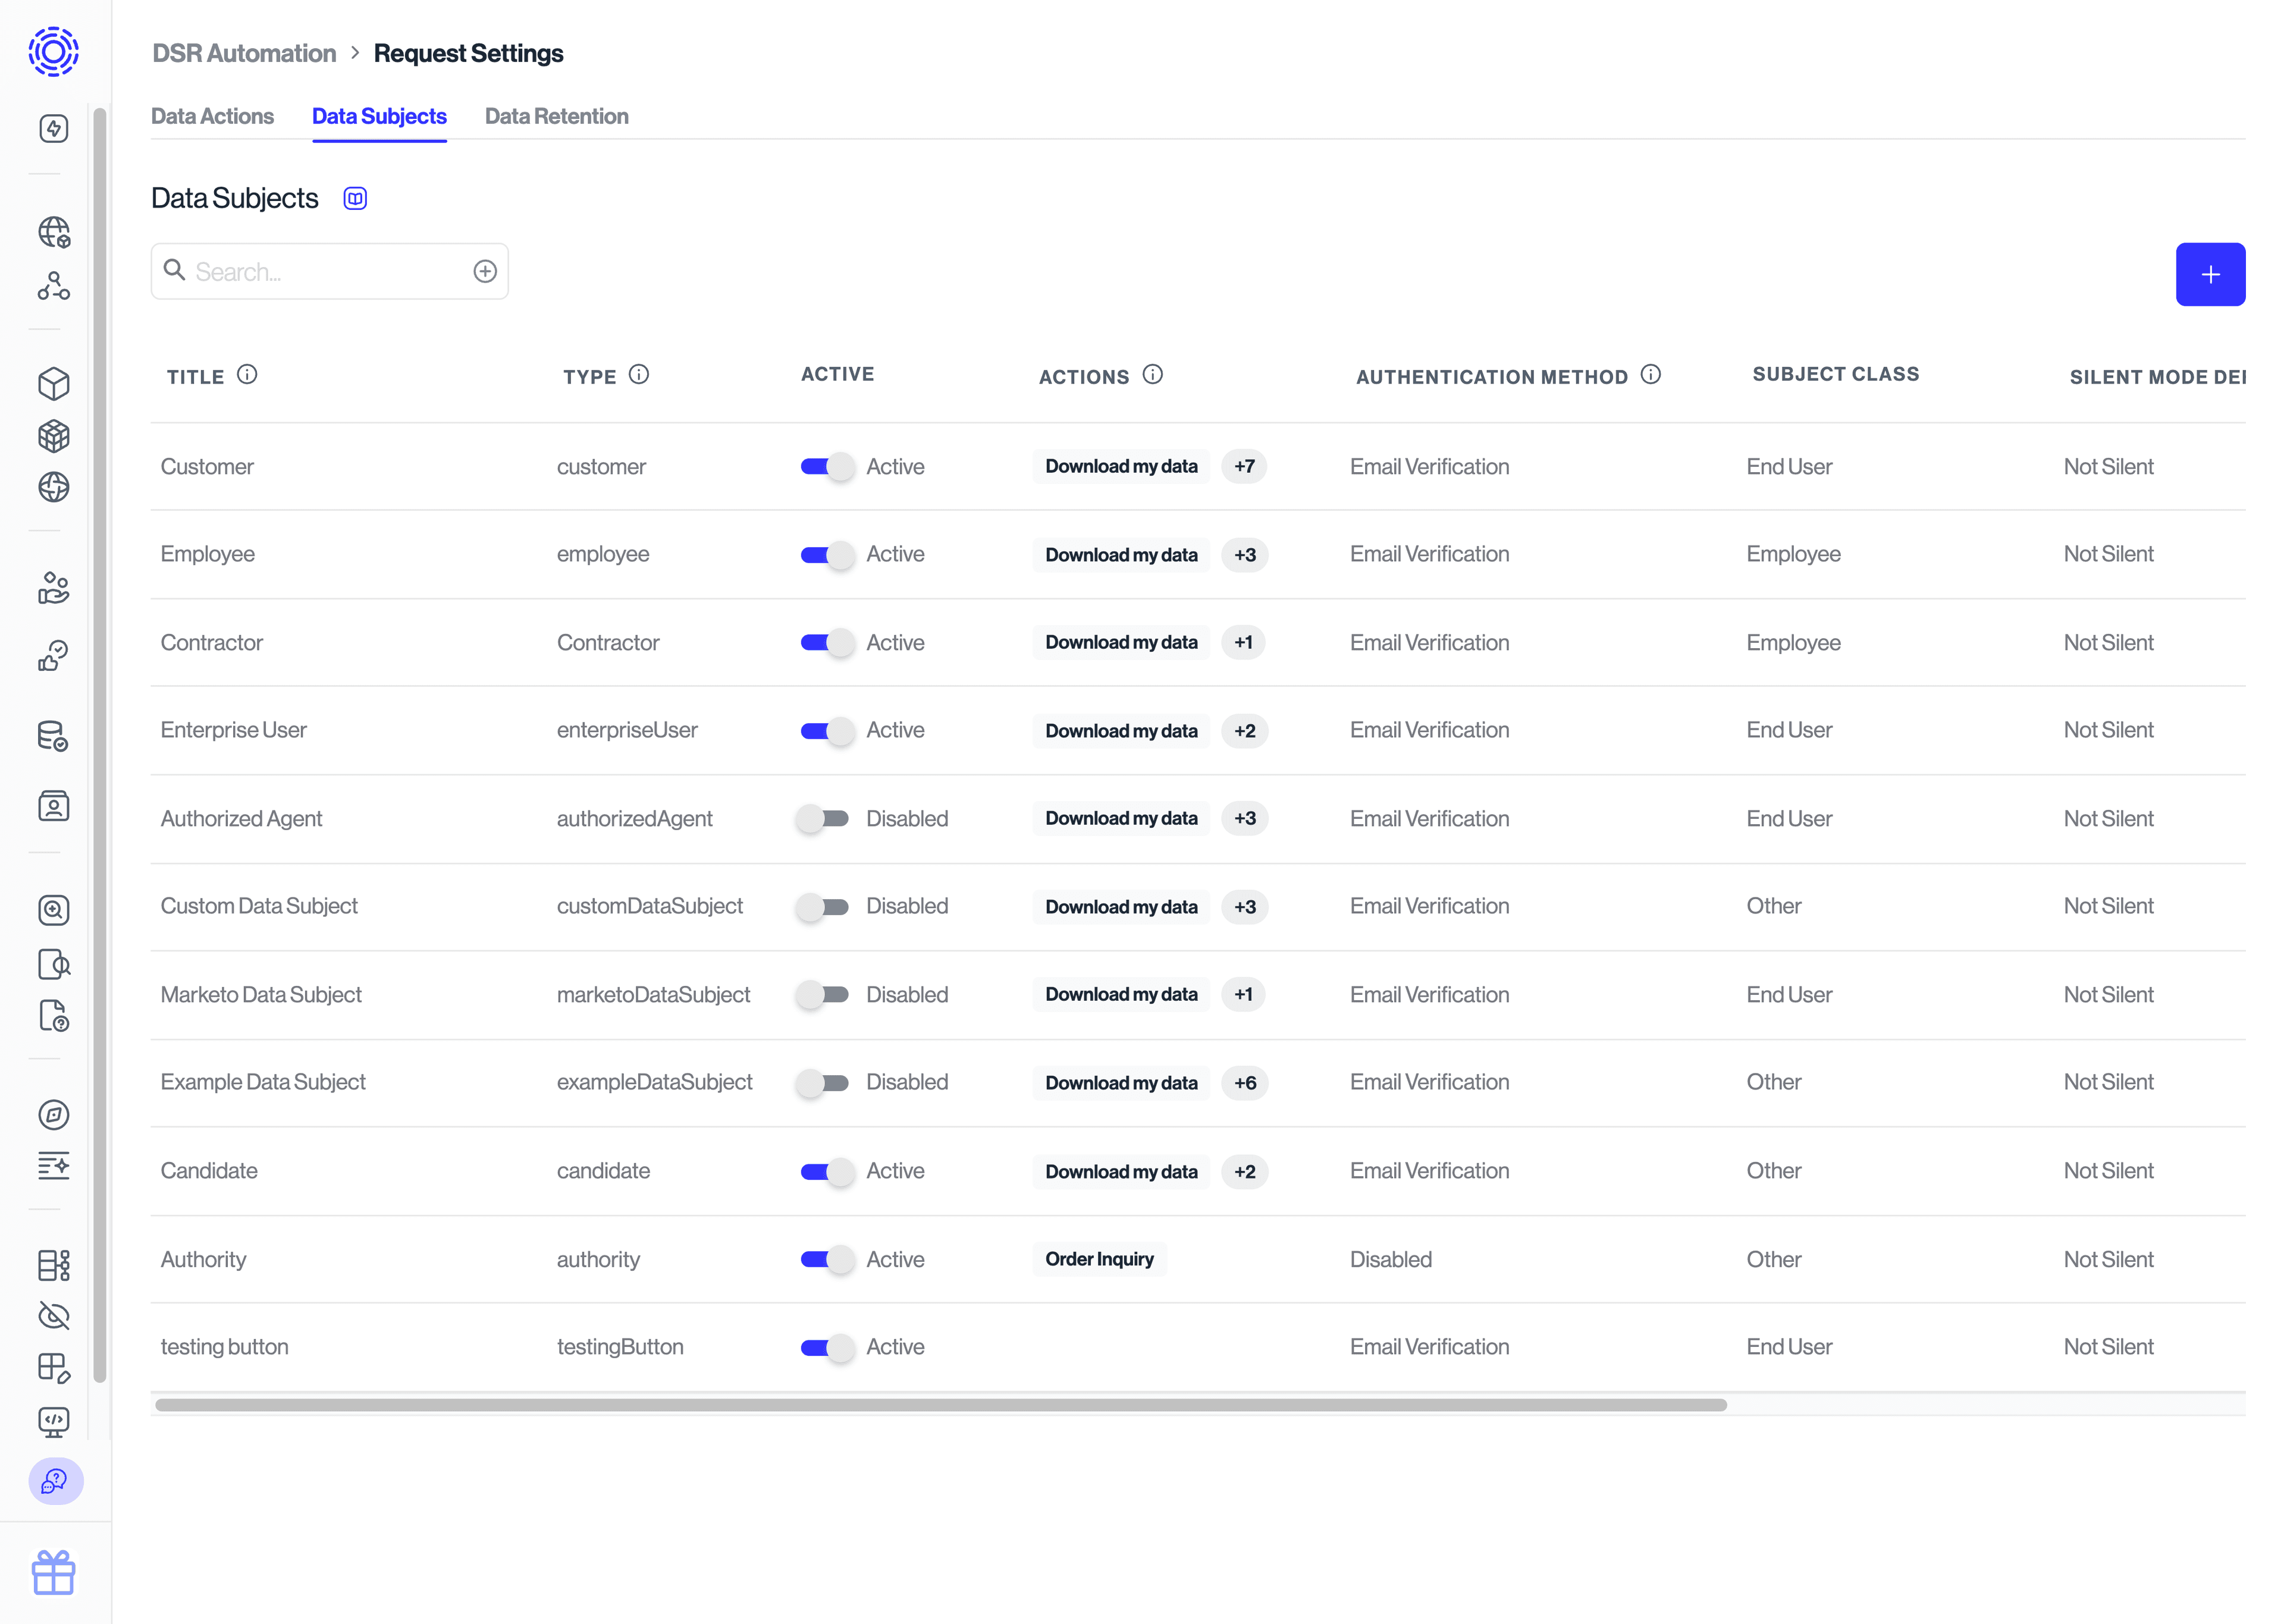
This section covers how to create and manage the different types of DSR requestors, also known as "data subjects". We refer to "data subject" as a person whose data you control or process, in line with GDPR's own definition.

A single company may collect and/or process the data of several different types of data subjects. These data subject groups could be things like Customers, Employees, Contractors, Job Applicants, etc. Each of these might have data stored and processed by different parts of your organization, in different ways. Transcend facilitates the management of all these scenarios by allowing you to specify and manage your organization's "data subjects" in the Request Settings tab of the DSR Automation page, where you can specify things like different authentication flows for different Data Subject types, or the different data actions that each data subject can submit.

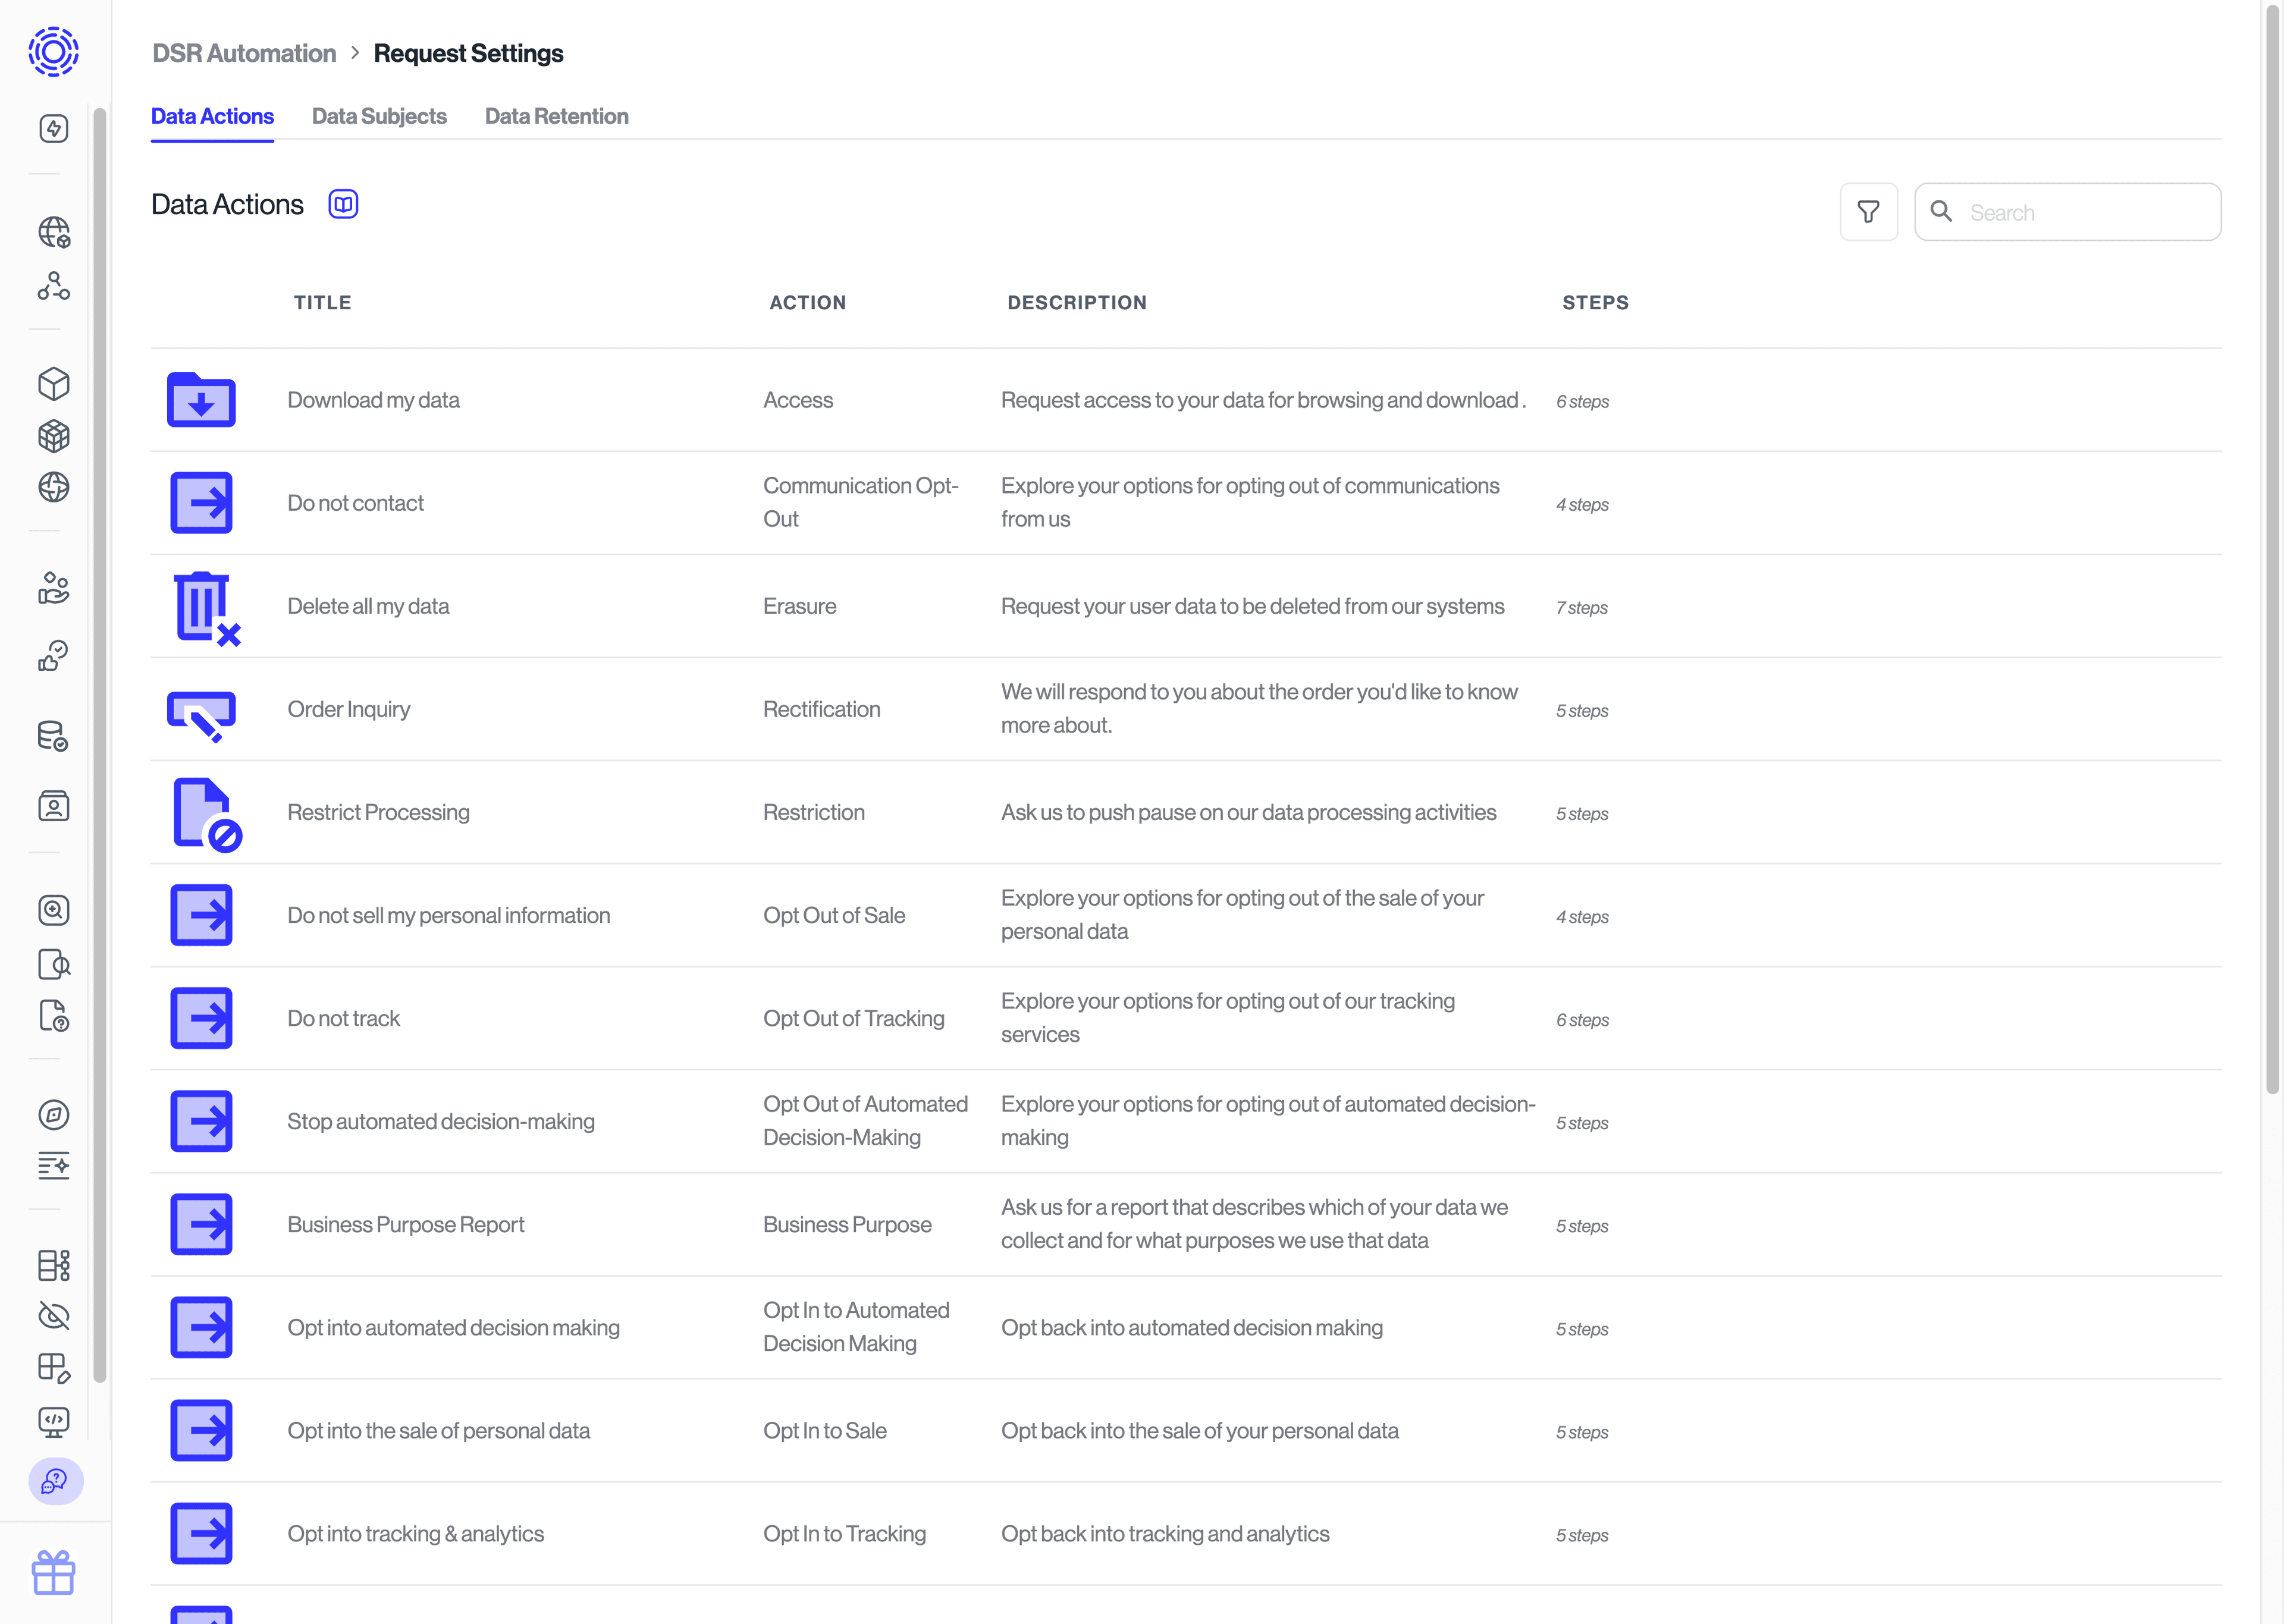
This section covers the different types of DSRs available to the data subjects, as well as details on configuring each.

Our predefined data actions are designed to comply with GDPR, CCPA/CPRA, and all the latest data privacy regulations. If you'd like to add a data action that is not currently available, please feel free to email us at support@transcend.io

To configure your existing data actions, navigate to "DSR Automation > Request Settings" and click on the pencil next to each action you would like to edit.

Different data privacy regulations often require that data subject requests are processed within specific timeframes. To customize the timeframe for processing requests according to the region, you can do the following:

  1. Navigate to DSR Automation > Request Settings.
  2. Click on the pencil icon next to the Data Action that you would like to configure.
  3. Scroll down to "Region Detection Method" and select "Request in form".
  4. Configure the "Regions to show in form" and select all the regions that you would like to make available in the DSR form. Leave blank to enable all regions.
  5. Under "Expiry Time", configure the default expiry time for DSRs. This expiry time will be used as default for requests from regions that don't have an explicit regional expiry time.
  6. Under "Expiry Time By Region", click on the "+" sign to add regional expiry times. Configure the regions and the number of days before requests made from those regions are set to expire.
  7. When ready, scroll down and click on "Update Action" to confirm your changes.

You can enable a waiting period before certain requests are processed. This gives time for the user or your team to cancel the request if necessary. You can also disable automatic fulfillment and require an approval. You can make these changes by going to Request Settings. Once there, click the pencil icon on the data action you'd like to edit and you'll see a settings view.

For erasure requests, we also support the ability to allow the data subject to download their data before the account is deleted.

When someone is deleting their account, you may want to give them the option to back up the data before deleting it for good. When this feature is in use the workflow will look like:

  1. Compile a report with all the data for the user across the integrations.
  2. Send the user a link to download their report and wait 2 weeks before deleting the account. The Data Subject has the option to cancel their request at any time on the Privacy Center.
  3. After the 2 week delay period, the erasure process will begin. At this stage, the user will no longer be able to download their data or cancel their request.

To enable this feature ensure the setting named "Begin erasure immediately and prevent file downloads" is unchecked. If you turn on this checkbox, there will be no delay period, and the request will begin to erase immediately after the request is approved.

To require an approval before sending the final report to the data subject, enable "Approval Before Send". Note that "Approval Before Send" only affects the final report, and not the actual data erasure.