Set up a Privacy Webhook in Zendesk
Zendesk offers the ability to create Webhooks that can be used along with the Privacy API to automatically create and manage DSR Automation.
In this example, we will create a Webhook that will submit an Erasure request upon receiving a Zendesk ticket coming from the DSR submission service Mine.
Transcend is working with Consumer Reports on a technical standard for securely sharing data rights requests between authorized agents and businesses.
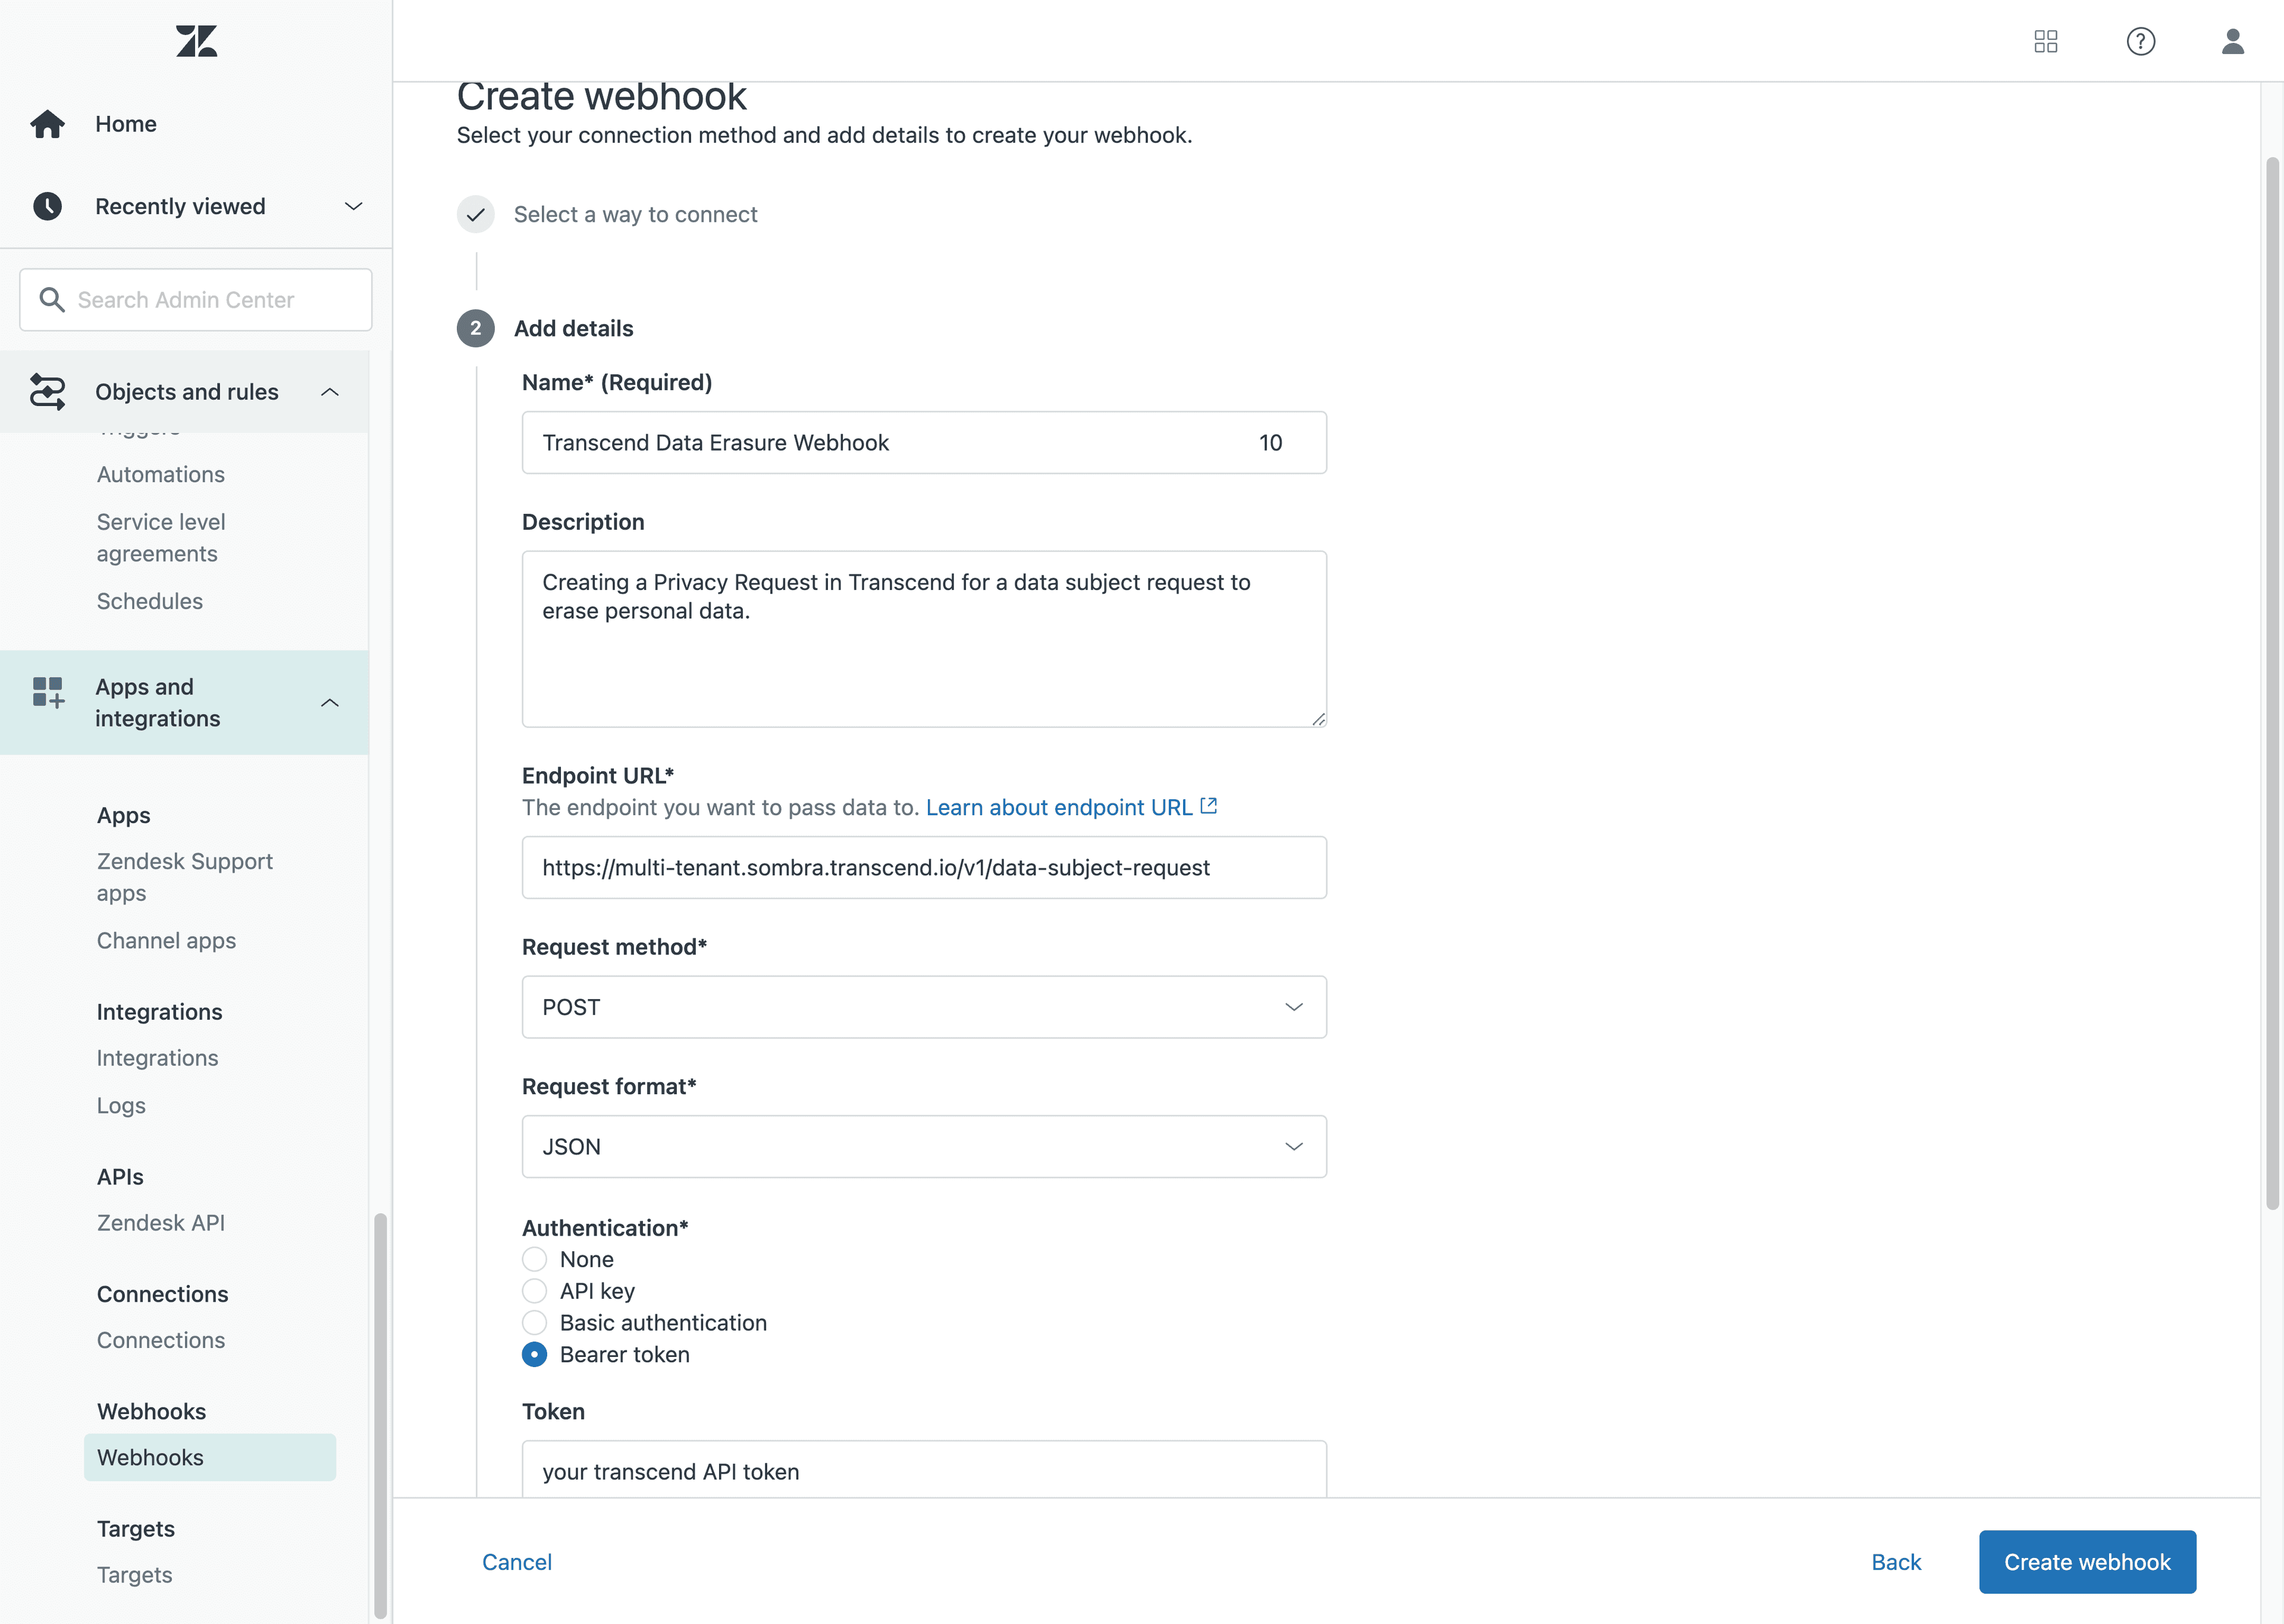
- In the Zendesk Admin Center, select the
Apps and integrationsentry in the sidebar. - Select
Webhooks > Webhooks, thenCreate webhook. - Choose
TriggerorAutomationas a way to connect (difference between events and triggers). - In the next screen, add a
NameandDescriptionfor the webhook. - For the
Endpoint URLfield, usehttps://multi-tenant.sombra.transcend.io/v1/data-subject-request- If you are running a self-hosted Sombra™ instance, change the base URL from
https://multi-tenant.sombra.transcend.ioto your gateway's URL, which can be found in your dashboard. You may also need to allow Zendesk's IP ranges to your Sombra gateway.
- If you are running a self-hosted Sombra™ instance, change the base URL from
- Use
POSTforRequest methodandJSONforRequest format. - Select
Bearer tokenas theAuthentication method. - Create your API key in your Transcend dashboard, including the
Submit New Data Subject Requestscope.- More information on authentication to Transcend APIs can be found here
- If you are hosting your own instance of Sombra, Click
Add header, and enterx-sombra-authorizationfor theHeader Name.- For the
Header Value, get your Sombra Bearer token API key. - If needed, rotate your API key:
- Navigate to "Settings > Sombra" on your Admin Dashboard
- Scroll to the "Hosted Sombra Keys" section
- Click on the "Rotate Sombra Keys" button
- Once the keys are finished rotating, you will be presented with your new
INTERNAL_KEY. - You will need to copy it down, as it will be lost once the modal is closed.
- After the modal closes, you will be redirected to the login page for the new keys to take effect.
- For the
- Finish by selecting
Create webhook.
More information about webhooks in Zendesk can be found here
The full documentation for Privacy API is located here
- Go to your Zendesk Admin Center and click on
Objects and rulesin the sidebar. - Select
Business rules > Triggers. - Click
Add trigger. - Enter a
Name,DescriptionandCategoryfor your trigger. - Add your trigger conditions using
Add condition. All conditions need to be met to activate the trigger. For our example of requests coming from Mine, you could create a condition using the following- First parameter: select
Subject text - Second parameter: select
Contains the following string - Third parameter: type “powered by mine”.
- See this documentation for more information on building trigger condition statements.
- First parameter: select
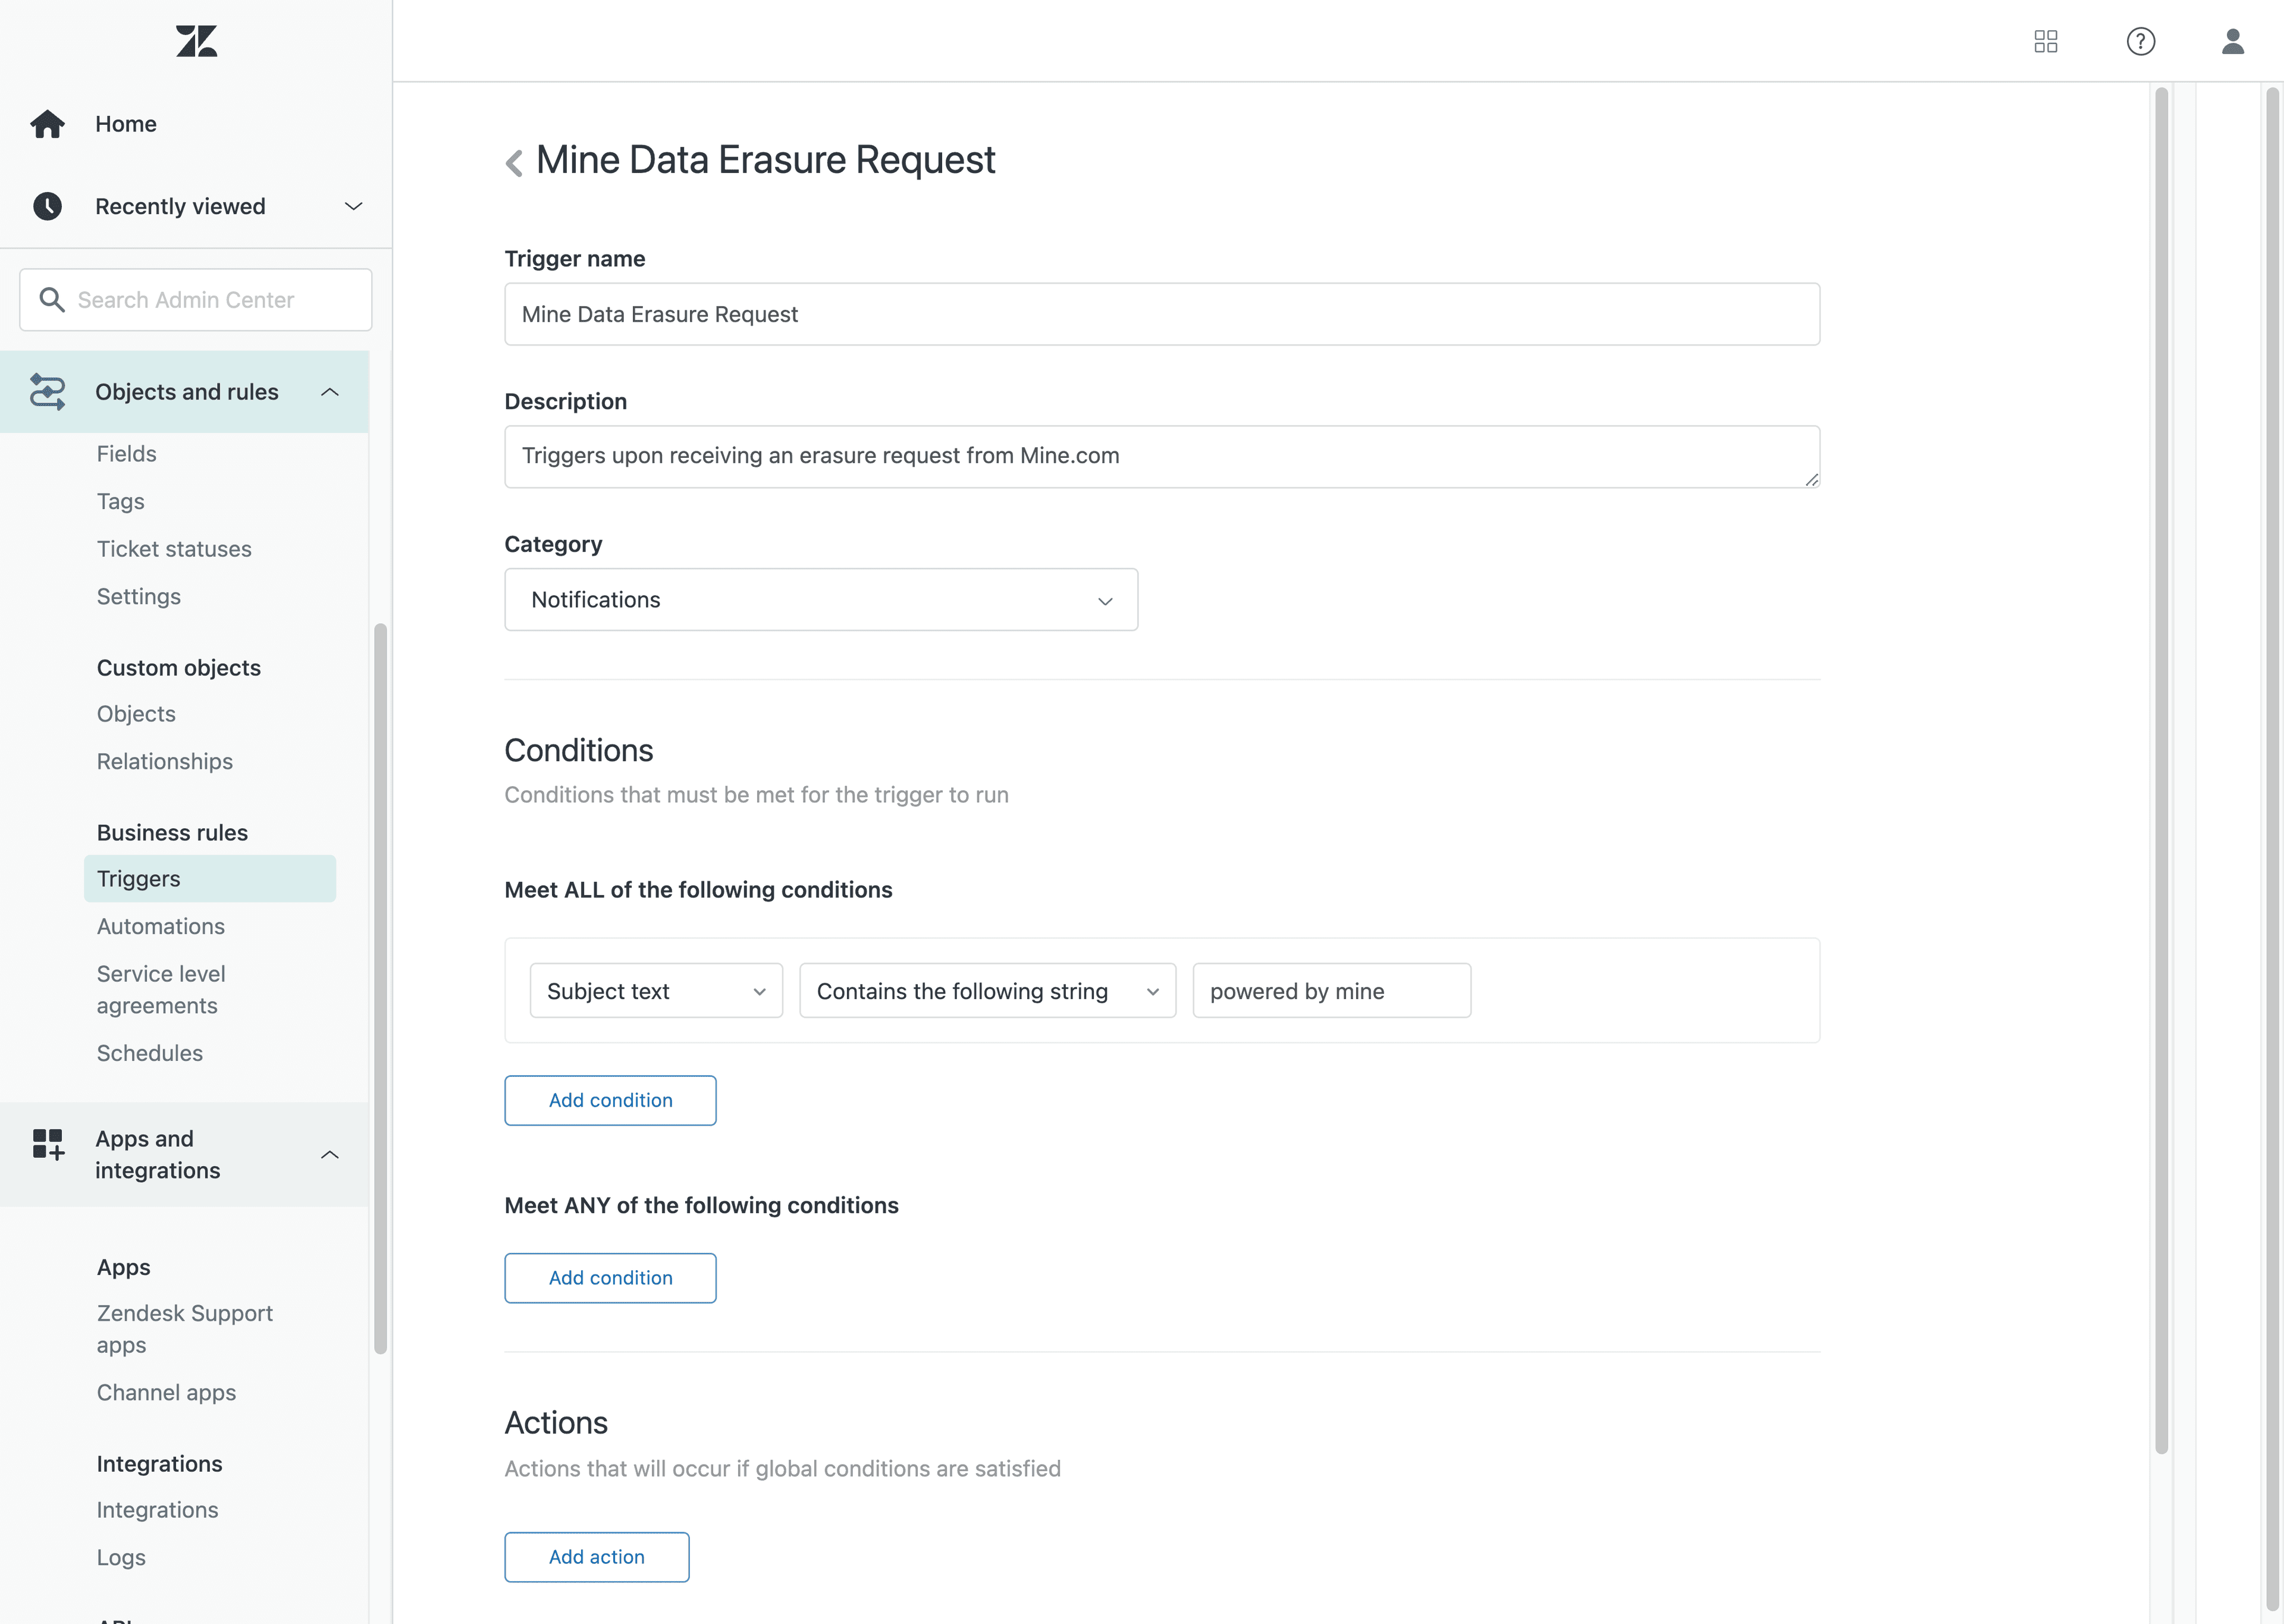
- Click
Add actionto define what should happen when the trigger fires.- For
Action, selectNotify active webhookand select the Transcend webhook previously created. - Add JSON body for the API request. See below for a Data Erasure example and here for full documentation of the Privacy API.
- For
- Click
Create.
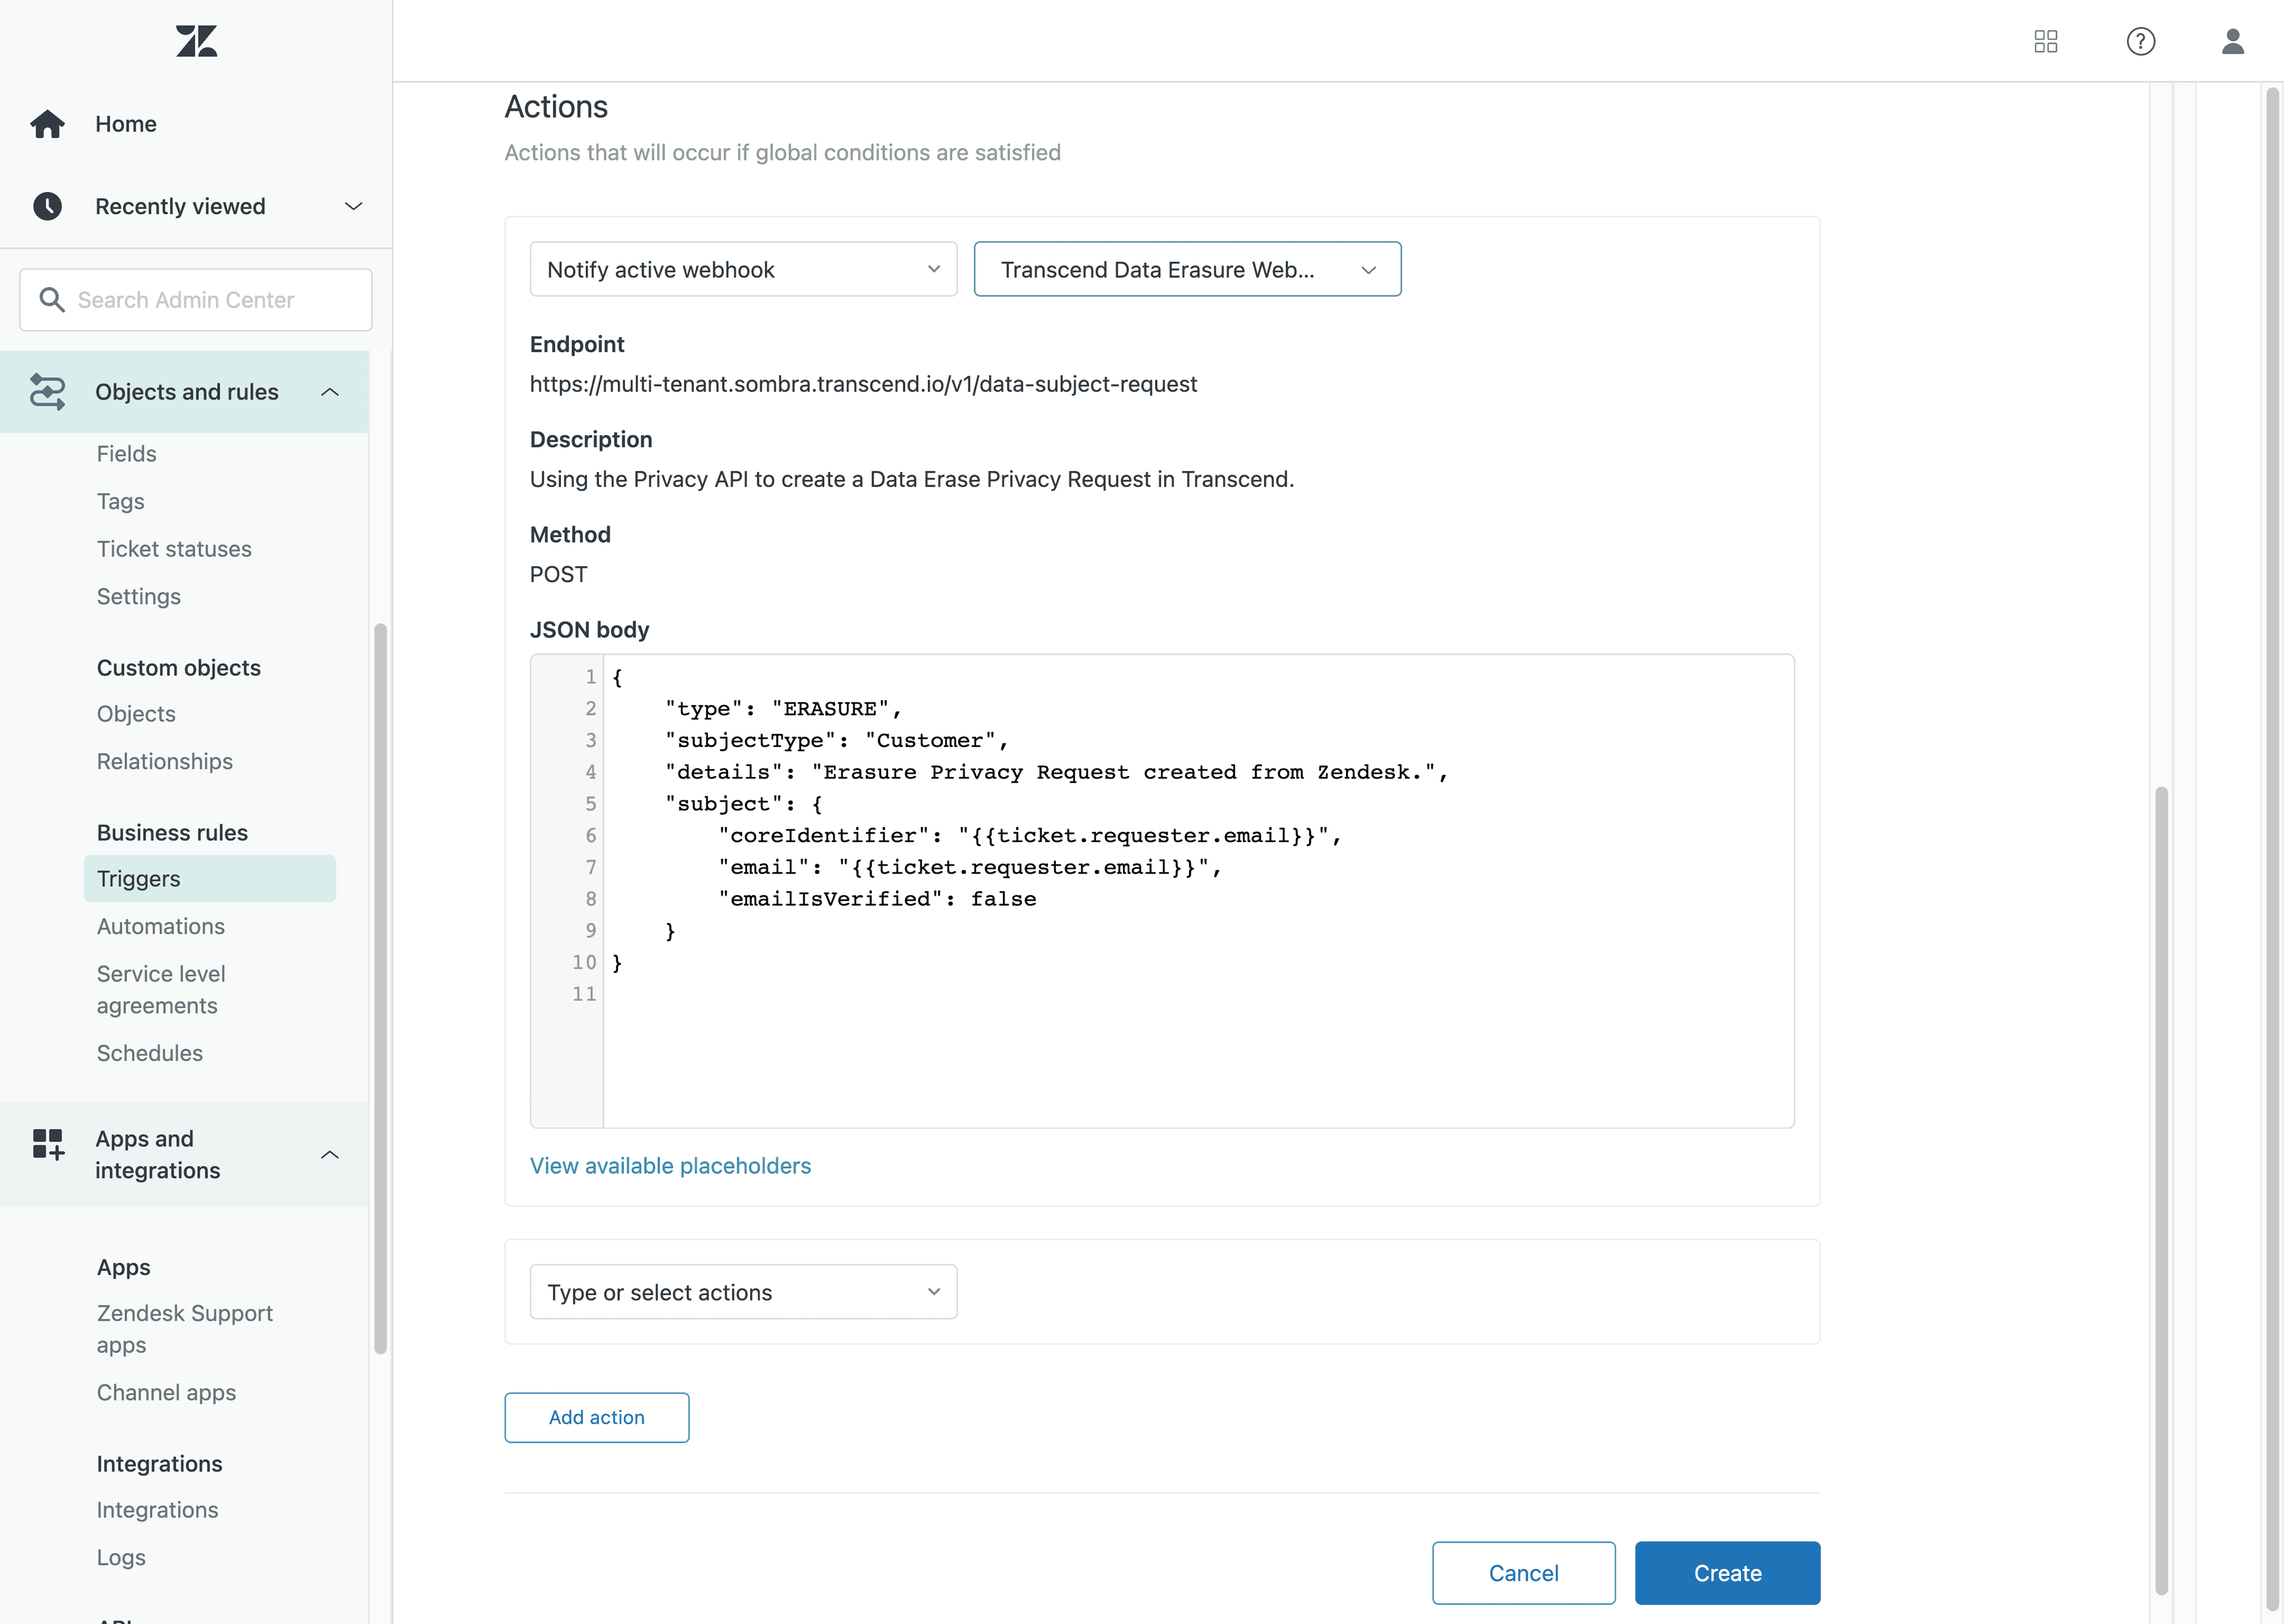
The code below is a simple example of JSON data required to create a Data Erasure ticket in Transcend.
If you are setting up a different type of DSR than Erasure, the type field values can be found here.
Your subjectType can be found in the Privacy Request Settings, below the Action settings.
In this example, we mark emailIsVerified as false, so your data subject will receive an email confirmation before the DSR workflow can continue as if they submitted a request from the Privacy Center. Additional information on submitting DSRs, deleting, and more can be found here.
Fields like ticket.requester.email are created using Zendesk Fields. See here for more documentation on fields.
{
  "type": "ERASURE",
  "subjectType": "Customer",
  "details": "Erasure DSR created from Zendesk.",
  "subject": {
    "coreIdentifier": "{{ticket.requester.email}}",
    "email": "{{ticket.requester.email}}",
    "emailIsVerified": false
  }
}