Automated Vendor Coordination
Automated vendor coordination automates the process of prompting internal and external users to process DSRs when they are submitted, and it enables the customization of email digests and other associated settings for each vendor. This is useful when there is no automated programmatic integration available for a given vendor.
There are several reasons why we might not have direct integrations with certain vendors:
- The vendor has no API for a certain type(s) of DSRs
- The vendor expects you to send an email in a specific template
- The vendor only provides a self-serve dashboard to submit DSRs, and someone on your team would need to log in and submit the request through their browser
- You want to notify an internal team to perform a manual process against a database or internal tool that is not integrated
Creating AVC integrations is similar to any other integration type. Go to the Integrations page.
To configure an AVC integration for a supported vendor, you can use the search bar to find them. Transcend has presets for each vendor even if they are just email based integrations.
If you are setting up an internal AVC integration, or don't see the vendor you want to connect with:
- Search for the "Prompt a Person" integration.
- Click on the "Prompt a Person" card to open the configuration window.
- Review the datapoint that are in scope for this integration, and click on "+ Add"
- On this page, you can create an Integration title (to make it easier to find this integration in the future) and configure the assignee for requests reaching this integration.
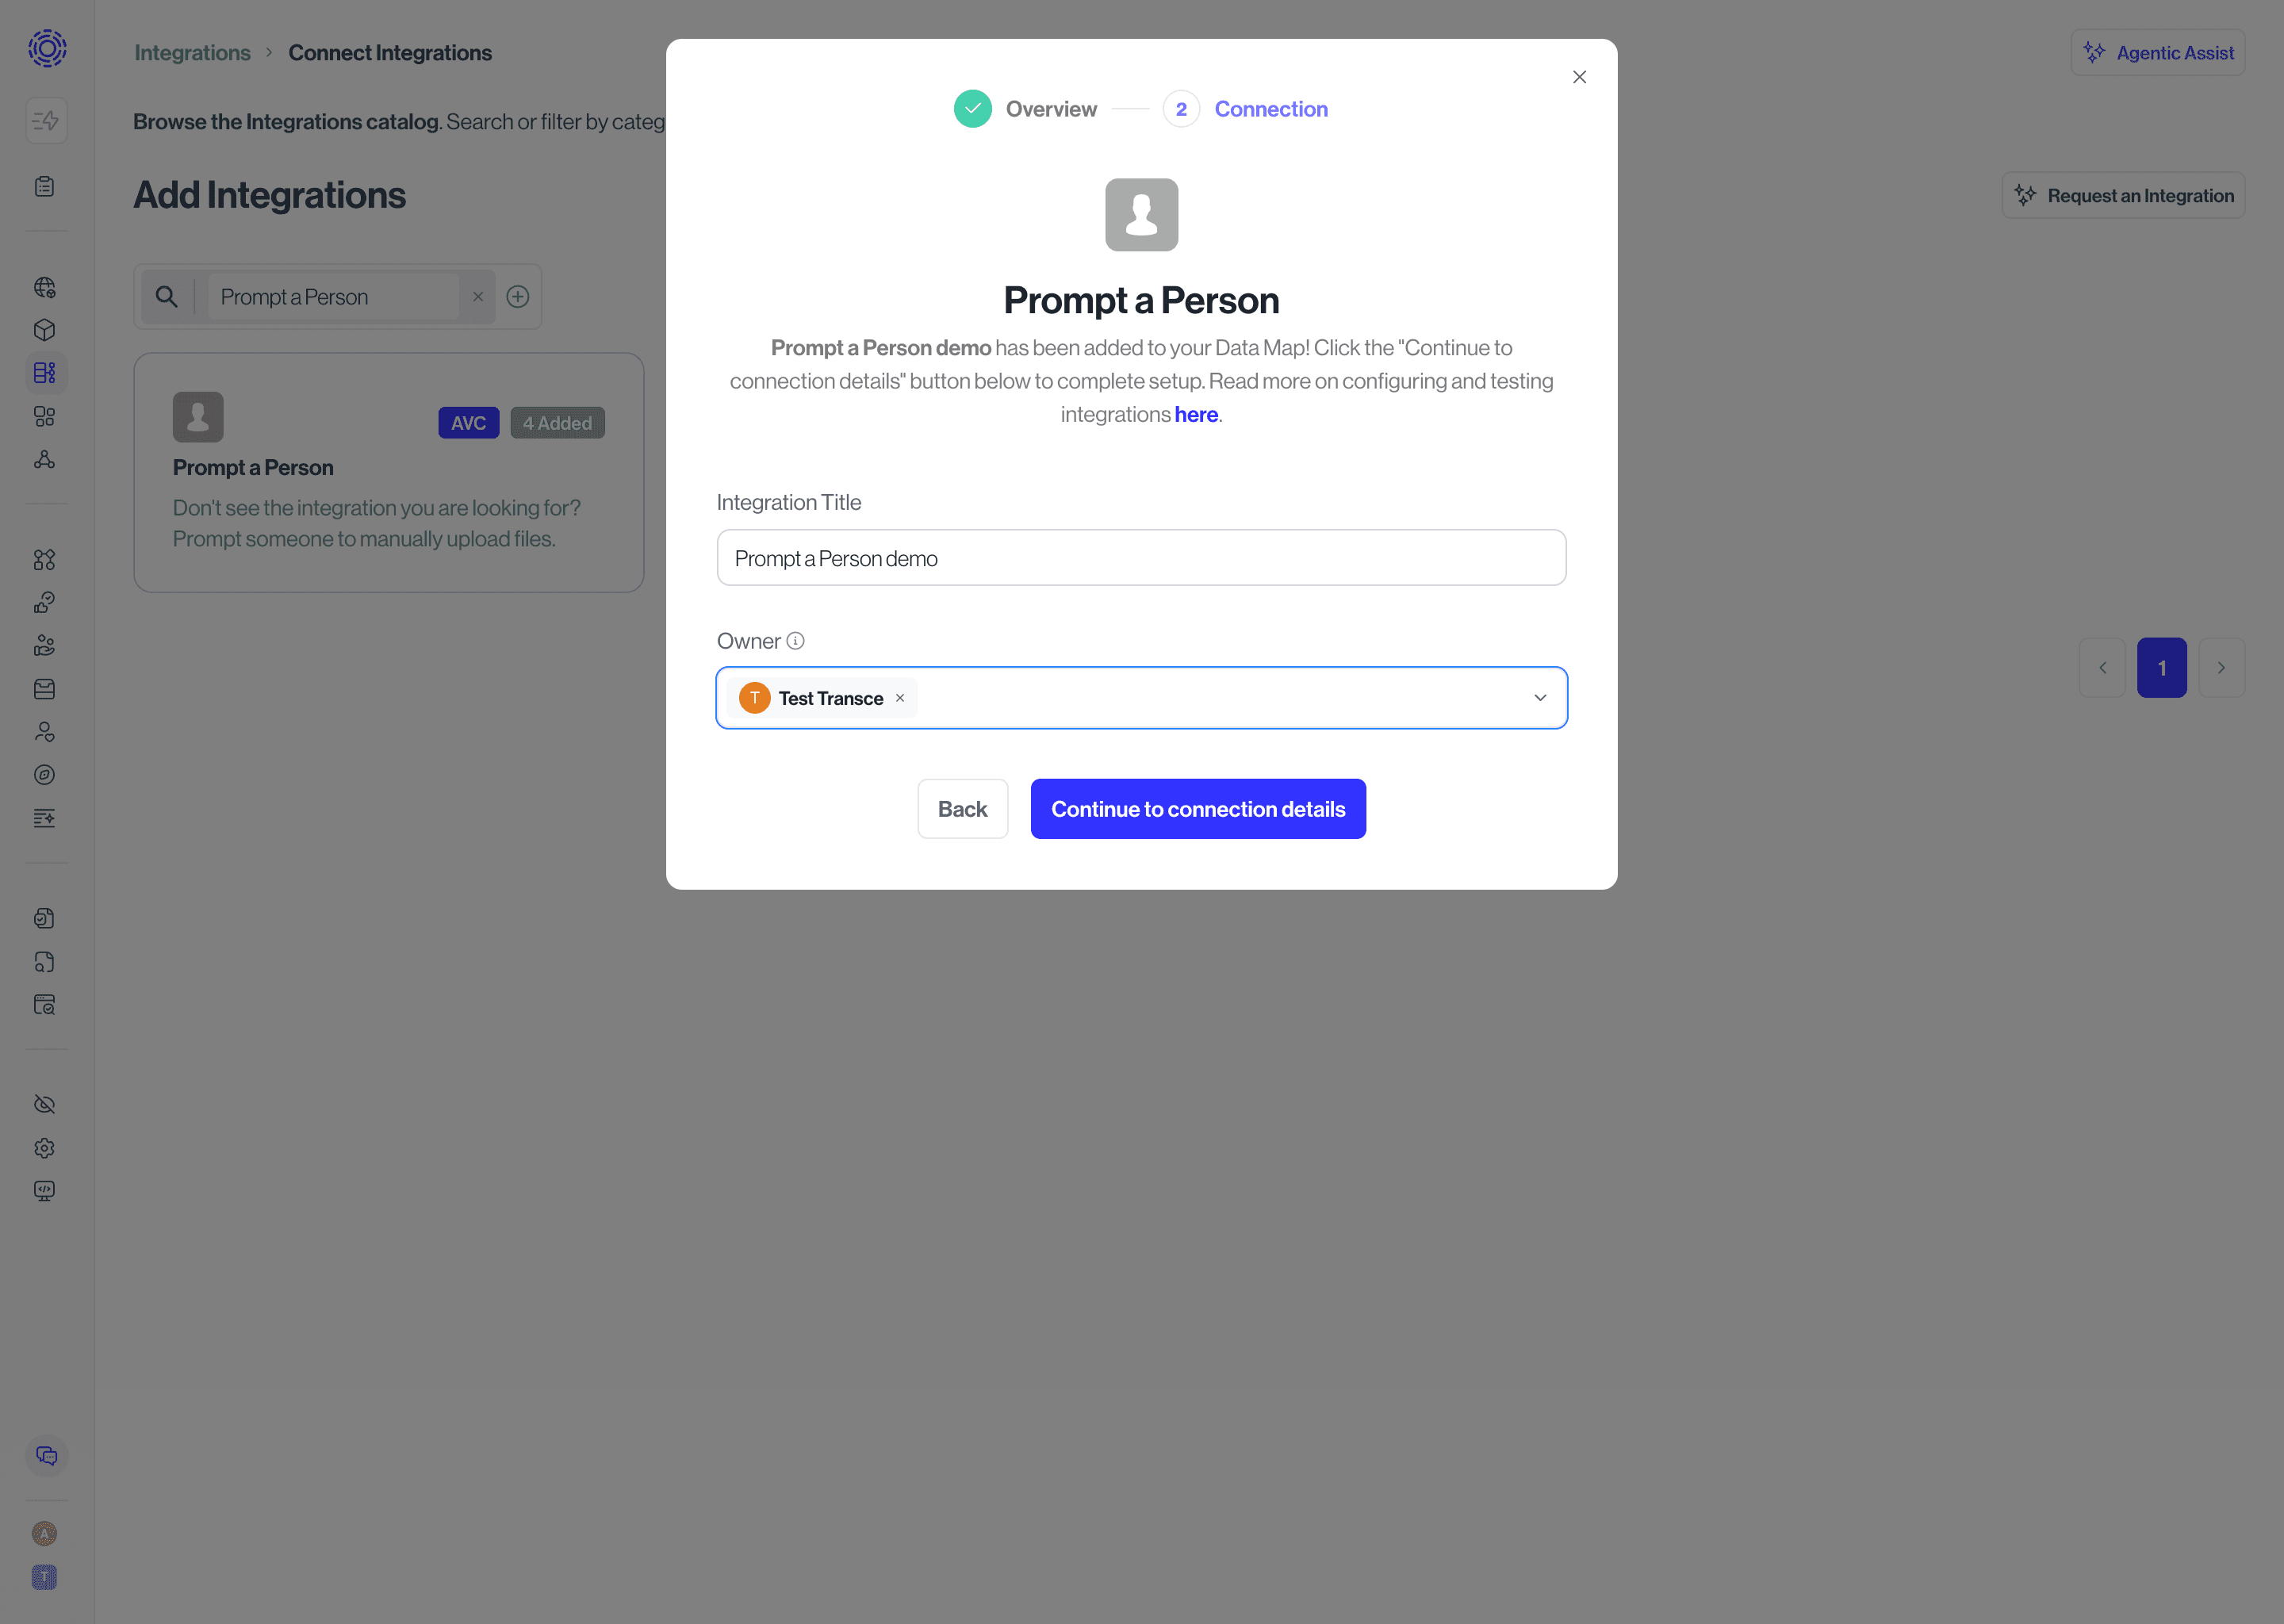
See more in Connecting integrations.
When configuring an AVC integration, you have the option to change the email address, templates and notification frequencies to your liking.
To change,remove, or add an email address or email template for an existing integration, follow these steps:
- Navigate to Integrations
- Search for your integration and click on the tile to open the settings
- Navigate to the DSR Automation tab
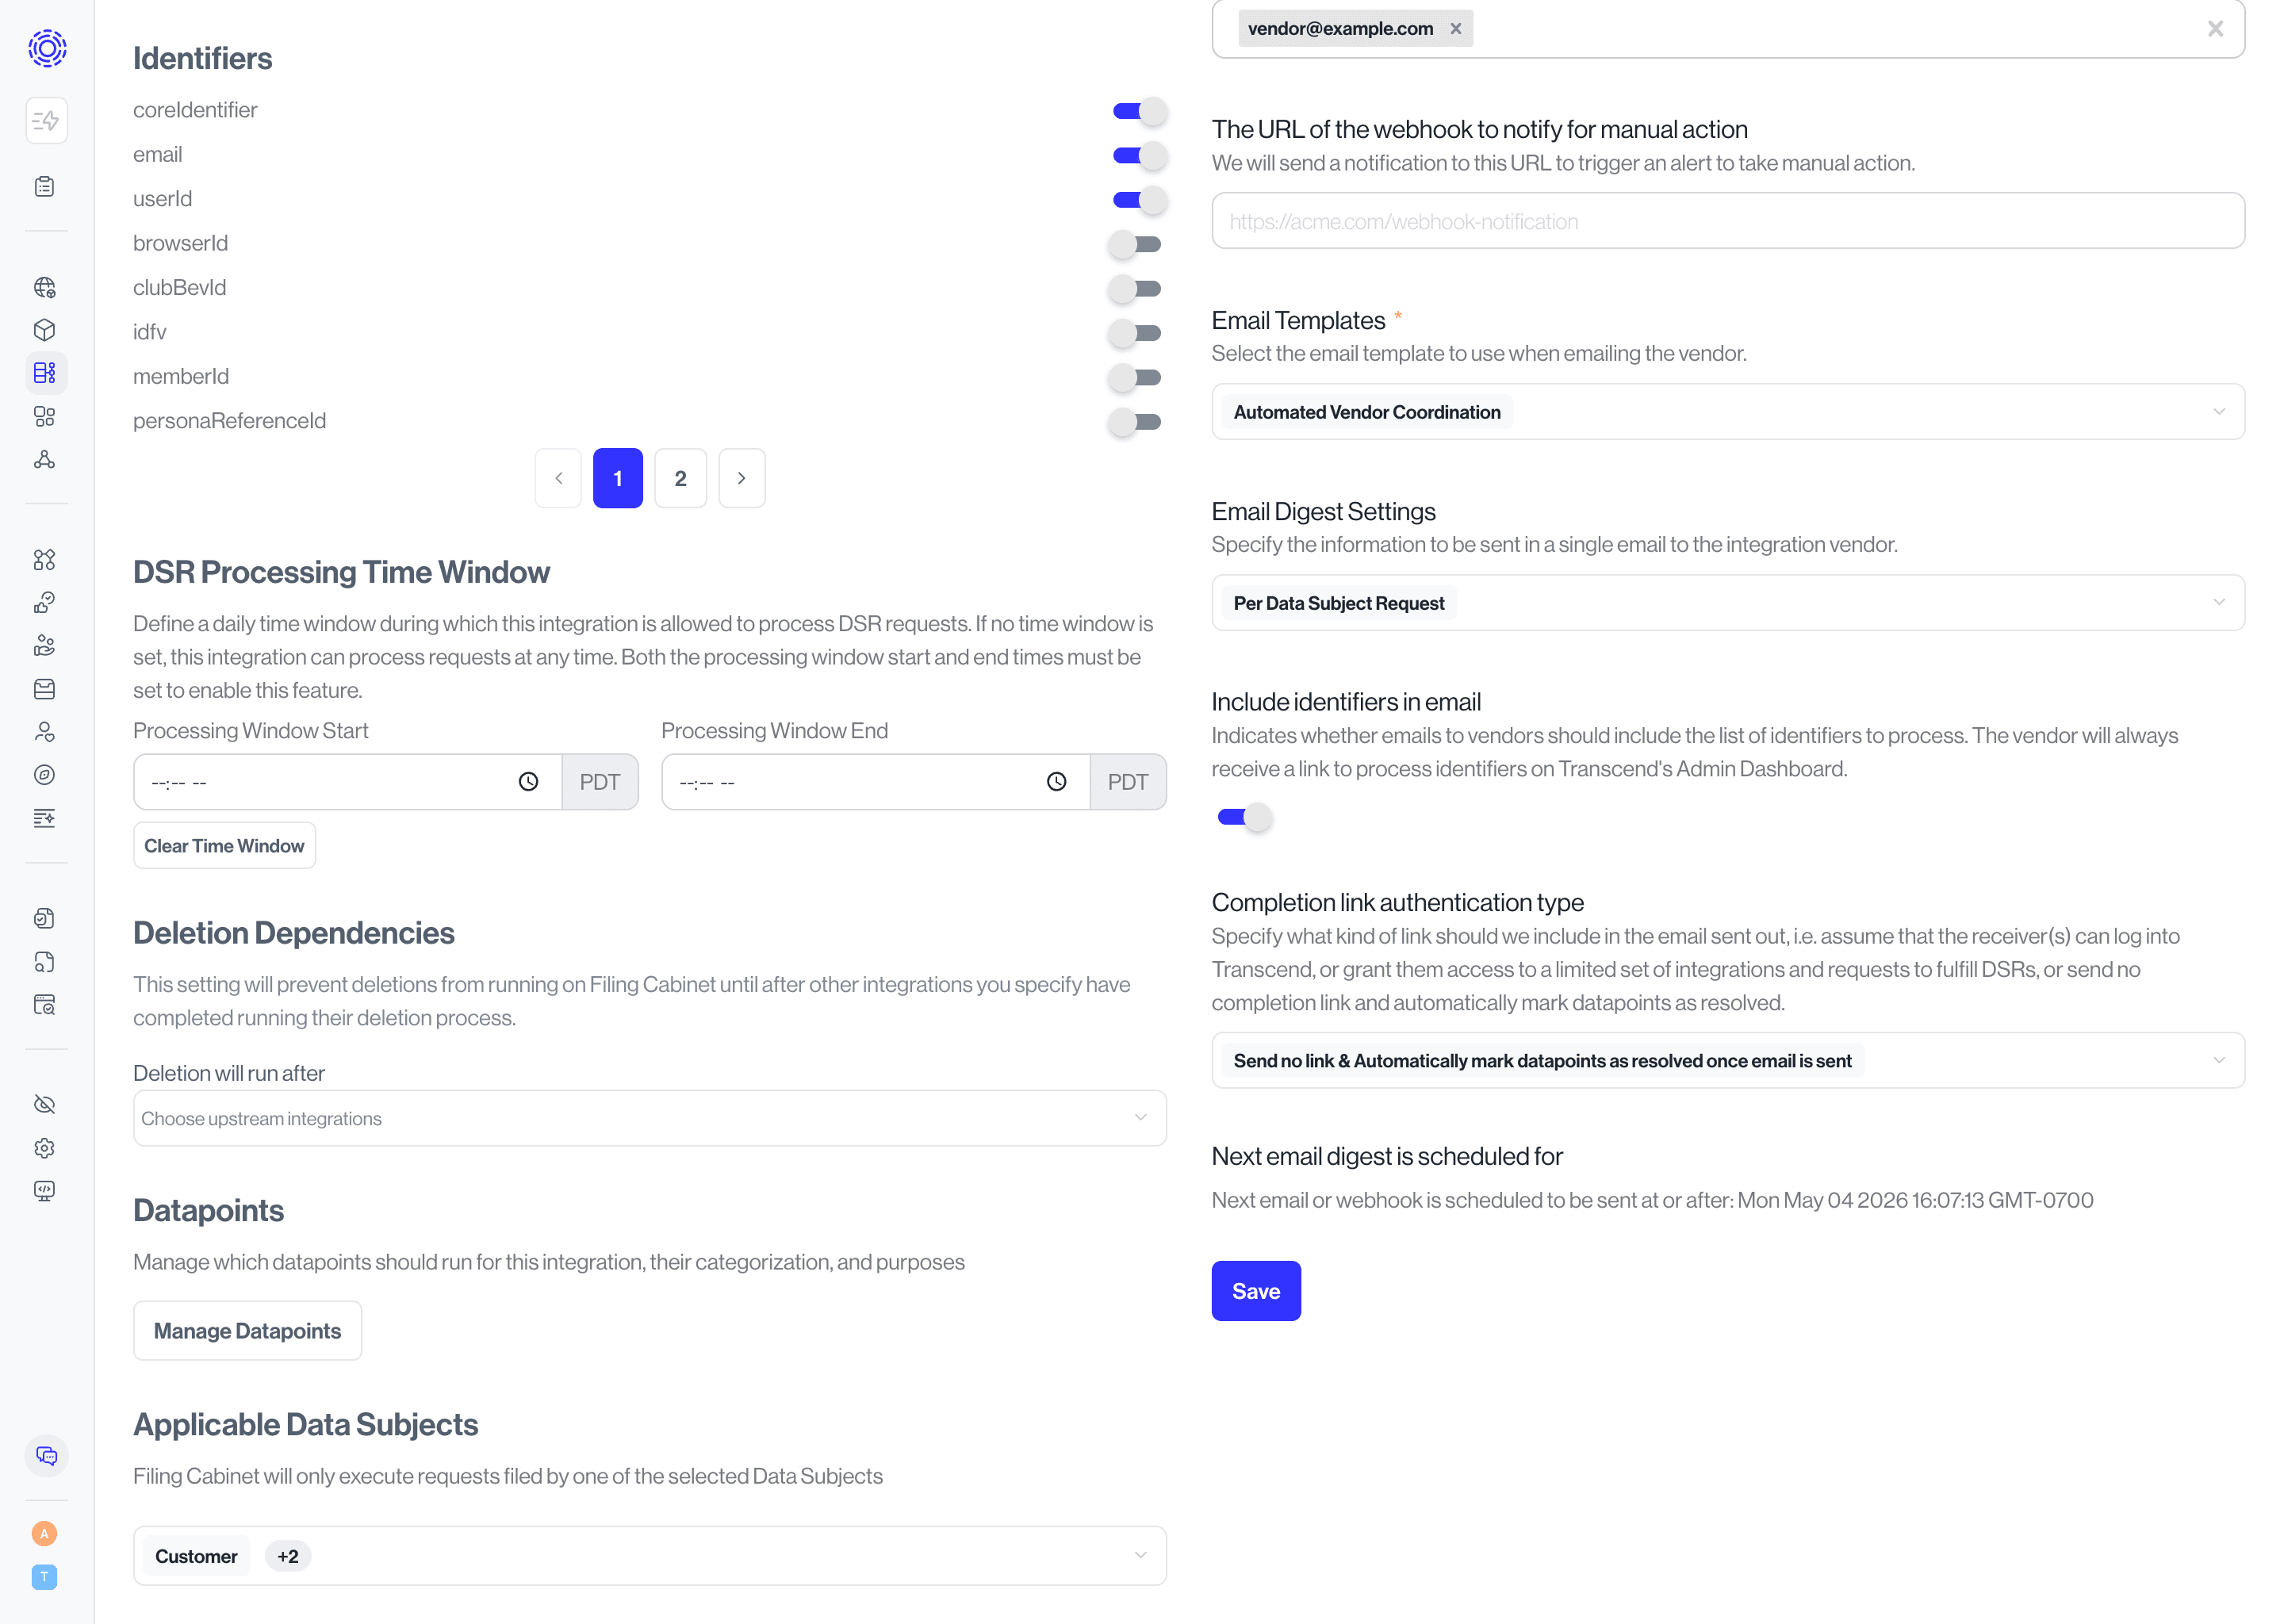
- Scroll down to the "Email Automation" section.
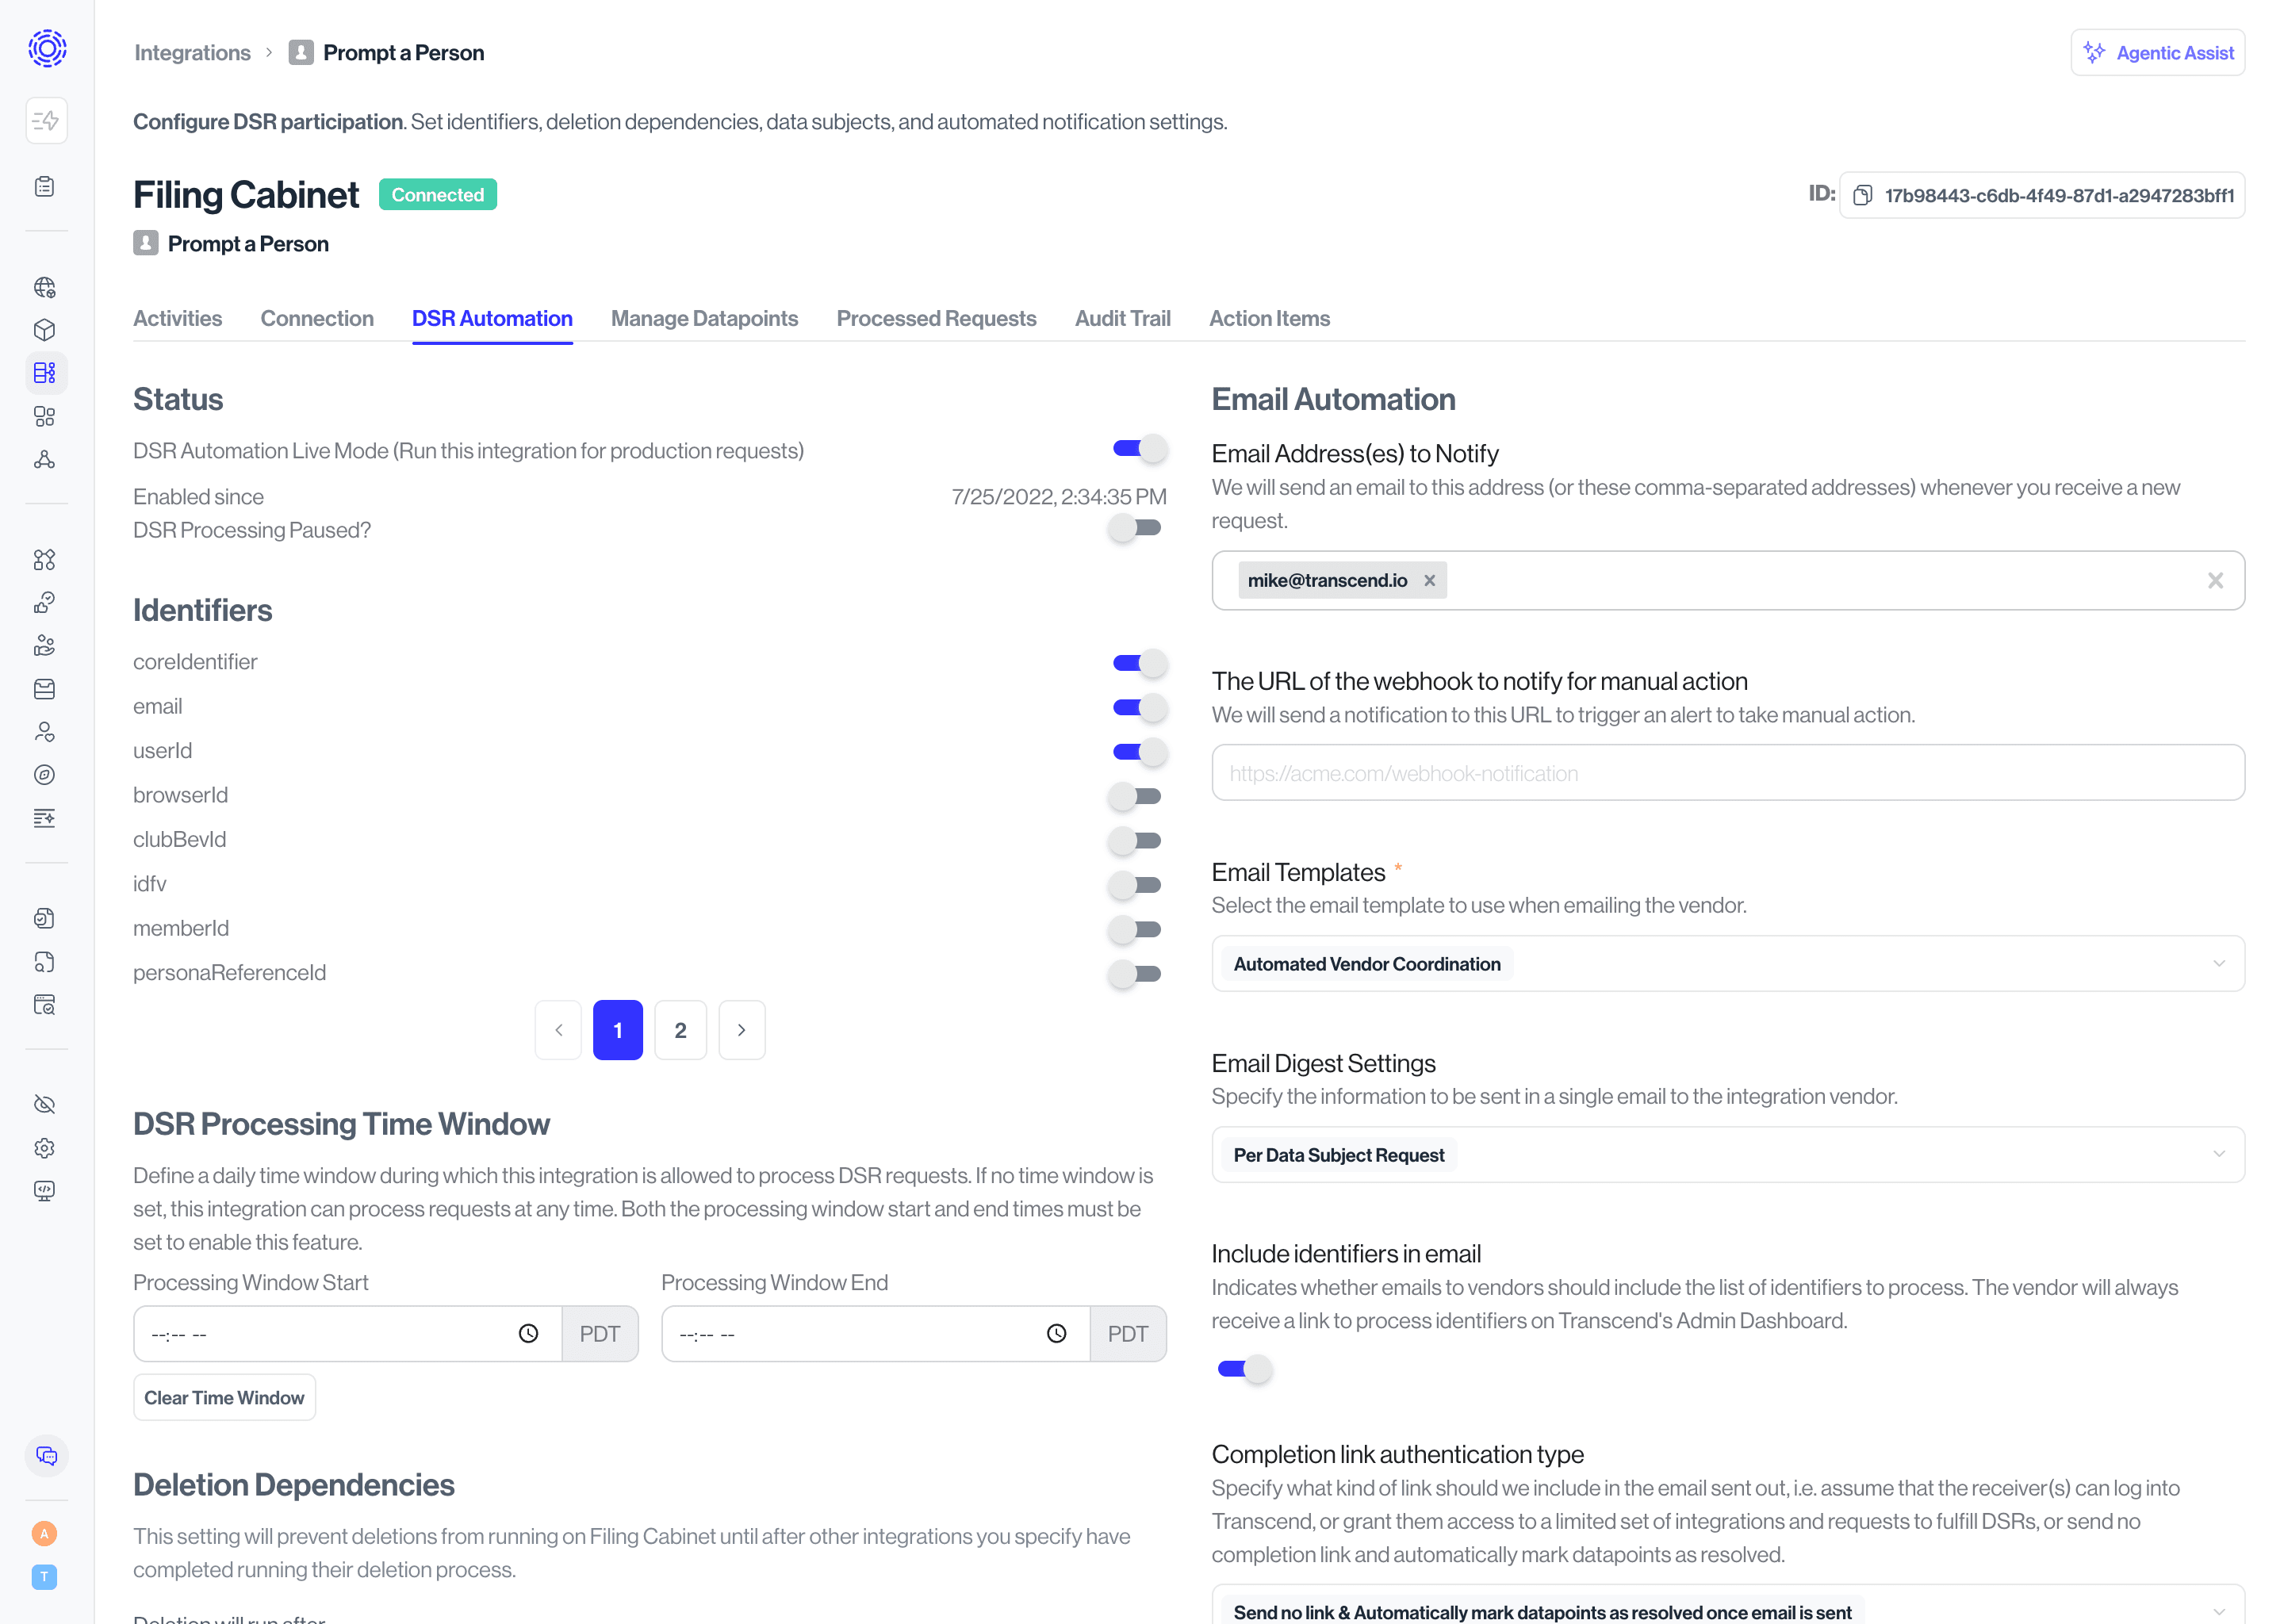
- Here you can specify whether emails should be batched across multiple requests ("Across Active Data Subject Requests") or sent for each request as they are ready ("Per Data Subject Request").
If you decide to batch notifications "Across Active Data Subject Requests", you can configure the "Email Frequency" to specify how often email notifications should be sent (per hour, per day, per week, etc…) - You can decide to include a CSV with the identifiers of the requests by clicking on the "Include identifiers in email" toggle.
- Additionally, you can configure how these integrations need to authenticate to process requests through the "Completion Link Authentication Type" field:
- The default is set to "Require receiver(s) to log in with SSO or username/password", requiring the integration owner to have access to Transcend. This is the recommended setting for internal data systems.
- If you'd like to exclusively give access to a specific integration or set of integrations for specific users, you can assign the
View Assigned Data InventoryorManage Assigned Data Inventoryscopes to that user to allow them to respond to all requests for that system without having access to the rest of the integrations.
- If you'd like to exclusively give access to a specific integration or set of integrations for specific users, you can assign the
- When configuring an AVC integration for third party vendors, the recommended setting is to "Allow anyone receiving the email to view outstanding requests for this integration", which will authenticate the email address and expose the bulk respond interface even without access to the platform.
- A third option of "Send no link and automatically mark datapoints as resolved once email is sent" can be selected. This disables the bulk respond interface entirely for the integration. Instead, an email will be sent to the vendor with the CSV of identifiers attached. The request will immediately mark those integrations as completed and continue processing the request without waiting for the vendor to respond.
- The default is set to "Require receiver(s) to log in with SSO or username/password", requiring the integration owner to have access to Transcend. This is the recommended setting for internal data systems.
Read more about connecting and configuring integrations.
Before you can configure specific elements of the workflow, you'll want to make sure that emails are sent from an internal email address. Most vendors require that DSR emails are sent from a domain that your company owns. Review our guide on setting up email domains to get started, including information about Mail From verification for improved email deliverability.
We use an intermediary S3 bucket to store CSV attachments during sending. When using self-hosted Sombra, in order to allow CSVs to be sent you must allow HTTPS PUT calls to the hostname for your region.
- EU-based backends:
https://prod-eu-west-1-backend-email-outbox-transcend-io.s3.eu-west-1.amazonaws.com/ - US-based backends:
https://prod-us-east-1-backend-email-outbox-transcend-io.s3.eu-west-1.amazonaws.com/
In addition, since CSV email attachments can be up to 25MB you must allow egress HTTP request body sizes of up to 25MB.
Each integration that you configure with email notifications can have its own custom email template. You can customize each email template to have instructions on how to fulfill the request, or you can simply use the default email template to notify a vendor to respond to a DSR.
By default, your organization will come with an email template named "Automated Vendor Coordination". Each integration will default to this email template. If you want to change the default language for all vendor emails, edit this template.
To learn more about how to create or adjust email templates, refer to our Email Template Overview article.
Configuring Email Templates for Specific Vendors
If you want to use specific email templates for each vendor, you will need to:
- Navigate to the "integrations" page
- Find the AVC integration you'd like to customize.
Tip: you can use the filter button to find all your AVC integrations
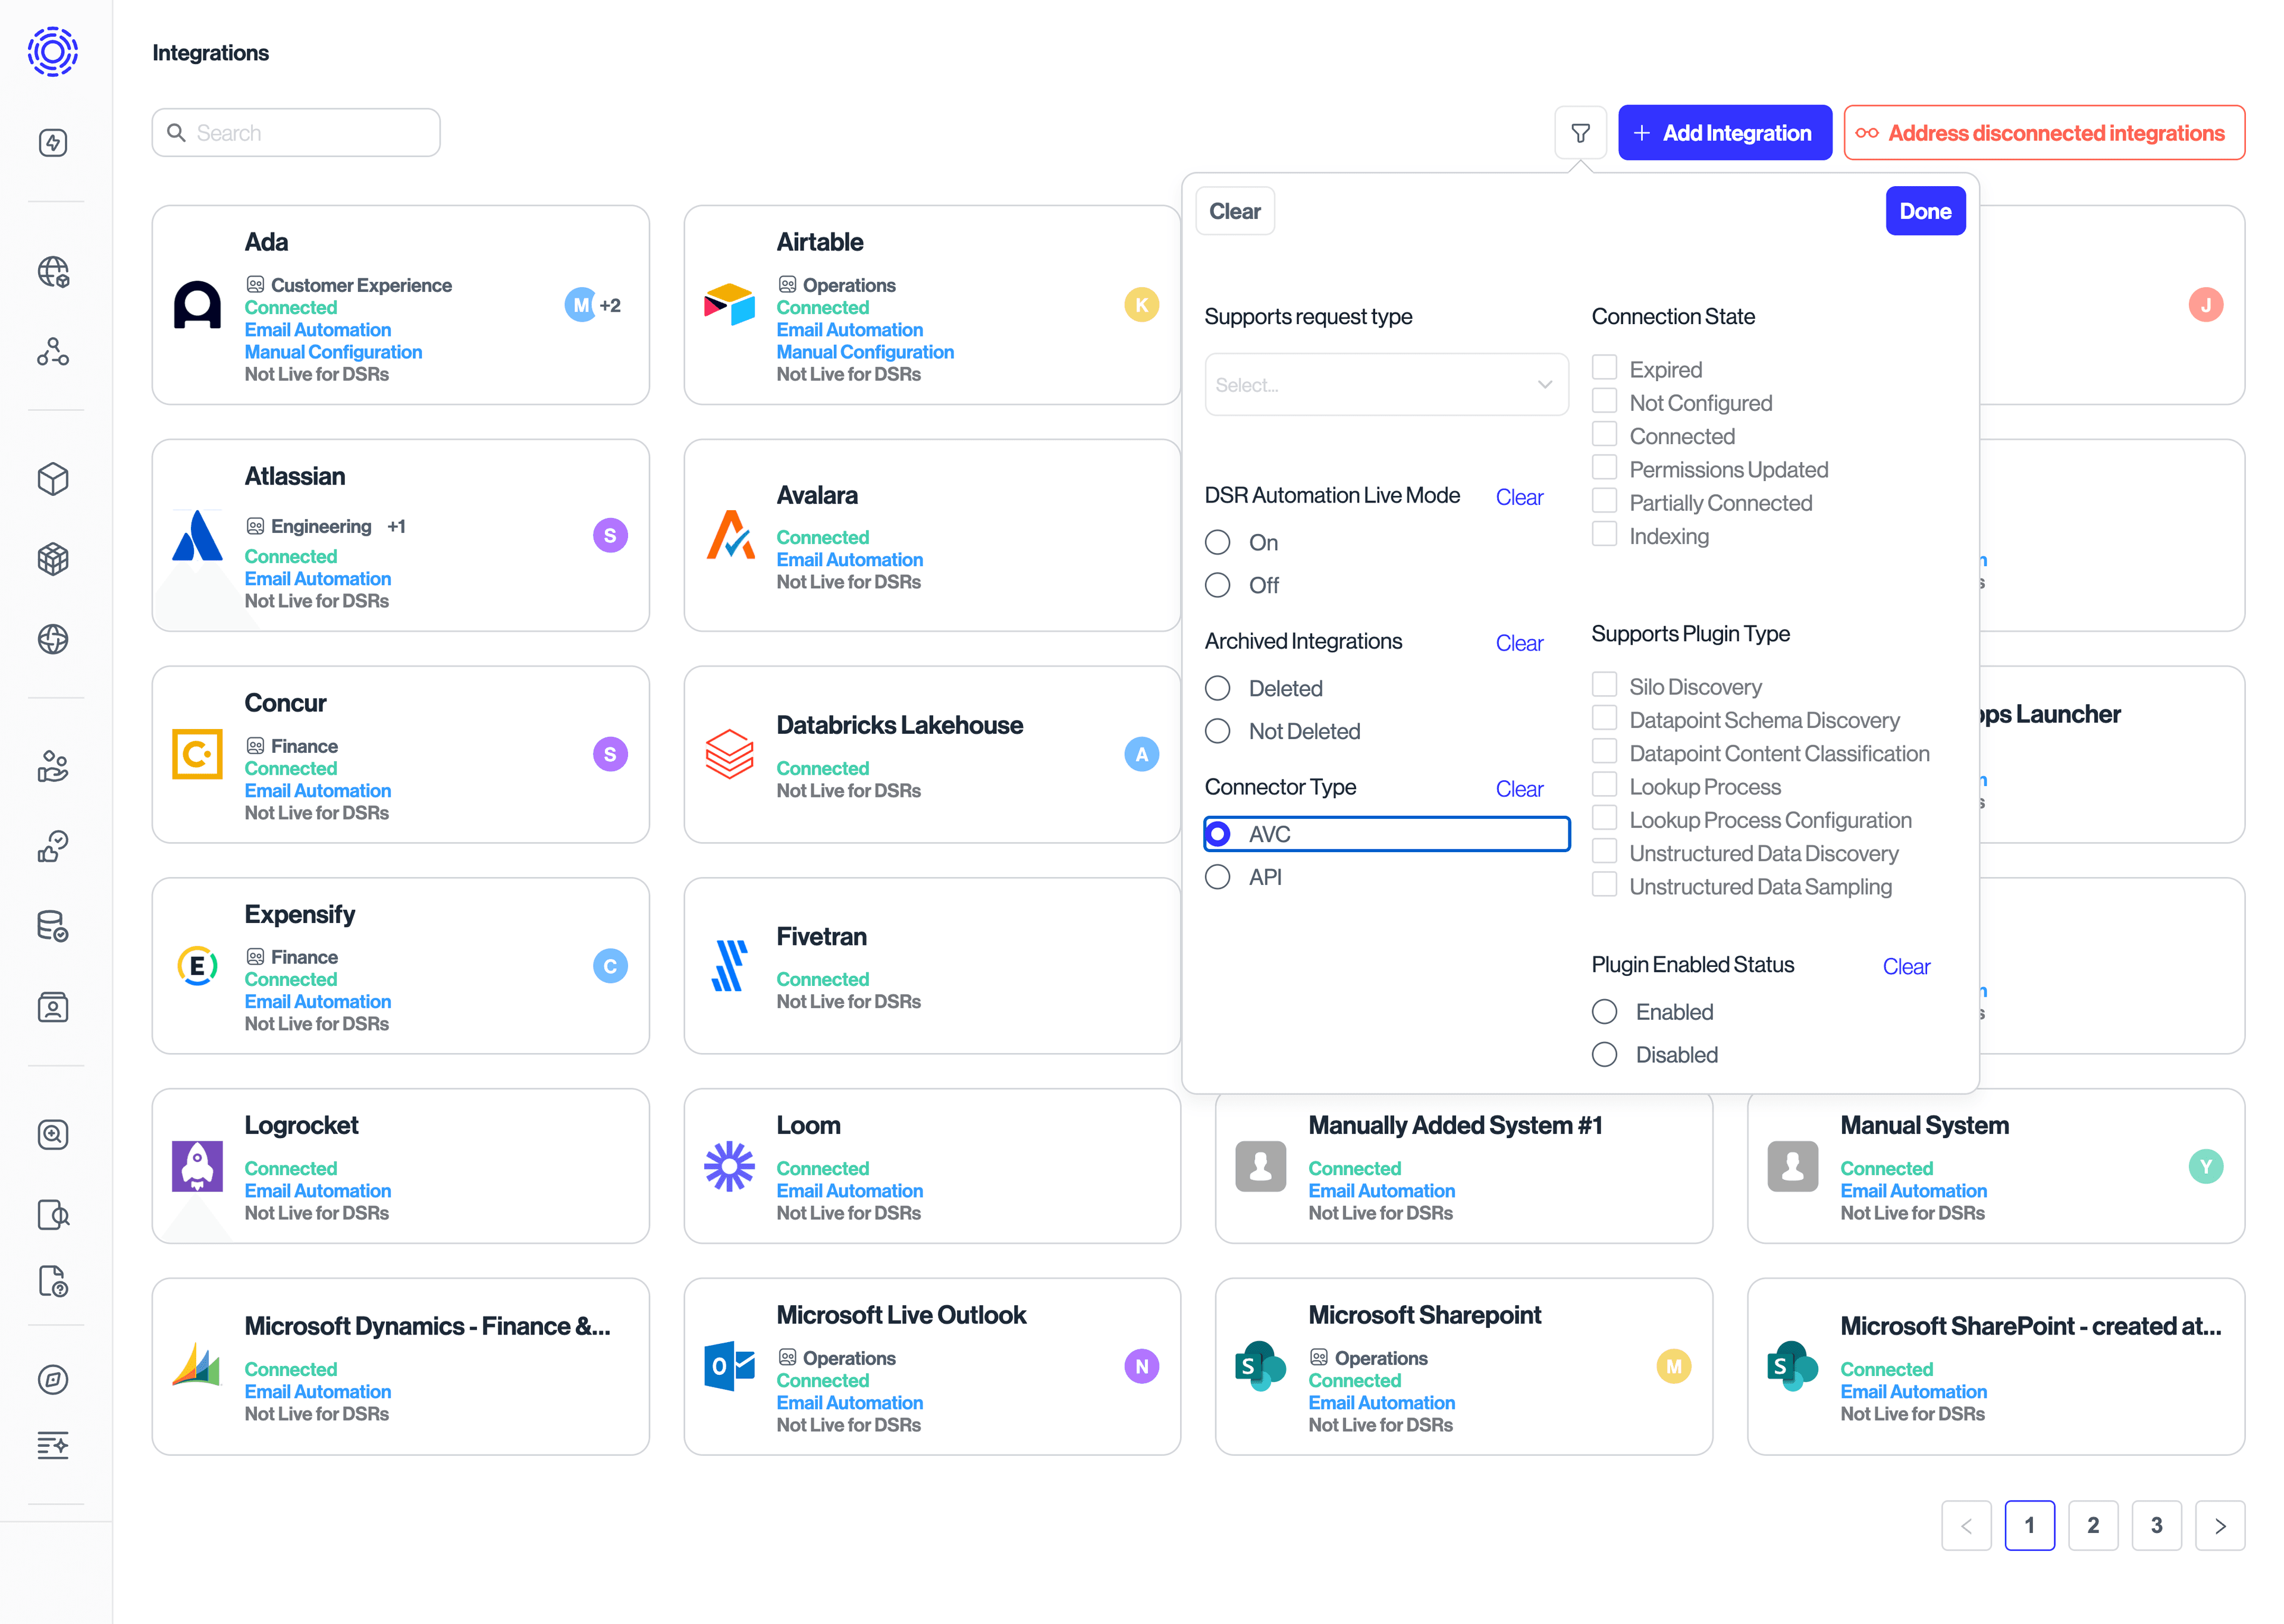
- Click on the integration to see the details of the integration
- Navigate to the "DSR Automation" tab and scroll down to the "Email Automation" section
- Configure the details of the integrations as you see fit.
- Click on "Email template" and select the email template you'd like to use for this integration. If you need to create a new one, you can do so under "DSR Automation" > "Email Settings" > "Email Templates"
Specific templates variables are available when sending emails relating to data subject requests.
You can add integration-specific instructions that assignees see in bulk respond and on individual requests—without embedding those steps in email templates. See Add DSR Processing Documentation to an Integration for setup steps.
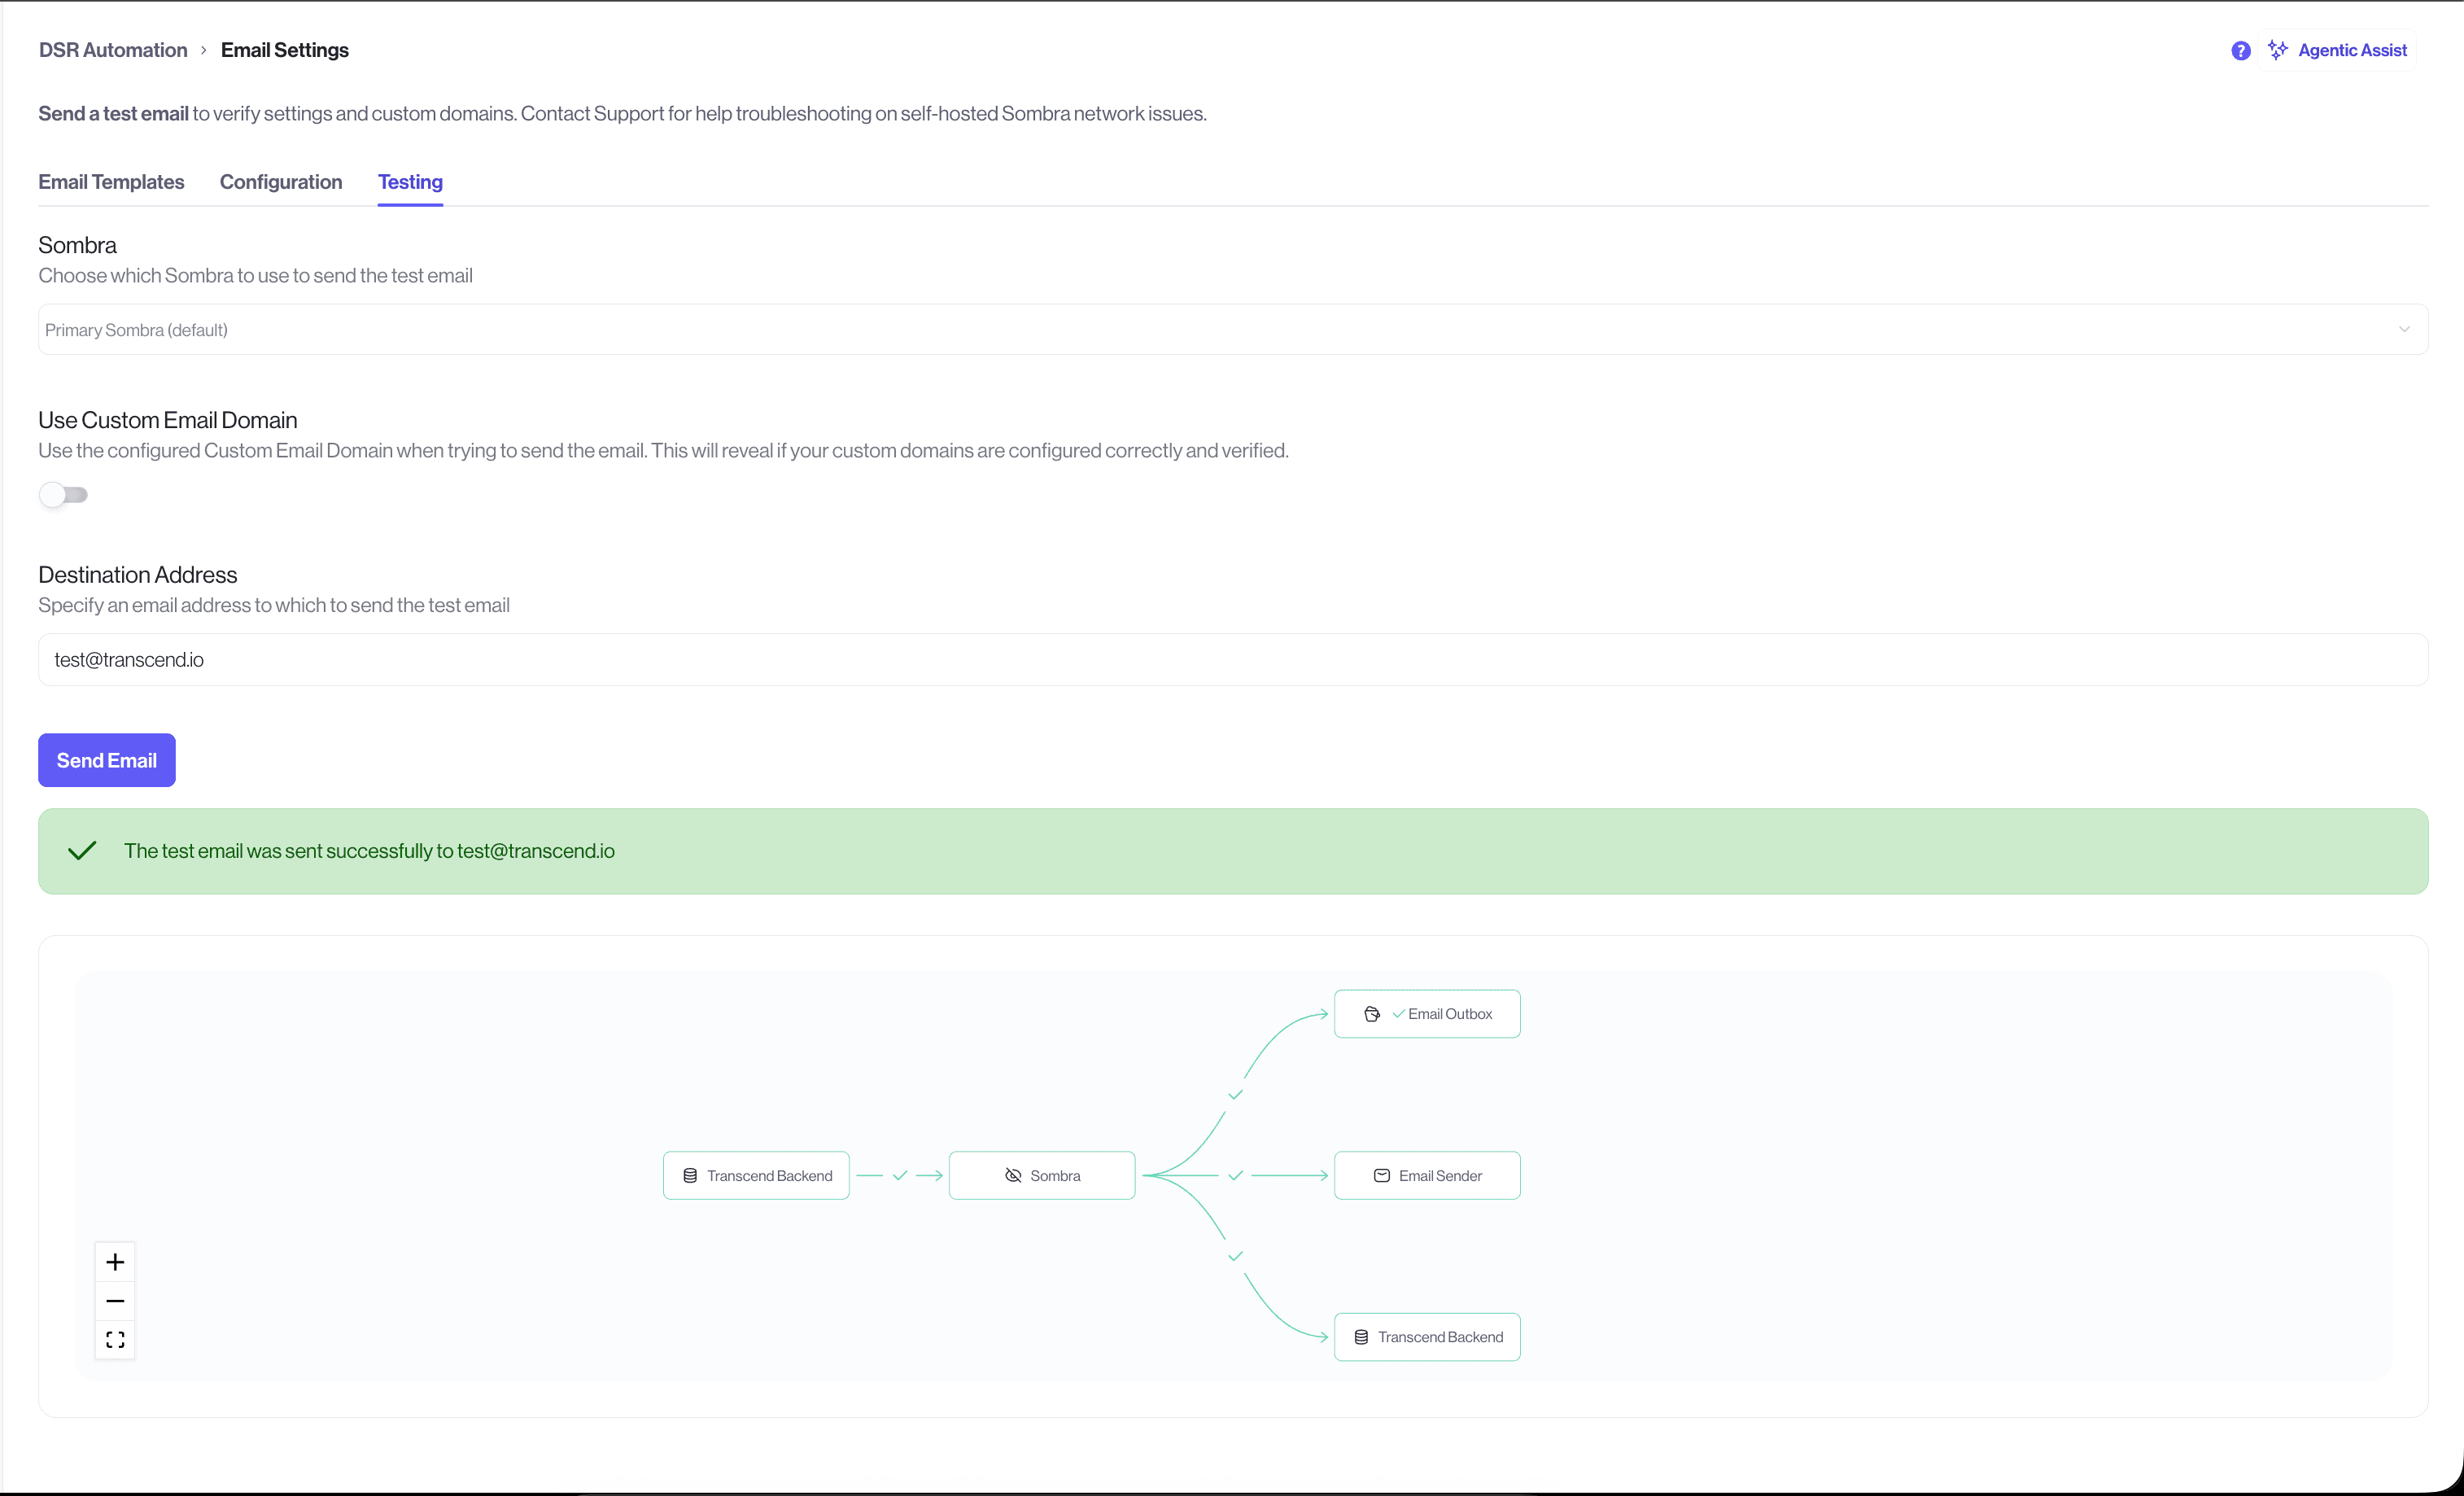
You can test the AVC configuration end to end under "DSR Automation" > "Email Settings" > "Testing". This tests each step of the email sending process to ensure that the AVC integration can send emails to your configured destinations. This tool illustrates points of failure when they occur and provides information to help debug the issue.