Custom Functions
With Custom Functions, you can easily extend Transcend's integration functionality to connect to any API or home-grown system.
Custom Functions are serverless functions that execute on Sombra™ as part of a workflow. Unlike webhooks, Custom Functions require zero infrastructure to set up. Just write your code, and publish.
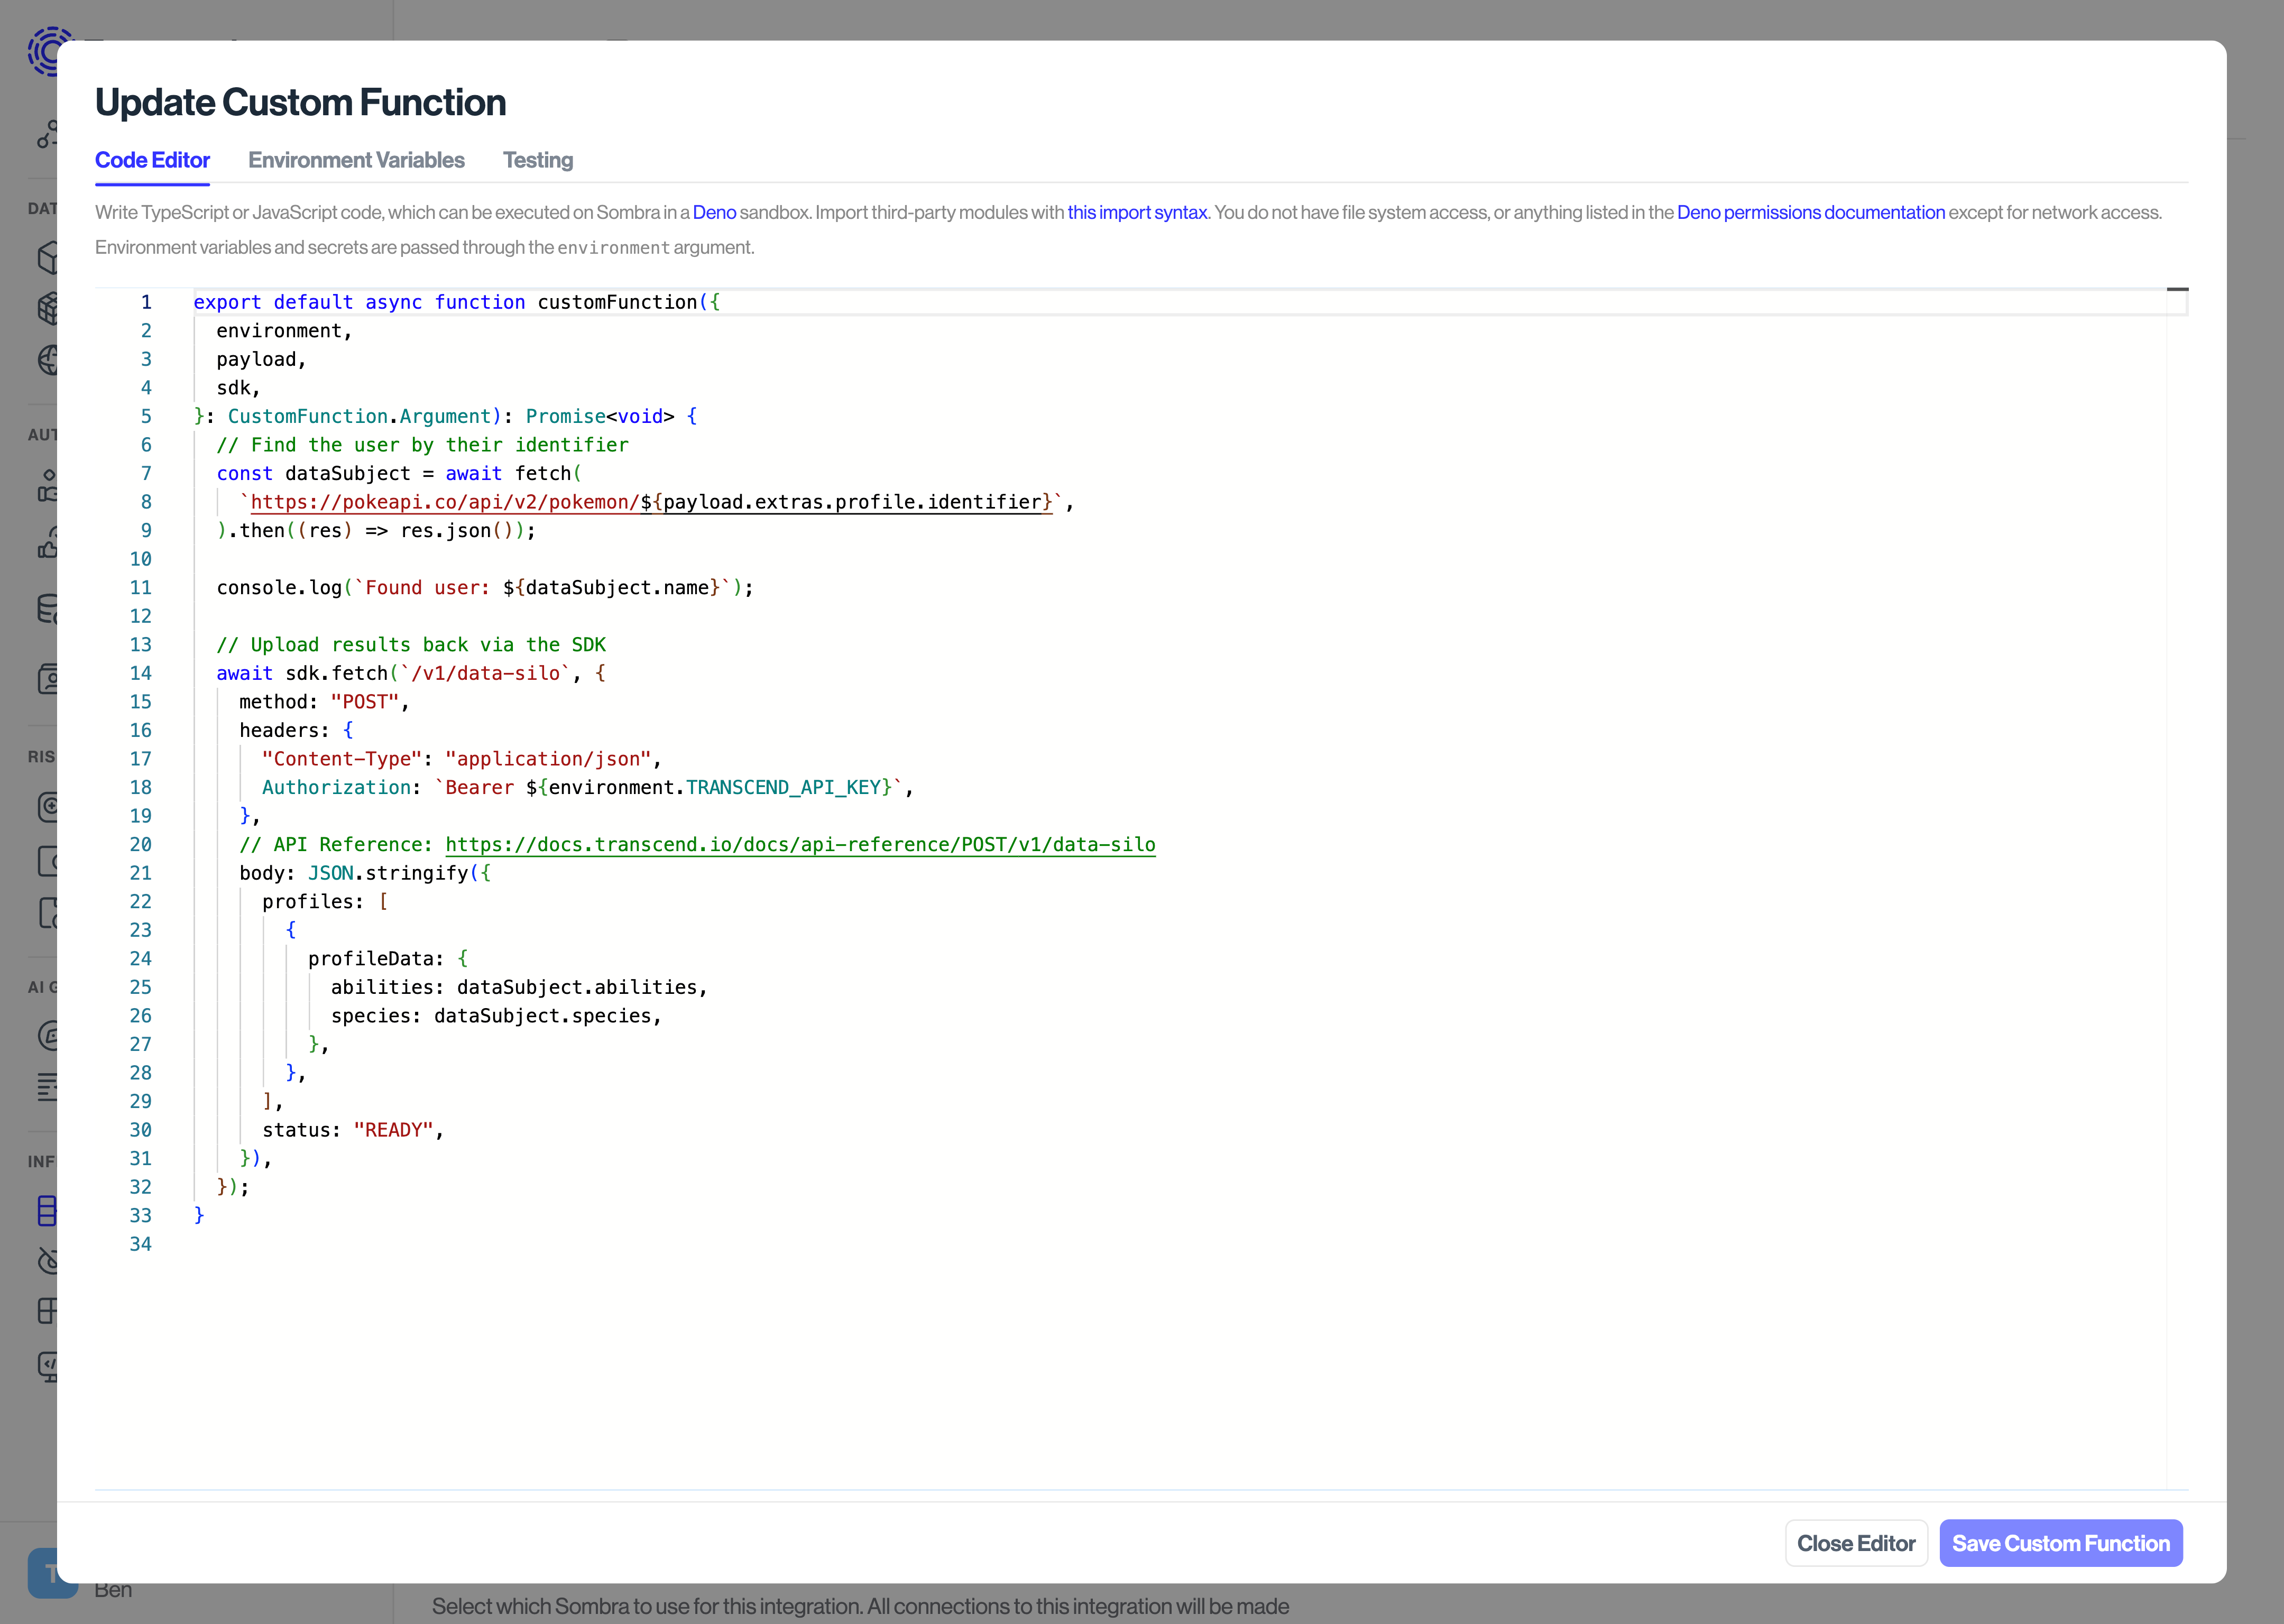
Custom Functions are written in TypeScript, and execute in a Deno runtime. They run in the context of a Transcend workflow, and have access to the workflow's context.
export default async function customFunction({
  environment,
  payload,
  sdk,
  kv,
}: CustomFunction.Argument): Promise<void> {
  console.log('Hello, world!');
}- The default export is the main function that will be executed.
- You can also write code outside of the main function—the whole file will be executed.
- You can rename the function, so long as it has
export default async function.
- You have full access to third-party libraries.
Deno has broad support for Web APIs, including fetch. We recommend using fetch to make calls to your services.
const response = await fetch('https://api.example.com/v1/users', {
  method: 'GET',
  headers: {
    'Content-Type': 'application/json',
    Authorization: `Bearer ${environment.API_KEY}`,
  },
  body: JSON.stringify({ username: 'john.doe' }),
});

// Tip: Always check the response status code to ensure the request was successful before accessing the response body.
if (!response.ok) {
  const error = await response.text();
  throw new Error(`Failed to get user: ${error}`);
}

const user = await response.json();
console.log(user);You can import modules from a remote registry and Deno will automatically download them on the first run, and cache them for future runs. You can read more about Deno's import system here.
import { say } from 'jsr:@morinokami/deno-says/say';

export default async function customFunction({
  environment,
  payload,
  sdk,
}: CustomFunction.Argument): Promise<void> {
  say('Hello from Deno!');
}
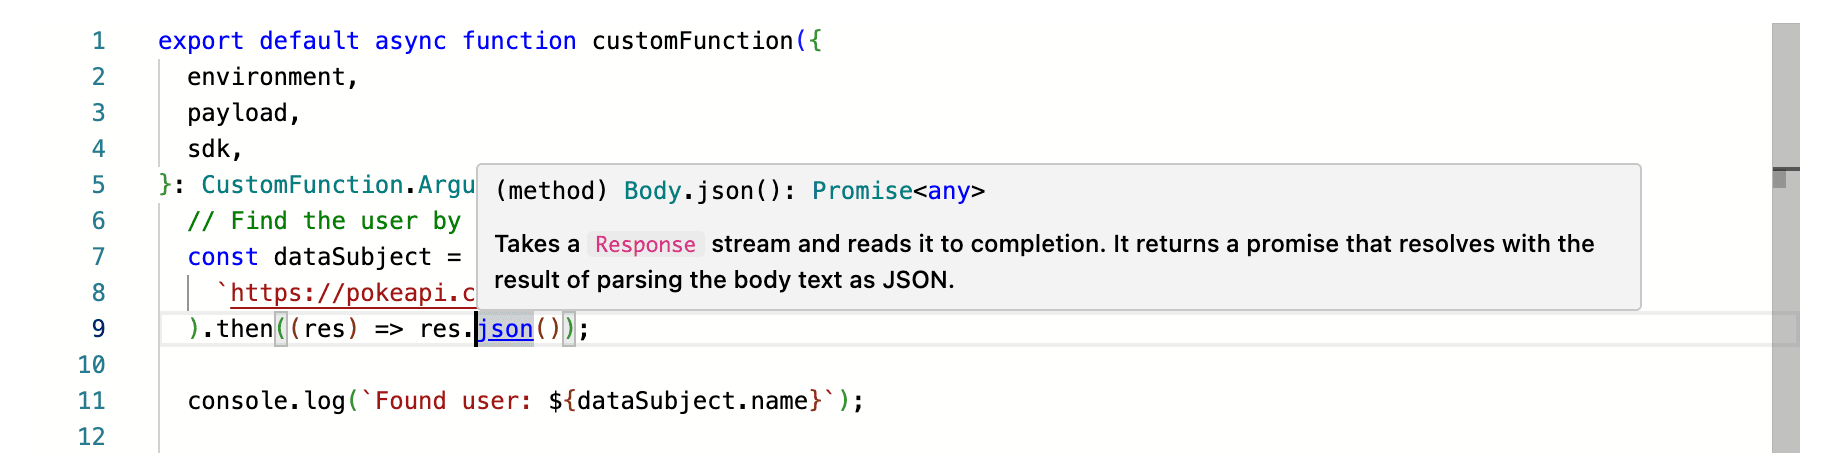
The Custom Function editor supports IntelliSense, which will show you the Custom Function argument types, return types, and the globals available in the Deno runtime.
There are four arguments to your Custom Function:
environment: The environment variables for the workflow. These are secret variables set by you in the Environment Variables tab of the Custom Function.payload: The payload the workflow context, which contains information such as the action that triggered the workflow (such as an access request, or a contact opt-out), the user's identifiers, and more. It is identical to the "New Privacy Request Job" request body. It is also fully typed, so you can use IntelliSense to reference the documentation.sdk: An SDK for interacting with the Sombra API, such as to upload data to a system. This is a simple wrapper aroundfetch, which abstracts away a few details, such as the URL for the Sombra API, and authentication.kv: A key-value database for persisting dynamic values and secrets across Custom Function runs, such as OAuth refresh tokens.
The Environment Variables tab is where you should store static configuration parameters and secrets, such as API keys.
These values are securely stored by Sombra, and Transcend's cloud does not have access to them. When you set these values through the Admin Dashboard, they are uploaded to Sombra via an end-to-end encrypted connection. You should not store secret values in plaintext in Custom Function code.
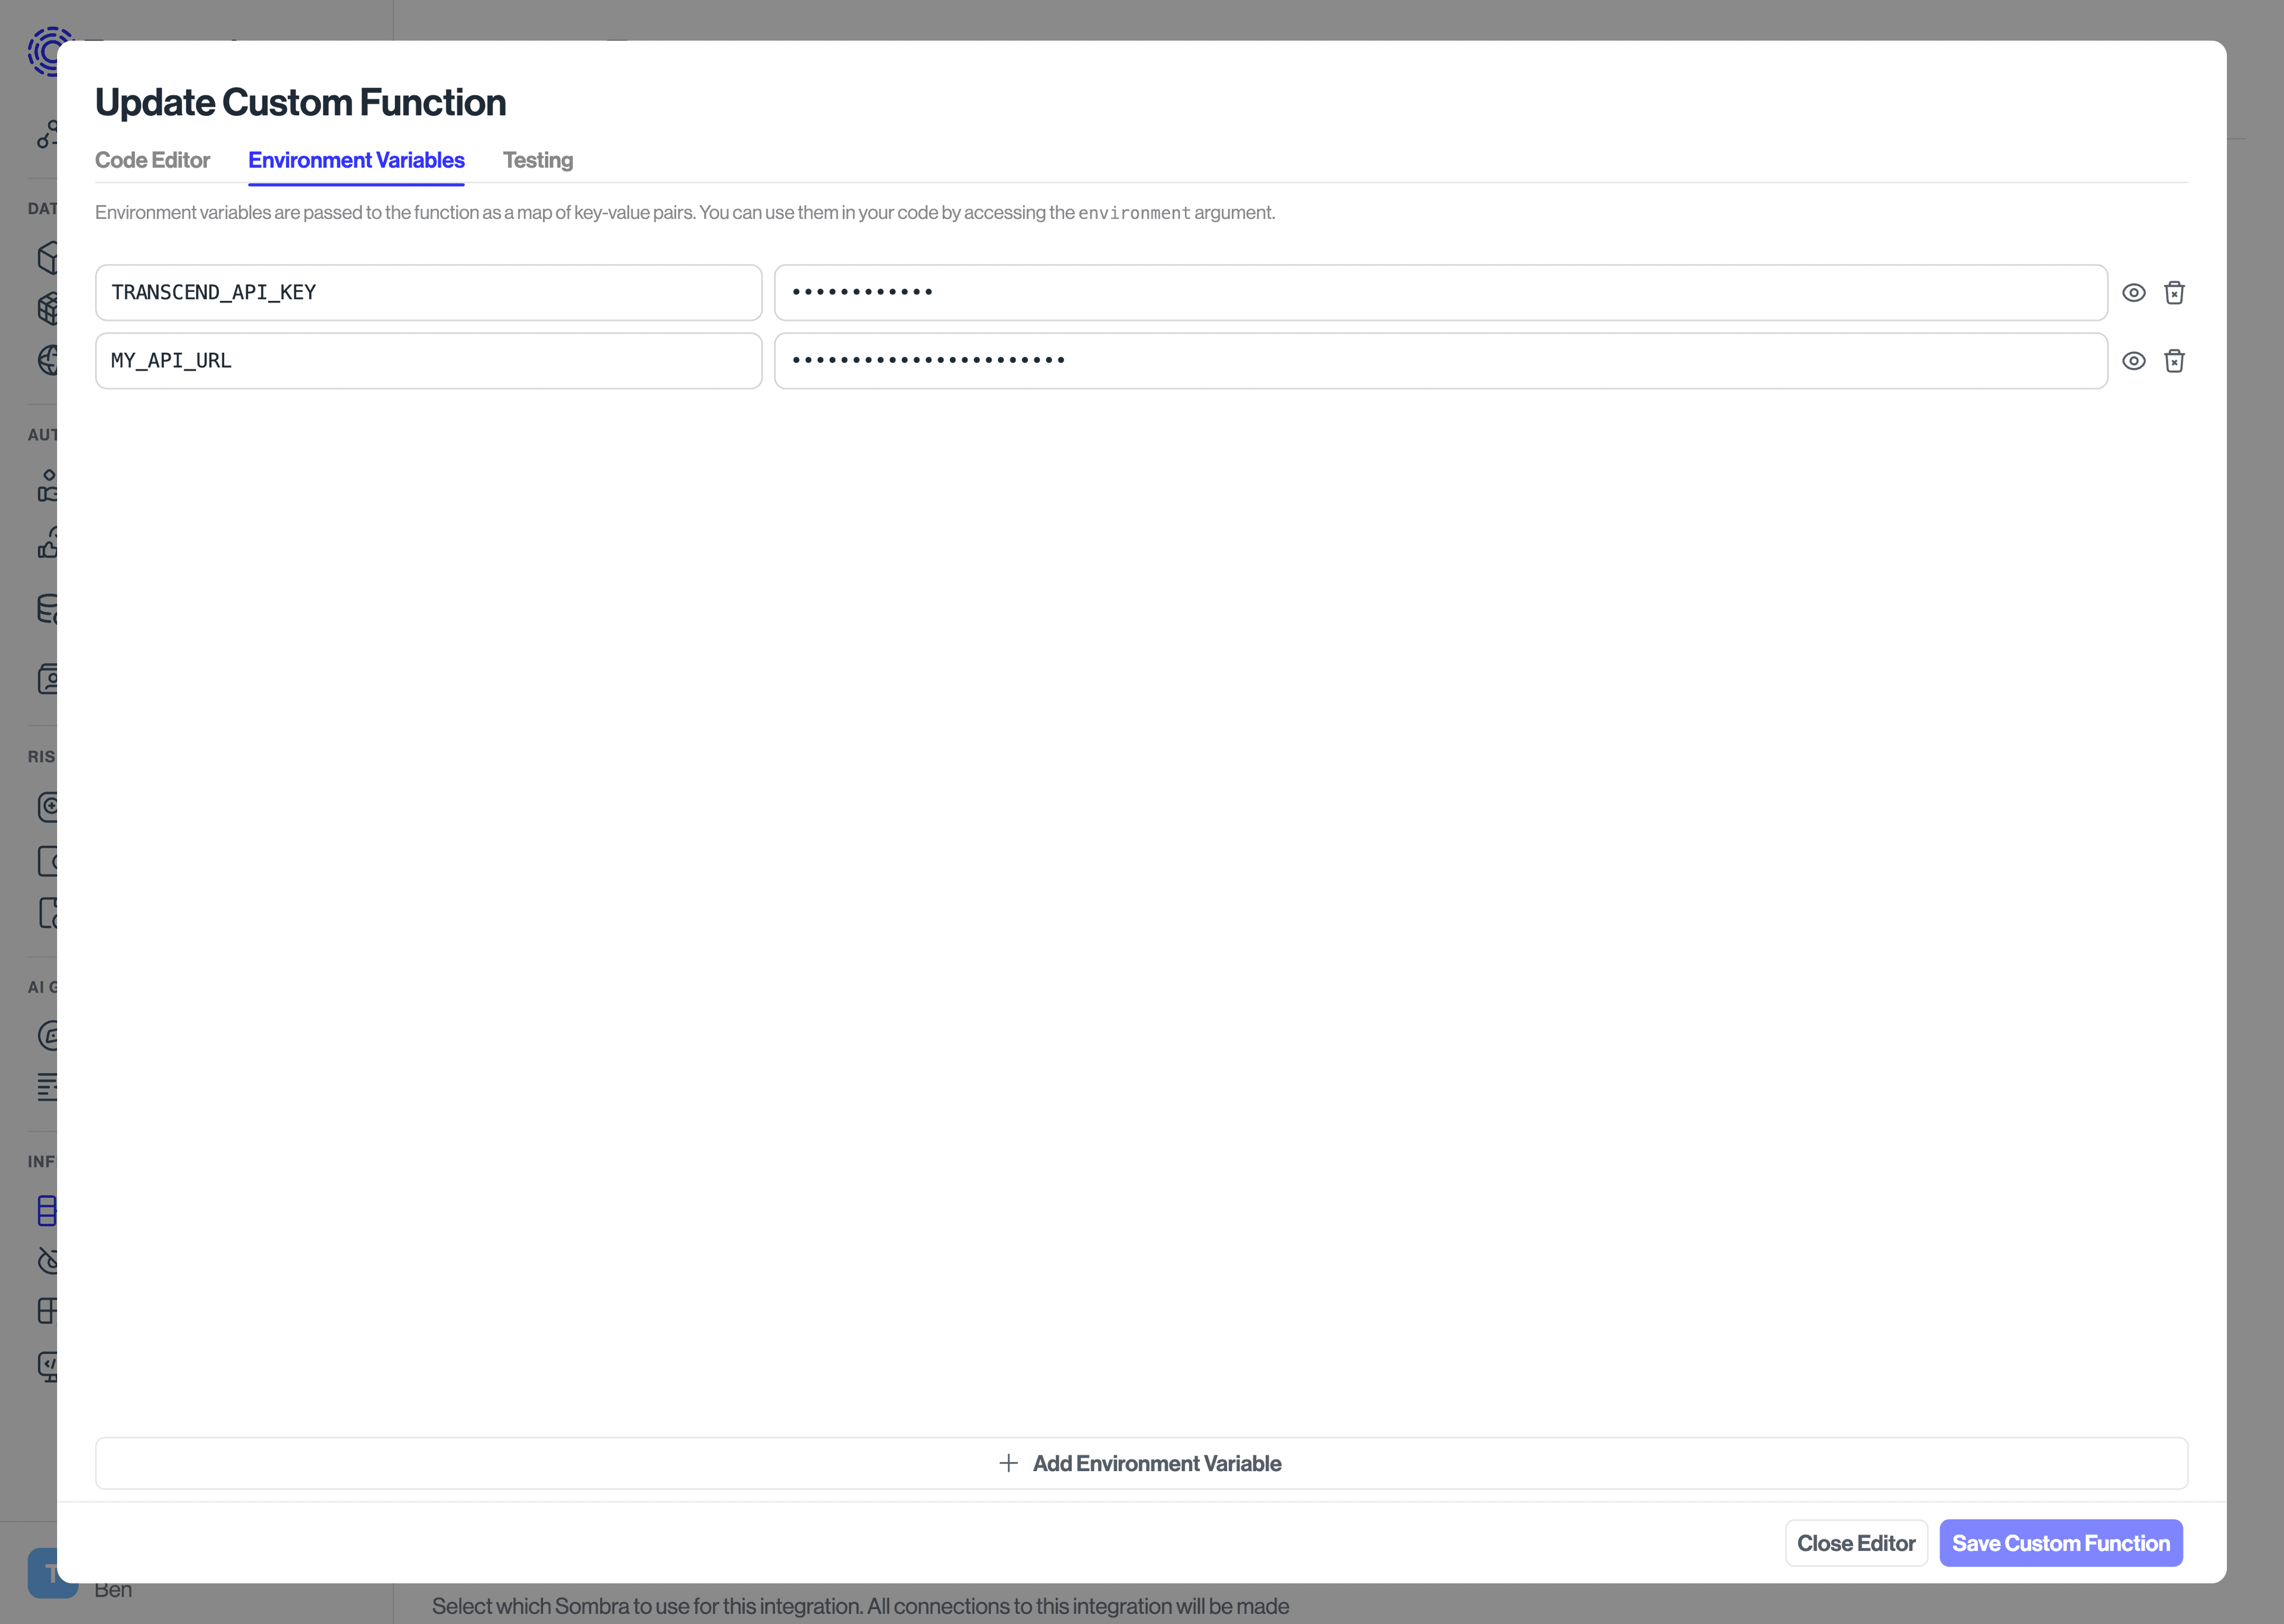
Environment variables are accessible through the environment argument to a Custom Function.
export default async function customFunction({
  environment,
}: CustomFunction.Argument): Promise<void> {
  await fetch('https://api.example.com/opt-out', {
    method: 'POST',
    headers: {
      'Content-Type': 'application/json',
      Authorization: `Bearer ${environment.API_KEY}`,
    },
    body: JSON.stringify({ key: 'value' }),
  });
}
Environment variables are also loaded onto the process.env object, but this is only intended for third-party modules such as SDKs which read from process.env. In your own code, we recommend you only access these values through the environment argument, and not via process.env (or Deno.env.get()).
- Environment variables are for static values, and cannot be updated by the Custom Function. For dynamic values, use the Key-Value Store instead.
- Environment variable names:
- Must start with a letter, and can only contain letters, numbers, and underscores. You should use CONSTANT_CASE for your environment variables, but you may use lowercase letters where necessary. Environment variables are case-sensitive.
- Special environment variable names are reserved:
DENO_*: Any environment variable name that starts withDENO_is reserved for use by Sombra to configure the Custom Function's Deno runtime.- For a full list of reserved environment variable names, see Deno's special environment variables.
- Accessing environment variables:
- You cannot access Sombra's system environment variables. You can only access the environment variables you've defined in the Environment Variables tab.
- Using the
environmentargument (recommended): You can access all the environment variables you've defined in the Environment Variables tab via theenvironmentargument, and you can access specific environment variables throughenvironment.YOUR_ENV_VAR_NAME. - Using
process.envorDeno.env(not recommended):- Environment variable access is restricted to those set in the Environment Variables tab.
- You cannot access a specific environment variable which is not defined in your Environment Variables tab. Calling
process.env.UNAVAILABLE_ENV_VAR_NAMEorDeno.env.get('UNAVAILABLE_ENV_VAR_NAME')will throw aNotCapableerror. - You cannot list all environment variables (e.g.,
console.log(process.env)orDeno.env.toObject()); doing so will throw aNotCapableerror. - You can access a specific environment variable which is defined in your Environment Variables tab through
process.env.YOUR_ENV_VAR_NAMEorDeno.env.get('YOUR_ENV_VAR_NAME').
Logging an environment variable's value, (such as with
console.log(environment.API_KEY)), will be redacted as********in the logs. This is to prevent sensitive data from being logged in the logs.
Each Custom Function has a key-value (KV) database to persist values and secrets, such as OAuth refresh tokens. The KV allows you to remember values across Custom Function runs.
export default async function customFunction({
  environment,
  payload,
  kv,
}: CustomFunction.Argument): Promise<void> {
  // Get a value
  const value = await kv.get('last_run_time');
  console.log('This function last ran at:', value);

  // Set a value (strings only)
  await kv.set('last_run_time', new Date().toISOString());
}- The Key-Value store can only hold string values.
- There is a limit of 2048 characters allowed for each value in the store. In addition, we allow storing a maximum of 128 keys, with each key limited to 128 characters in length.
- Custom Functions cannot share the same KV. Each Custom Function has one unique KV database.
- In a Custom Function run, the KV store's state is isolated from other parallel invocations of the same Custom Function. The KV store is hydrated at the beginning of the run, and persisted at the end of the run.
Thus, within one execution, the value ofkv.get()cannot be changed by other parallel executions of the same Custom Function:
  const firstValue = await kv.get('my_key');

  // In this time, a parallel execution might have called `kv.set('my_key', 'new_value')`
  await waitFor(1000);

  const secondValue = await kv.get('my_key');
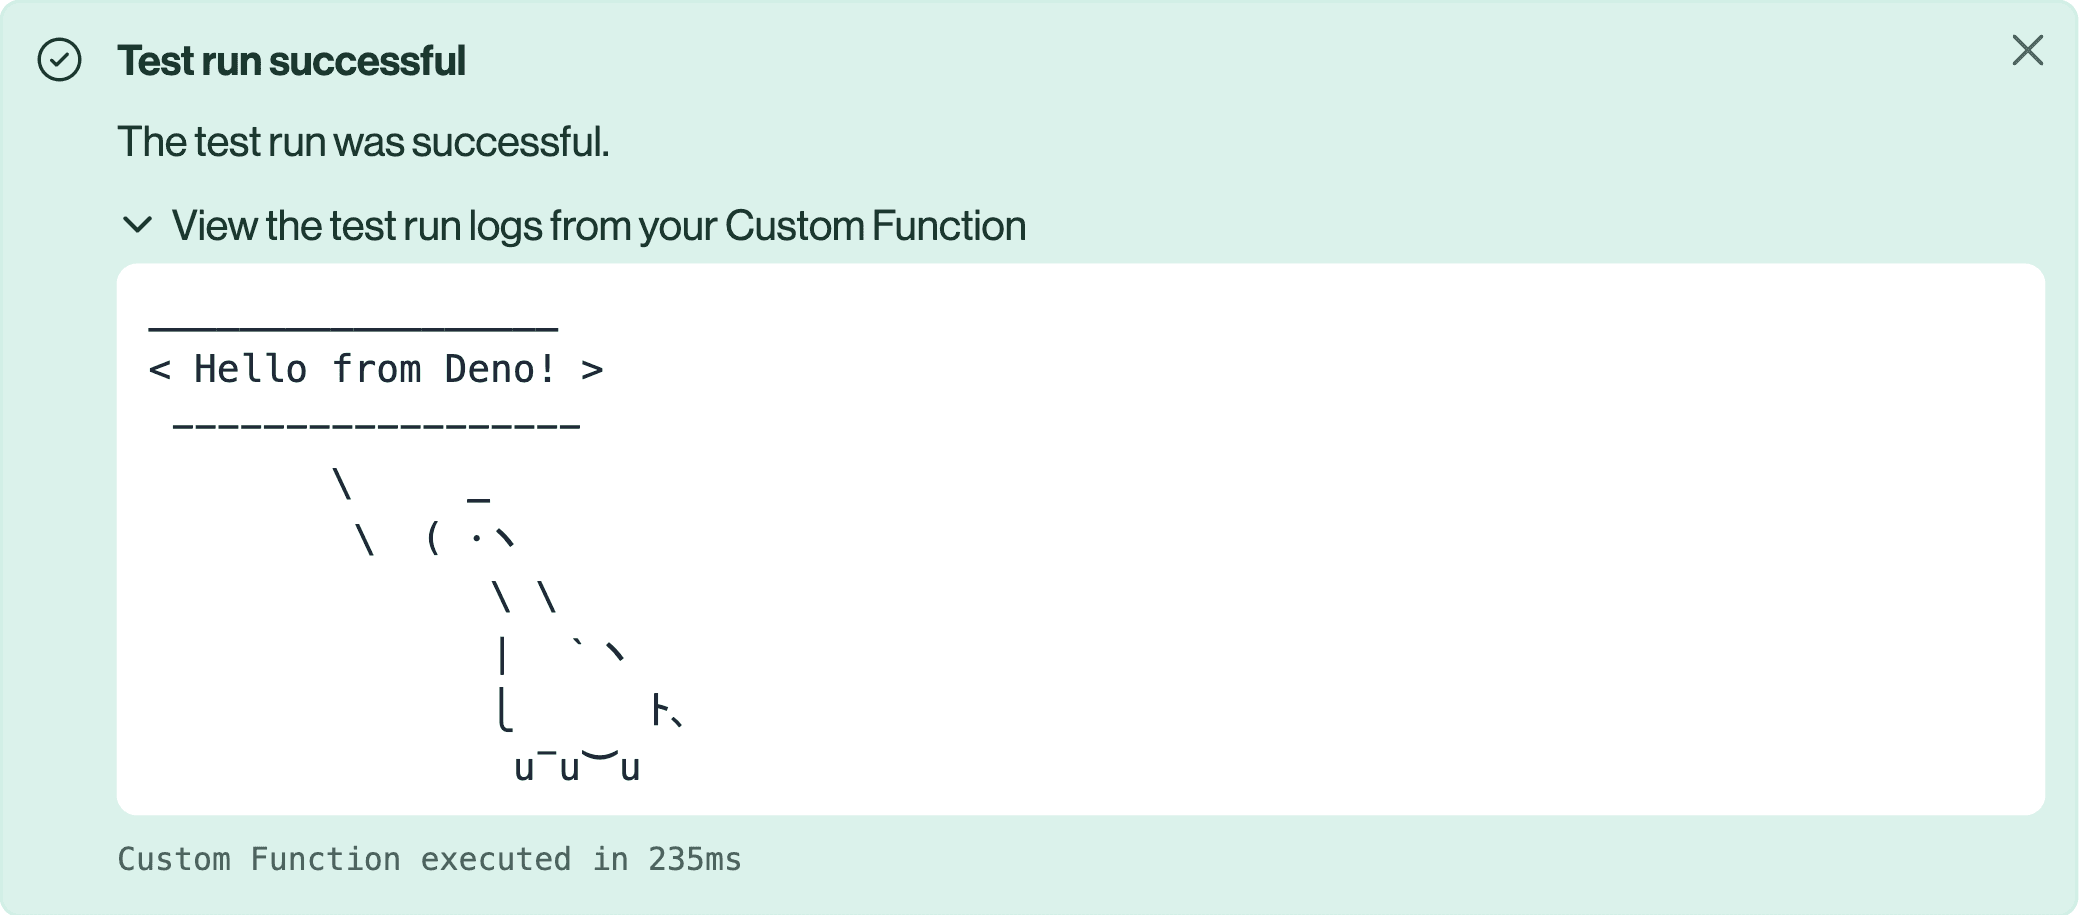
console.log(firstValue === secondValue); // guaranteed to be trueIn the Testing tab, you can execute your Custom Function with a test payload, which will be passed to the payload argument. Click Send Test Request to execute the Custom Function. The Custom Function will be executed in a new sandboxed process, and the log output will be shown in the console. To log output to the console, use console.log.
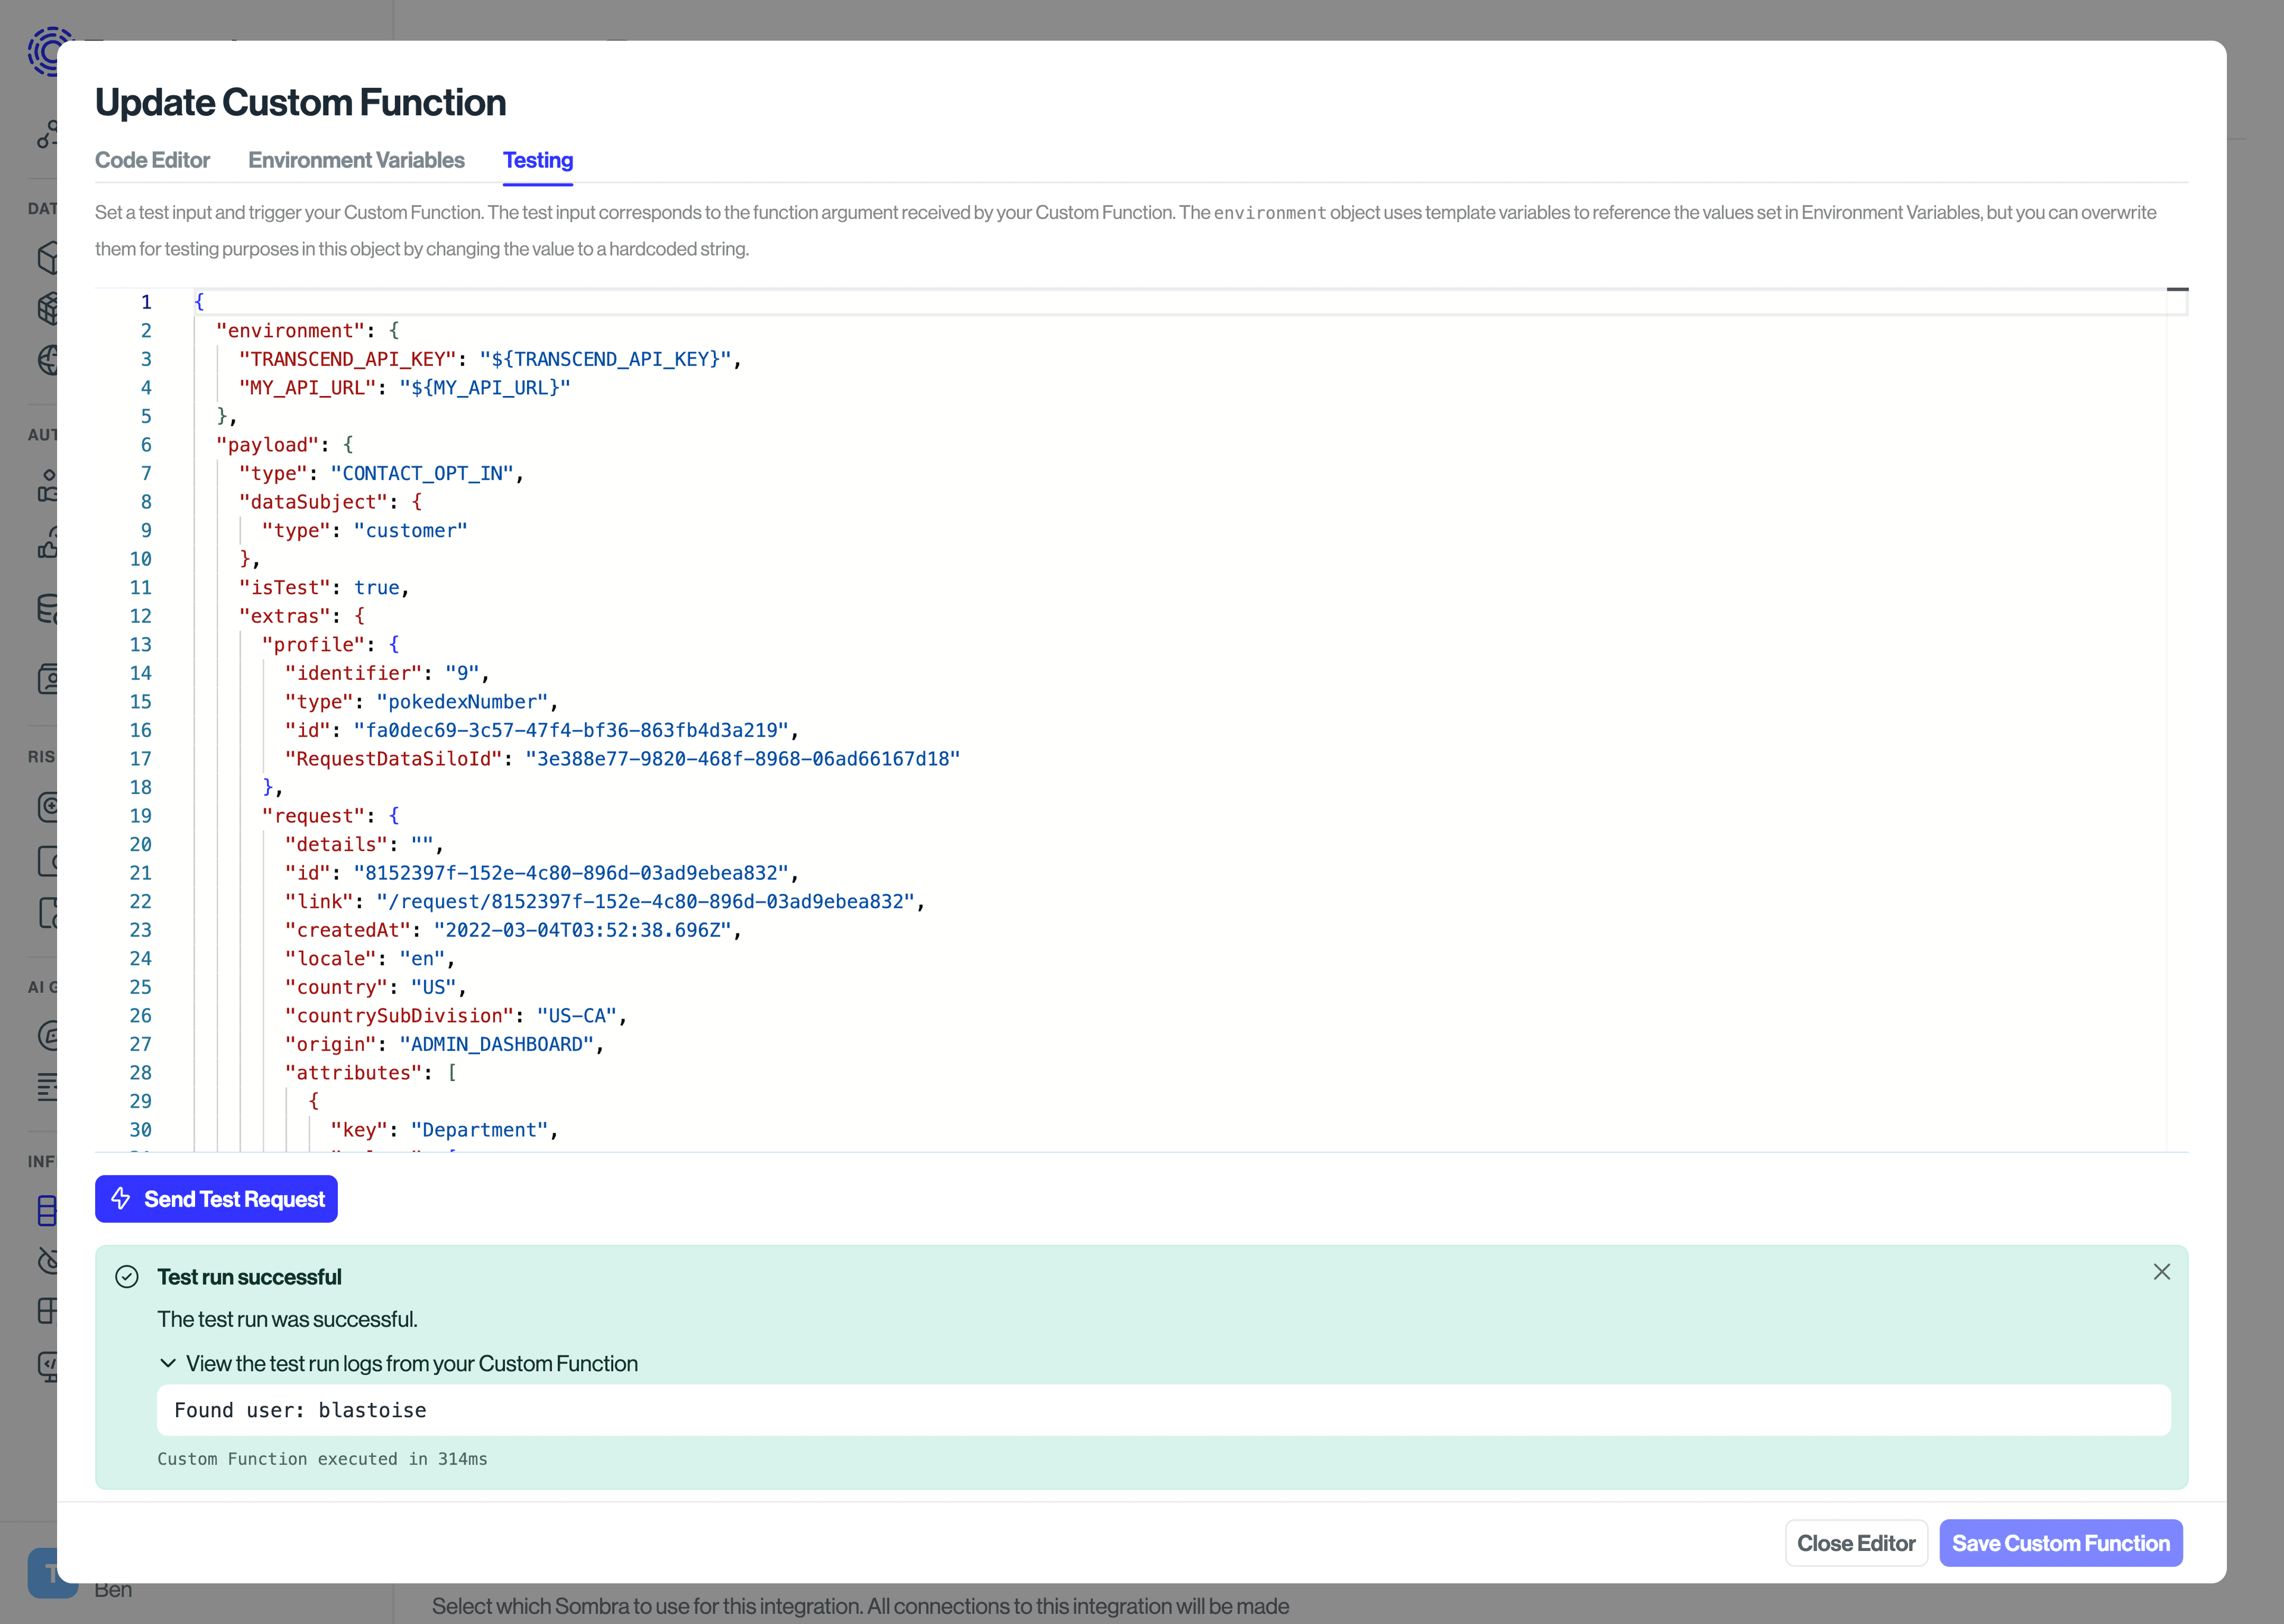
You can override the test payload by changing the JSON payload in the Testing tab before clicking Send Test Request. Since events that invoke Custom Functions can also invoke webhooks, payloads are identical to their respective webhook bodies.
Environment variables can also be overridden in the test payload, and they default to the special value of ${YOUR_ENV_VAR_NAME}, which means it will be replaced with the value of the environment variable as specified in the Environment Variables tab.
- Navigate to Integrations
- Add a "Server Webhook" integration (while Custom Functions are in beta, they will live alongside webhooks in the integrations page)
- On the Connection tab of the integration, under Connection Strategy click the dropdown and switch from "Send a webhook" to "Run a Custom Function".
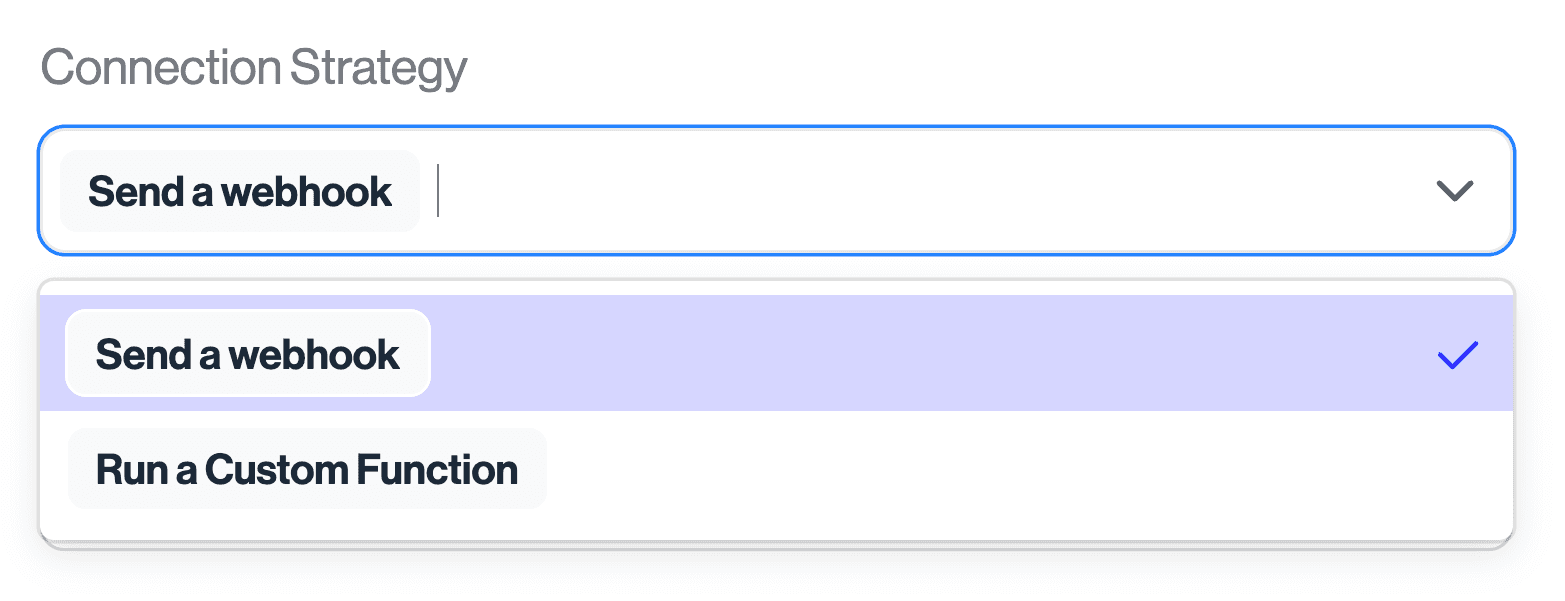
- Click "Update Custom Function".
- The maximum runtime for your Custom Function is limited to 30 seconds. You change this value if you are self-hosting Sombra.
- You do not have access to the file system.
- You do not have access to system environment variables (however, you can set your own secret variables in the Custom Function editor).
- You cannot spawn child processes.
- You cannot access system information.
- You cannot call foreign functions (e.g., a C++ library).
Out of this list of Deno permissions, only Network Access is granted.
- No two Transcend customers run Custom Functions on the same hardware.
- Each Custom Function invocation is run in a new sandboxed process.
For information on how to globally configure Custom Function executions on your self-hosted Sombra cluster, check out Custom Function environment variables.
For information on how to configure your Custom Function to perform Preflight checks, check out the Custom Function Enricher guide.
If you see issues invoking services using self-signed certificates from within Custom Functions, follow this guide.
When connecting to an API that requires OAuth to issue an access token, you should use the Client Credentials flow wherever possible, since it is intended for server-side authentication.
This is a helper function to request an access token with OAuth. It will be used in the following examples.
interface AccessTokenRequest {
  /** The URL to the token endpoint. */
  tokenUrl: string;
  /** The client ID. */
  clientId: string;
  /** The client secret. */
  clientSecret: string;
  /** The grant type and its parameters. */
  grant:
    | {
        /** The client_credentials grant. */
        type: 'client_credentials';
      }
    | {
        /** The refresh_token grant. */
        type: 'refresh_token';
        /** The refresh token. */
        refreshToken: string;
      };
  /** The scope of the access token. */
  scope?: string;
}

/**
 * @see https://datatracker.ietf.org/doc/html/rfc6749#section-5.1
 */
interface AccessTokenResponse {
  /** The access token issued by the authorization server. */
  access_token: string;
  /* The type of the token issued. */
  token_type: string;
  /** The lifetime in seconds of the access token. */
  expires_in?: number;
  /** The refresh token, which can be used to obtain a new access token. */
  refresh_token?: string;
  /** The scope of the access token. */
  scope?: string;
}

/** A helper function to request an access token with OAuth */
async function requestAccessToken({
  tokenUrl,
  clientId,
  clientSecret,
  grant,
  scope,
}: AccessTokenRequest): Promise<AccessTokenResponse> {
  const body = new URLSearchParams({
    grant_type: grant.type,
    ...(grant.type === 'refresh_token'
      ? { refresh_token: grant.refreshToken }
      : {}),
    ...(scope ? { scope } : {}),
  }).toString();

  const res = await fetch(tokenUrl, {
    method: 'POST',
    headers: {
      'Content-Type': 'application/x-www-form-urlencoded',
      Authorization: 'Basic ' + btoa(`${clientId}:${clientSecret}`),
    },
    body,
  });

  if (!res.ok) {
    const error = await res.text();
    throw new Error(`Access token request failed (${res.status}):\n${error}`);
  }

  return res.json() as Promise<AccessTokenResponse>;
}This is the preferred flow for requesting an access token with OAuth, as it is stable and intended for intended for server-side authentication.
/**
 * Update the KV with a fresh access token if we don't have one, or if it's expired
 * Uses 'client_credentials' grant type
 */
async function ensureFreshAccessToken({
  environment,
  kv,
}: CustomFunction.Argument): Promise<void> {
  const expiresAt = (await kv.has('expires_at'))
    ? Number(await kv.get('expires_at'))
    : 0;

  if ((await kv.has('access_token')) && expiresAt > Date.now()) {
    // We have a valid access token, so we don't need to refresh it
    return;
  }

  const { access_token, expires_in } = await requestAccessToken({
    tokenUrl: environment.OAUTH_TOKEN_URL,
    clientId: environment.OAUTH_CLIENT_ID,
    clientSecret: environment.OAUTH_CLIENT_SECRET,
    grant: {
      type: 'client_credentials',
    },
  });

  // Update the KV store with the new access token and expires at
  await kv.set('access_token', access_token);
  await kv.set(
    'expires_at',
    (Date.now() + (expires_in ?? 0) * 1000).toFixed(0),
  );
}

export default async function customFunction({
  environment,
  kv,
}: CustomFunction.Argument): Promise<void> {
  await ensureFreshAccessToken({ environment, kv });

  // Get the access token from the KV store and use it to make a request
  const accessToken = await kv.get('access_token');
  const response = await fetch('https://service.example/api/v1/', {
    method: 'POST',
    headers: {
      Authorization: `Bearer ${accessToken}`,
    },
    body: JSON.stringify({ userId: '123' }),
  });
  // Rest of your code
}Some OAuth APIs don't support the Client Credentials Grant, and only support the OAuth Authorization Code Grant paired with the Refresh Token Grant (for example, the Bullhorn API). This means you need to initially use a browser to authorize the application and get the initial refresh token. In this case, you can use the OAuth refresh token flow to refresh the access token in the Custom Function.
In this flow, you can use the KV store to store the refresh token, and use it to refresh the access token.
1. Go through the OAuth Authorization Code Grant flow manually in your browser to get an access token and a refresh token.
2. Load the refresh token into the Environment Variables tab of the Custom Function as INITIAL_REFRESH_TOKEN.
3. In your Custom Function, use the refresh token to get a fresh access token.
/**
 * Update the KV with a fresh access token if we don't have one, or if it's expired
 * Uses 'refresh_token' grant type
 */
async function ensureFreshAccessToken({
  environment,
  kv,
}: CustomFunction.Argument): Promise<void> {
  const expiresAt = (await kv.has('expires_at'))
    ? Number(await kv.get('expires_at'))
    : 0;

  if ((await kv.has('access_token')) && expiresAt > Date.now()) {
    // We have a valid access token, so we don't need to refresh it
    return;
  }

  // Get the latest refresh token from the KV store
  const latestRefreshToken =
    (await kv.get('refresh_token')) ?? environment.INITIAL_REFRESH_TOKEN;

  // Request a new access token using the refresh token grant
  const { access_token, refresh_token, expires_in } = await requestAccessToken({
    tokenUrl: environment.OAUTH_TOKEN_URL,
    clientId: environment.OAUTH_CLIENT_ID,
    clientSecret: environment.OAUTH_CLIENT_SECRET,
    grant: {
      type: 'refresh_token',
      refreshToken: latestRefreshToken,
    },
  });

  // Update the KV store with the new access token
  await kv.set('access_token', access_token);
  await kv.set(
    'expires_at',
    (Date.now() + (expires_in ?? 0) * 1000).toFixed(0),
  );

  if (refresh_token) {
    // Update the refresh token if it was returned
    await kv.set('refresh_token', refresh_token);
  }
}

export default async function customFunction({
  environment,
  kv,
}: CustomFunction.Argument): Promise<void> {
  await ensureFreshAccessToken({ environment, kv });

  // Get the access token from the KV store and use it to make a request
  const accessToken = await kv.get('access_token');
  const response = await fetch('https://service.example/api/v1/', {
    method: 'POST',
    headers: {
      Authorization: `Bearer ${accessToken}`,
    },
    body: JSON.stringify({ userId: '123' }),
  });
  // Rest of your code
}