Database Integration Connection Guide
Transcend has the ability to integrate directly with your databases. This integration is built on top of the ODBC framework. This framework allows for Transcend to quickly integrate with any SQL-flavored database such as MySQL, PostgreSQL, Snowflake, Redshift, Aurora, BigQuery and many more.
Note: We also support Google BigQuery, but it has its own separate integration. The doc can be found here.
By connecting your database, Transcend can:
- Scan your database to identify datapoint that contain personal information
- Programmatically classify the data category and storage purpose of datapoints
- Generate SQL statements that query or delete personal data
- Define and execute DSRs directly against your database
Before moving forward, we recommend reviewing our Database Integration Security Considerations guide to confirm if this integration aligns with organization policies.
You can connect your database by using the Admin Dashboard or our Terraform Provider.
Navigate to Structured Discovery on the left side menu. To add a data system for datapoints scanning, click “Add Data System".

You’ll now see a filtered list of data systems that are compatible with Structured Discovery. Add as many as you need by hovering over the data systems and selecting “Quick Add”. This will take you to the Integrations view under the platform’s Infrastructure section. Find and select the data system you just added.

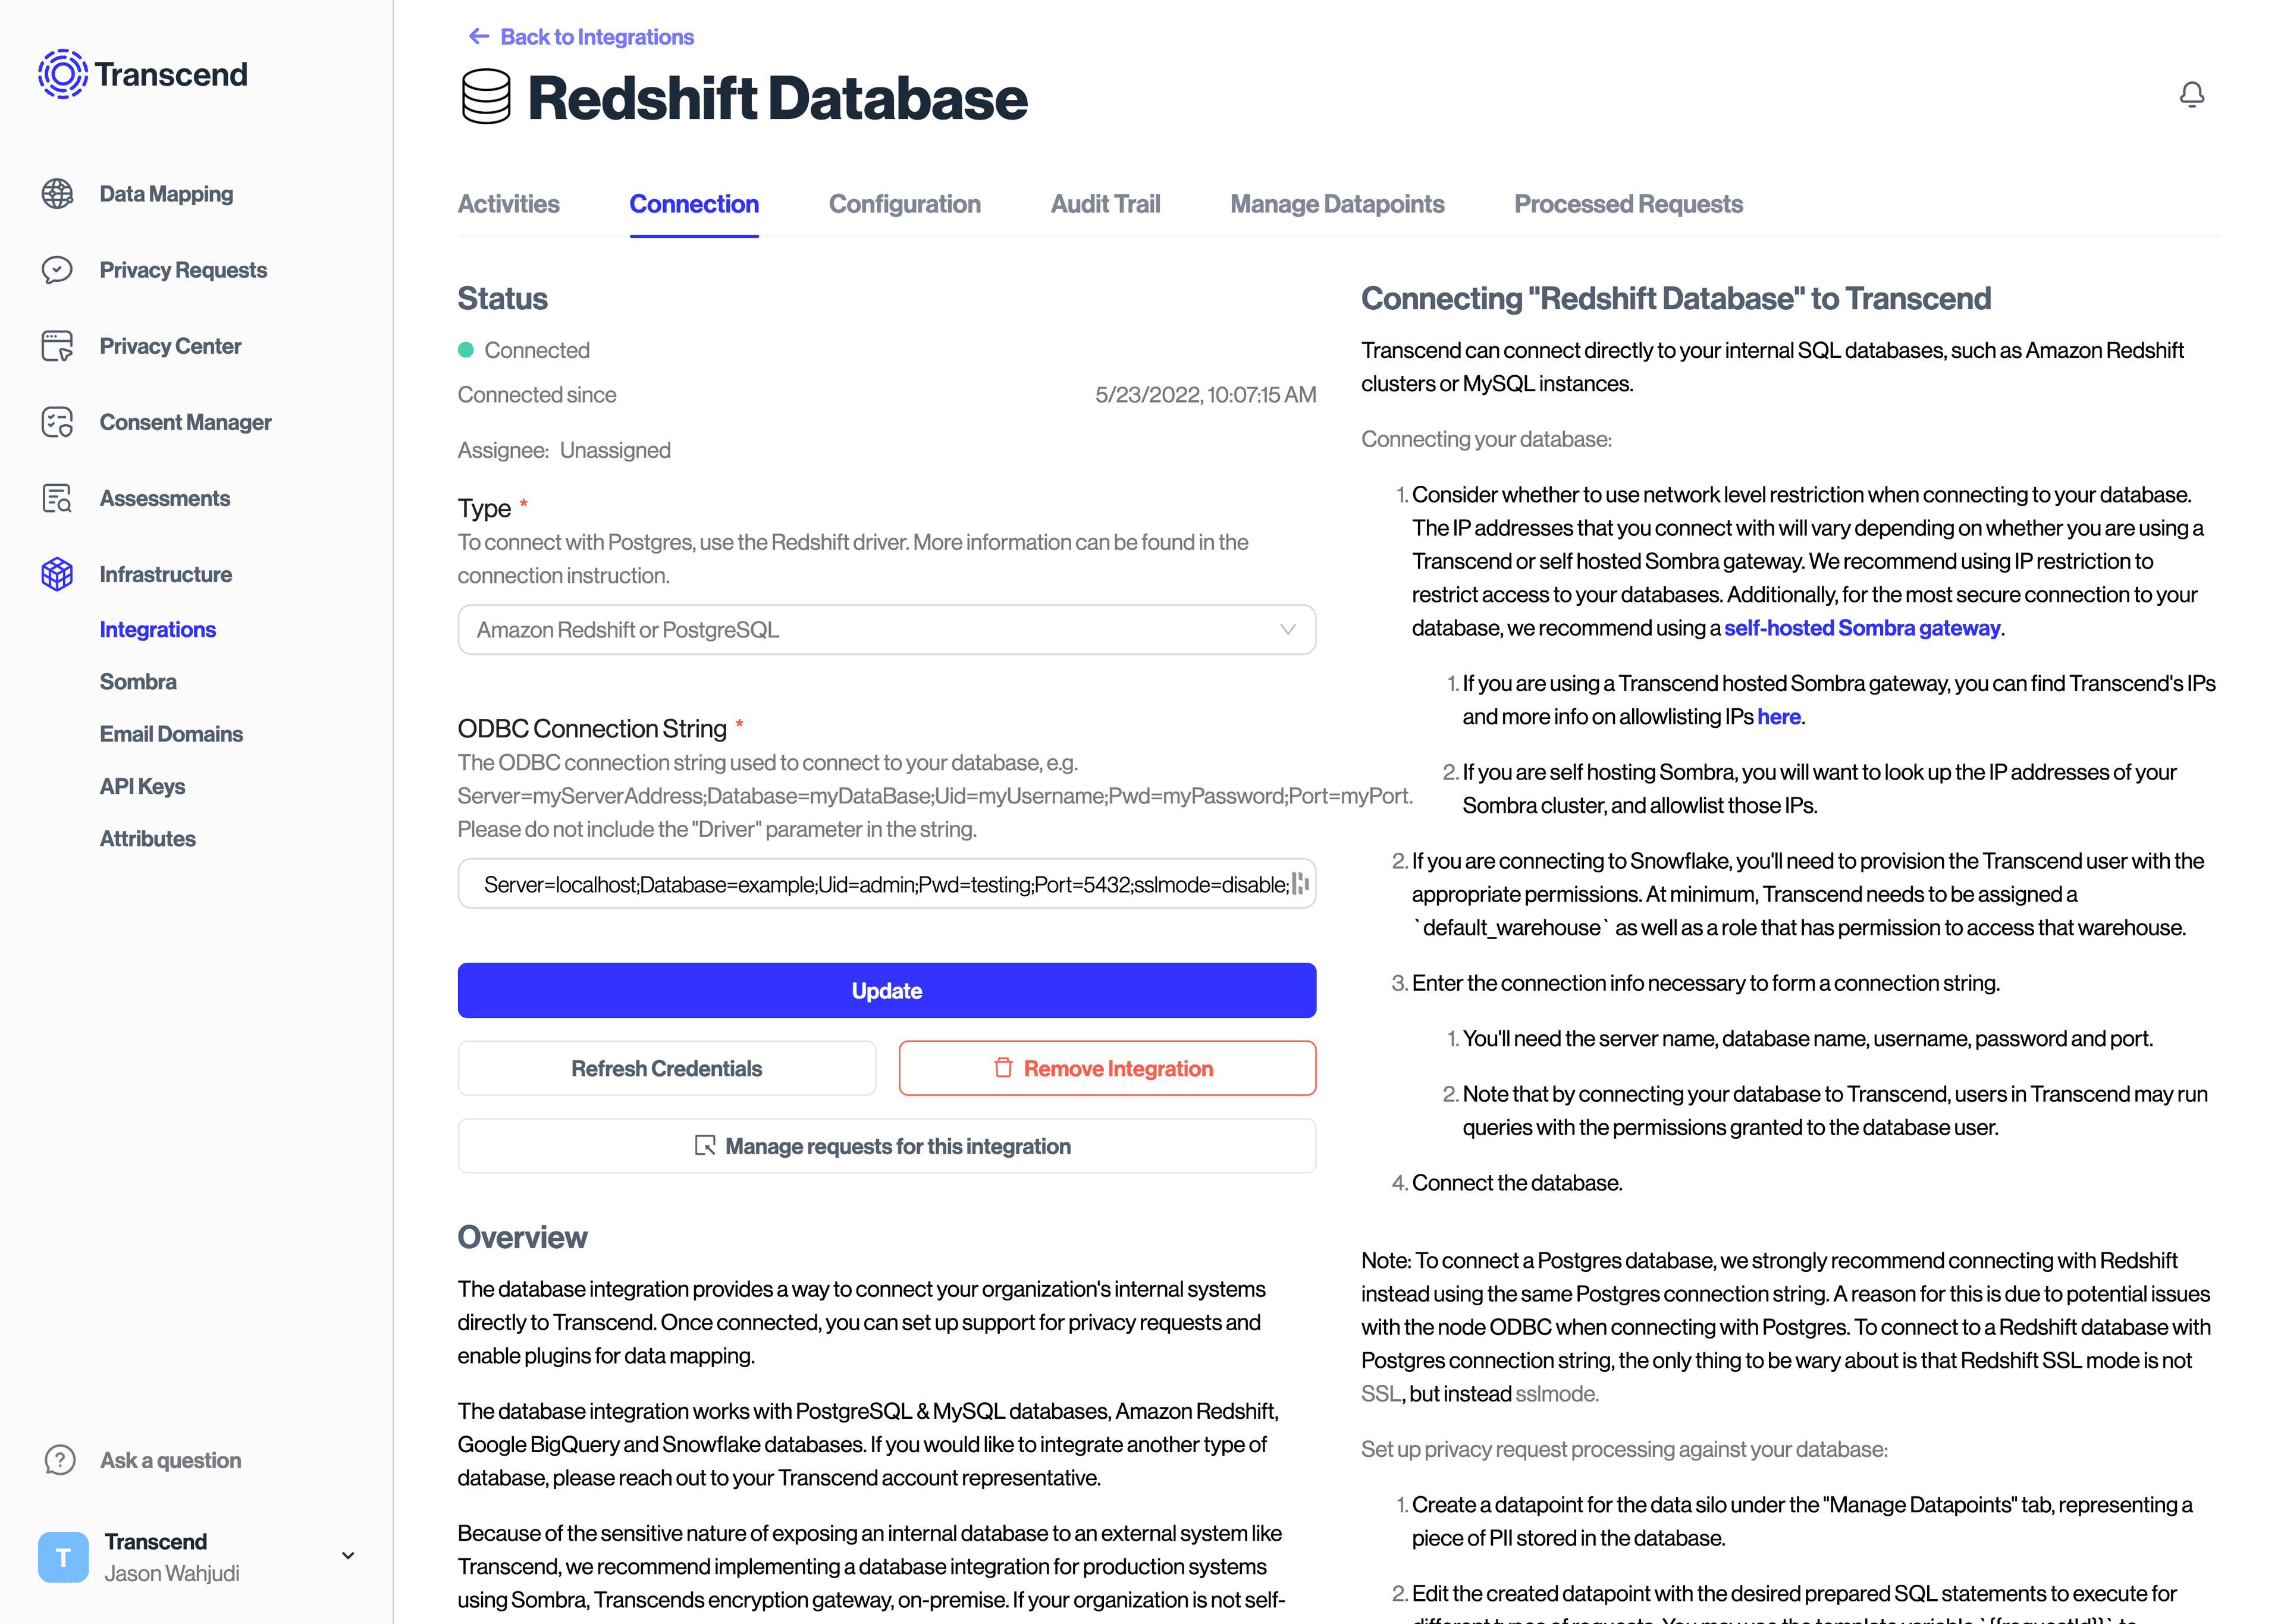
From the “Connection” tab in the data system, click “Connect” and follow the connection instructions. You'll need the server name, database name, username, password and port to create an ODBC Connection string in the format ofServer=myServerAddress;Database=myDataBase;Uid=myUsername;Pwd=myPassword;Port=myPort.
Please do not include the "Driver" parameter in the string. Note that by connecting your database to Transcend, users in Transcend may run queries with the permissions granted to the database user.
Once connected, click on the "Structured Discovery" tab and turn on the "Datapoint schema discovery", and “Datapoint classification” plugins.

From here, click "Browse Data System Schema" to see the results of this scan.
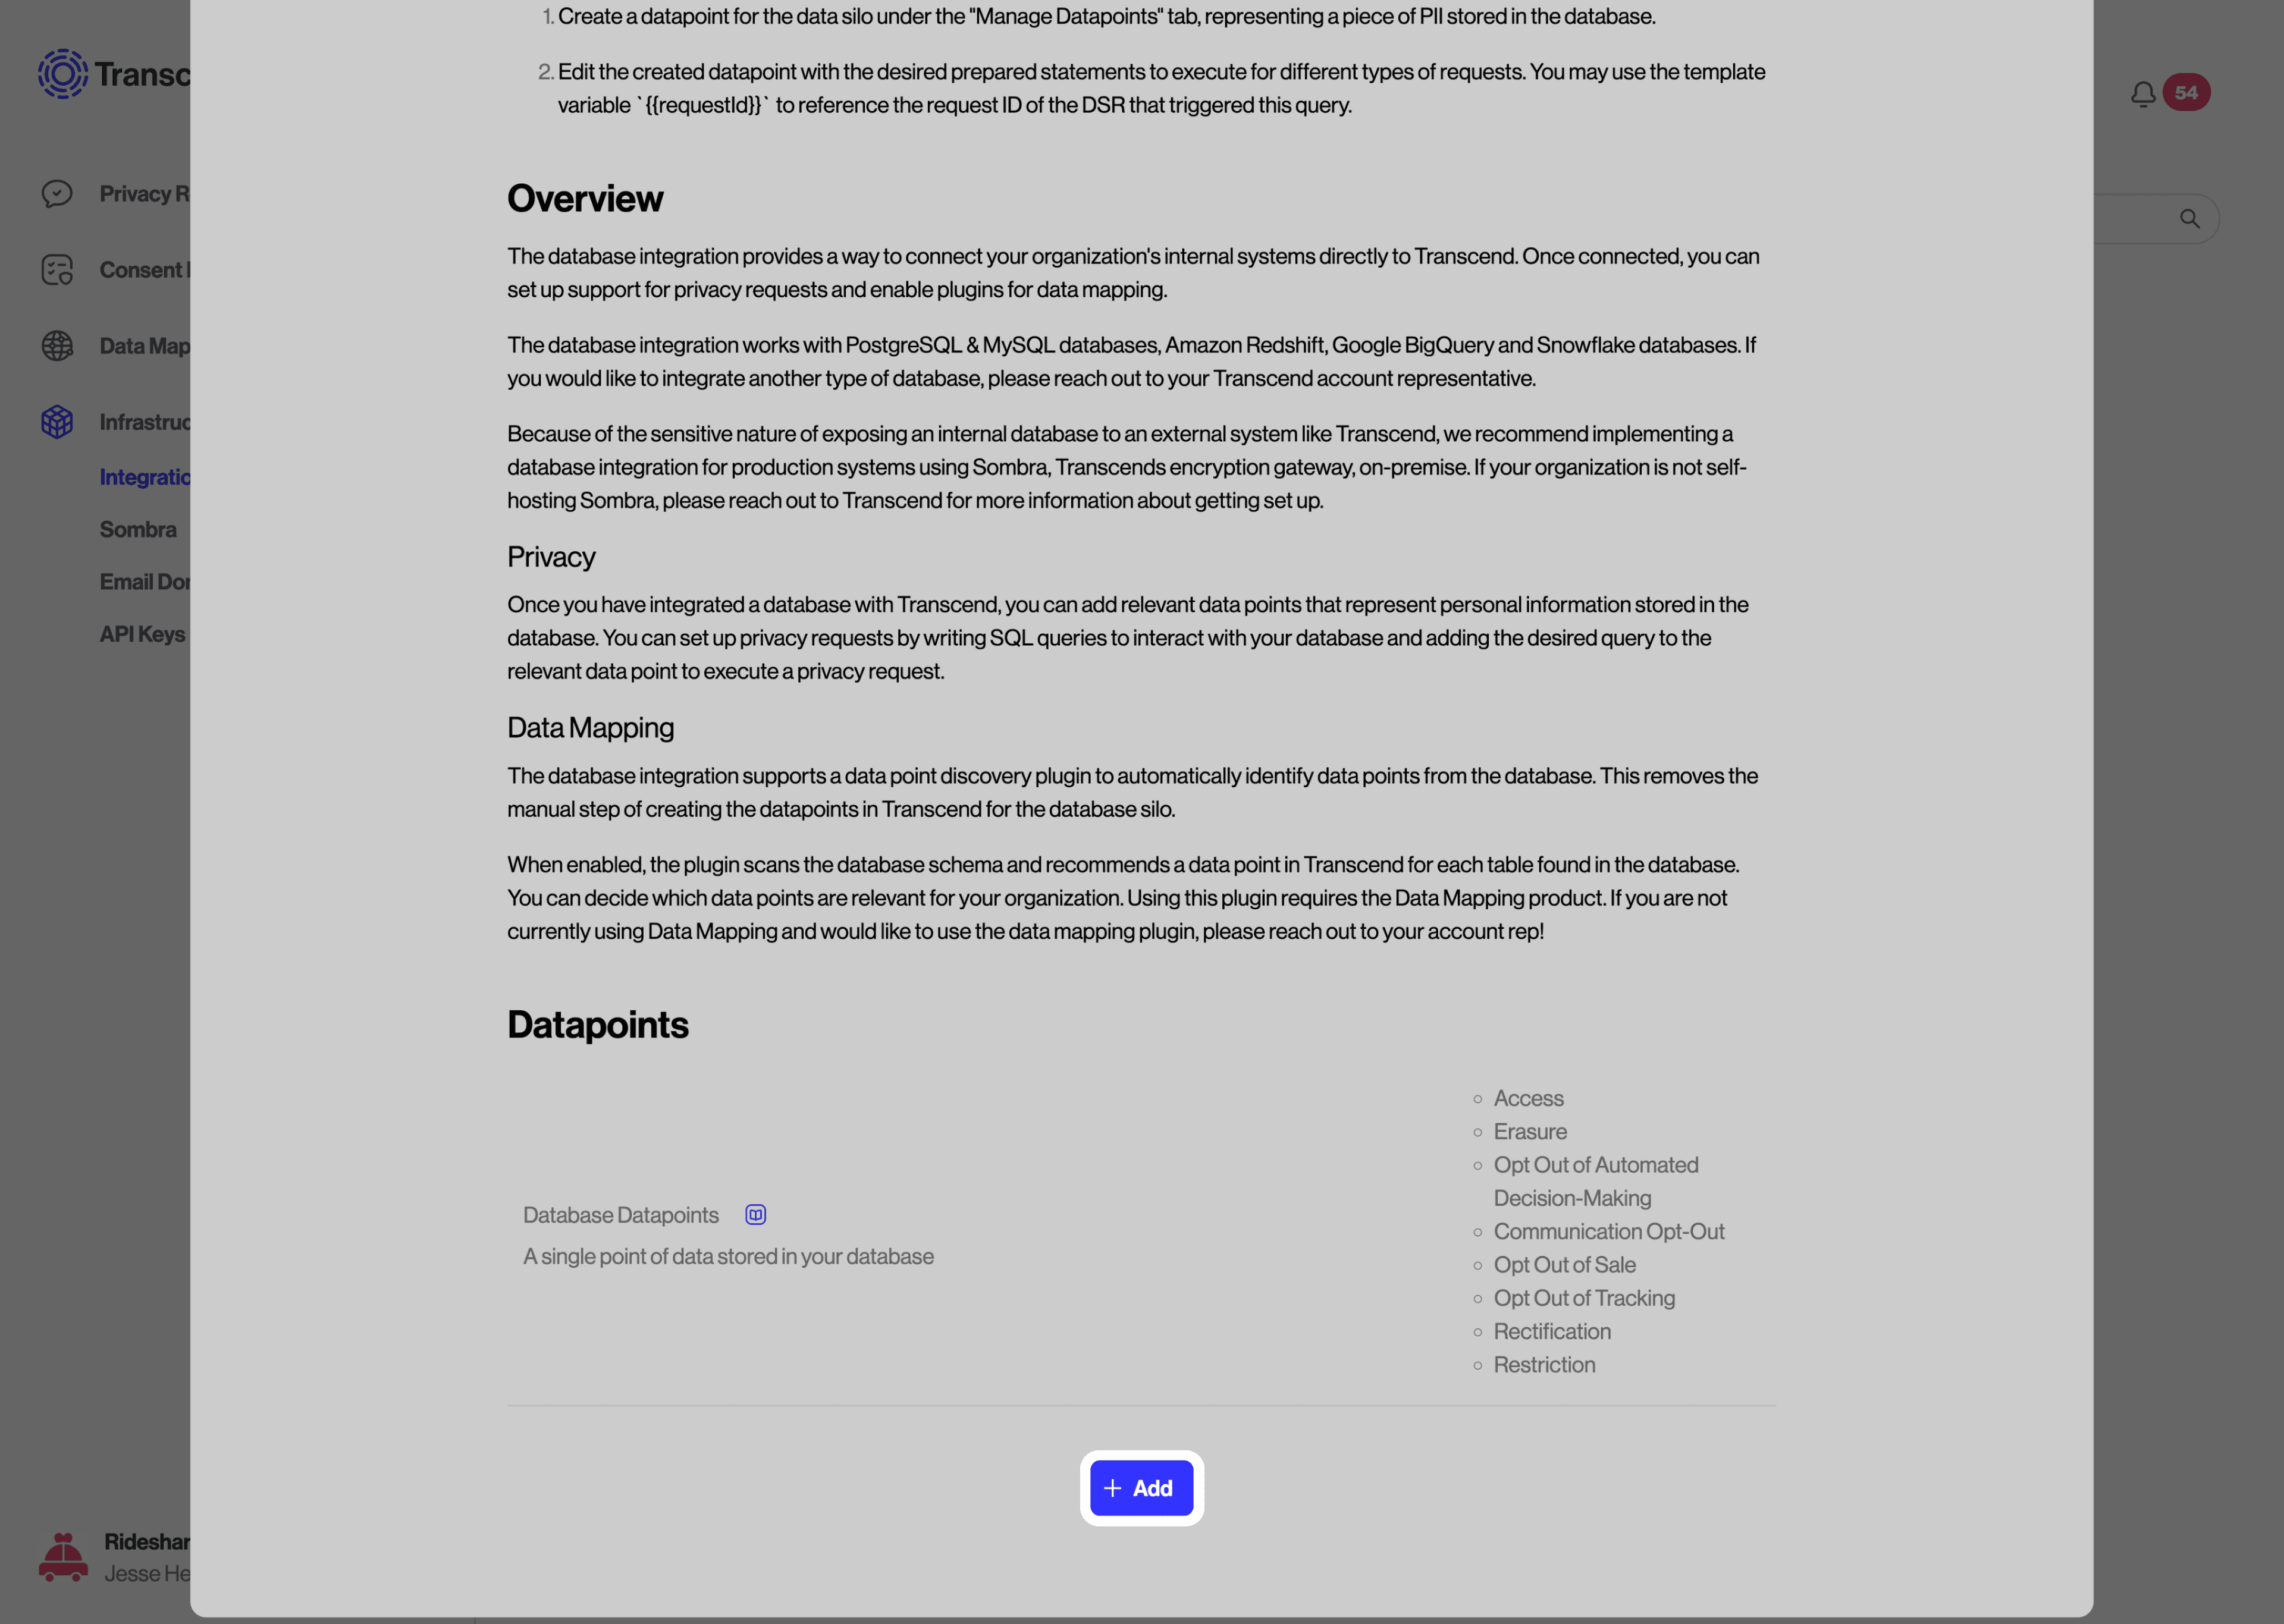
Alternatively, you can add and configure data systems one by one. Select your desired data system, scroll down and click the “Add” button. Then, click “View Database” to open up the view for this specific integration. From here, follow the connection instructions and turn on the "Datapoint schema discovery" and “Datapoint classification" plugins, as before.
Database integrations can also be declaratively created and updated using Transcend's Terraform Provider. See the docs here and check out our blog post here.
Using the Terraform provider will ensure that database credentials are uploaded to and encrypted by Sombra™. Transcend will store encrypted values of these keys but will not have access to your internal KMS (key management service) to decrypt these values.
Further information can also be found in the Transcend's Terraform Provider article in our documentation.
Some special characters, like % and +, are not supported for database passwords. If you are having trouble connecting to your database, via either the Admin Dashboard or our Terraform provider, please confirm you are not using unsupported characters.
If you are connecting to Snowflake, you'll need to provision the Transcend user with the appropriate permissions. At minimum, Transcend needs to be assigned a default_warehouse as well as a role that has permission to access that warehouse.
There is also an option to configure a Database Enricher, which allows the ability to populate a DSR by specifying a SQL query that will be run prior to the SQL query for the request.
Review our Preflight Check: Database Enricher guide for details on configuration.
After getting your Database integration connected, utilize the following guides to get the most out of your integration: