Salesforce Integration

Transcend's Salesforce integration provides Structured Discovery and DSR Automation functionality allowing businesses to:

  • Scan Salesforce to surface systems and tools connected to Salesforce
  • Identify and classify data stored in Salesforce, including custom data
  • Programmatically fulfill DSRs against data stored in Salesforce, with the ability to customize data redactions

In this guide:

Regardless of whether the Salesforce integration will be used for structured data discovery, DSRs or both, the first step is to connect Salesforce to Transcend by authenticating the integration. After the integration is connected, structured data discovery and DSR features can be enabled in the Salesforce data silo.

The Salesforce integration is authenticated using the OAuth2 protocol. This allows a Salesforce user to connect the Salesforce integration with the same login credentials used to access Salesforce. The user connecting the integration should be a Salesforce Admin with read and write permissions to ensure the integration functions as expected.

  1. Navigate to Integrations in the Transcend Admin Dashboard and select or add the Salesforce data silo.
  2. In the Connection section, select Connect and input the same login credentials used to log in to Salesforce.
  3. A list of scopes used by the integration will be presented. Accept the scopes to finish authenticating the integration connection.

After authenticating the integration, DSR and data discovery functionality can be enabled in the data silo. The following sections discuss use cases and setup for each.

Understanding where data is stored, what that data is and what it's used for is key for implementing a compliant privacy program. Salesforce is often one of the central data system for business operations where large quantities of data are synced from several connected systems. This makes Salesforce an ideal target for structured data discovery.

Transcend's integration with Salesforce supports Silo Discovery functionality to help businesses identify where data is stored, as well as datapoint schema discovery & Structured Discovery features to programmatically identify and classify personal data in Salesforce.

The integration can be used to scan Salesforce to identify connected systems and SaaS tools that sync or share data. At Transcend this is called 'Silo Discovery'. Enabling Silo Discovery for Salesforce is a fast and programmatic option to building out Data Inventory, as many companies have many, if not a majority of SaaS and third party platforms connected to Salesforce. The integration continues to scan for new systems as well.

Silo Discovery in Salesforce works by retrieving the Connected Applications and mapping the objects to a known system. Each discovered system is recommended as a data silo in Transcend for review to be approved into Data Inventory.

  1. Navigate to the Silo Discovery tab within the Salesforce data silo
  2. Enable the toggle for the Silo Discovery plugin
  3. Select the frequency to re-scan Salesforce for new systems
  4. After the scan has run, review the discovered systems and approve any that should be included in Data Inventory. Approved data silos can be configured for further structured data discovery or DSRs.

Out of the box, the Salesforce data silo is pre-configured with datapoints to represent standard Salesforce objects that are known to store personal information. This includes objects like Leads, Individuals and Contacts. However, it's also important to ensure custom data in Salesforce is accounted for in structured data discovery. The integration supports datapoint schema discovery functionality to identify custom objects. It works by scanning the Salesforce schema and recommending a datapoint for each custom object. In this way, the Salesforce data silo will contain a datapoint to represent each Salesforce object that may contain personal information.

Each datapoint discovered from Salesforce will include the property metadata (also known as sub-datapoints). Transcend's Structured Discovery algorithm assigns a recommended data category for each property on the datapoint. This makes it easy to quickly understand which properties represent personal information, and in turn which datapoints contain that personal info.

  1. Navigate to the Silo Discovery tab within the Salesforce data silo
  2. Enable the toggle for the datapoint schema discovery plugin
  3. Select the frequency to re-scan Salesforce for new objects
  4. After the scan has run, review the discovered datapoints and the auto-classifications. Further configure additional custom fields and data labels for the discovered data as needed.

The DSR functionality of the integration allows for programmatic DSR fulfillment directly against a Salesforce instance. Property-level settings are available for datapoints that support access and erasure requests to allow for fine-grained redaction customizations.

The integration works to find personal information from contact, lead and individuals objects in Salesforce using a data subject's email or phone number to uniquely identify the user record. When an erasure request is submitted, the contact/lead/individual object will be permanently deleted, unless the corresponding datapoint is configured for redaction. Note that if you use "Person accounts", it is not possible to delete these records.

For standard datapoints in the Salesforce data silo, it's possible to configure specify which fields on the corresponding object should be redacted for access and erasure requests.

For erasure requests, the default is to hard delete the object from Salesforce. If property settings are configured to redact specific fields, the object in Salesforce will be retained and the specific configured fields will be redacted.

When redacting on the standard Individual field in Salesforce, Transcend will set the ShouldForget field to true. This native Salesforce field indicates a right to be forgotten, which indicates the user would like their PII (Personally Identifiable Information) data and any related records deleted. There is no automatic functionality tied to this field, however, Salesforce suggests customers should build automations off of this field using Apex Triggers.

There are a few considerations when deciding whether to redact or delete data when responding to an erasure DSR for Salesforce. Deleting records from Salesforce may reduce compliance risk, but it may interrupt reporting and analytics flows. Additionally, hard deleting records may result in an issue if other integrations re-sync deleted data into Salesforce, in which case redaction would preserve the record and reduce risk of re-syncing data.

For access requests, an object matching the data subject's identifier (email or phone) will be returned to the data subject with all fields from the object. If property settings are configured for redaction, the specified fields on the object will not be returned to the data subject. In other words, using the visibility settings, gives flexibility in determining which fields on the object should be redacted from the final payload returned to the user. For example, there may be a field on the contact object that contains internal notes. It's possible to redact this field from the data returned to a data subject, if this information should be kept internal.

For more information about how to configure redaction for specific fields, see the next section on how to configure Salesforce for DSRs.

  1. Navigate to the Manage Datapoints tab within the Salesforce data silo
  2. Configure the request types that should be available for each standard datapoint.
    • For the individuals, lead and contact objects, confirm which types of data actions will be enabled.
    • Data actions are enabled be default. Specifically review access and erasure actions to ensure configuration is as expected.

  1. Optionally configure property-level settings for redaction on datapoints that support access and/or erasure.

    • For each standard datapoint where redaction of certain fields is desired, select Review XX Properties to configure Property Visibility Settings.

    • Configure ACCESS REQUEST VISIBILITY and ERASURE PROPERTIES TO REDACT as desired.

  2. Set the data silo live for DSRs.

    • Navigate back to the DSR Automation tab
    • Toggle the Status setting to Live Mode

Transcend supports running Access and Erasure-based DSR Automation on more than just the Contact, Individual, and Lead standard Salesforce Objects.

In order to enable running DSR Automation on these objects, you will first need to enable the Datapoint Schema Discovery plugin, and then allow the plugin to discover your custom objects.

  1. Once the plugin populates the Manage Datapoints view for the Salesforce data silo in question with all of your custom objects, you should then tag the attributes for all the custom objects you wish to run DSRs, with the Contact/Email or Contact/Phone data categories.
  2. You may then enable the ACCESS and/or ERASURE workflows for the custom object, from the Manage Datapoints view for the silo. a. You can follow the instructions in the Configuring DSR Automation section in order to enable hard-deletion vs. redaction workflows for custom objects too.

That's it! Any new requests (or old ones, re-started) will now also run through those custom objects.

Note: Be aware that we currently only support custom objects that use the Id property as the primary key for the object.

There are multiple ways that the Salesforce integration can be used within Transcend. For the most expansive usage of the plugin, admin permissions are needed. However, it is possible to create a permission set within Salesforce to scope down the integration's access to only the specific objects that you plan to operate on.

In order to support both Structured Discovery and DSR Automation, the integration will need the ability to both read and write all objects in Salesforce. This allows the integration to discover all custom fields using the Structured Discovery plugins. Then, you can configure DSR Automation to delete or modify any of the objects that are identified as having personal data. The permission set required to do this is close to that of a full admin.

If the user is not using an admin profile, the profile settings of the user will need to have the Customize Application permission enabled. You can find this permission by navigating to the user, and then selecting System Permissions. Within System Permissions, you should be able to find the Customize Application permission.

In order to perform Structured Discovery in Salesforce, but not DSR Automation, it is possible to scope the integration down to simply have read access to the Salesforce objects and fields. With read access, you can index all the fields, pull sample data for each object, and even perform an Access request. Without write access, you will not be able to process data deletion or opt out requests into Salesforce.

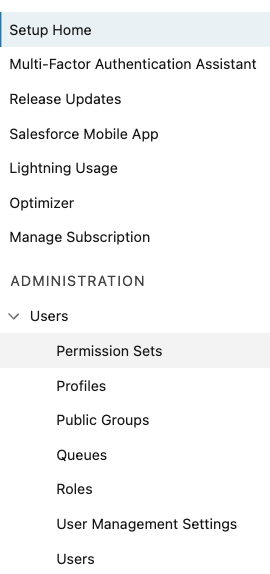
In order to create the permission set, you can do the following:

  • As an admin of the Salesforce account, navigate to Setup > Users > Permission Sets in order to create a new Permissions
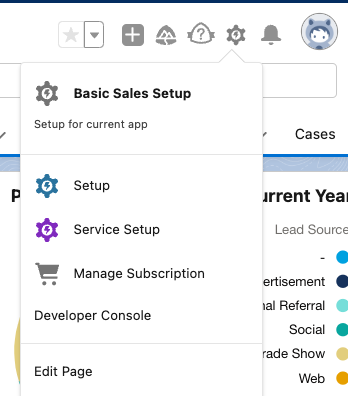
  • Create a permission set, or update an existing permission set to have the relevant read/write access to the objects that you wish to process by selecting Object Settings in the permission set view.
    • For each object, select an Object permission:
    • Read access is required to perform Structured Discovery and process Data Access Requests for a particular object.
    • Delete access is required if you want to hard delete an object as a part of a Data Erasure request.
    • Edit access is required to redact an object as a part of a Data Erasure request, or if you want to persist opt out settings into Salesforce.
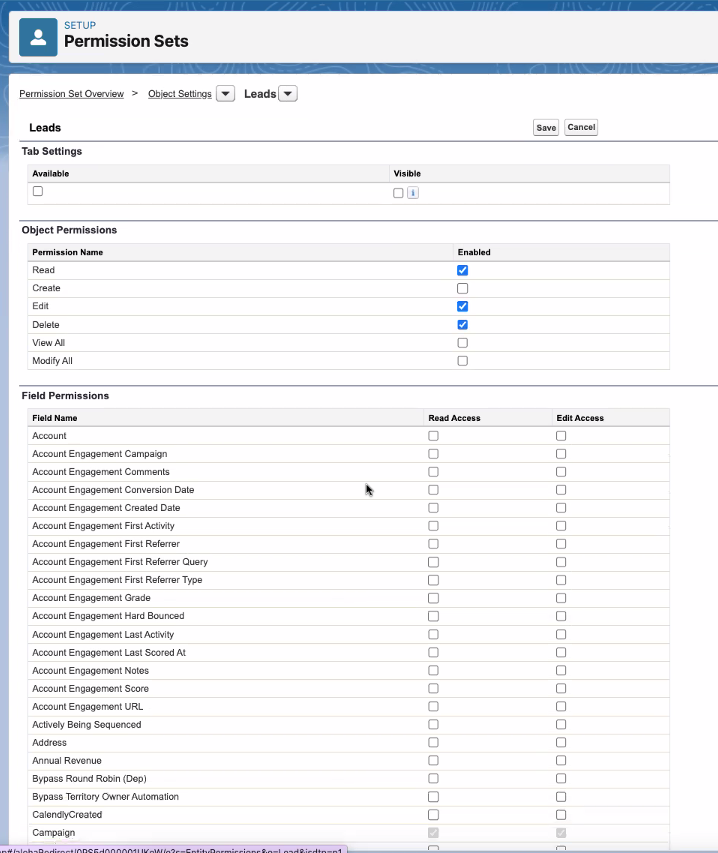
    • If field level access is needed, you can customize which Field Permissions you would like Transcend to have access to. In the case of an Erasure or Opt Out request, you will select fields that you decide to modify. Transcend is capable of modifying any field that you specify.
  • In the Find Settings search bar, search for API Enabled and enable this for the permission set. There are pre-requisites to this on the Salesforce side, such as which edition you have that supports this. You can read more about this here.
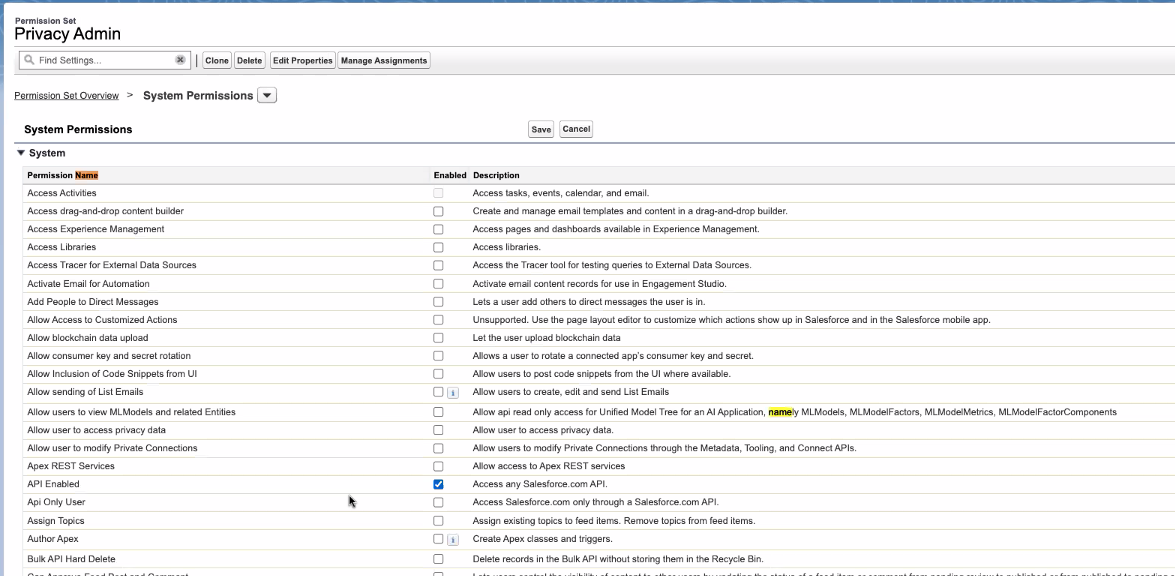
  • Assign the permission set to the user within Salesforce that will be used to connect the Salesforce instance to Transcend. This could be a service account or a real user.
  • Log in to the user or service account with the desired permission set and then authenticate Salesforce to Transcend using OAuth