Amazon S3 Integration Connection Guide
For companies that want to discover and classify files stored in S3, we offer multiple integrations that can do so:
- Amazon S3 — Discovers and classifies most types of file ranging from text to PDF files
- S3 Parquet — Focuses on Apache Parquet format files
- S3 JSONL - Focuses on JSON and JSON Lines format files
Similarly to the AWS integration, S3 integrations is also scoped to a single AWS account. If you have multiple AWS accounts to connect, you must add a data silo for each account.
- You must first add the integration to your Transcend account and visit the connection form. Here is an example using the Amazon S3 Integration
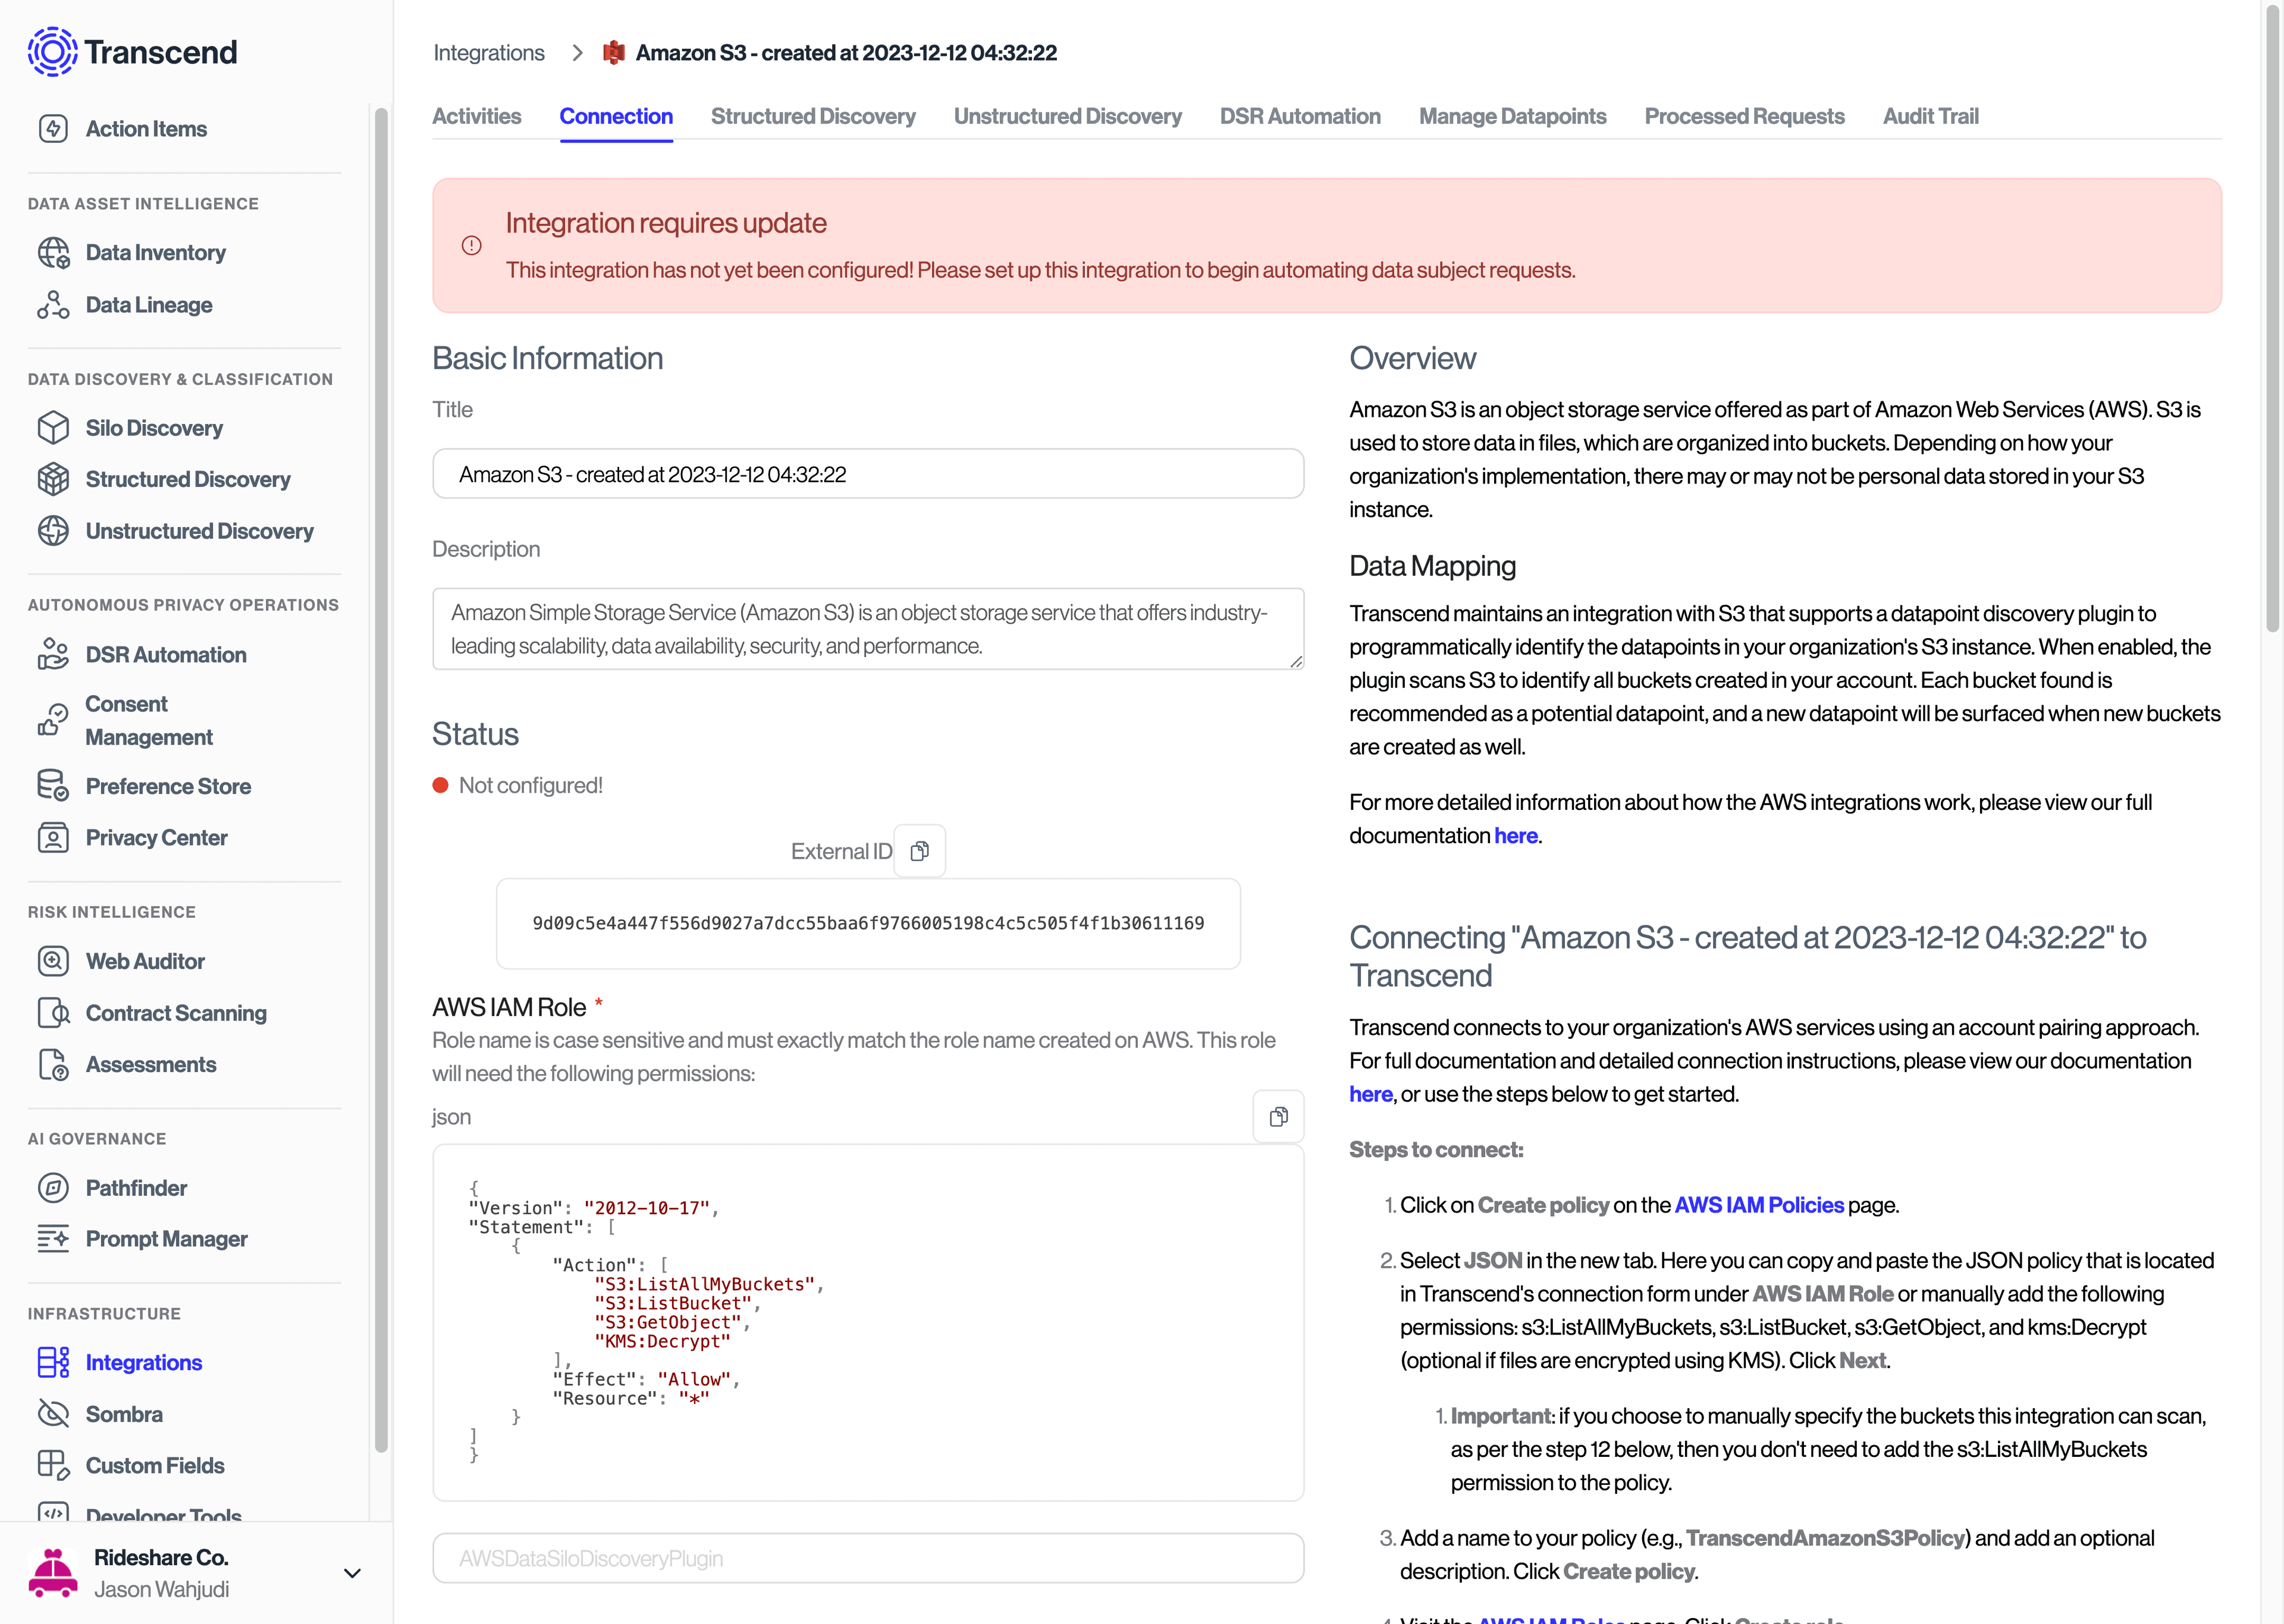
-
In
Select trusted entity, select AWS account as the trusted entity type. Here you will put:- For Multi-tenant Sombra, include 829095311197 (Transcend's Account ID).
- For Self-hosted Sombra, include the account ID of where the self-hosted Sombra is hosted in
-
Select
Require external IDand copy/paste the External ID provided on our integration connection page (see below).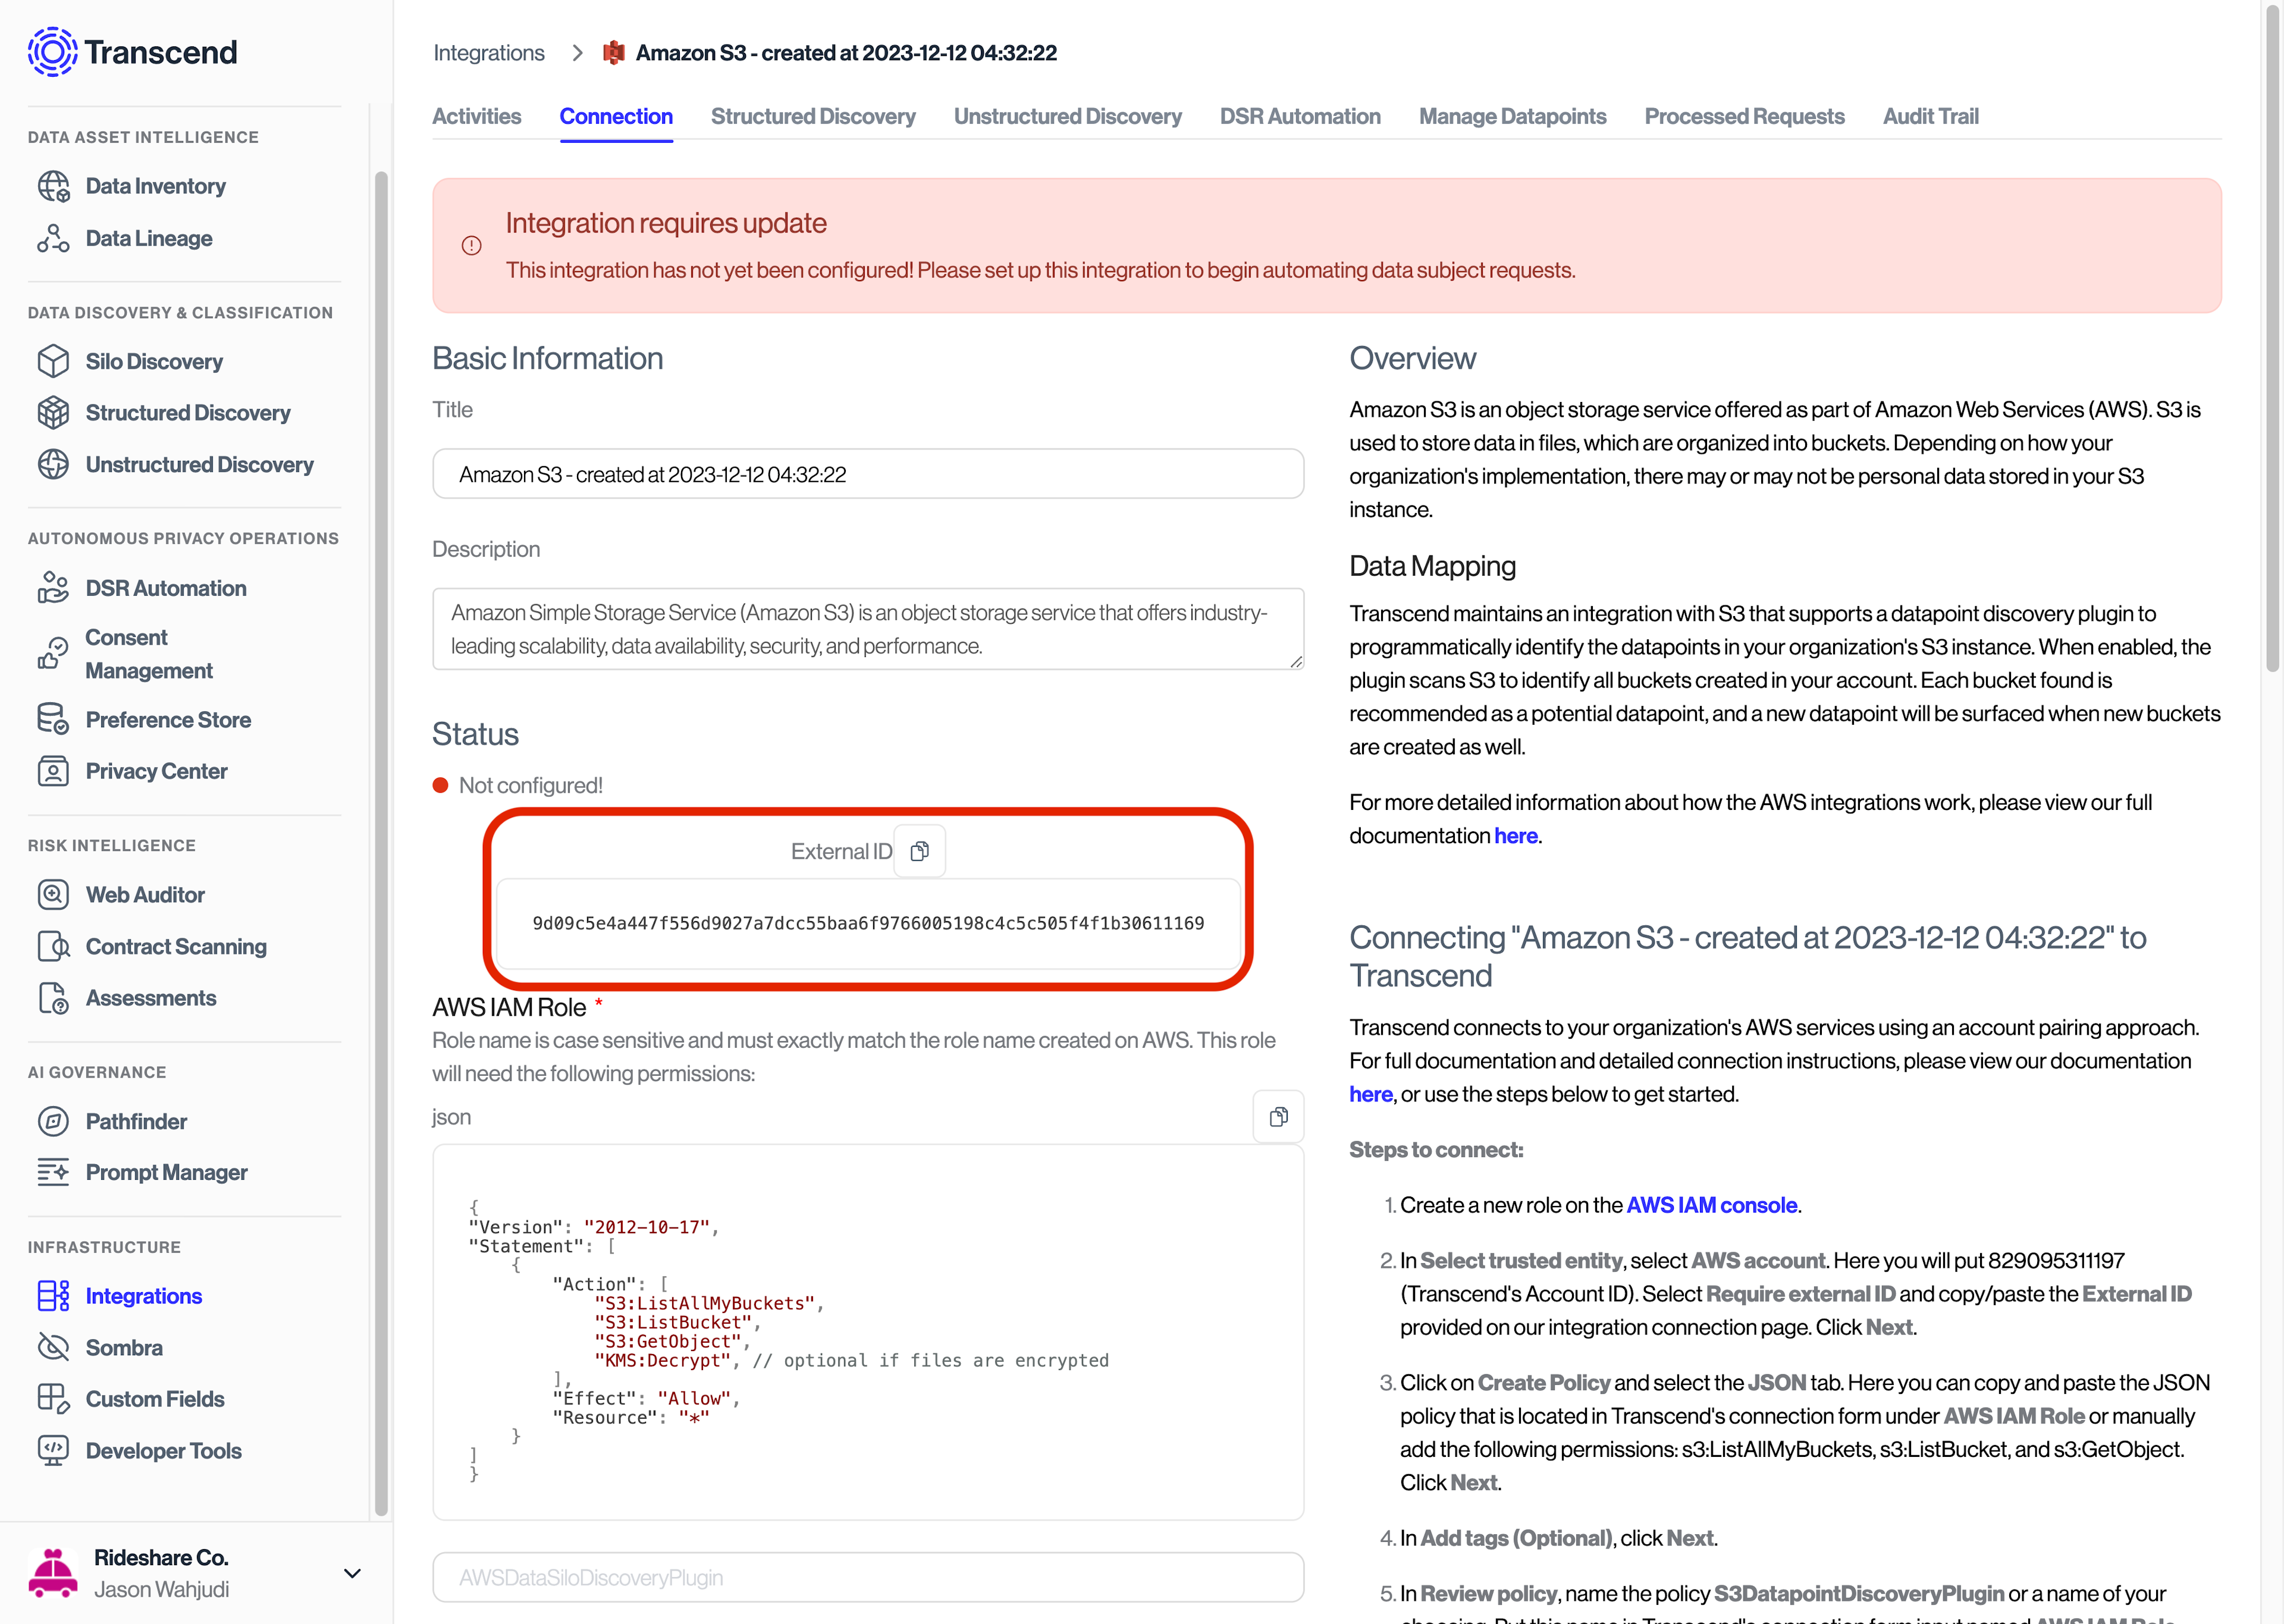
-
Click Next.
-
Once the role is created, you can navigate to the Trust Relationships tab of the role and the trusted entity should generally look something like this:
JSON
{
  "Version": "2012-10-17",
  "Statement": [
    {
      "Effect": "Allow",
      "Principal": {
        "AWS": [
          "arn:aws:iam::<transcend-or-self-hosted-sombra-account-id>:root"
        ]
      },
      "Action": "sts:AssumeRole",
      "Condition": {
        "StringEquals": {
          "sts:ExternalId": "5ab4defb0bef8e2bf4b9e636c3949f3edff73c5fb2eb0f56d84a913bd38b8445"
        }
      }
    }
  ]
}
- For self-hosted Sombra, make sure that the Sombra instance has the permission to also assume the role.
- If you host Sombra via our Terraform Module, you may add this by updating the roles_to_assume variable.
- Otherwise, adjust the IAM permissions attached to the Sombra instance to have
sts:AssumeRolepermissions on the IAM Role you created.- If your Sombra instance is hosted on an ECS cluster, you would also need to include the role attached to that cluster as well
- The policy should generally look something like this:
JSON
{
  "Action": ["sts:AssumeRole"],
  "Resource": [
    "arn:aws:iam::<sombra-account-where-role-lives>:role/<name-of-role>",
    "<any other resources ...>"
  ],
  "Effect": "Allow"
}
- Either create or pick a policy containing the
s3:ListBucketands3:GetObjectpolicies. The former allows us to read the files from within your buckets. The latter lets us read the files themselves. - If your files are encrypted using KMS, also include the
kms:Decryptpolicy to allow us to decrypt the object. - If you want Transcend to scan all of your buckets in S3, you must also add the
s3:ListAllMyBucketspermission. Otherwise, you can manually insert the bucket names when connecting the integration in the Admin Dashboard. For more info, see step 5 below.- Note that this call would grab all buckets from all regions. We recommend that if there are buckets living in different regions, to make a new S3 integration specific for each region.
- In the next page, pick a name for your Role (e.g., TranscendS3Role) and add a description.
- Review the selected trusted entities and permissions, and create the role.
- Head back to the connection form in the Admin Dashboard.
- Add the name of the created role, as well as your AWS Account ID and region.
- If you didn't add the
s3:ListAllMyBucketsin step 3 above, you may enter a comma-separated list of one or more buckets to be scanned. If you do so, Transcend will only scan the listed buckets. - There are also several filters that can be configured, in order to make the scans run depending on your needs. These include:
- Dedupe Table Filters — Specify a path from a bucket to a prefix, and we would aim to grab just a single object from that prefix. This helps avoid scanning prefixes that may have partition tables with all the same schemas.
- For example, specifying a path bucket/path/to/object would only allow us to grab a single object, even if their multiple prefixes and objects still available for scanning
- File Extensions — Only scan objects that does have the extensions specified here. This can also include files without extensions, by including '*' character in the field. To scan all files, leave the field empty.
- Each of the different S3 integration will already have default extensions set to help ease the process, but feel free to make any edits. Make sure, however, that file formats captured are of the expected type for the integration. If during scanning, it captures file that is not supported by the integration, the file can still be saved and displayed, but would not be available for classification. This means:
- S3 Parquet should only scan parquet files
- S3 JSONL should only scan JSON or JSONL files
- Amazon S3 supports most text and PDF files
- Each of the different S3 integration will already have default extensions set to help ease the process, but feel free to make any edits. Make sure, however, that file formats captured are of the expected type for the integration. If during scanning, it captures file that is not supported by the integration, the file can still be saved and displayed, but would not be available for classification. This means:
- File Regexes — Only scan objects that match the regex. This can be left empty if not needed.
- Dedupe Table Filters — Specify a path from a bucket to a prefix, and we would aim to grab just a single object from that prefix. This helps avoid scanning prefixes that may have partition tables with all the same schemas.